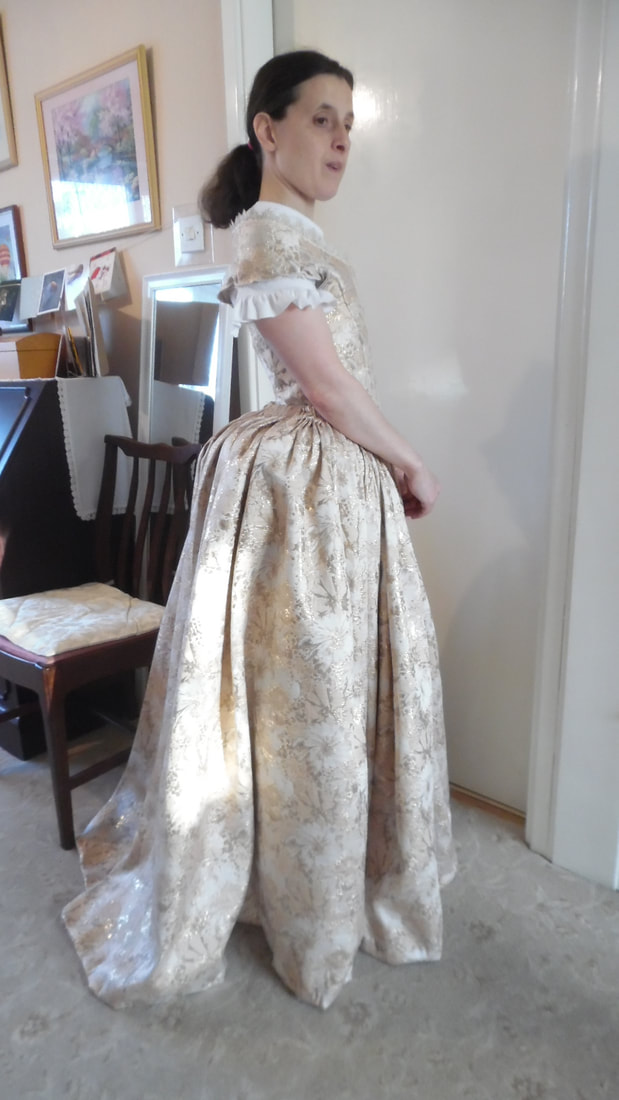
Costume from
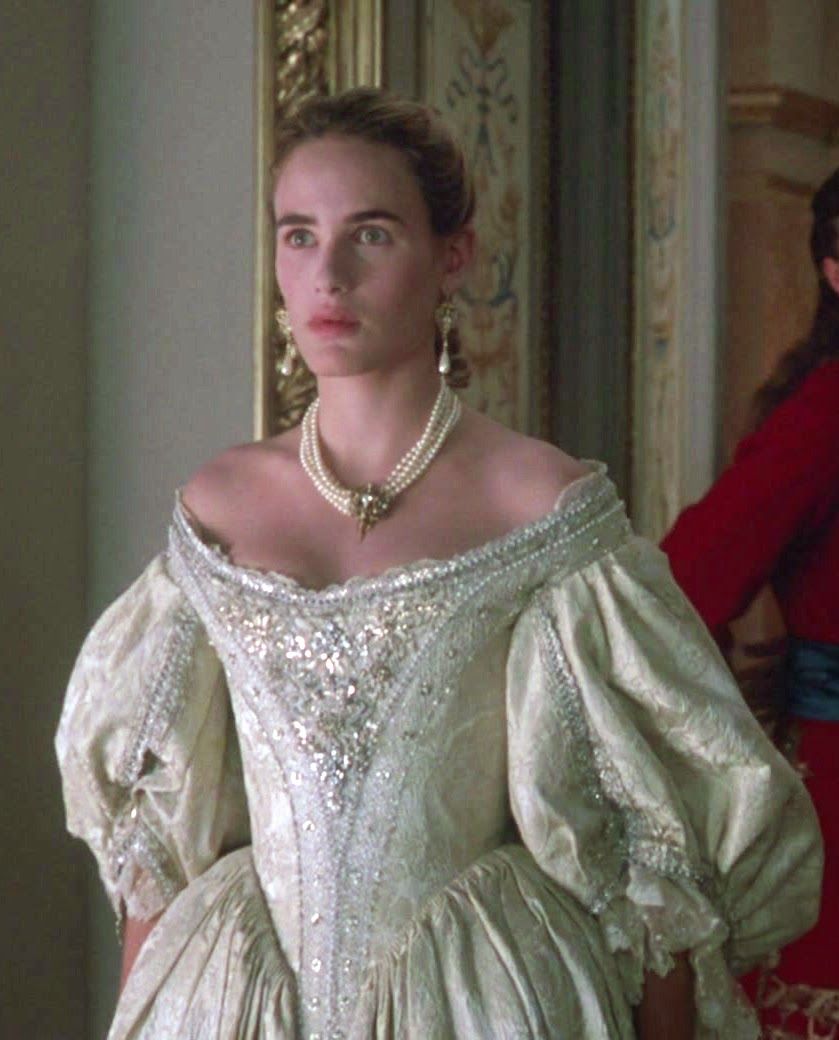
approximately 1640 - 1660 Based on Man
In The Iron Mask
Written instructions are to be used in conjunction with our videos
The stays and bodice were taken from Patterns of Fashion 5 by Janet Arnold
Materials:
Stays
Approximately 25 meters of synthetic whale bone 5mm wide. From venacavadesign.co.uk
Piece of plywood approximately 2cm wide x length of centre front
1 metre yellow Duchese Satin
1 metre cream medium weight cotton canvas From Ebay fabricguysonlin
Top stitching thread of contrast colour
Lacing to cover seams
Shift
1.1/2 metres chosen fabric, you can choose whatever you like to make this
1 metre of satin for the sleeves
1.1/2 metres Bias for neckline
Shirring elastic
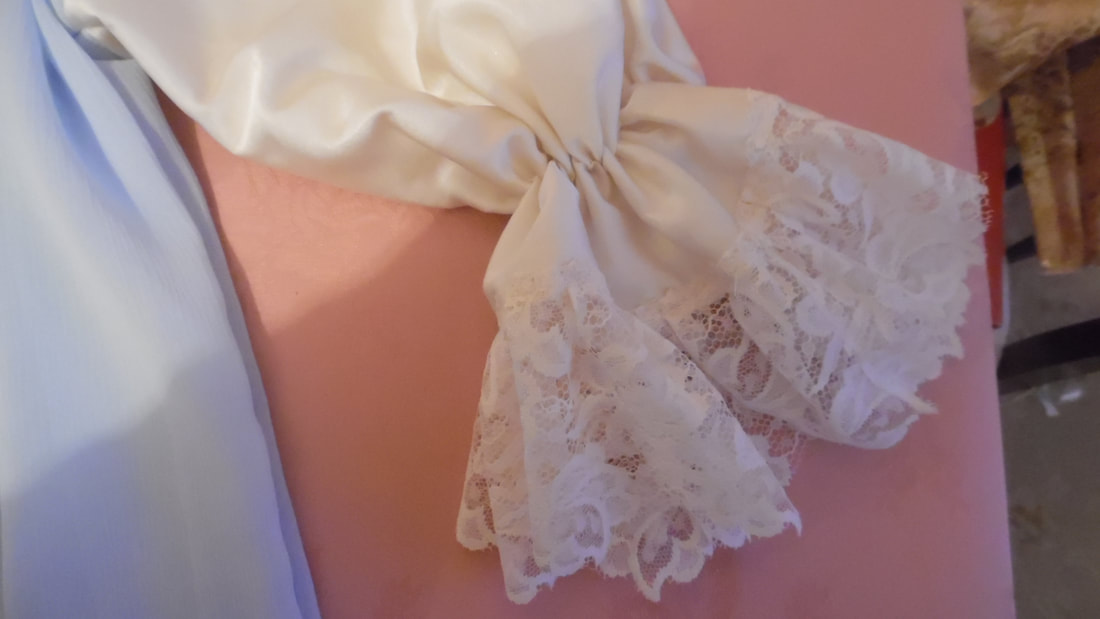
Choice of lace for the cuffs
Pattern for sleeves Simplicity 9769
Bum Roll
These are made to the individual, so there are instructions on the video for this. The stuffing will depend on how much of a lift you want to your skirt. Having researched into this, it varied from person to person. These patterns should be easily available on the internet.
Scrap of cotton fabric and stuffing material
Length of ribbon
Under Petticoat
Approximately 4 metres of your chosen fabric. I used an offcut from a curtain as the fabric needs a bit of weight to it. So try and chose something similar to curtains for weight.
Bodice
2 metres fashion fabric
1/2 metre cotton canvass
Various pieces of lace to go around the top of the bodice, around the sleeves and along the sleeve slits.
Cord for lacing
Skirt:
6 metres light peach petunia floral gold metallic brocade fabric No. 1894 from Ebay
Piece of herringbone tape for the top of the skirt and enough to make ties.
Strong top stitching thread to suit colour
Wig: Bought from Abby of Bloomers ad bows wig facebook page here:-
https://www.facebook.com/bloomerandbowuk/
Construction:
Stays:
The pattern is to a scale of 1:4. 2 small squares = 1". This was taken from Patterns of Fashion 5 by Janet Arnold. Although this was the reference pattern, many alterations were made to get to the finished pattern to fit Tracy.
|
|
|
|
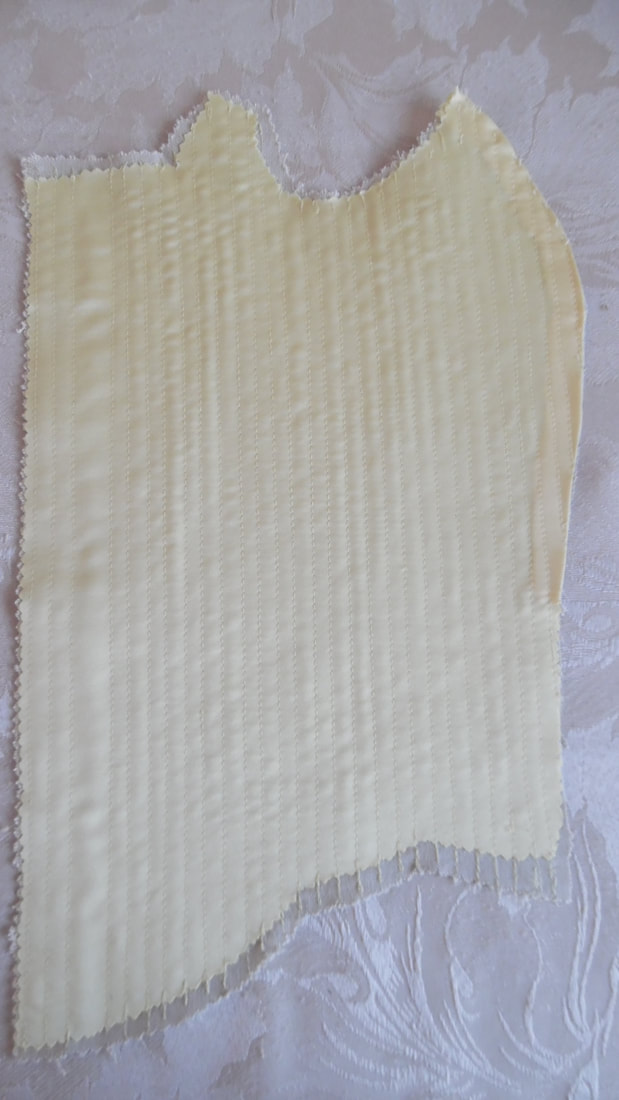
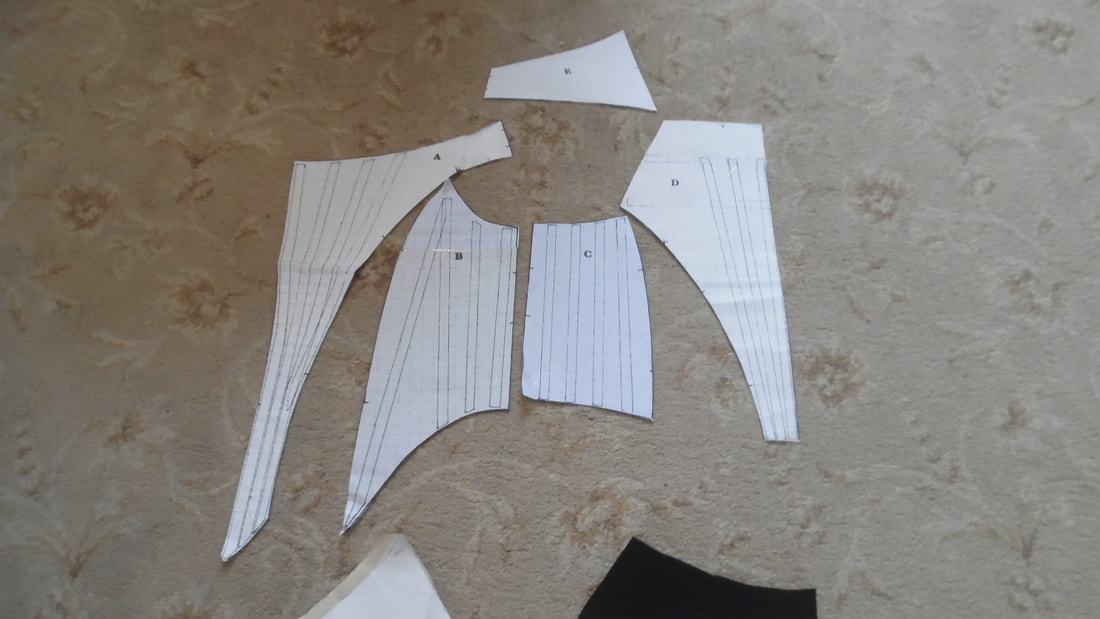
These were the final pattern pieces. Cut one set out of Duchese satin and one set out of canvas
|
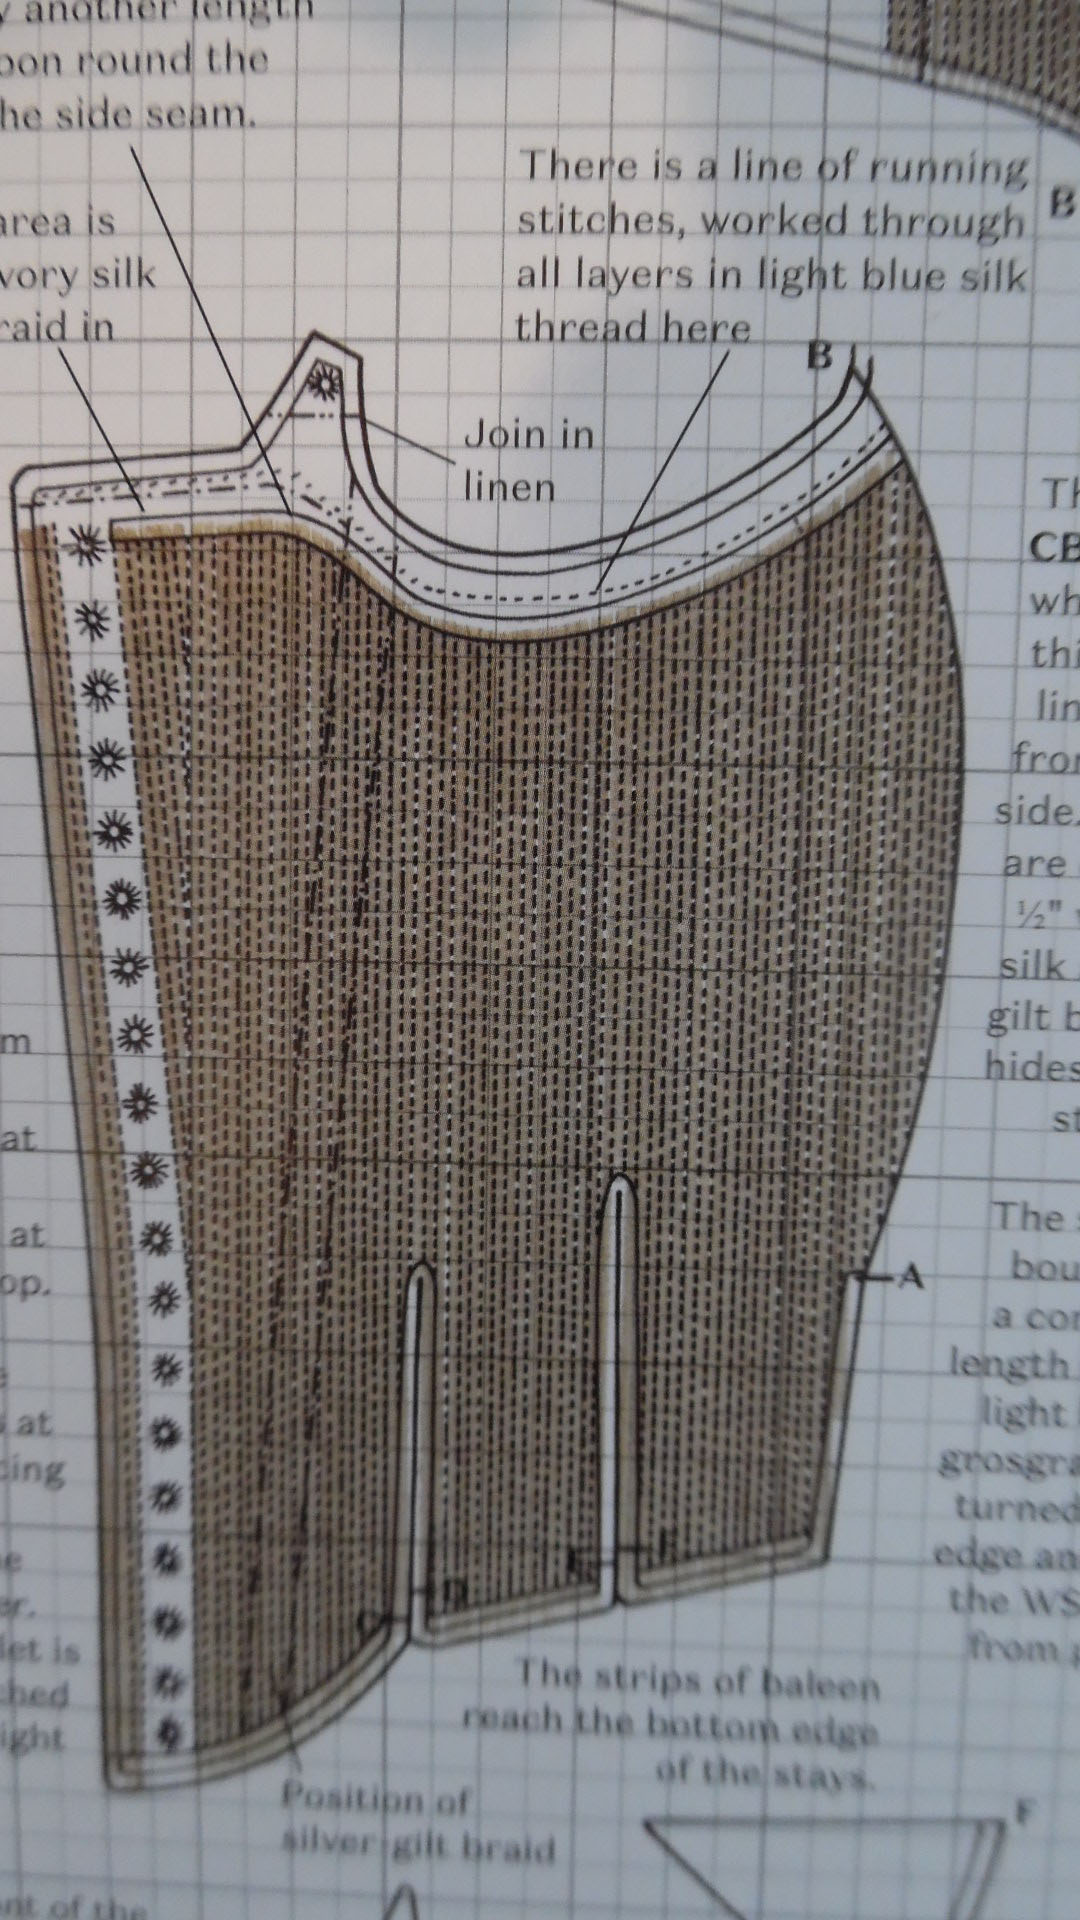
The lines for the boning are drawn on first and then machine sewn
|
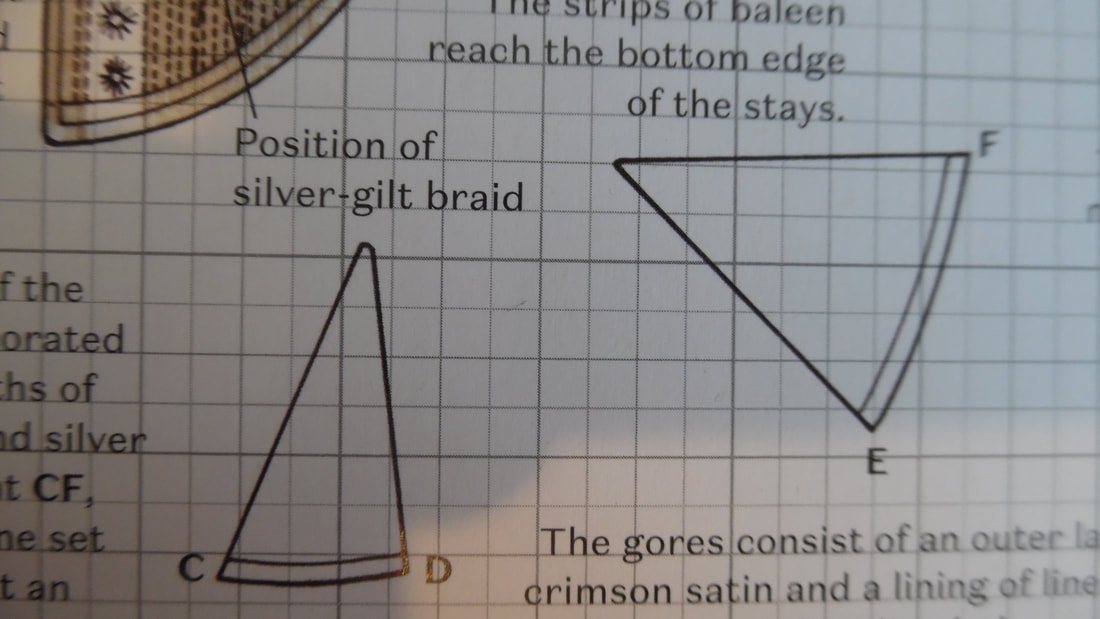
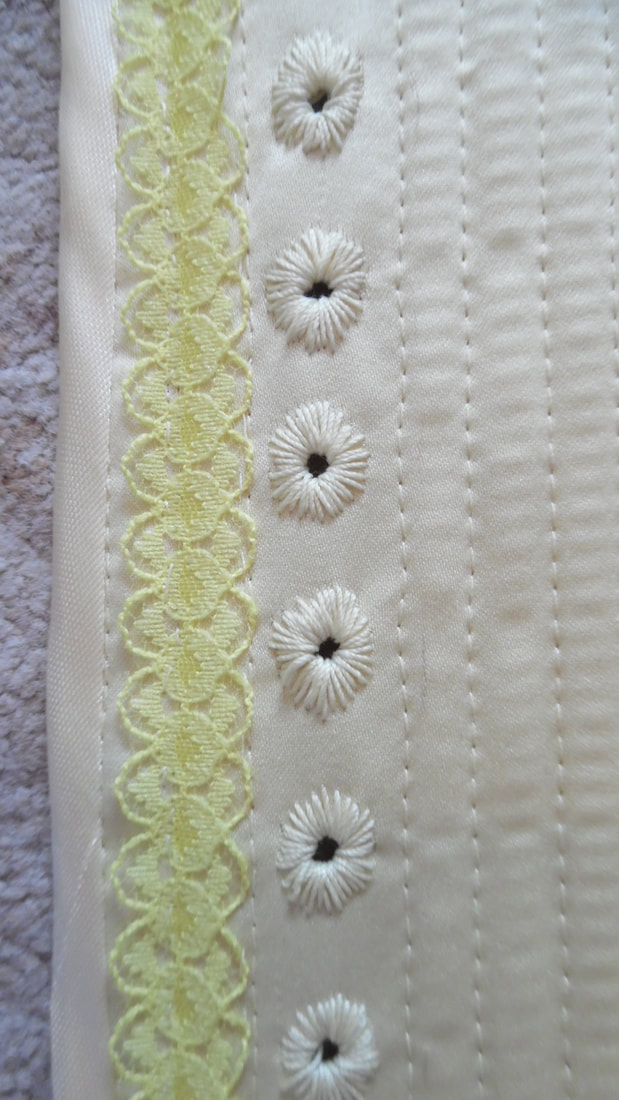
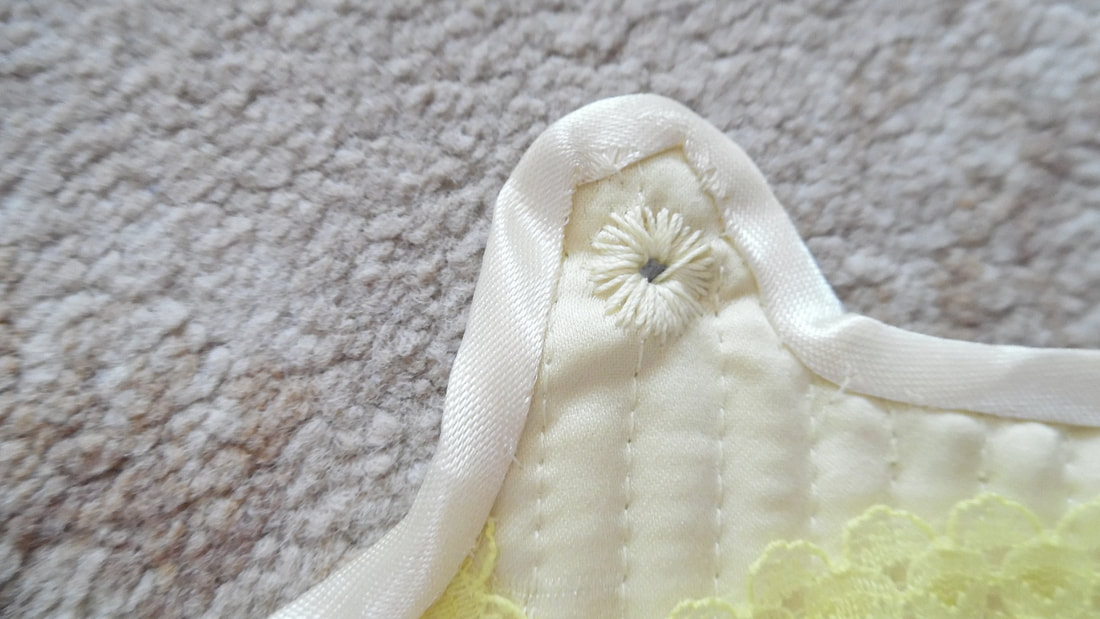
When the pieces have been hand sewn together and the boning inserted, a bias binding is hand sewn around all the tassets and a decorative lace sewn onto the seams.
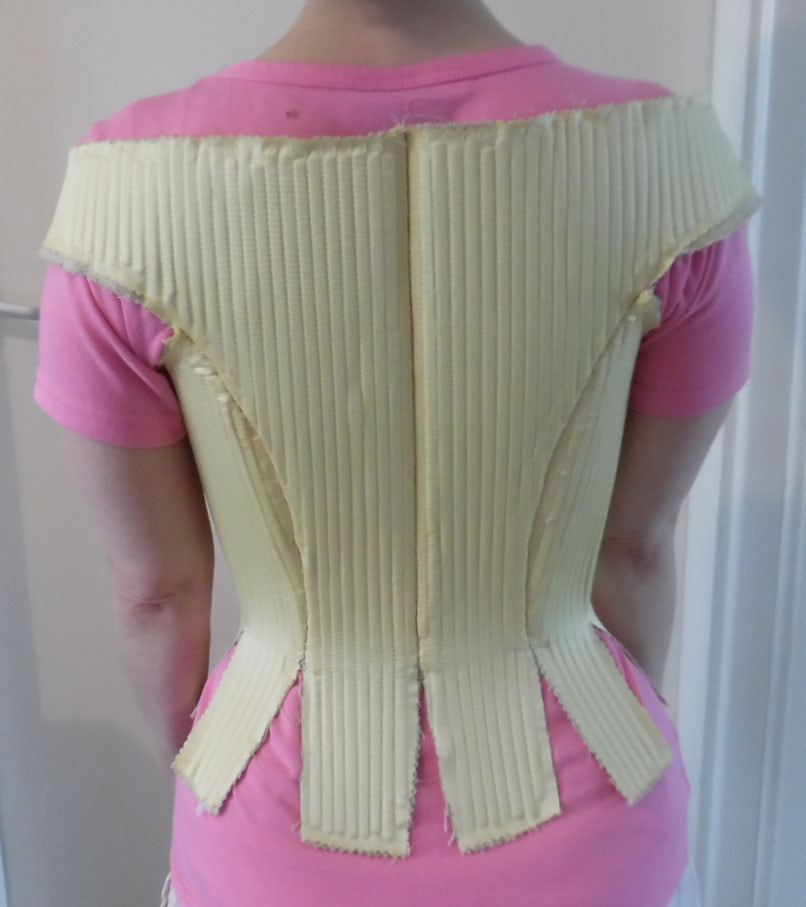
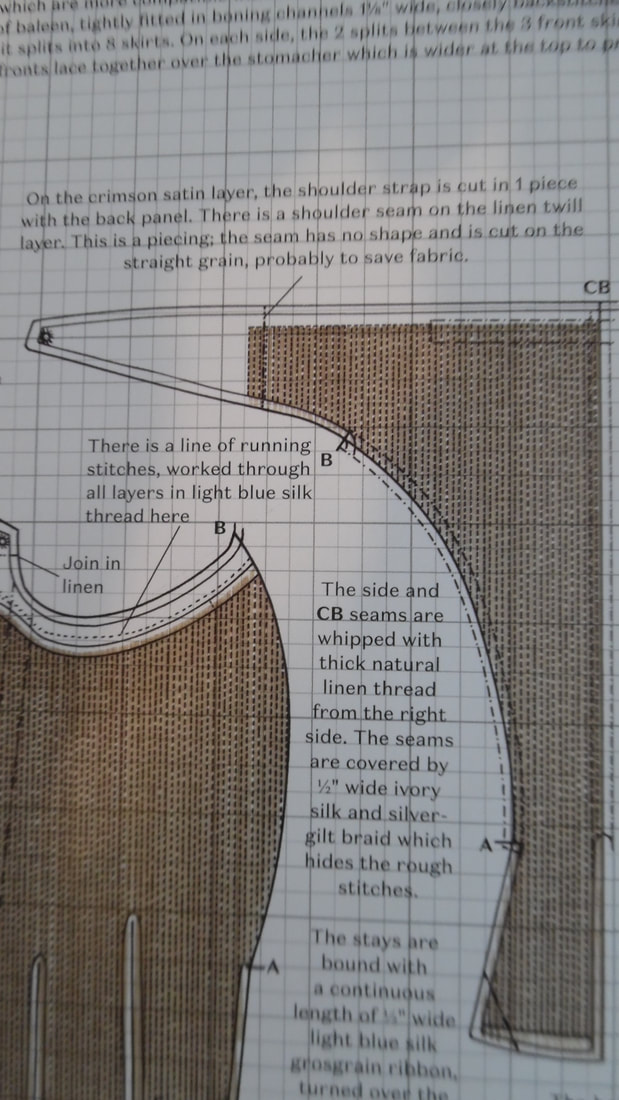
Lacing holes are then hand sewn down the front edges and also where the straps will attach at the top.
|
|

|
The shoulder ties are a simple bow
|
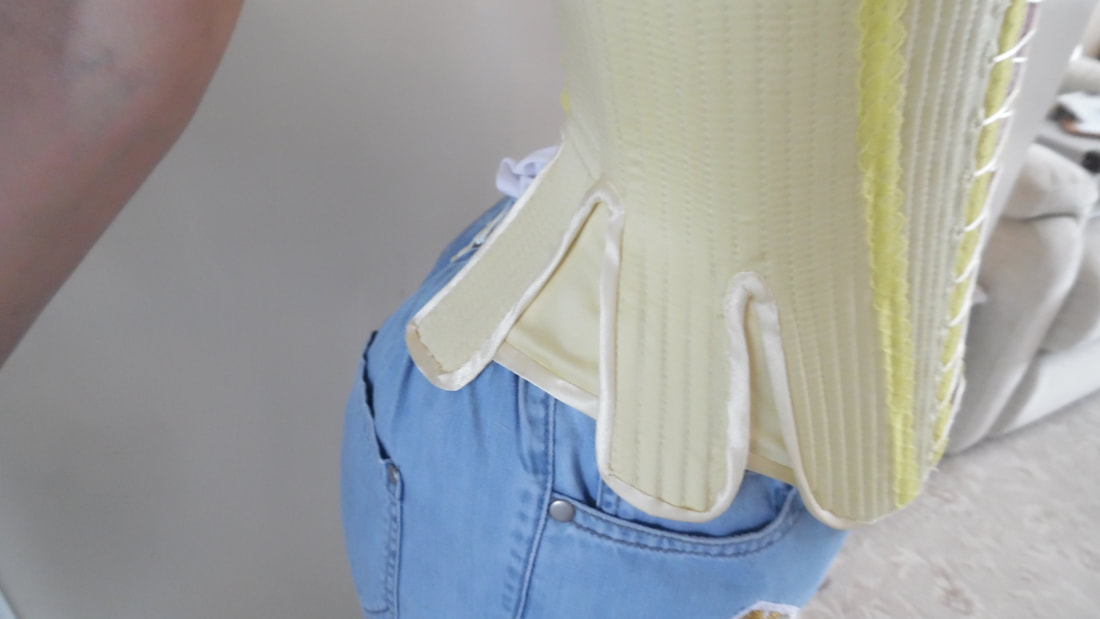
The gores are made and hand sewn between the front tassets.

|
|
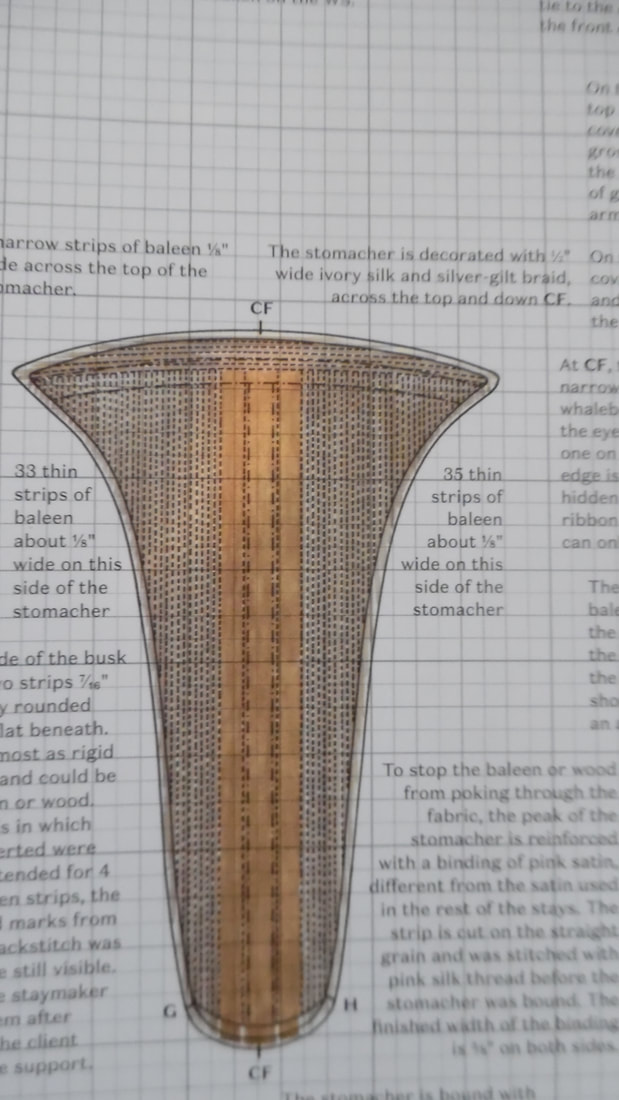
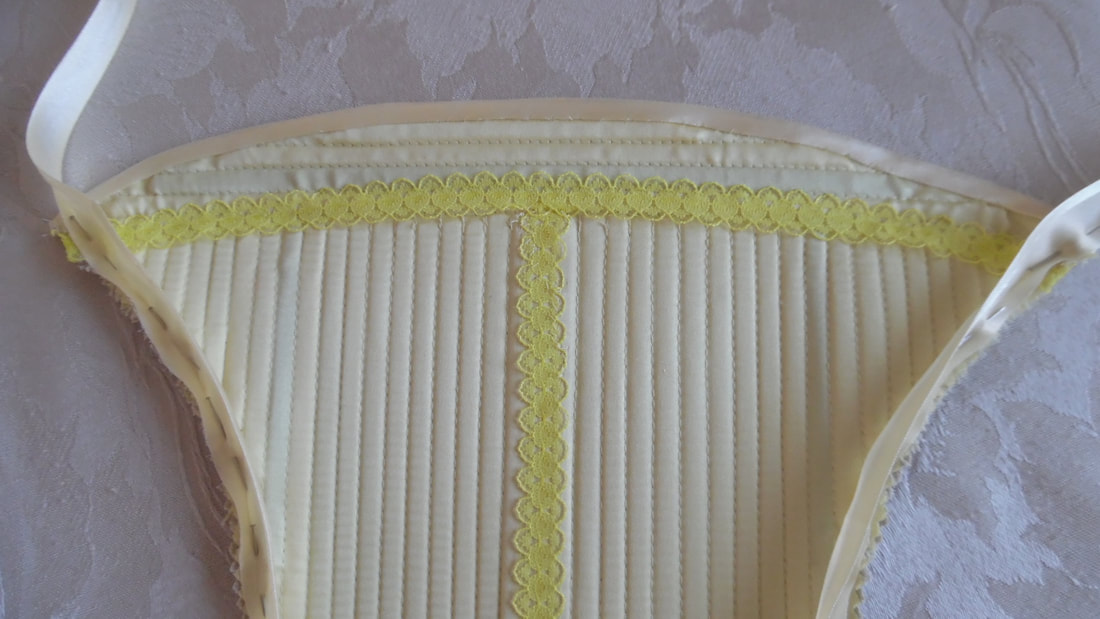
The stomacher boning channels are first drawn on and machine sewn. The middle boning channel is wider to accommodate a piece of thin plywood.

|

|
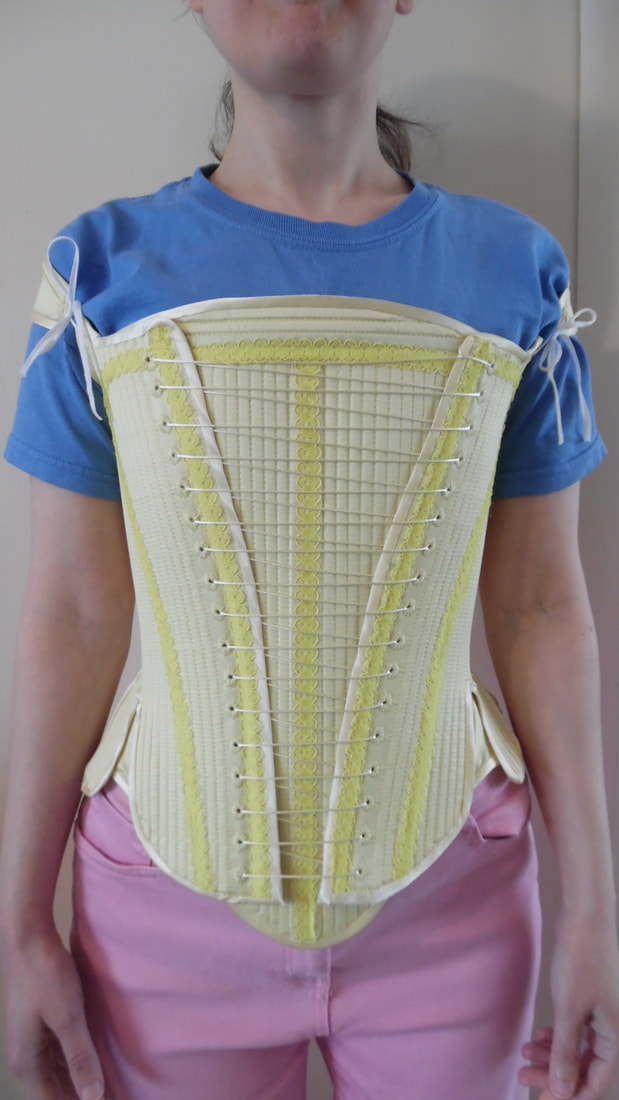
Bias is hand sewn around the stomacher. The stays are laced from the bottom to the top.
|
|
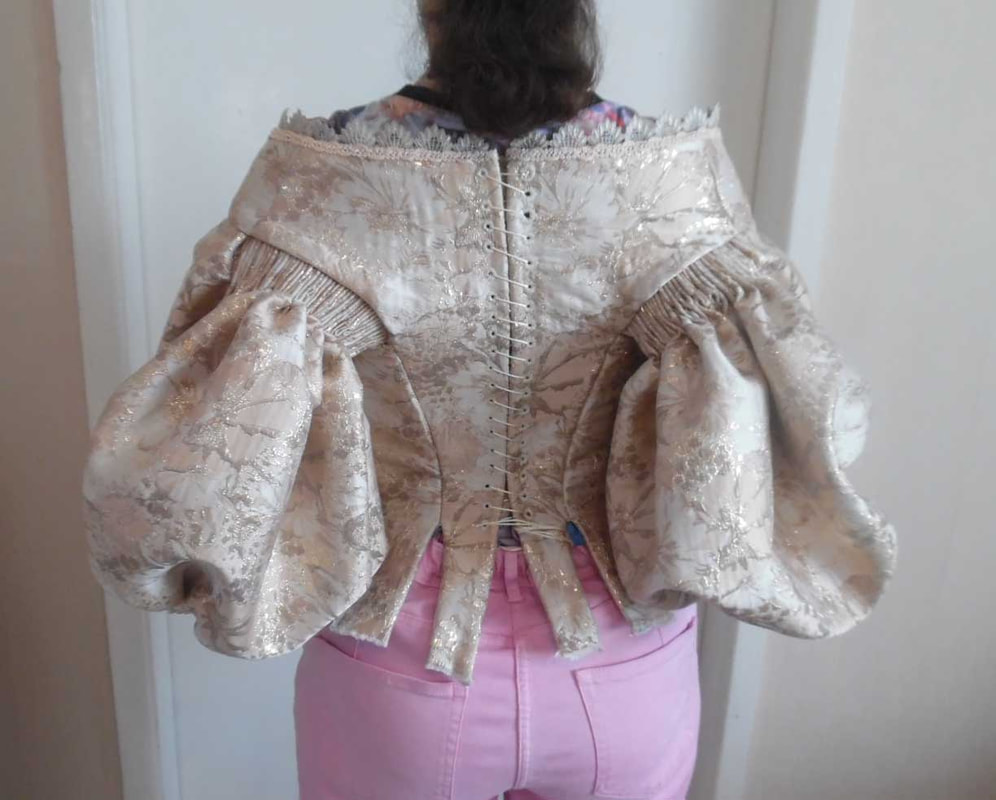
Comparison photos to the original
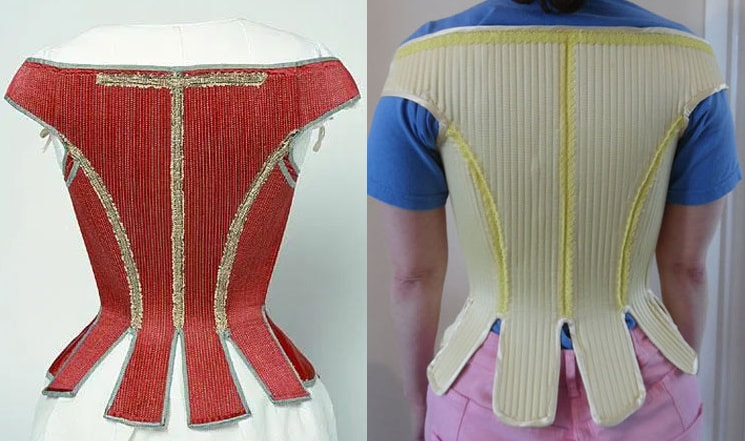
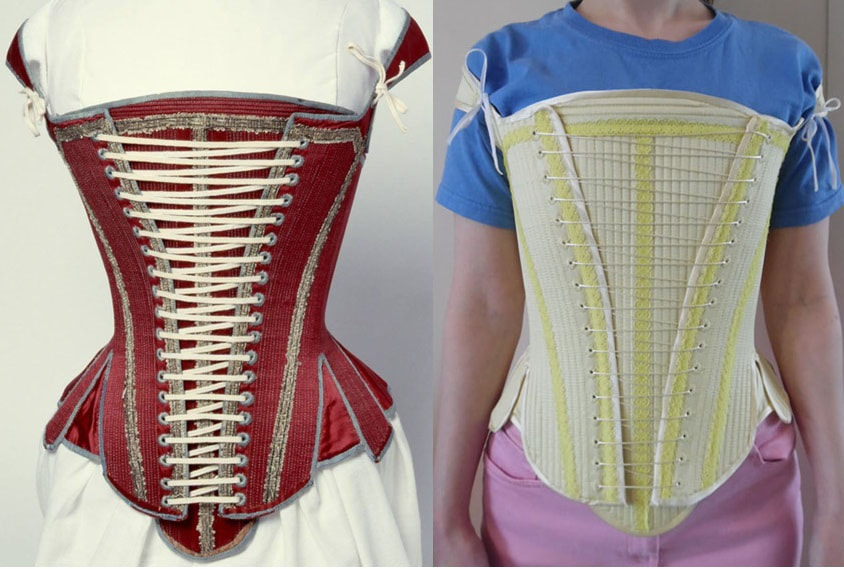
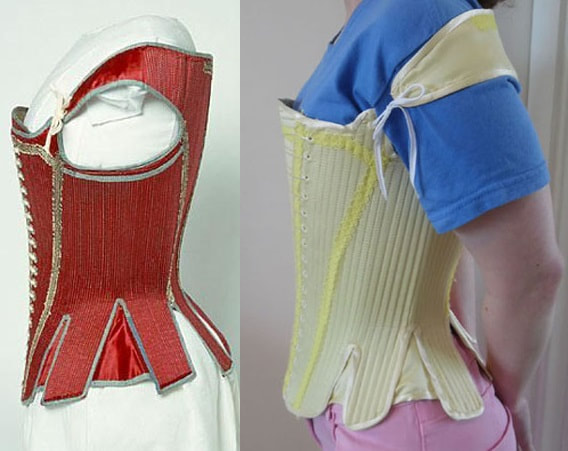
This completes the Stays.
The Shift:
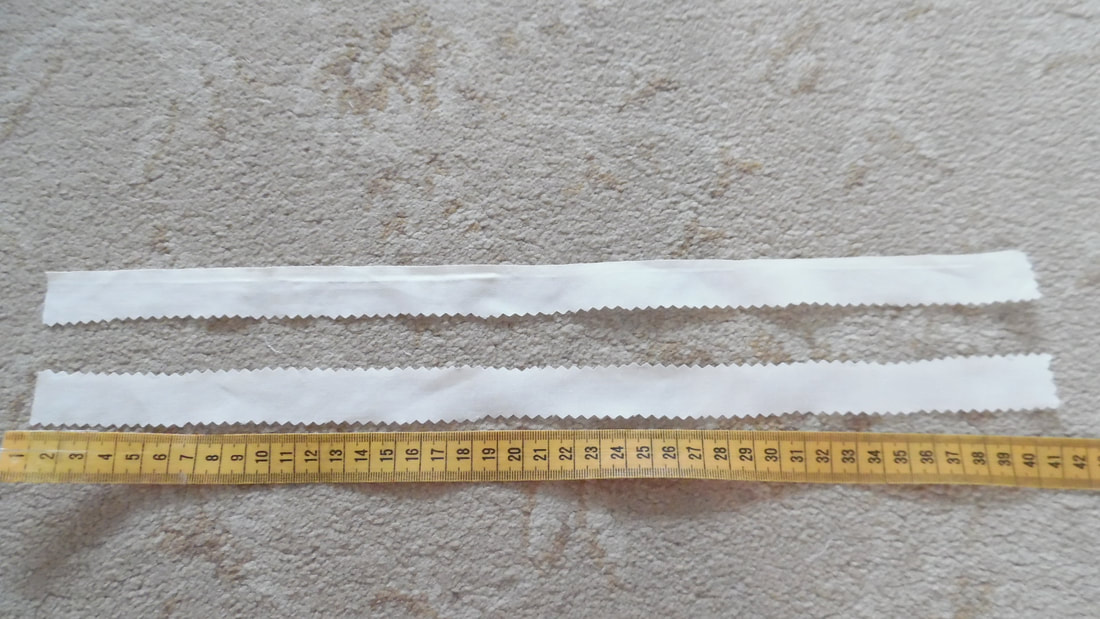
Measure your desired length, (approximately to the knee) and allow sufficient width so its not clingy and too tight to get into. The sleeves were made using pattern Simplicity 9769 82cm at the widest point and 41cm width. We knew we needed arm holes to allow plenty of room and practiced with different widths for a desired amount of material to peek through the main dress slit on the sleeve. As we weren't sure at this stage what the inner sleeve looked like because of lack of photo evidence, we took a guess for the length, with hindsight, these should be approximately 6" (15cm) longer.
Measure your desired length, (approximately to the knee) and allow sufficient width so its not clingy and too tight to get into. The sleeves were made using pattern Simplicity 9769 82cm at the widest point and 41cm width. We knew we needed arm holes to allow plenty of room and practiced with different widths for a desired amount of material to peek through the main dress slit on the sleeve. As we weren't sure at this stage what the inner sleeve looked like because of lack of photo evidence, we took a guess for the length, with hindsight, these should be approximately 6" (15cm) longer.

|
The shift is basically two oblong pieces of fabric. We used light blue crepe as we had some spare from a previous project.

|
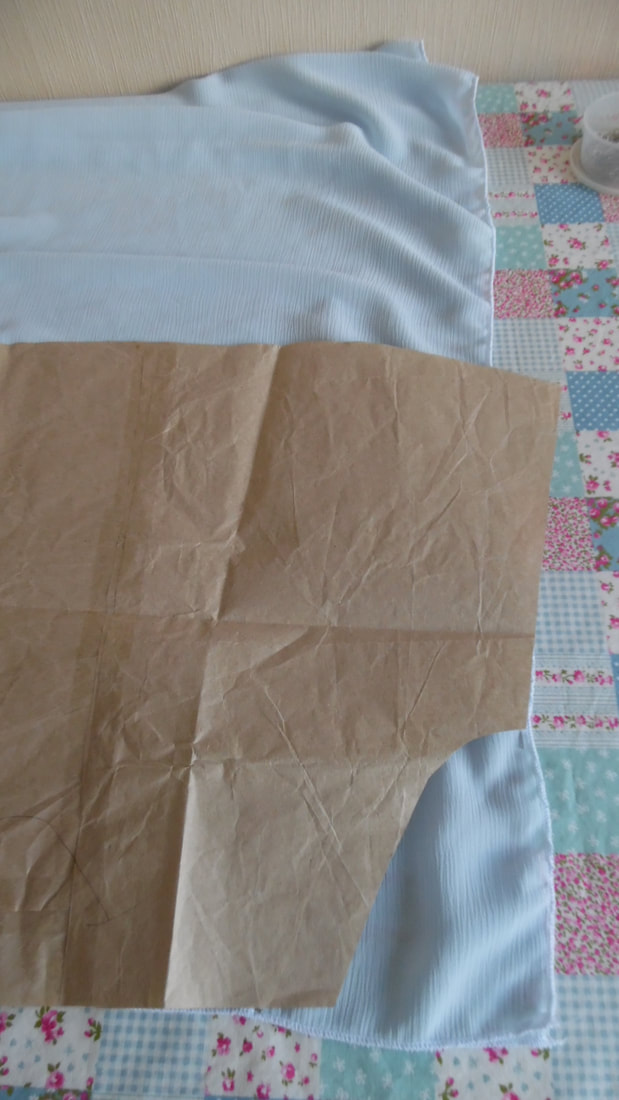
|
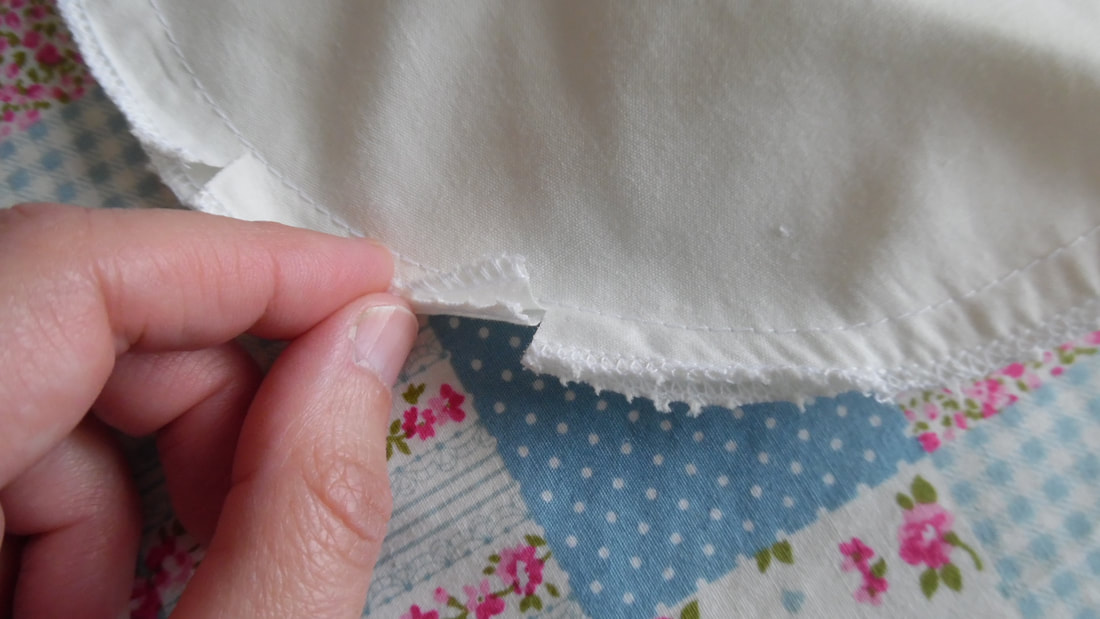
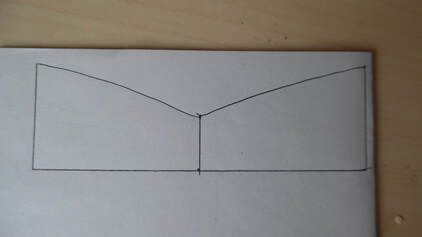
Before the sides are sewn up, place the sleeve pattern at the top corners and cut out the shape of the sleeves both pieces. You can make the sleeves longer if you wish as the length doesn't matter too much, but don't make them short.
|
|
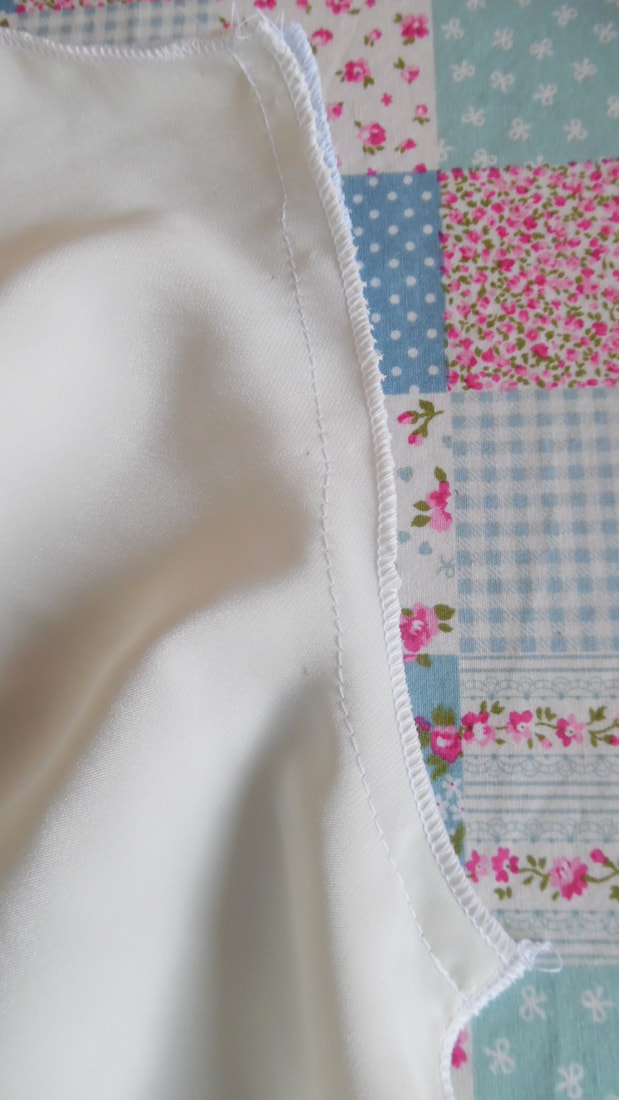
Sew in the sleeves first front and back and leave the side seam until last.
|
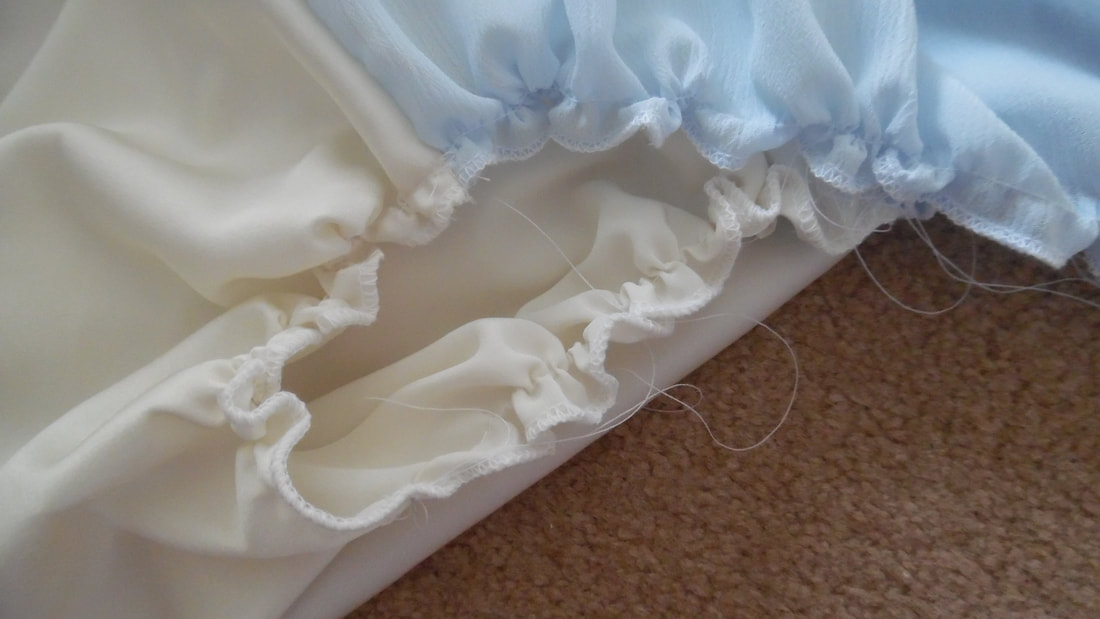
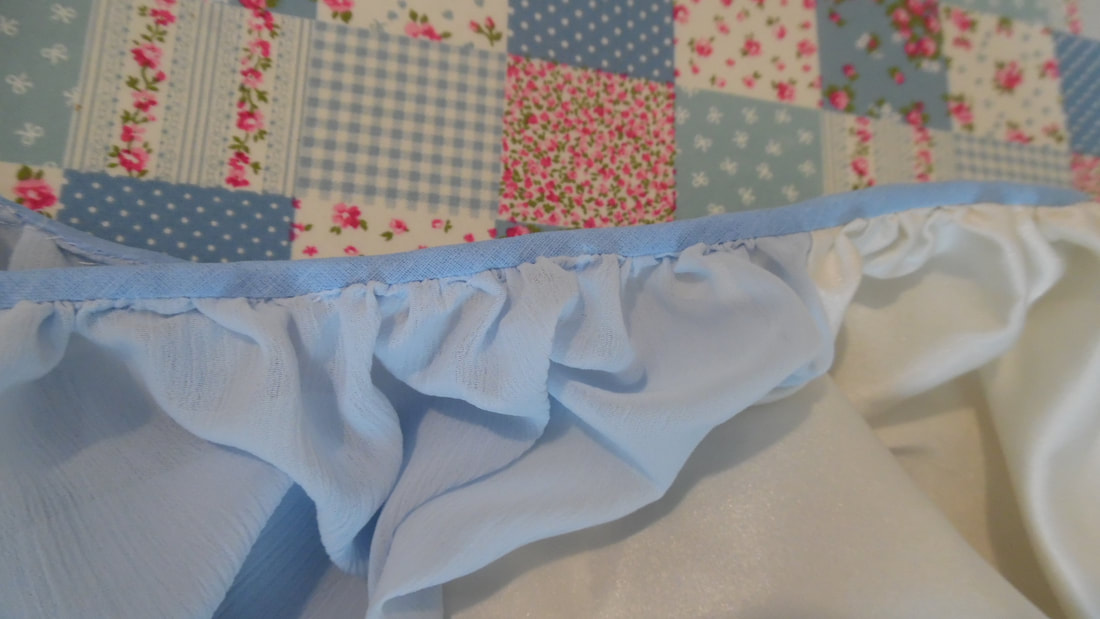
Measure around the body where the neckline will sit on the shoulders and cut a piece of bias to this measurement. Gather the front, back and sleeves individually. If you try and do it all in one go, if the thread breaks, you will have to start again. You now need to fit this onto the bias.

|
|
|
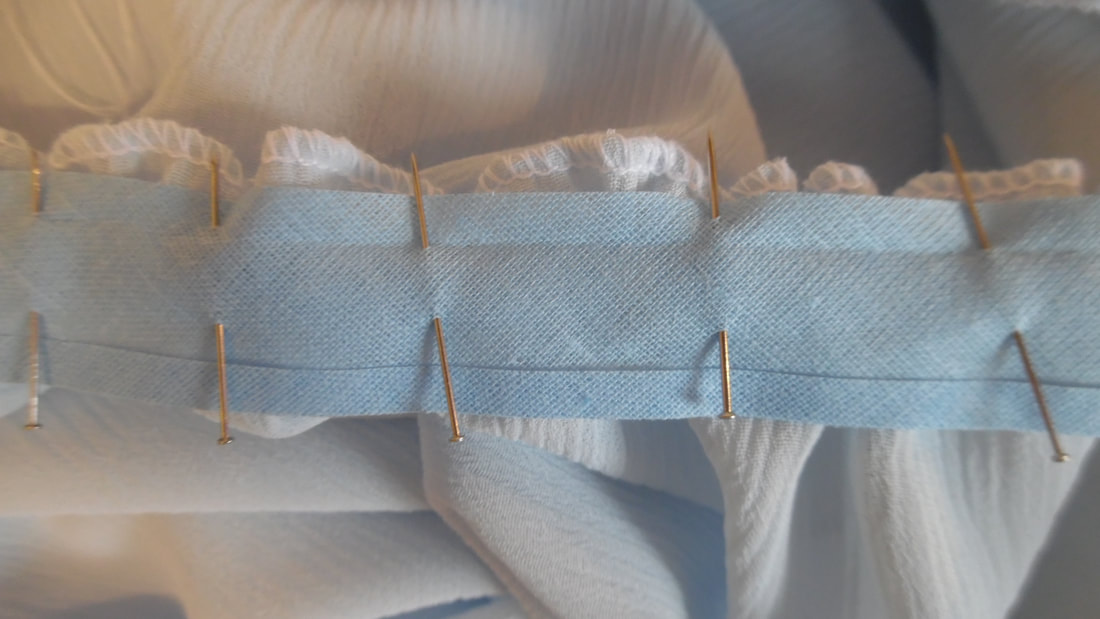
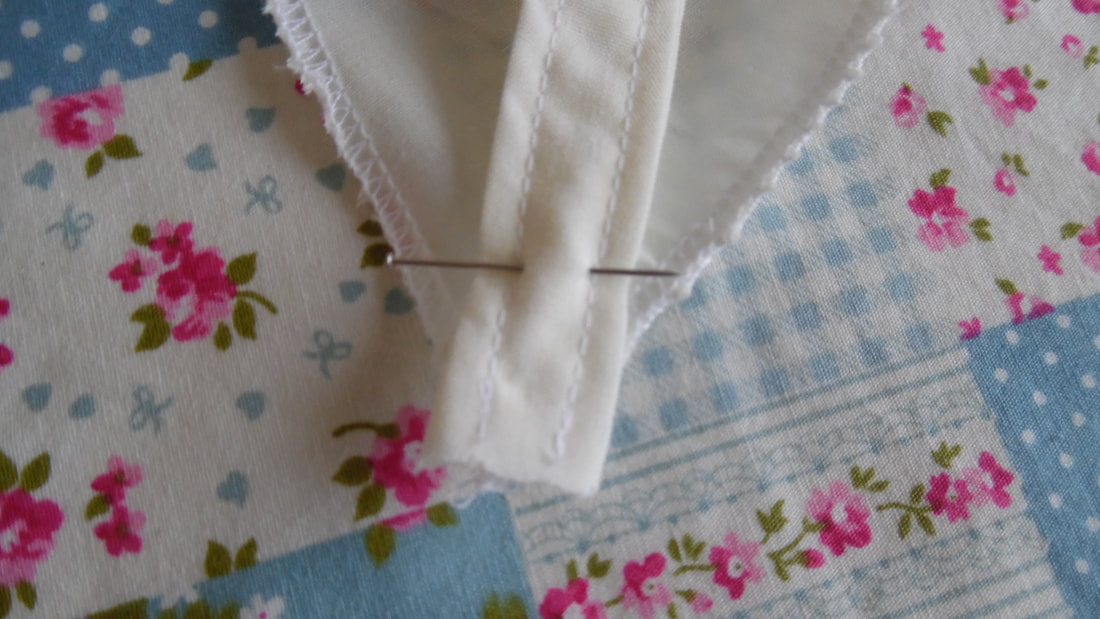
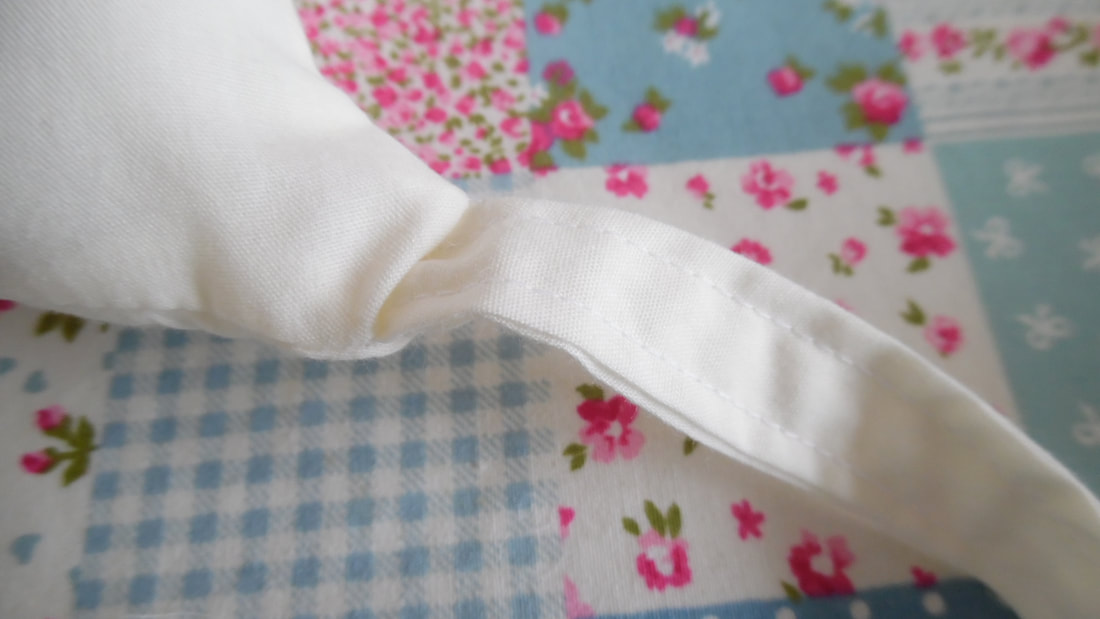
Open the bias out and pin it in place on the right side, you will be sewing on the fold line of the bias.
|
|
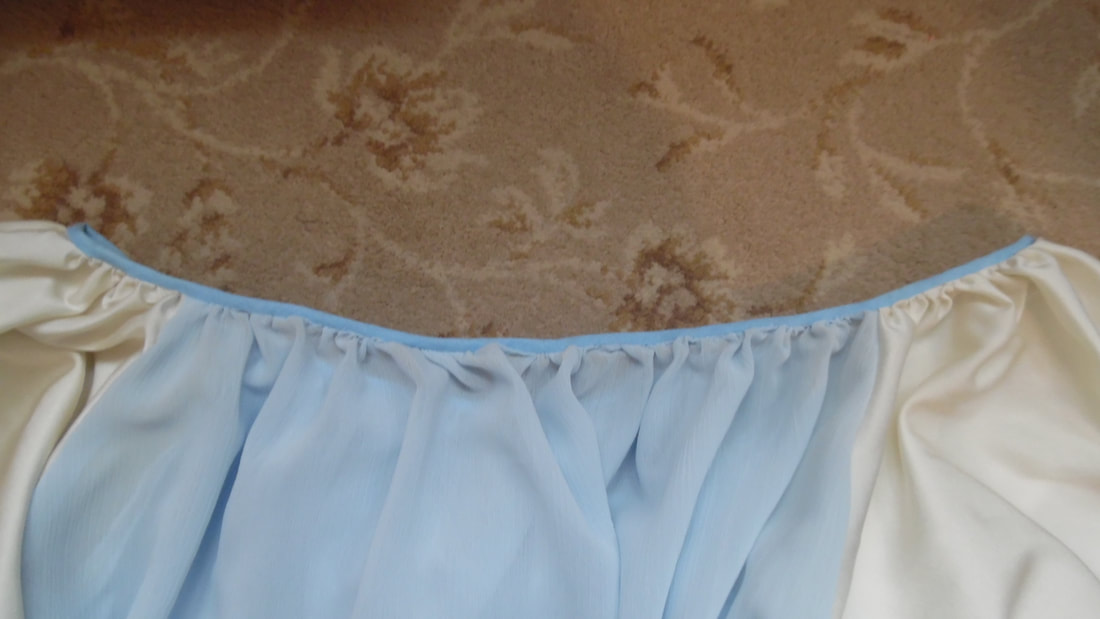
Turn the bias to the inside and hand sew in place
|
|
The sleeves do not need to be turned up at this point. The shift is now complete. The sleeves will be finished after the bodice and skirt have been made. Please see continuation after bodice completion.
|
Bum Roll
See video
See video
|
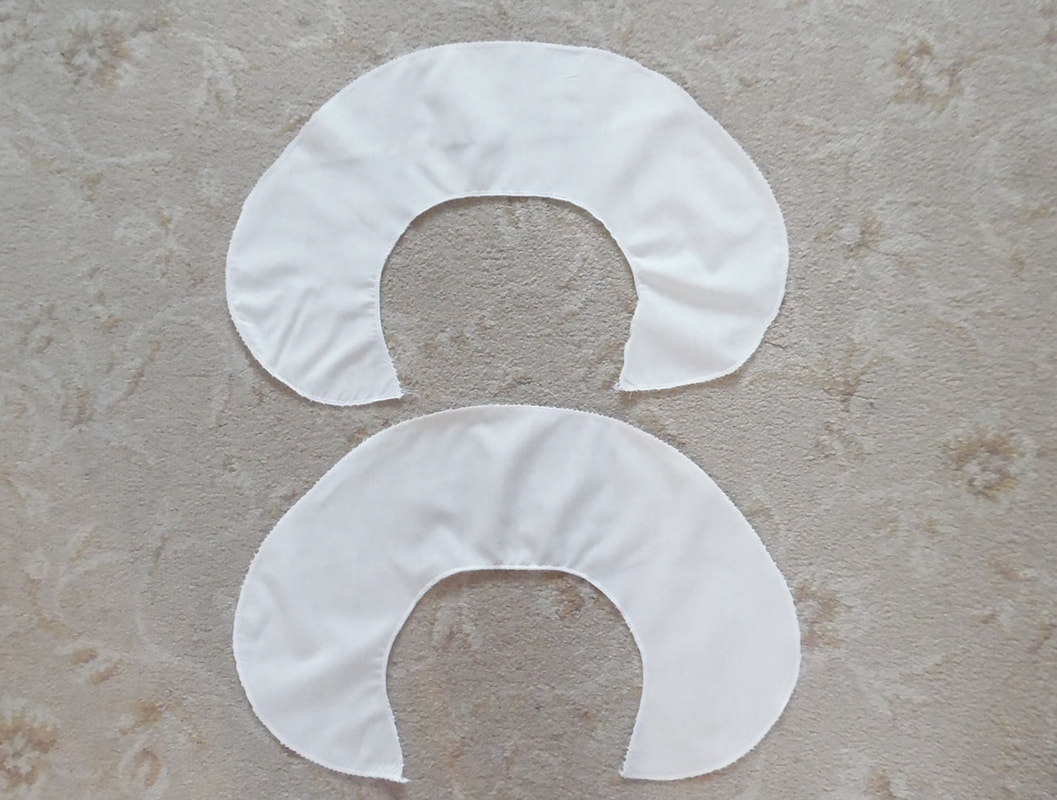
Cut two pieces
|
|
Either cut strips of fabric or use ribbon for your ties.
|
|
Before you sew this together sew an end of your ribbons to the front on the bum roll. So when this is turned the right way out, they will be firmly attached.
|
|
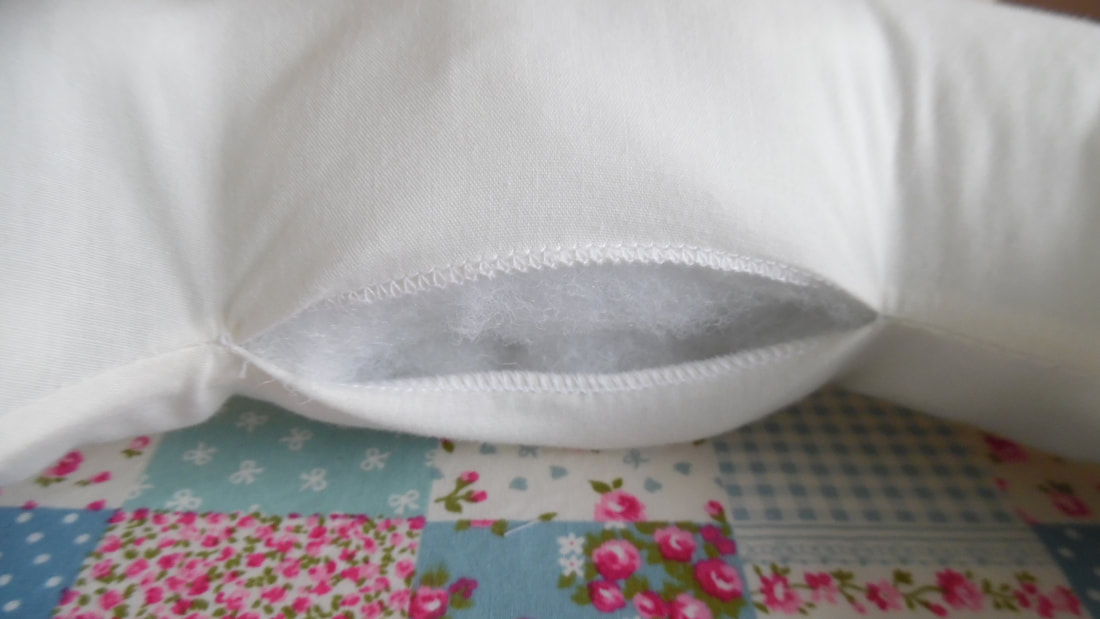
Sew the two pieces together, but leave a gap on the inside centre at the waist to turn it the right way out. Clip the curves.
|
|
I used padding from an old quilt. Once stuffed to your requirement, sew up the gap you left.
|
|
This shows the ribbon now on the outside.
|

|
This completed the bum roll.
|
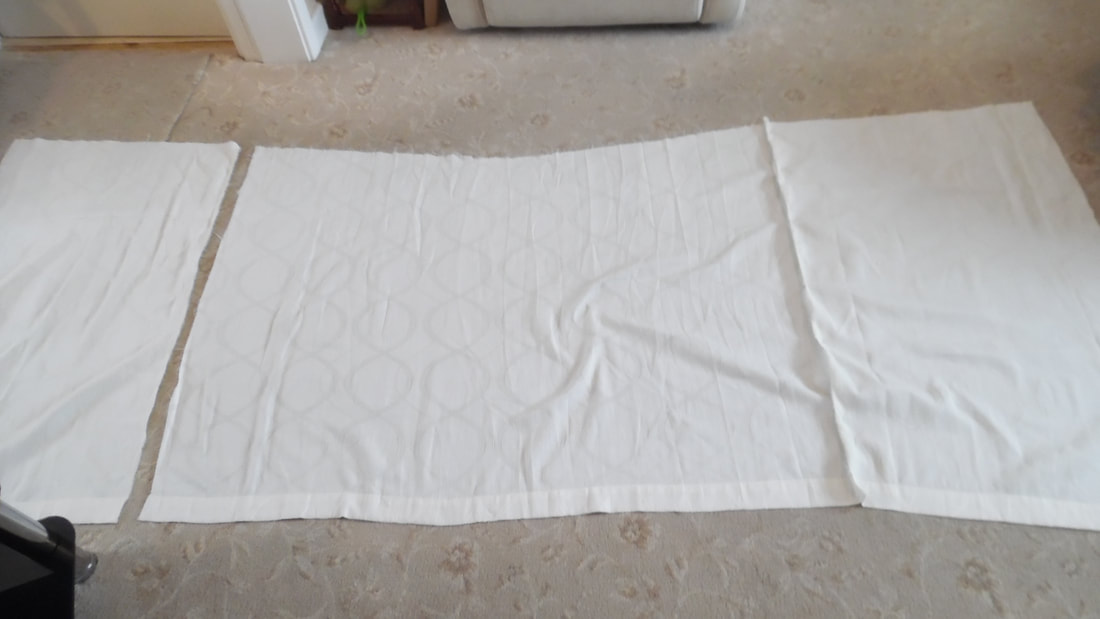
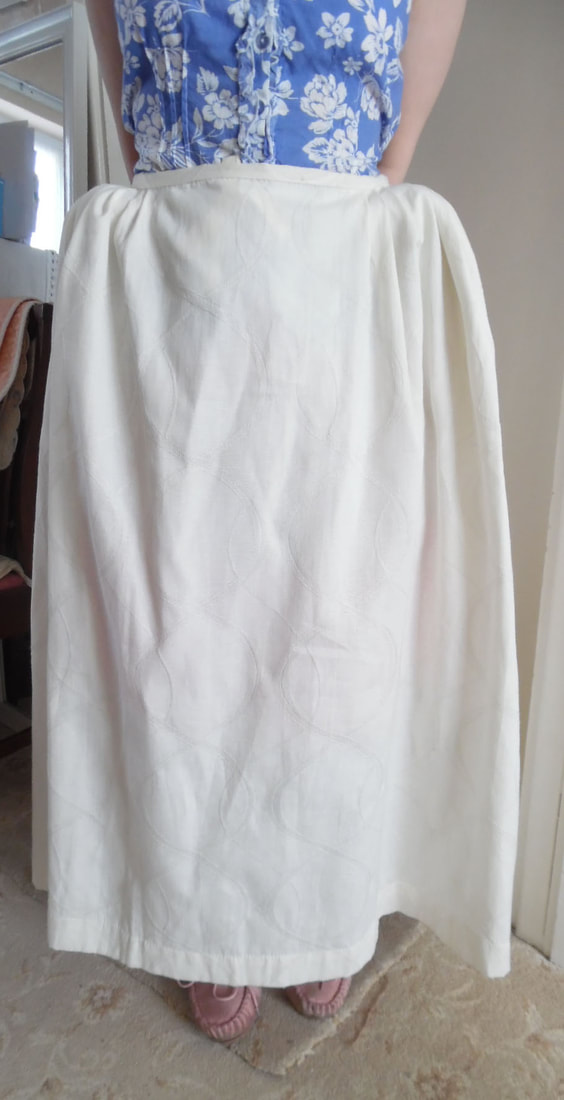
Under Petticoat
This is cut as a front and two backs, the front is approximately 188cm wide. Put the bum roll on first and have someone measure from your waist to just above your feet. Take a second measurement at the side waist going over the bum roll. Take a third measurement centre back going over bum roll. Lay your pieces down and mark your measurements. You will notice that it slopes up towards the back. Sew the sides seams together. Because I am using old curtains, I kept the hem line as it was already sewn for me. You will need to allow seam allowance to yours for the hem.
|
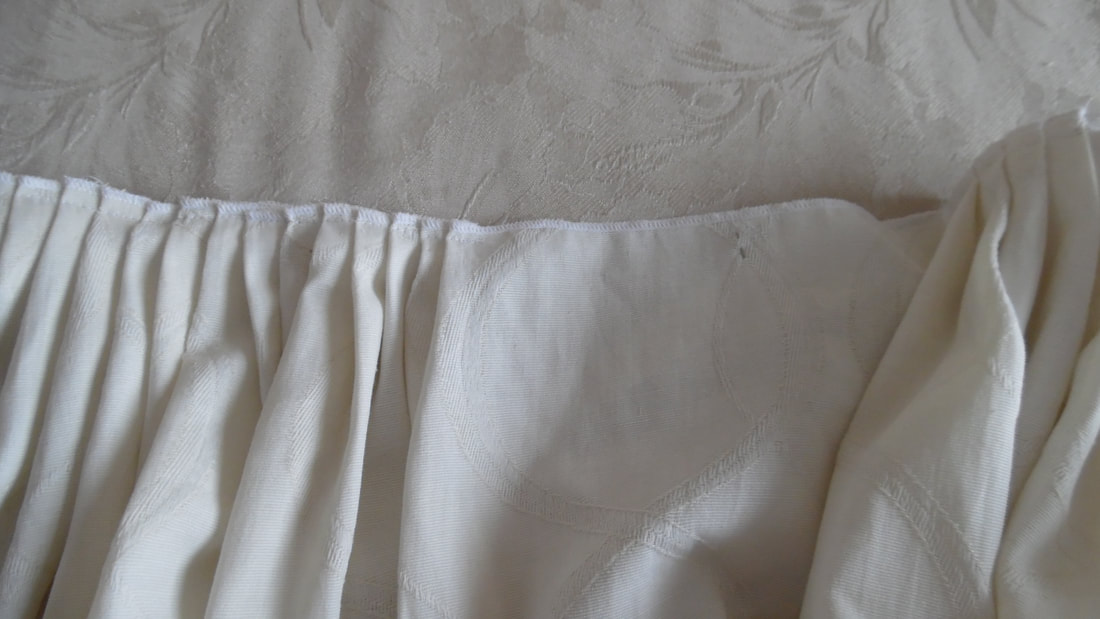
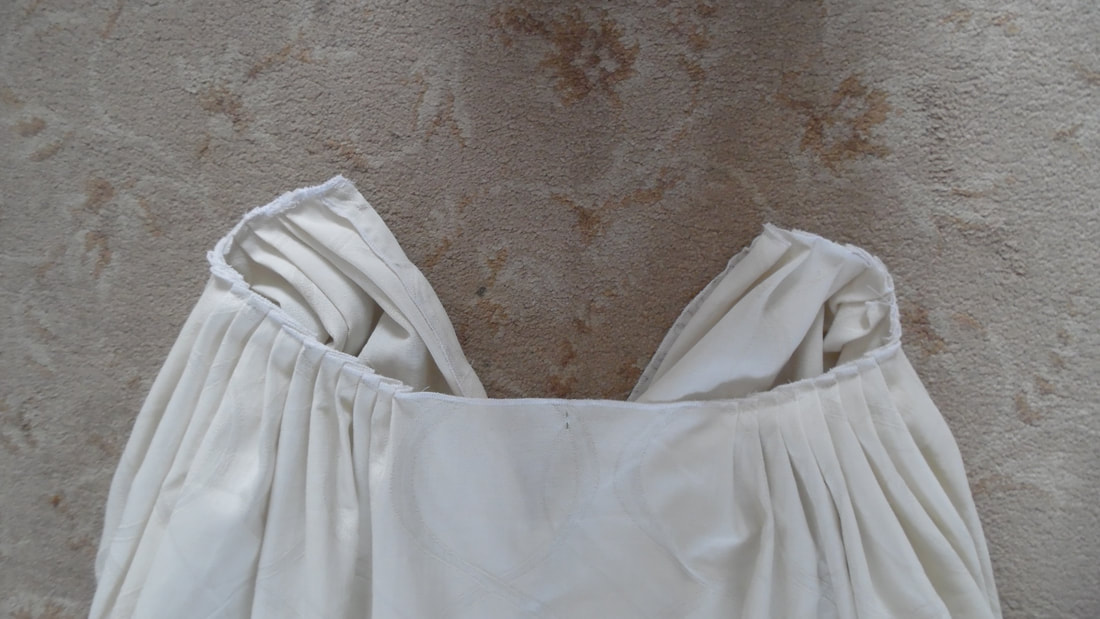
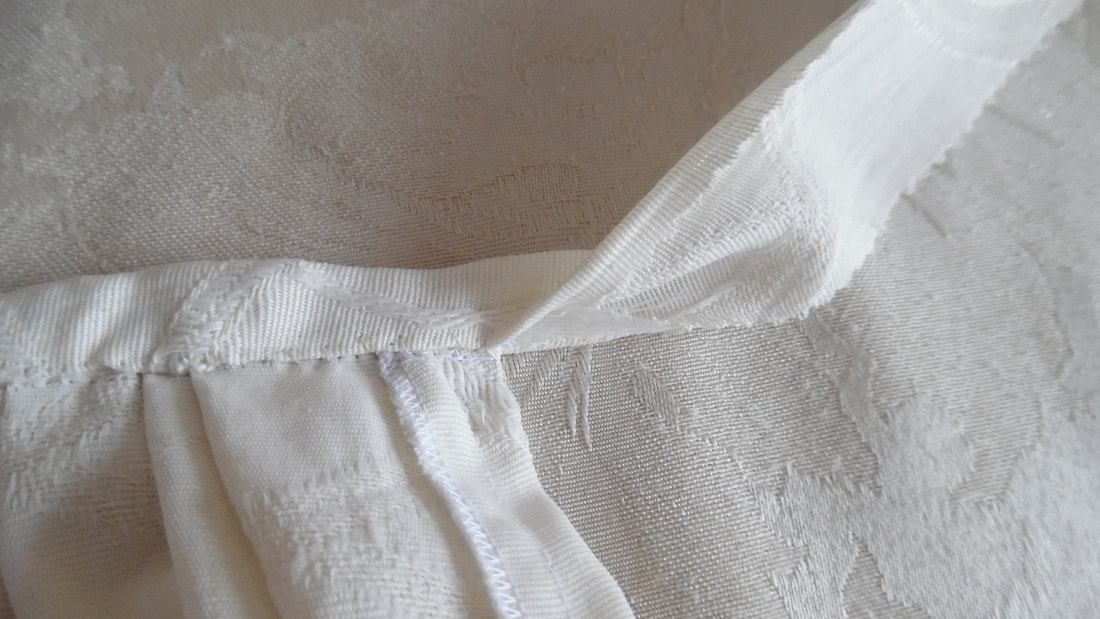
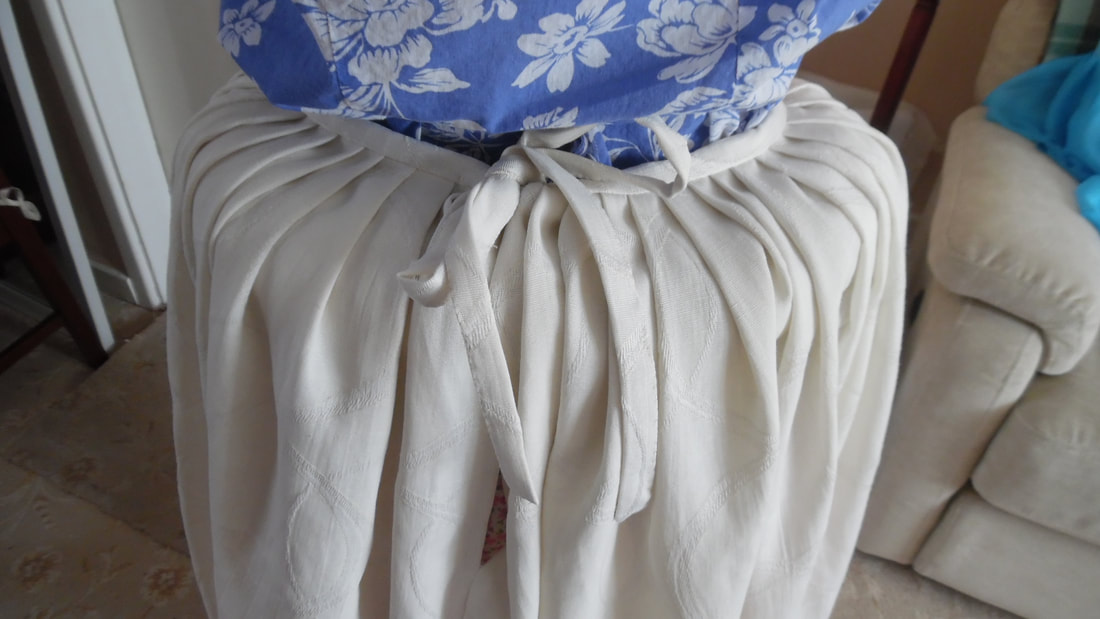
Leave approximately 15cm at the centre front un-pleated. Take a waist measurement and fit pleats in to fit.
|
|
Sew up the back seam, allowing plenty of room to get the garment on.
|
|
Cut a strip of material for the band allowing plenty over as you will be tying a bow with it.
|
|
|
This completes the under petticoat.
The Bodice:
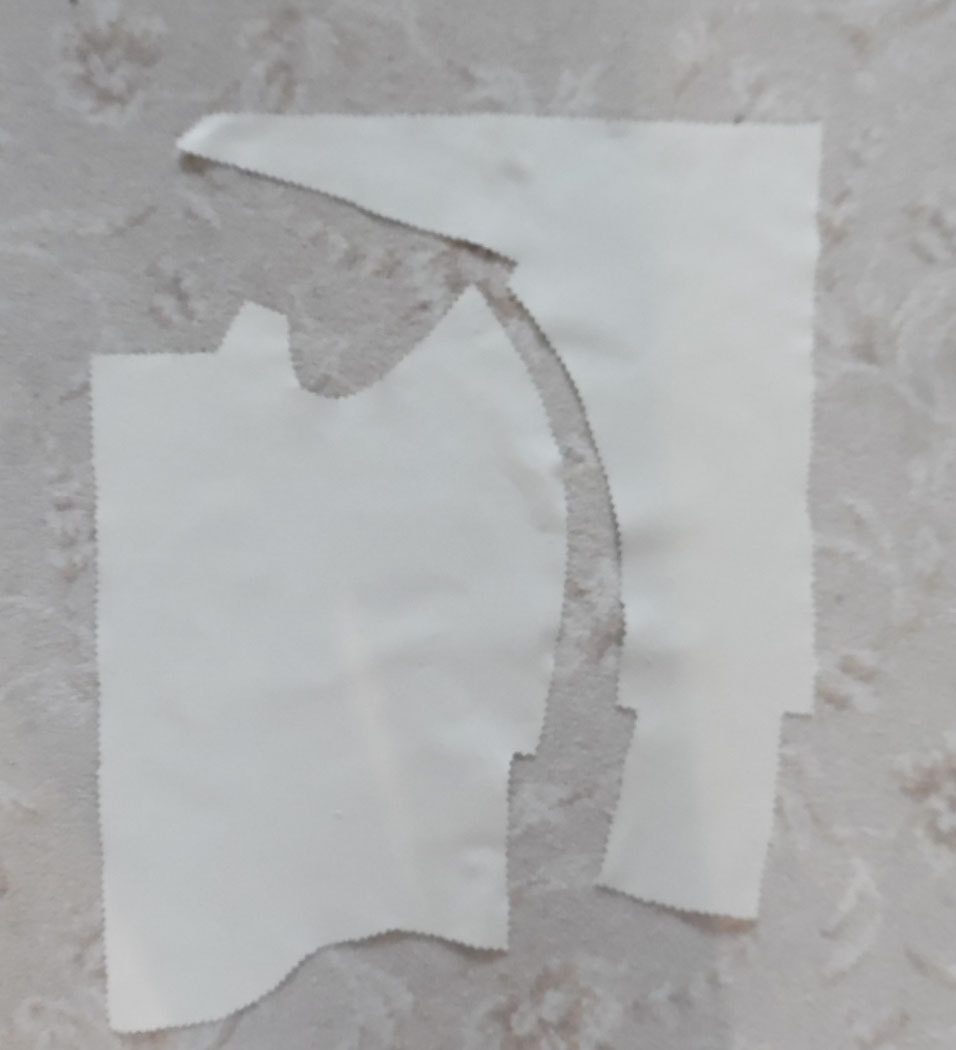
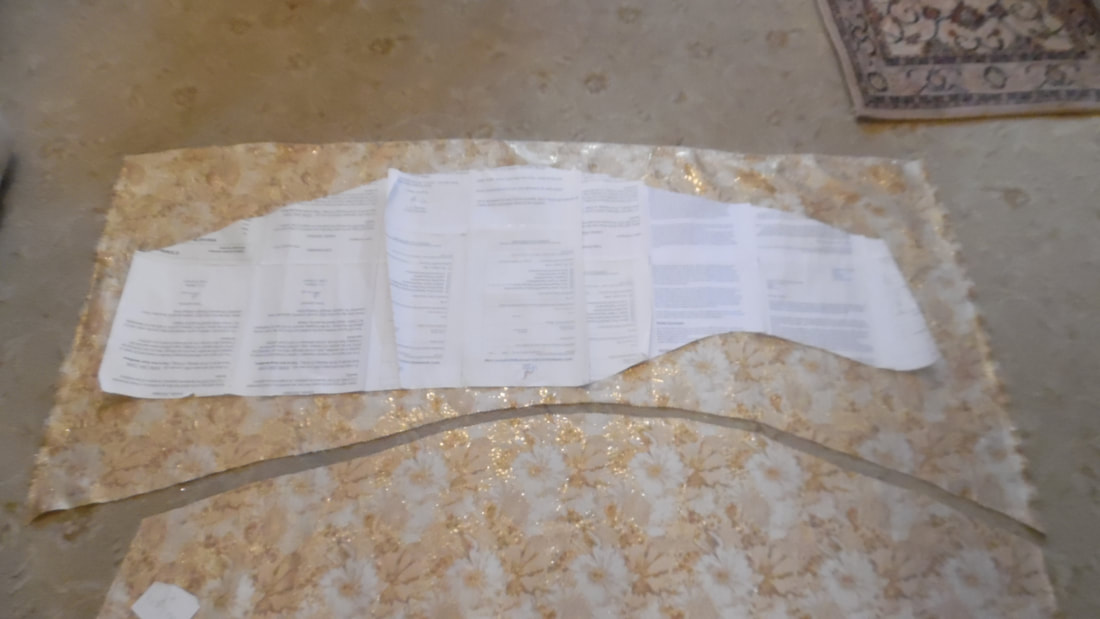
The pattern was taken from: Period Costume for Stage & Screen by Jean Hunnissett 1500 - 1800. This shows the original first cut and the final cut. Cut two pieces each from canvass and one piece from fashion fabric.
|

|

|
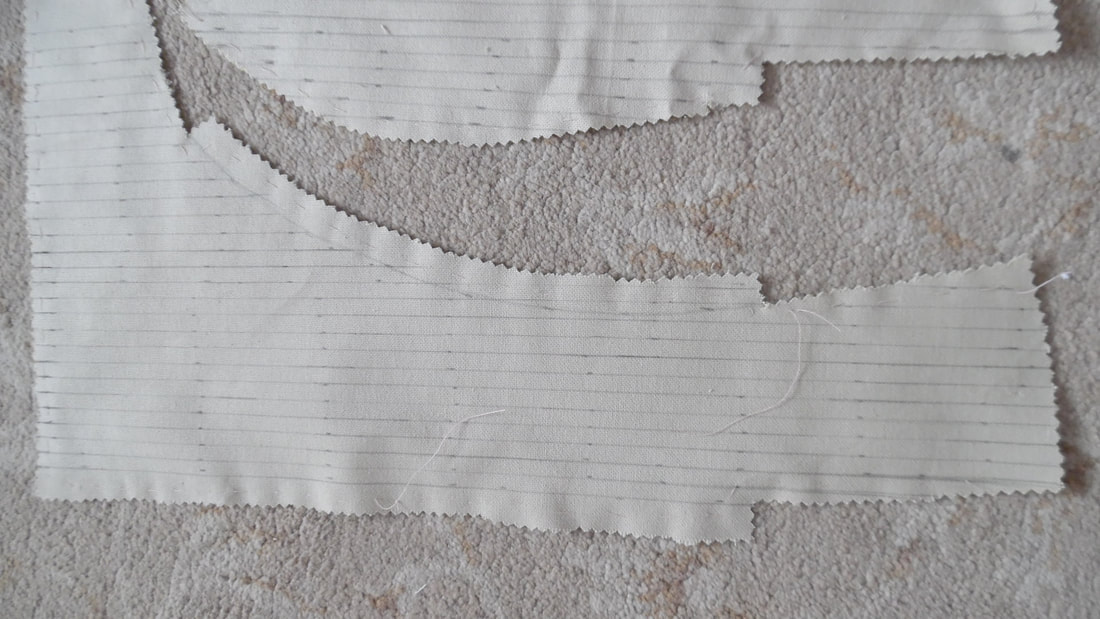
Cut two pieces of canvass for each section. Tack all the pieces together for each section, draw the boning channels and sew them, also mark where the waist will be
|
|
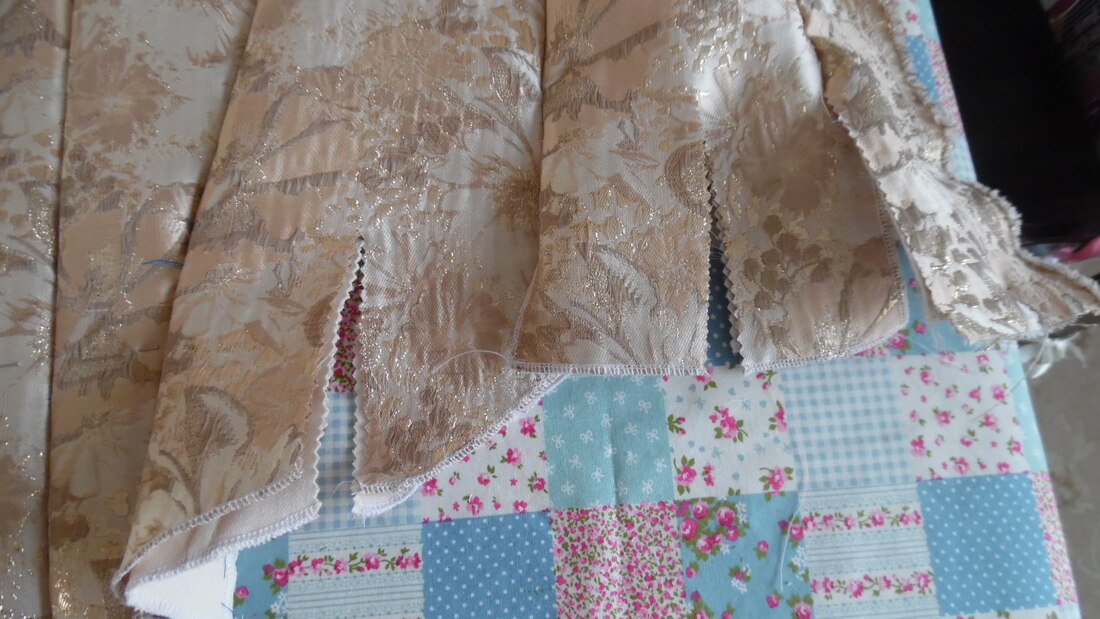
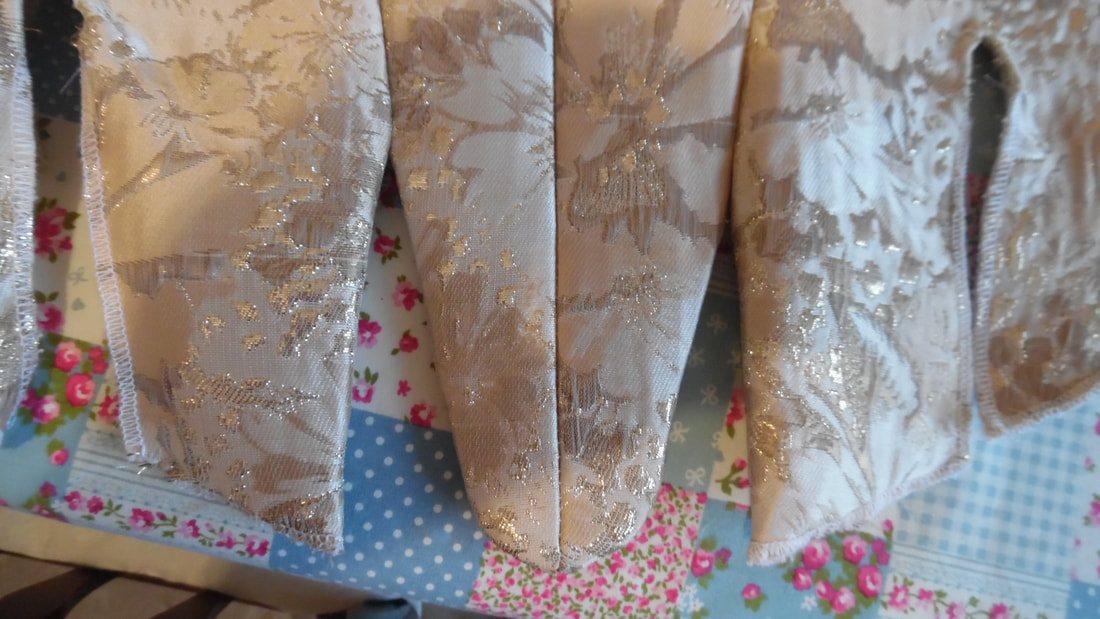
This shows the cut tassets
|
|
After cutting the tassets through all the sections at the same time and overlock all the edges. Because this fabric frays a lot, all the pieces were overlocked before being put together. This shows the boning channel sewn to the front seam. You don't bone the other seams.
|
|
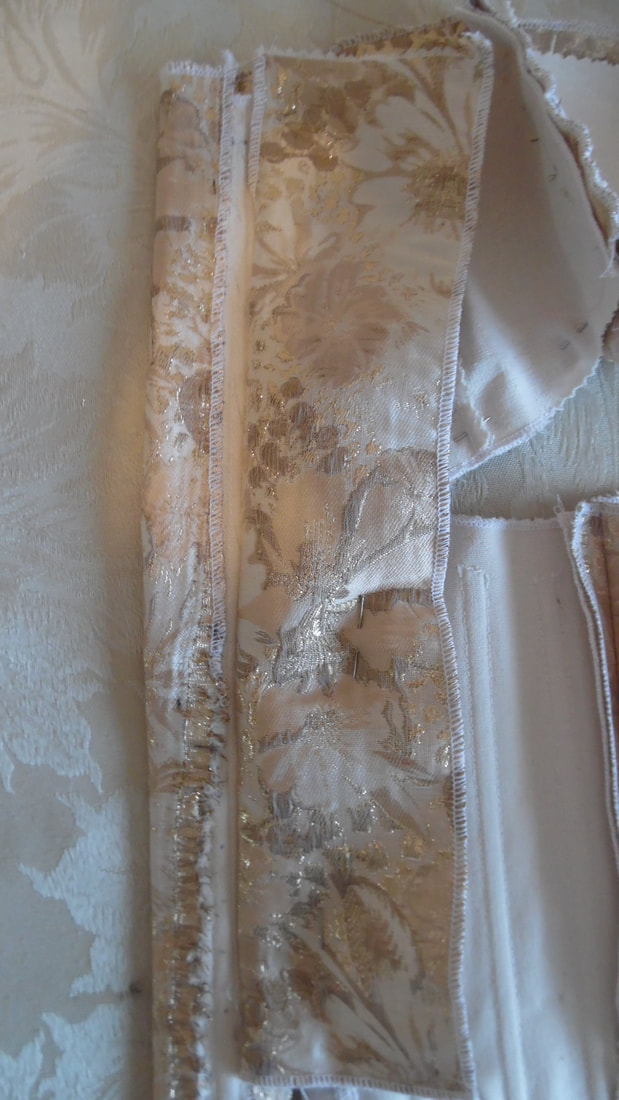
Turn the top edge under about 1.5cm
|
One part not photographed is the lining piece for the front centre section, but this was videoed.
|
|
|
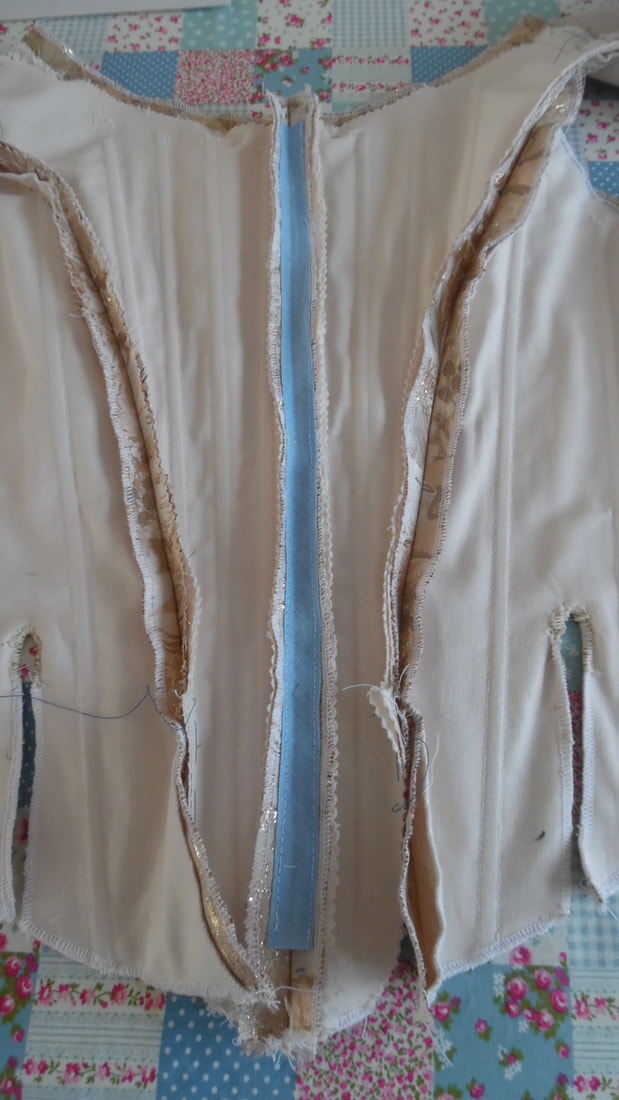
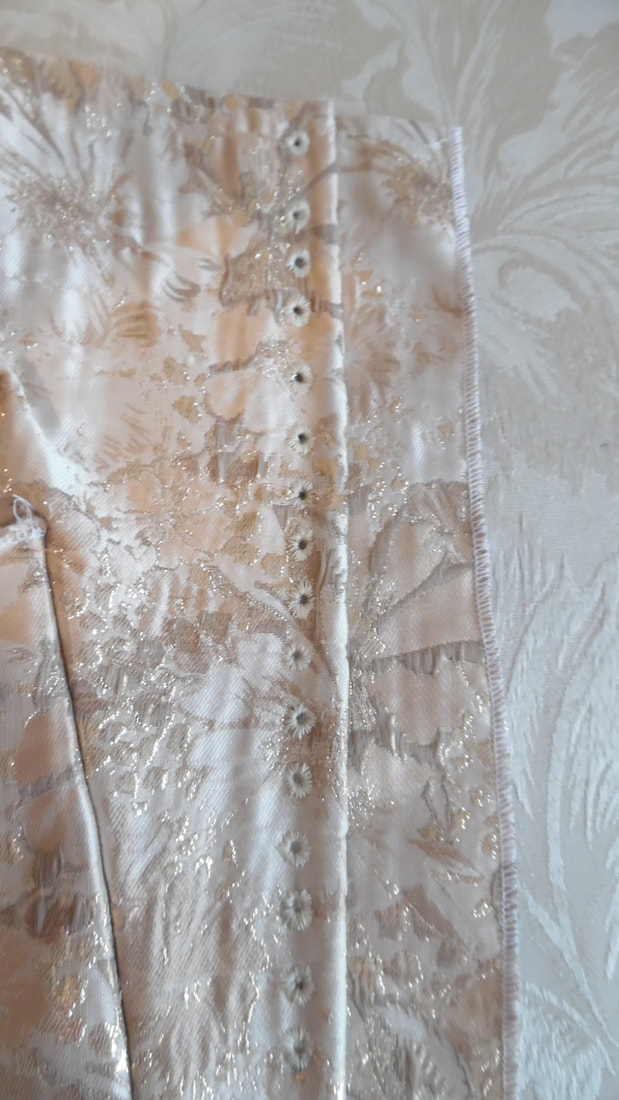
We decided to make a placket at the back opening if there was a gap after lacing up, the stays would not be seen. Cut a piece of fabric the length of the eyelets, approximately 2" (5cm) wide. Sew the placket to the inside of the bodice.
|

|
Using an awl to make the eyelets, they need to be diagonally placed as far as the tasset. The eyelets are hand sewn.
|
|
This is what the placket looks like once sewn on. You need to be able to get to the eyelets to lace the bodice.
|

|
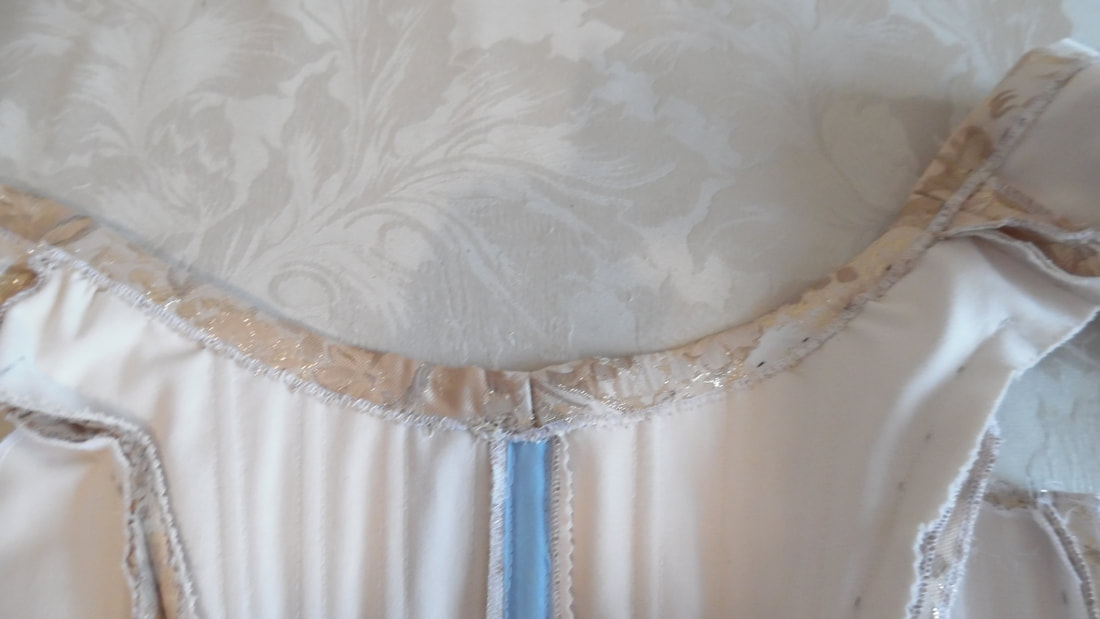
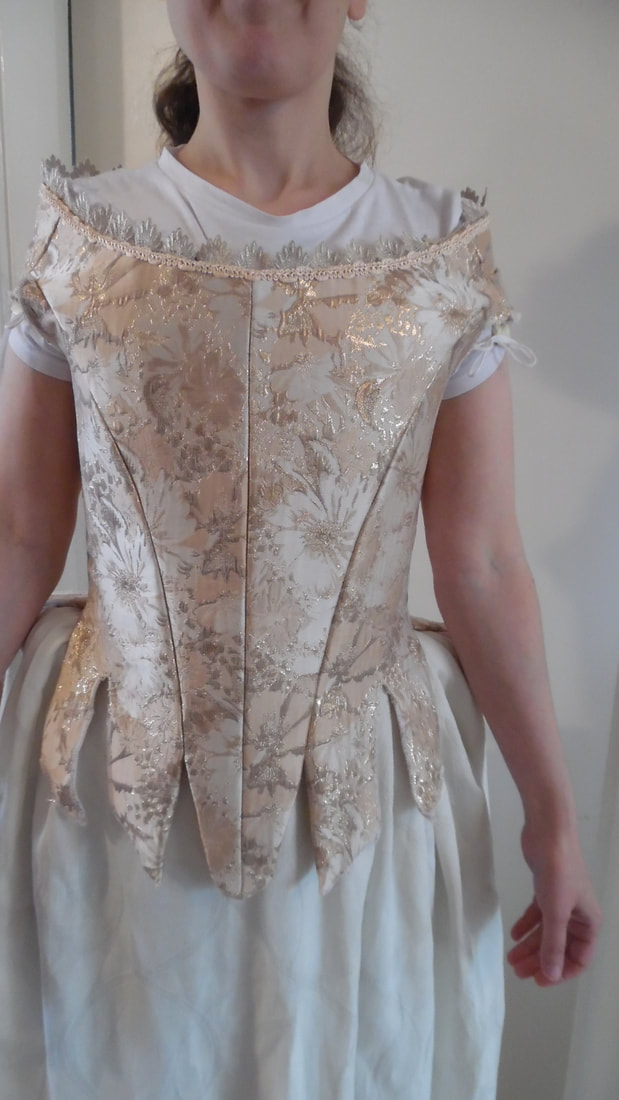
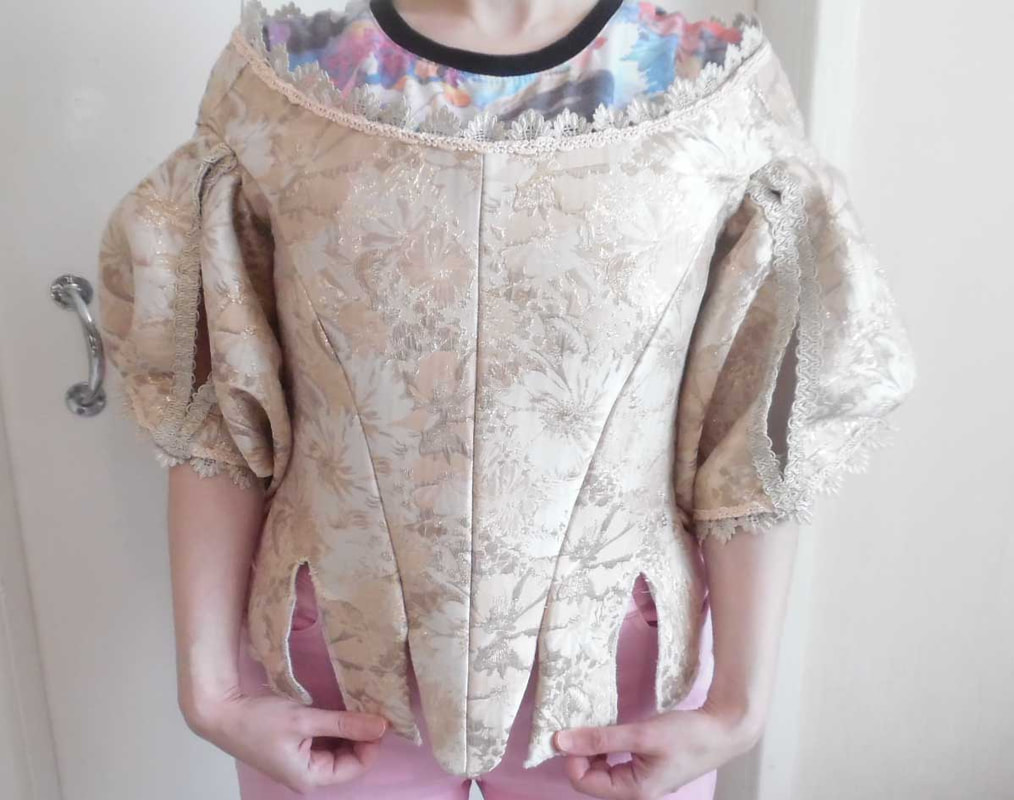
I decided to use a deep lace around the top of the bodice, It was sewn on the inside of the bodice, this is also put on around the sleeve cuffs.
|

|
I then sewed on a thinner line of lace at the front.
|
|
This completed the main bodice, now we will make the sleeves.
|
Sleeves:
|
Turn the edges of the sleeves under about 1cm and sew in place.
|
|
This is where you will have to make a very difficult decision, because there are countless different sleeves to choose from during the period. We decided to make it quite roomy in keeping with the main character from Man in the Iron Mask, so ours is quite wide. 52" (130cm) and 18" wide (46cm). There is also an unlimited amount of designs for slits, or gathers or cartridge pleating. We decided it would be cartridge pleated, which meant we had to allow for another 2" (5cm) to turn over the top hem, exactly the same as we did on the skirt.
|

|
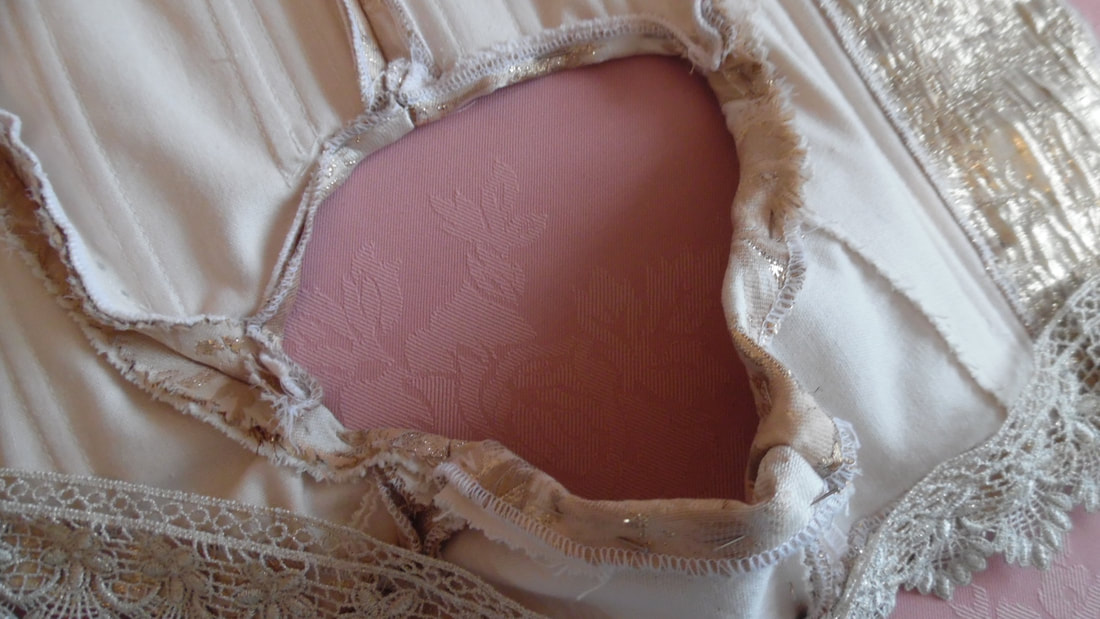
After turning a hem, (but don't sew it down), you will need to measure from the front seam of the bodice arm hole to the second seam towards the back. We made this 6" (15cm). Then measure from the same front seam underneath the arm to the seam at the back of the bodice, we made this 7" (17cm), Yours will be a different. This area is to be left un-gathered, mark three rows of 1cm apart sideways and 2cms apart down. (see below)
|
|
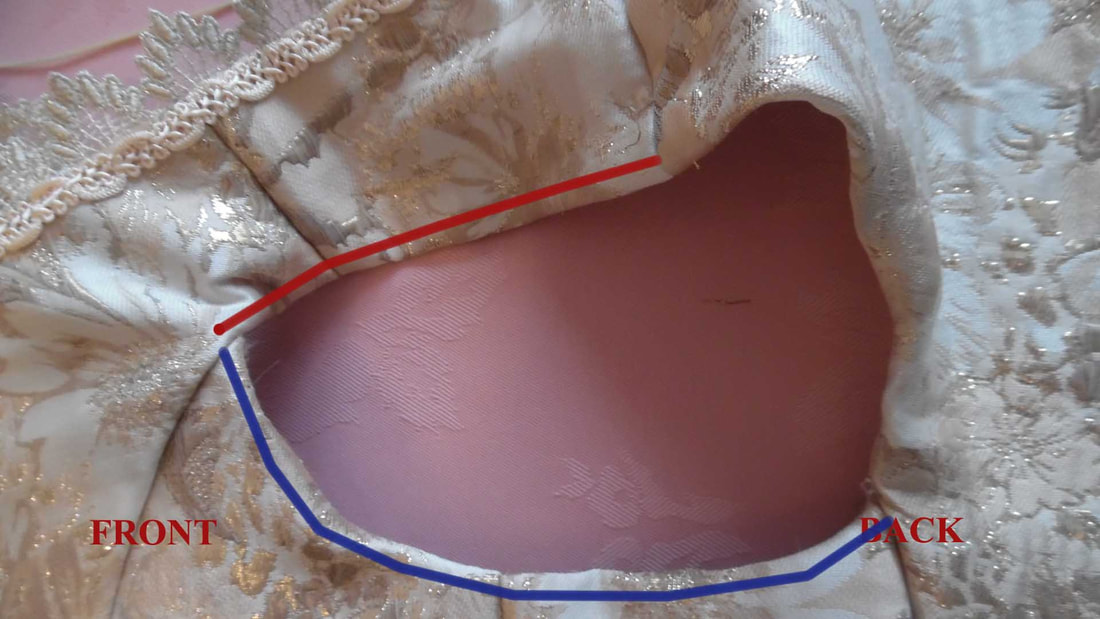
This is where you take the measurements from. The red line is the top sleeve and the blue line is the bottom of the sleeve. These measurements are the start and end of the sleeve that will not be gathered.
|
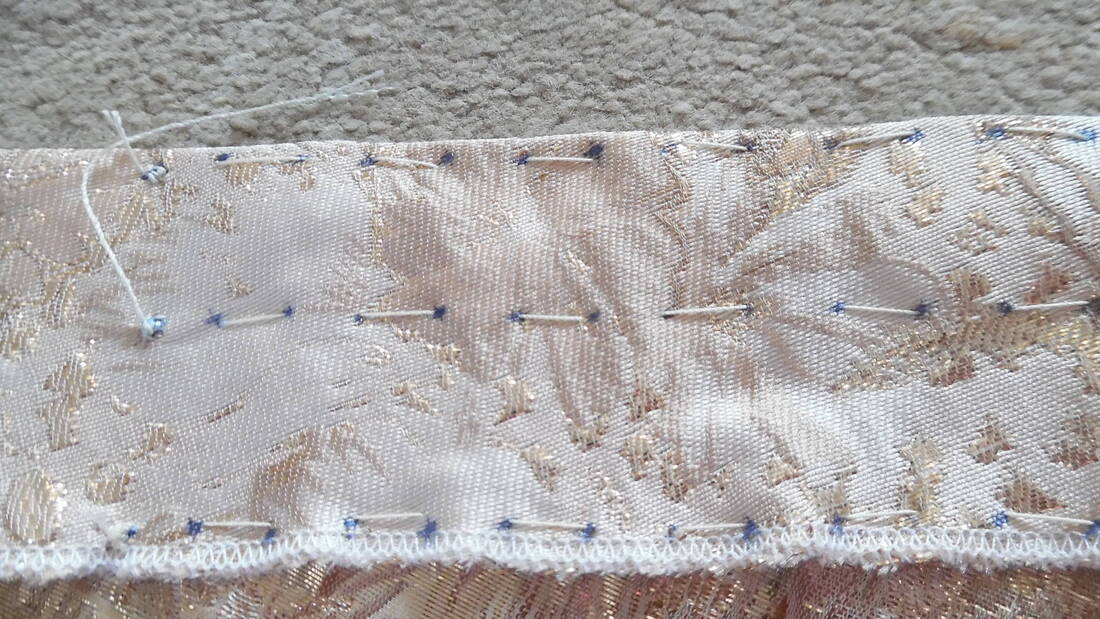
You will need to use a top stitch thread as it will need to be very strong. You will also need to turn both ends and sew them.
|
|
|
The bottom of the sleeve is pleated with 1" (2cm) pleats , the end 5" (12cm) at each end is left un-pleated.
|
|
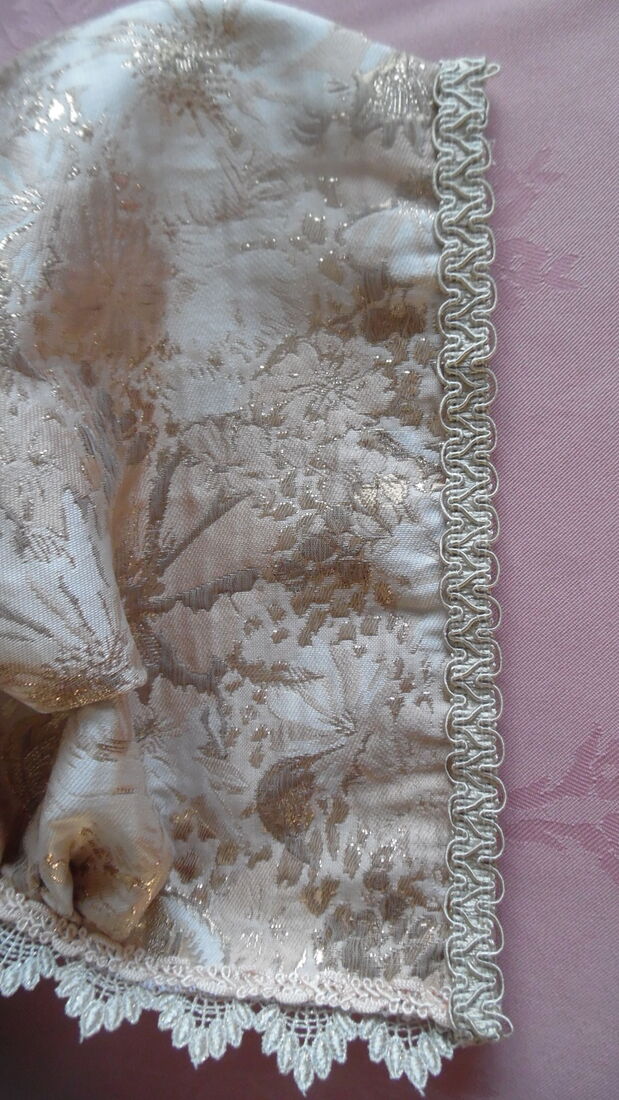
I then added the same lace combination as the top of the bodice
|
|
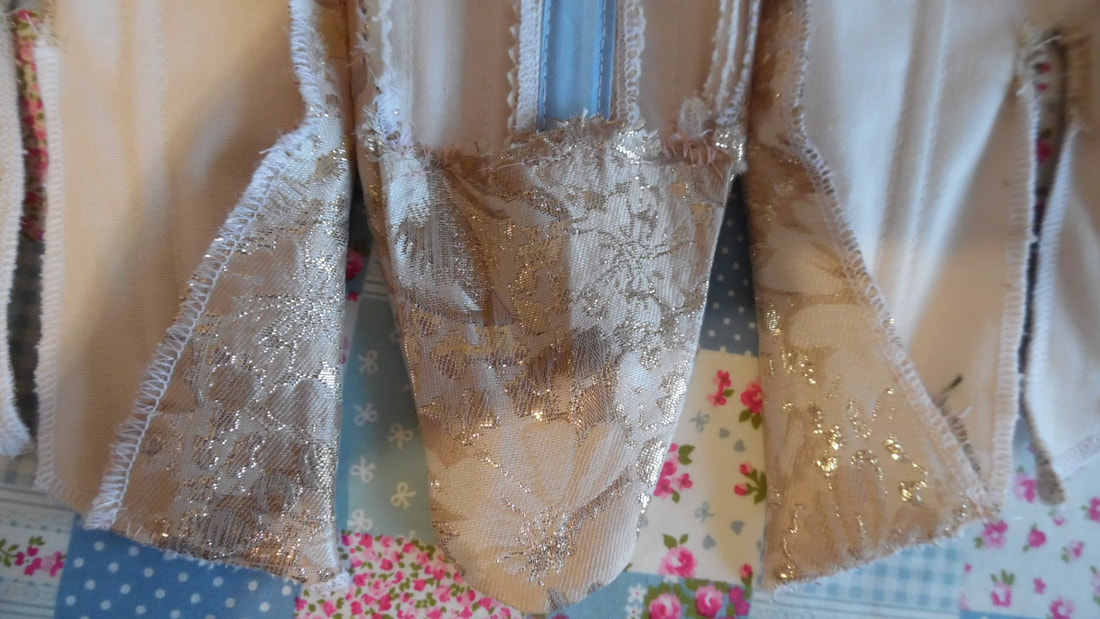
I chose this lace to go down both sides of the slit.
|
|
Insert the sleeve in the bodice approximately 1 cm, this is backstitched through all the layers as far as the start of the pleating. The slit opening at the top must be butted together, so as not to create a gap. Then back stitched in place up to as far as the pleating. Sew on the OUTSIDE edge.
|
|
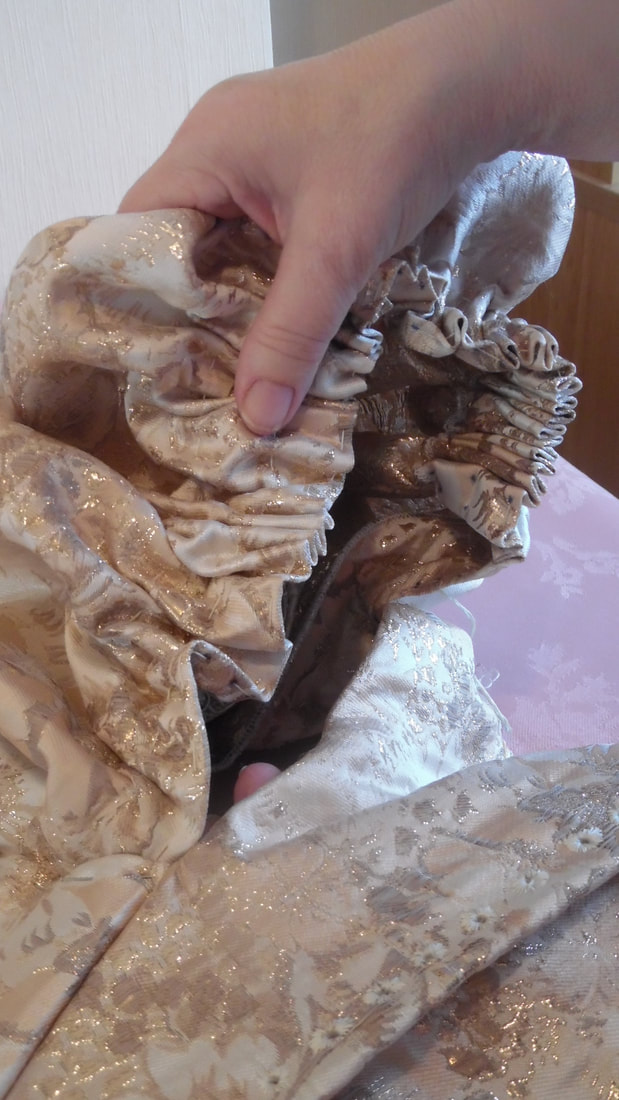
Gather the cartridge pleating evenly and insert into the sleeve.
|
|
Now turn the bodice sleeve to the inside and whip stitch the pleats in place approximately 1cm in from the edge.
|

|
Finish the sleeve by whip stitching the top and bottom of the slit together, about 1.5 cms.
|
|
|
This completes the bodice
Continuation of making the shift.
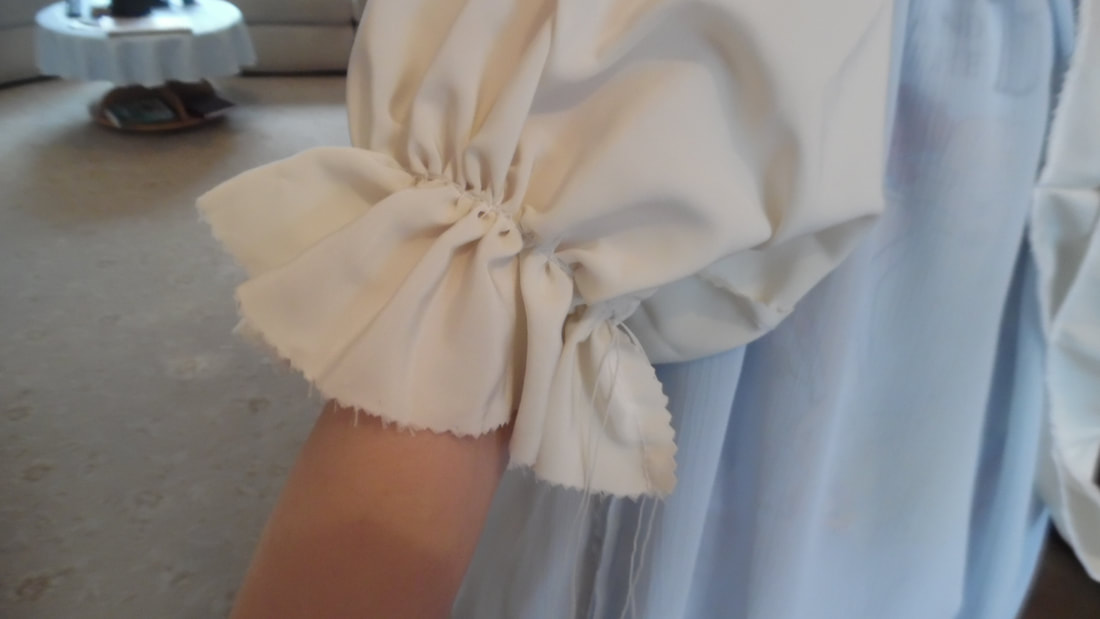
|
approximately 6cm up from the bottom of the cuff, sew in a row of shirring elastic, not too tight. This isn't authentic as they would have just used a piece of ribbon for this.
|
|
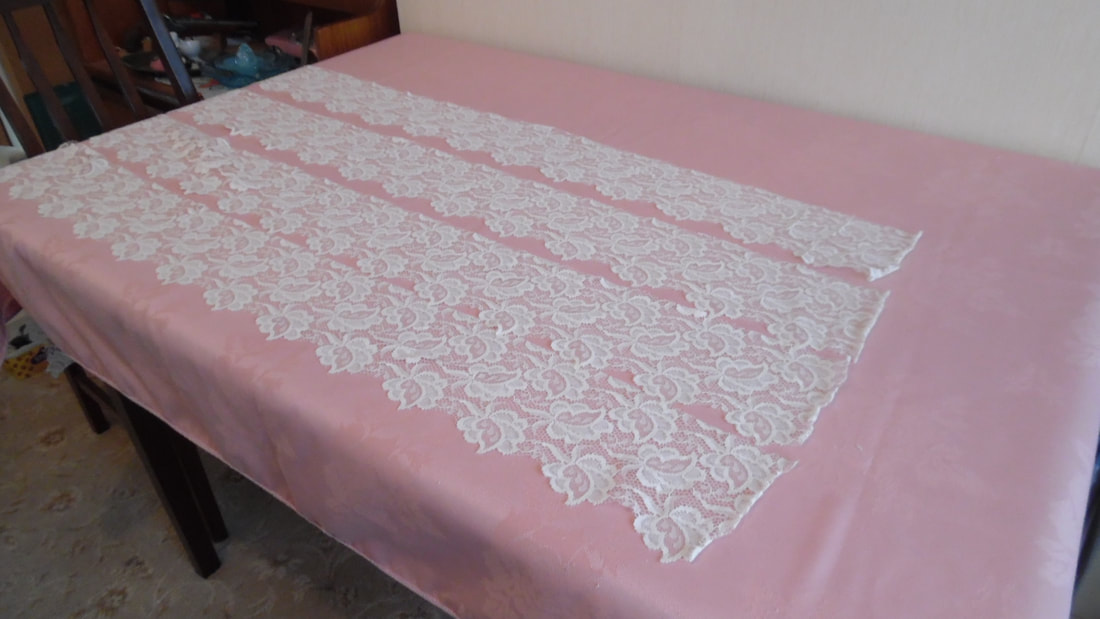
This is the lace we chose for the bottom of the sleeve. It is 12cm wide
|
|
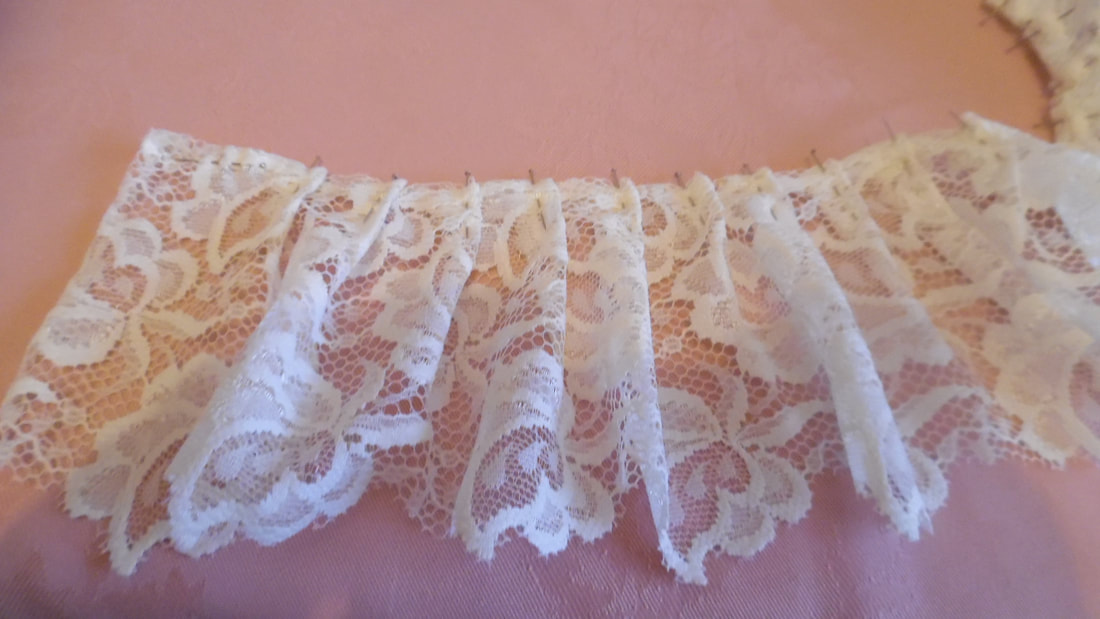
You can if you want, put a small pleat along the top for a bit of extra flounce.
|
|
I sewed the lace on using a zig zag stitch.
|
|
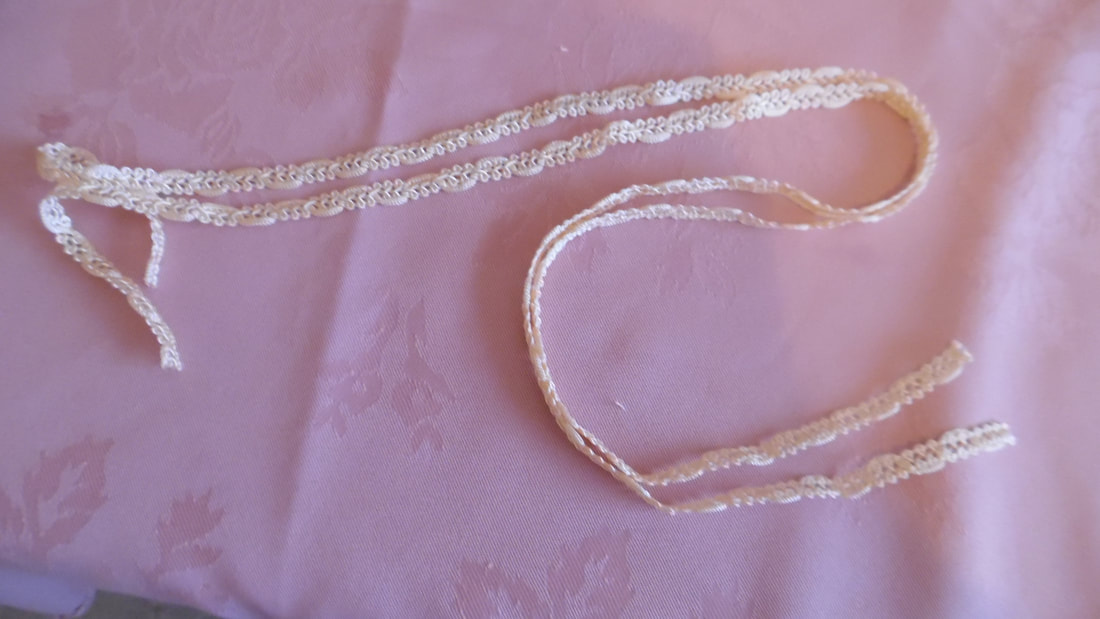
We decided to use the same lace as was used on the top edge of the bodice and around the bottom of the sleeves. This is just for decoration to make it look as though a ribbon was used instead of shirring elastic.
|
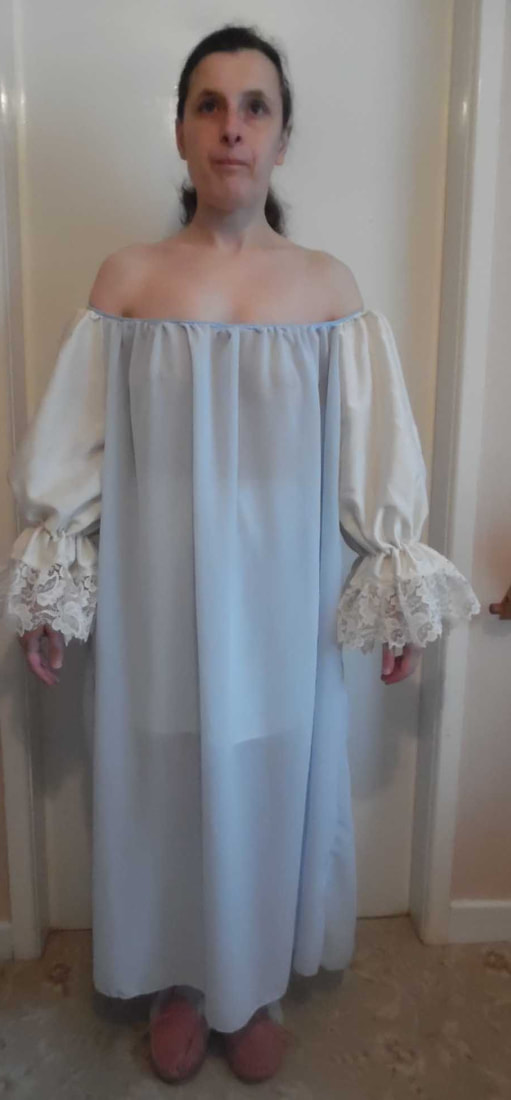
This completes the shift. The sleeves will be pulled up when the bodice is on and a piece of lace tied around just above the elbow.
Skirt:
First you have to take measurements, front, side and back, the same as the petticoat. Tracy wanted a long train so we added about 40cms to the back length. You should make the bodice BEFORE you make the skirt then you measure the front "V" at the height of the first tassets. Allow enough material to turn up a hem.
|
Like the underskirt, the pattern gets gradually wider towards the side.
|

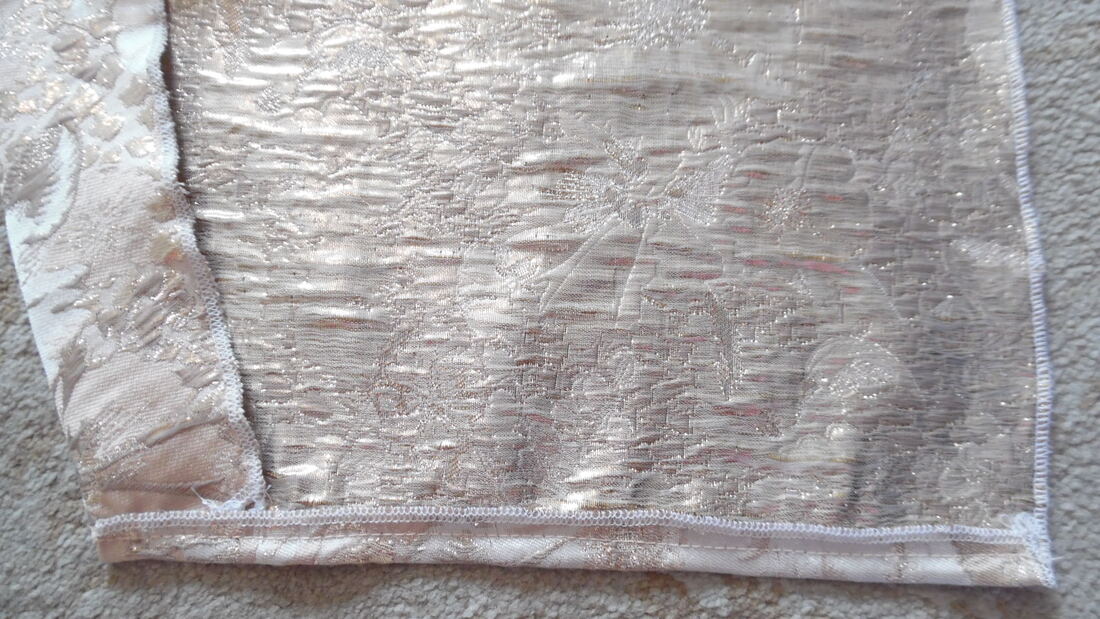
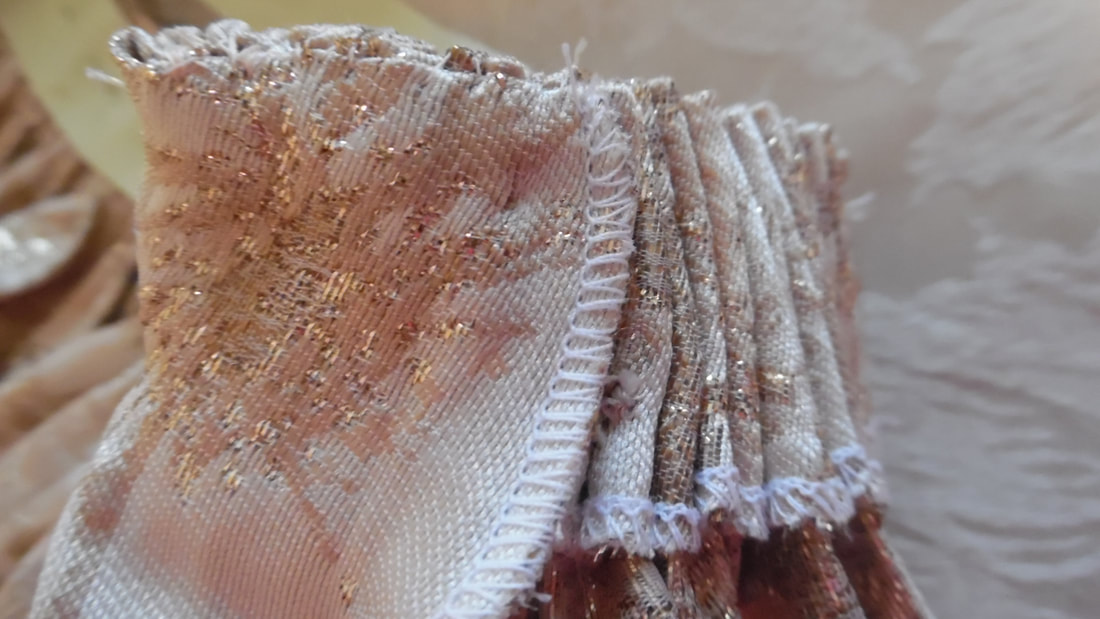
If you "pink" the "V", it should not need overlocking. We overlocked the top edge because it frays a lot.

|
I then need to make a template as this front section is going to have a facing. I made it 1.1/2cms wide than the centre front bodice piece, which is approximately 6cm wide.
|
Cut out the shape, then using your facing material (doesn't matter what you use) give this a 2" (5cm) margin all round and cut it out.
|
|
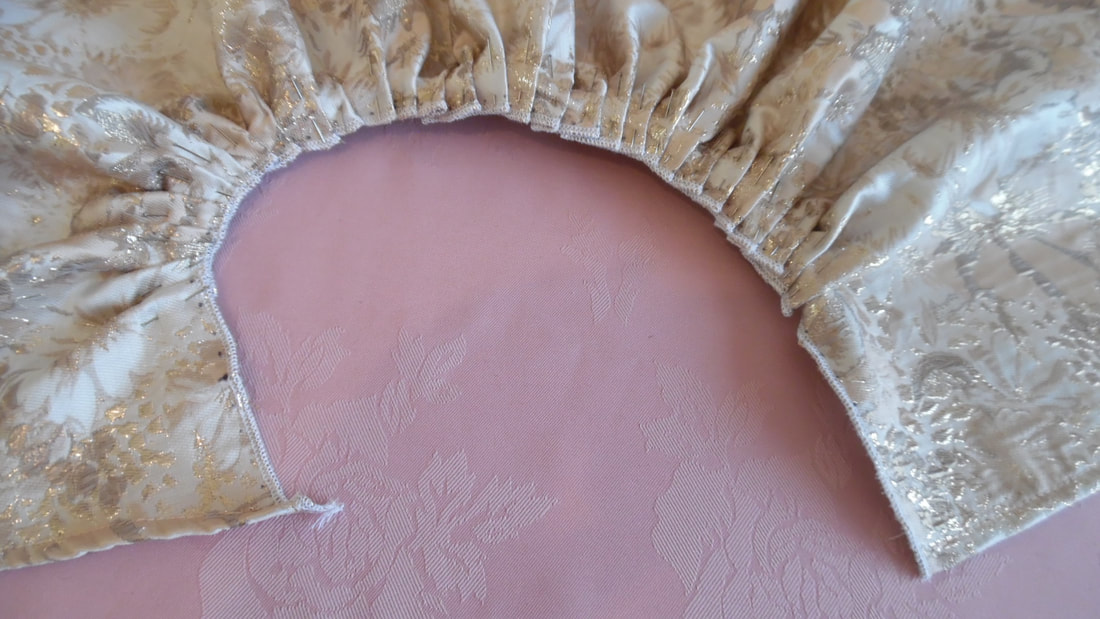
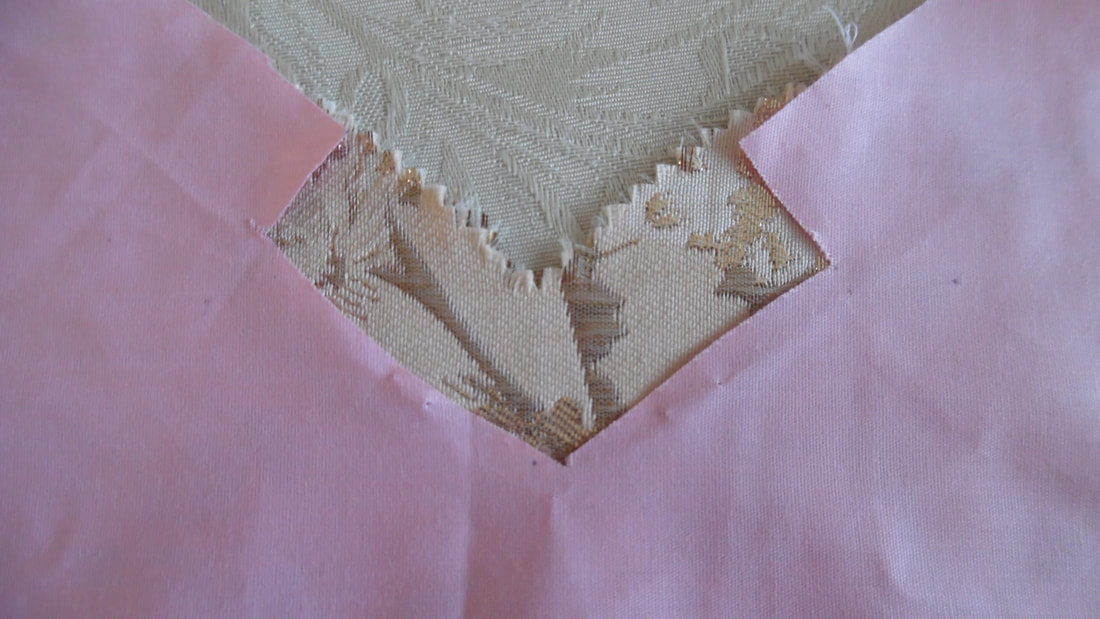
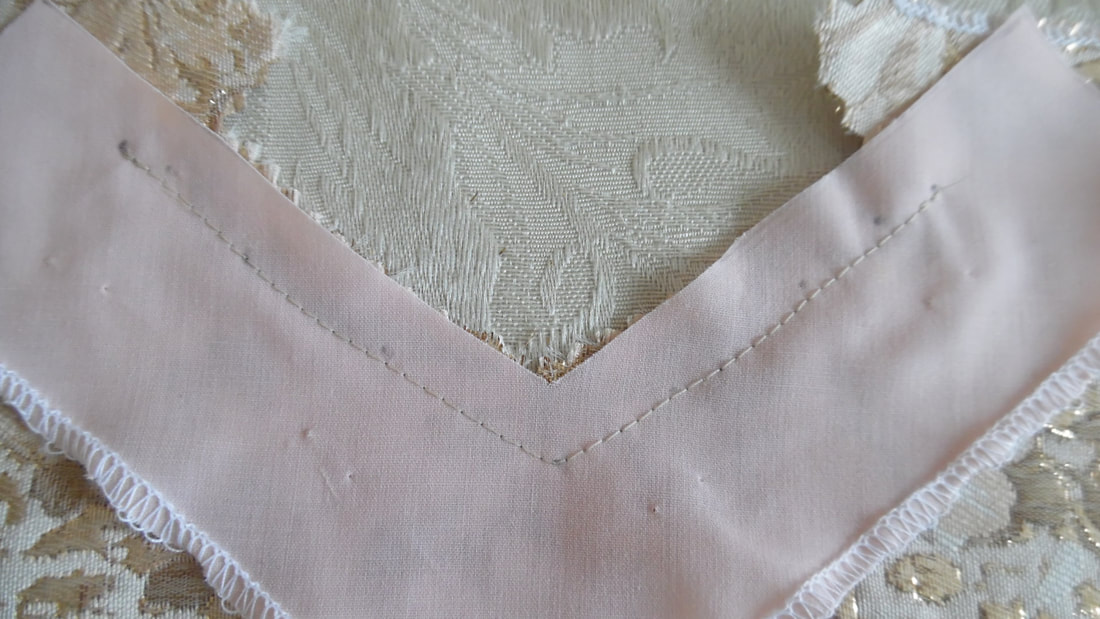
You should end up with this shape "V", I extended the left and right pieces by about 2cm. I also overlocked the bottom of the piece. Machine sew this as shown, going past the dress fabric about 1cm. Snip up to the centre "V" being careful not to cut the stitches.
|
|
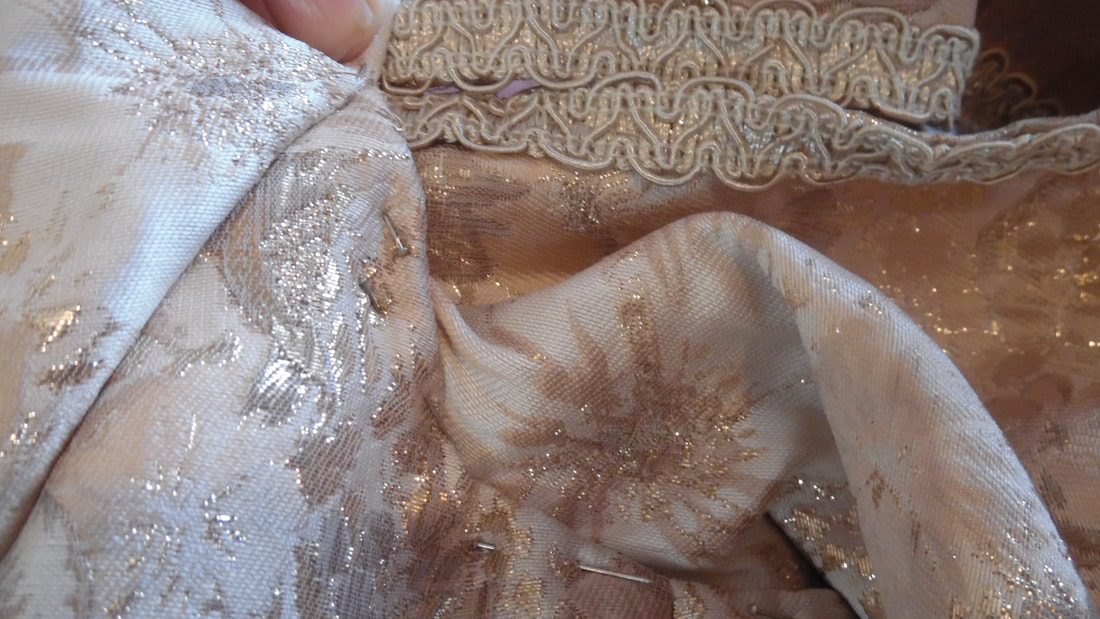
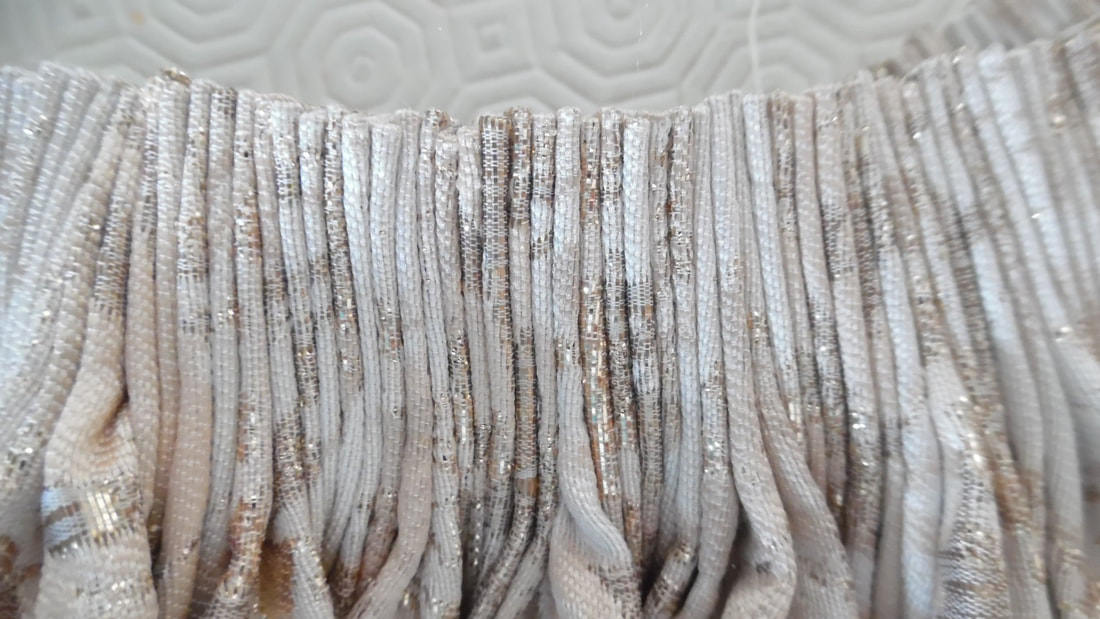
Using a strong top stitching thread do a gathering stitch along both sets of marks. Pull the thread really tight to get a cartridge pleat. Do not gather the "V" at the centre front.
|
|
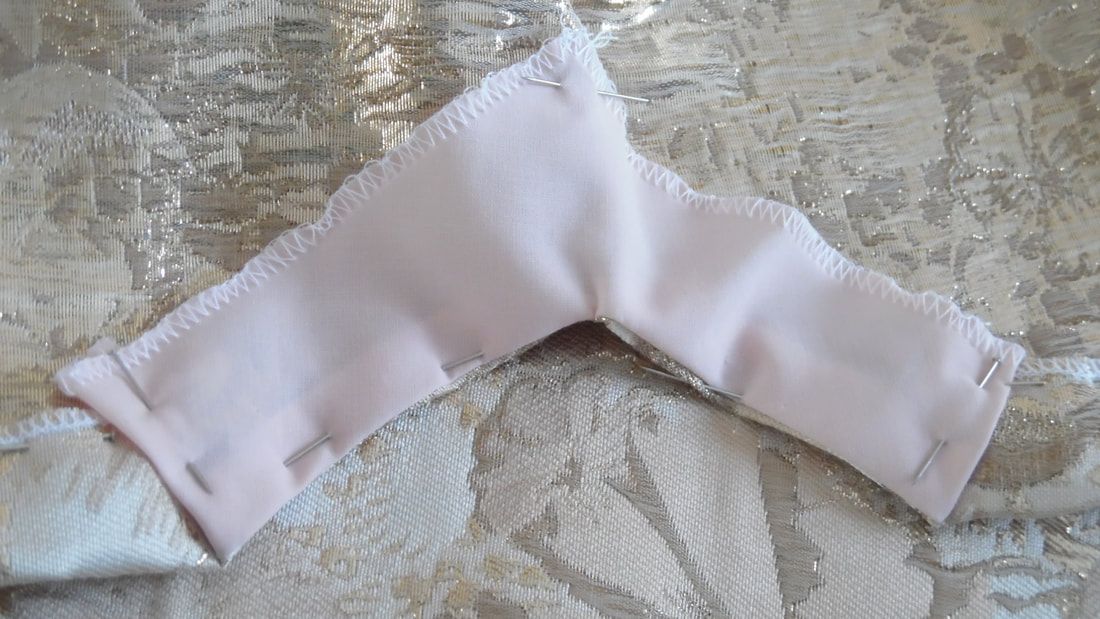
Leave the ends ungathered, turn this to the back and sew
|
|
We attached a short piece of tape to tie the skirt.
|
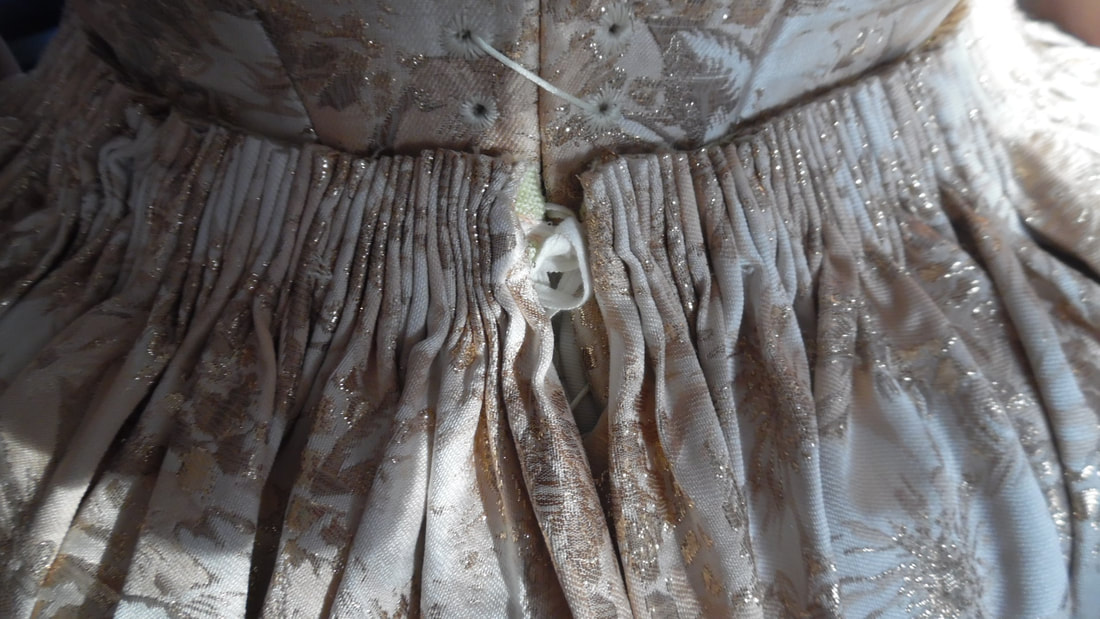
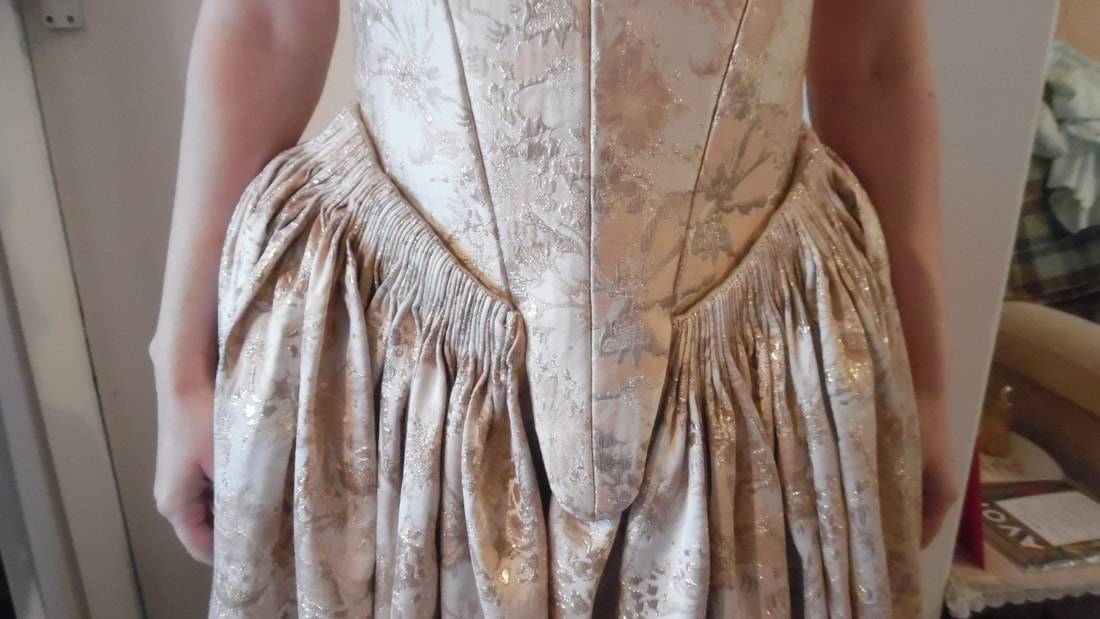
We are just doing a practice fit at this point. As you can see from the picture below, the cartridge pleats do not sit on the bodice properly, so we are now going to add a tape to make the cartridge pleats flatter. The hem was turned up.
|
|
|
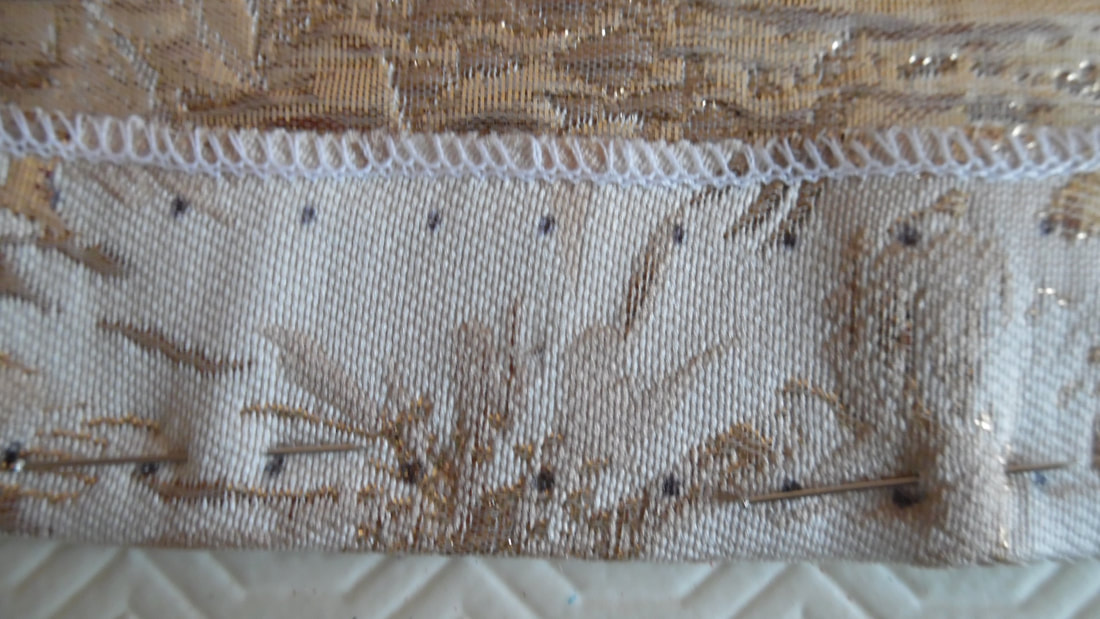
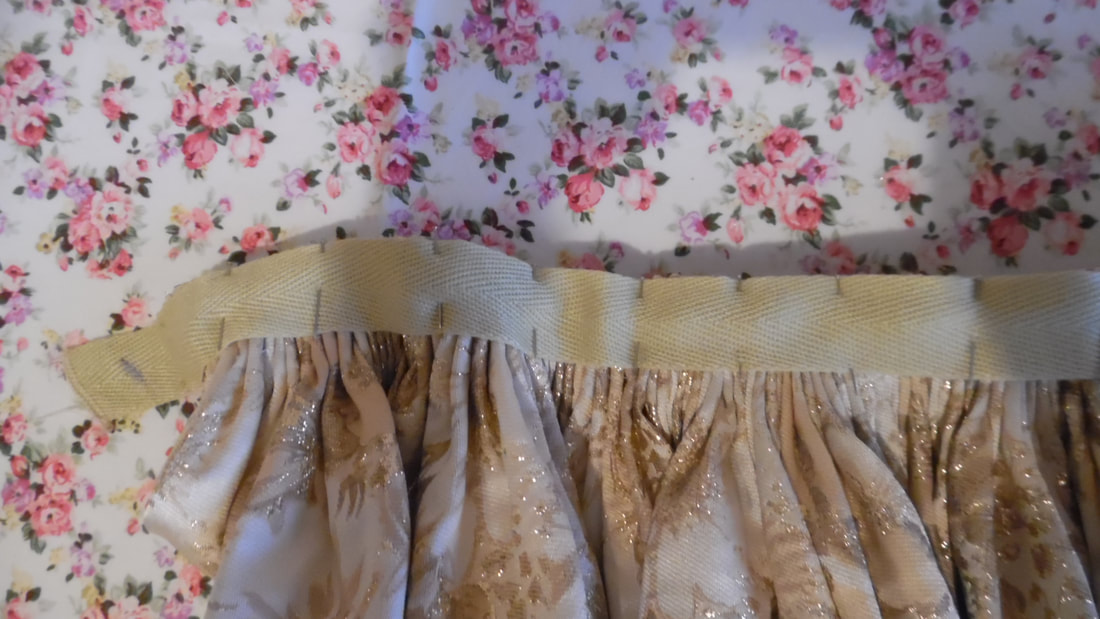
Attach a piece of herringbone tape to the front of the cartridge pleats. You will need an overlap at each end which will be turned in to neaten.
|
|
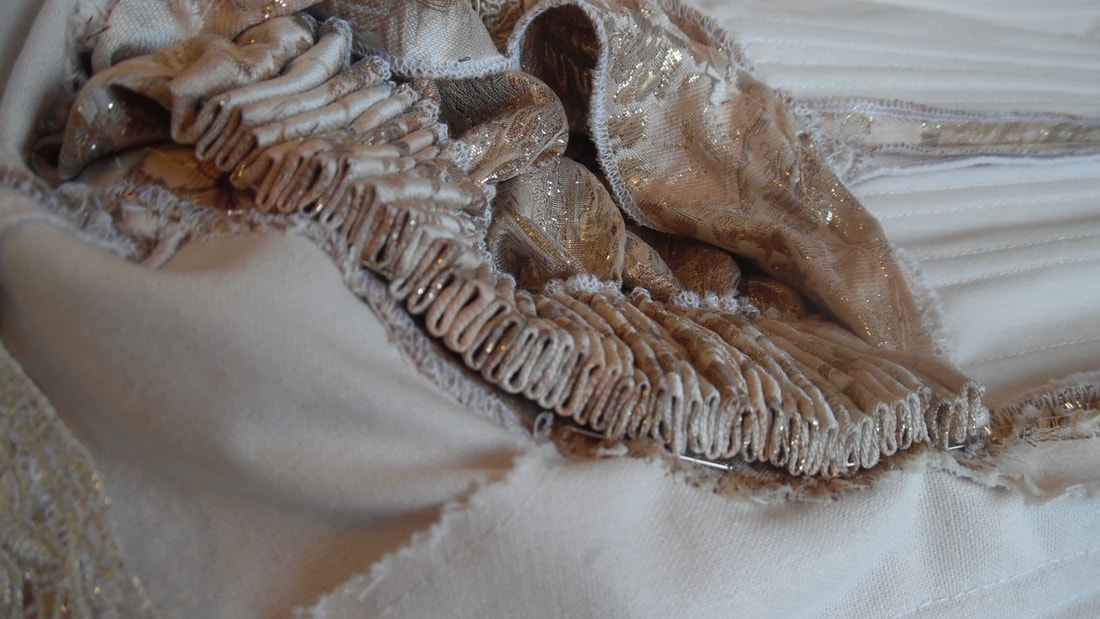
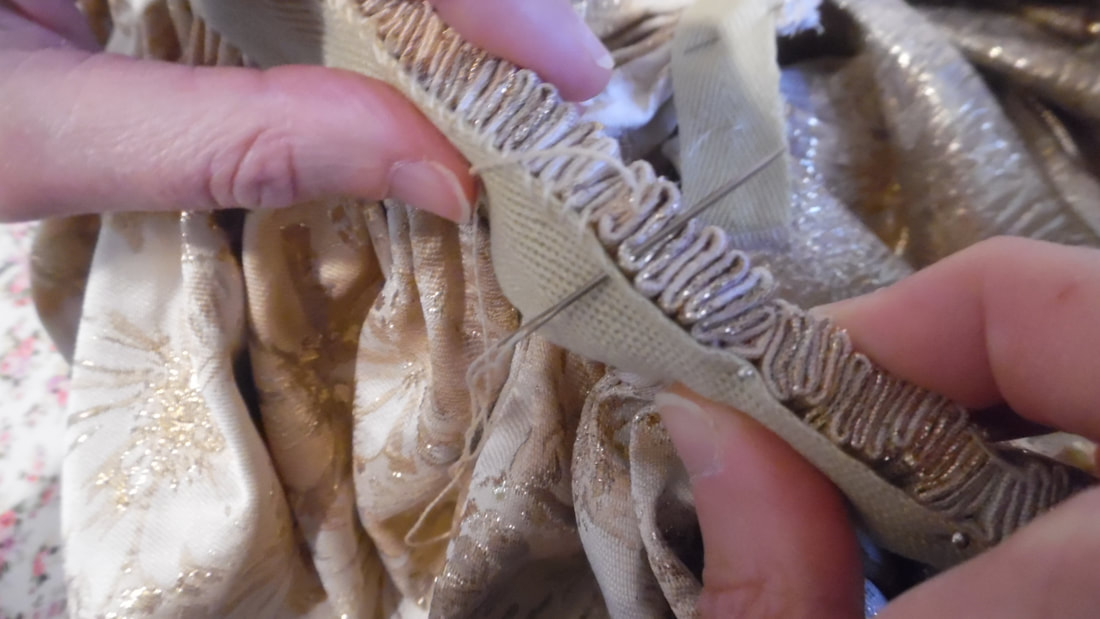
Using a strong top thread attach the tape to the skirt. Starting with the needle on the side of the tape, sew through each individual loop on the skirt.
|
|
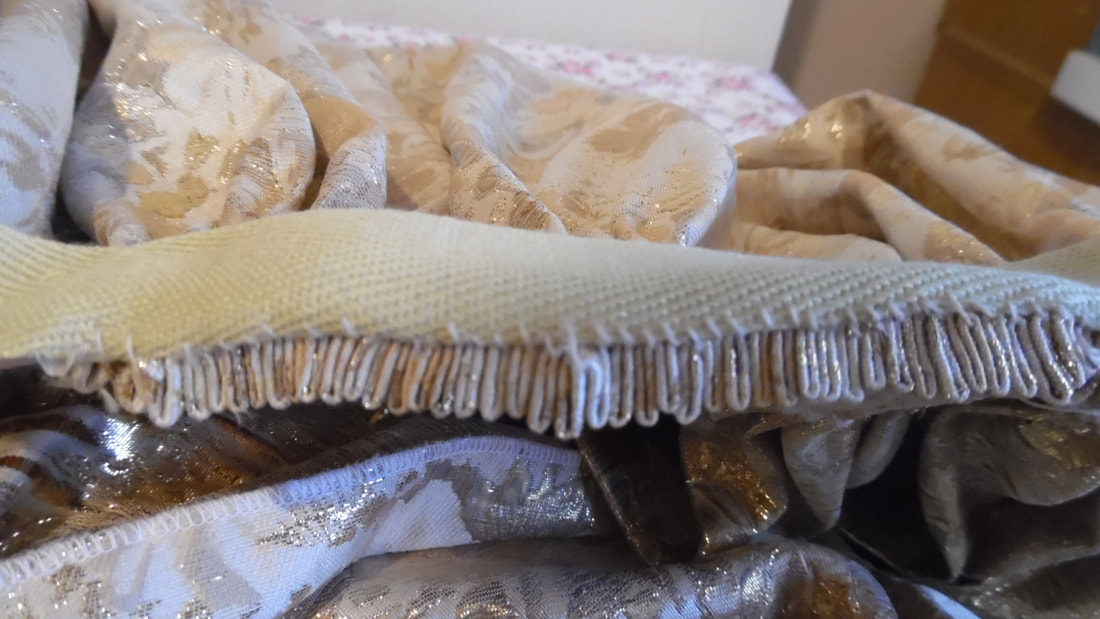
With the tape now attached, you pull the tape to the inside of the skirt very tightly and whip stitch it to the inside of the skirt.
|
|
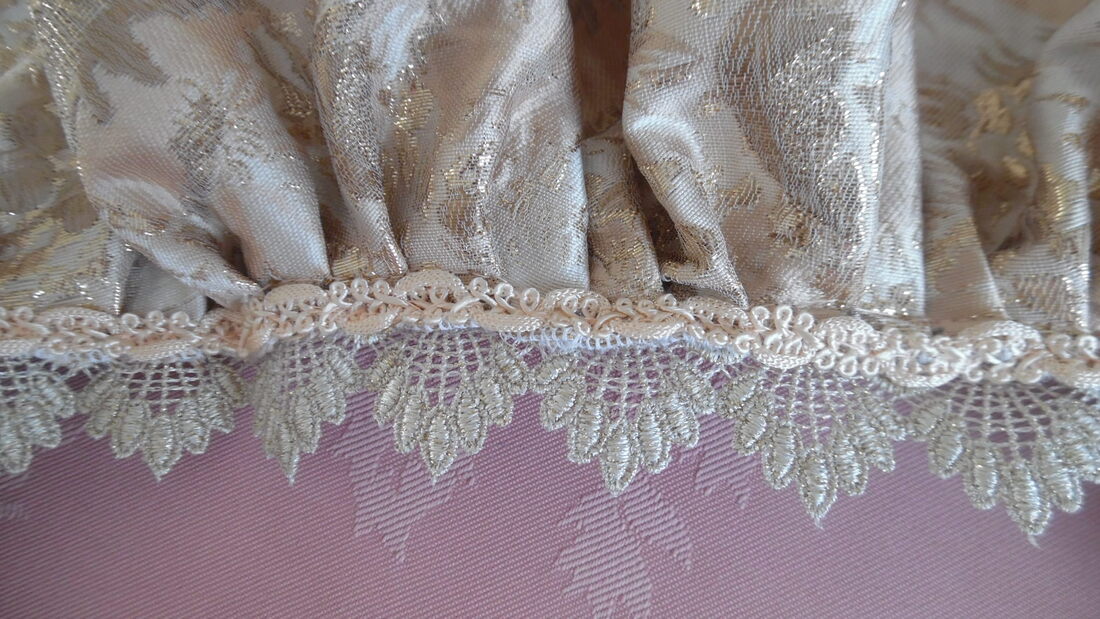
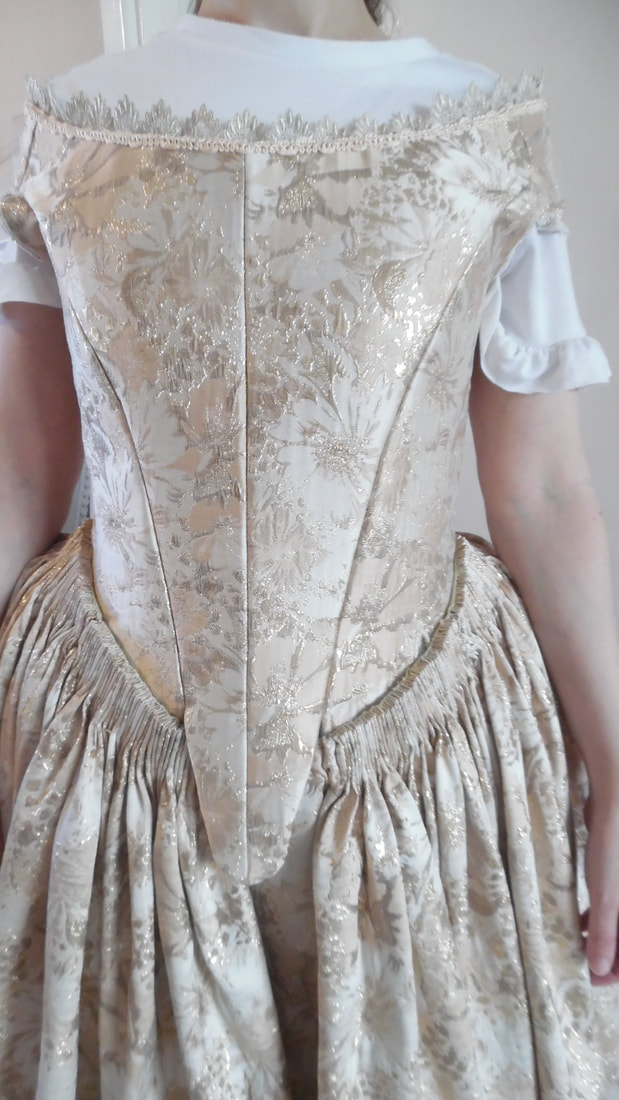
The cartridge pleats now lie against the bodice.
|
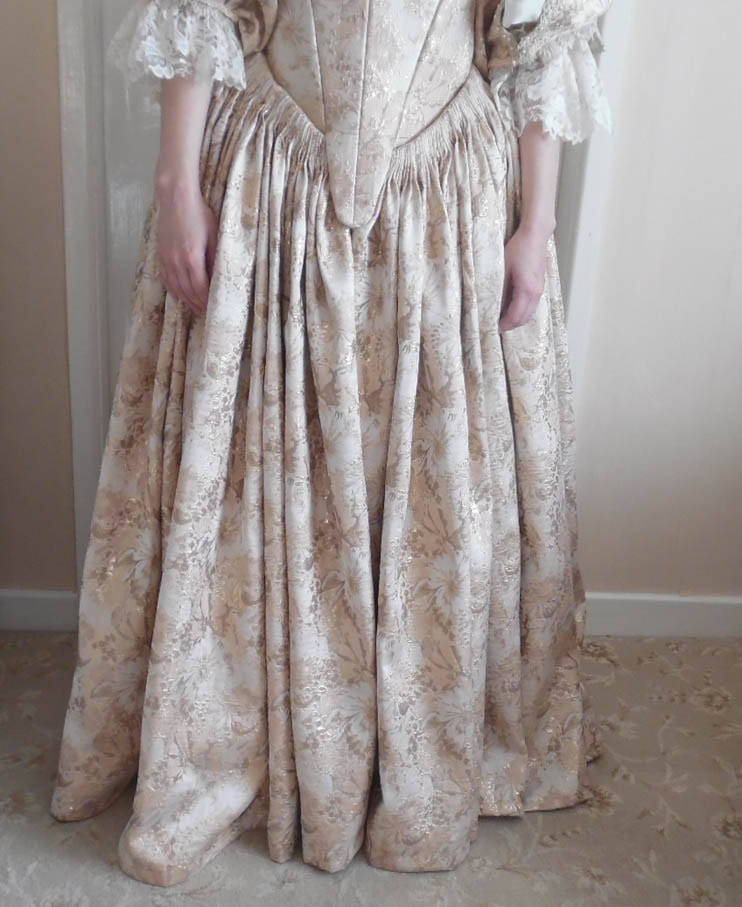
This completes the skirt.
