For this costume, you will require intermediate to experienced expertise in sewing, corset making and boning
Please watch the video in conjunction with the written
instructions for more detail
Difficulty
factor 10 - 10
Please be aware that we do not make costumes to sell or hire
Please watch the video in conjunction with the written
instructions for more detail
Difficulty
factor 10 - 10
Please be aware that we do not make costumes to sell or hire
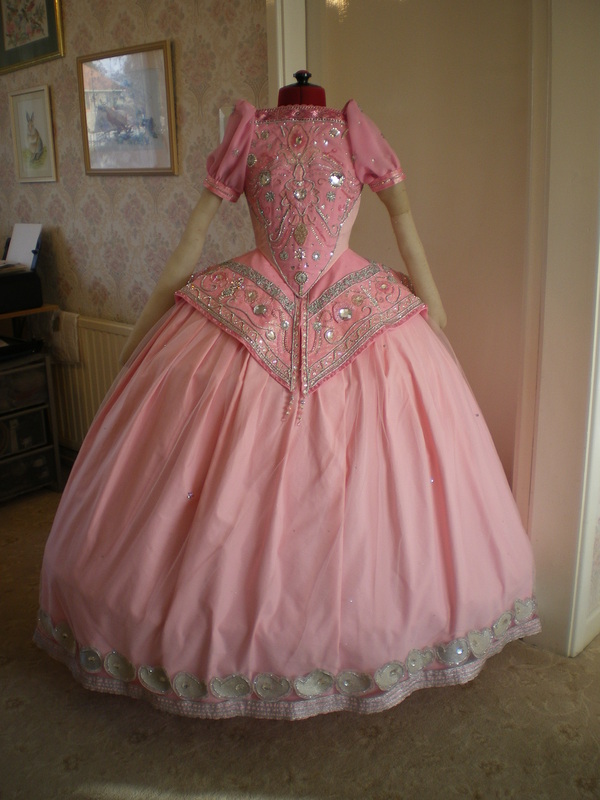
Young Snow White
from the TV Series
Once Upon a Time
from the TV Series
Once Upon a Time
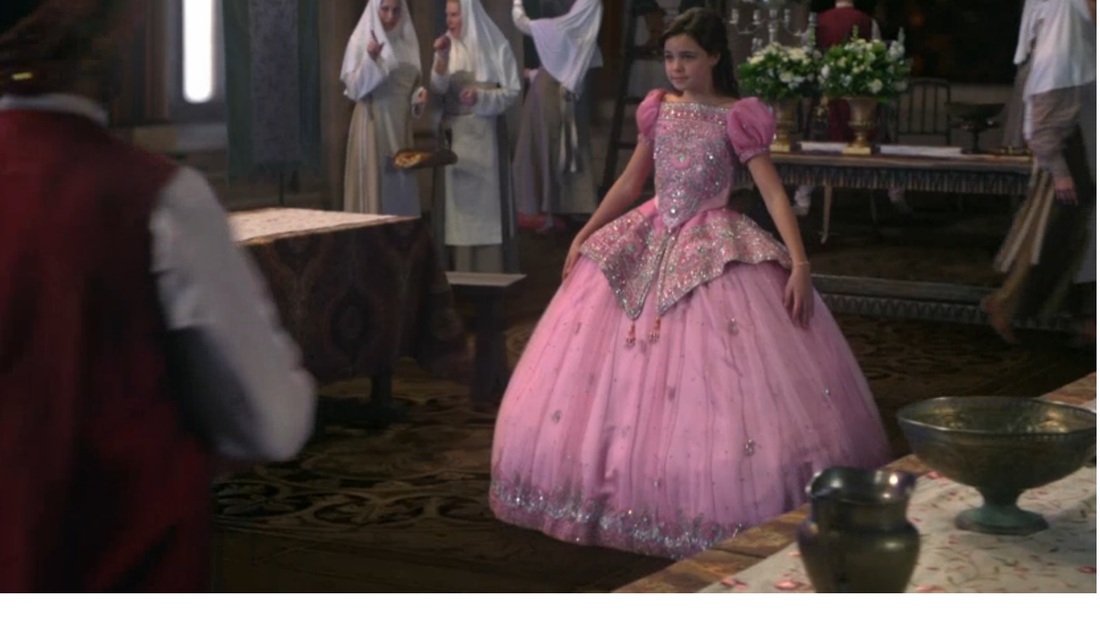
The original costume worn by Bailee Madison
Construction of Young Snow White
Materials:
Skirt:
4 metres Pink Shower Coated Poplin
4 metres pink net Tulle
2 metres pink Chiffon
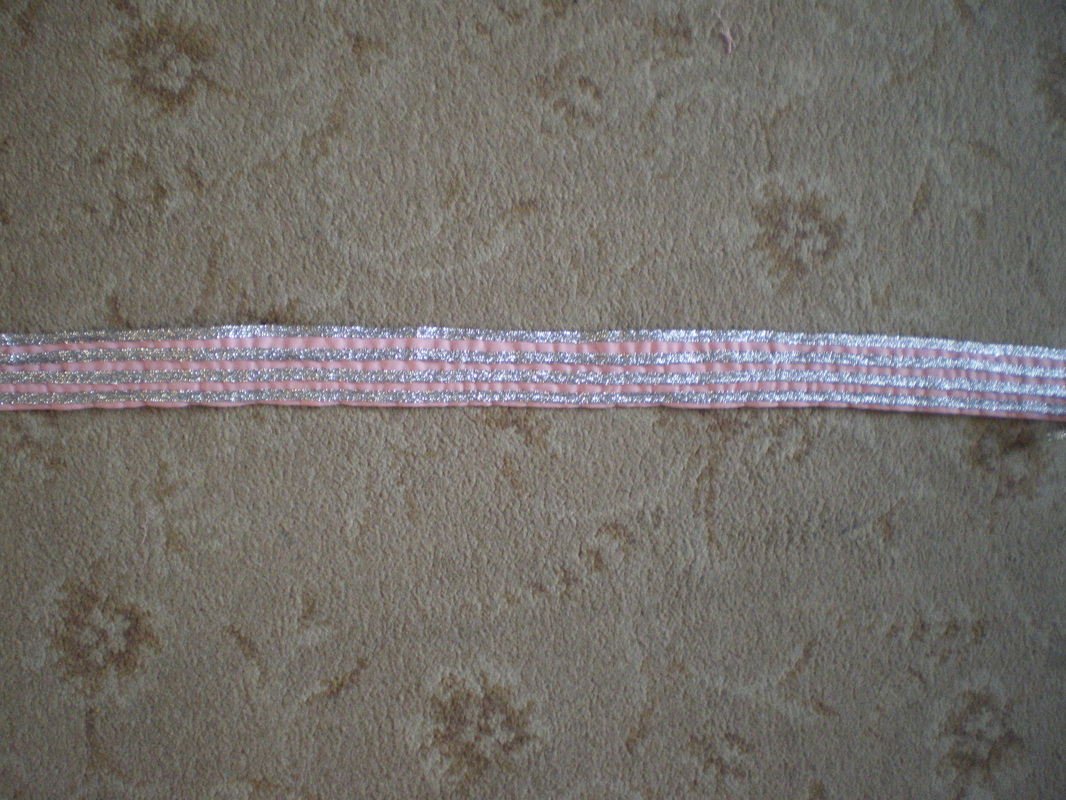
16 metres approx silver braid trim
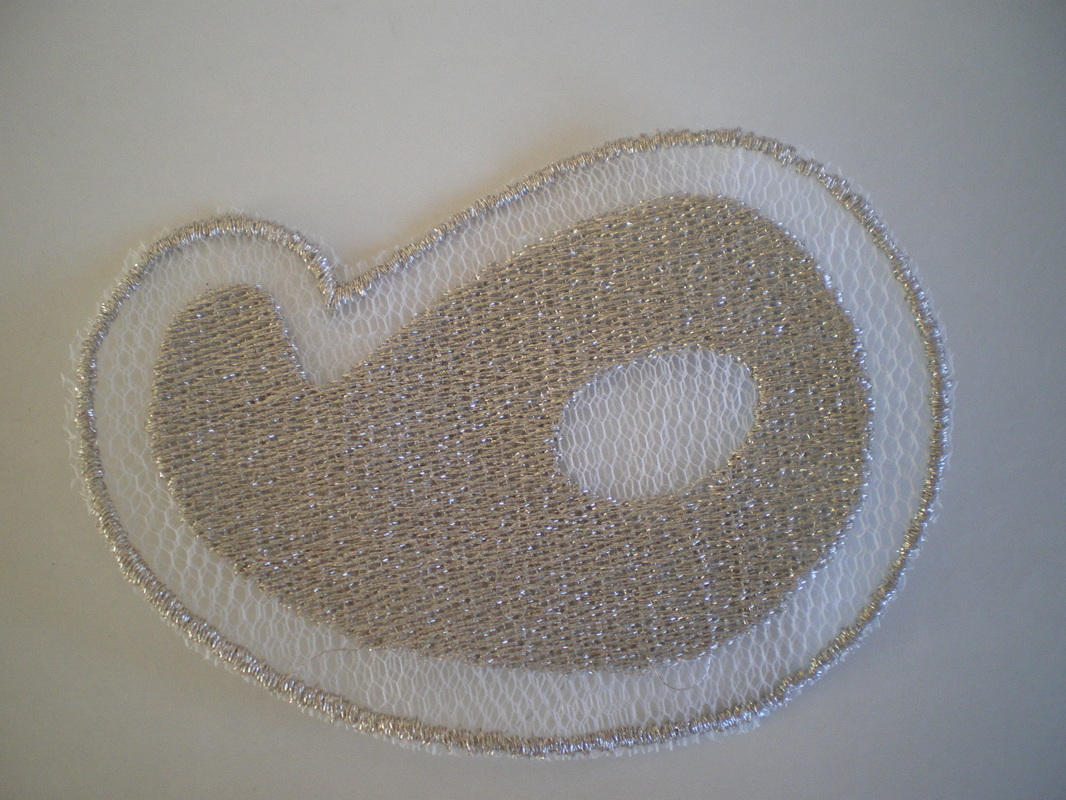
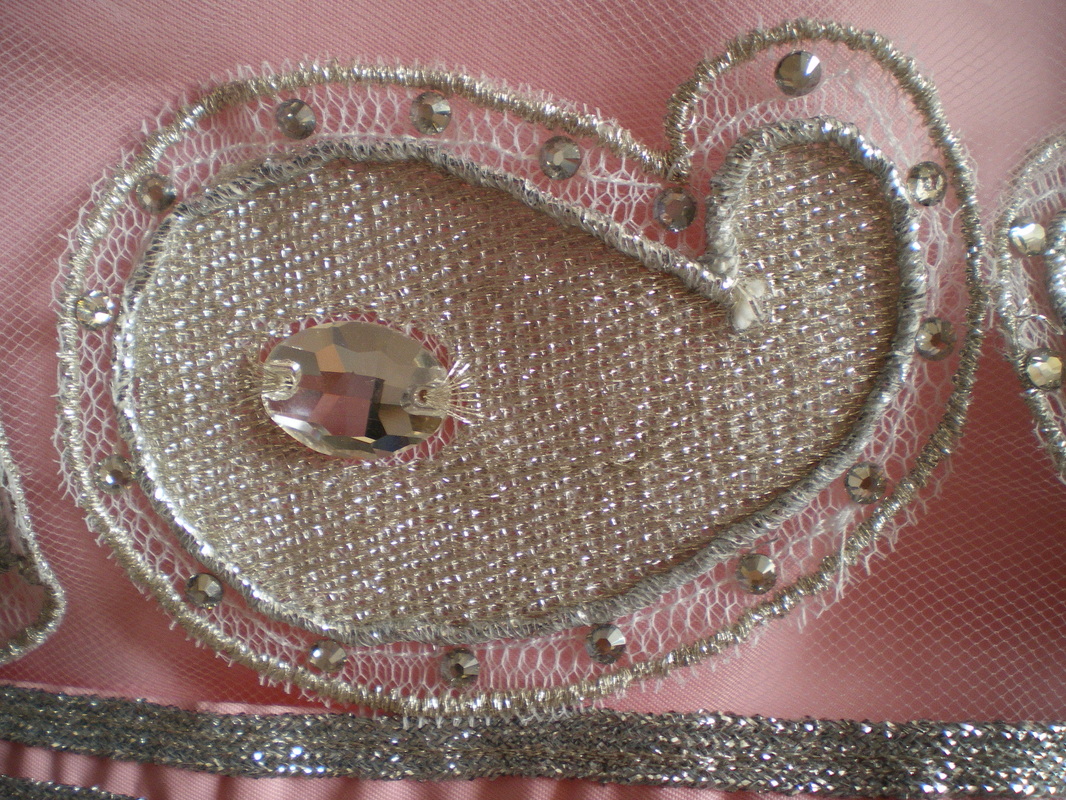
38 hand embroidered "Paisley" motifs
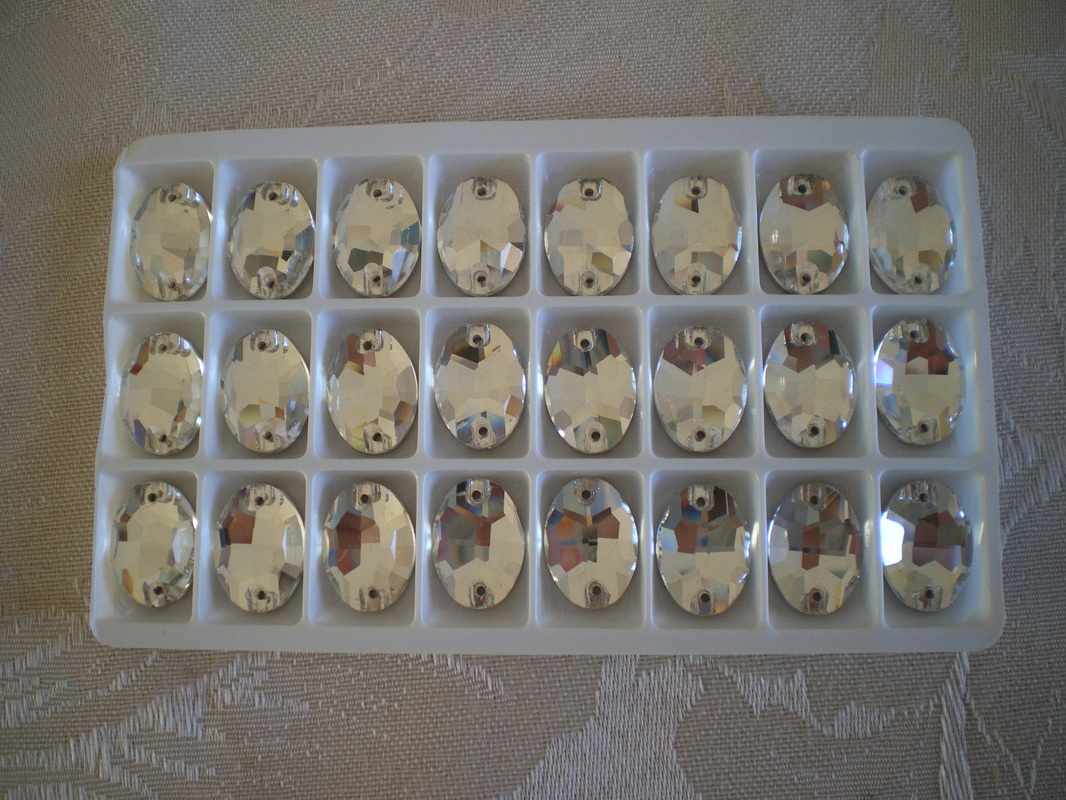
13 x 8mm Flat Back Oval Clear Crystal Sew-on
Approx 600 x 4mm Swarovski silver flat back crystals
also a few 2mm Swarovski silver flat back crystals
2 pairs hooks and eyes
1 metre Petersham
Peplum:
1 Metre Pink Shower Coated Poplin
1 metre Silky Pink Habutae (can use polyester lining material)
Large quantity of 4mm Silver Swarovski Crystals
Pink 4mm Bicone Glass Beads
30 x 4mm Swarovski Bicone Beads
Dark Rose Swarovski Bicone Beads
4mm Silver Clear Diamante Chain
3mm Pink Diamante Chain
Silver Cord
Metallic Lurex Daisy motifs
Swarovski Pear Drop Clear Crystals
Silver beaded floral appliques
Small piece of velcro
Hook and Eye
Hand made pink beaded half moons using 2mm pink seed beads
2mm Silver seed beads
Pink Glitter
Variety of beads to make 3 "dangles"
Bodice:
Simplicity 3782 Misses Elizabethan Costumes for the Bodice
McCalls M5426 for the sleeves
1 Metre Pink Shower Coated Poplin
1 metre Medium Pink Polyester Chiffon
1 metre Coutil
Boning
Using a variety of crystals and cord as above
1 metre Pink decorative edging
3mm Eyelets
2 metre x 1cm pink ribbon
5mm silver sequins
2 metres of rat tail cord
1 metre pale pink ribbon
2 pairs of hooks and eyes
Small piece of wadding approximately 2-3mm thick
Hoop:
4 or 5 boned hoop
several lengths of spare ribbon or cord
To Make the Skirt:
Materials:
Skirt:
4 metres Pink Shower Coated Poplin
4 metres pink net Tulle
2 metres pink Chiffon
16 metres approx silver braid trim
38 hand embroidered "Paisley" motifs
13 x 8mm Flat Back Oval Clear Crystal Sew-on
Approx 600 x 4mm Swarovski silver flat back crystals
also a few 2mm Swarovski silver flat back crystals
2 pairs hooks and eyes
1 metre Petersham
Peplum:
1 Metre Pink Shower Coated Poplin
1 metre Silky Pink Habutae (can use polyester lining material)
Large quantity of 4mm Silver Swarovski Crystals
Pink 4mm Bicone Glass Beads
30 x 4mm Swarovski Bicone Beads
Dark Rose Swarovski Bicone Beads
4mm Silver Clear Diamante Chain
3mm Pink Diamante Chain
Silver Cord
Metallic Lurex Daisy motifs
Swarovski Pear Drop Clear Crystals
Silver beaded floral appliques
Small piece of velcro
Hook and Eye
Hand made pink beaded half moons using 2mm pink seed beads
2mm Silver seed beads
Pink Glitter
Variety of beads to make 3 "dangles"
Bodice:
Simplicity 3782 Misses Elizabethan Costumes for the Bodice
McCalls M5426 for the sleeves
1 Metre Pink Shower Coated Poplin
1 metre Medium Pink Polyester Chiffon
1 metre Coutil
Boning
Using a variety of crystals and cord as above
1 metre Pink decorative edging
3mm Eyelets
2 metre x 1cm pink ribbon
5mm silver sequins
2 metres of rat tail cord
1 metre pale pink ribbon
2 pairs of hooks and eyes
Small piece of wadding approximately 2-3mm thick
Hoop:
4 or 5 boned hoop
several lengths of spare ribbon or cord
To Make the Skirt:
|
You will find instructions on making the flattened hoop in our video tutorial, this has to be made first.
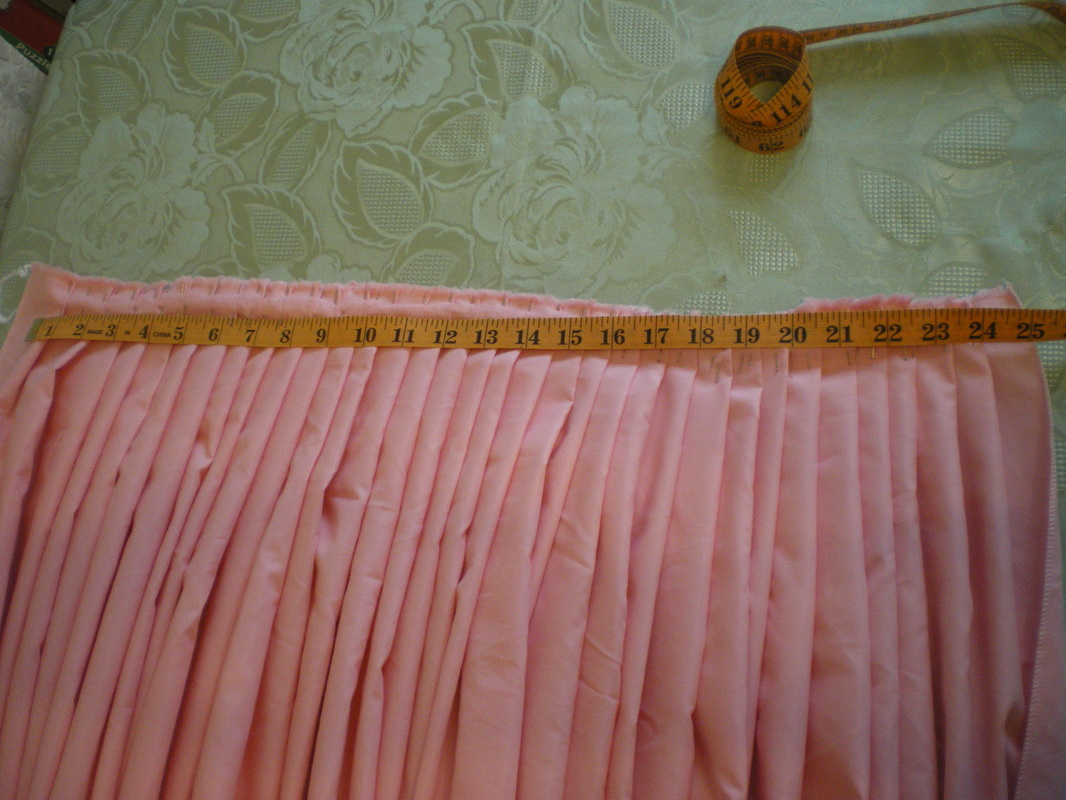
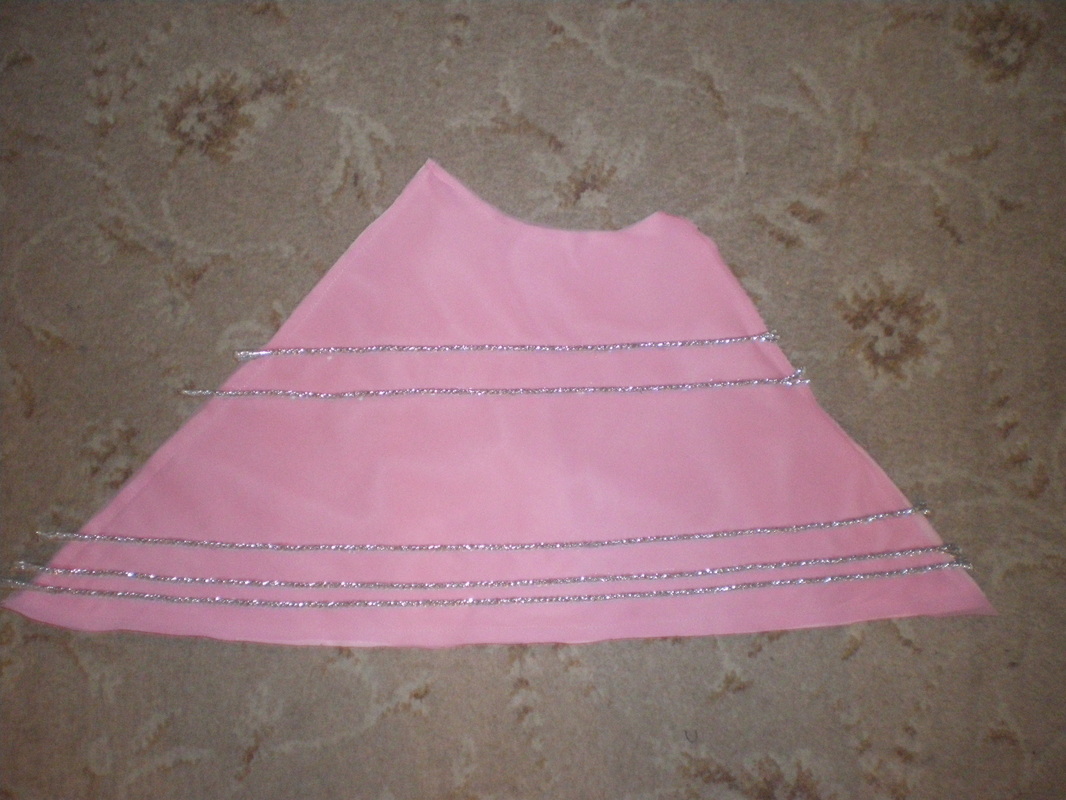
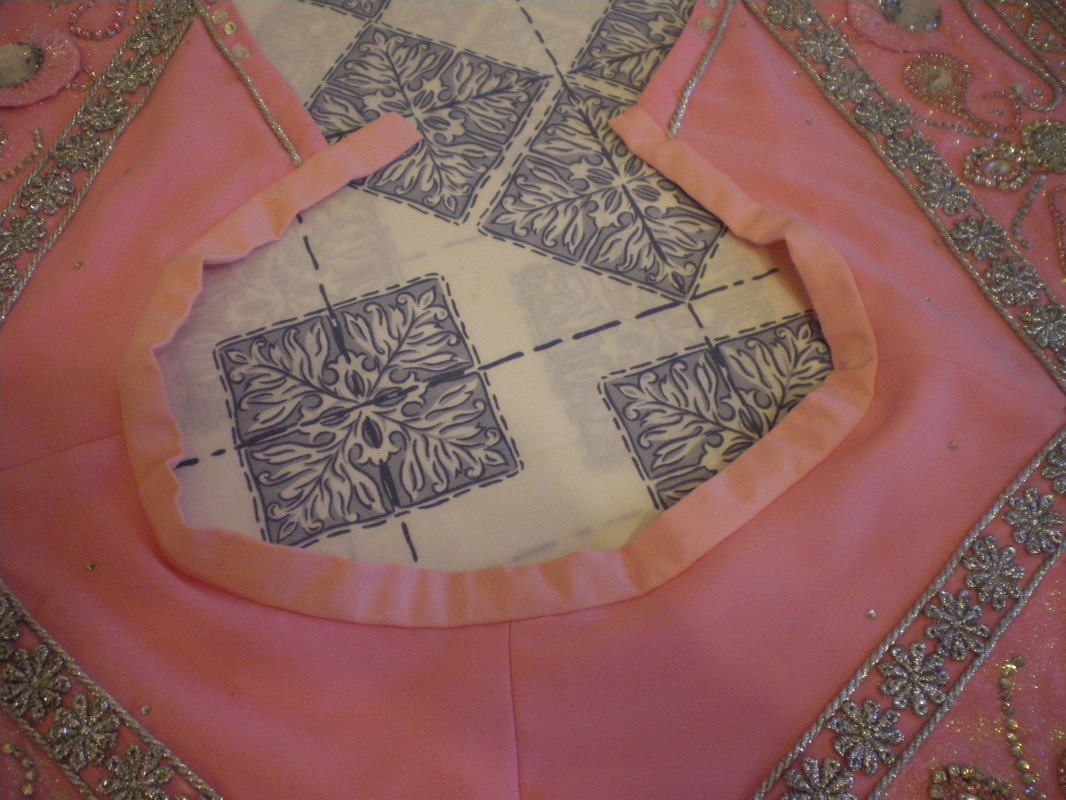
To measure for the skirt, take the measurement around the bottom of the finished hoop and add about 20-30cm to allow for a bit of "give" in the fabric. Measure from the waist down the side of the hoop to the floor (this will give the longest measurement), Note: Wear shoes before measuring otherwise it may end up too short. You can either make up the skirt and Tulle as separate skirts, or put them together and make one skirt. Cut a rectangle of fabric and Tulle to these measurements +5cm, and pleat the Skirt to fit your waist measurements. |
|
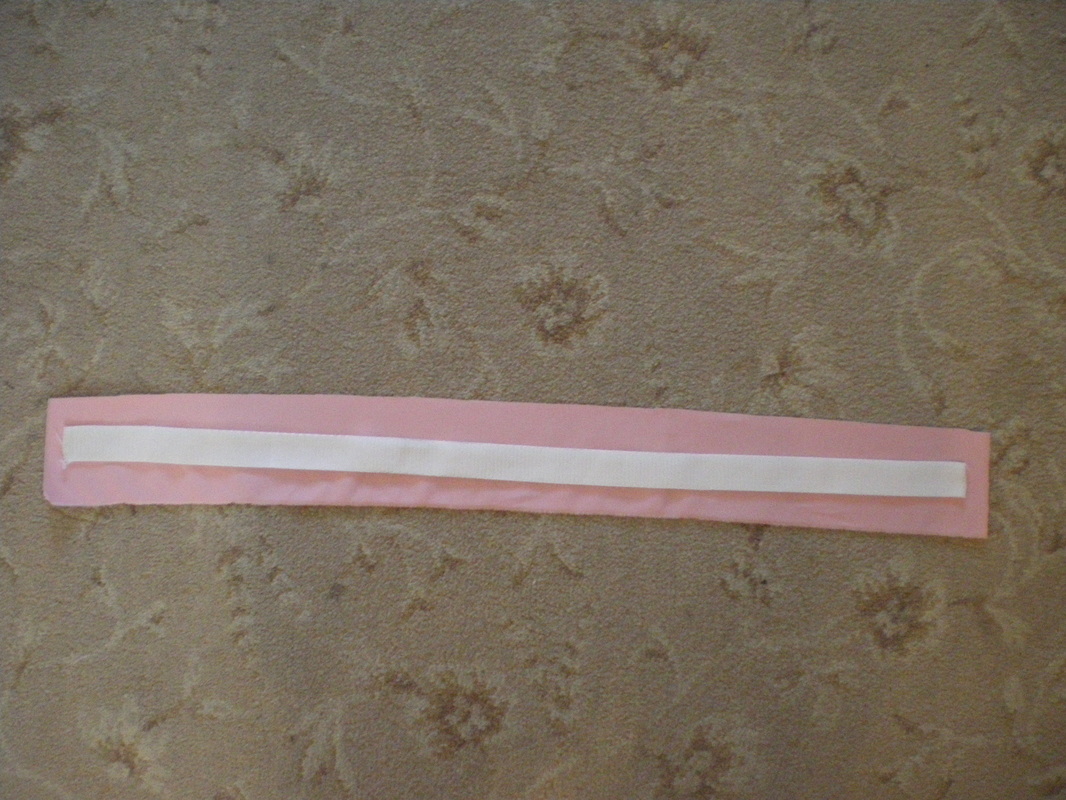
Cut a strip of fabric approximately 6cm wide x your waist measurement and add 5cm. Also cut a strip of Petersham 2cm shorter than the fabric.
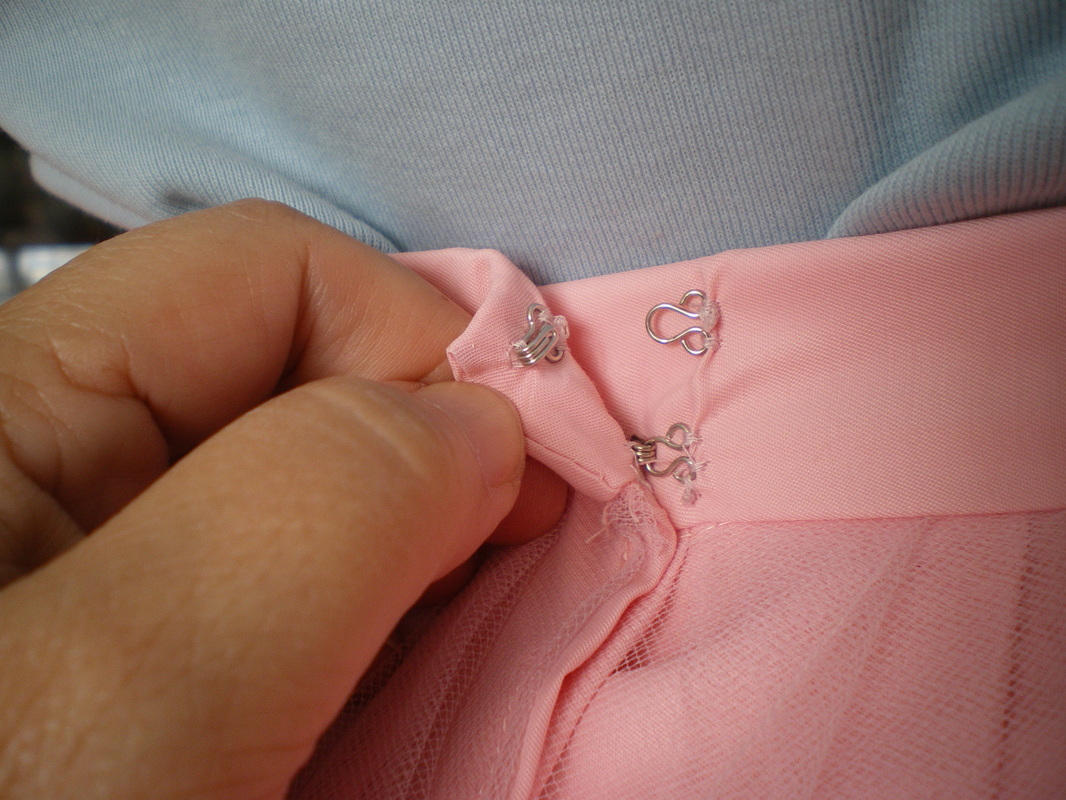
Attach the band to the skirt as per the video instructions and the Peplum Sew up the back seam, but leave the top 6" (15cm) open. and sew on a pair of hooks and eyes to close. |
|
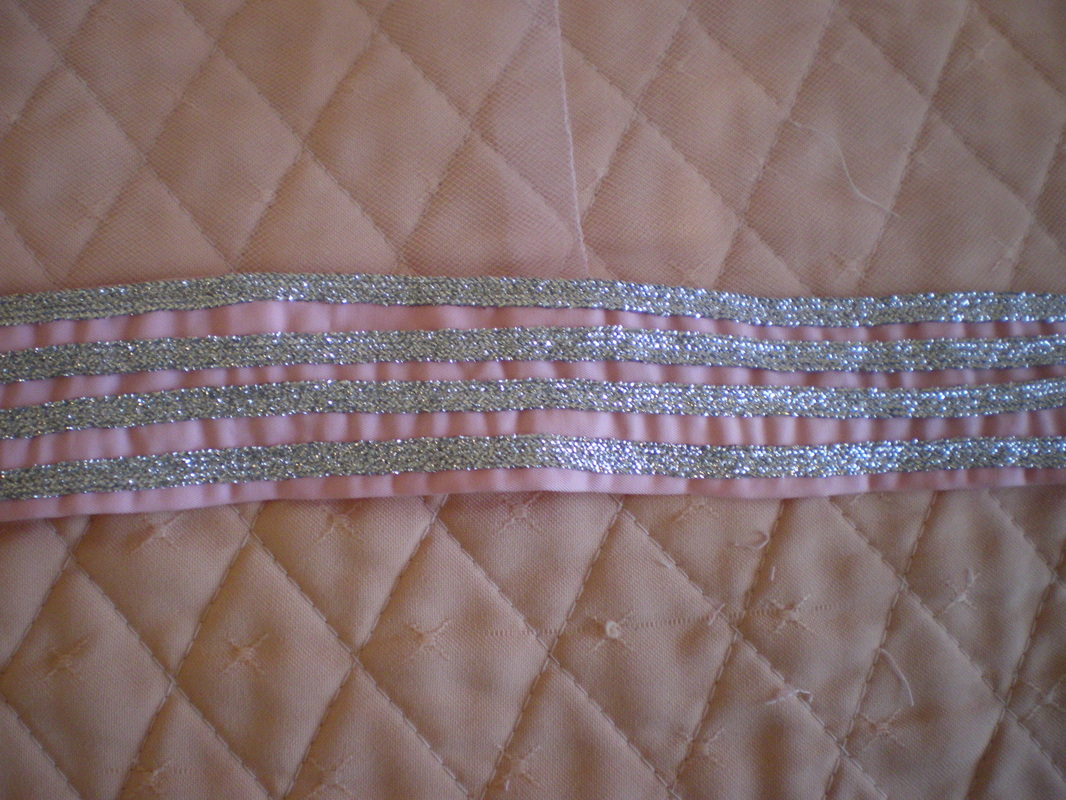
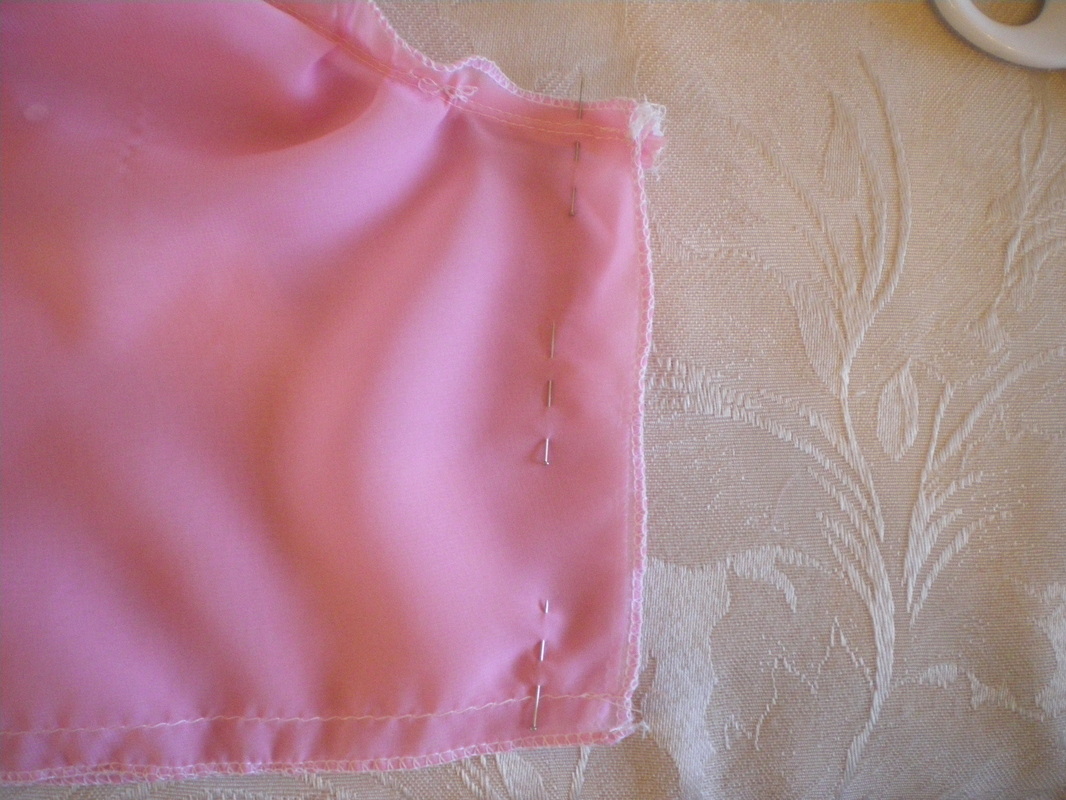
Cut a strip of fabric approximately 6cm wide x the total circumference of the Tulle/skirt. Turn over a seam top and bottom to neaten and sew on 4 strips of silver braid along the entire length.
|
|
Sew this to the bottom of the Tulle. The finished length should be about 2cm (1") off the floor
|
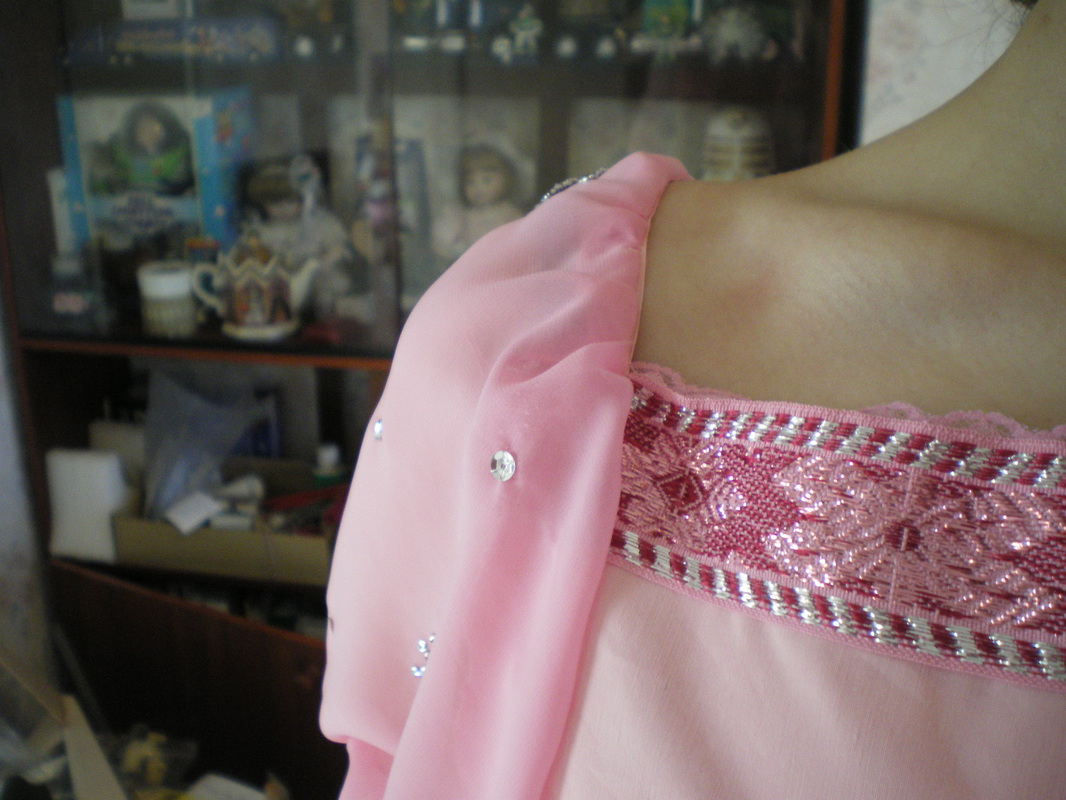
The choice of decoration above the edging is entirely up to you. I choose to make machine embroidered motifs using silver thread and sewn onto 3 layers of stiff net and stuck a flat back crystal into each oval, then glued on a length of silver cord. I then glued on 4mm flat back crystals around the motif.
|

|
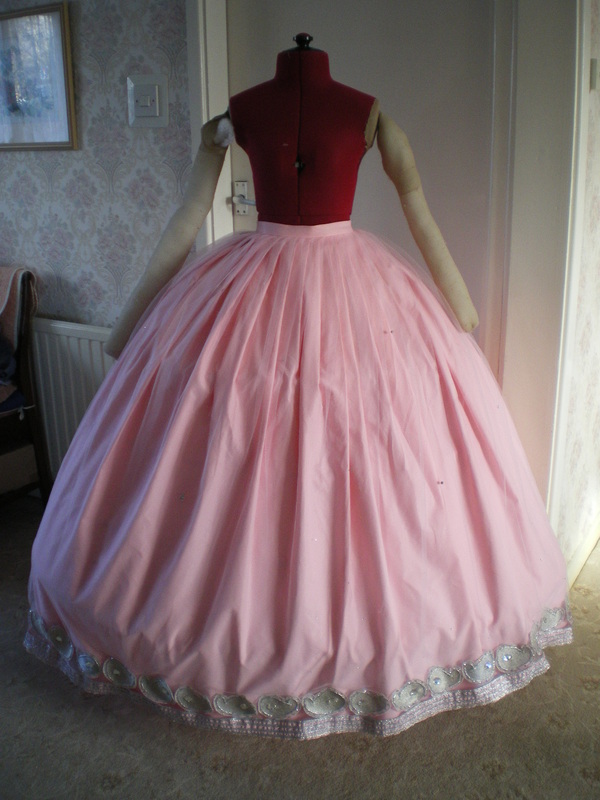
After scattering a few 4mm and 2mm flat back Swarovski crystals on the skirt, it is now finished
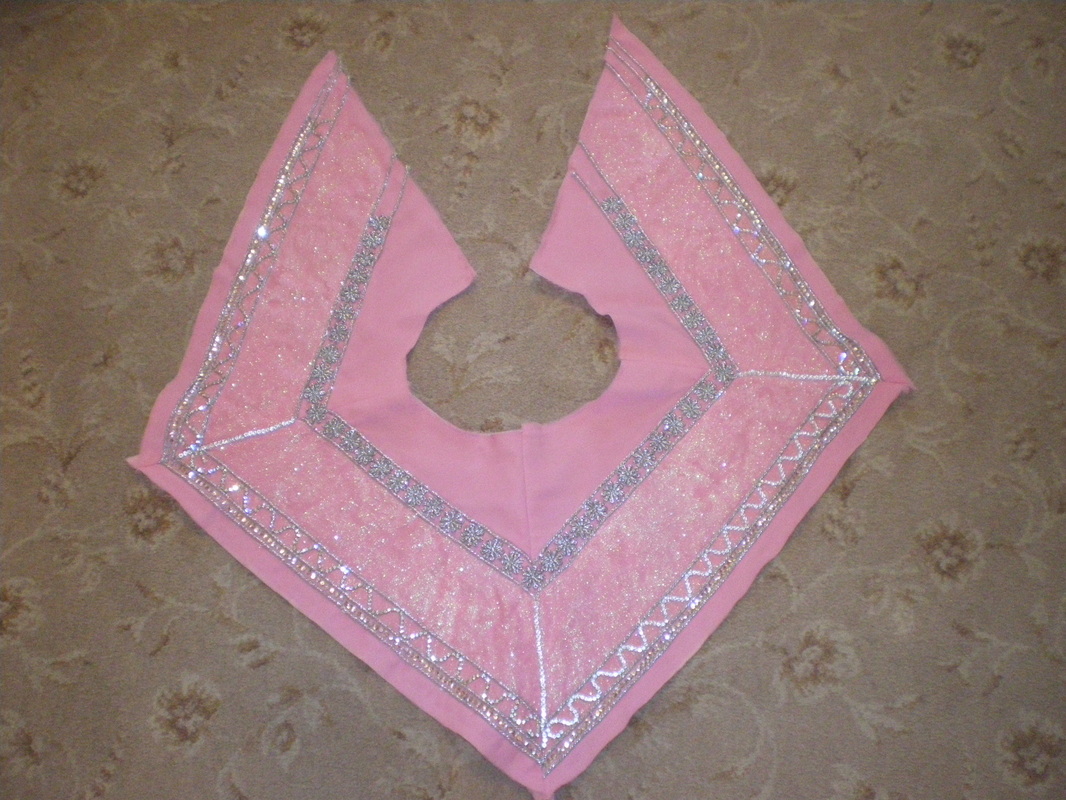
To make the Peplum:
|
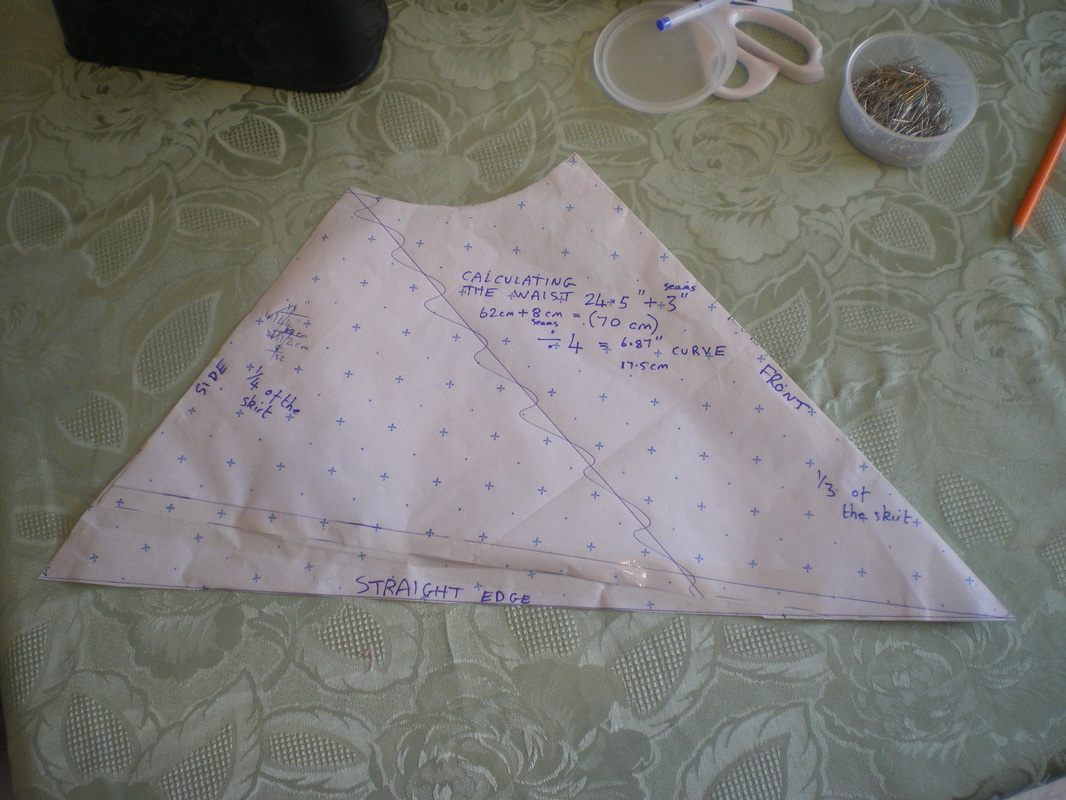
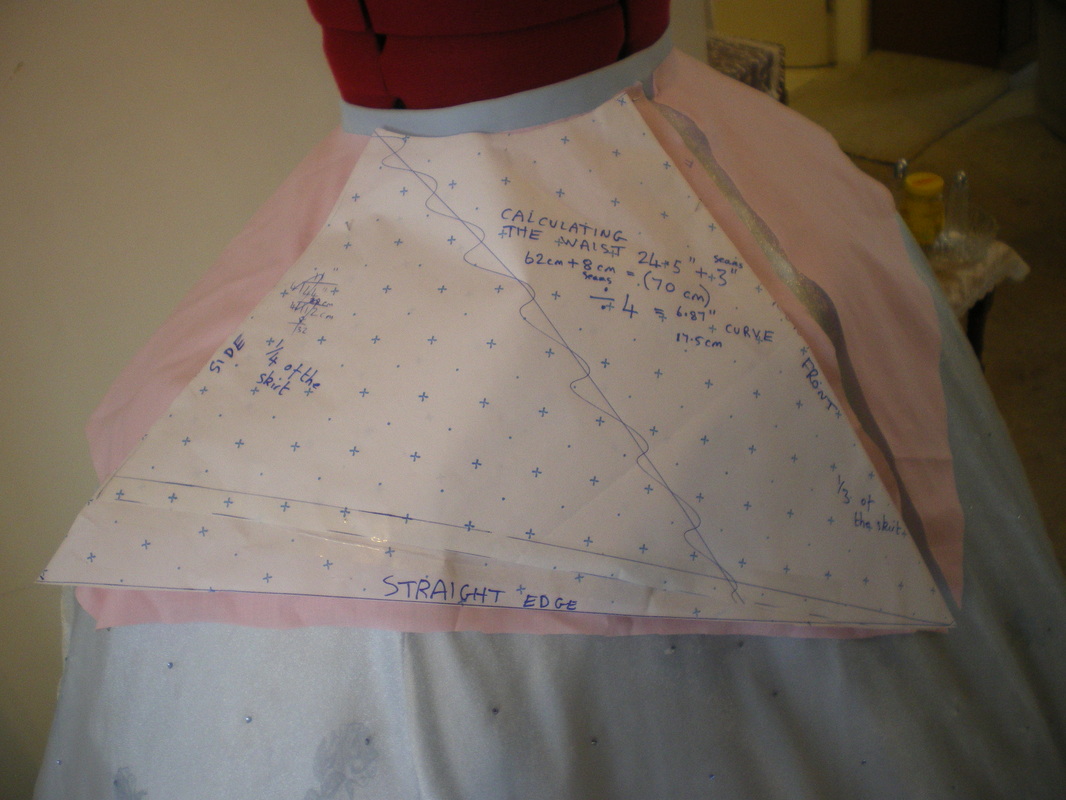
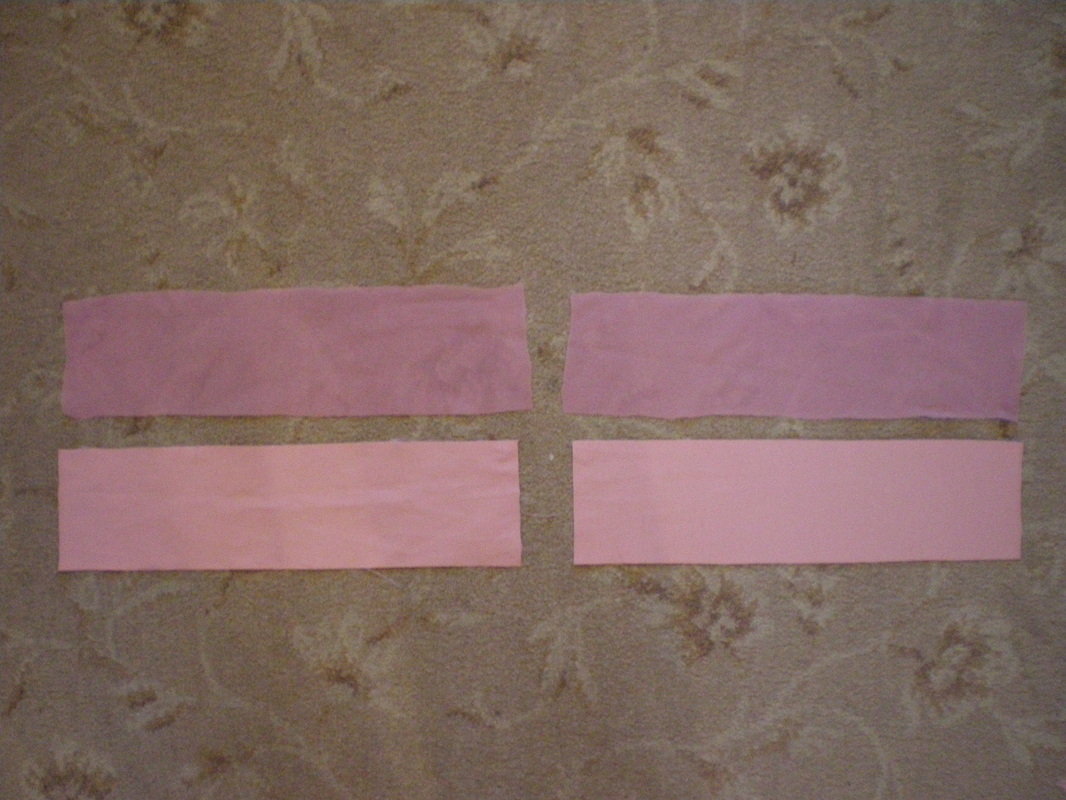
These are the measurements I used to make the pattern. You will need four pieces, all identical.
The waist measurement is divided by 4, but add a seam allowance for the two edges, onto this. The front edge is 1/3 the length of the skirt. The side edge is 1/4 the length of the skirt. If you click on this photo, you will see all the calculations you need to make. You will also need to make an identical lining, this can be of your choice. Cut 1 layer of Chiffon, Poplin and liner |
|
Towards the end of making the Peplum, we realised that the front edge needed to be angled back slightly, as it did have a tendency to overlap after it was made.
|
|
This is how I decorated mine, but the choice is yours to make to your own design.
Each piece was made individually to begin with, sew a layer of chiffon along all the edges of all the pieces. I started with sewing on silver cord. The instructions for making the beaded "half moons" is in the video tutorial |

|
|
|
|
|
Sew the lining pieces together and attach to the top layer. Pin, tack and sew down the front edges and along the bottom, leave the waist open for now.
|
|
Take the measurement of the waist and add approximately 4cm (2"). Cut a strip of fabric 6cm wide double over and sew down the side seams, turn the right way out and press.
|
|
Pin, tack and sew the waistband to the top layer only. Start one end right up against the seam, the other end of the waistband should have enough for an overlap
|
|
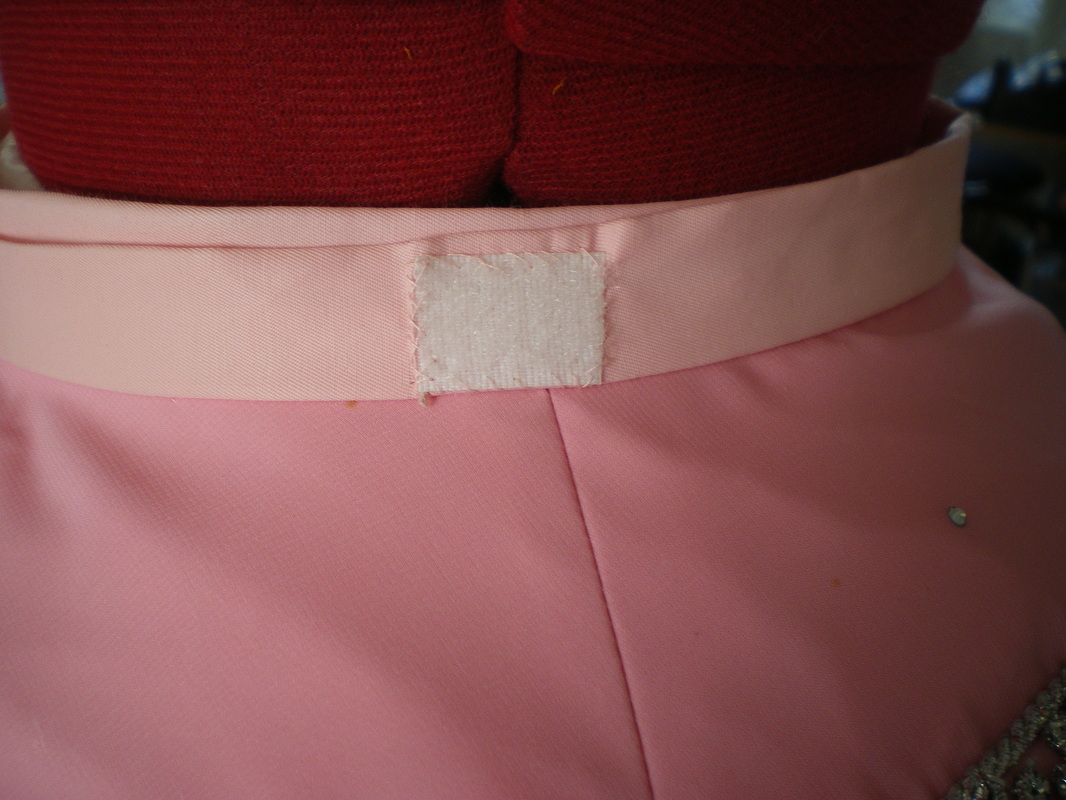
On the inside of the waistband, turn over a seam and attach it to the lining. This shows the overlap on the band. I sewed on a small piece of velcro to close and also put a piece on the side of the Peplum, as I want this to attach to the bodice to stop any gaps occurring.
|
|
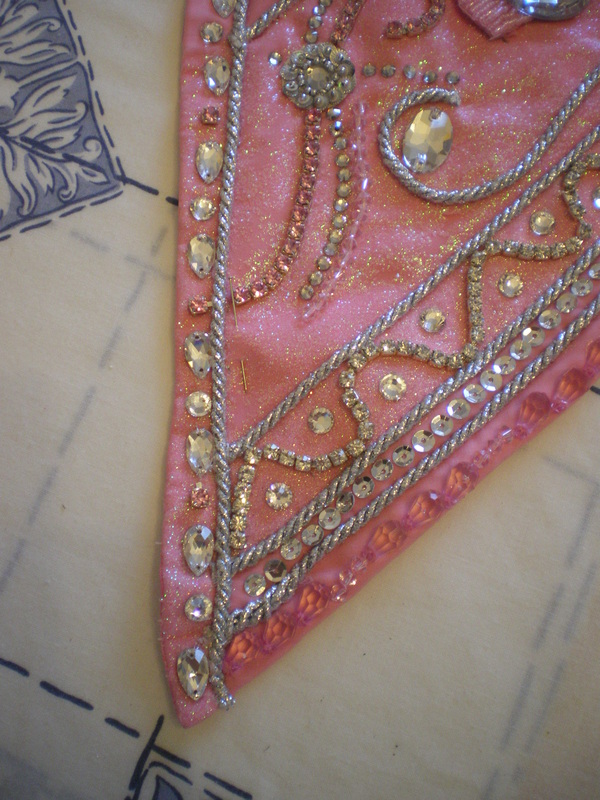
Now that the Peplum has been put together, I can finish adding crystals to the edging and make up 3 "dangles", two for the front and one for the back. Instructions for making the dangles is in the video

|

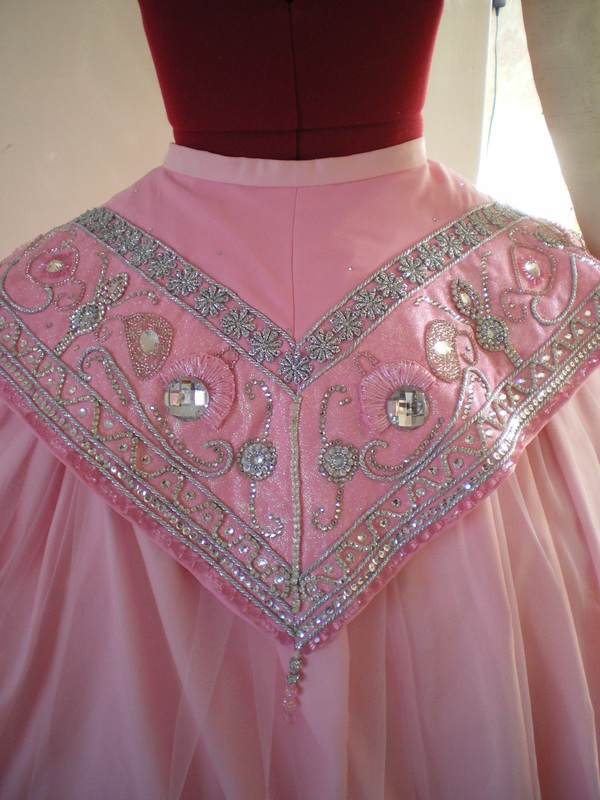
The Peplum is complete
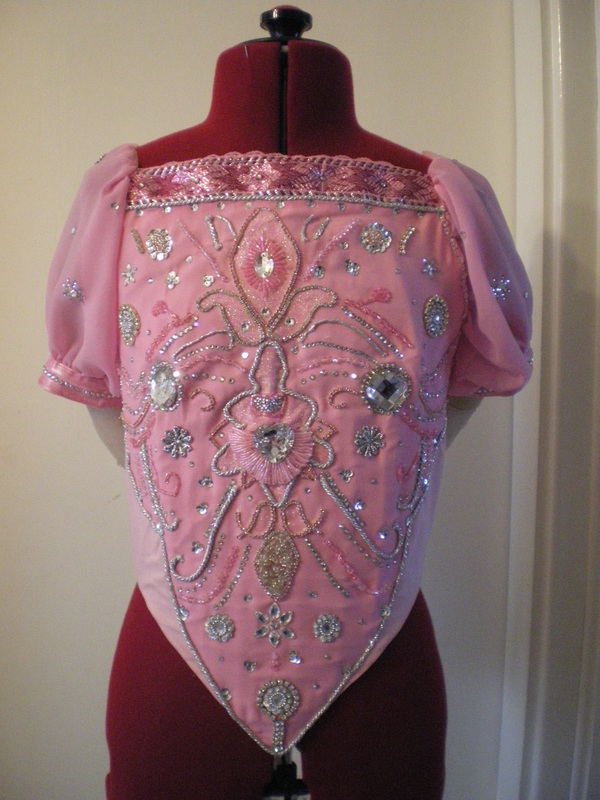
Making the Bodice:
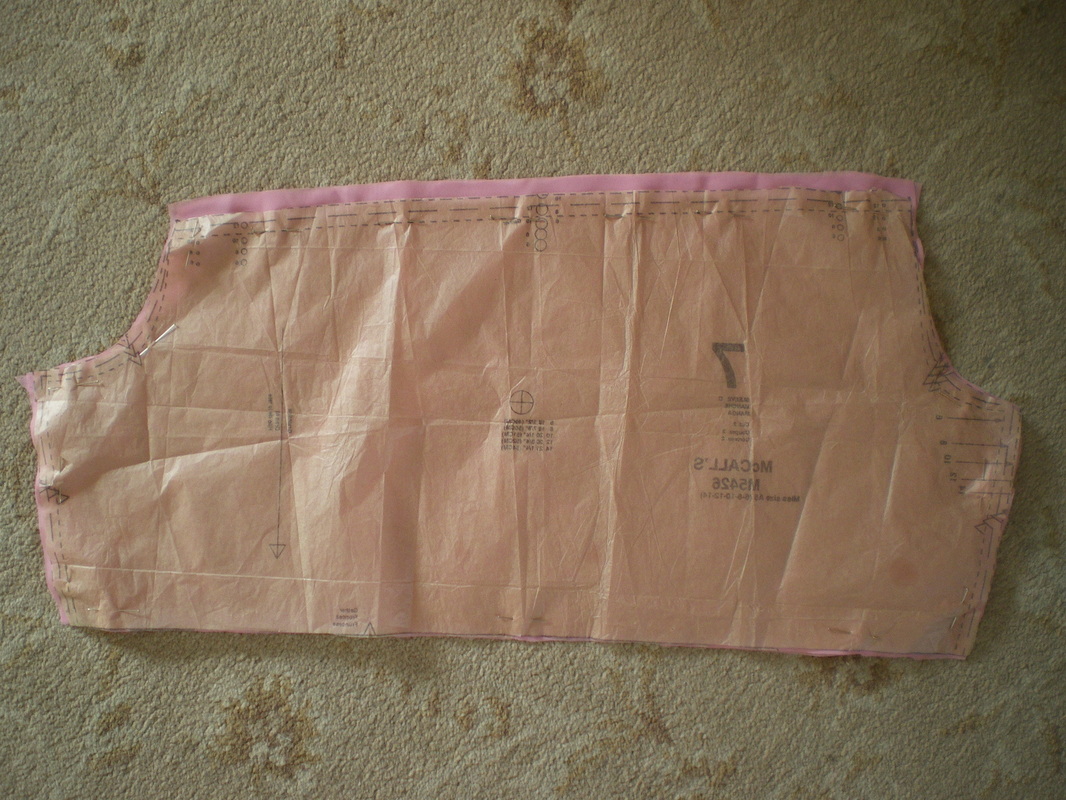
Using Simplicity 3782, we used the original pattern for the front and sides, but the top had to be squared off.
Making the Bodice:
Using Simplicity 3782, we used the original pattern for the front and sides, but the top had to be squared off.
|
Because this costume was made for a young girl, I decided to give it a bit of shape at the bust by including darts, these were also put on the lining and outer fabric.
|
|
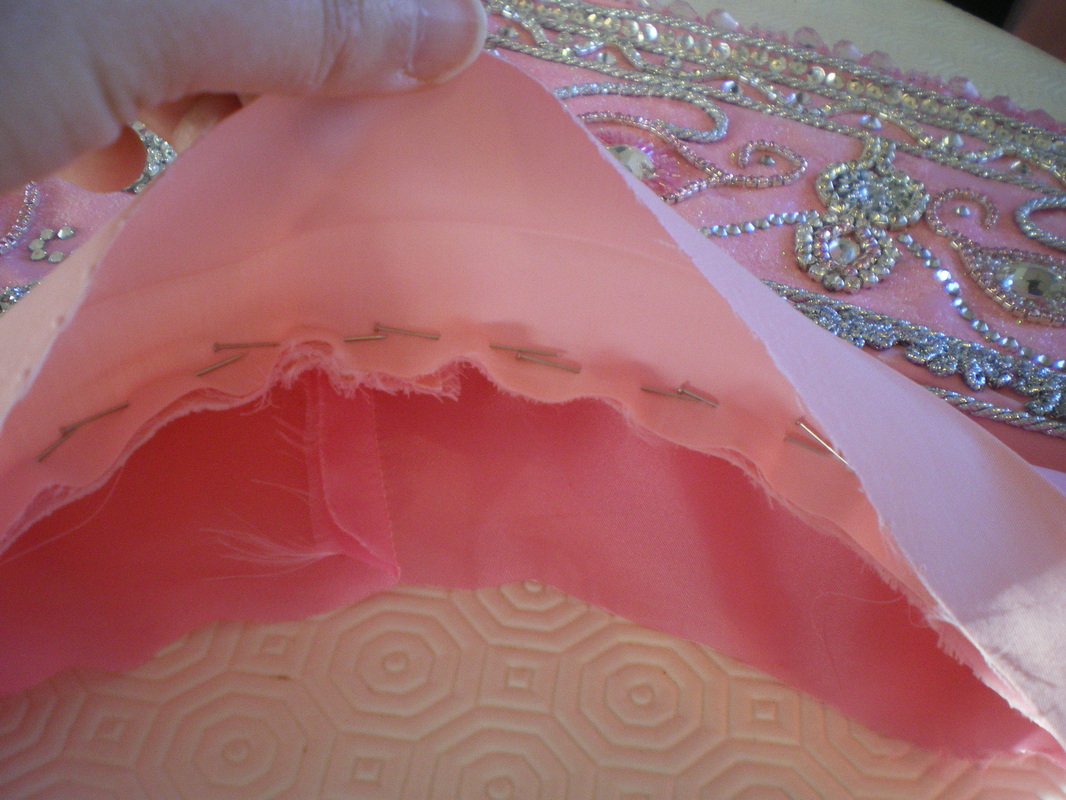
When cutting the lining, make the top edges 5cm longer. This shows the coutil attached to the lining and where the channels were sewn for the boning.
This shows the lining. When measuring for the boning, make sure it is 3cm shorter than your channel as you need to allow for a bottom seam. When cutting the outer fabric, this is cut to the same shape as the coutil and will be 5cm shorter than the lining |
|
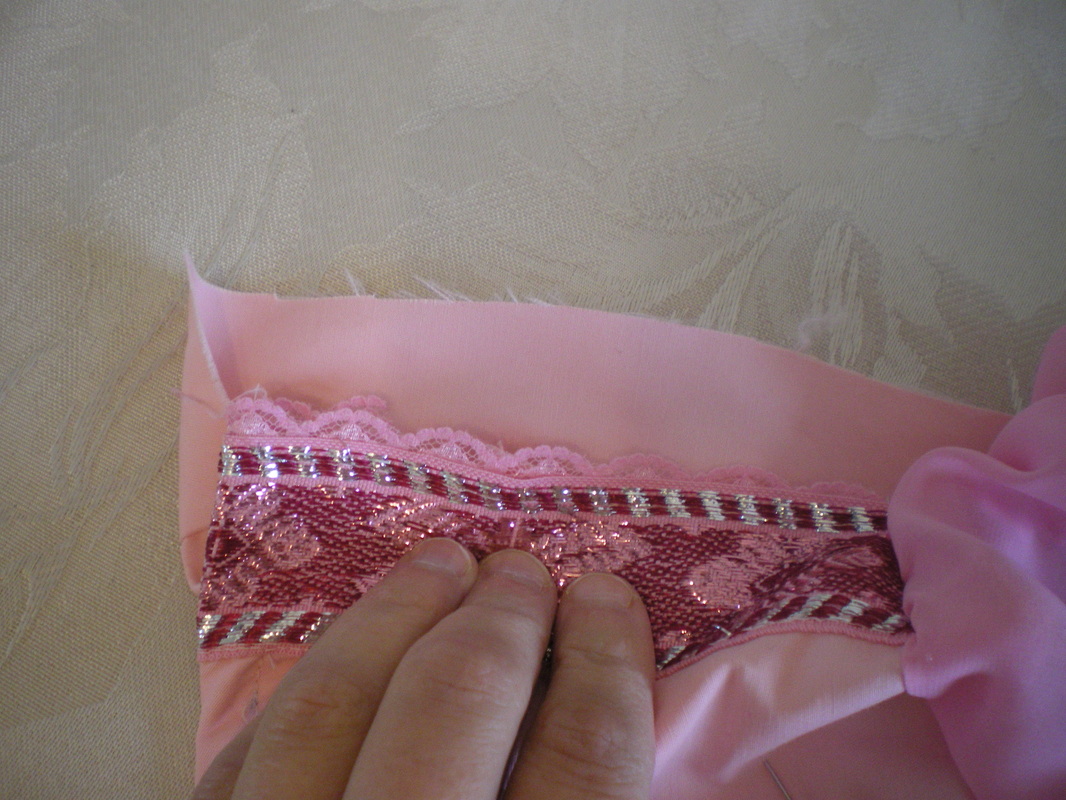
Cut the decorative braid to length, I also sewed on a piece of pink lace across the top of each.
|

|
Sew the braid to the tops of the outer fabric, they should now be the same length as the inner lining.
|

|
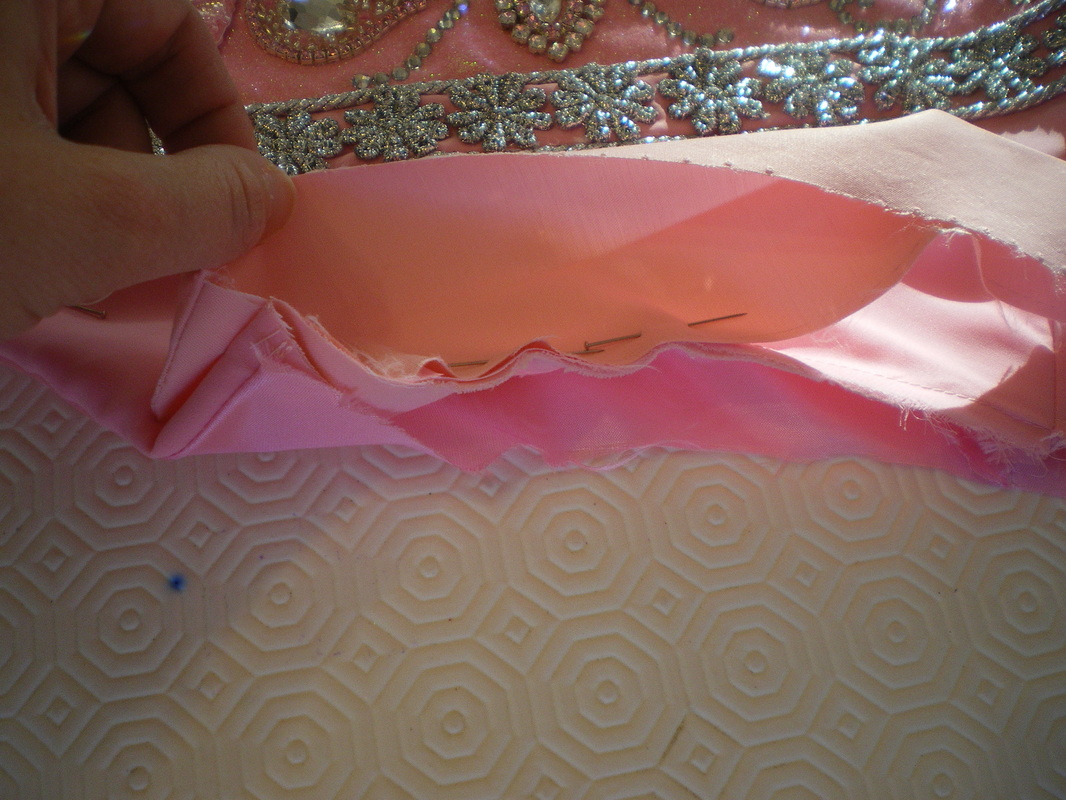
Pin, tack and sew the lining to the outer fabric, down both side and along the bottom, leave the top of the bodice un-sewn. Remembering to insert your boning into the channels first.
|
|
Turn down the lining inside the bodice and sew these shut.
|
|
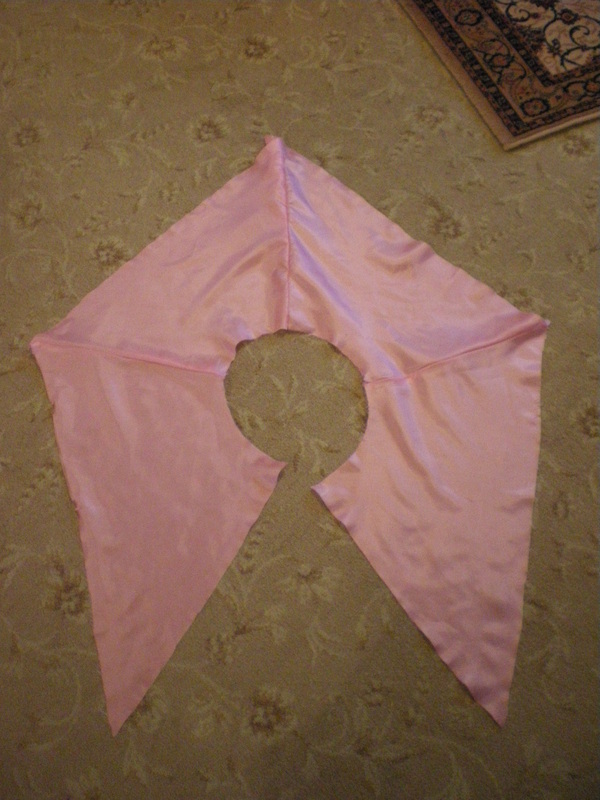
I used McCalls M5426 for the sleeves as I needed this shape, but you can use any similar pattern to create a small puff sleeve. The top needs to be flat as it doesn't fit into a conventional armhole. Cut one layer of Chiffon each
|
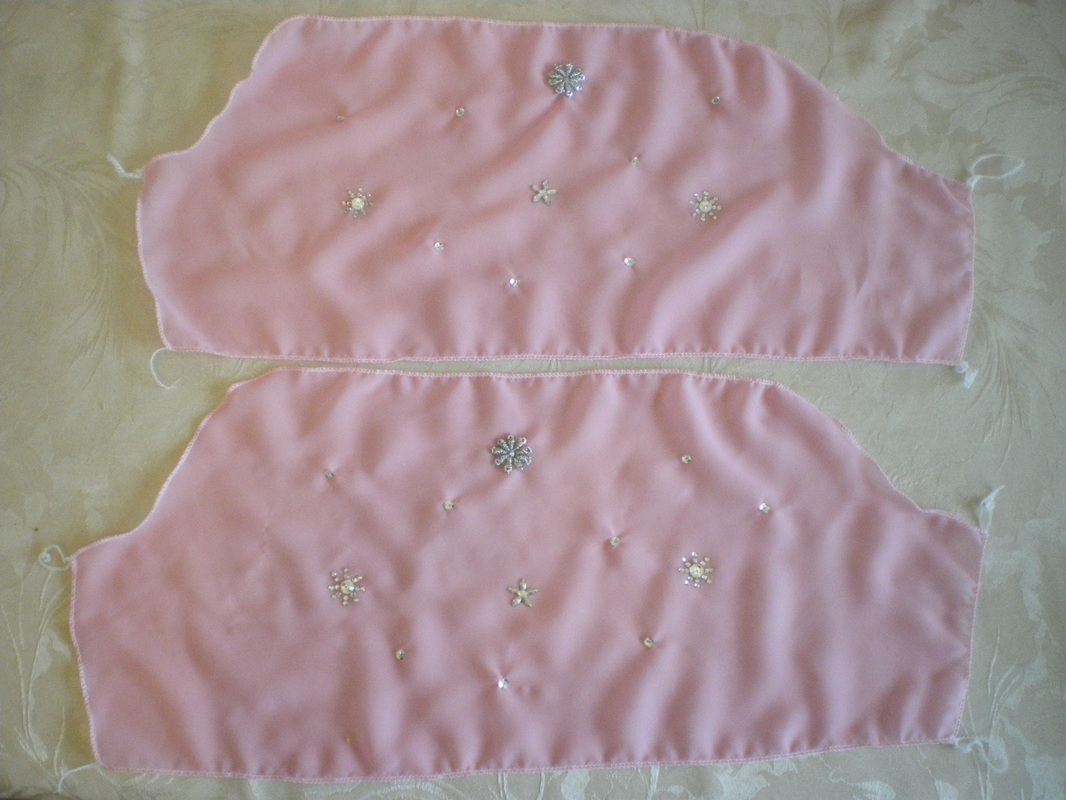
|
|
Glue or sew on your decorations, being careful not to go too near the edges. Measure the gap over the shoulder and cut a piece of ribbon to fit. Gather the top of the sleeve and sew the ribbon to the outer edge.
|
|
Sew up the side seam and put a gathering stitch along the bottom of the sleeves. Insert the sleeve onto the bodice. The ribbon will turn under giving the impression it isn't attached to anything
|
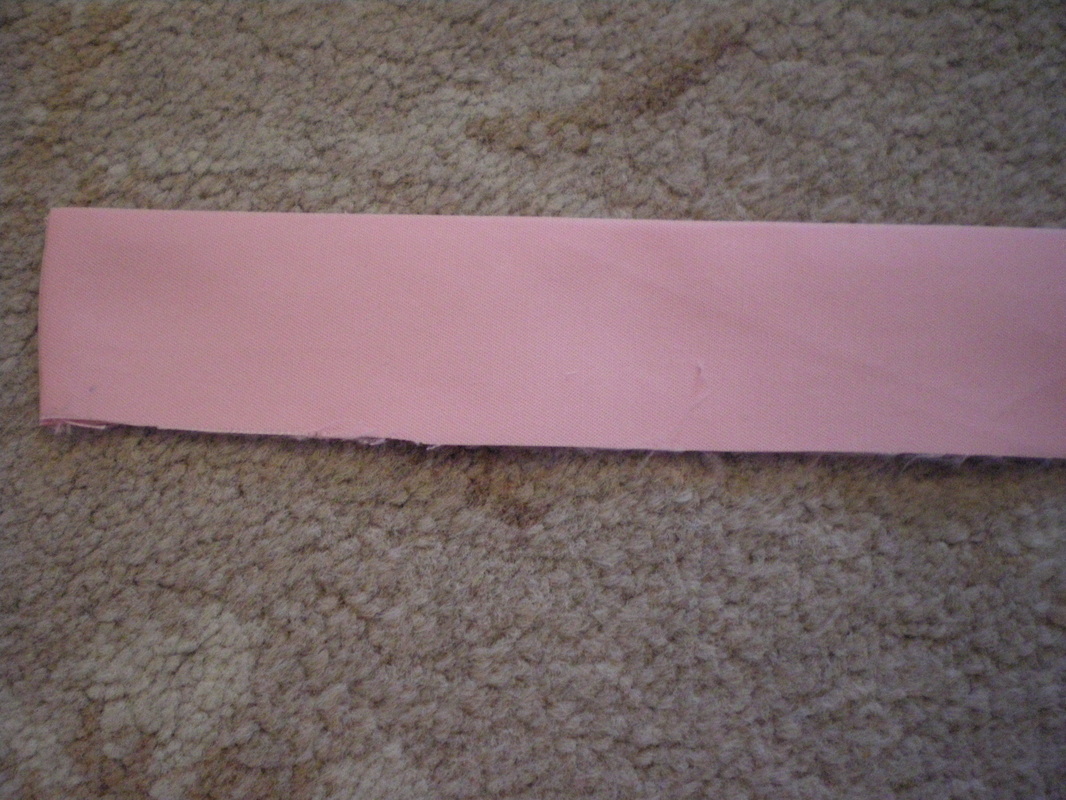
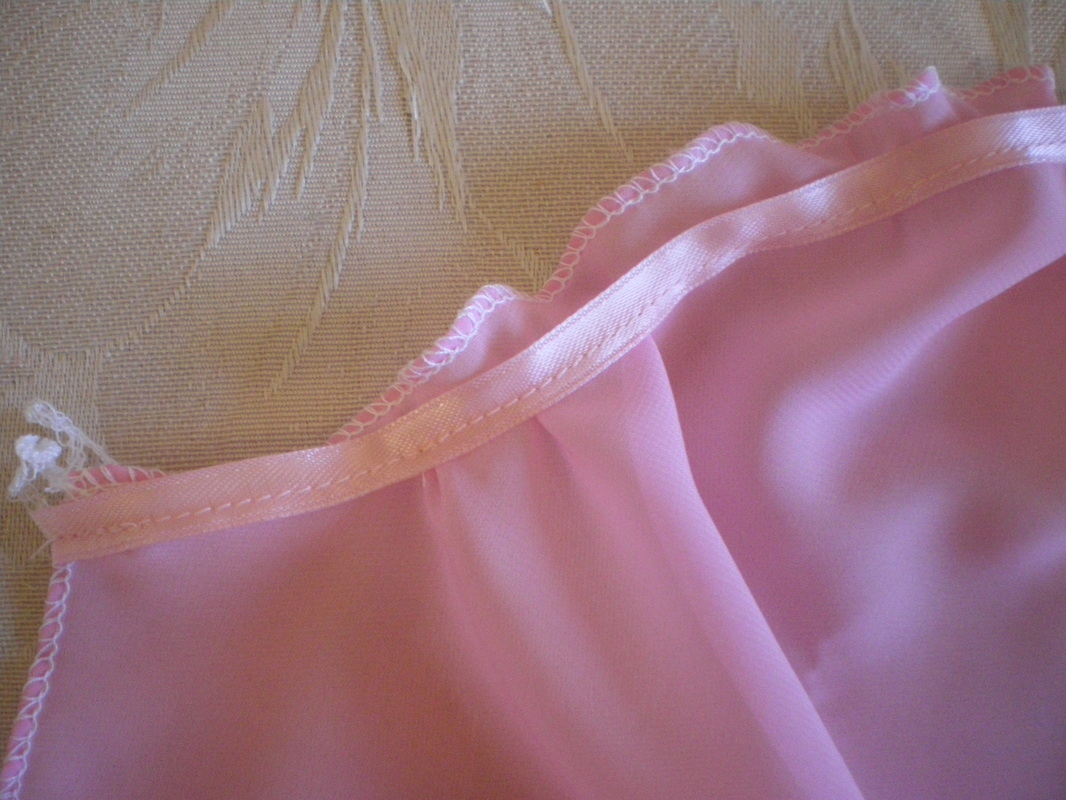
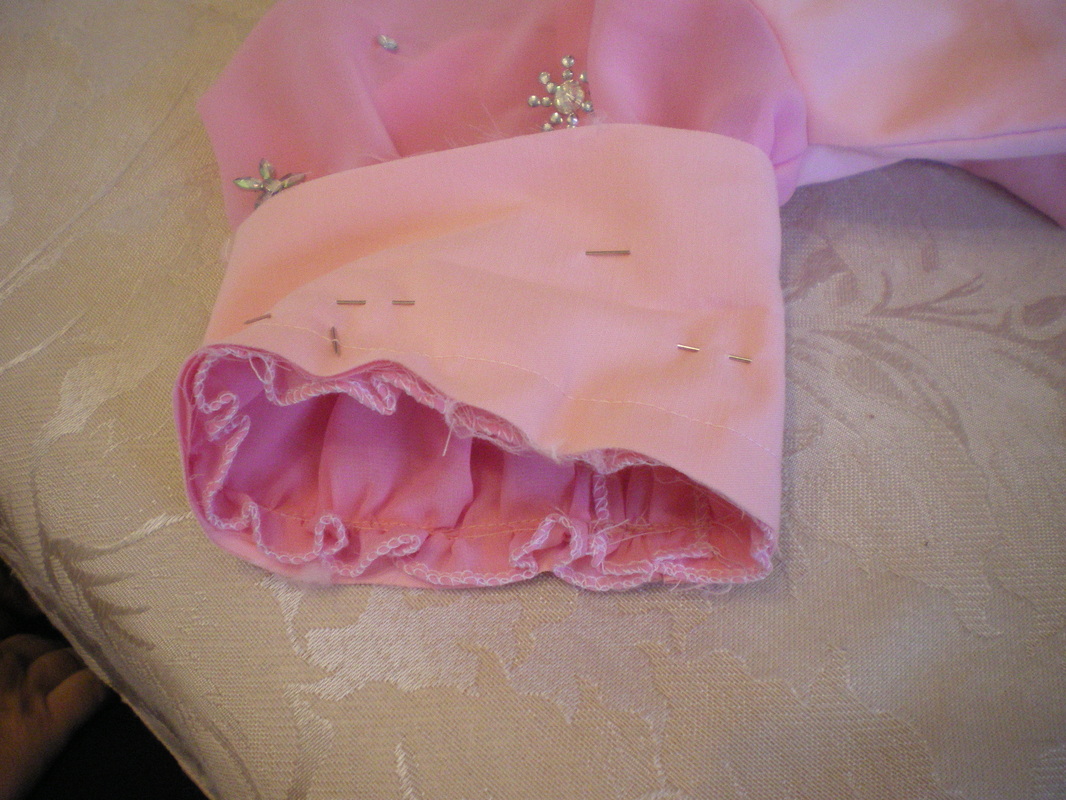
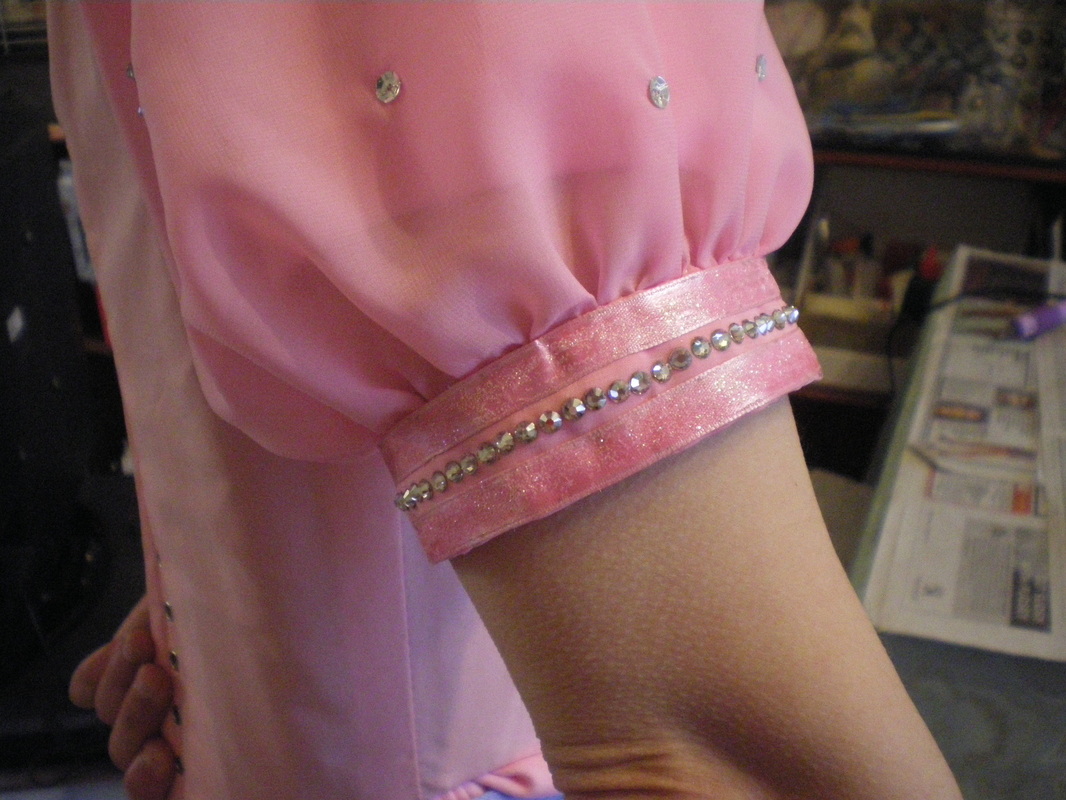
Cut two cuffs from Poplin and Chiffon 8cm wide. Measure around the arm and allow a little extra for movement plus enough for a seam. Pin or tack the two layers together temporarily.
Fold in half lengthways and press. Sew up the side seam. Gather the sleeve to fit the cuff. Turn the cuff under and hand stitch to the inside. |
|
|
|
Sew on two strips of ribbon top and bottom and glue or stick a row of 4mm flat back Swarovski crystals.
|

|
Insert the eyelets and lace
|
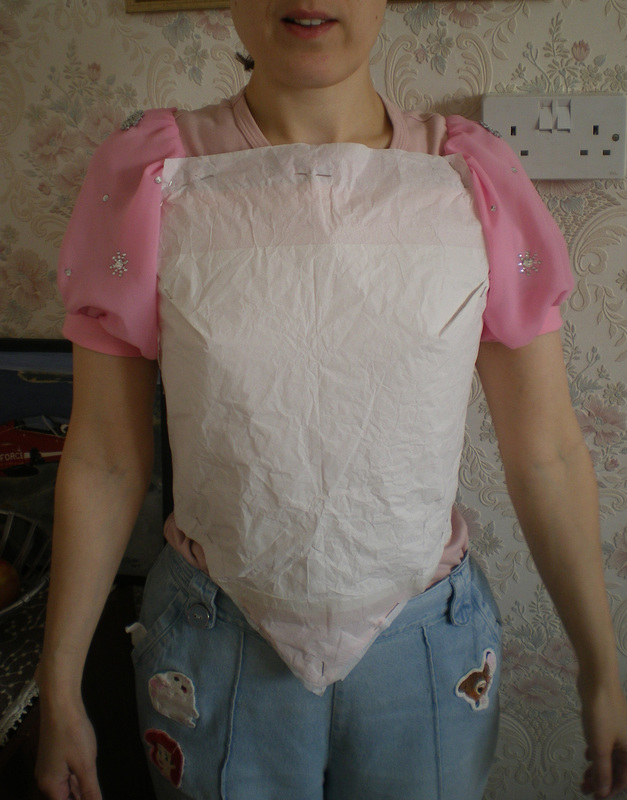
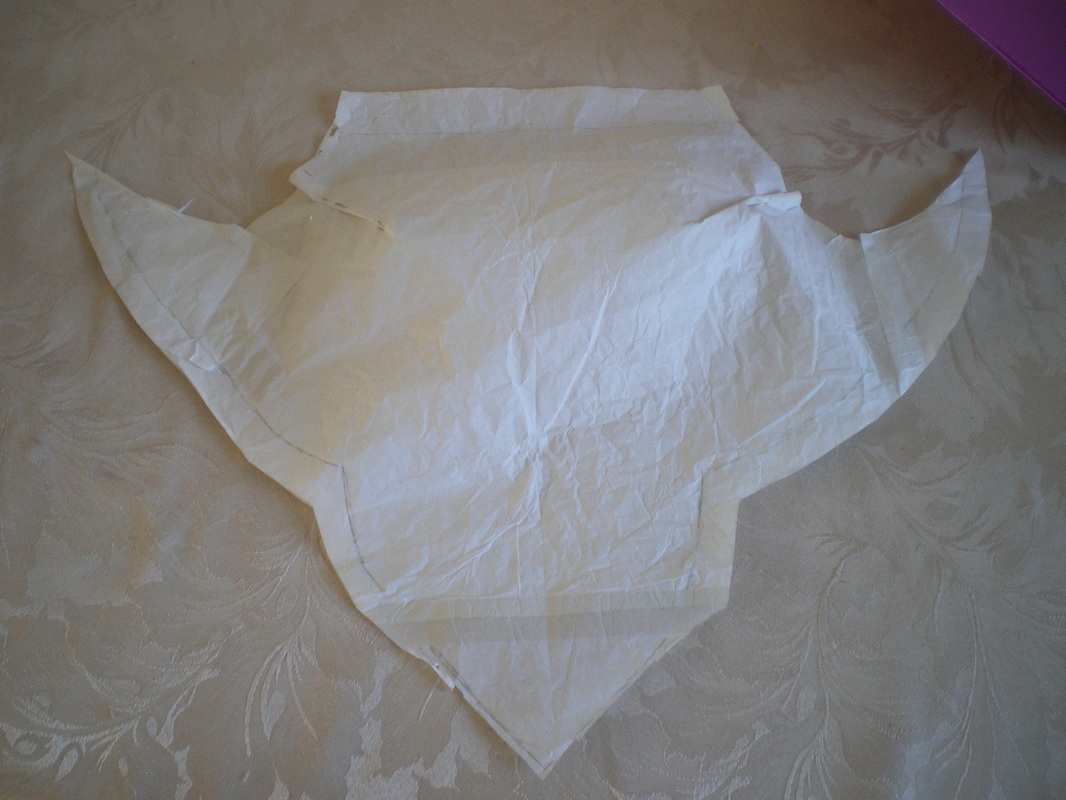
Mom pinned tissue onto the bodice and allowed for darts and using her best judgment, drew the line for the outer Chiffon layer.
|
|
|
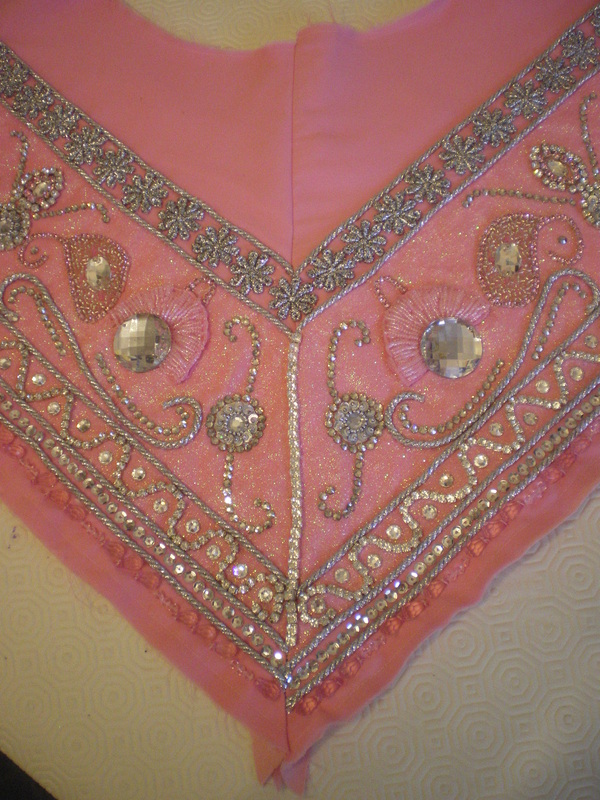
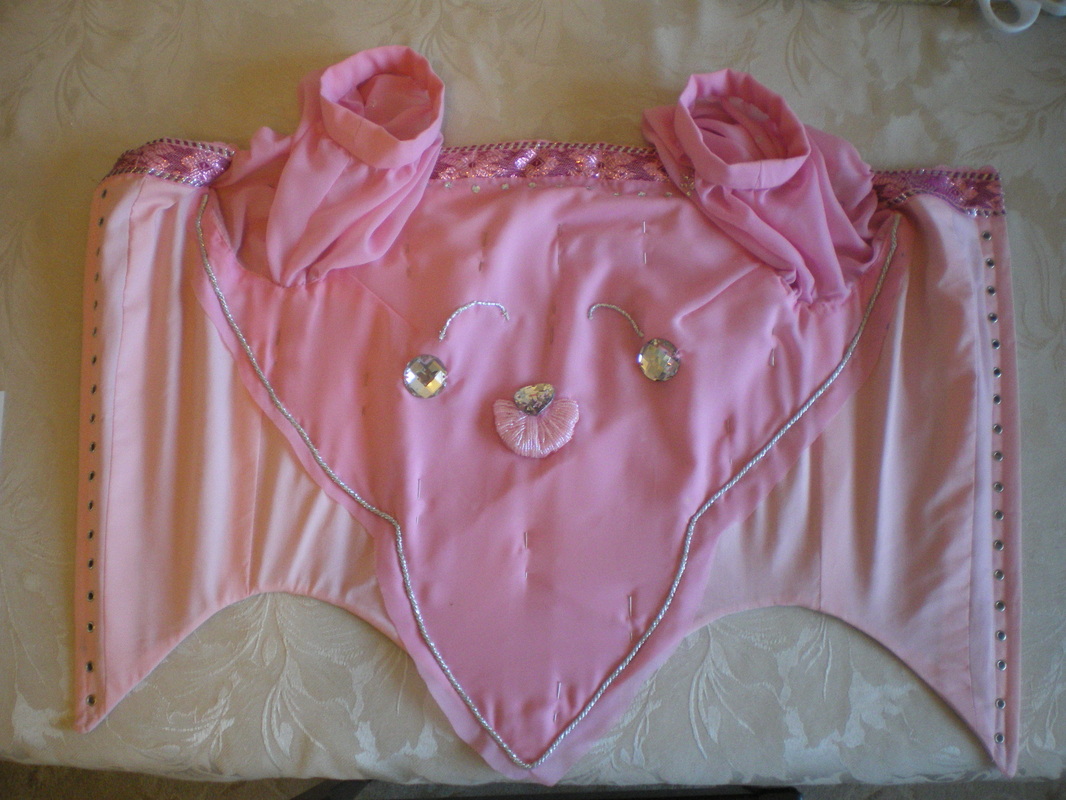
Now for the difficult bit!!!!. Sew the darts in to match the bodice. Lay the Chiffon on the bodice and pin in place, sew down an outline of silver cord. As you can see, I have allowed a little extra around the Chiffon for neatening, this is cut close to the cord. I also sewed cord along the bottom edge of the decorative braid. Now I will show you how I created the half moons.
|
|
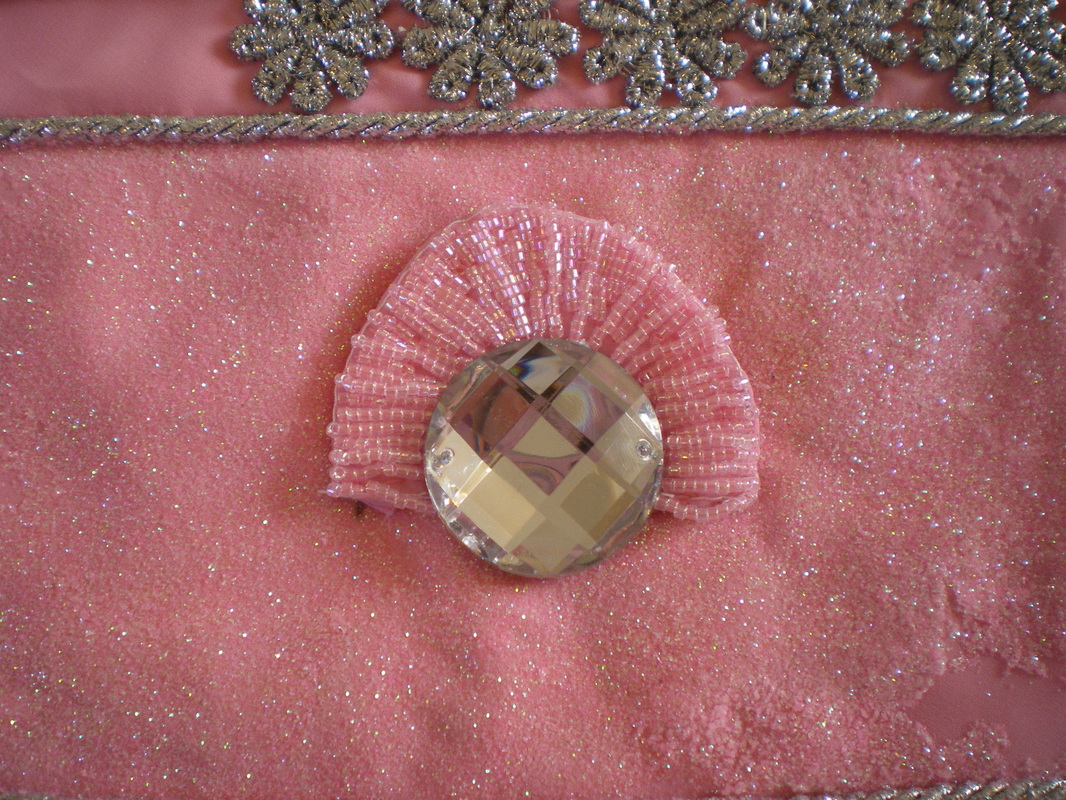
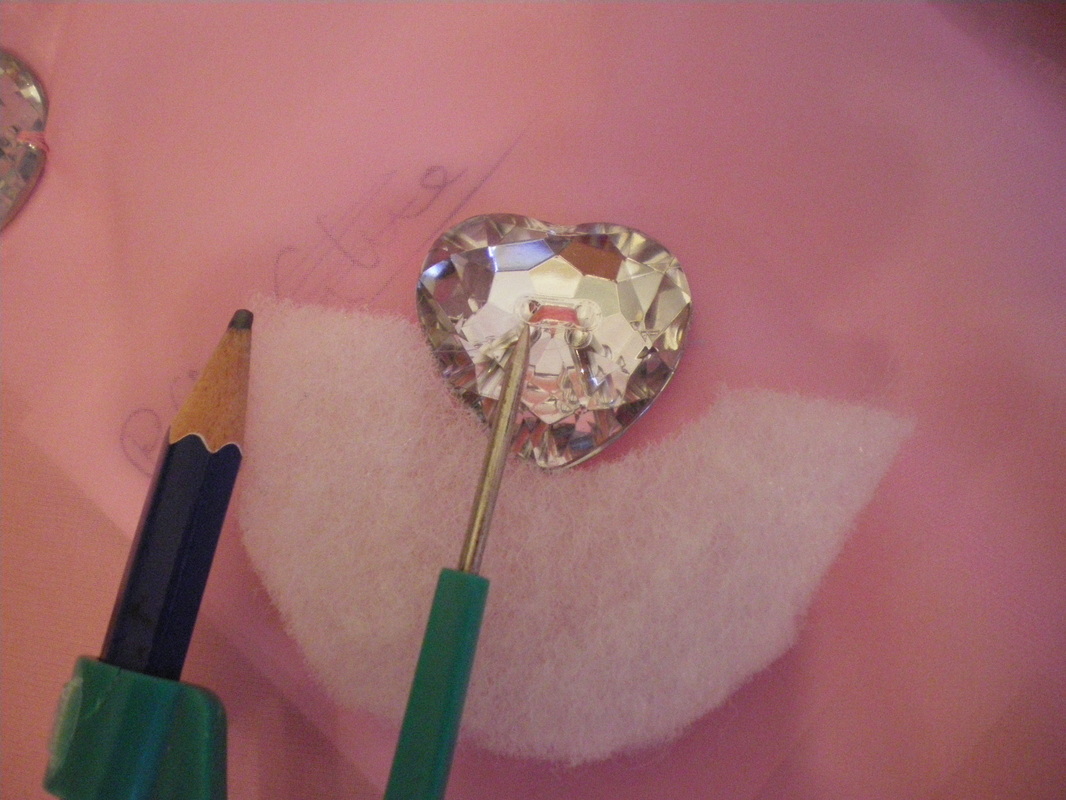
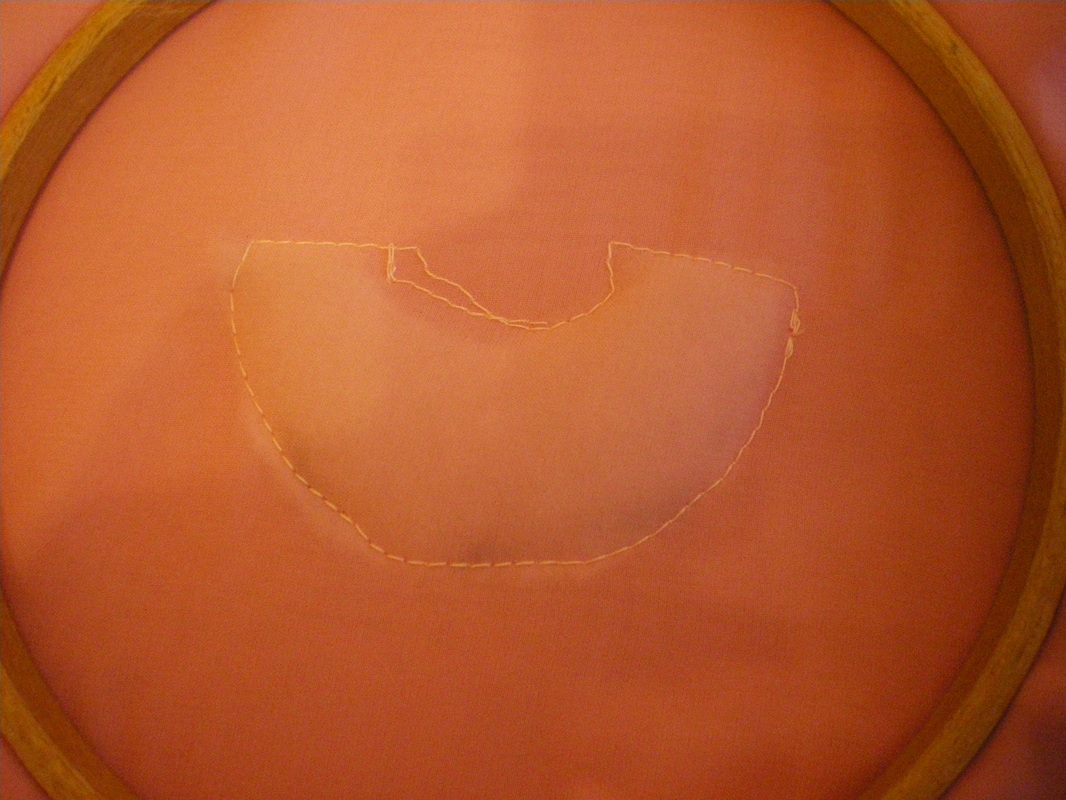
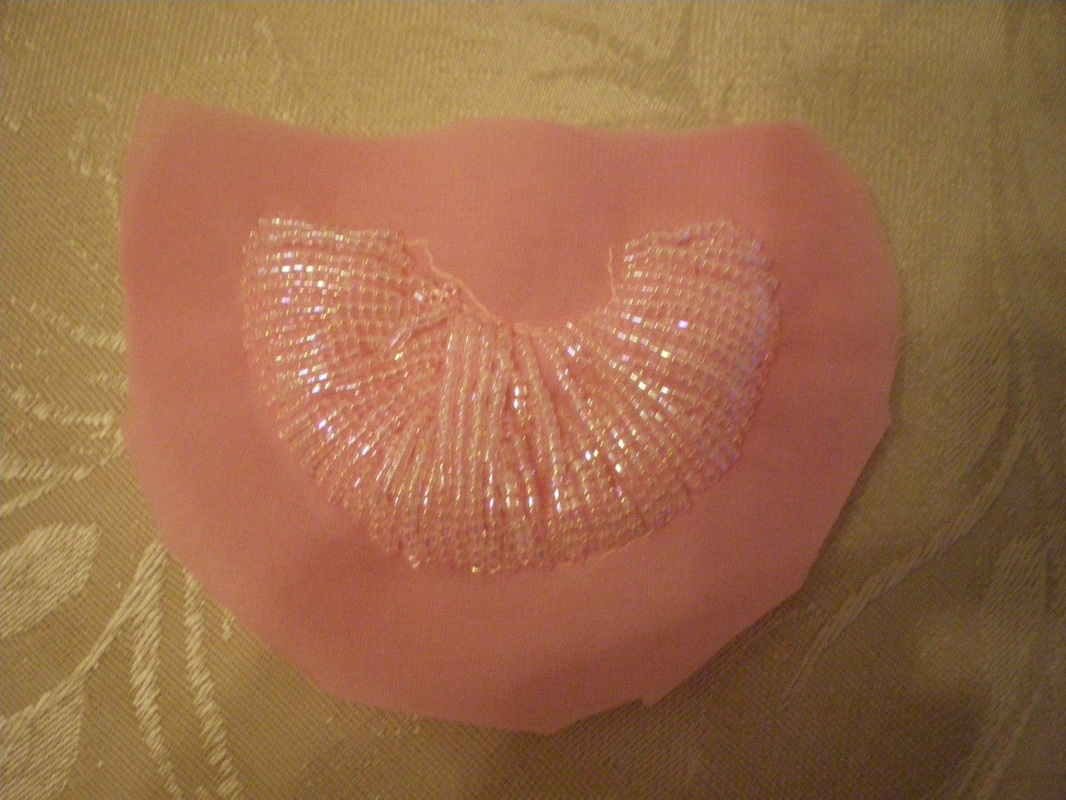
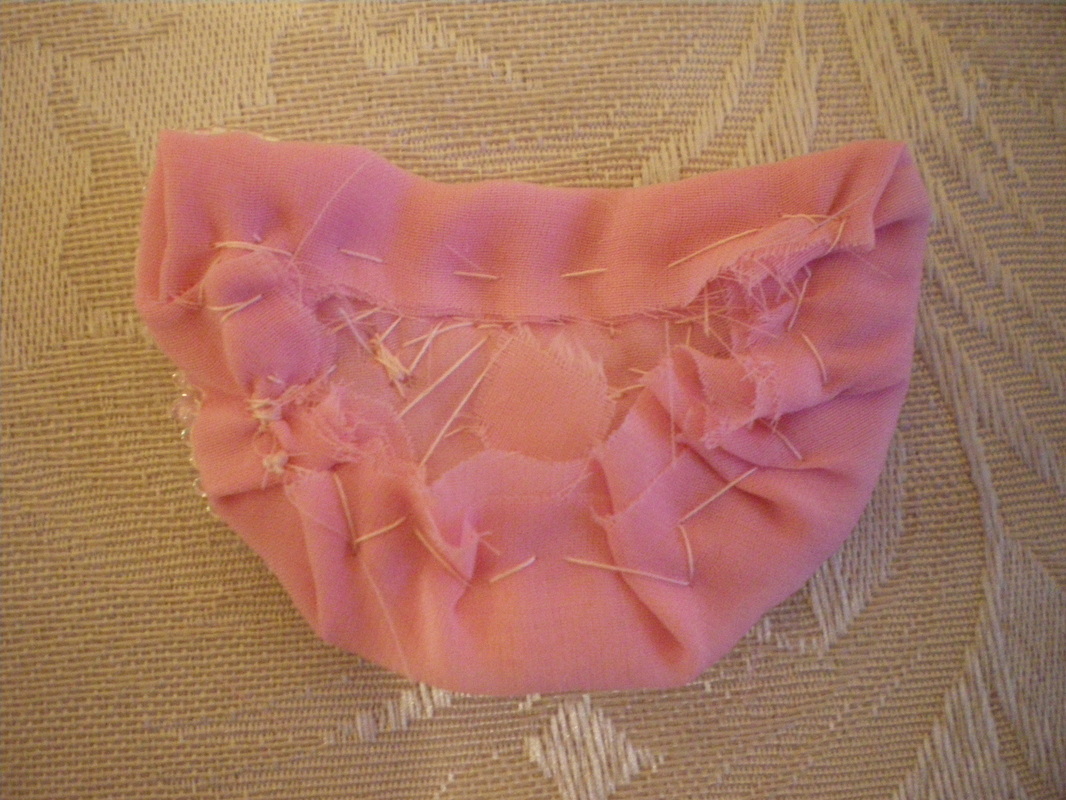
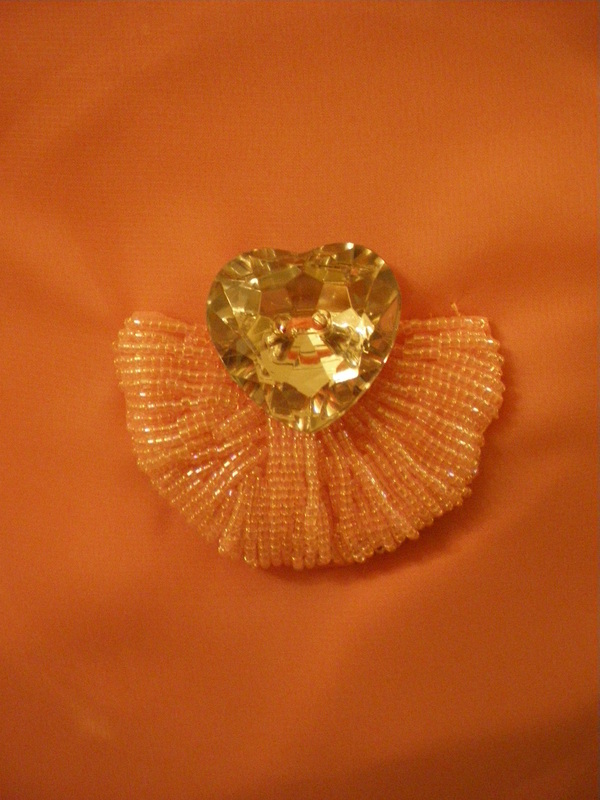
Take a measurement as shown, approximately 2cm wider than the crystal and cut a piece of wadding to this diameter, scoop out a semi circle. Sandwich the wadding between 2 layers of Chiffon and put into an embroidery hoop. On a sewing machine, sew the outer line, mine isn't too neat (but I got better with practice!) Using the 2mm seed beads thread some onto a needle and following the instructions in the video, criss cross across the wadding.
Cut excess around the finished item and turn under to neaten, sew directly under the centre jewel. |
|
|
|
|
|
I tried to stay as close to the original design as possible. But as the original panel was taken from a Sari, you would find it impossible to duplicate it exactly.
|
|
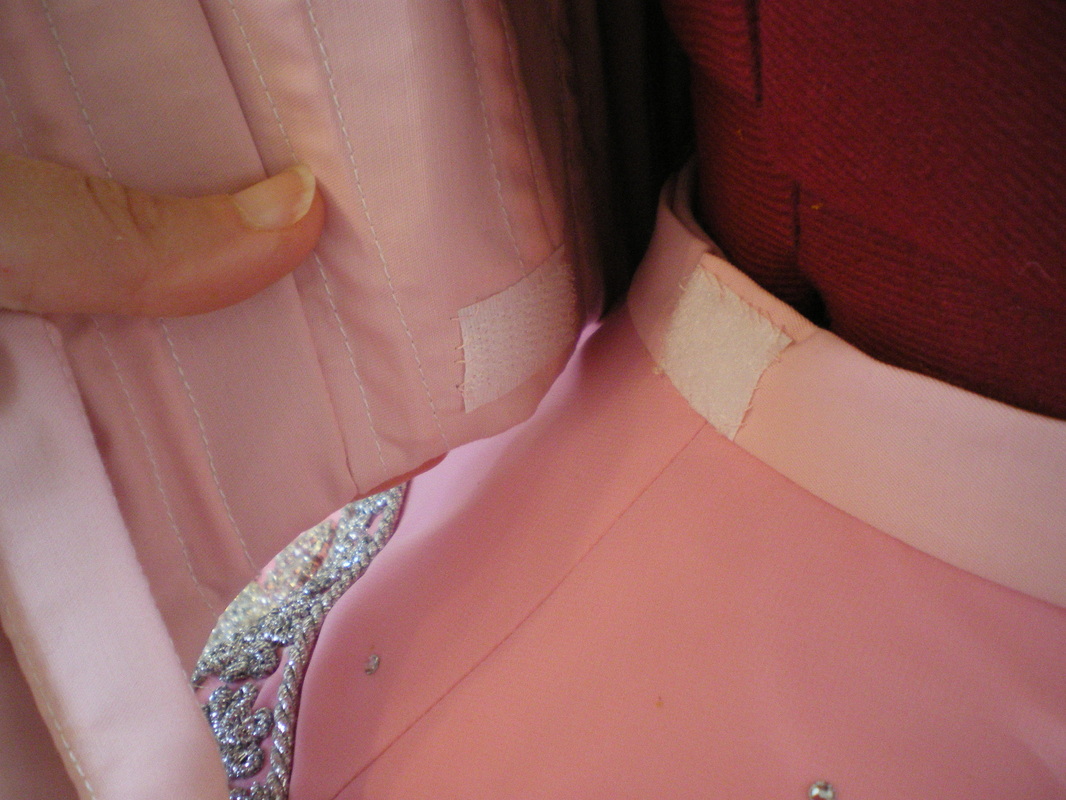
To finish I sewed on a corresponding piece of velcro to the inside of the bodice.
This concludes the Bodice. |
This concludes the costume
