To make this costume, you will require experience in boning and some knowledge of wire work for the flowers.
Difficulty factor 10 - 10
All videos for making the complete costume can be found in our "video tutorials" link
Difficulty factor 10 - 10
All videos for making the complete costume can be found in our "video tutorials" link
Making Christine Daae's
Gown from
Phantom of the Opera
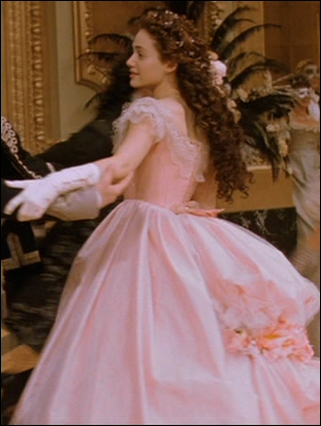
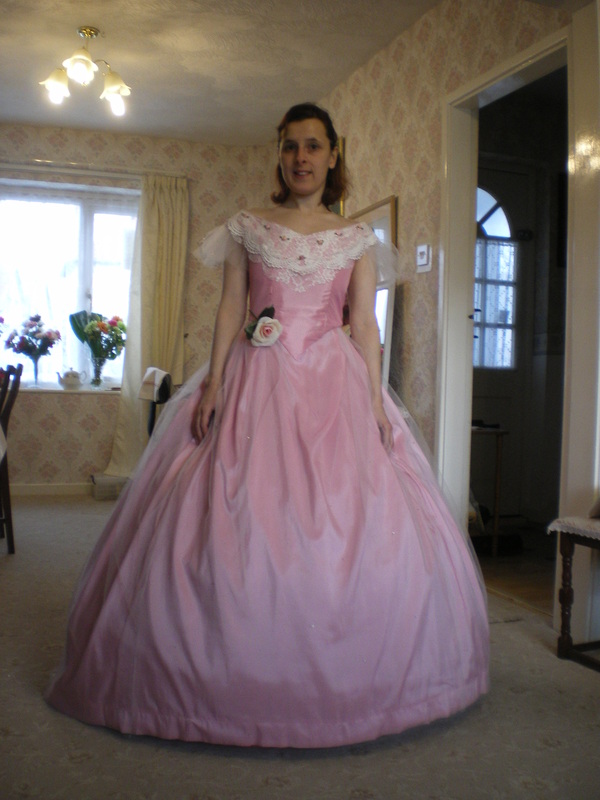
The original costume worn by Emmy Rossum as the character Christine Daae from the film The Phantom of the Opera.
The making of this costume can be found in "video tutorials"
Materials:
Dress:
7 metres blush pink polyester Taffeta
1 metre pink lining
5 metres Ivory soft tulle/net
1 metre Cream Crushed Taffeta
1/2 metre Ivory lace for bodice
1 metre scalloped lace trim
200 Swarovski clear flat back crystals 3.2mm
50 Swarovski clear flat back crystals 2mm
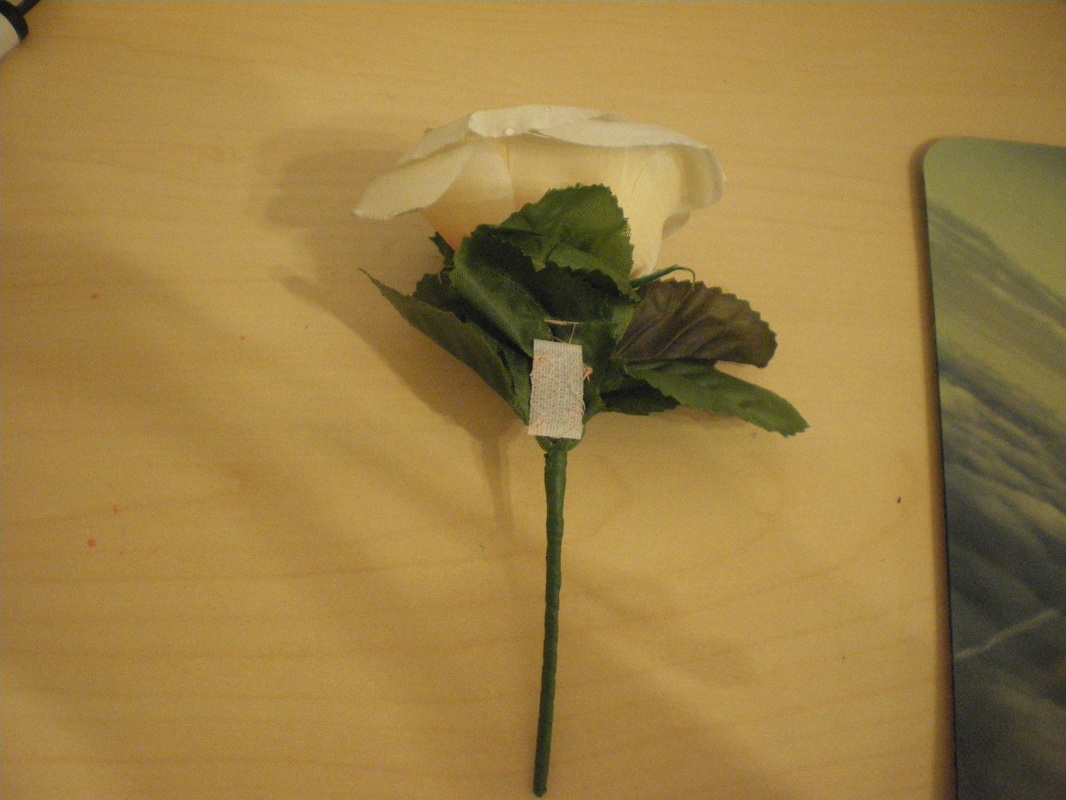
12 ribbon roses
Invisible open ended zip to fit
1/2 metre interfacing
Petticoat:
3.1/2 metres dark pink cotton
Velcro
Pleat flipper (optional)
Stud fasteners
Bouquet:
6 large roses
9 medium roses
2 small-medium roses
3 small roses
Extras:
4 large hooks and eyes
4 small plastic/metal rings
4 metres 1cm wide pink ribbon
1/2 metre striped pink satin for bow
White masquerade mask from craft shop
1 metre .5cm pink ribbon
2 metres x 2cm wide white ribbon
Stick 18" long
Large pink flower and 6 small flowers for hair
Boned hoop
To make bustle:
Please see my tutorial for making Scarlett O'Haras dress
I was fortunate that there is a pattern for this dress, Simplicity Costumes for Adults 4479. I made this up almost identical to the pattern except I made a few alterations in places. Don't make the mistake I did and leave the boning out, you WILL need it in! I will probably remake the bodice at a later date.
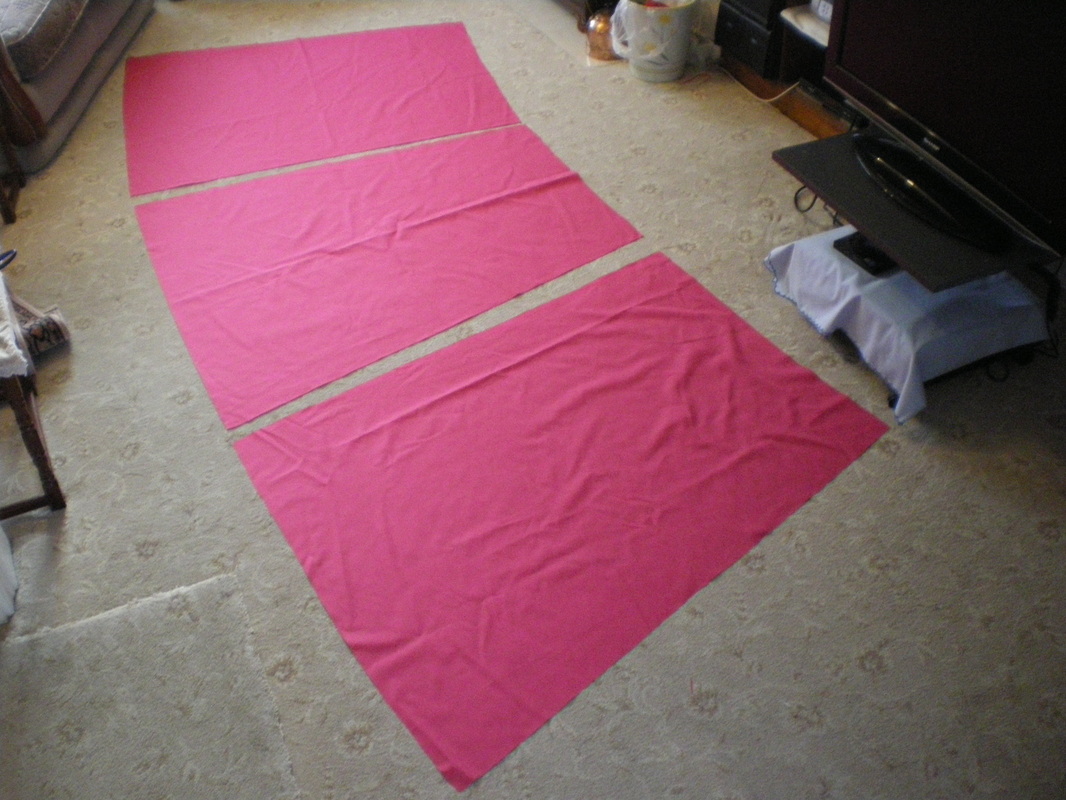
To make the Petticoat:
Materials:
Dress:
7 metres blush pink polyester Taffeta
1 metre pink lining
5 metres Ivory soft tulle/net
1 metre Cream Crushed Taffeta
1/2 metre Ivory lace for bodice
1 metre scalloped lace trim
200 Swarovski clear flat back crystals 3.2mm
50 Swarovski clear flat back crystals 2mm
12 ribbon roses
Invisible open ended zip to fit
1/2 metre interfacing
Petticoat:
3.1/2 metres dark pink cotton
Velcro
Pleat flipper (optional)
Stud fasteners
Bouquet:
6 large roses
9 medium roses
2 small-medium roses
3 small roses
Extras:
4 large hooks and eyes
4 small plastic/metal rings
4 metres 1cm wide pink ribbon
1/2 metre striped pink satin for bow
White masquerade mask from craft shop
1 metre .5cm pink ribbon
2 metres x 2cm wide white ribbon
Stick 18" long
Large pink flower and 6 small flowers for hair
Boned hoop
To make bustle:
Please see my tutorial for making Scarlett O'Haras dress
I was fortunate that there is a pattern for this dress, Simplicity Costumes for Adults 4479. I made this up almost identical to the pattern except I made a few alterations in places. Don't make the mistake I did and leave the boning out, you WILL need it in! I will probably remake the bodice at a later date.
To make the Petticoat:
|
I used the same pattern pieces as the skirt pattern, except our hoop was a bigger circumference, so I added a few inches to each piece.
|
|
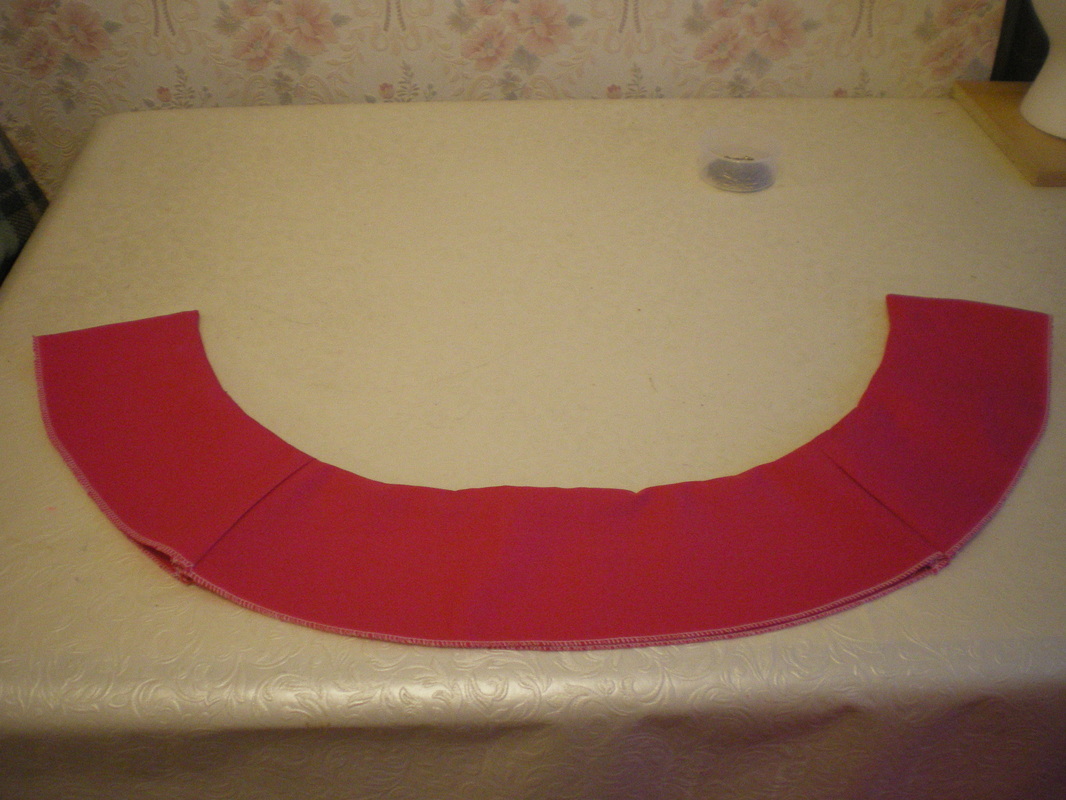
I made a wide yoke to reduce the bulk.
|

|
The skirt was pleated onto the yoke, but because of the large bustle, I needed to change the shape of the yoke. This was fastened with a piece of velcro and 3 stud fasteners. The skirt has a 6" opening.
|
|
|
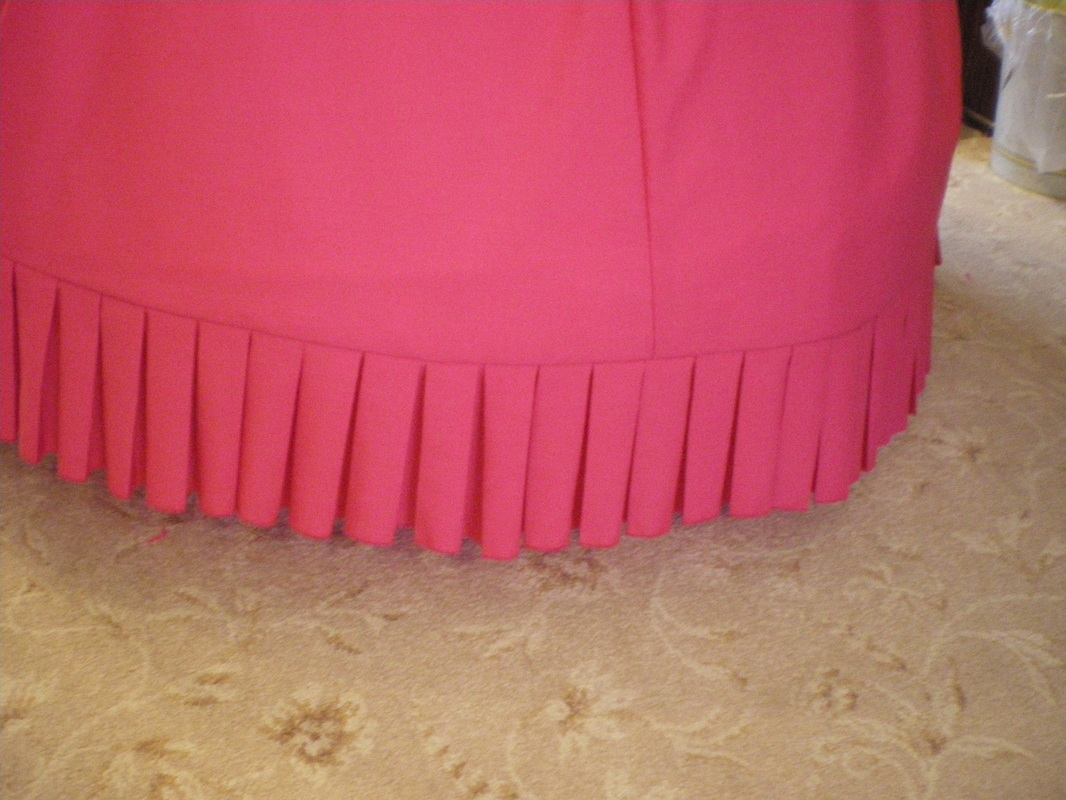
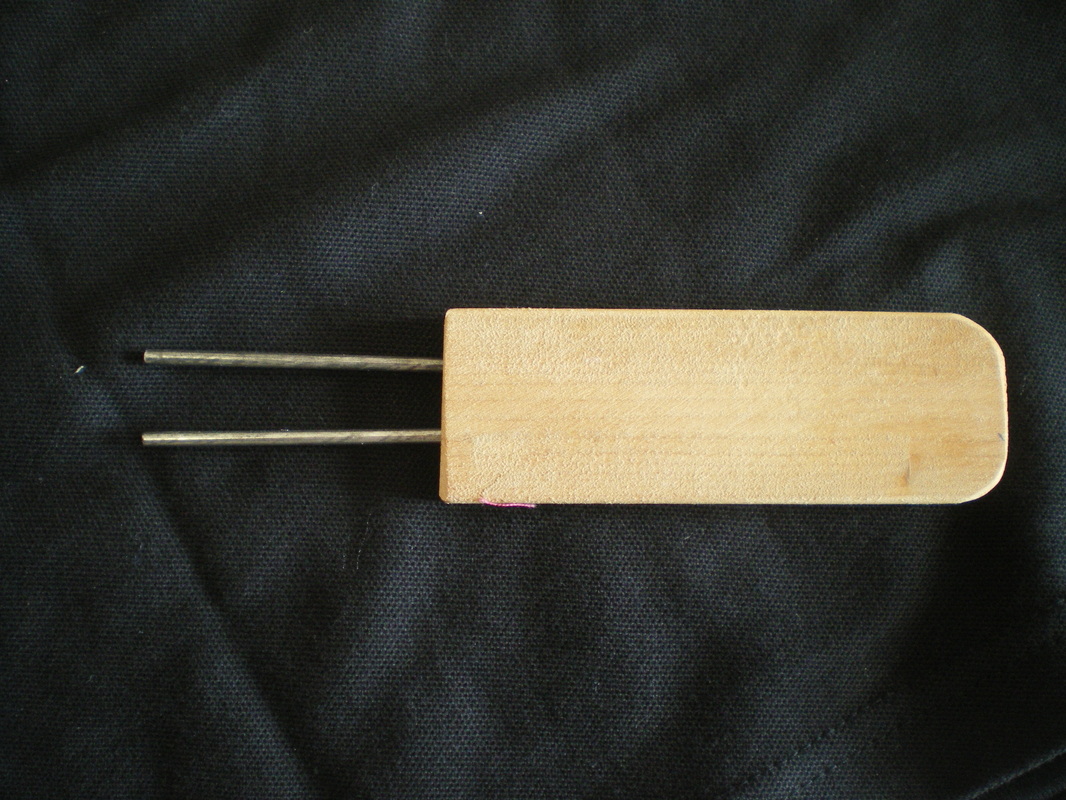
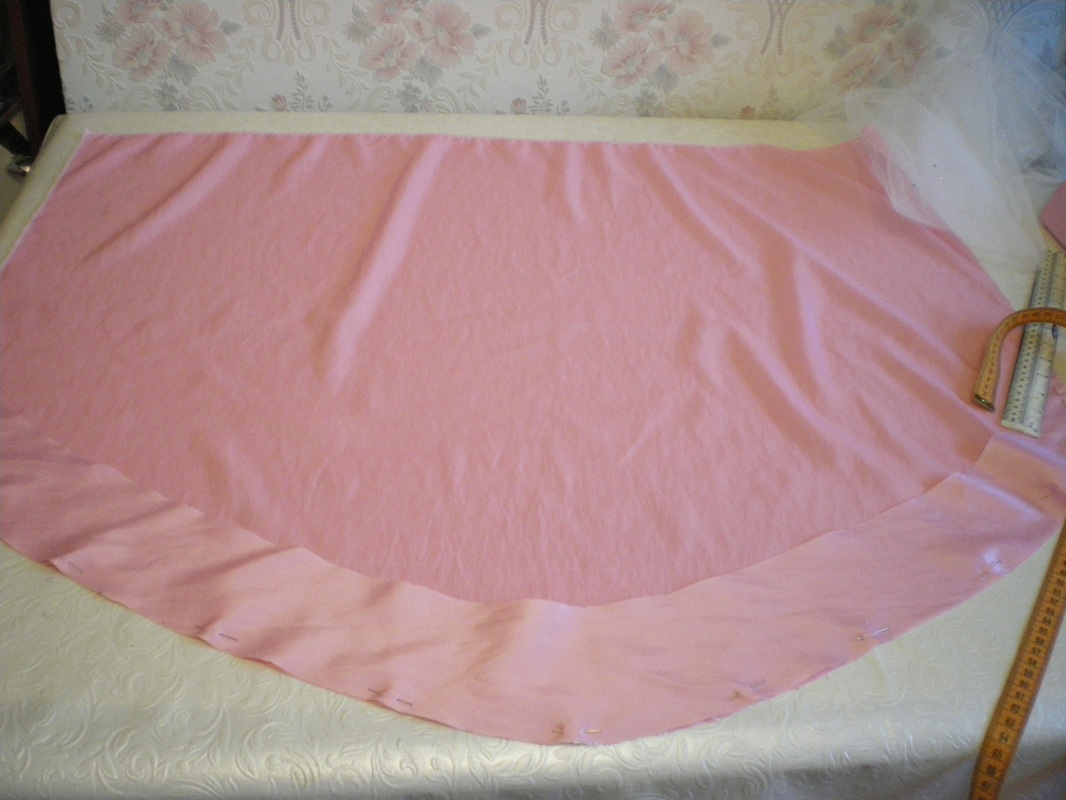
I made a box pleated edging 6" wide. This was produced using a pleat flipper. They can be obtained from the internet, but I made our own, using a piece of wood and 2 metal prongs. The outside edge measurement of the prongs is 1", this produced a 2" box pleat.
This completes the Petticoat.
The Bodice:
This completes the Petticoat.
The Bodice:
|
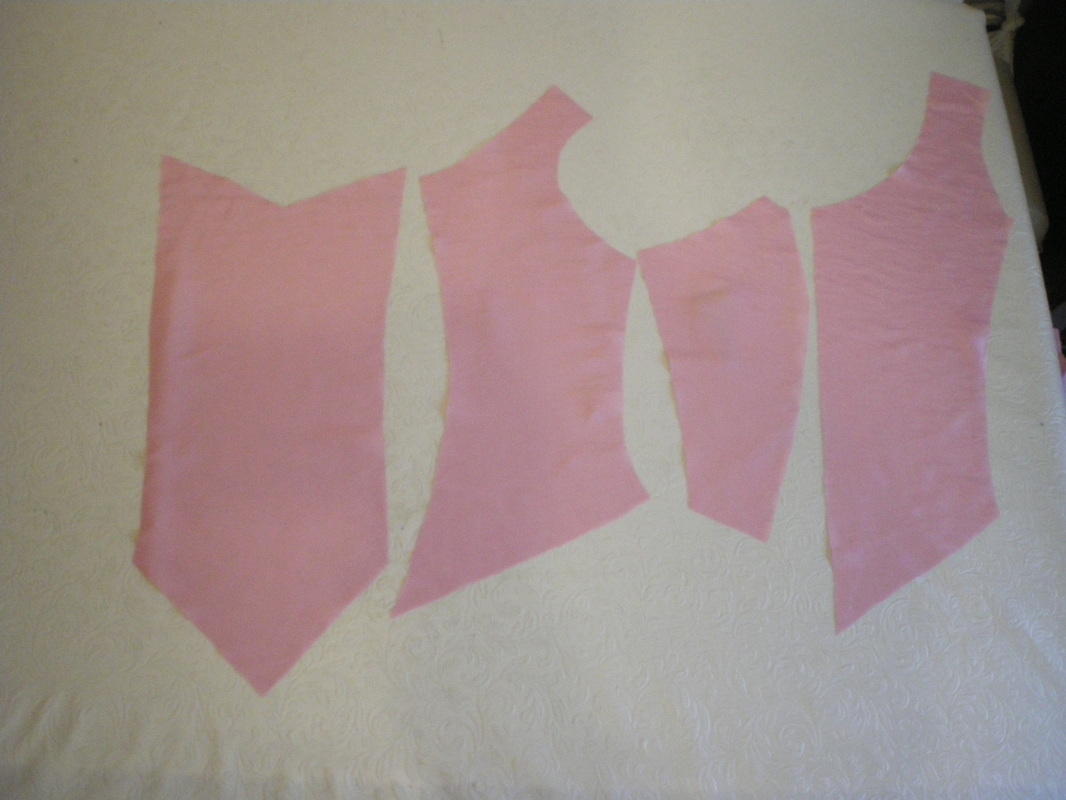
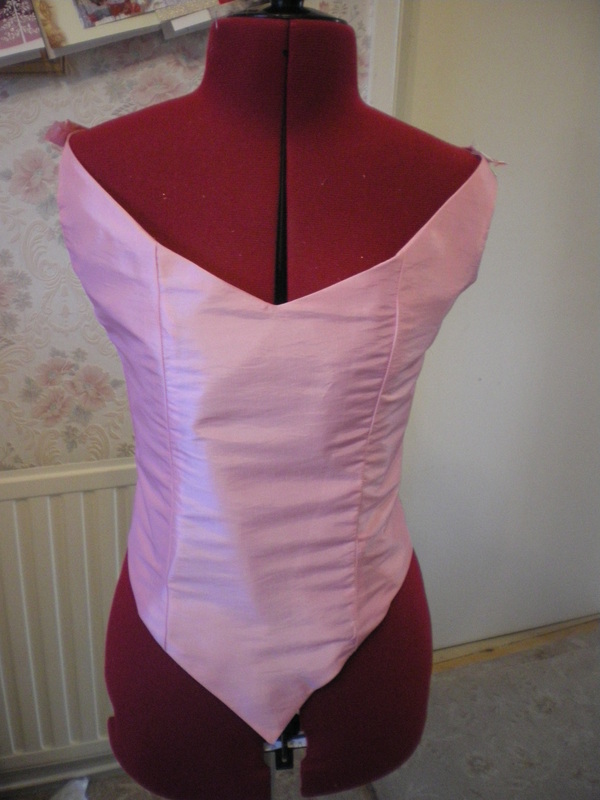
I had to make our usual alterations to the pattern pieces to fit me. I cut one layer of outer fabric, one layer of coutil and a lining made from polyester. (Please follow my tutorial for Ariel's Kiss The Girl costume for corset instructions, as I forgot to take pictures when making this dress.)
|
|
This shows the inner lining and coutil put together before they are boned. You will need to put channels at the seams and bone it before this is sewn to the outer fabric. (See instructions as above)
|
|
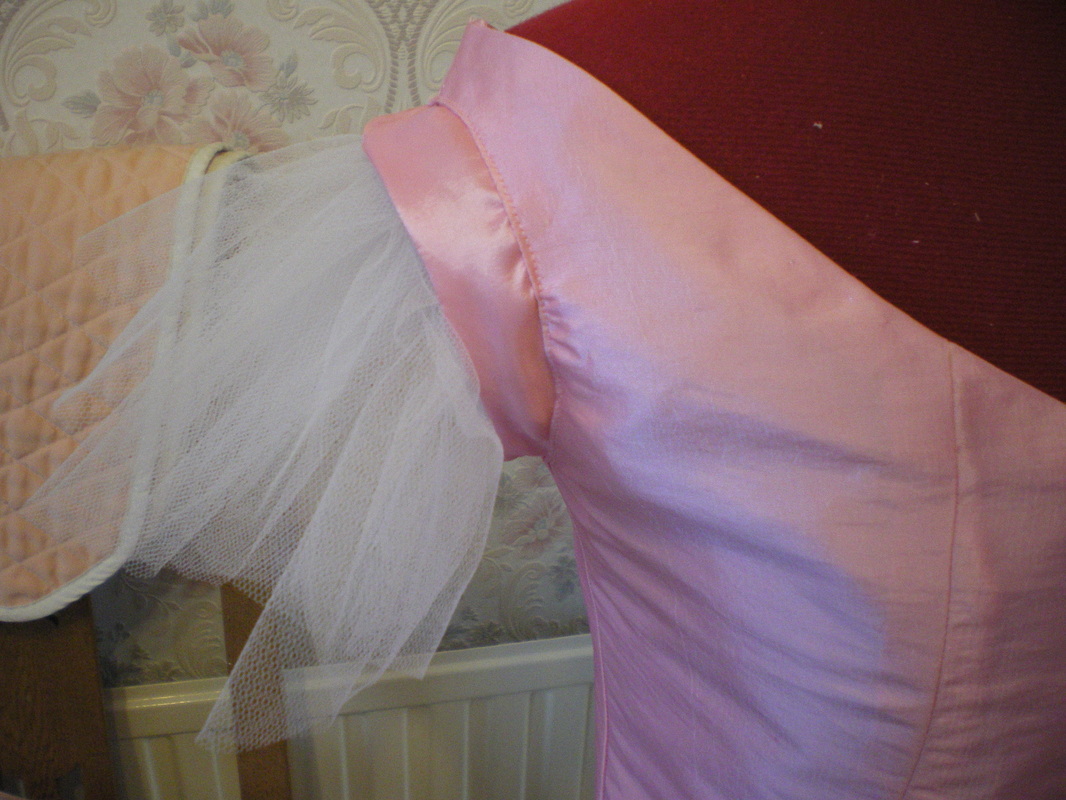
We attached a narrow cap sleeve and attached to layers of ruffled tulle underneath. This was cut level and the top layer made shorter in a 2 tier effect.
|
|
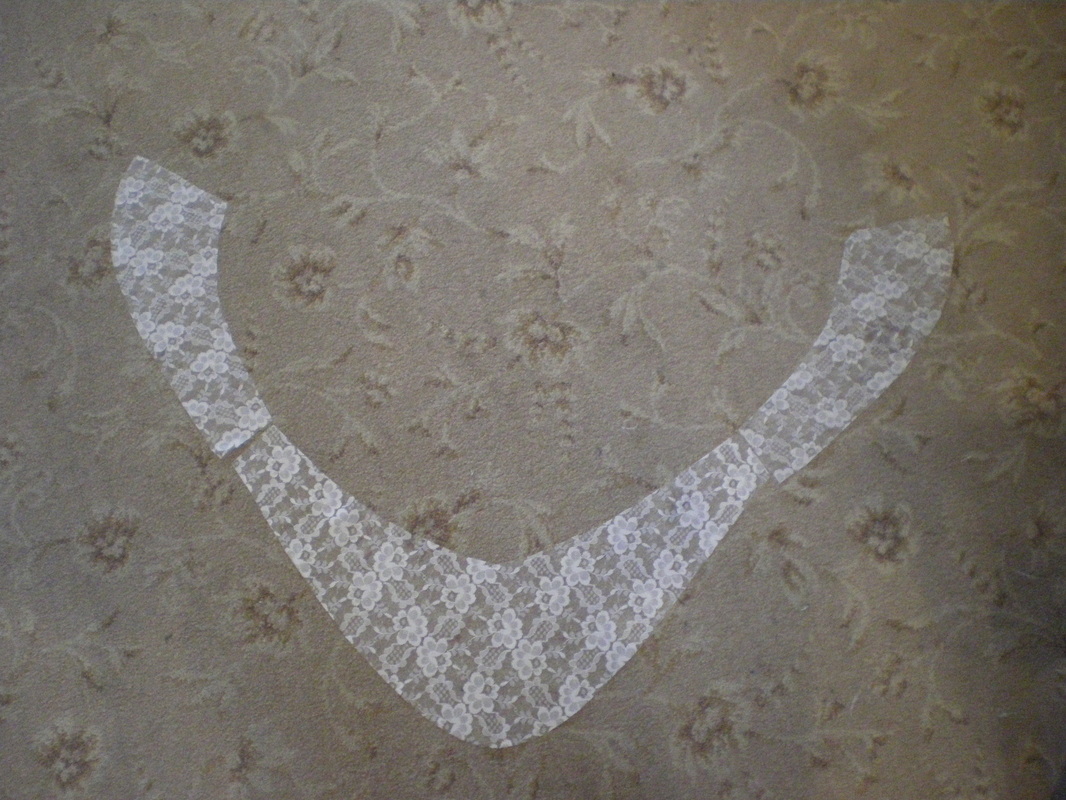
Following the contours of the bodice neck line, cut the lace so it is approximately 6" wide at the front, tapering off towards the shoulders then widens towards the back, join the pieces together at the shoulder. Cut another piece to match this one, but make it narrower at the front and back.
|
|
On the narrower lace, sew on the scalloped edging
|
|
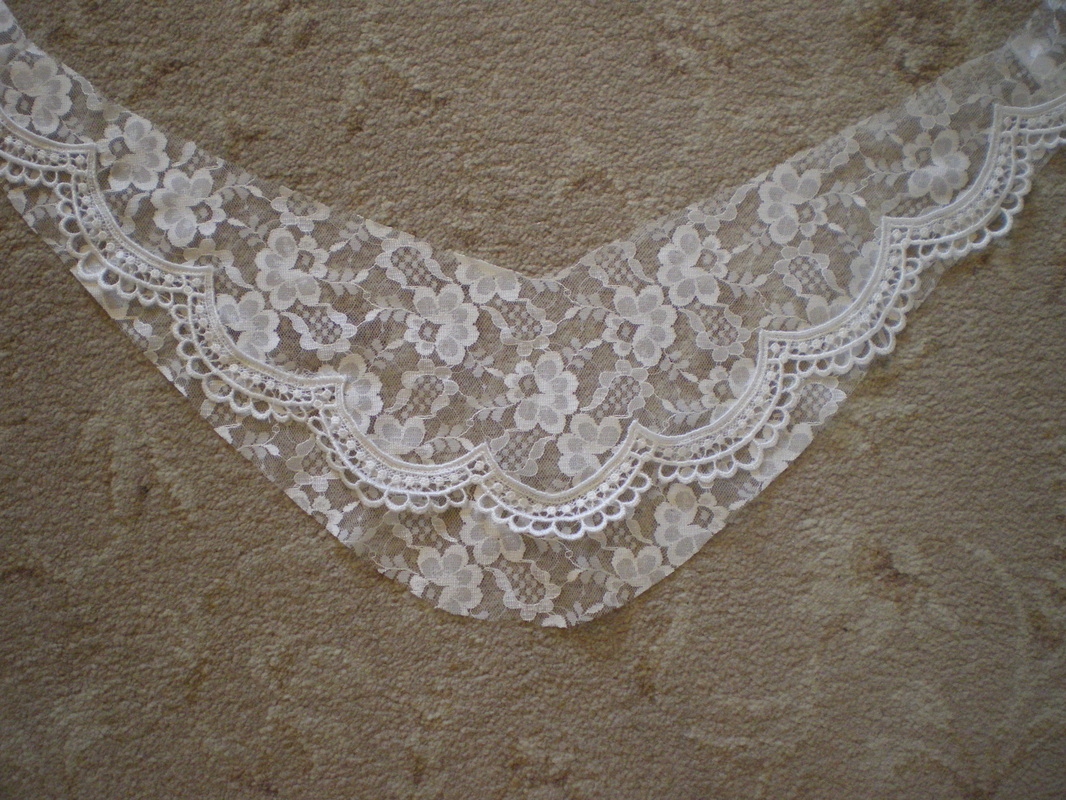
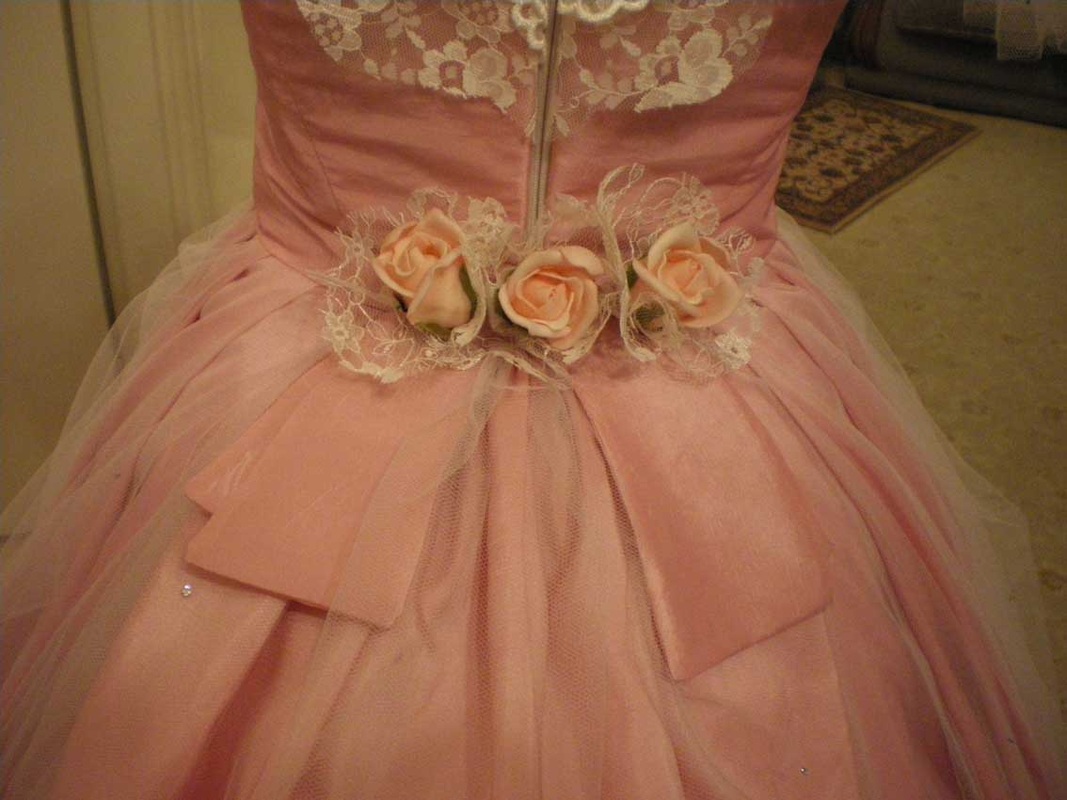
Scallop the lower lace and sew on the ribbon roses.
|

|
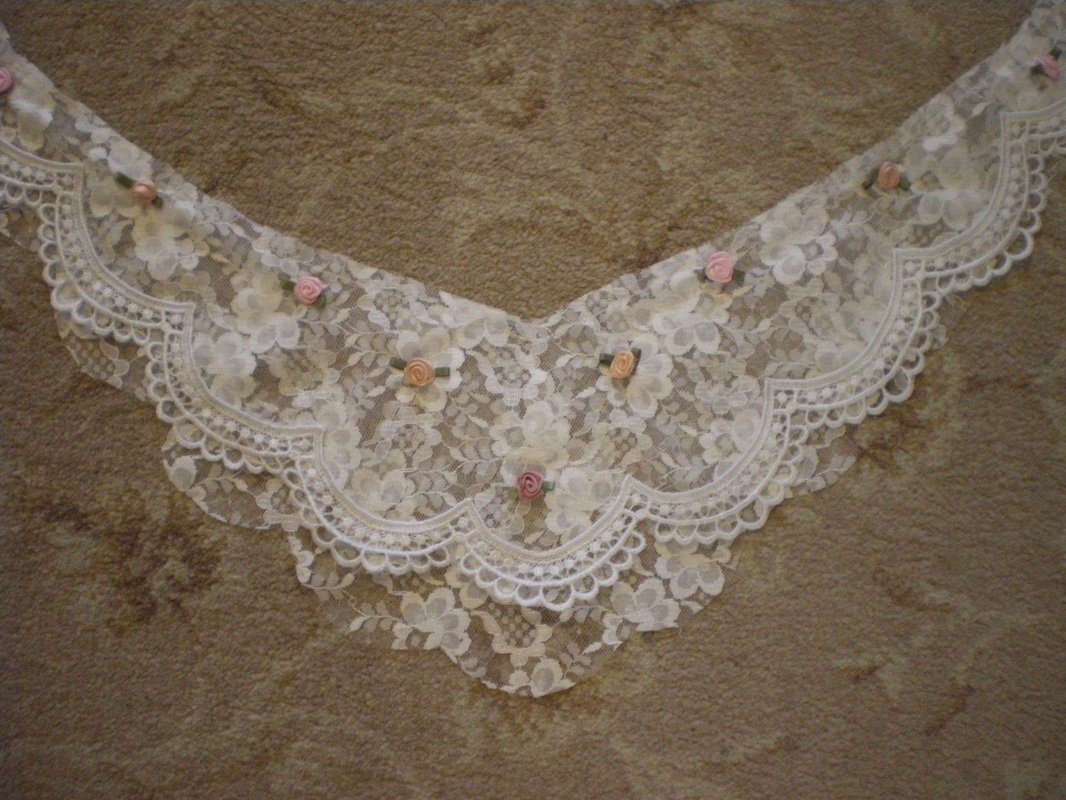
Sew to the edge of the bodice and insert the zip. I scattered a few small 2mm crystals on the top layer of the tulle sleeve. You will then need to pipe around the bottom of the corset (As per Ariel instructions)
This completes the bodice. |
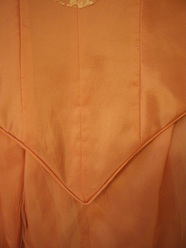
My apologies for the flash on the camera, it really is pink!!!!!!
The skirt.
Because of our hoop size, we added on a few inches to the pattern pieces.
|
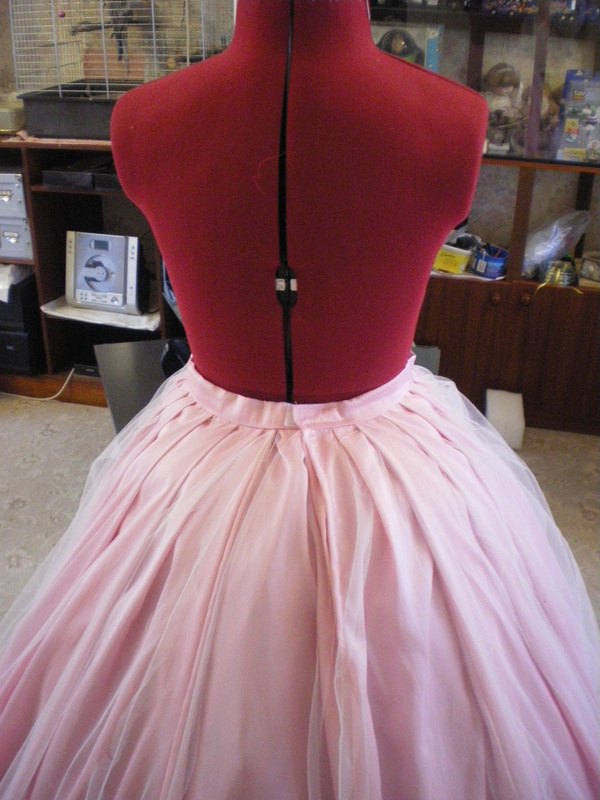
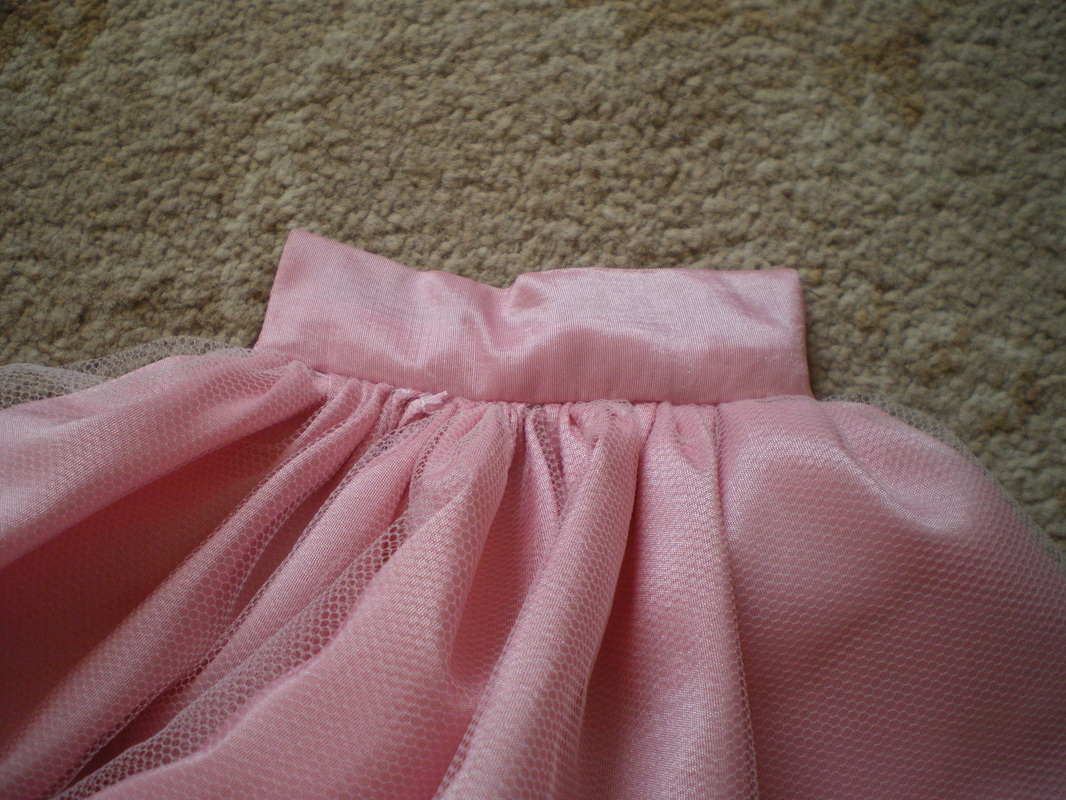
Make one skirt of fabric and one of tulle. When you have made the skirts, treat them as one and pleat them onto a narrow waistband. The pleats at the back of the skirt have a very heavy pleat. Leave an opening at the back seam of approximately 6-8" and sew a piece of velcro to fasten. The fabric skirt has a deep hem, the tulle skirt is overlocked.
|
|

|
Attach the hook side of a piece of velcro to a rose and sew the fabric side to the bodice to attach the rose.
I didn't follow the instructions for connecting the bodice to the skirt, I just sewed the two together.
I didn't follow the instructions for connecting the bodice to the skirt, I just sewed the two together.
This completes the dress:
Making the train:
I followed the instructions from the pattern, using one layer of fabric and one layer of tulle for each section.
Making the train:
I followed the instructions from the pattern, using one layer of fabric and one layer of tulle for each section.
|
I found the top band pattern much too wide for the dress so reduced this to 4" wide.
I made the middle section exactly the same as the pattern. |
|
For the bottom tier, we changed the curved edges to a sharp angle and made a deep facing piece for the bottom edge. This was turned under after being sewn on.
|
|
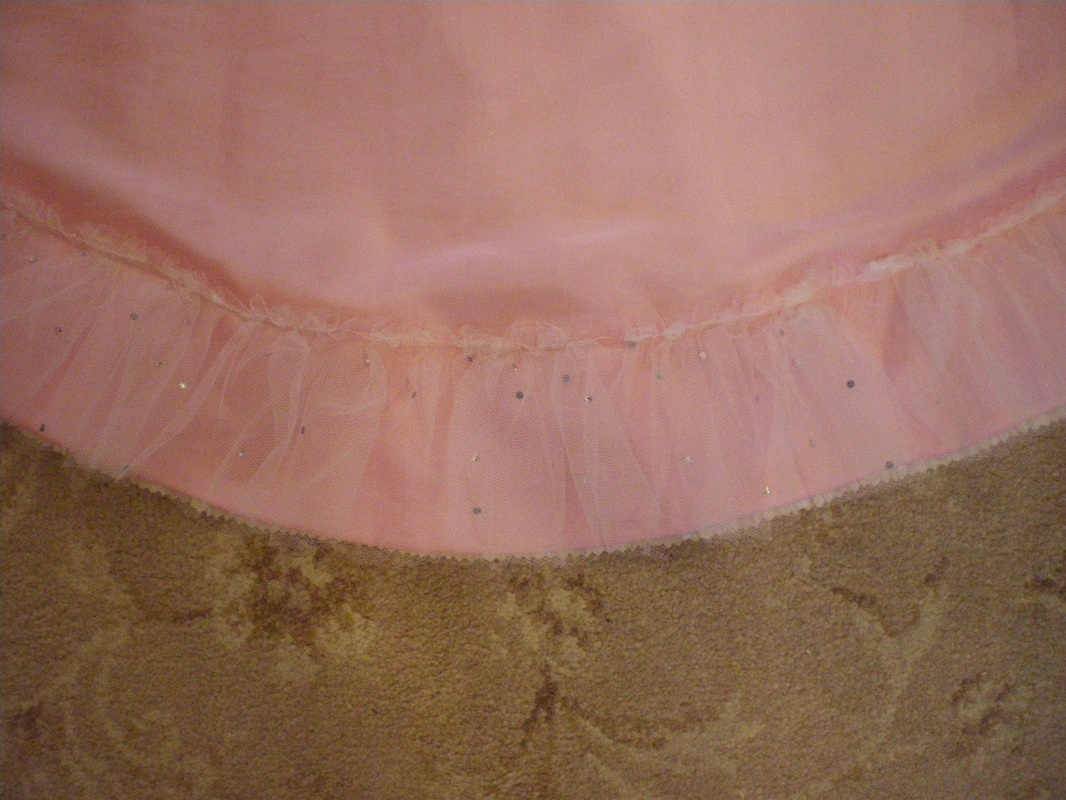
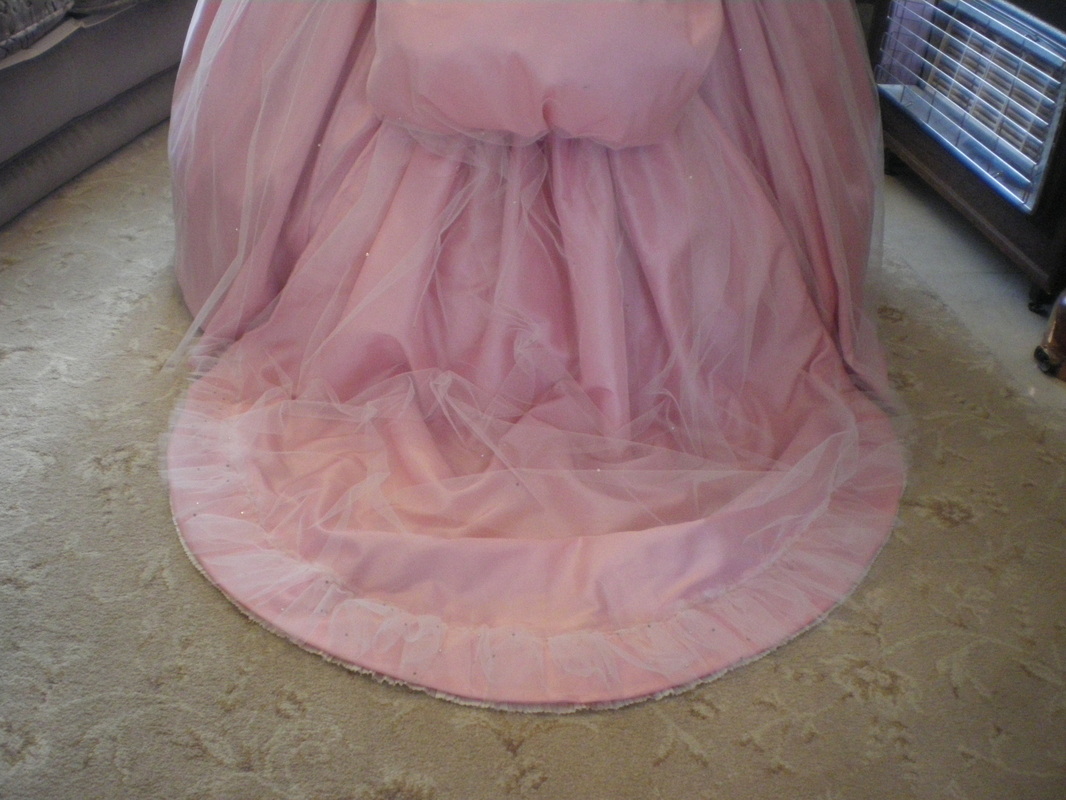
Ruffle a piece of tulle 3" wide and attach to the bottom of the train, scatter some small Swarovski crystals on the tulle.
|
|
On this type of train there would have been a dust cover underneath. So cut a 3" piece of cream crushed Taffeta and attach to the bottom of the train, cut a piece for the main train be careful NOT to stretch the material.
|
|
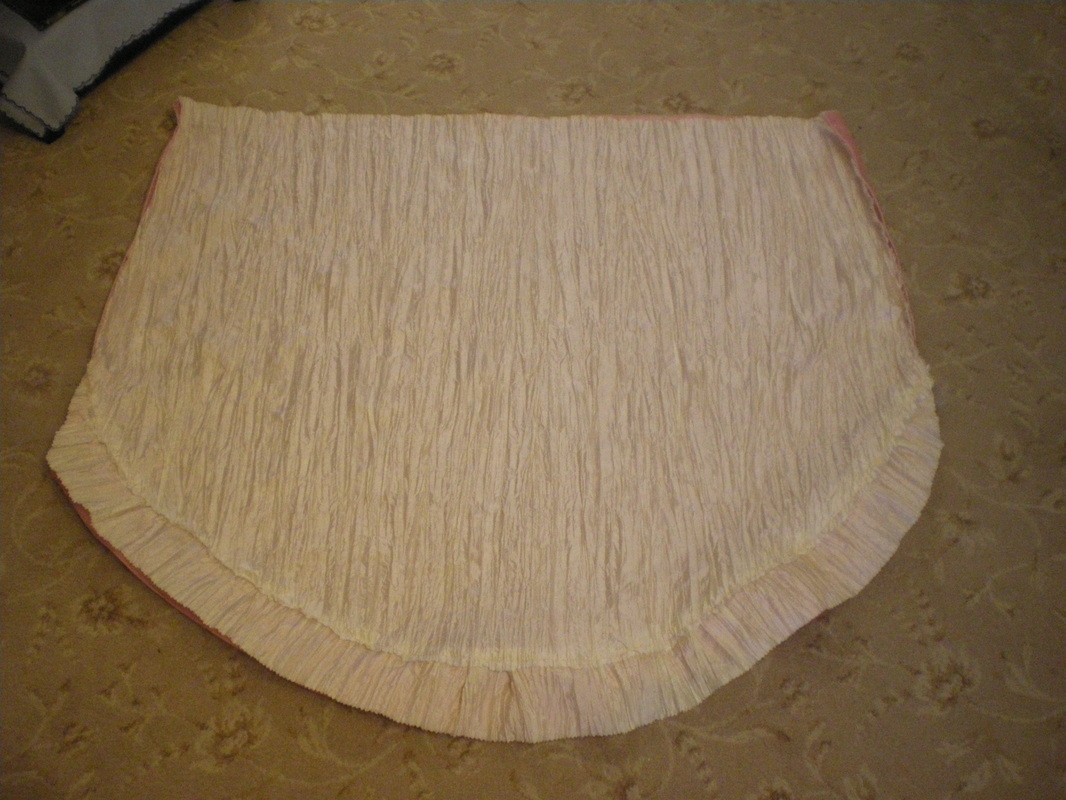
I made our tulle piece for the bottom train, wider and longer to create extra folds.
|
|
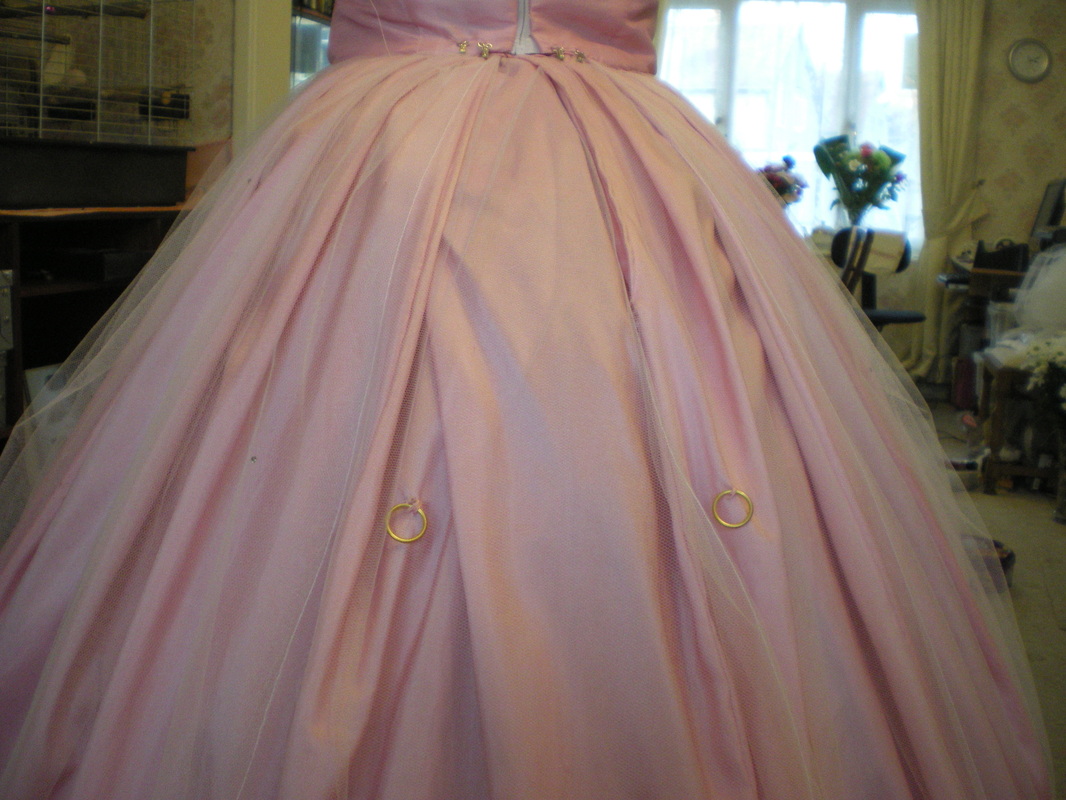
As per the pattern instructions, you will have sewn ribbons to the middle and bottom bands. I found the distance between the rings too great and it pulled the skirt back too much, so I reduced the width.
|
|
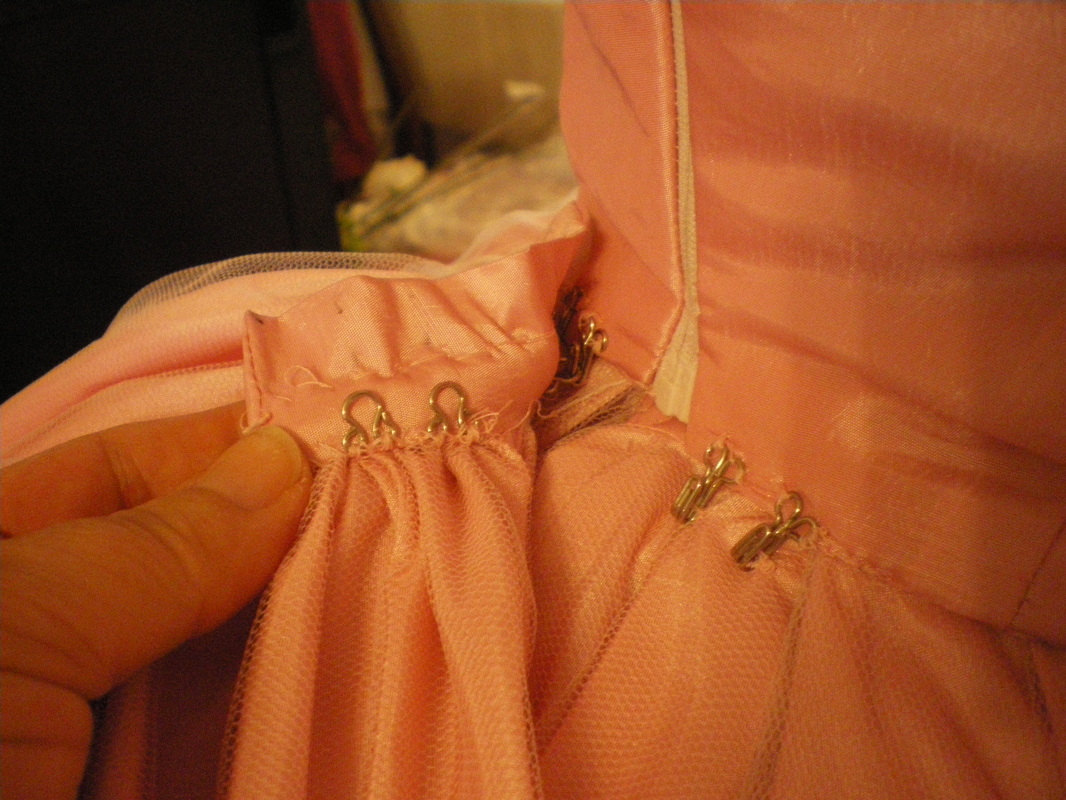
Attached 4 large hooks to the base of the bodice and 4 eyes to the top band.
|

|
Make bow tie shapes out of Taffeta and line them. Fold them over just off centre and attach to the base of the first band.
|
|
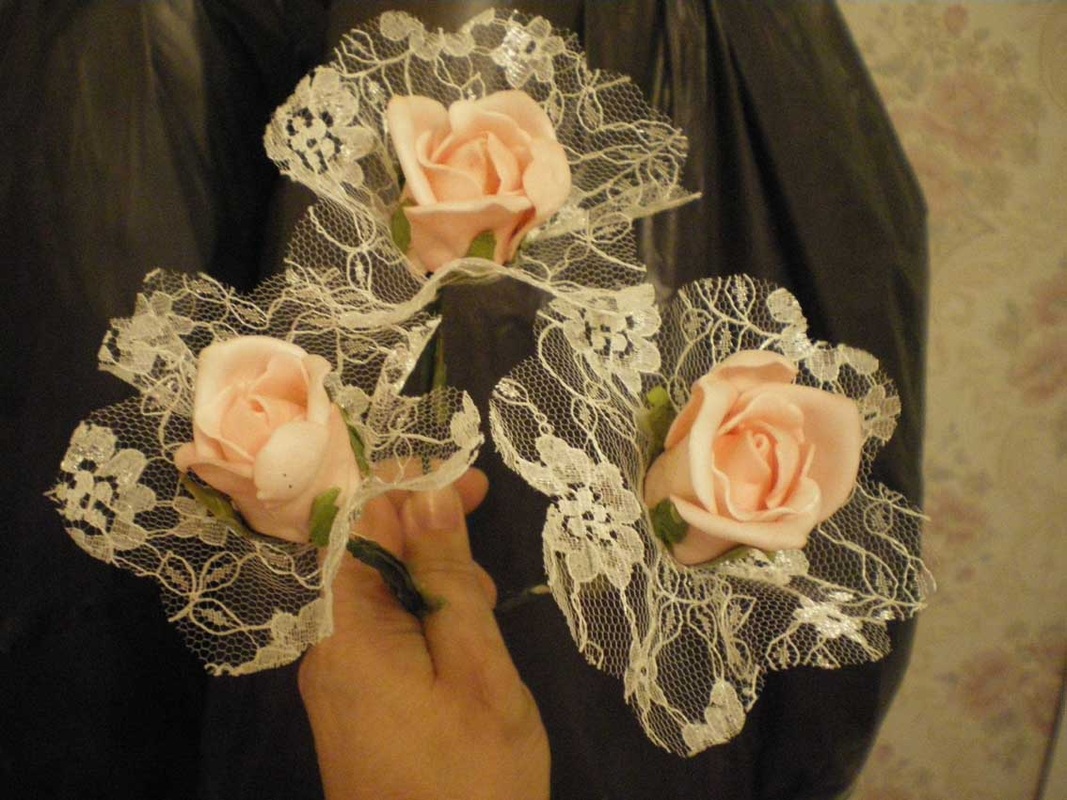
Cut out three circles of lace and scallop the edges, push small roses through the middle of each.
|
|
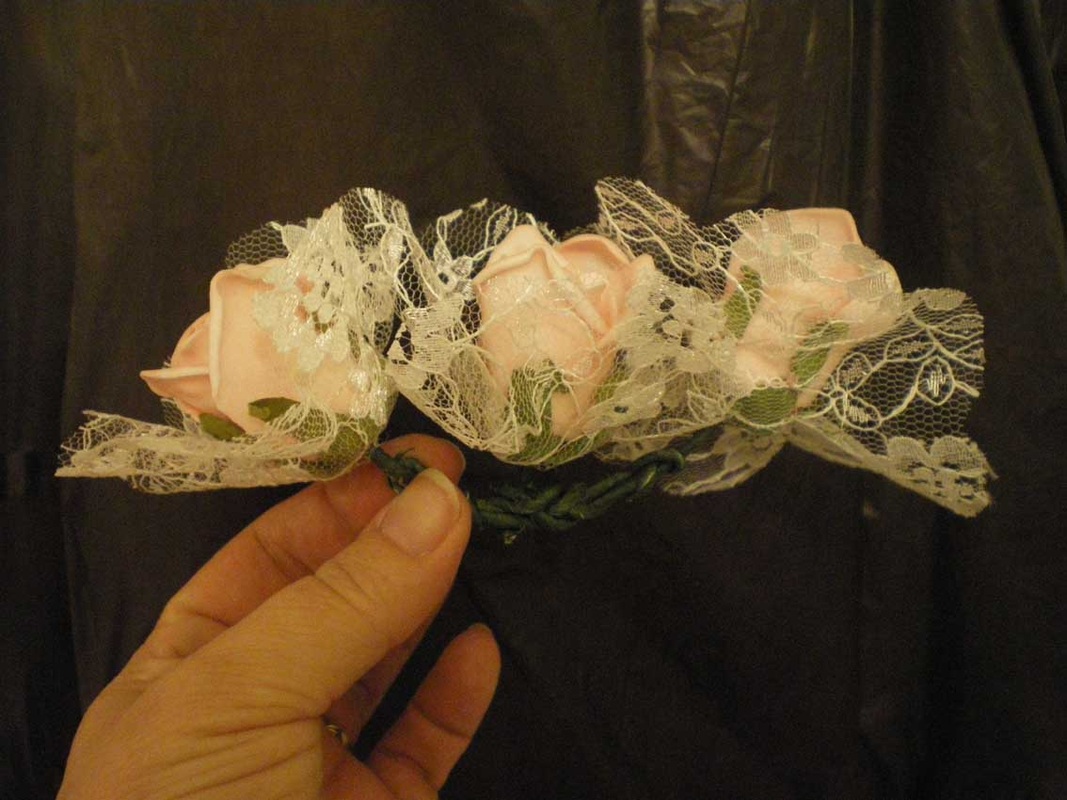
Wind the stems around each other to connect the roses in a line, cut off any excess wires.
|
|
Sew the roses to the top band.
|
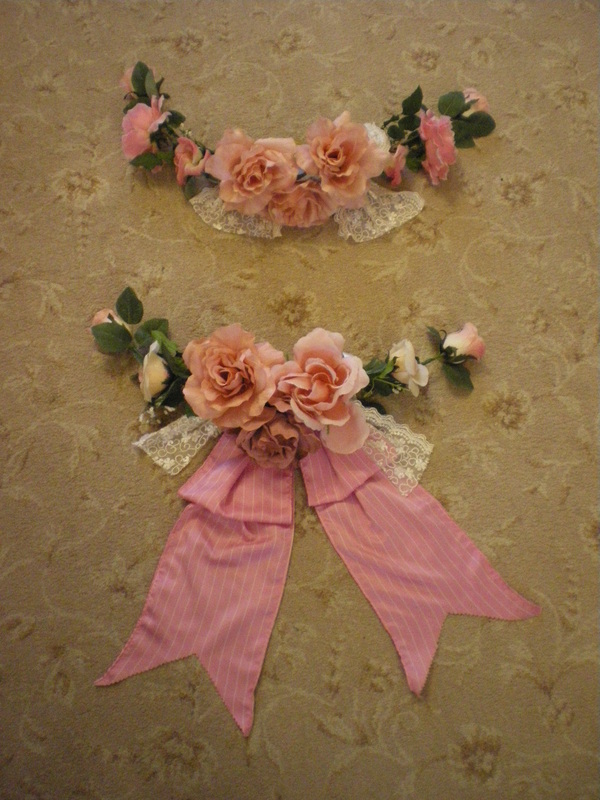
The final part to making the dress, are the bouquets. Please see my "video tutorial" on how these were made.
This completes the dress.
This completes the dress.
