For this costume, you will require intermediate to experienced expertise in sewing, corset making, embroidery and boning
Please watch the video in conjunction with the written
instructions for more detail
Difficulty
factor 10 - 10
Please be aware that we do not make costumes to sell or hire
PLEASE FEEL FREE TO USE ANY
OF THE IMAGES FOR YOUR
EMBROIDERY PROGRAM
YOU WILL NEED TO CHANGE THE COLOURS TO MATCH YOUR THREAD
ANNA
FROM
DISNEY'S FROZEN

Materials:
Blouse:
New Look 6732 (but any mandarin blouse pattern will be okay)
2.1/2 metres Turquoise blue cotton
Small amount of stiffener
Thread: Gutterman 715
1 metre velcro
2 buttons
Skirt:
Any half circle skirt pattern
3 metres Royal Blue Polyester heavy crepe
2 metres Hyacinth crepe from www.calicolaine.co.uk
2 metres of Blue cotton for Trim
Machine Embroidery threads:
Isacord 40 2300
Brildor 1128
Brildor 1331
Madeira 1623
6" invisible closed end zip
Cape:
2.1/2 metres Magenta Boiled 100% Wool
2.1/2 metres Deep red light weight crepe
2 metres wine coloured felt
2 metres purple tassles
1 metre Lilac/blue Marabou
Bodice:
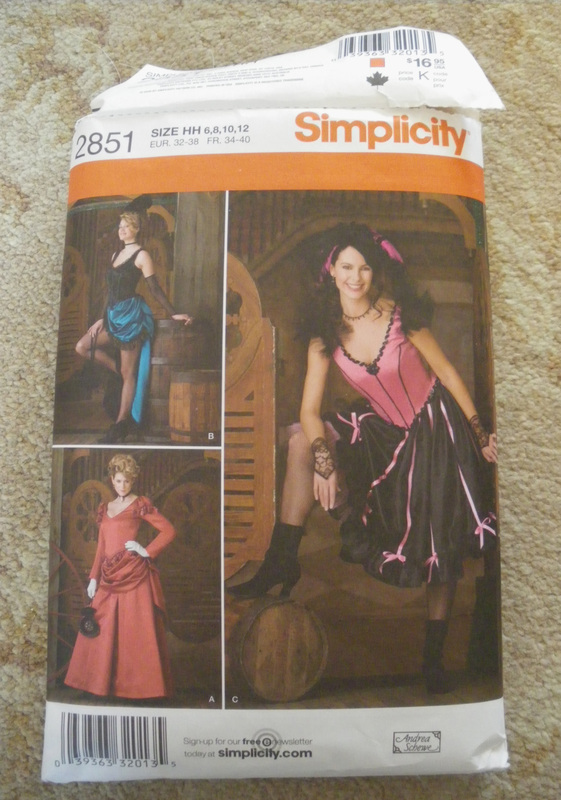
Simplicity 2851
1/2 metre Black cotton Velvet
1/2 metre coutil
1/2 metre lining of your choice
1/2 metre antique gold polyester or similar
Sufficient boning to make the bodice and end caps if necessary
Open ending zip
Hat:
Embroidery thread
Brildor 2205
Gutermann 3032
Small piece of Magenta Fabric
Red polyester lining
Small piece of wine coloured felt
Small piece of Lilac/Blue Marabou
Mittens:
Any mitten pattern
2 balls 4 ply "Truly Wool Rich" 563 Turquoise
2 balls 4 ply "Merino Blend" 926 Petrol
Knitting needles for your pattern as per the instructions
Making the Blouse:
Blouse:
New Look 6732 (but any mandarin blouse pattern will be okay)
2.1/2 metres Turquoise blue cotton
Small amount of stiffener
Thread: Gutterman 715
1 metre velcro
2 buttons
Skirt:
Any half circle skirt pattern
3 metres Royal Blue Polyester heavy crepe
2 metres Hyacinth crepe from www.calicolaine.co.uk
2 metres of Blue cotton for Trim
Machine Embroidery threads:
Isacord 40 2300
Brildor 1128
Brildor 1331
Madeira 1623
6" invisible closed end zip
Cape:
2.1/2 metres Magenta Boiled 100% Wool
2.1/2 metres Deep red light weight crepe
2 metres wine coloured felt
2 metres purple tassles
1 metre Lilac/blue Marabou
Bodice:
Simplicity 2851
1/2 metre Black cotton Velvet
1/2 metre coutil
1/2 metre lining of your choice
1/2 metre antique gold polyester or similar
Sufficient boning to make the bodice and end caps if necessary
Open ending zip
Hat:
Embroidery thread
Brildor 2205
Gutermann 3032
Small piece of Magenta Fabric
Red polyester lining
Small piece of wine coloured felt
Small piece of Lilac/Blue Marabou
Mittens:
Any mitten pattern
2 balls 4 ply "Truly Wool Rich" 563 Turquoise
2 balls 4 ply "Merino Blend" 926 Petrol
Knitting needles for your pattern as per the instructions
Making the Blouse:
|
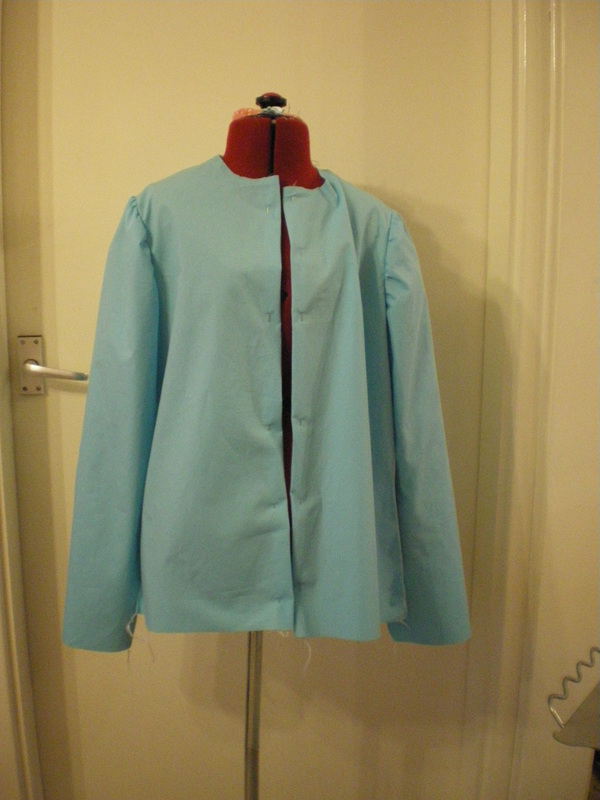
Make up your choice of blouse pattern. As there is no indication of the type of fastening that was used, I decided to put in a velcro fastening all the way down the front.
Before you put on the collar and cuffs, you will need to embroider your pattern. |
|
At the bottom of each cuff, leave a 2" (5cm) gap
|
|
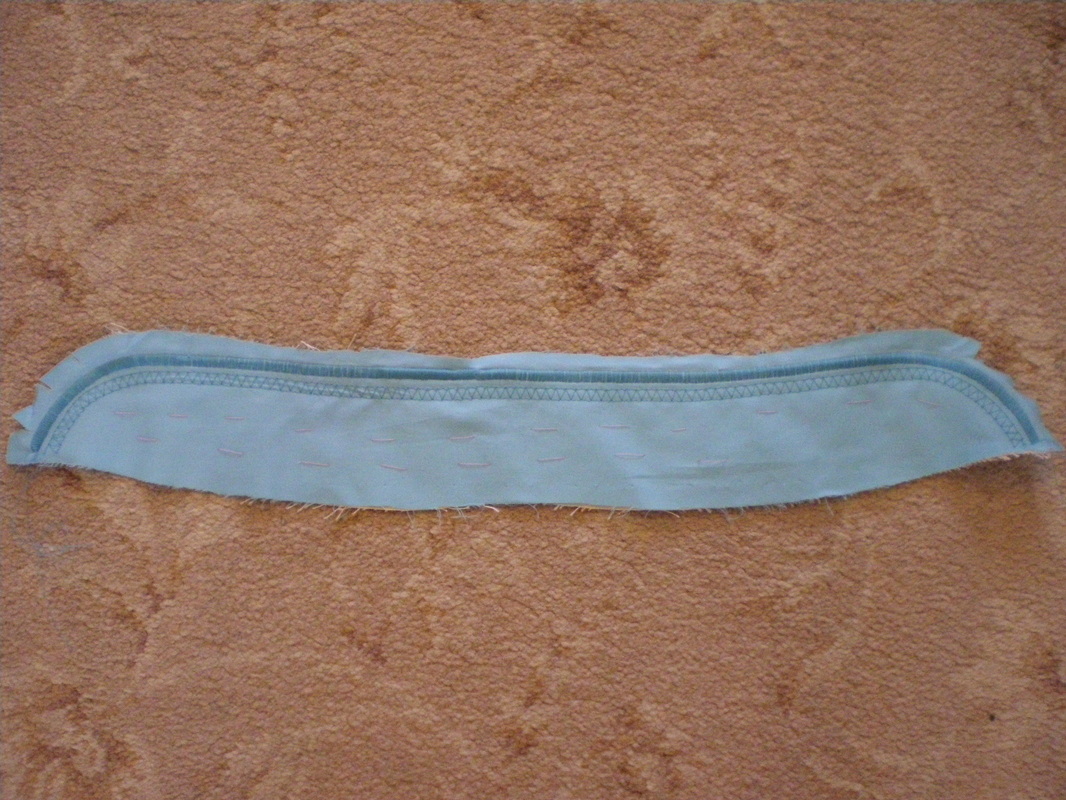
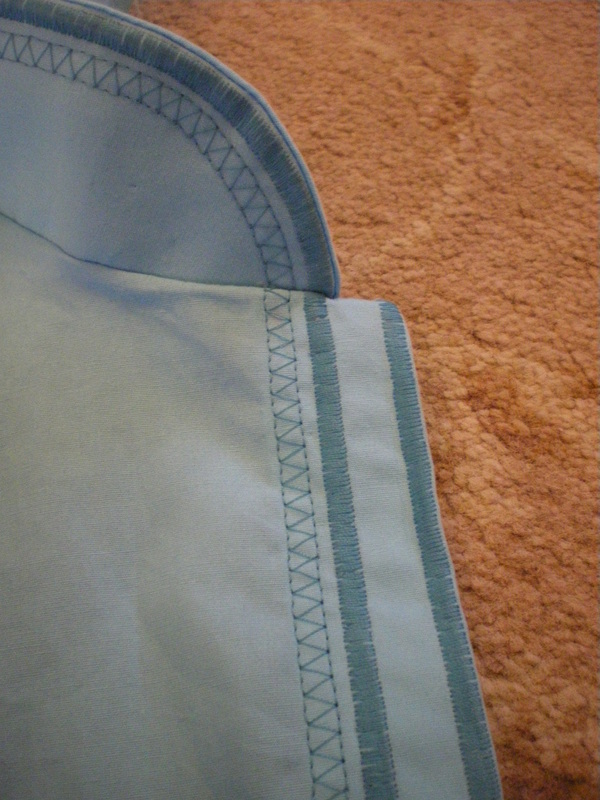
The patterns needed are on the sewing machine, one line of satin stitch and a triangular design. Instructions for the settings are on the video. Make up the collar with a stiffener inside. The seam line of the collar is right up against the satin stitch.
|
|
Before putting the collar on permanently, trial fit it to the blouse and mark where your designs will start on the blouse. (note: there is also a satin stitch line that needs to be sewn on the far right) There was no need to sew the pattern all the way down the front of the blouse as it will not be seen.
Remove the collar. and sew your pattern on the blouse. |
|

|
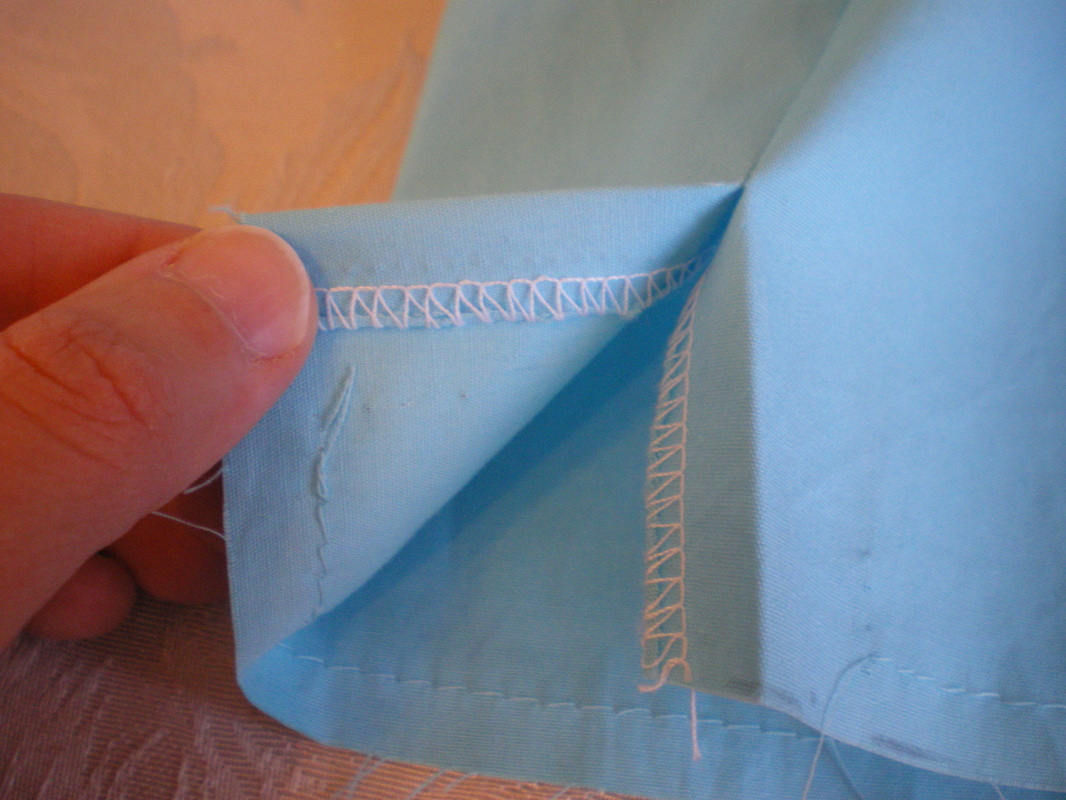
If you watch our video, you will see that a piece of velcro has been sewn on an extension piece for the left side of the blouse. You will also note, that the right picture only shows the one line of machine sewing, because, when the blouse is closed, the satin stitch on the far right will line up with the collar satin stitch on the left. Now sew on the collar permanently.
|
|
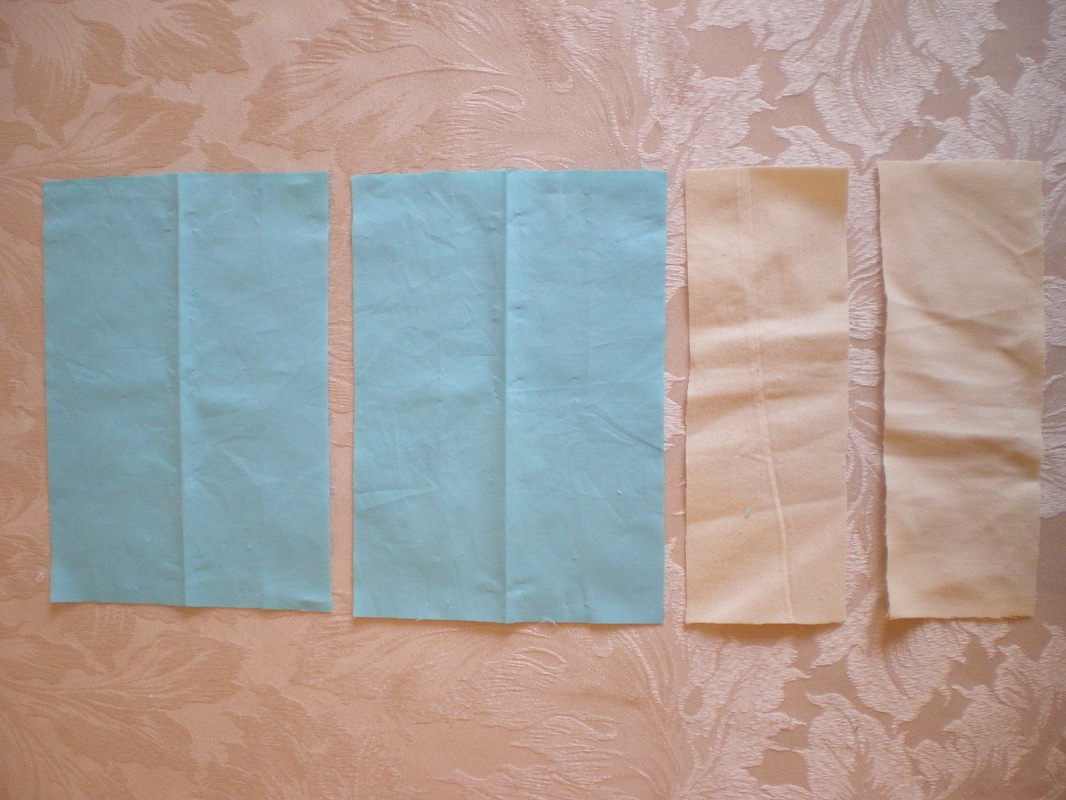
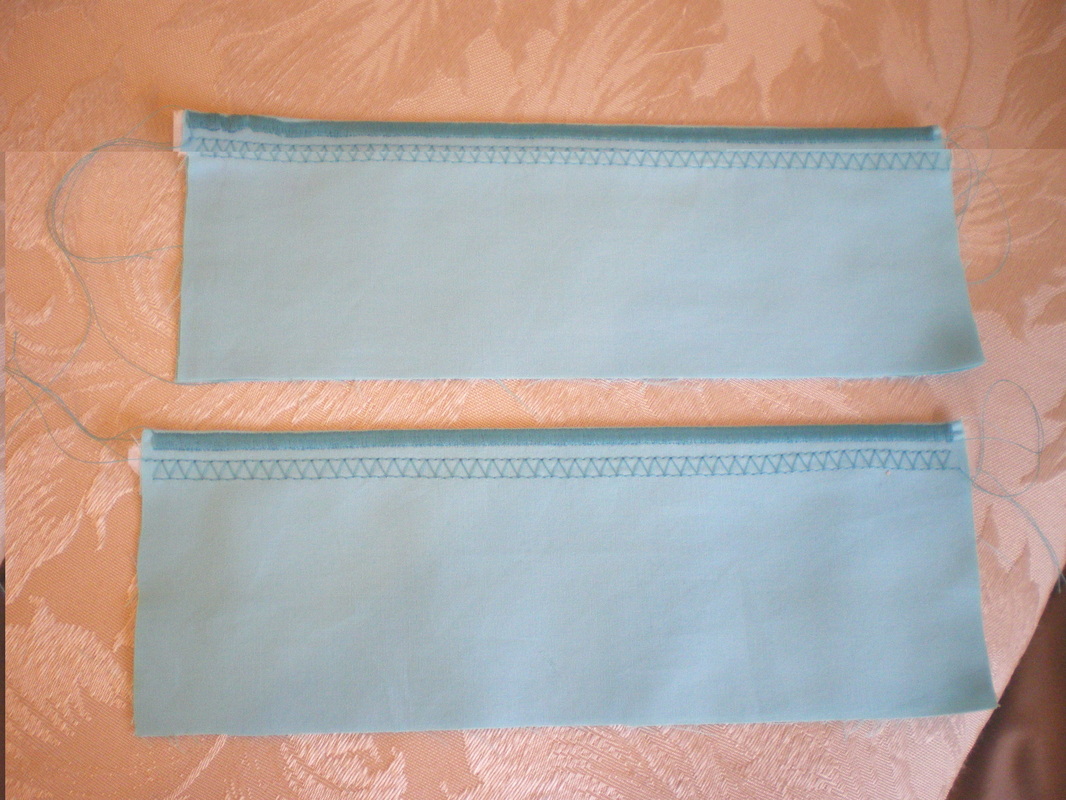
Each cuff is approximately 4" (10cm) wide, fold in half and iron. Also cut a piece of stiffener for each cuff. With the fabric opened out, stitch your satin stitch pattern right on the fold. After sewing your lines, reverse your fold and sew a seam down the short sides, turn the cuffs the right way out and iron again.
|
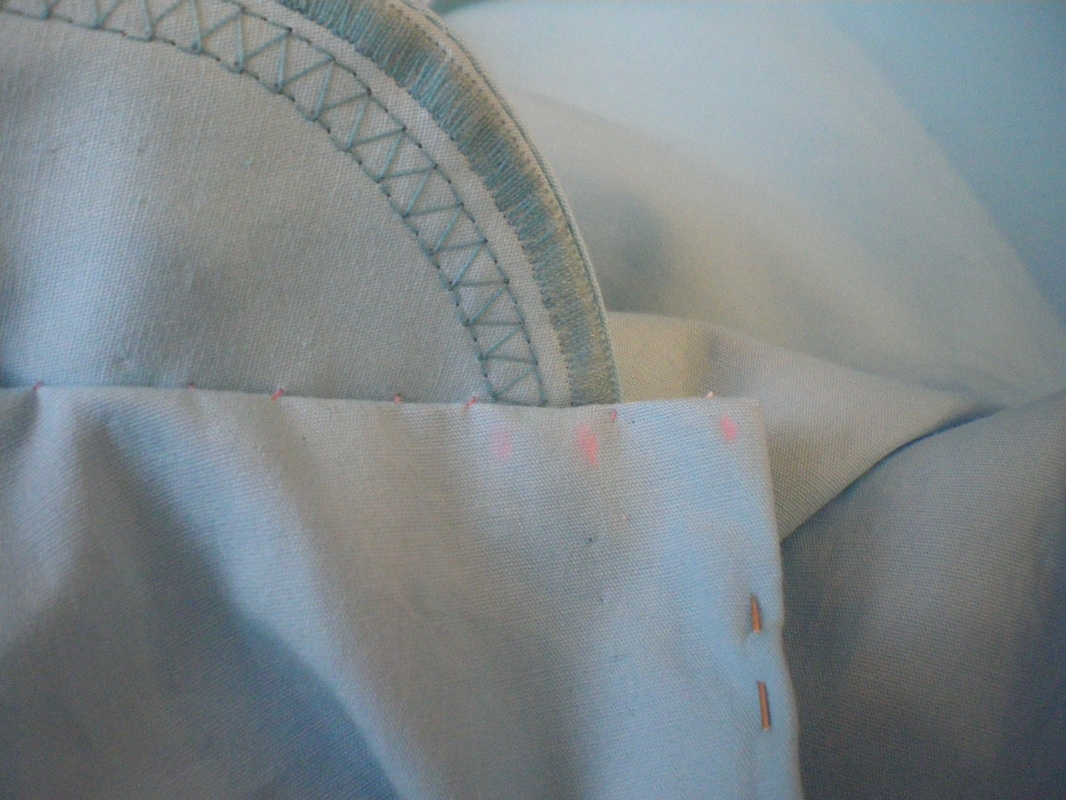
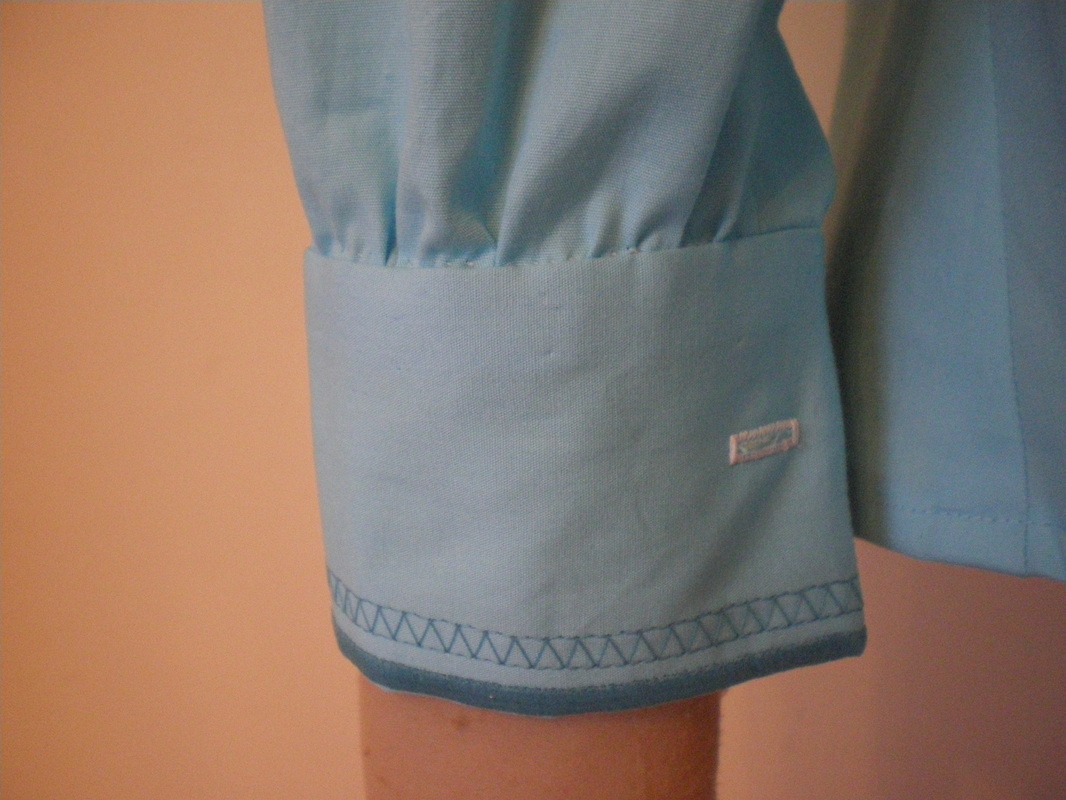
Attach your cuff to the sleeve and make a button hole. Then sew on your button. Turn up the hem on the blouse.
|

This completes the Blouse.
To make the Skirt:
To make the Skirt:
|
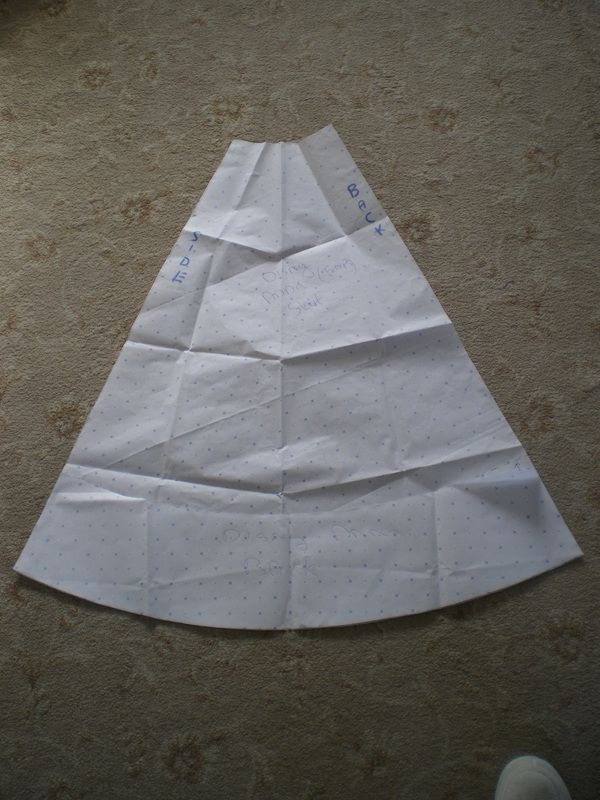
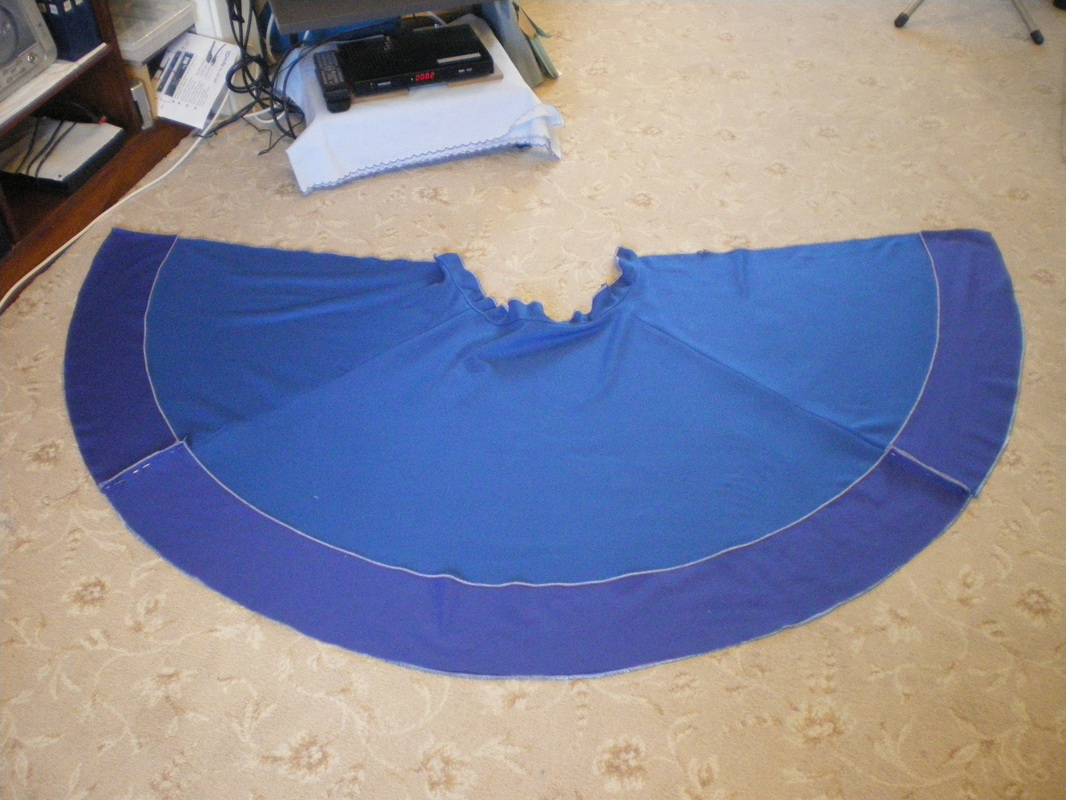
I used my own pattern for the skirt, but you can use any 1/2 circle skirt pattern. You can either make it in three pieces, or if your fabric is wide enough, just one half circle. You will also need an internal yoke at the waist, or if you prefer, you can make a small waistband.
To make a yoke, use your skirt pattern. Instructions are on the video.
|
|
Sew your yolk onto the skirt and clip the curve.
|

|
With the seams pointing up towards the yoke, top stitch near to the seam edge.
|
|
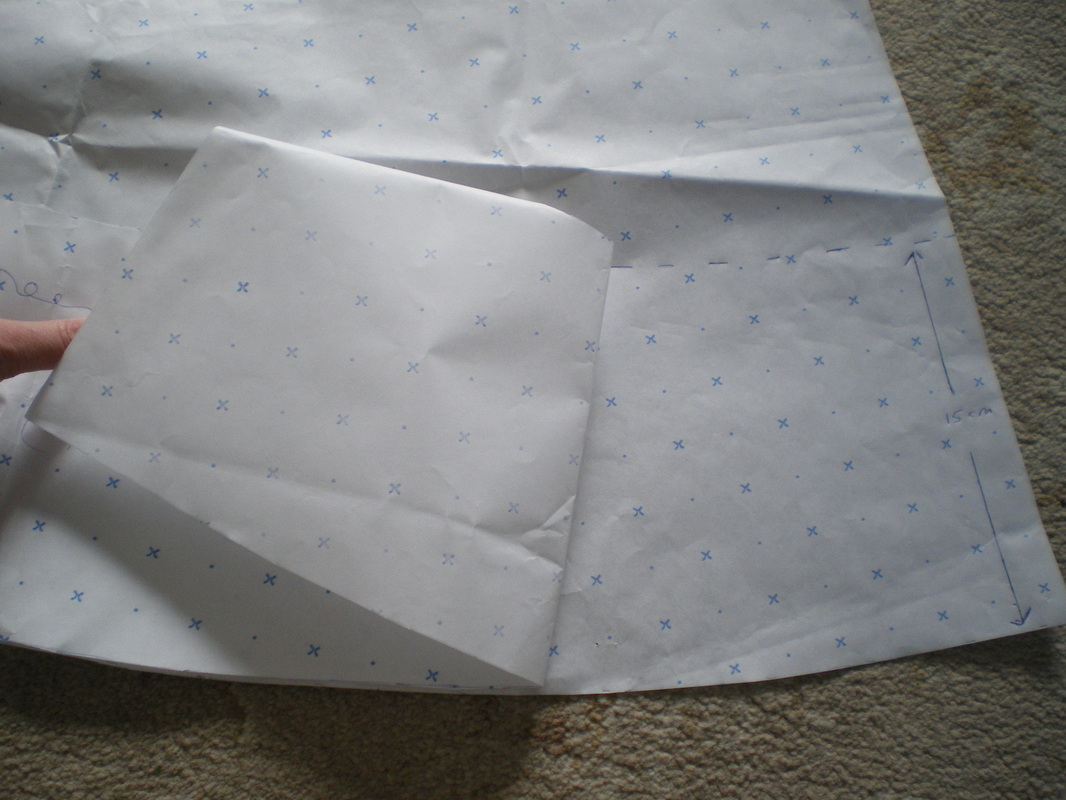
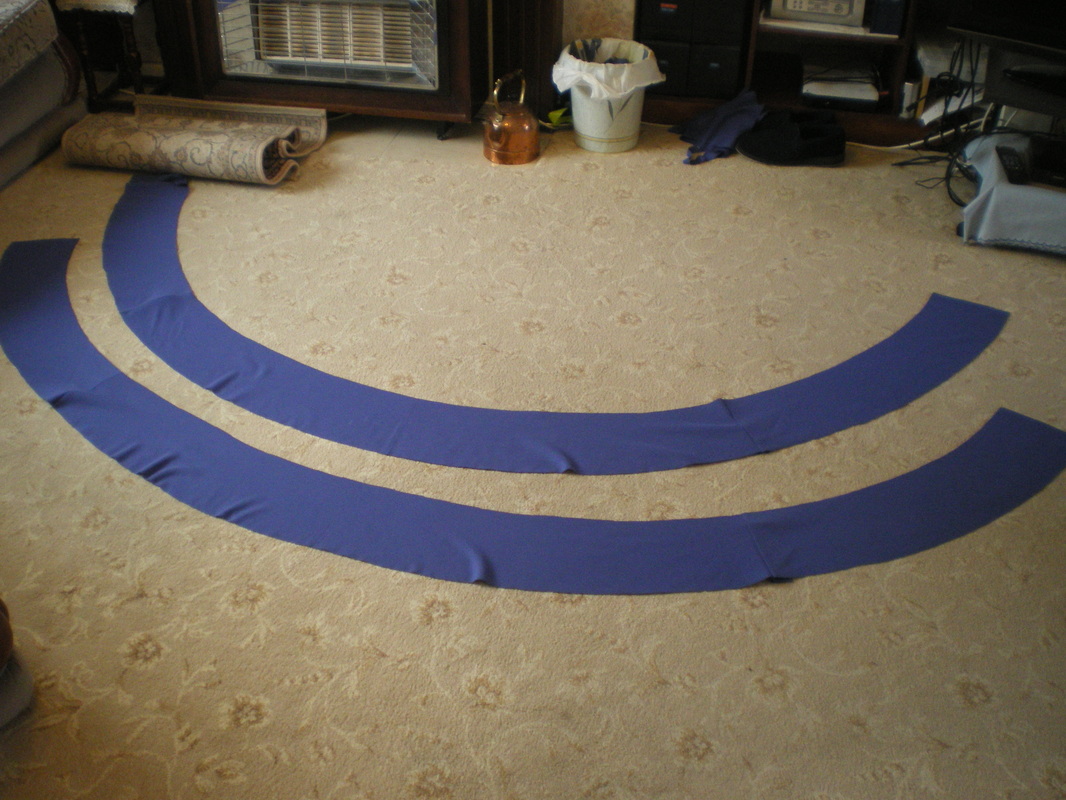
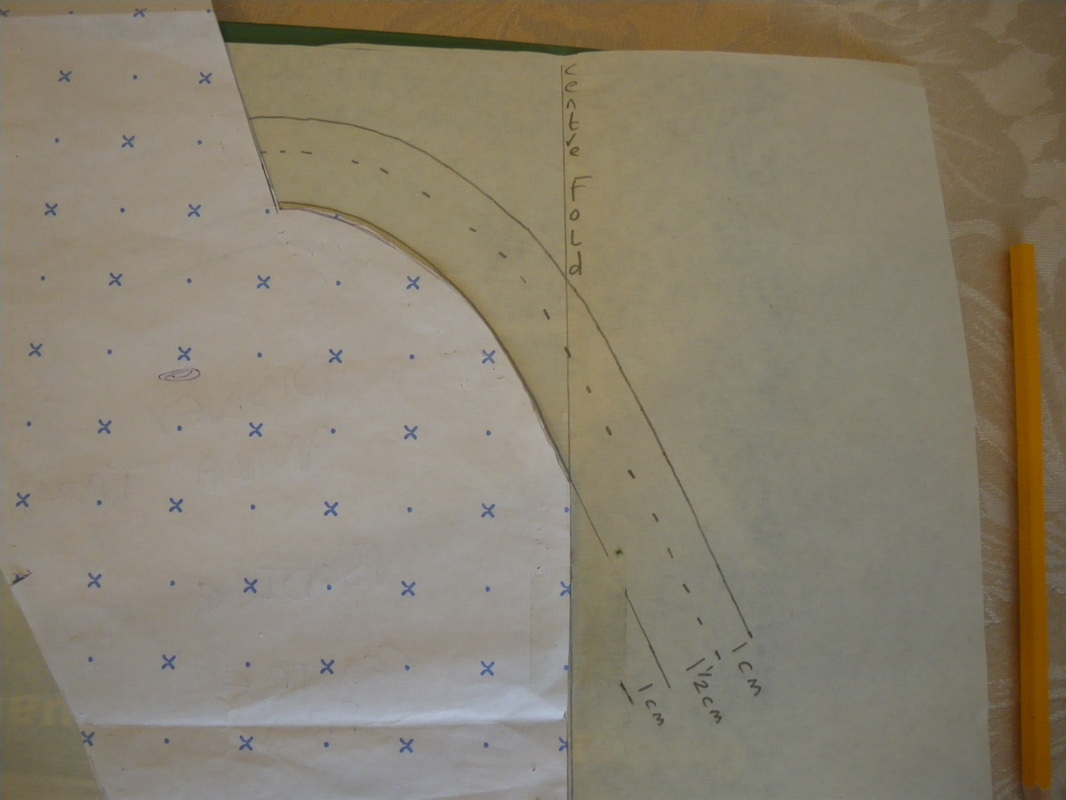
For the corresponding trim, make a pattern from the bottom of the skirt approximately 15cm wide. If your fabric is wide enough, you should be able to make a complete half circle, but if not, make three sections the same as the skirt. Use the blue cotton for this liner.
If you have any side seams, sew them up. Pin the extension to the bottom of the skirt on the right side, but do not sew on just yet.. |
|
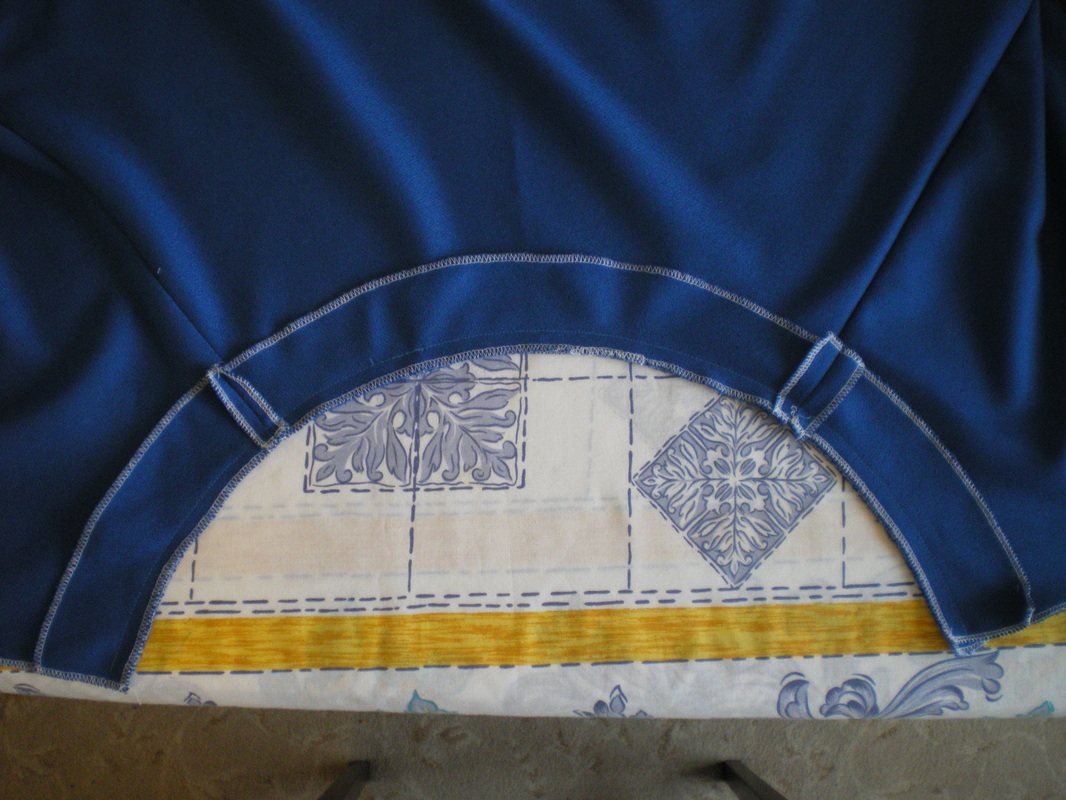
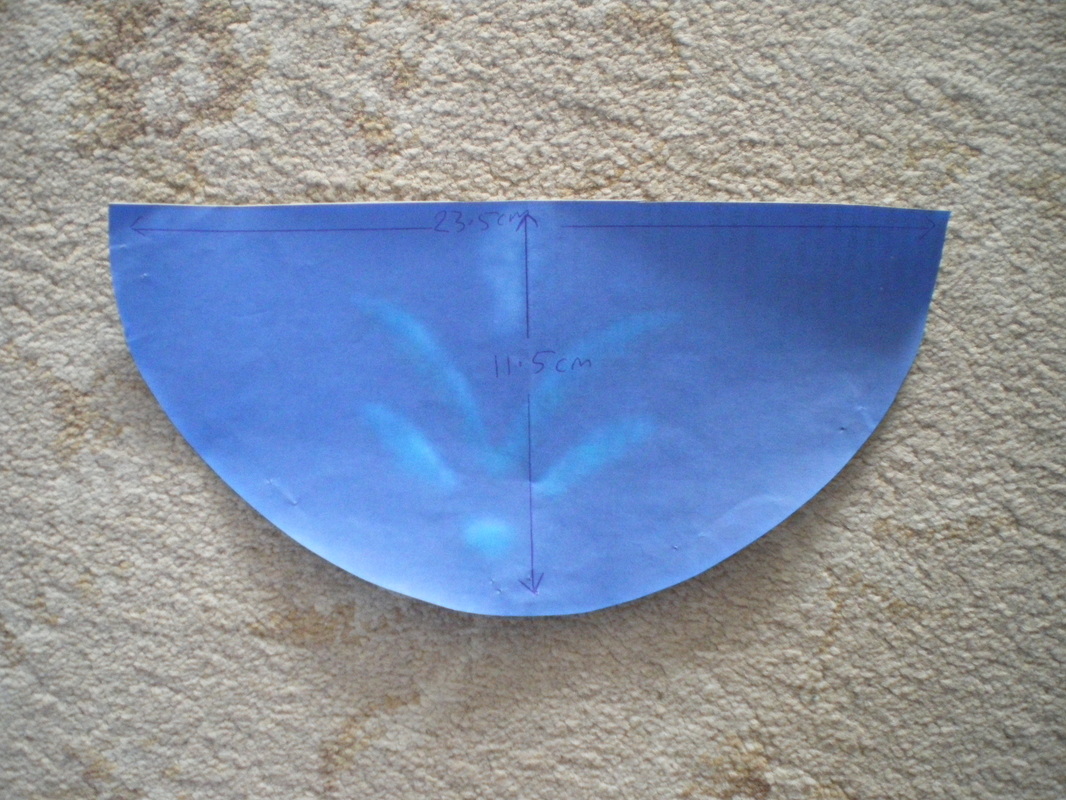
Make a scallop template. Ours is approximately 21cms wide x 10cm diameter. Try and measure it so that the scallops line up with the seams and you don't have any excess scallops at the back opening. They need to meet as a complete scallop (not cut in half)
|
|

|
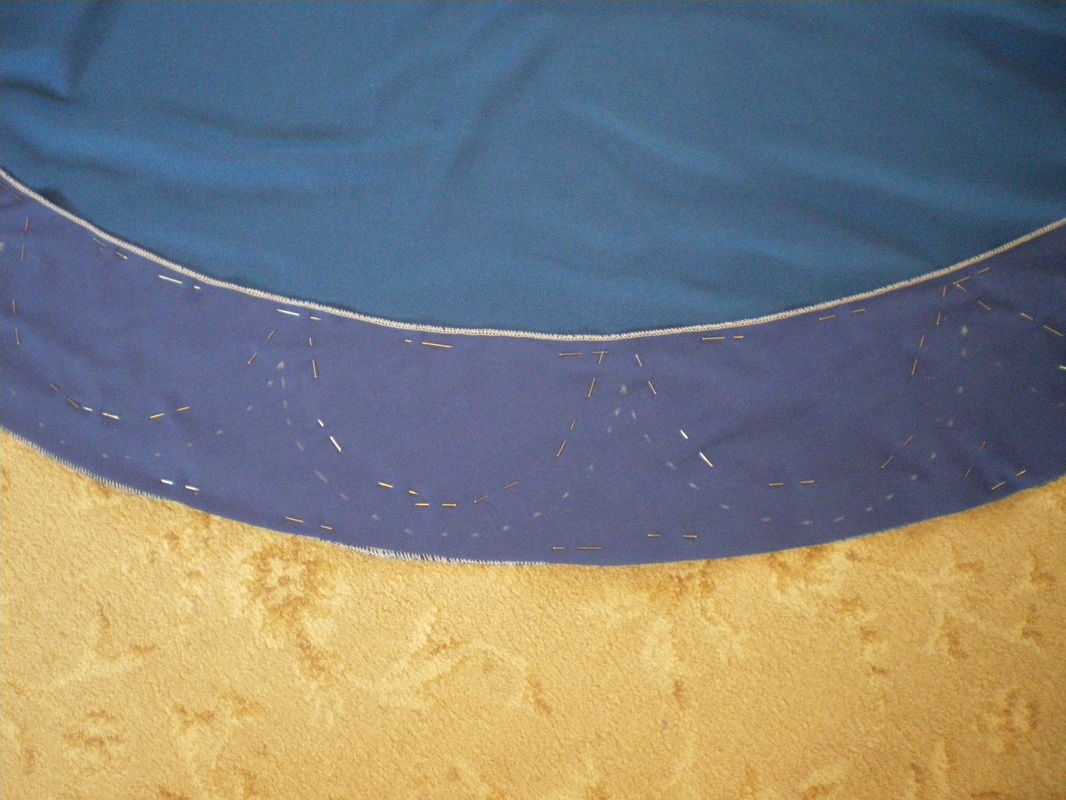
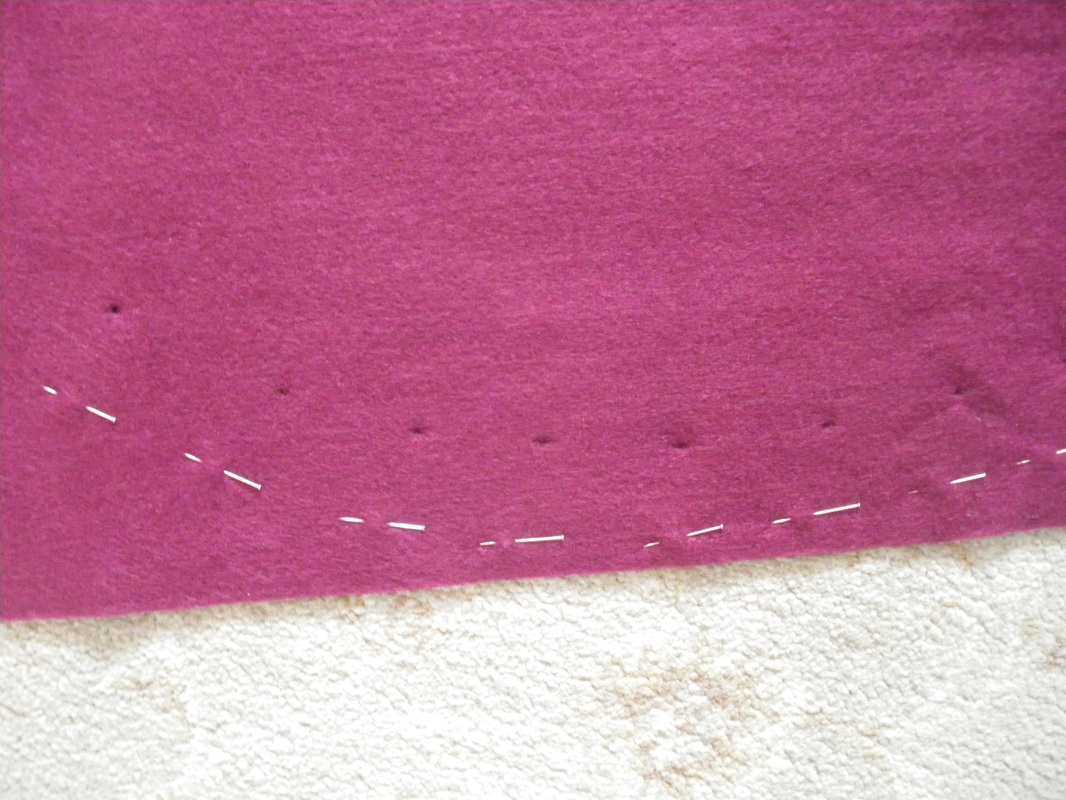
Draw around your scallop template with tailors chalk or a marker, then sew on the line, joining the two pieces together. The scallop needs to be approximately 2cms from the bottom and make sure you have about 5cm at the top of each scallop.
|
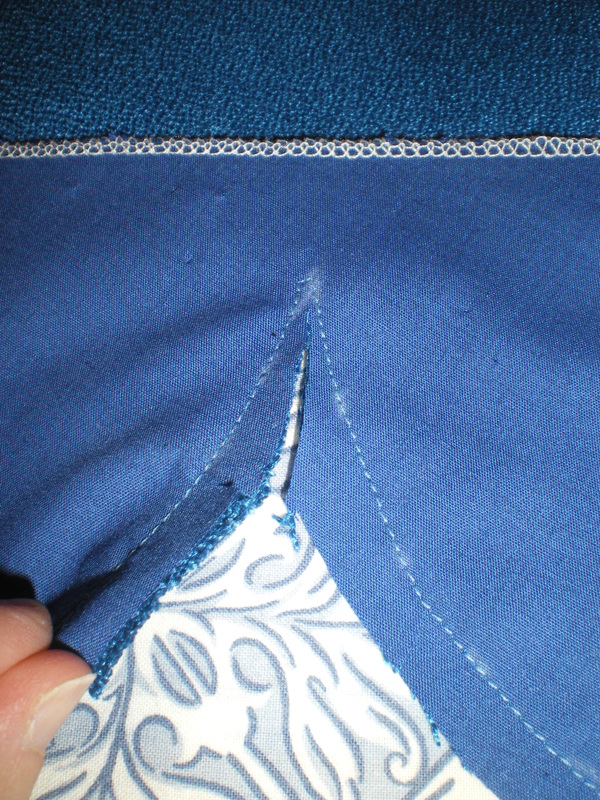
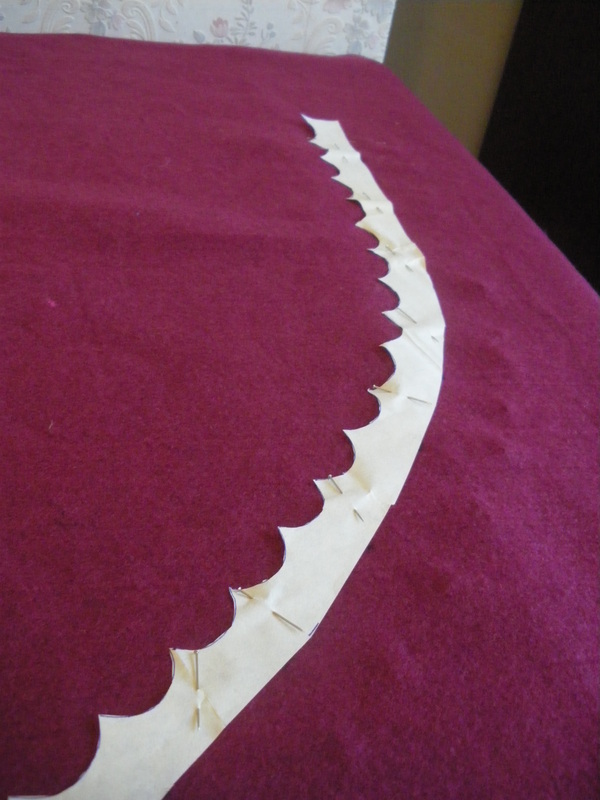
Trim around the scallops leaving about 1cm excess. Snip the curves and at the top of each scallop, cut upwards towards the stitch line. Turn all the scallops the right way out and iron.
|
|
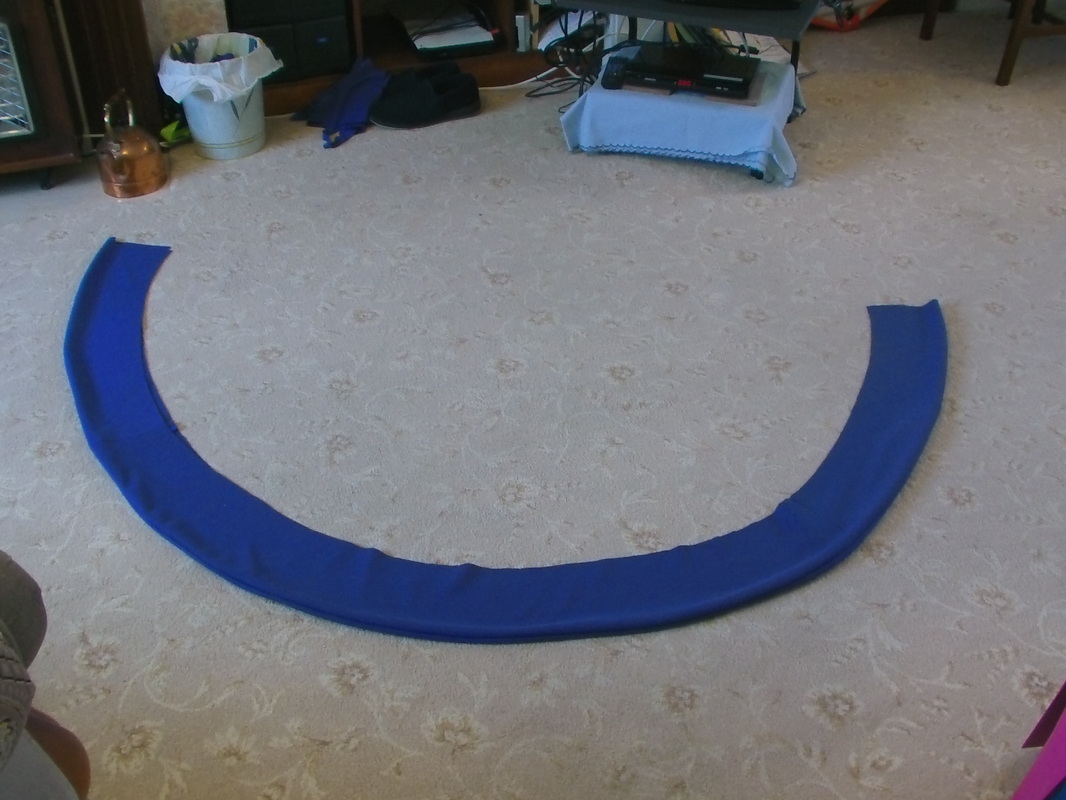
Using the Hyacinth crepe, cut another half circle from the trim pattern you just used. This will need to be lined, you can either use more cotton fabric, or in this case, I had plenty of Hyacinth crepe so I cut two identical pieces.
|
|

|
Sew the two half circles together using the outside edge of the curve. Turn the right way out and iron.
Place the circle underneath your main skirt, leaving about 2cm below each scallop. Hand sew around each of the scallops to the main dress.
Place the circle underneath your main skirt, leaving about 2cm below each scallop. Hand sew around each of the scallops to the main dress.
|
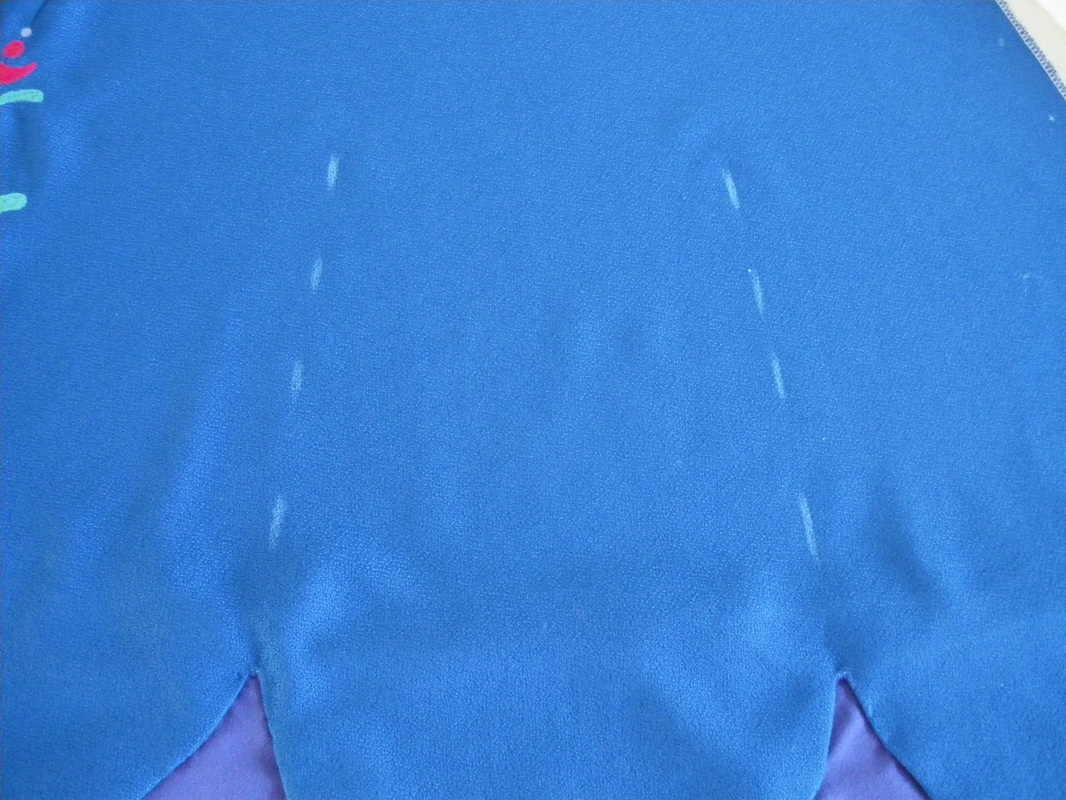
Using tailors chalk, mark vertical lines to correspond with the waist.
This is where a knowledge of embroidery will be useful, or you have an embroidery machine or know someone who does. |

|
The only problem that I had was embroidering on the seam.
|
|
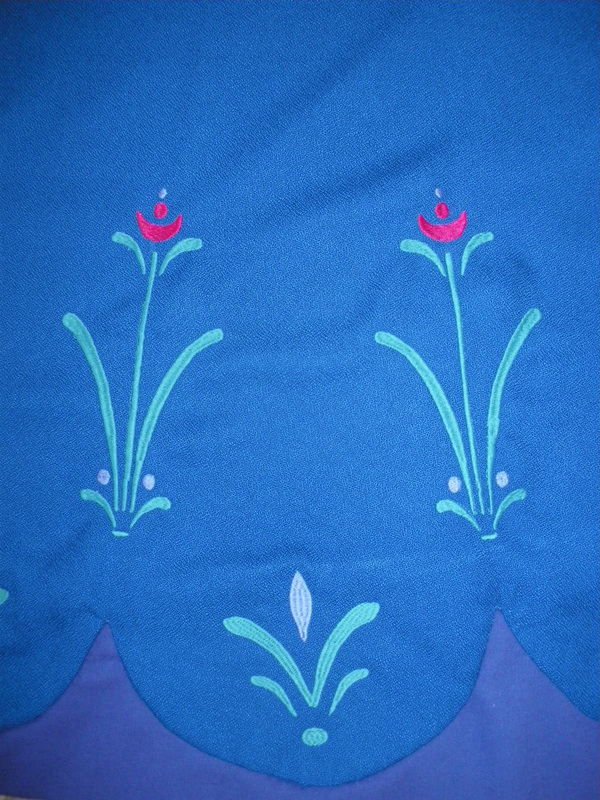
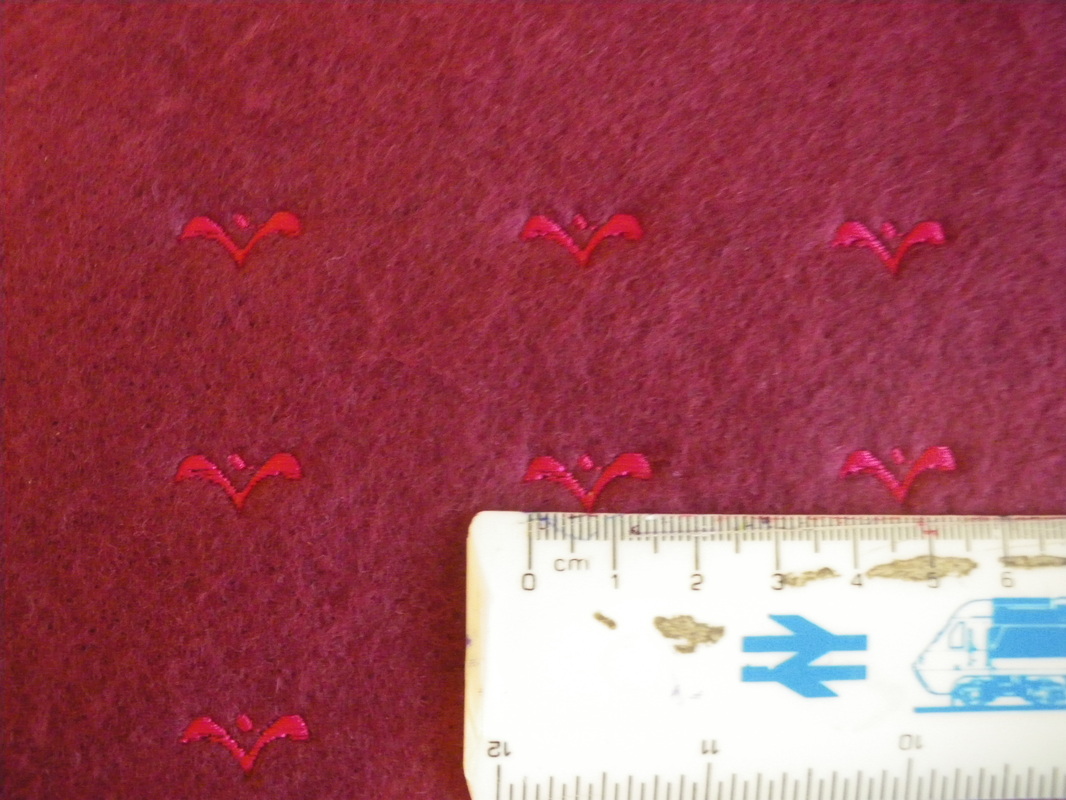
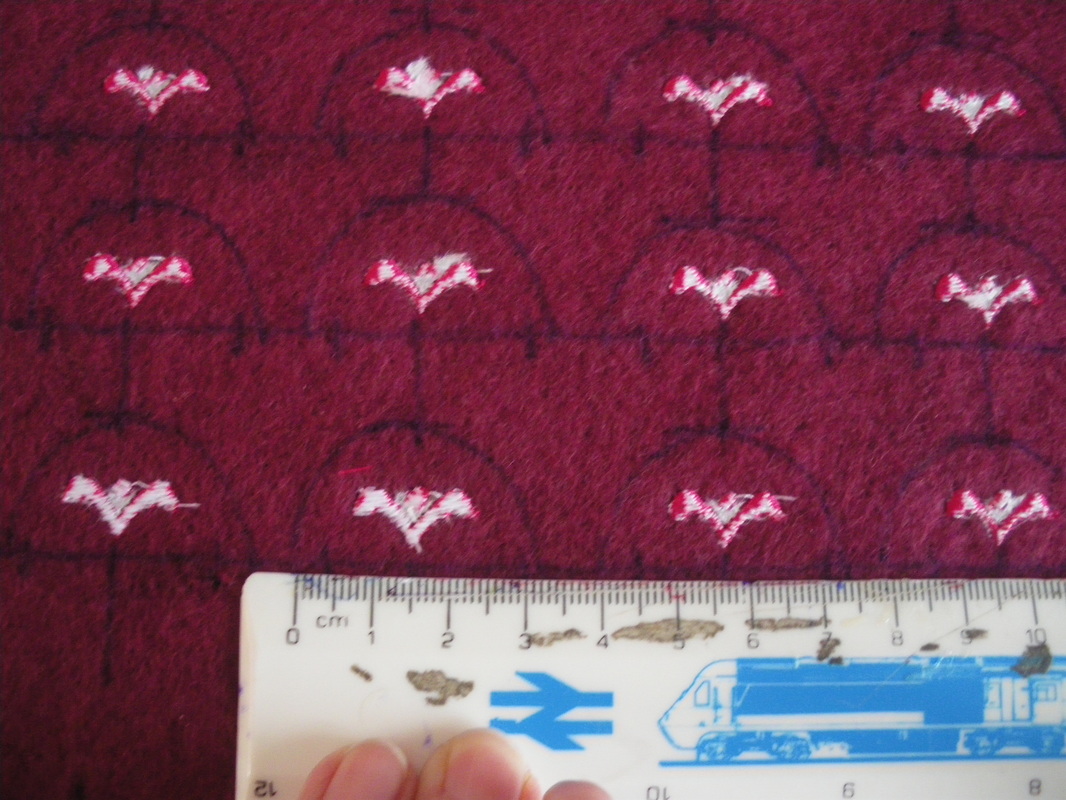
Next embroider the scallop pattern.
|


|
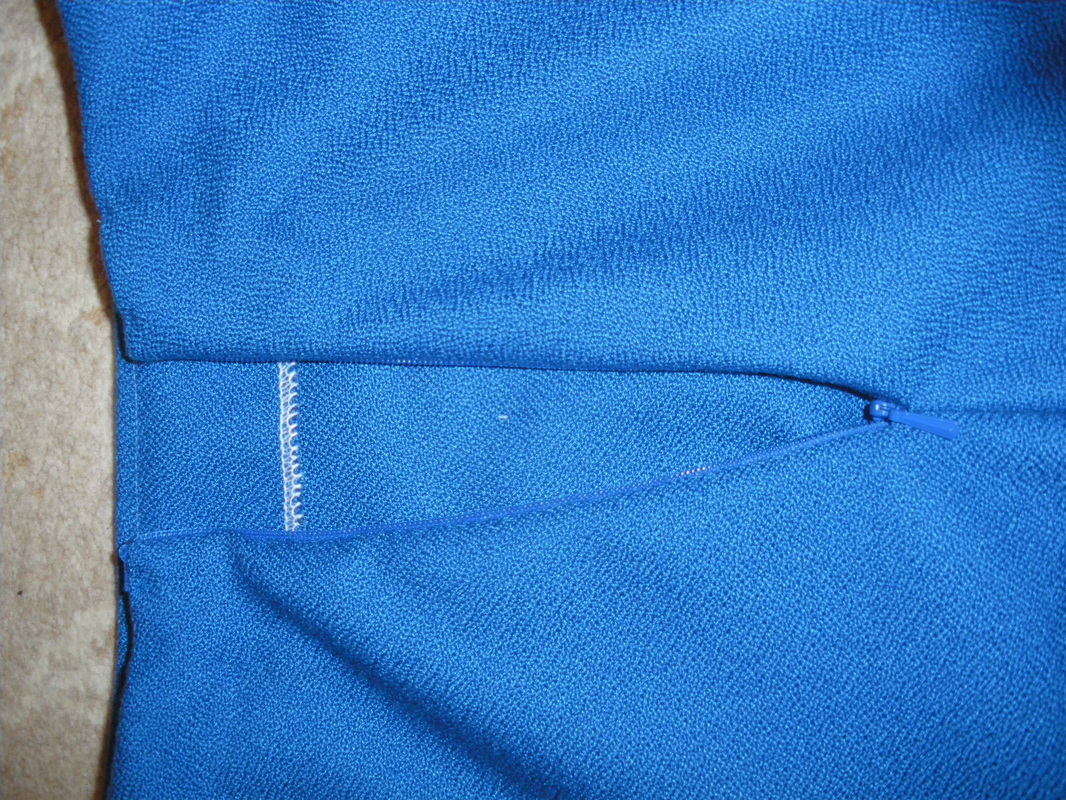
Insert the zip of your choice and sew up the back seam.
|
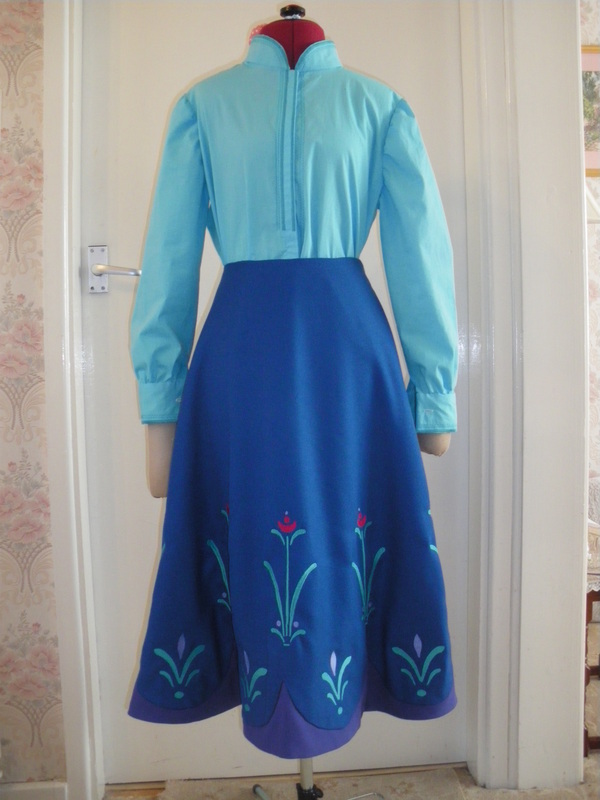
This completes the Skirt:
To make the cape
To make the cape
|
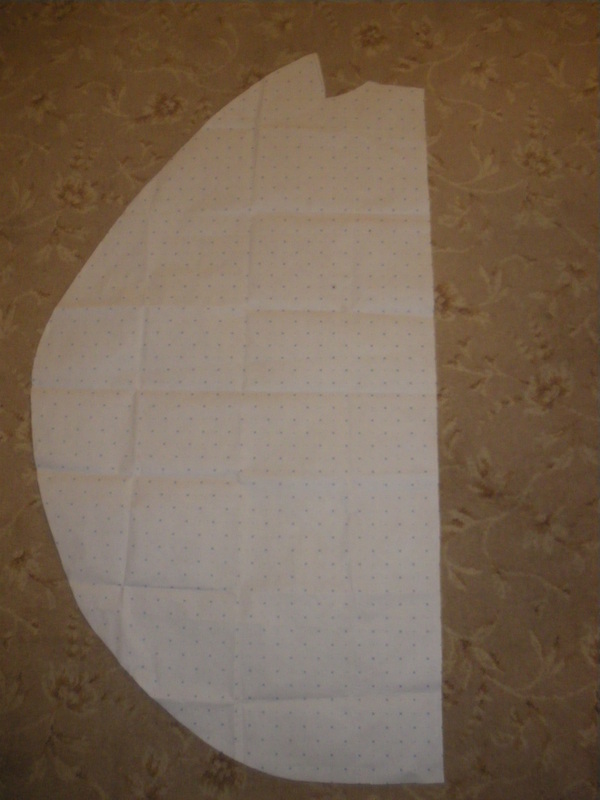
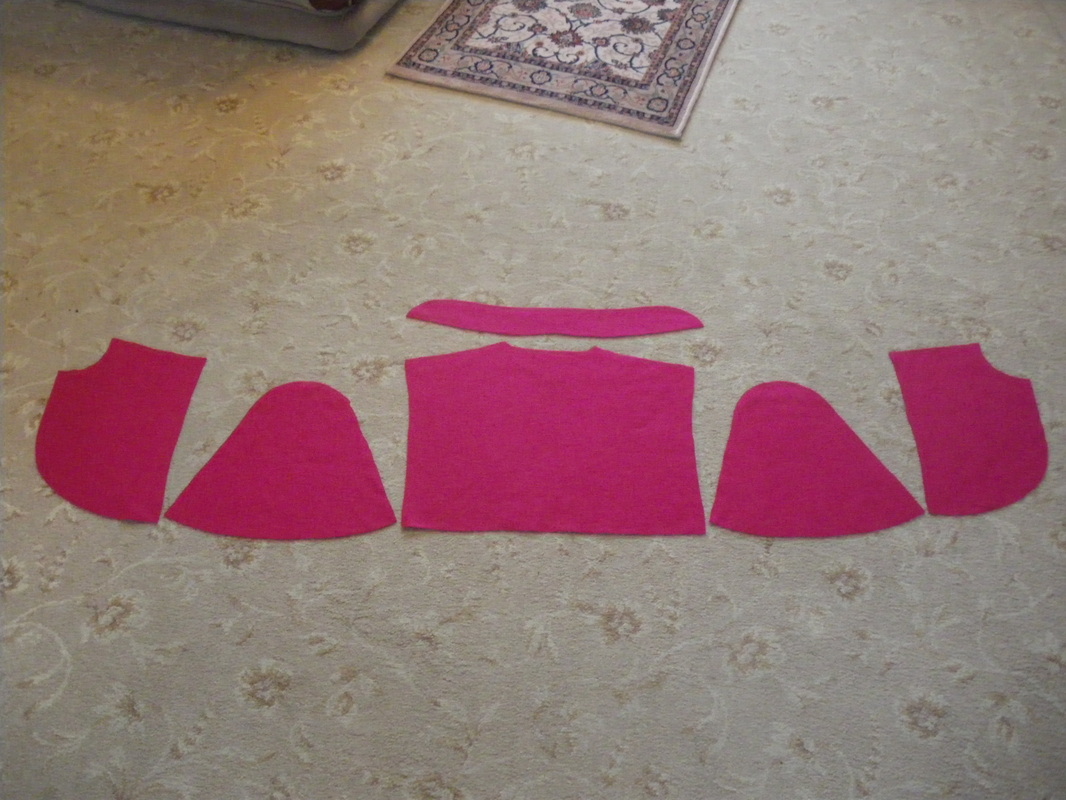
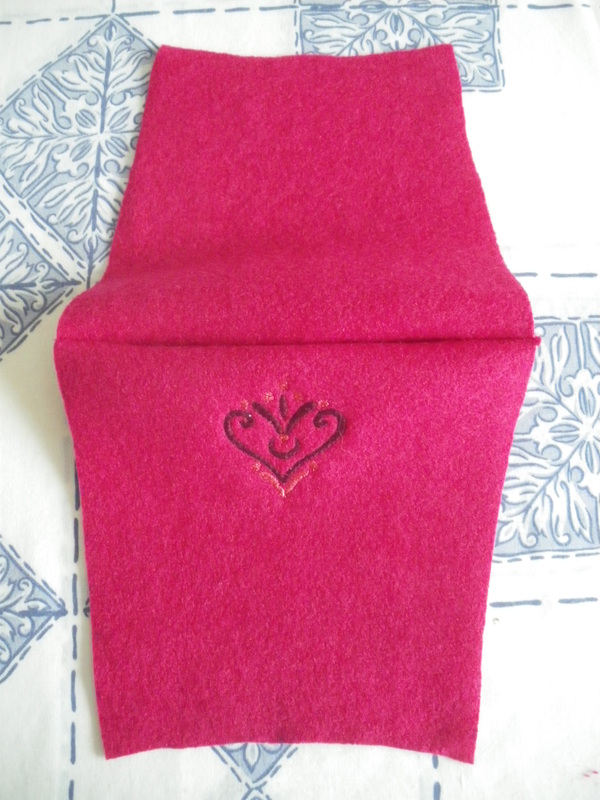
The pattern for the cape may look a little bizarre, but having studied the cape in close detail, I am certain that the front edge goes down straight before it curves.
Also, it isn't a conventional cape that sits around the shoulders and fastens at the front, but rather, it only goes as far as the shoulder seams. All will make perfect sense as the tutorial progresses. The cut out shape is the shoulder seam, which enables the cape to wrap over the shoulder. There is no pattern available for the cape so I made my own. Place this on the fold and cut out one piece each of fabric and liner. |
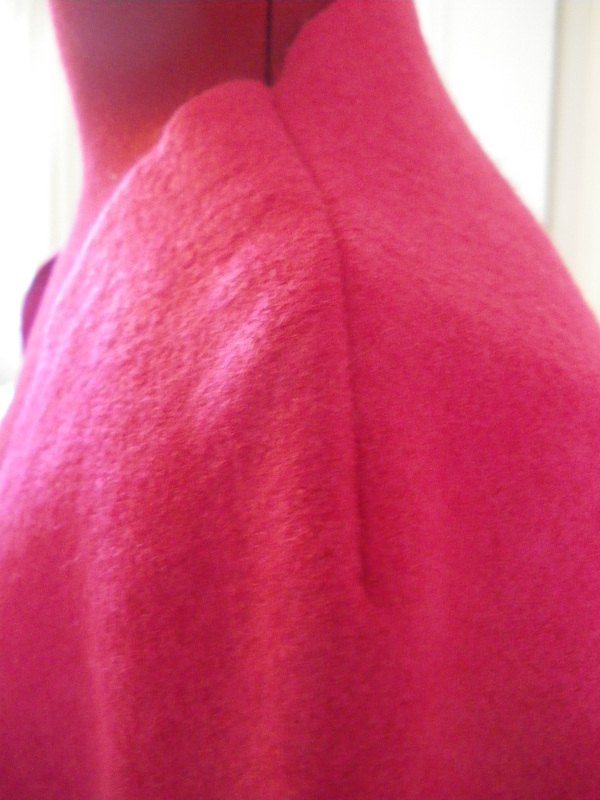
|
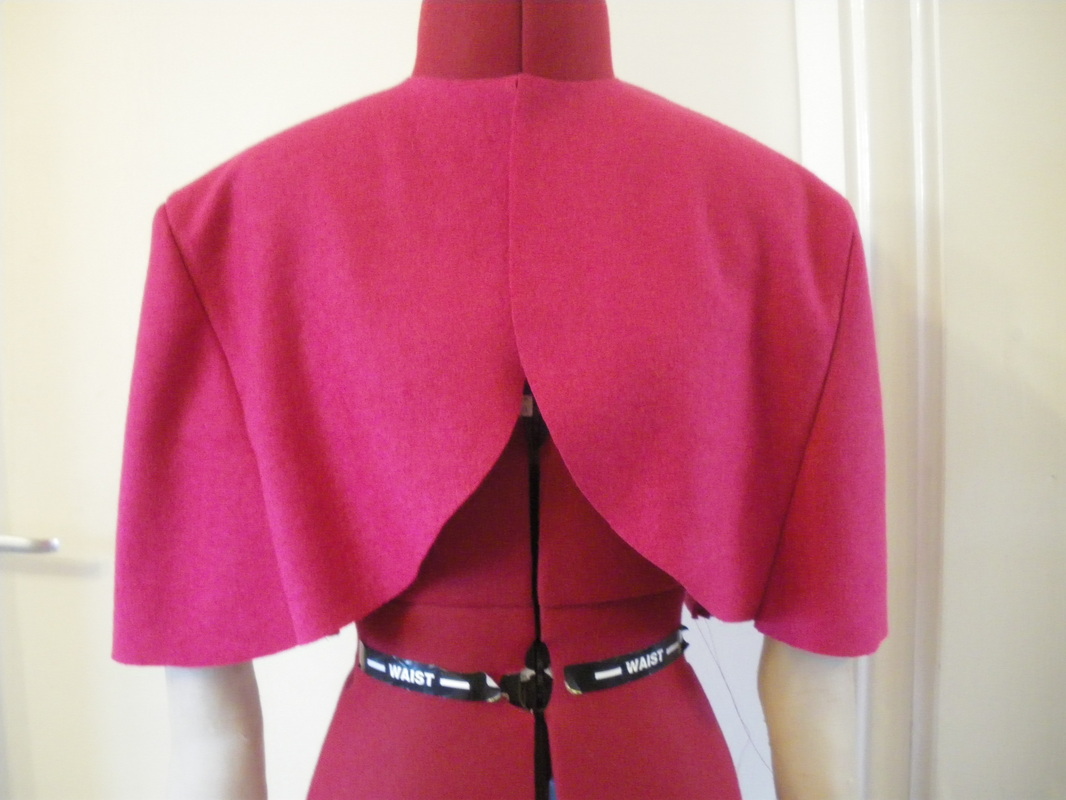
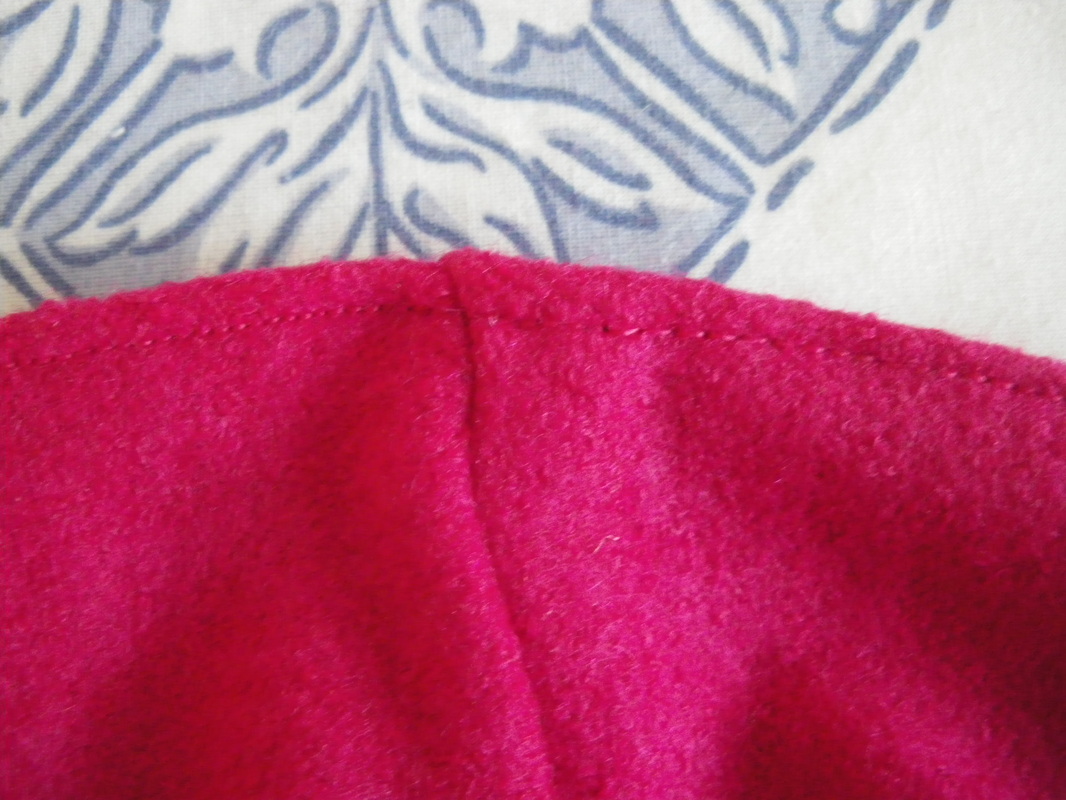
This shows the shoulder seam sewn up.
All video footage can be found in our video tutorial. |
|
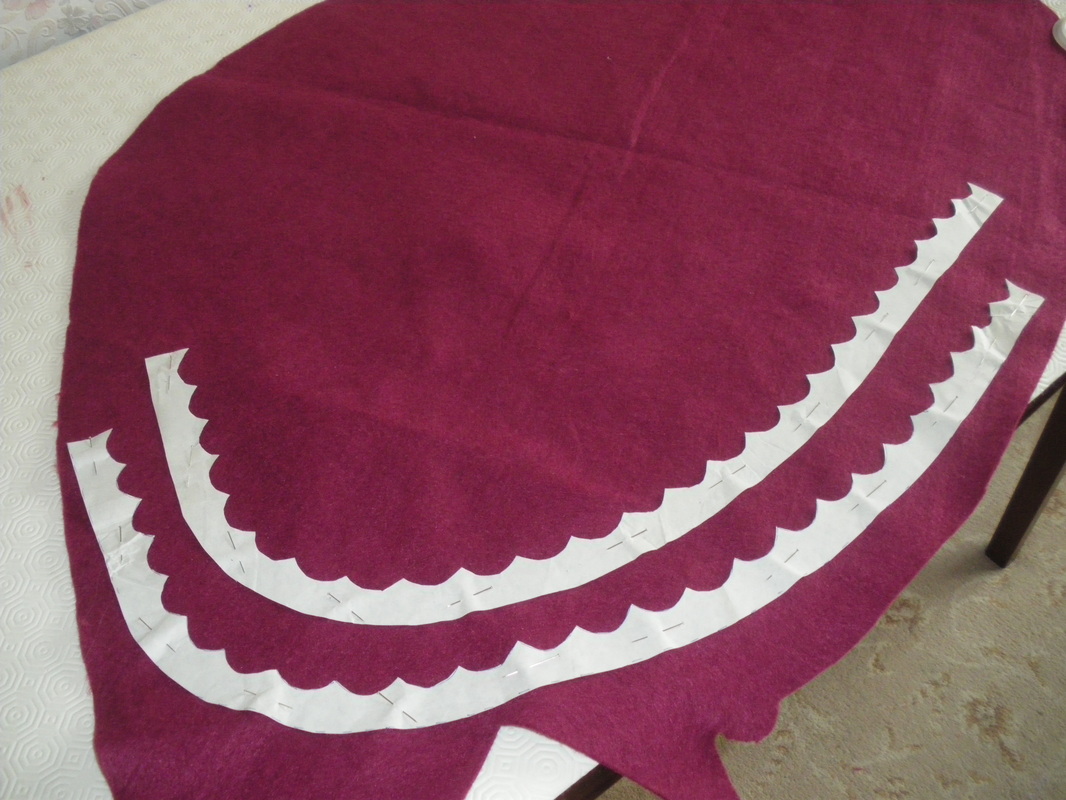
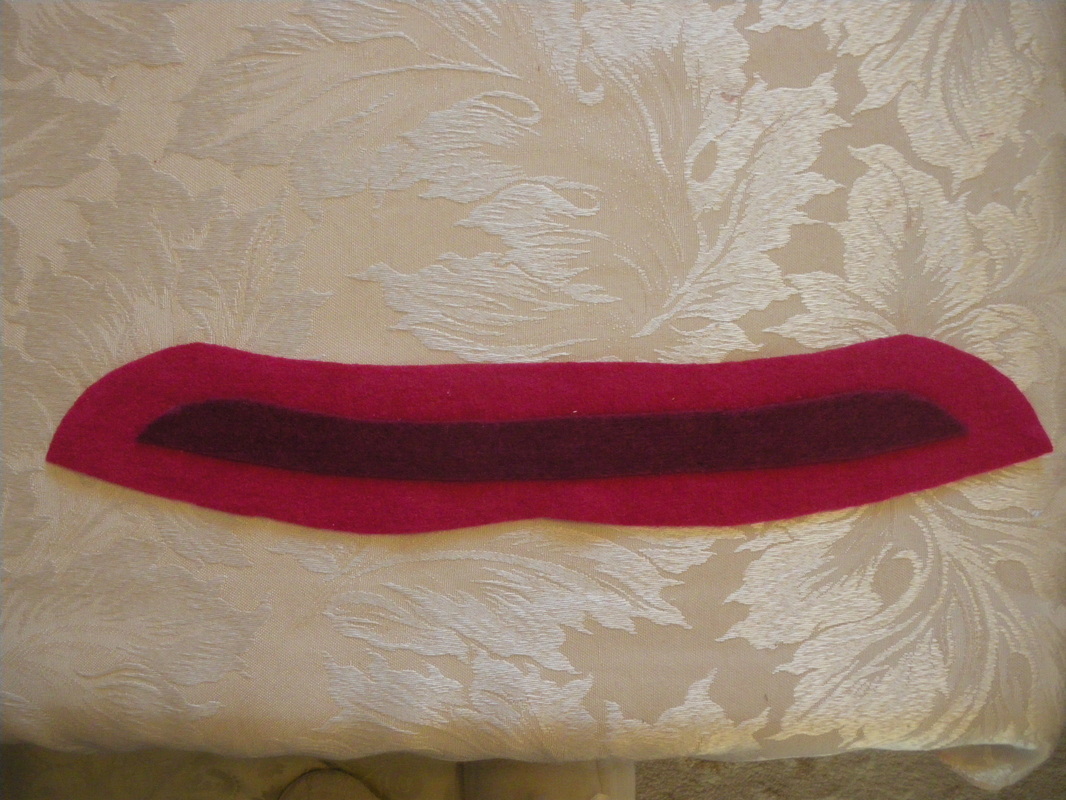
Place your cape pattern on the felt and using pins or tailors chalk, mark the edge of the pattern. If you have sufficient felt, you can make the edge all in one go, but as I didn't have enough, I did it in two halves.
After marking your pattern edge, using a ruler, make another mark 3cm in from the edge all the way around. This will become the cutting line. Take out the pins if this is what you used. |
|
Make up a small scallop template from paper and place it on your marked cutting line on the felt.
I used this scallop and replicated it along the paper. 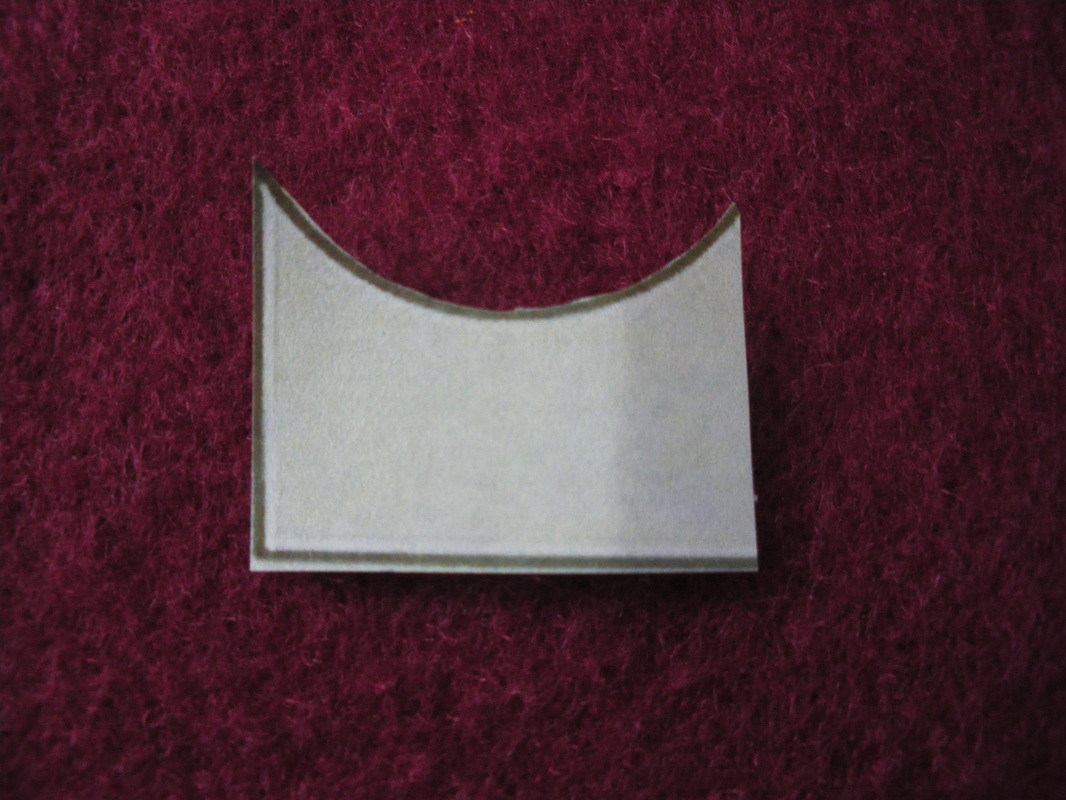
Cut out the felt pattern
|
|
Using a mark 3cm in from the edge of your cape, glue the felt on. I used a product called Plexi Glue, which is recommended for felt and can be found at most craft shops.
|
|
|
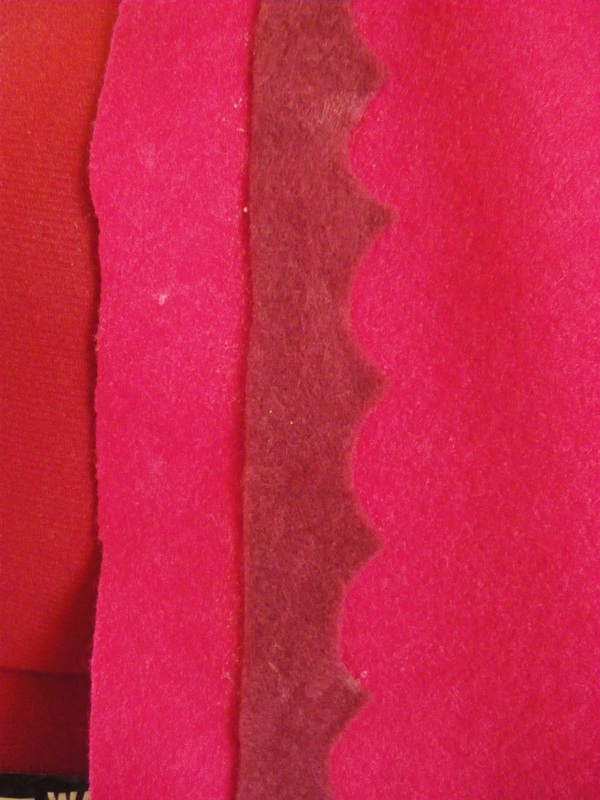
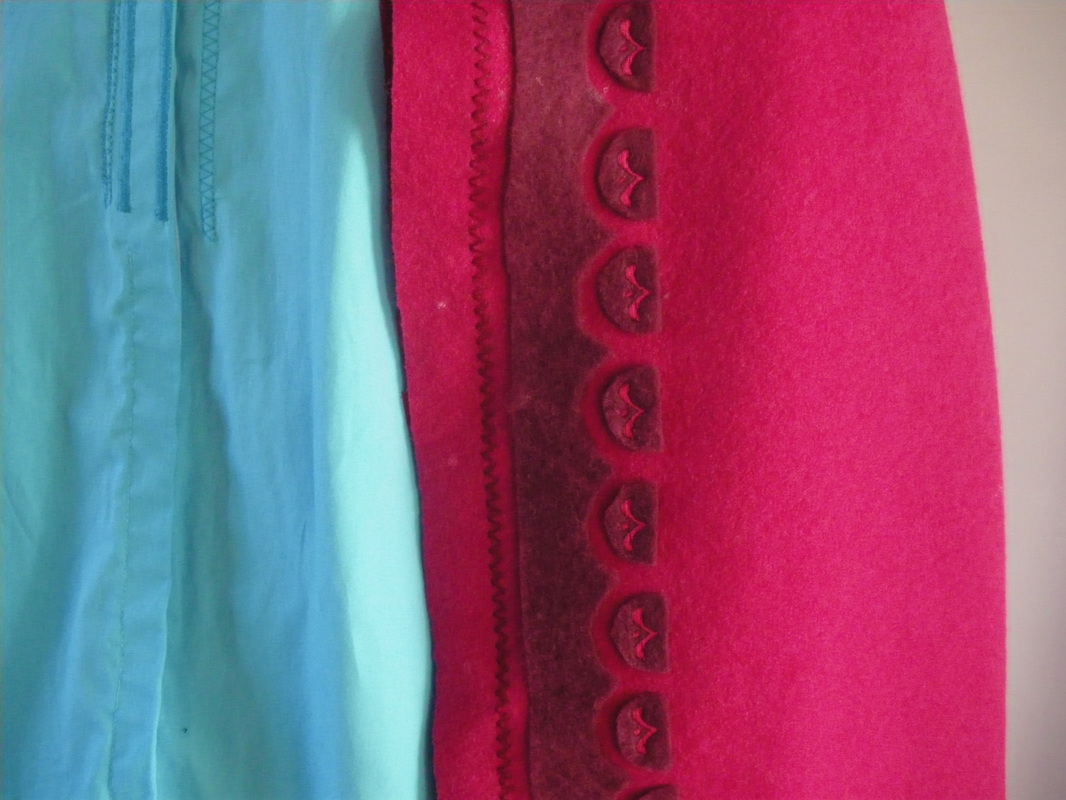
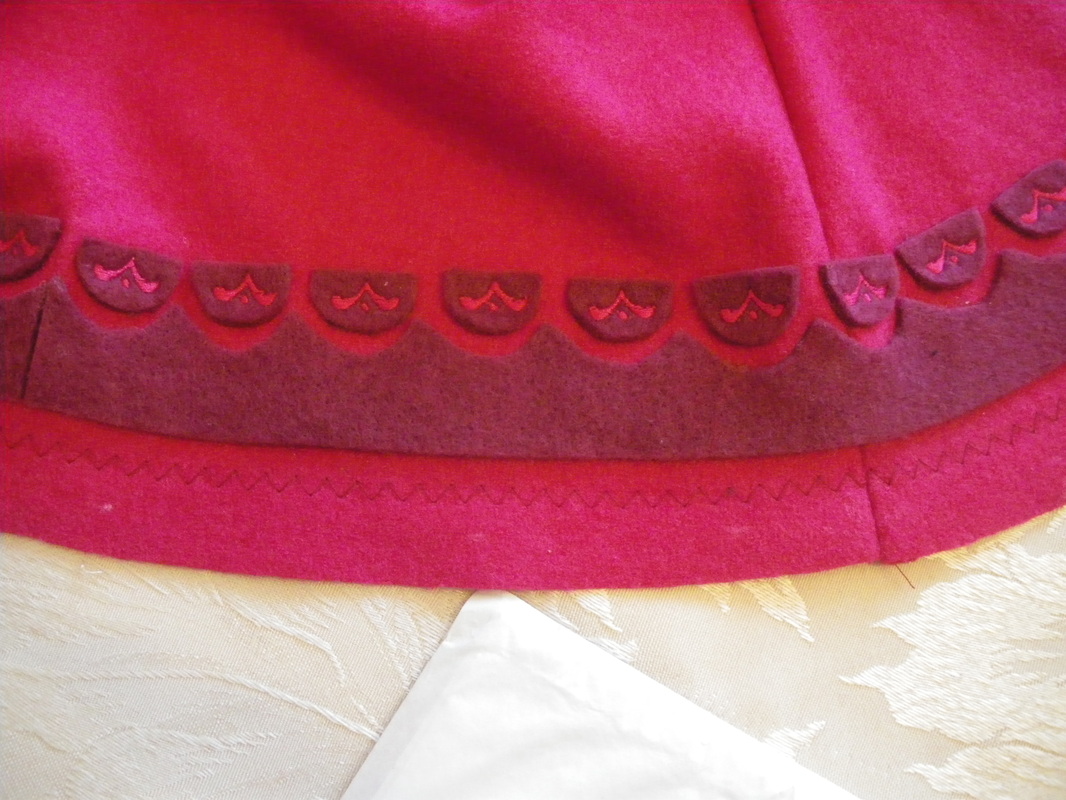
Using a leaf pattern, embroider onto the felt. I used an iron on stabilizer on the back. Using the same scallop shape, cut out the patterns.

|
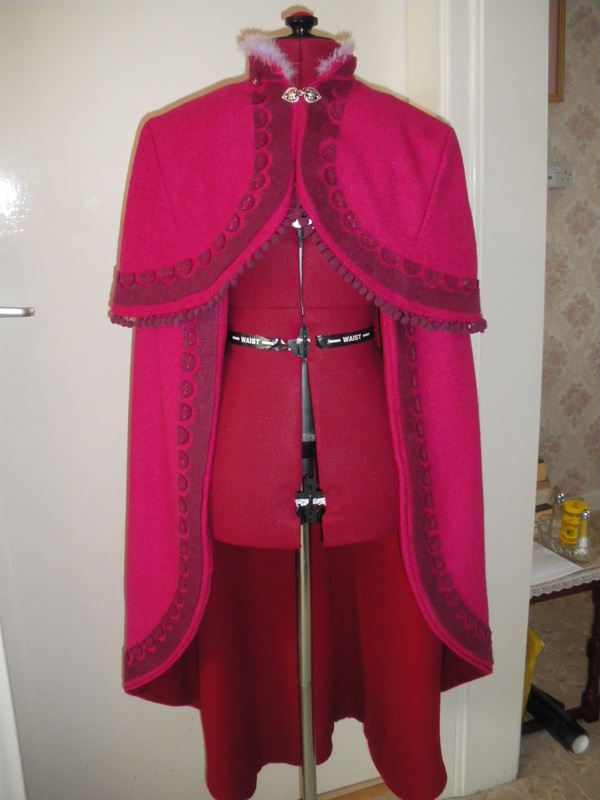
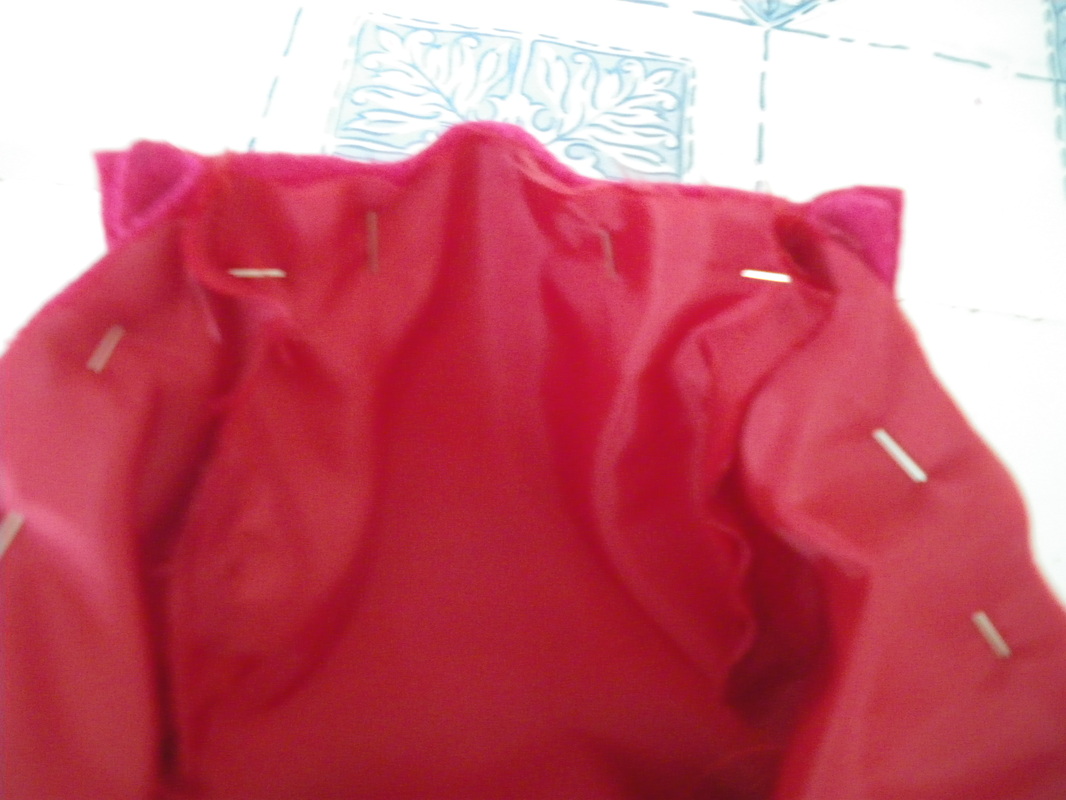
Glue the scallops onto the cape and using a triple stretch stitch, sew around the cape. Instructions for setting your machine can be found on the video tutorial. Make up the liner exactly the same as the cape and line you cape, remember to leave the neck open at the top so you can turn the cape the right way round and don't forget to snip the curves and iron it afterwards.
I didn't bother with the last few scallops at the shoulders, as they would not be seen. |
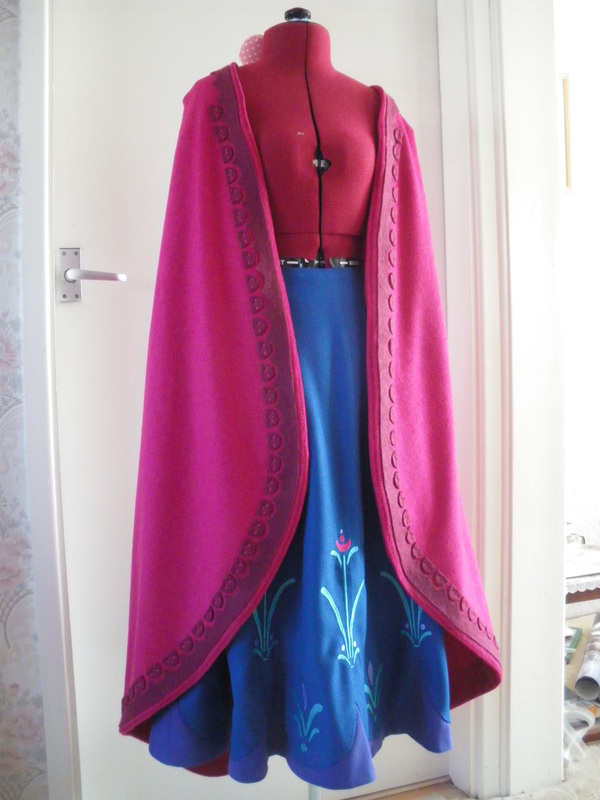
This completes the outer cape.
Making the shoulder cape:
I used this link to prepare my pattern pieces.
http://veravenus.com/wp-content/uploads/2012/01/capelet-pattern.pdf
Making the shoulder cape:
I used this link to prepare my pattern pieces.
http://veravenus.com/wp-content/uploads/2012/01/capelet-pattern.pdf
|
After trawling the internet with no luck whatsoever, I had to make my own cape using a pattern given me by a friend. It is very similar to a Priest's cape or Sherlock Holmes. It has straight side seams, with bell shaped sleeves, but is a tighter fitting than a conventional shoulder cape.
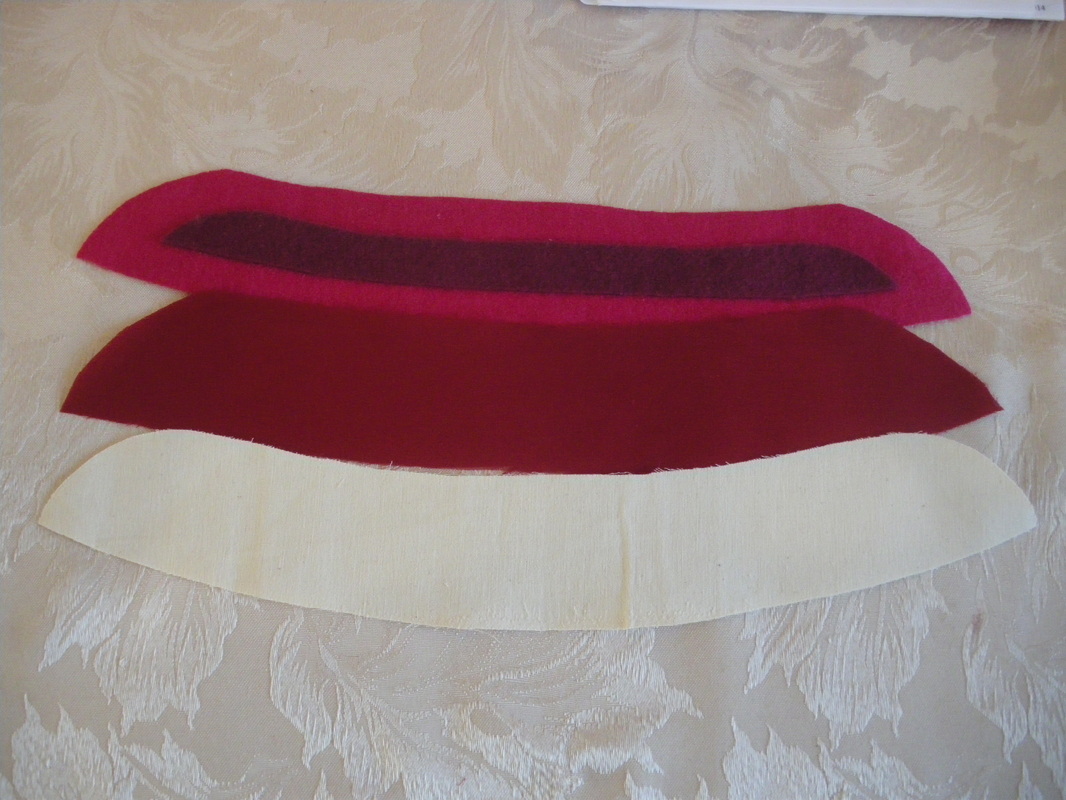
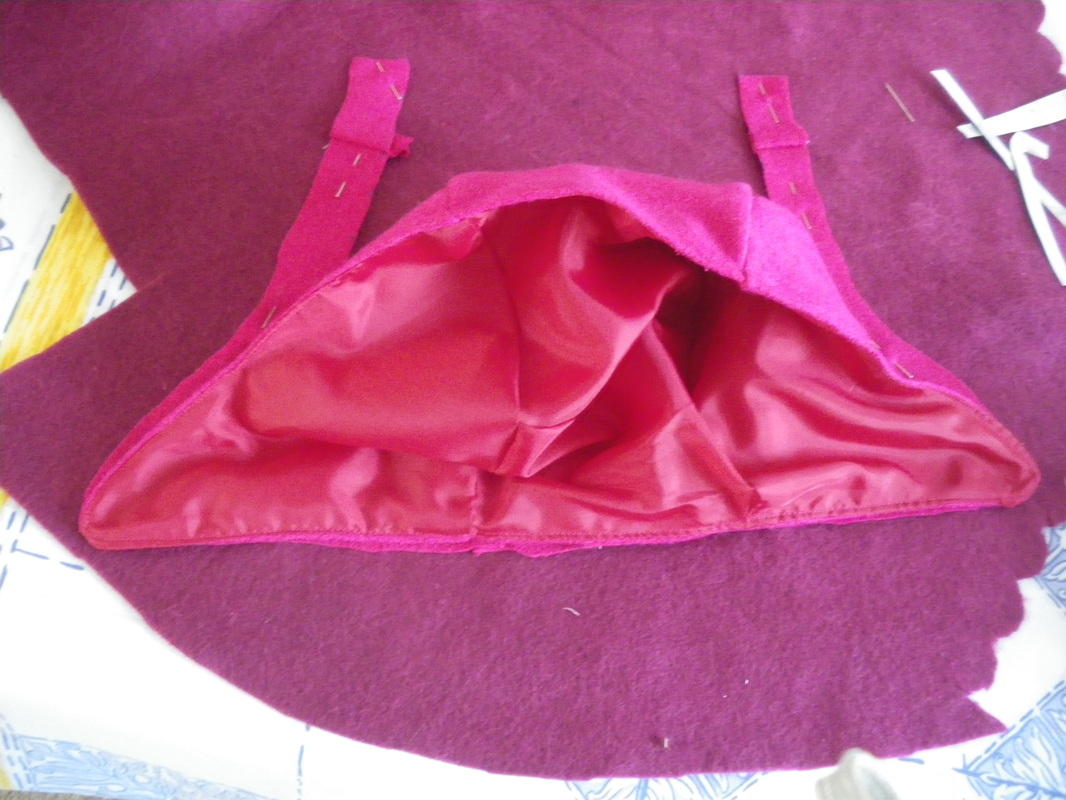
You will need outer pattern pieces and a red liner, the same as used on the outer cape. |
|
|
|
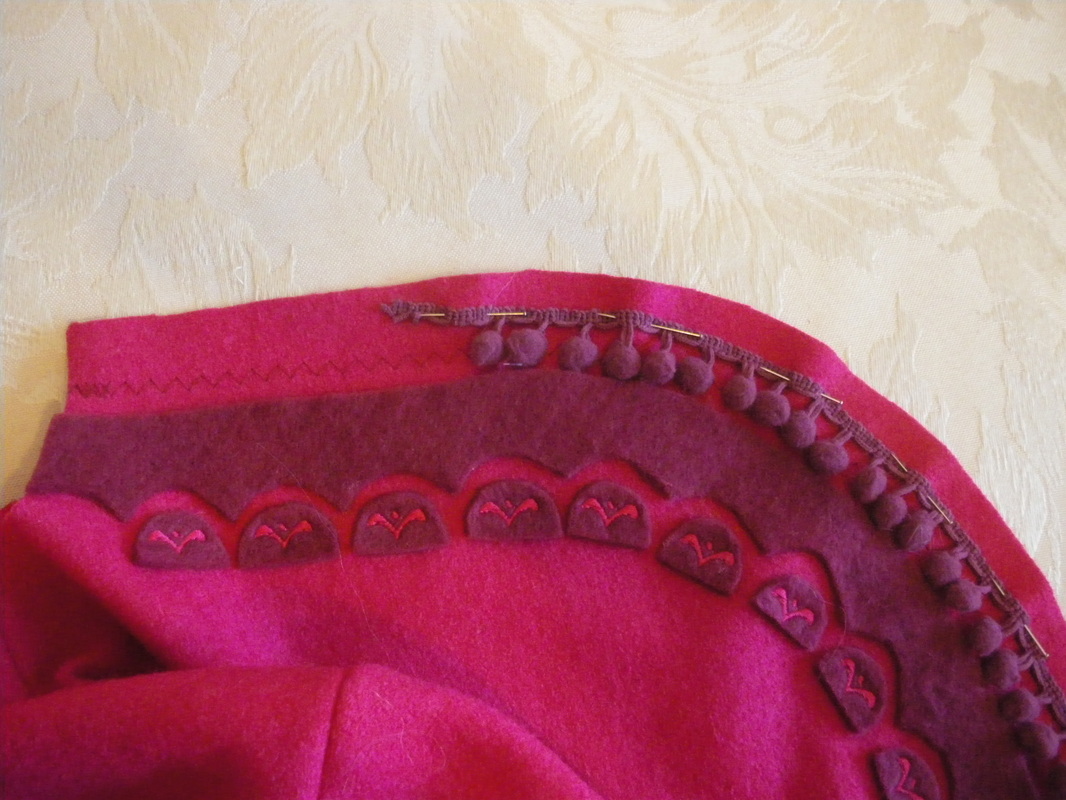
Using the same method as the outer cape, make a scallop template and cut out the design. Glue this to the cape 3cms in from the edge. Glue on the small scallop pieces and using a single zig zag, stitch around the edge. Settings for the machine can be found in the video tutorial.
|
|
|
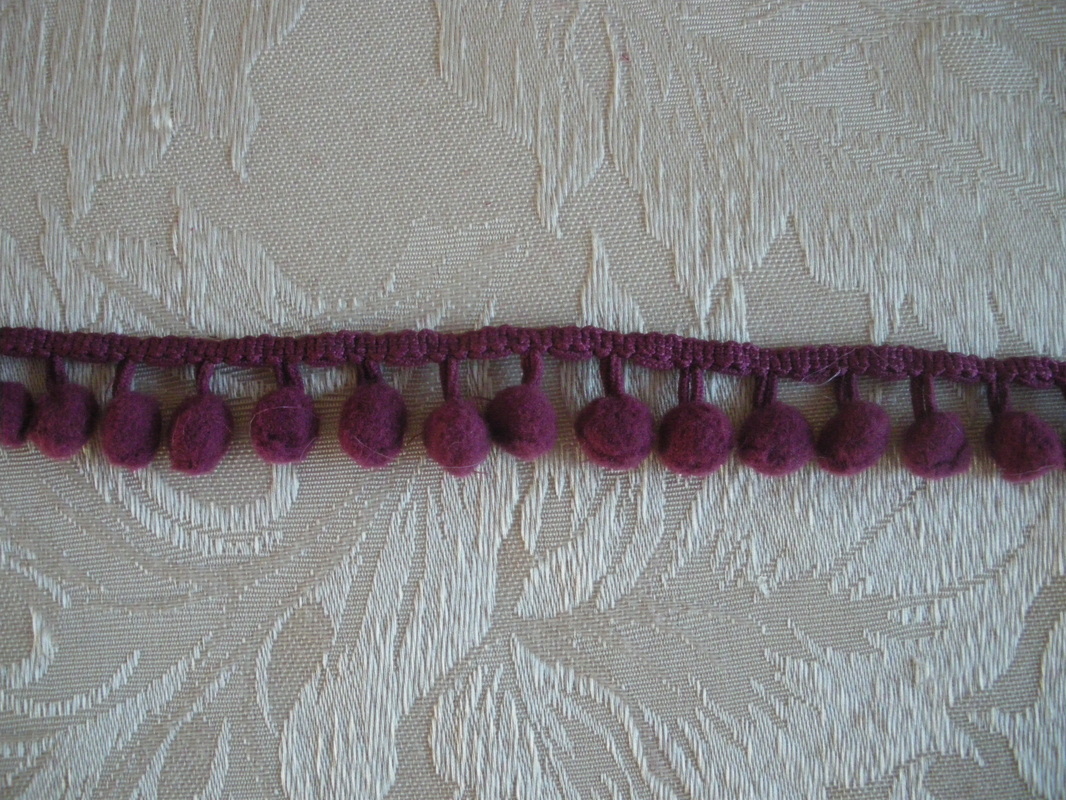
Using purple tassles, pin and tack them to the cape, approximately 1cm away from the zig zag sewing and make sure they point inwards. They start approximately 12cm (5") from the top of the neck.
|
|
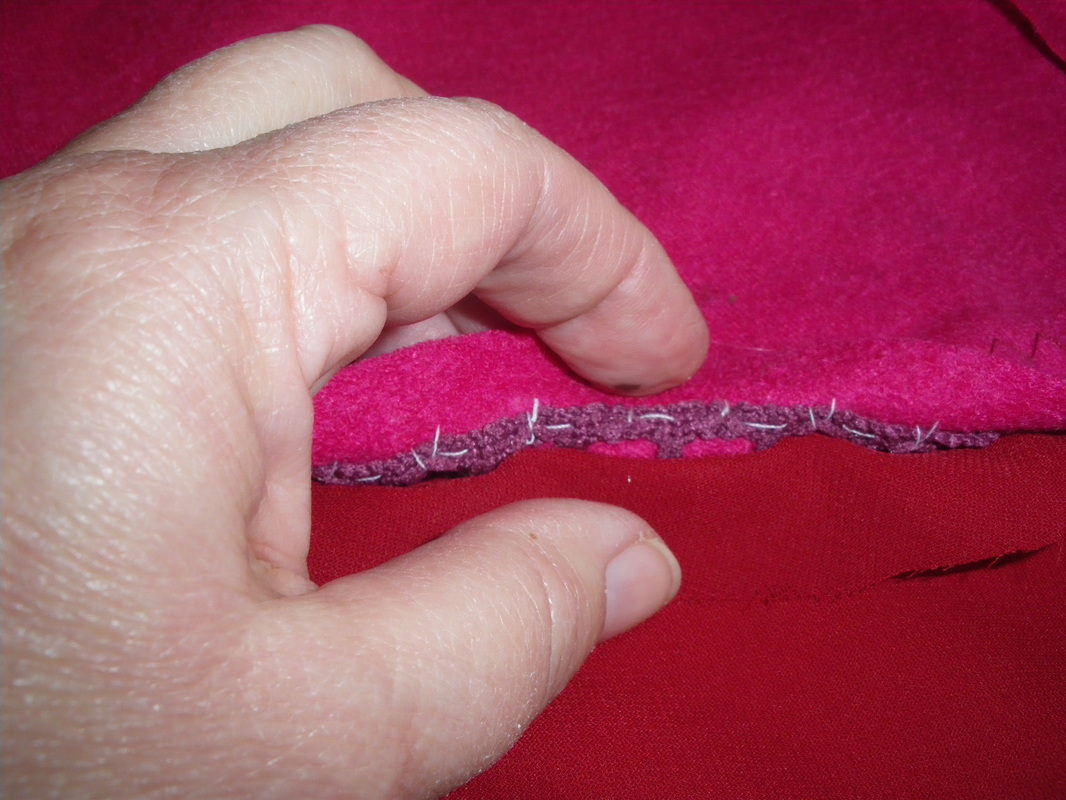
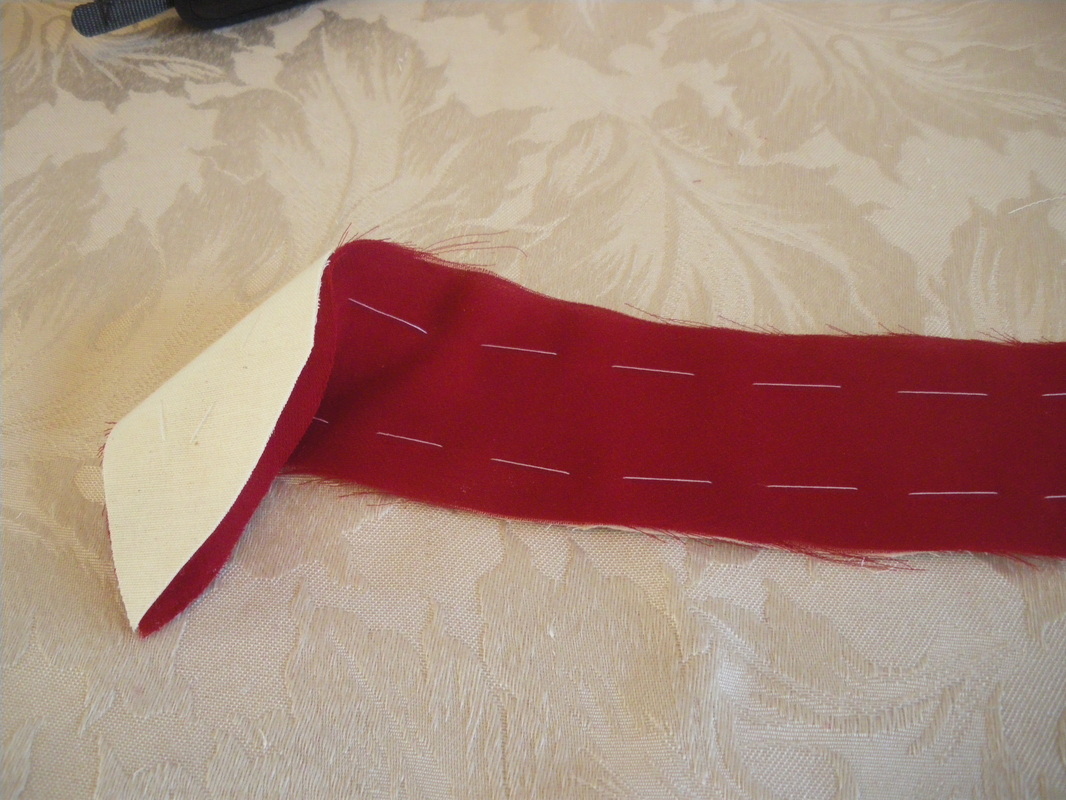
Pin the lining to the shoulder cape, right side to right side. When you come to do the sewing, use a zipper foot and you are aiming to sew just below the tassel strip as shown in the picture. This is very fiddly to do and if you find you can still see the tassel strip when you turn it the right way out, just go over the sewing line a bit further away and you should do it.
|
|
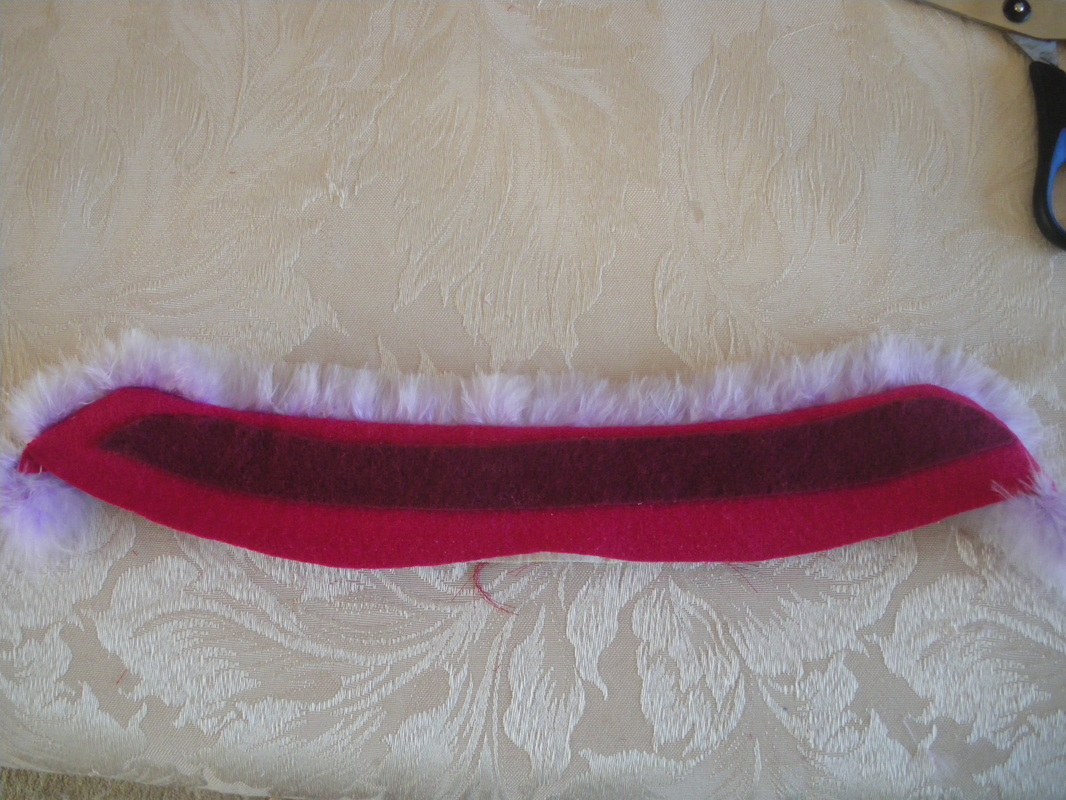
For the felt, you will need to leave a margin of 2cm all the way round. Cut a liner and a stiffener piece.
|
Tack the stiffener to the lining.
|
|
|
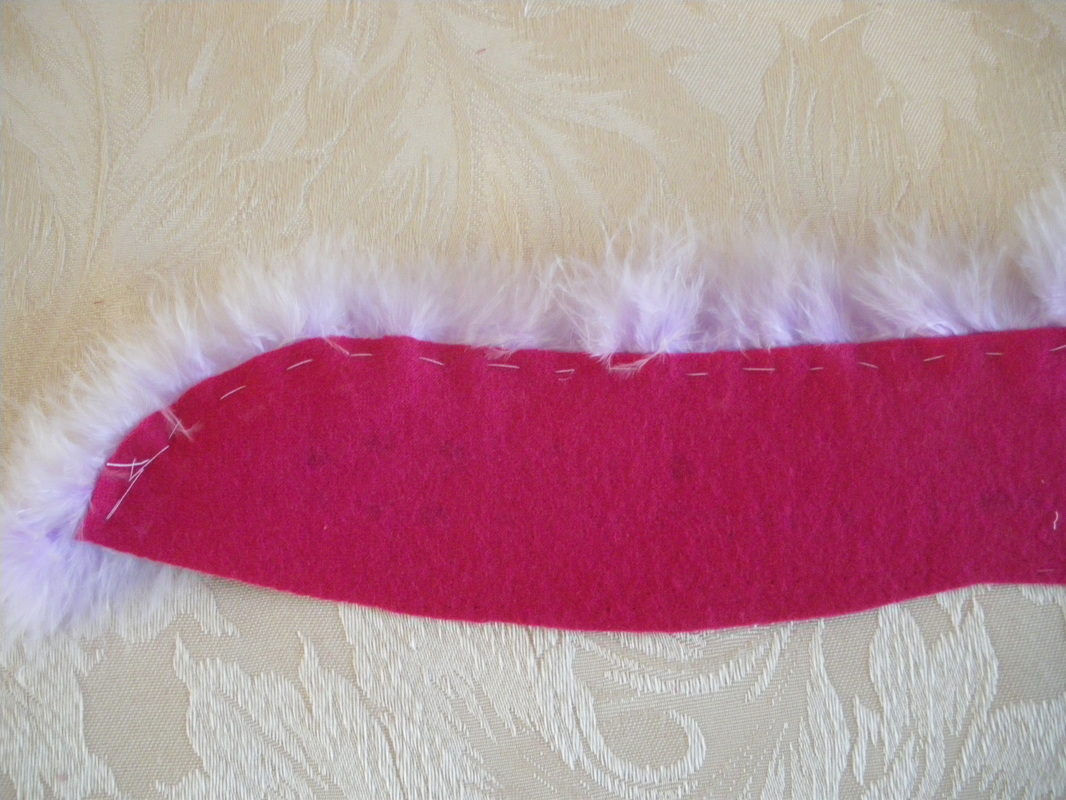
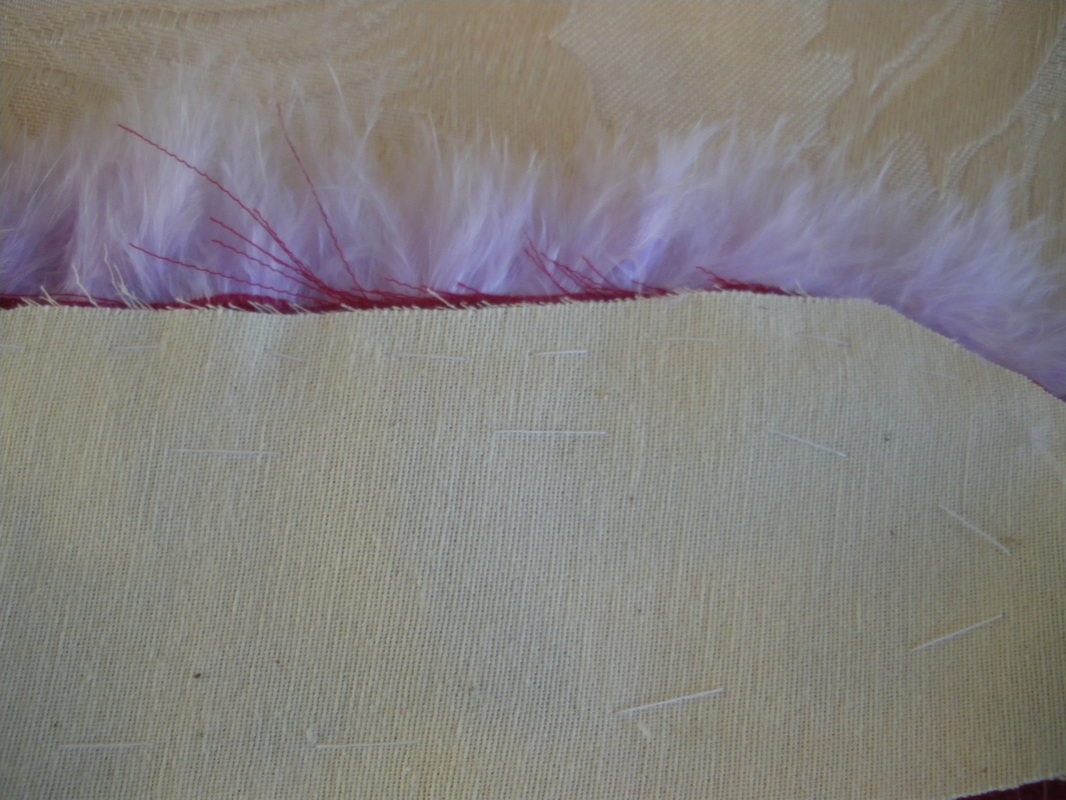
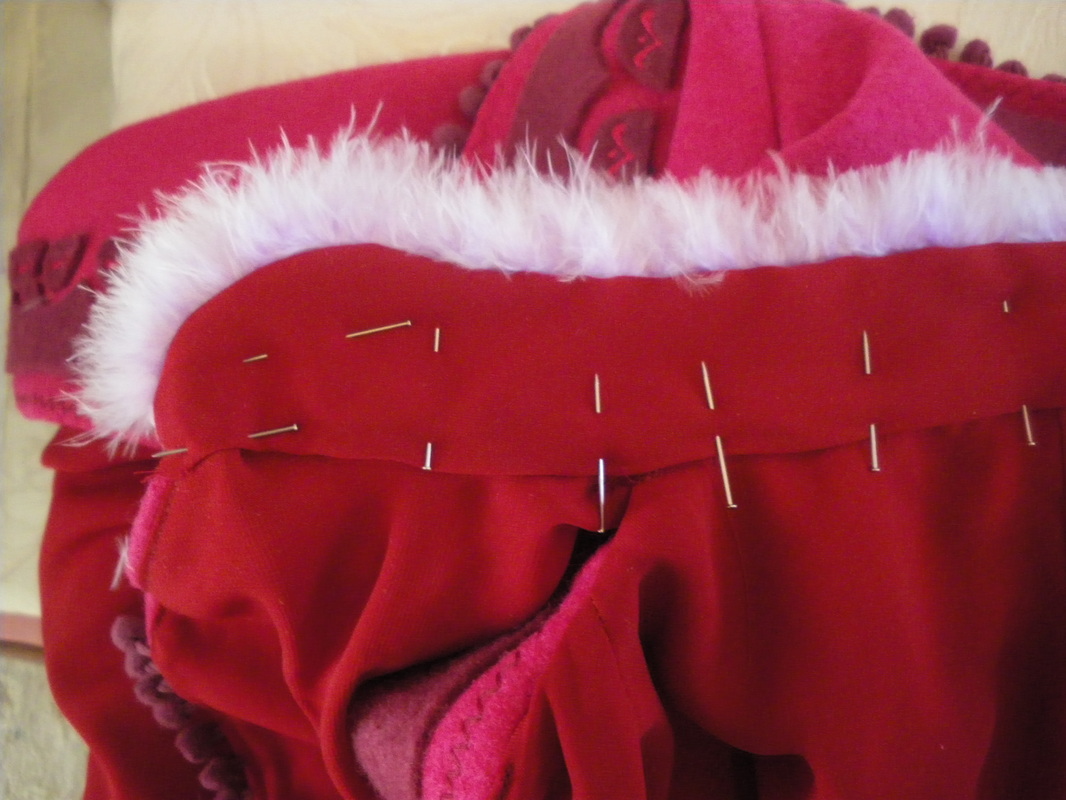
On the reverse side of the main fabric, feel for the cord in the Marabou and tack it to the edge of the collar. Leave a couple of centimetres over at the bottom edge Then use the liner on the other side and sandwich the Marabou in between. Tack through to the cord again on the edge. Make sure there is an equal amount of fur inside and outside the seam.
|
|
After sewing the seam, reduce any bulk by cutting the excess seams, clip the curves and turn the right way out. You can also reduce the excess Marabou now.
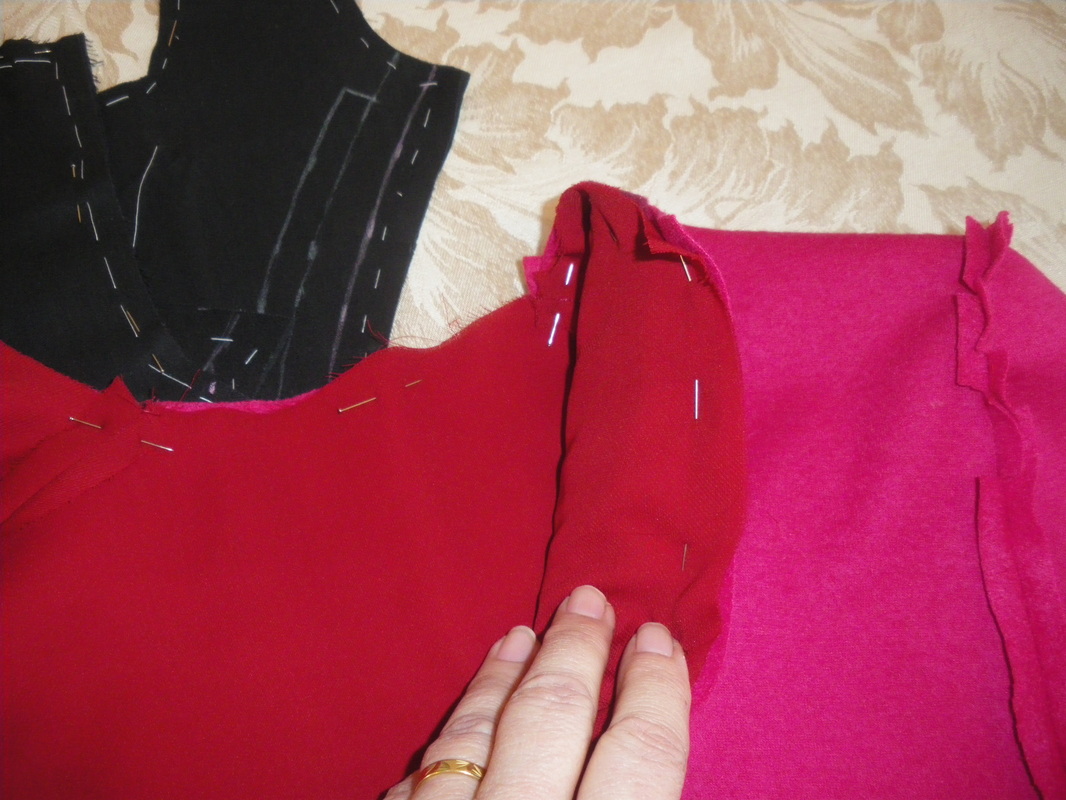
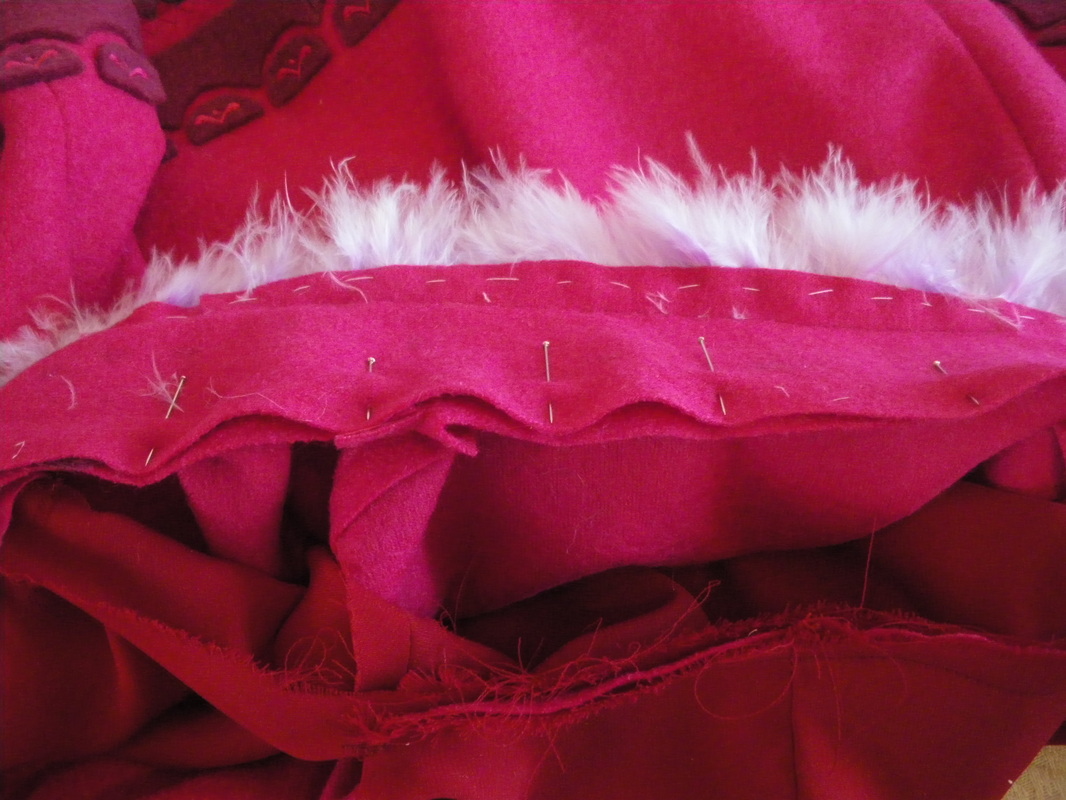
With the small cape facing down, place the long cape at the neck line. You should have about 15-20cms of cape that wasn't sewn. Pin and tack and sew this to the small cape - but - only sew to the liner of the small cape, not the outer fabric.
With the small cape facing down, place the long cape at the neck line. You should have about 15-20cms of cape that wasn't sewn. Pin and tack and sew this to the small cape - but - only sew to the liner of the small cape, not the outer fabric.
|
|
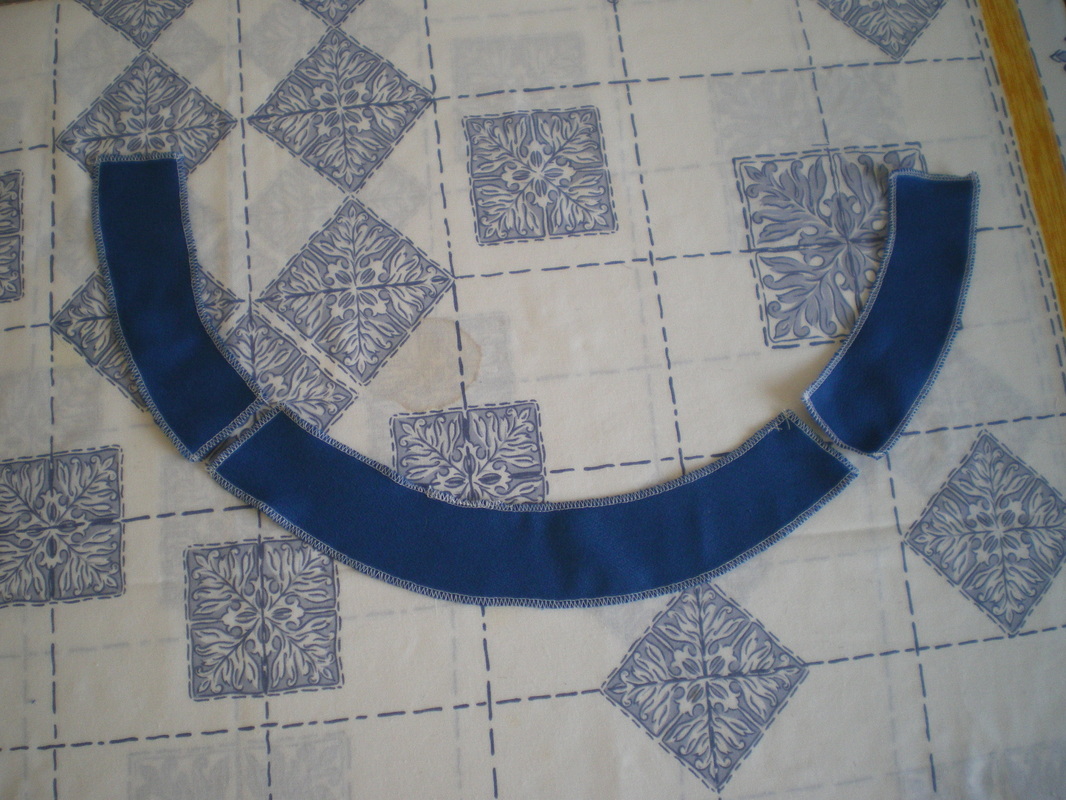
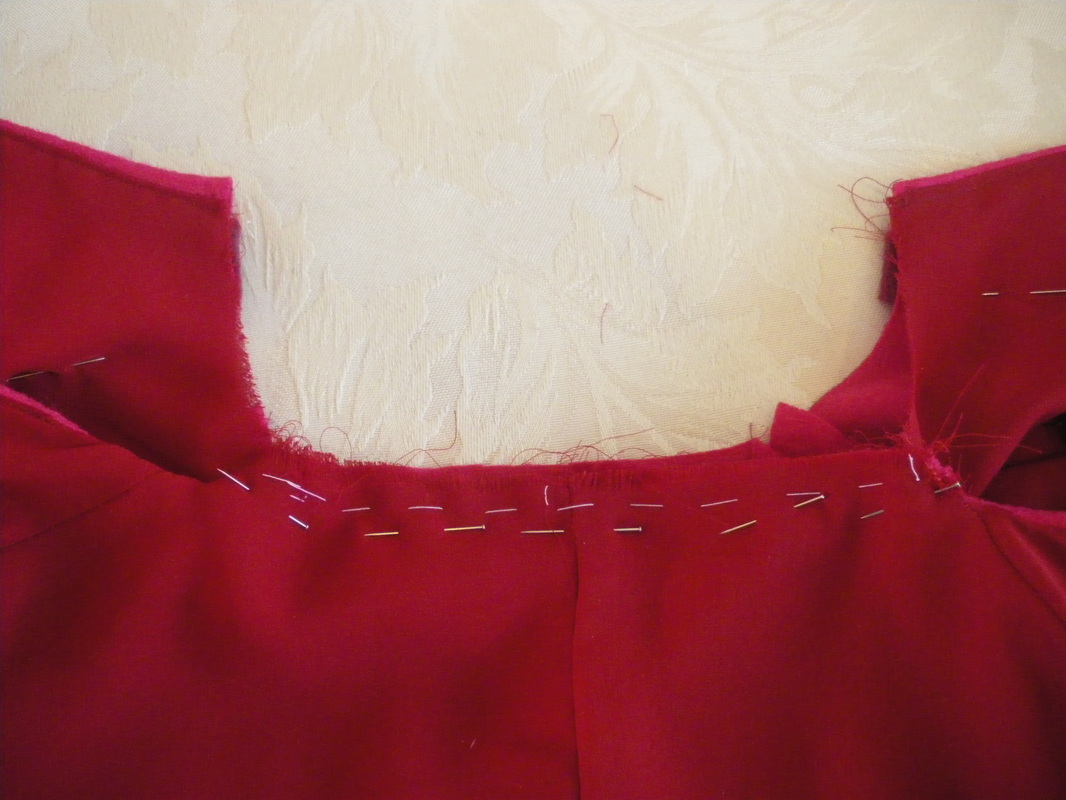
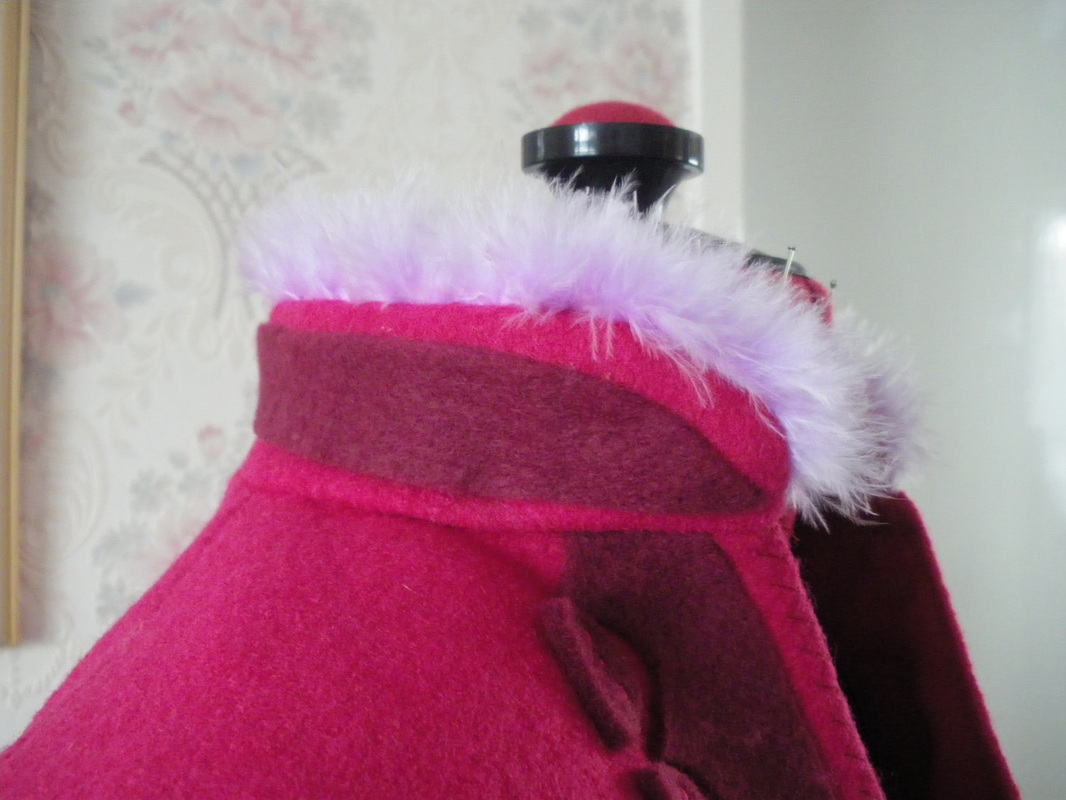
Pin the fabric collar to the cape and sew all the way across seam to seam. Turn the collar to the inside and hand stitch in place. If you find there is still too much bulk at the ends, try to reduce it further.
|
The collar should look like this.
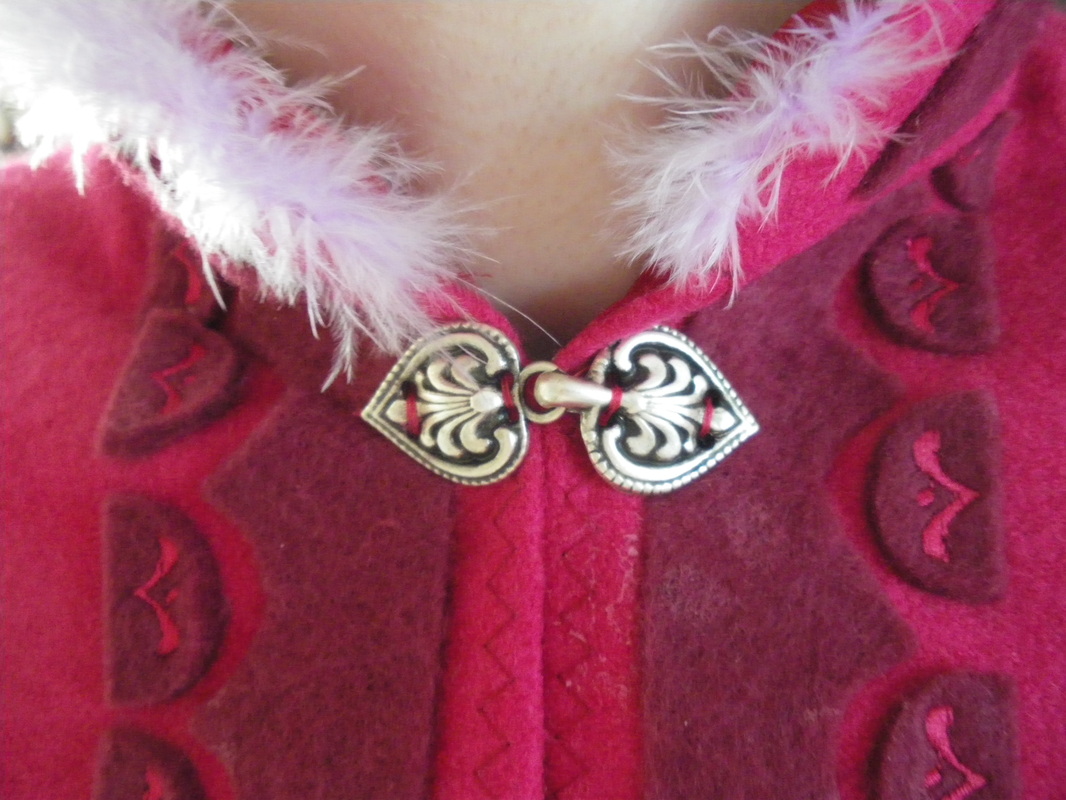
Sew on your chosen clasp.
|
This completes the cape.
To Make The Bodice:
To Make The Bodice:
|
|
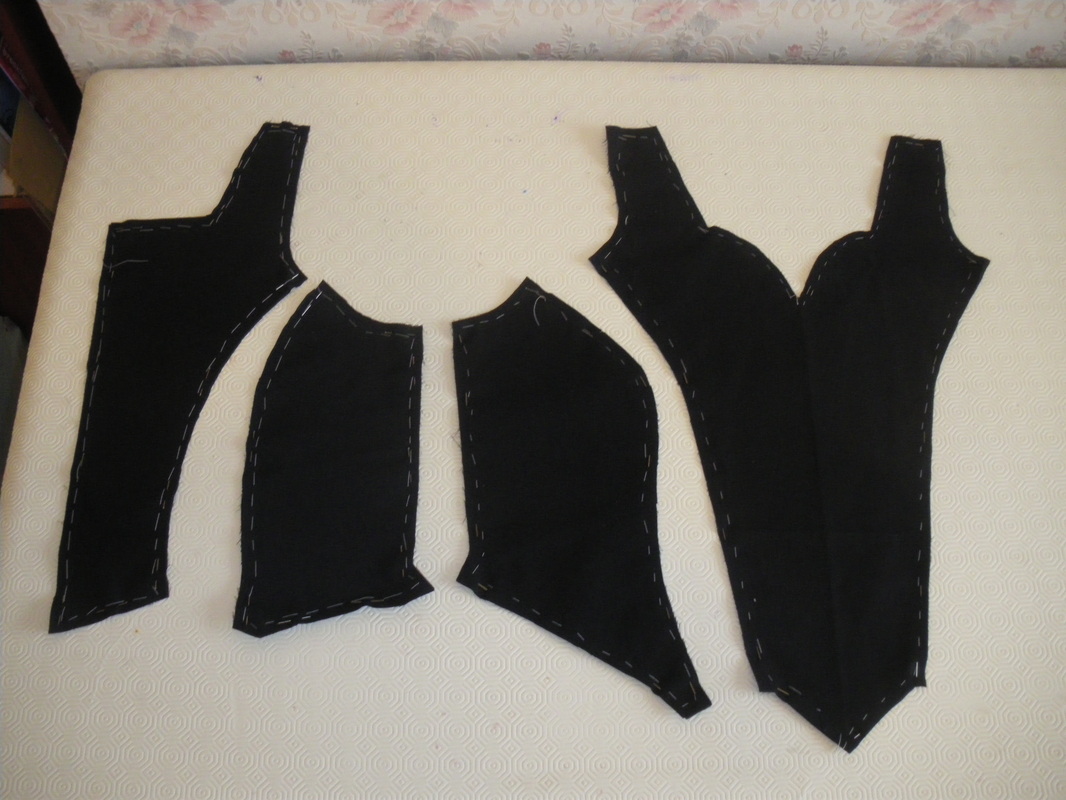
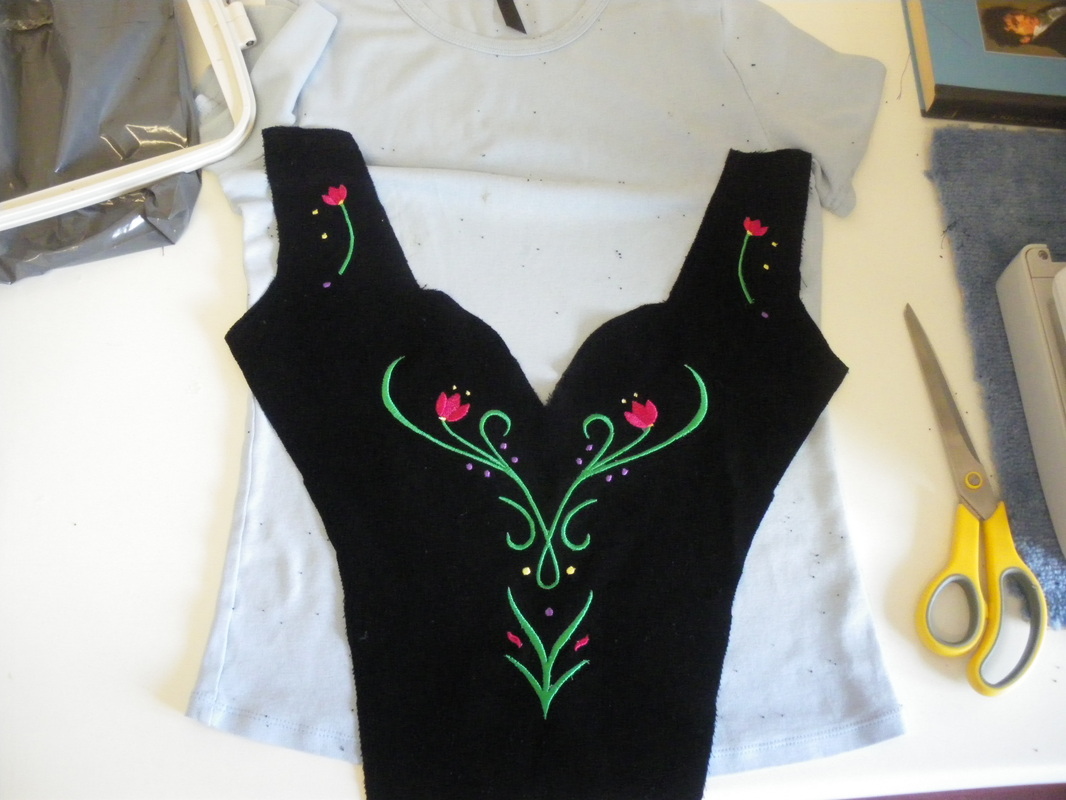
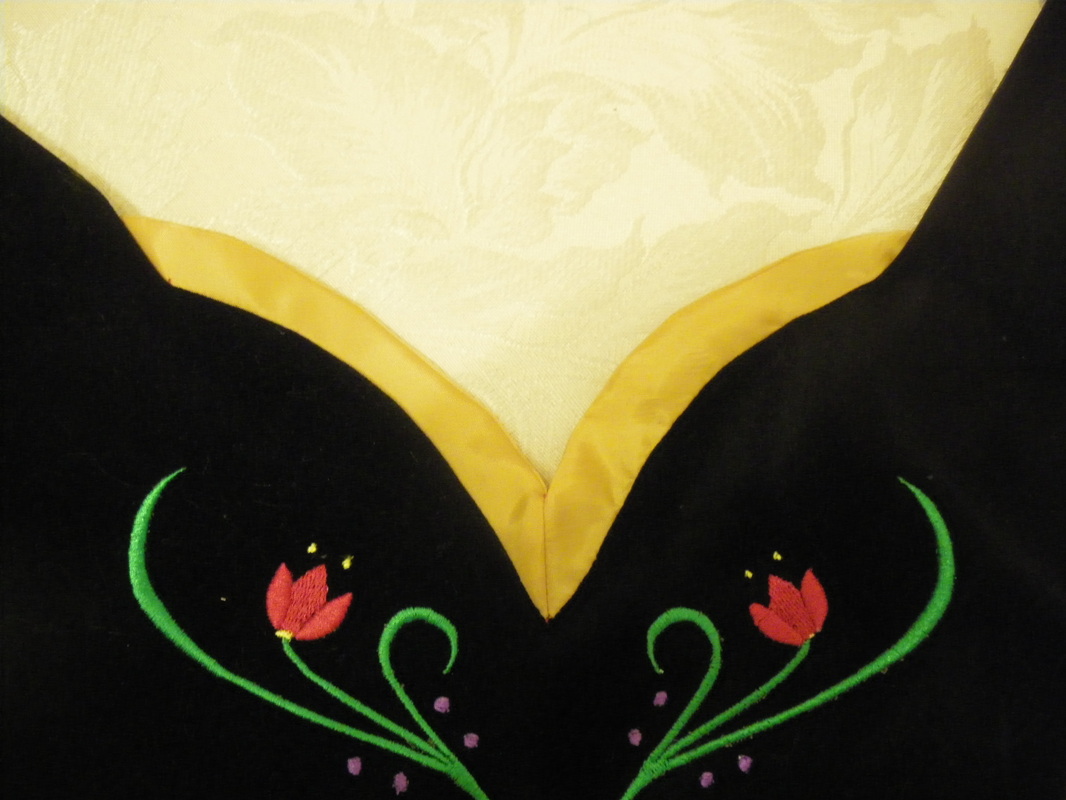
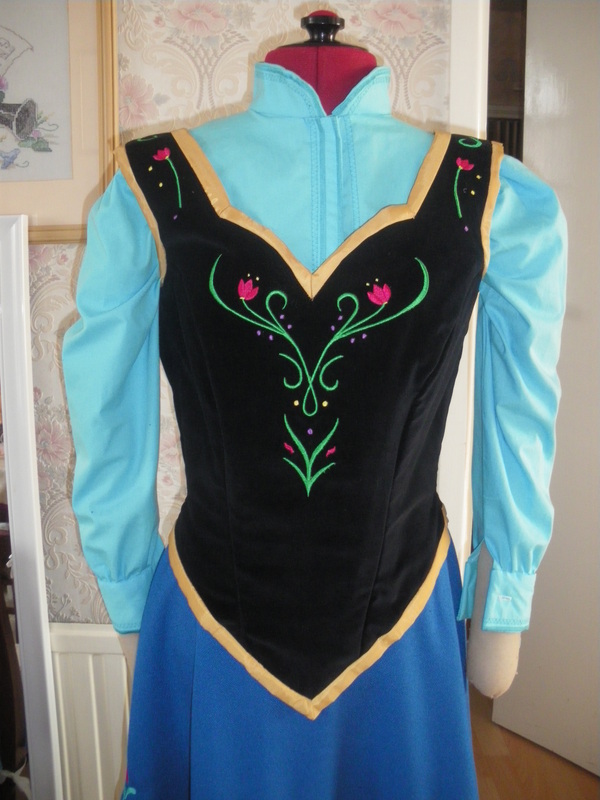
Using Simplicity 2851, I altered the front to a "Sweetheart" neckline and squared the back with a slight angle up over the shoulder. Cut out one set each of fabric, coutil and liner.
|

|
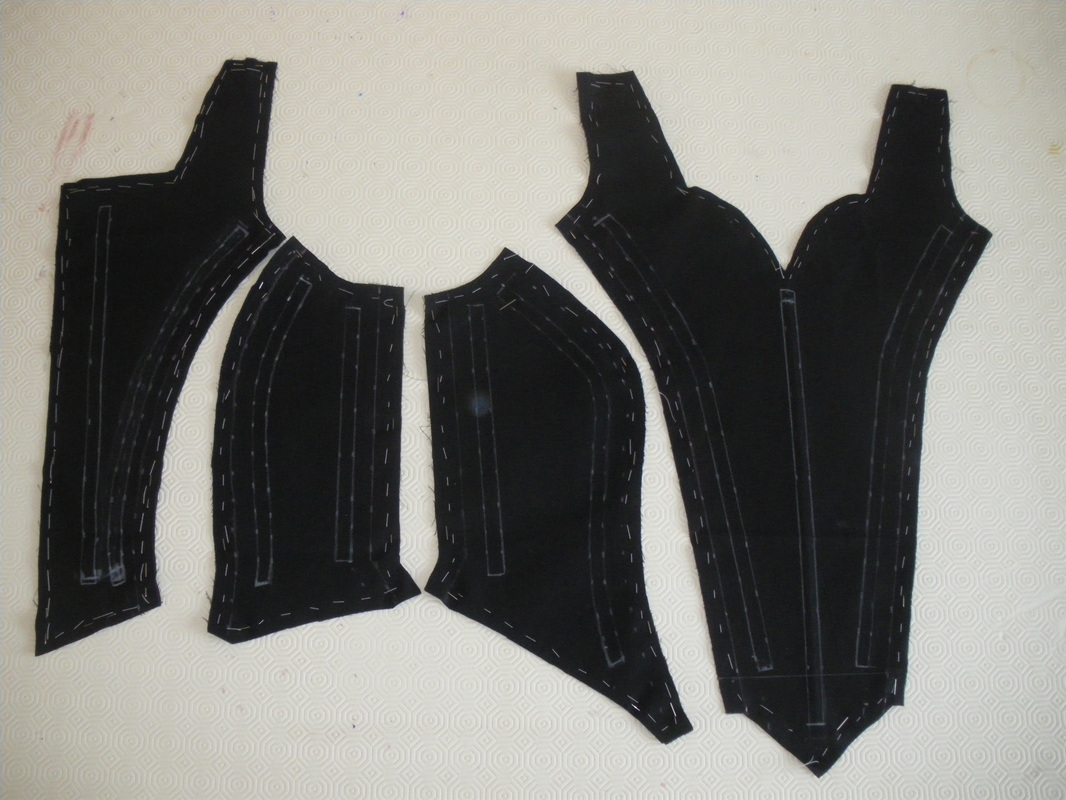
Tack the liner pieces to the coutil pieces and sew the channels for the boning. I will be using spring boning for the front panel left and right side, side panels on each of the curves and the curve on the back panel, all the rest are steel boning pieces. (Make sure you leave enough room top and bottom of the channels so they don't go too near any of the seams and bottom edge.)
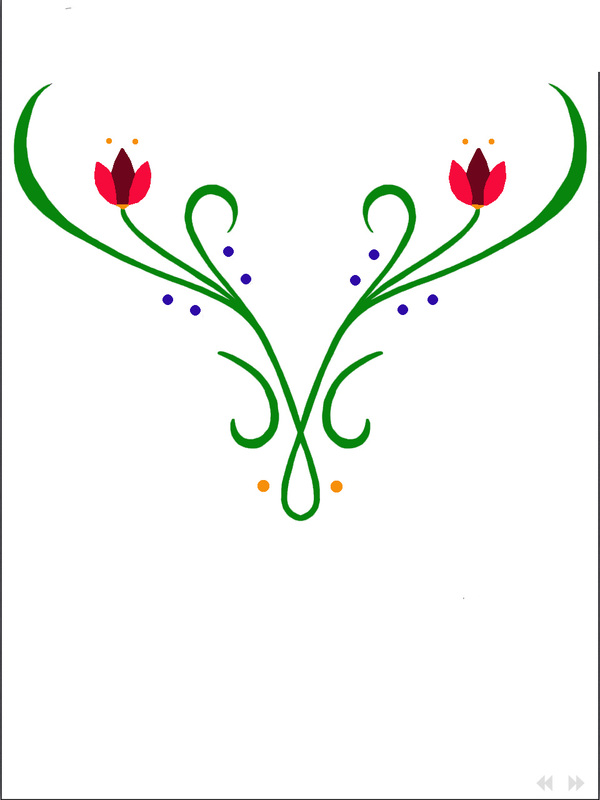

FOR THE STEM AND FLOWER NEAR THE SHOULDER, I TOOK PART OF THE STEM FROM THE MAIN MOTIF, CUT OFF THE FLOWER HEAD AND MOVED IT UPRIGHT, THEN ADDED THREE DOTS OF COLOUR. THIS WAS DONE USING ADOBE PHOTOSHOP, BUT YOU COULD USE PAINT OR ANY DRAWING PROGRAM THAT ALLOWS YOU TO CUT AND PASTE.
|
|
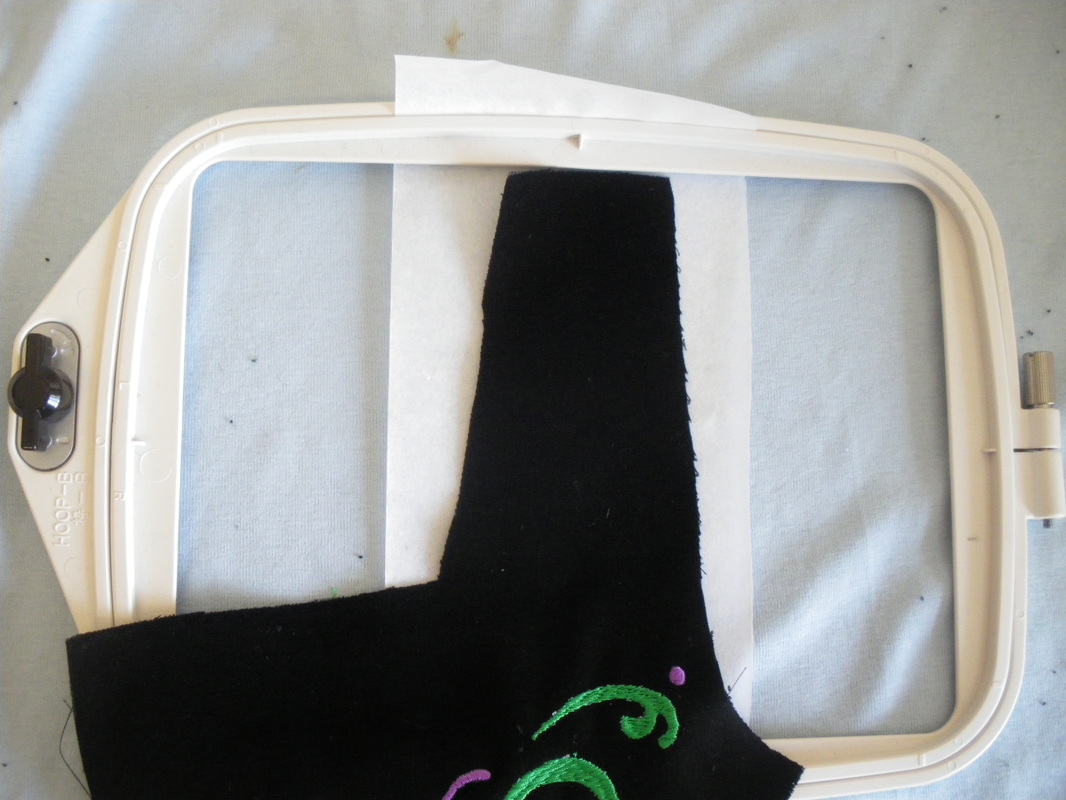
DO NOT, UNDER ANY CIRCUMSTANCES, HOOP VELVET. THIS CAUSES "HOOP BURN" WHICH LEAVES DAMAGED FIBRES WHICH CANNOT BE REMOVED)
Full instructions for using the "non hooped" method are in our video tutorial.
Full instructions for using the "non hooped" method are in our video tutorial.
|
|
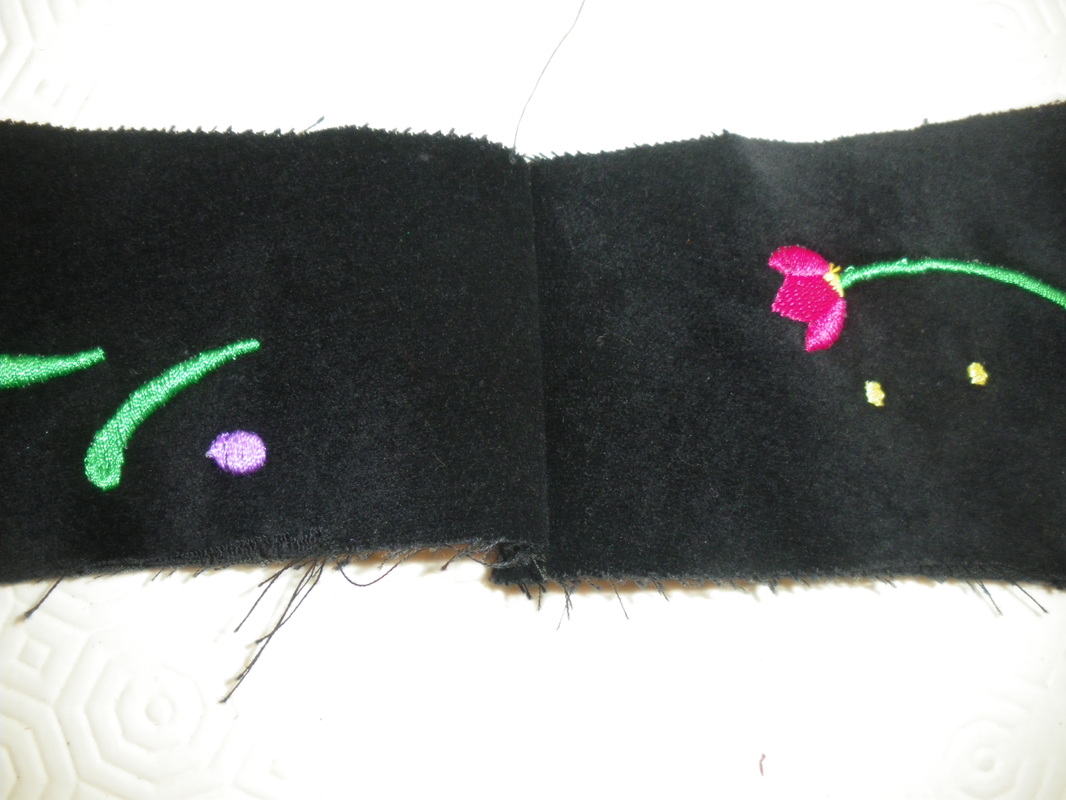
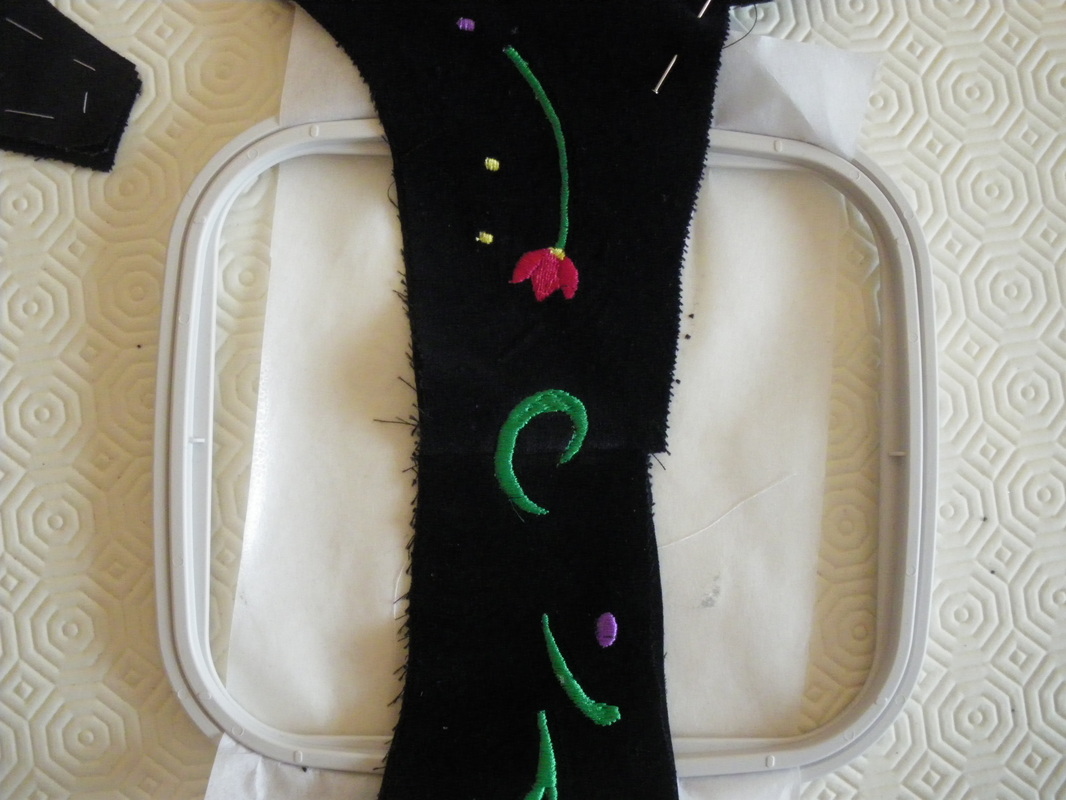
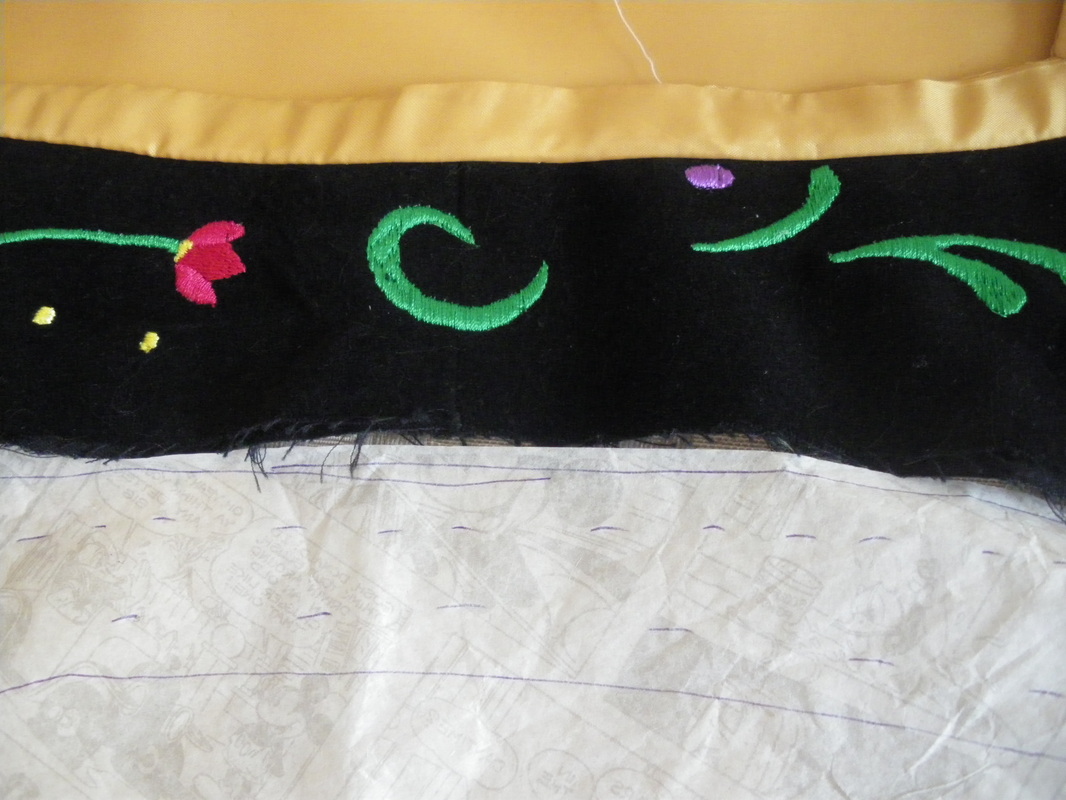
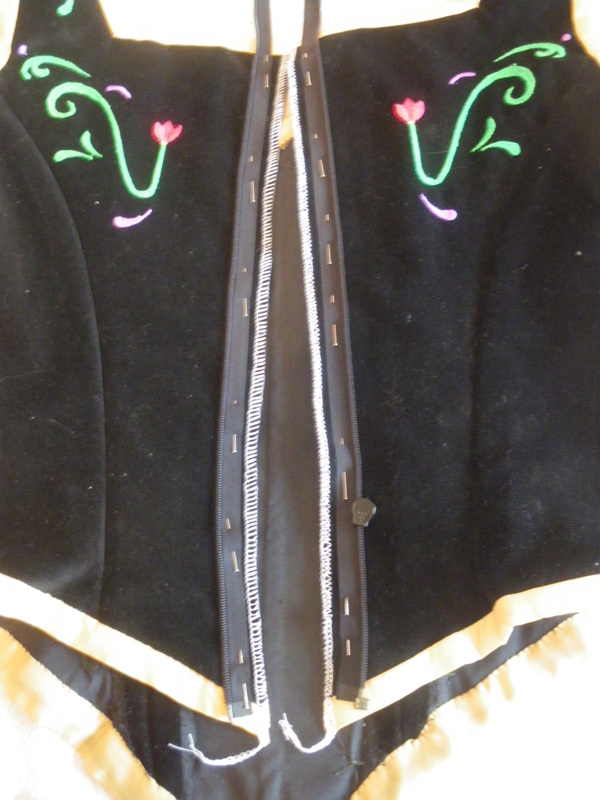
Sew the shoulder seam of the velvet pieces only. Using the non-hoop method, sew the final swirl over the seam.


|
|
Following these instructions from Youtube, I decided to have a seamed edge, which involves doing separate pieces for each section. It is entirely up to you how you go about putting your edging trim on
http://www.sissonfamily.com/Sewingroom/files/V-neck%20binding.pdf
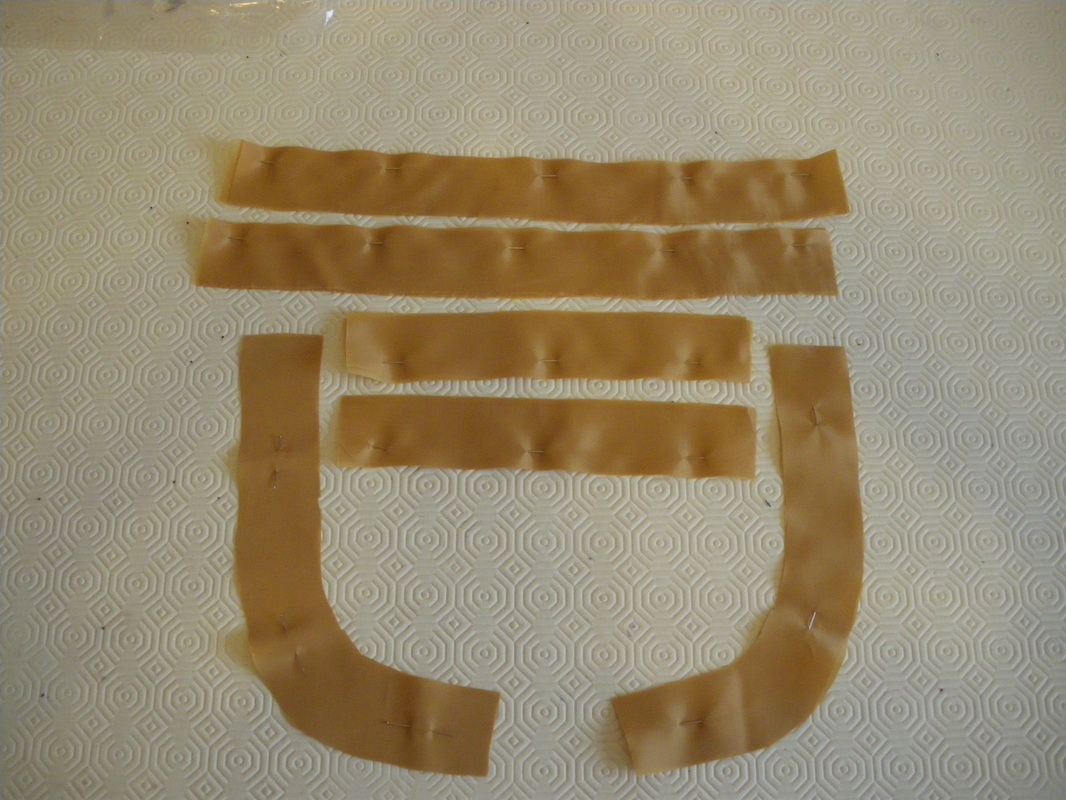
My instructions are in the video tutorial and involve cutting two pieces for each section, plus a stiffening fabric.
http://www.sissonfamily.com/Sewingroom/files/V-neck%20binding.pdf
My instructions are in the video tutorial and involve cutting two pieces for each section, plus a stiffening fabric.
|
|
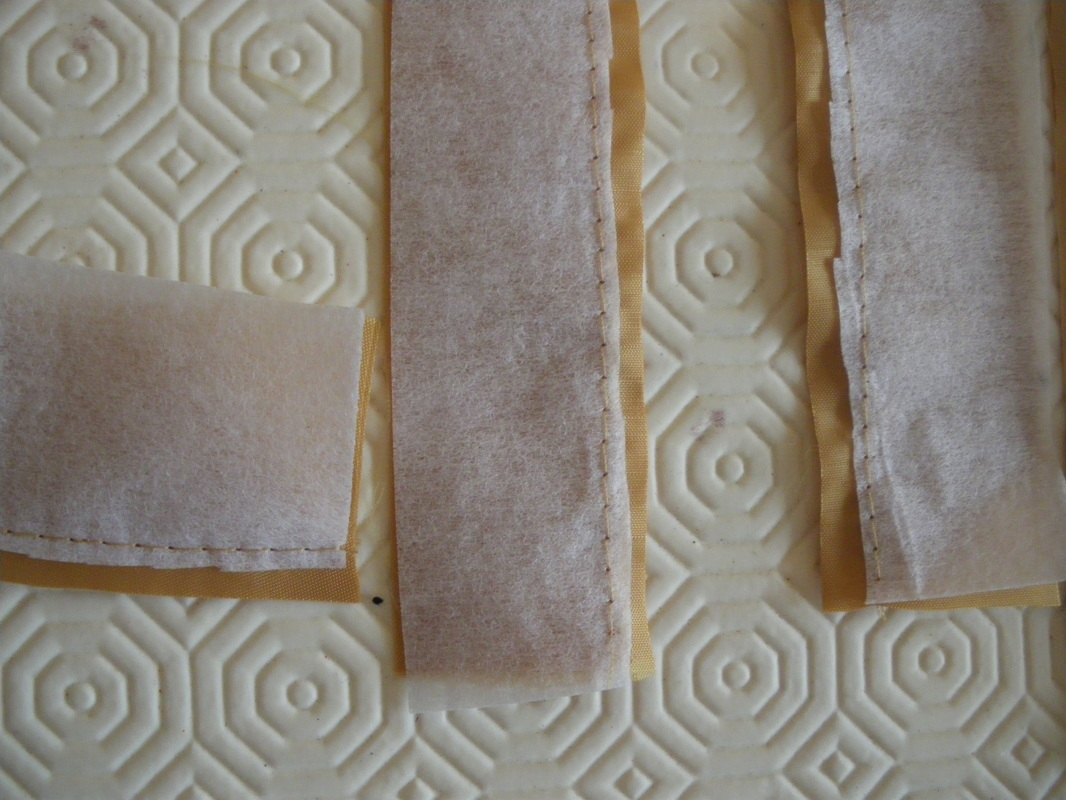
Sew the stiffener on two pieces of fabric. For the curved pieces, sew on the outside line. Cut the stiffener back to the sewing line and reduce the fabric seam, clip any curves. Turn the pieces the right way out and iron.
You can now pin, tack and sew all your pieces together, putting a piece of velvet fabric to each lining piece. Sew all the seams, but leave the side seam as it is easier to put your armhole in before this is done.
(Now the complicated bit!!) starting at the front of the bodice, sew on your sections, be sure to leave at least 2" (5cm) as an overlap, Full instructions are on the video.
|
|
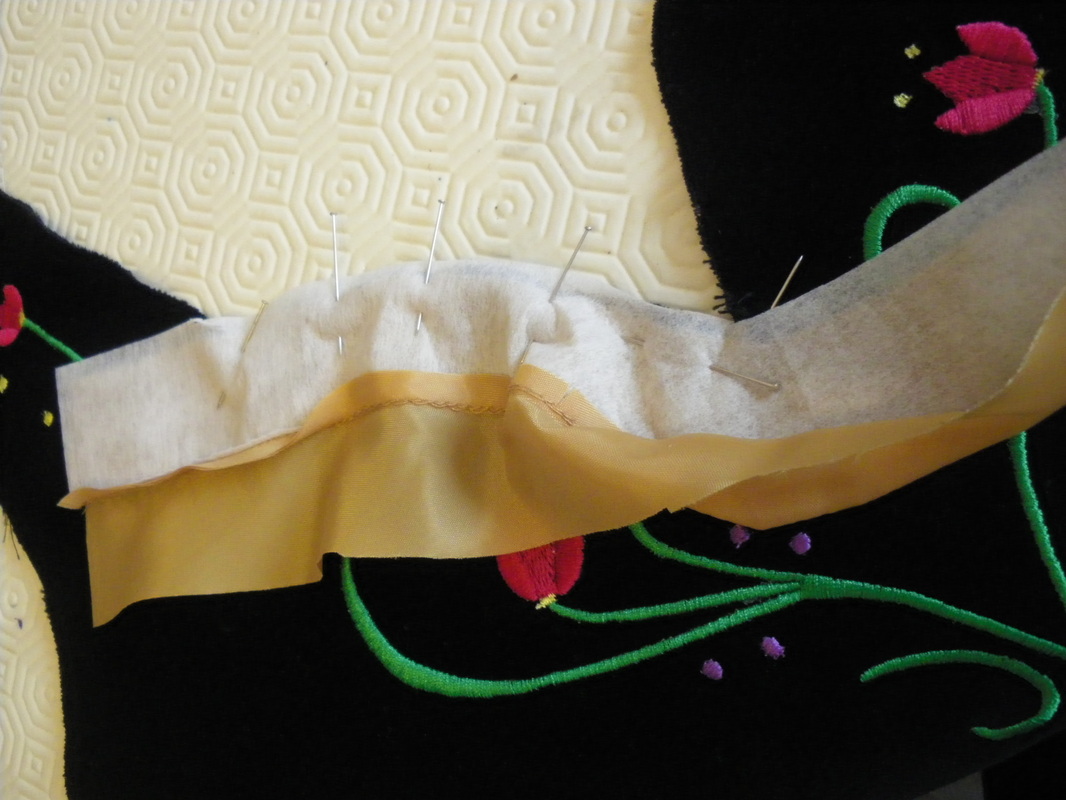
For demonstration purposes, this is what the first two pieces should look like. The inside, at this stage, has not been neated. Make a pattern for the armhole using the same method to produce a template. I made the armhole in one complete sections.
|
|
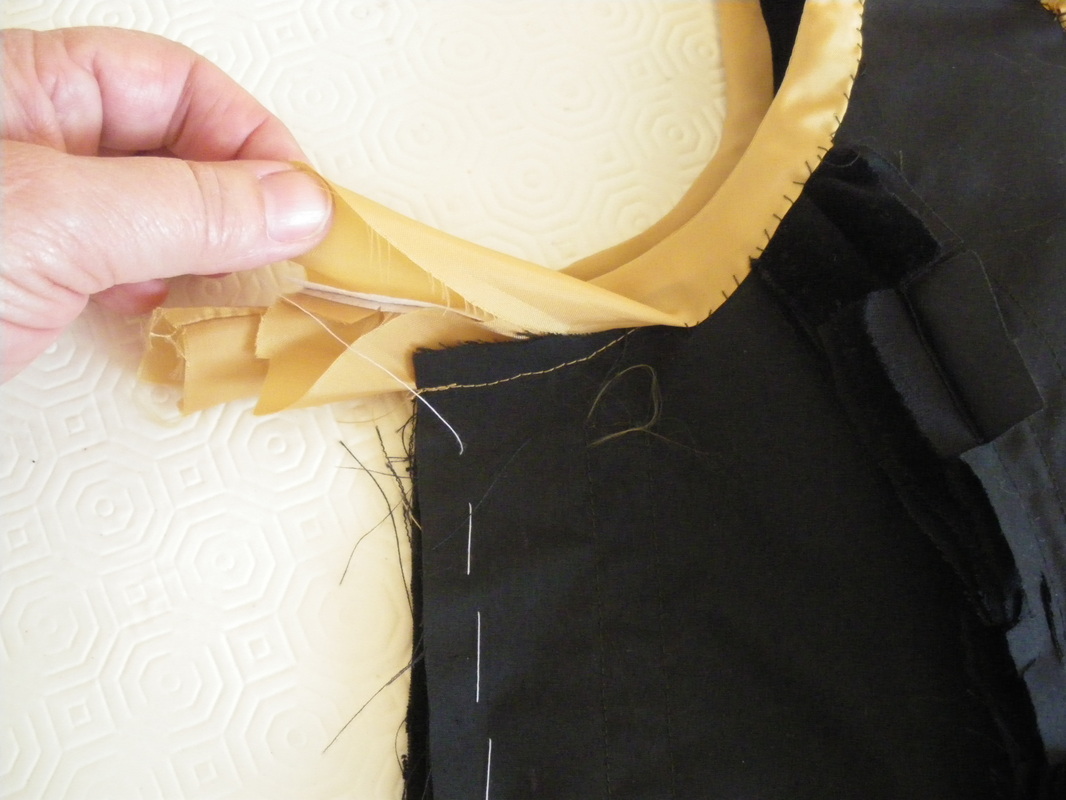
Now turn all the trim to the inside, turn a seam and hand sew to the bodice, this will involve cutting off any unnecessary fabric to reduce bulk. When you sew the armhole trim, leave the last couple of inches unsewn. You can now sew up the side seam and with the gold trim opened out, continue sewing the seam on the gold section. Cut off any seam excess on the trim, turn to the inside and hand sew to the inside of the bodice.

|
|
Put your boning into the channels and push up as far as they will go. Hand sew a few stitches at the bottom of each channel to stop the boning coming out, being careful NOT to sew through to the front fabric.
|
|
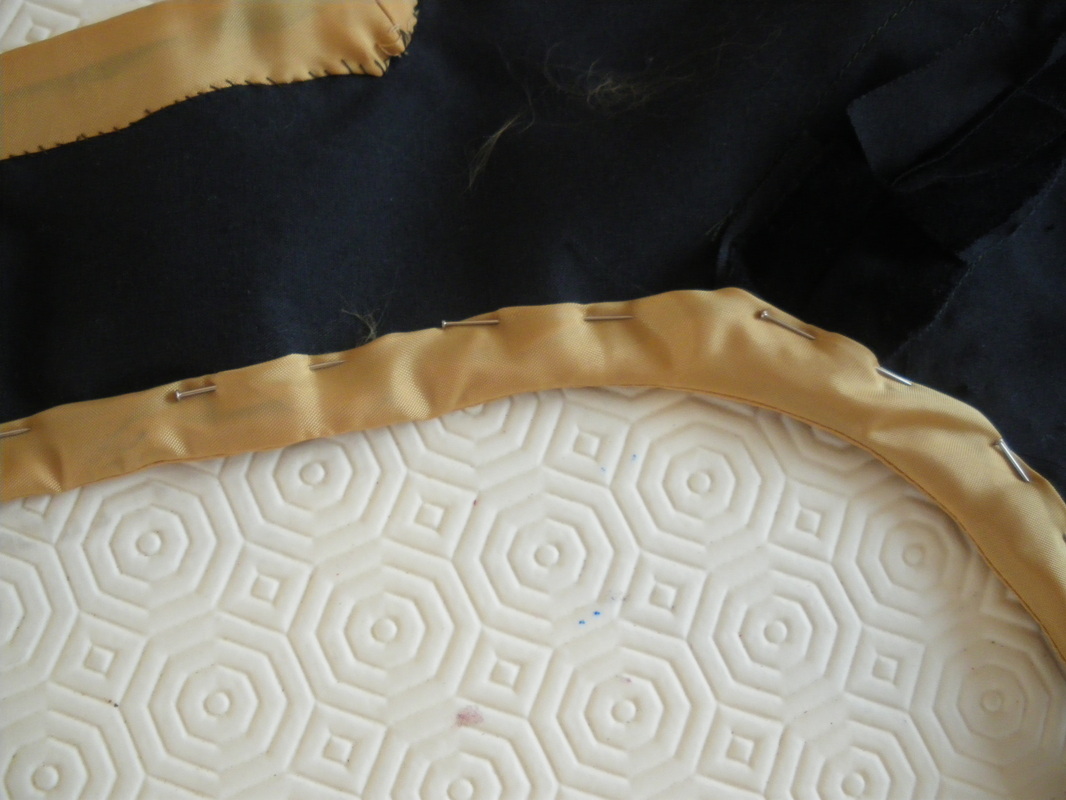
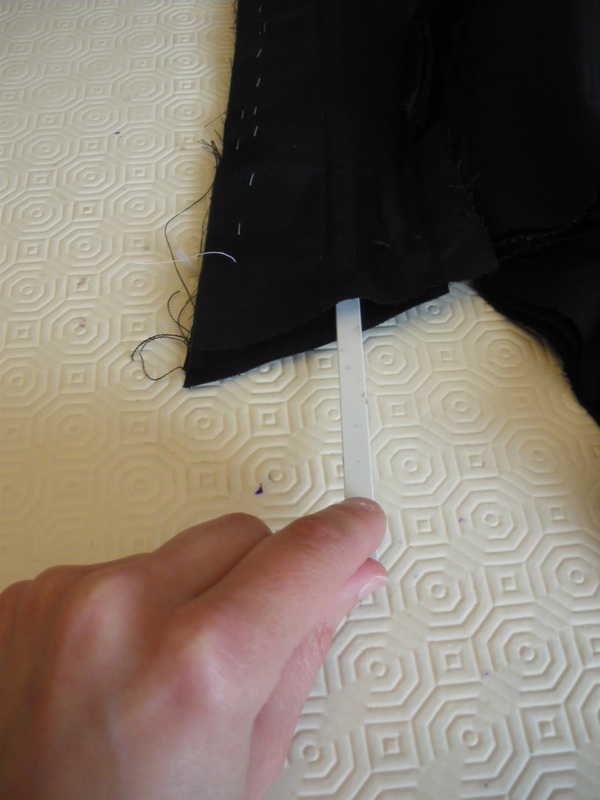
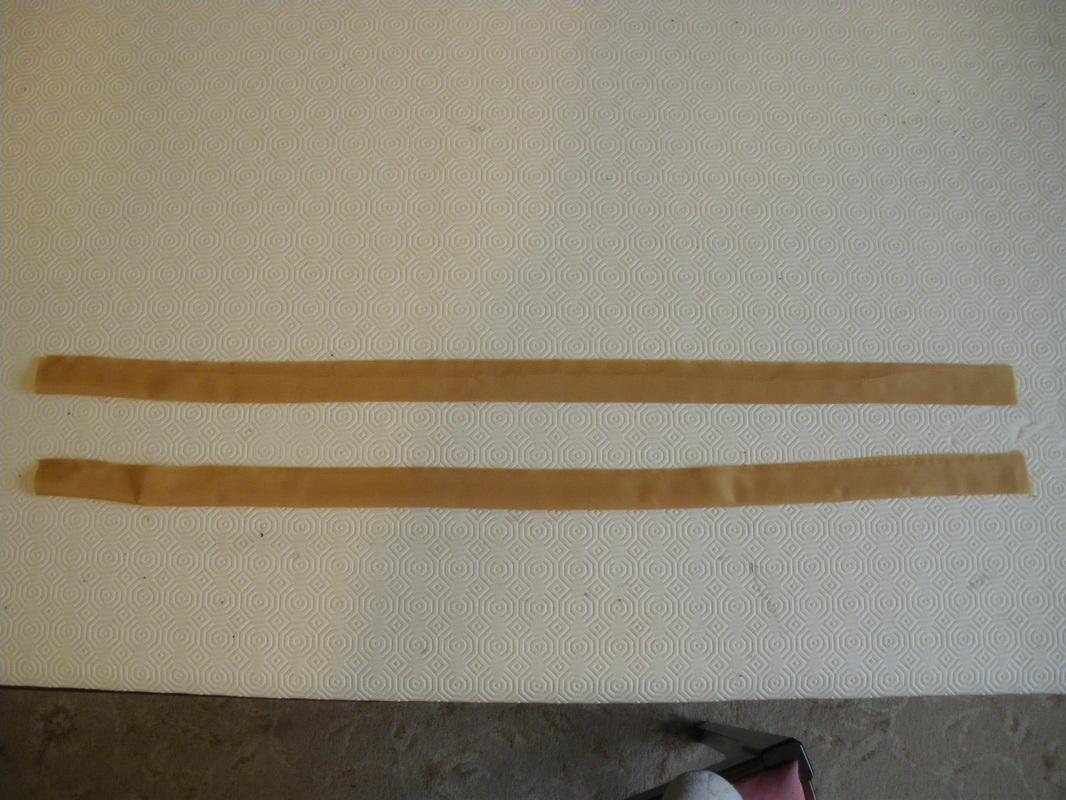
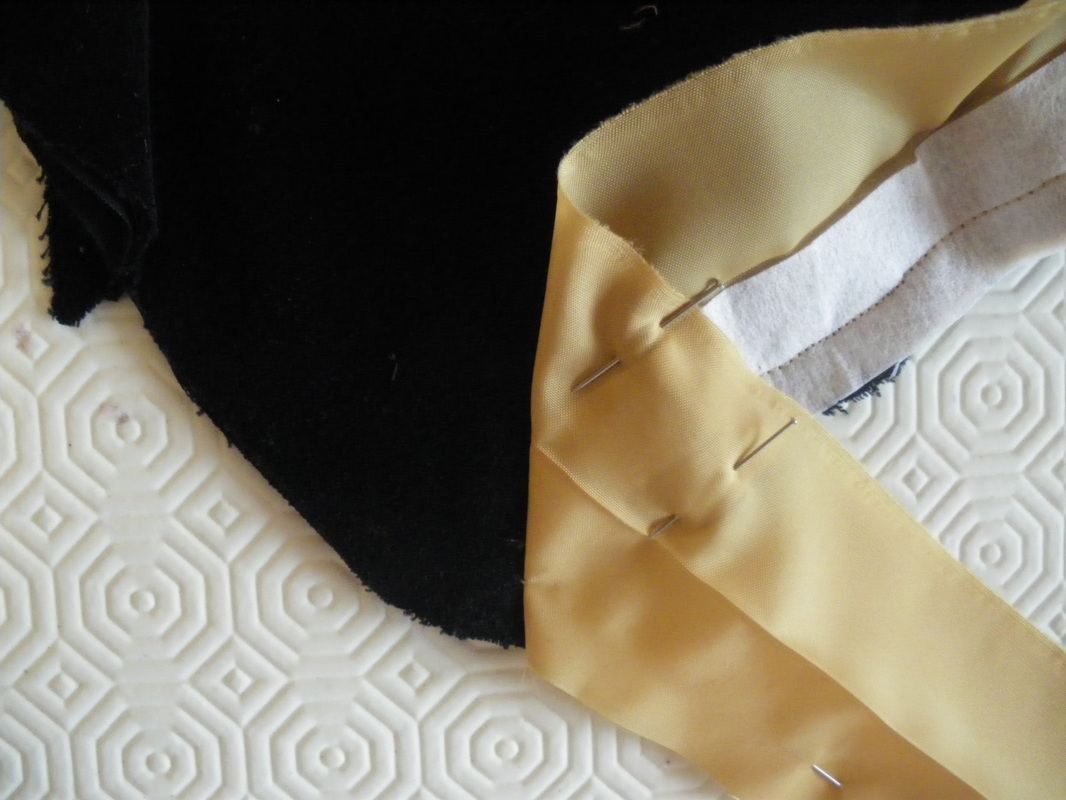
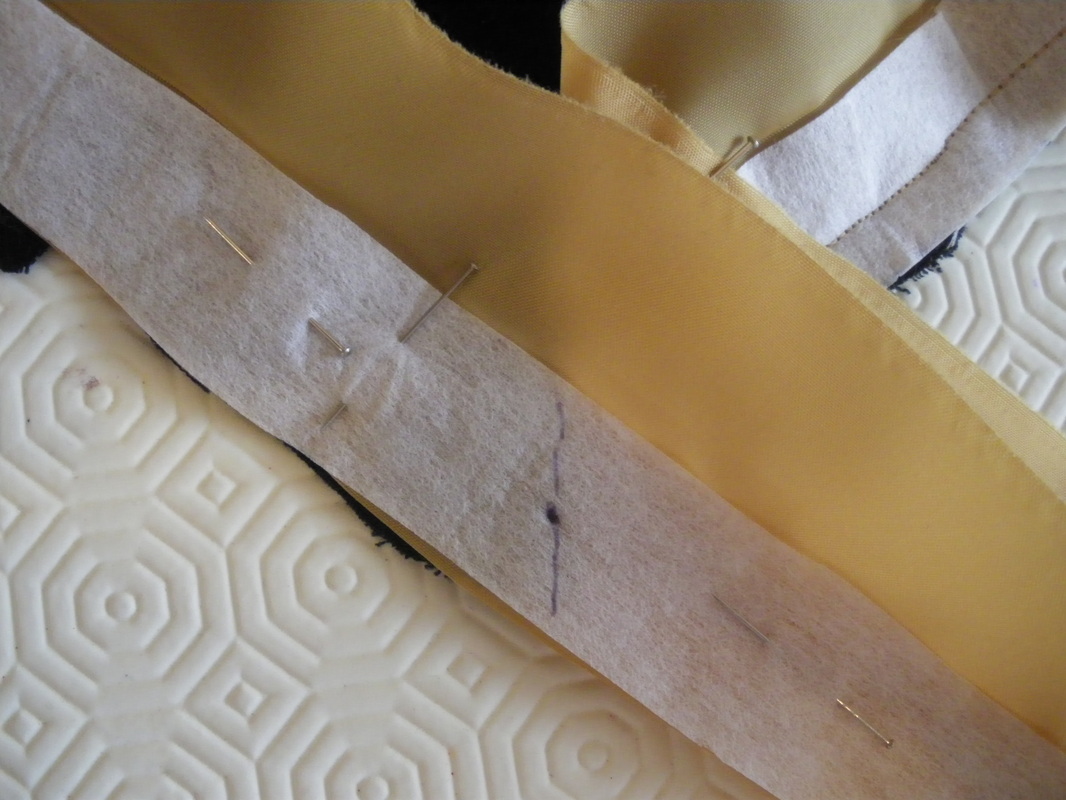
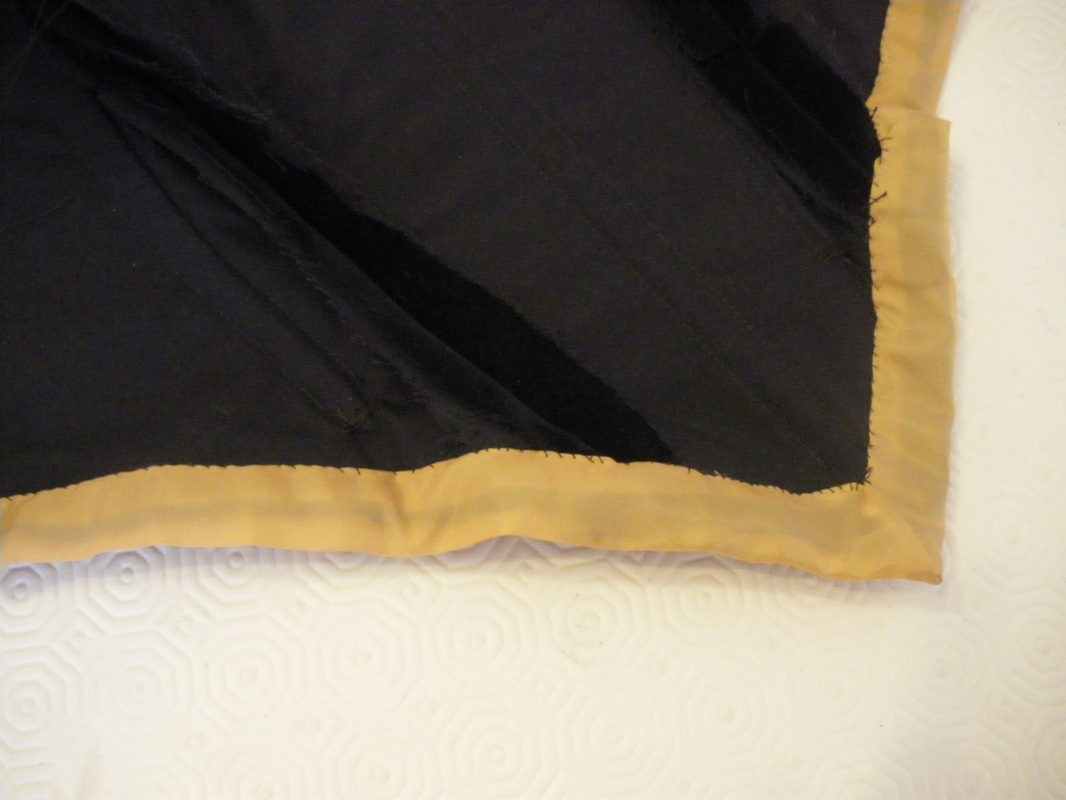
Holding the front "V" of the bodice and the back opening, pull the bodice as straight as possible and measure, add a few inches to the measurement and cut two strips of gold fabric. I'm not going to sew a seam for these pieces just cut it wide enough to double over and iron (approximately 2", (5cm). Cut a piece of stiffener and tack it to one edge. Starting at the centre front. sew onto the bottom of the bodice all the way along to the back opening. Using the same method as the neckline and armholes, attach a second piece of gold fabric.
|
|
Place a mark where the previous stitching ended, this will be your starting point to sew the edging on. Turn the edging to the inside and hand sew.
|
|

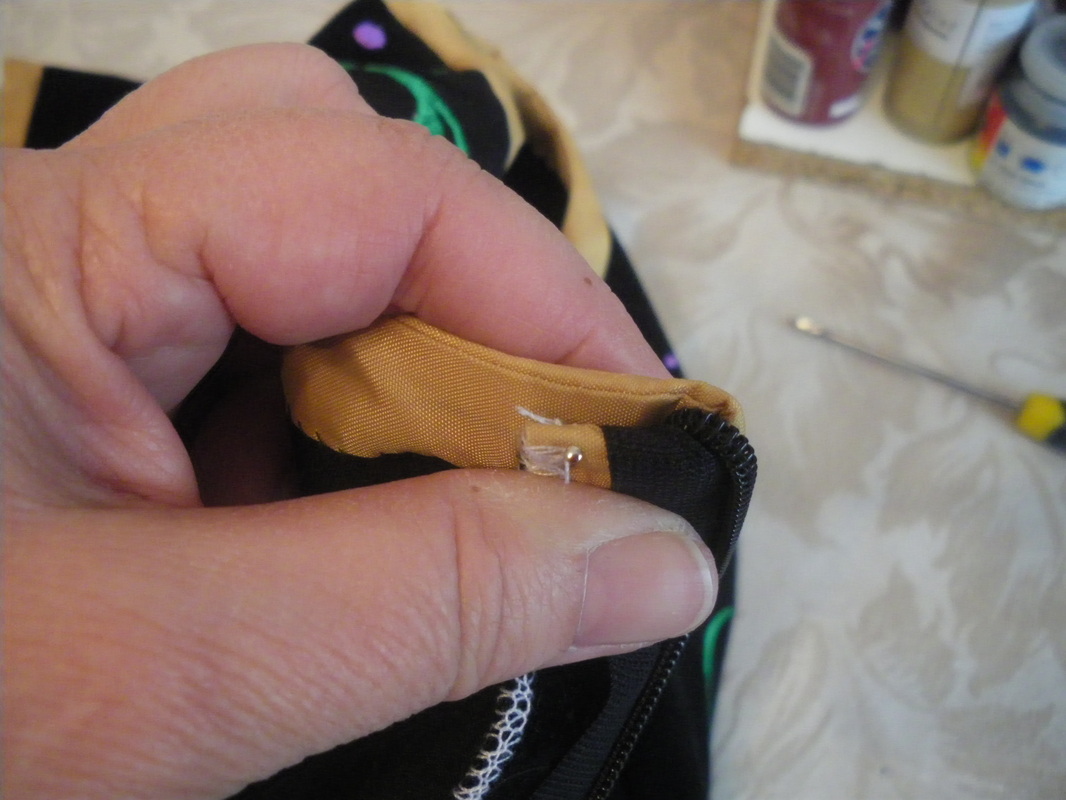
You are probably aware of how difficult it is to get hold of an open ended invisible zip. I got one that was 30" long and cut it down. Sew your zip in, turn the zip end to the inside of your seam and hand sew the zip to the seam allowance, then hand sew the seam allowance to the bodice. For the bottom of the zip, turn the bottom edging up to form a triangle and hand sew this in place.
This completes the bodice.
To make the bonnet:
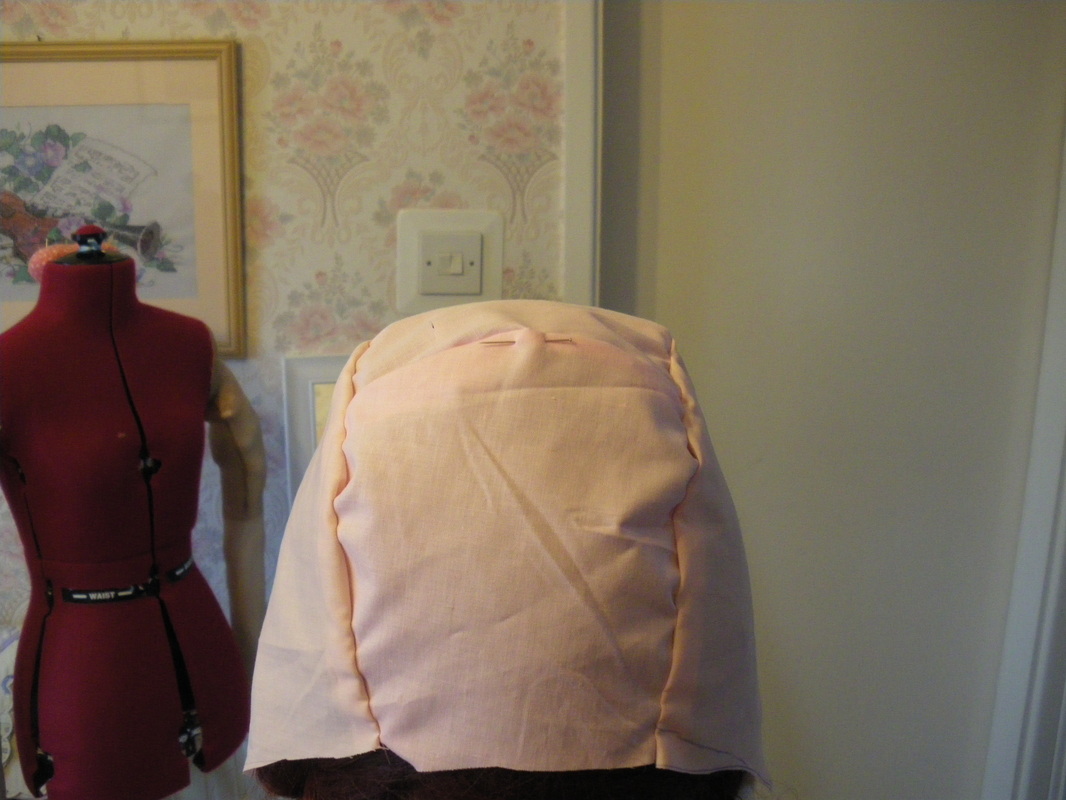
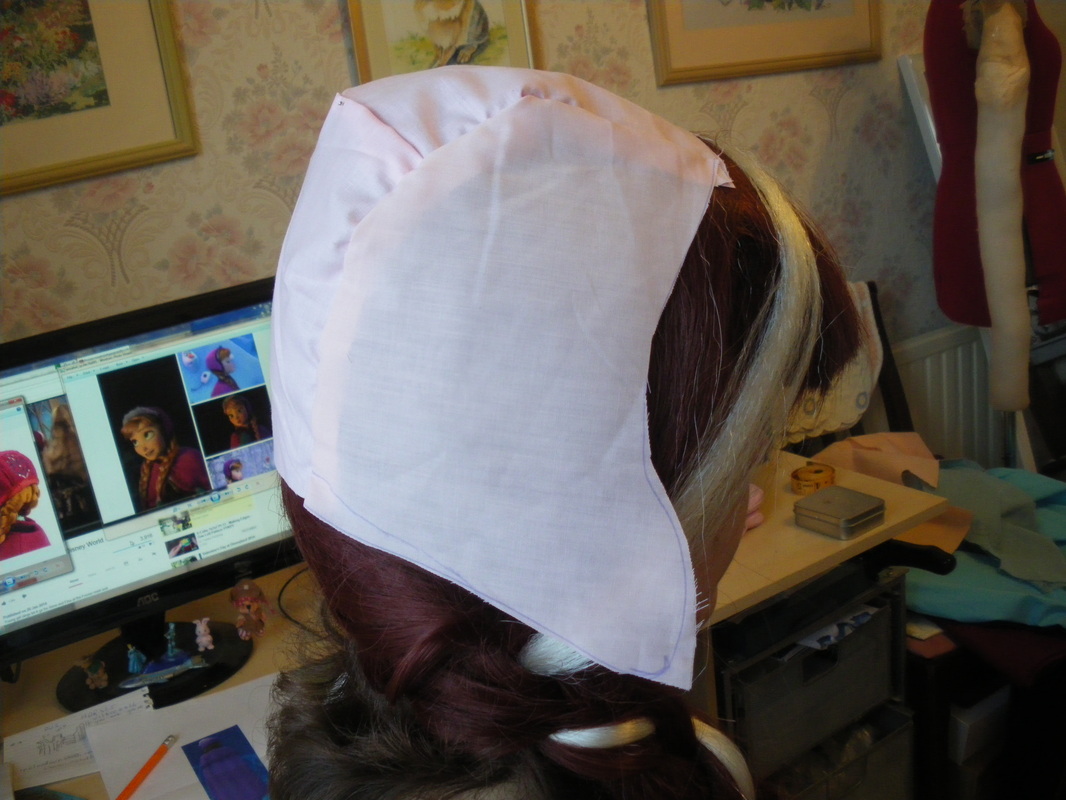
Unfortunately, there is no pattern for the hat :( So what I did was, I had the hat moulded to my head (You must have the wig on to do this). I knew it was in four pieces, it was just a matter of getting the shape right. Making a mock up was also useful for getting the felt trim pattern, which is in the video (to follow)
To make the bonnet:
Unfortunately, there is no pattern for the hat :( So what I did was, I had the hat moulded to my head (You must have the wig on to do this). I knew it was in four pieces, it was just a matter of getting the shape right. Making a mock up was also useful for getting the felt trim pattern, which is in the video (to follow)
|
|
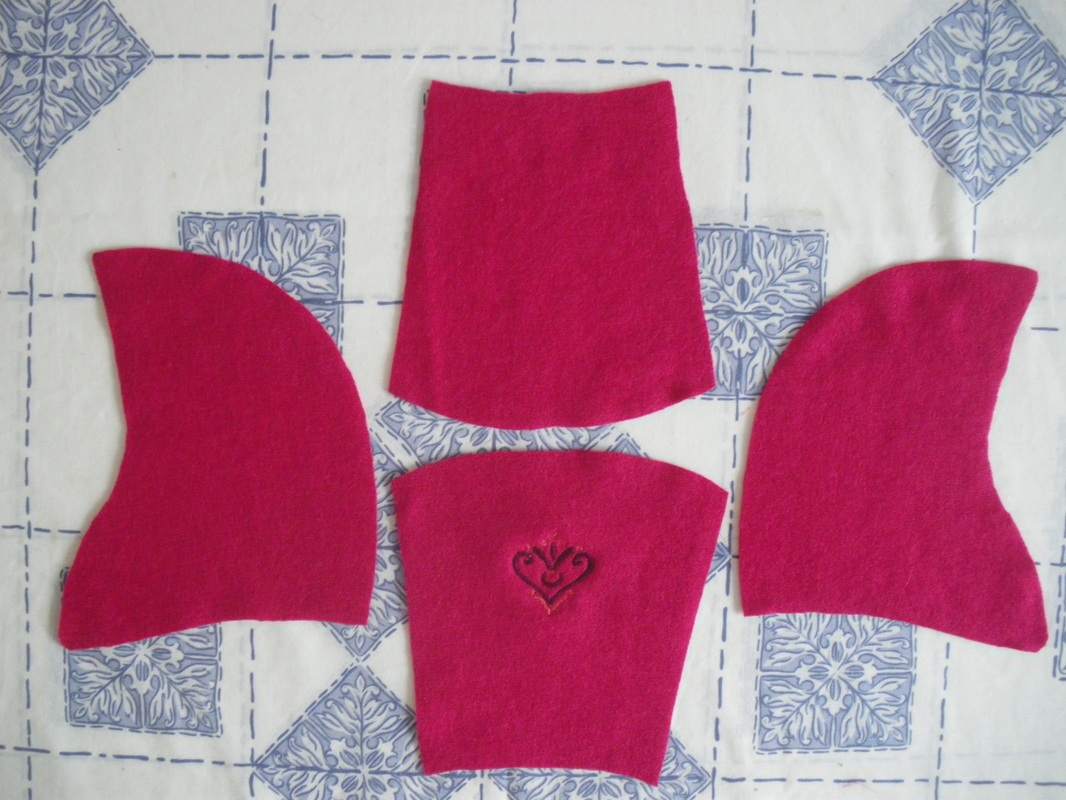
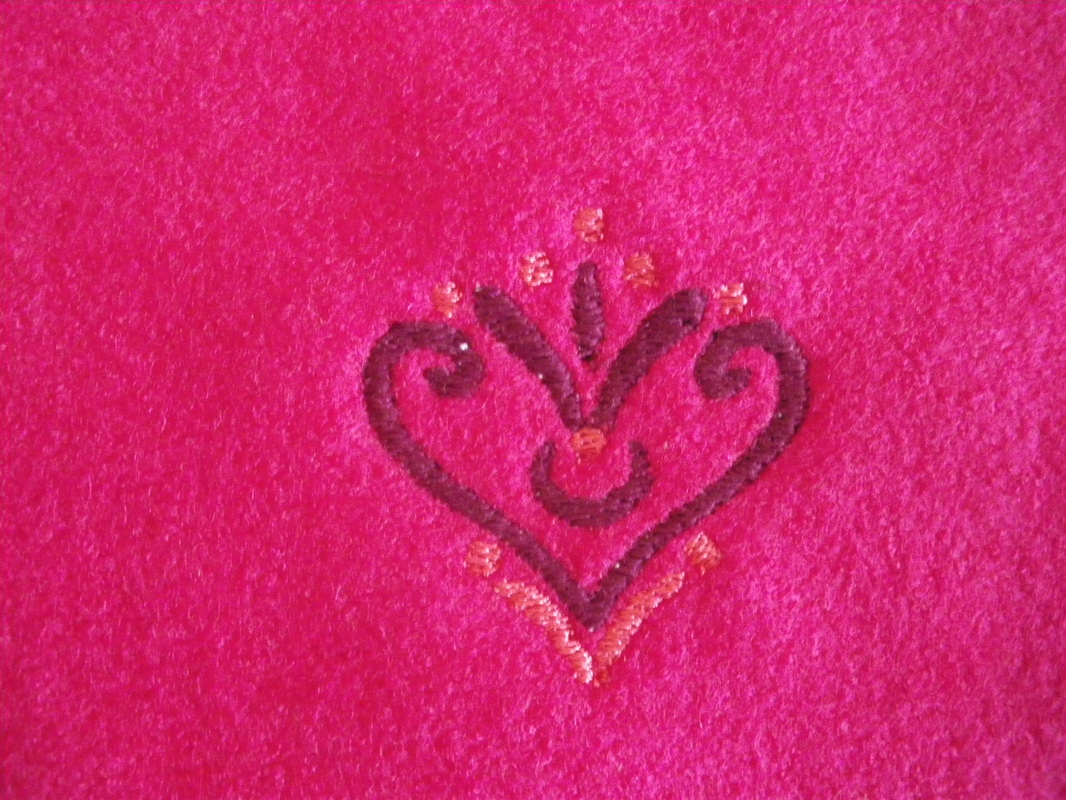
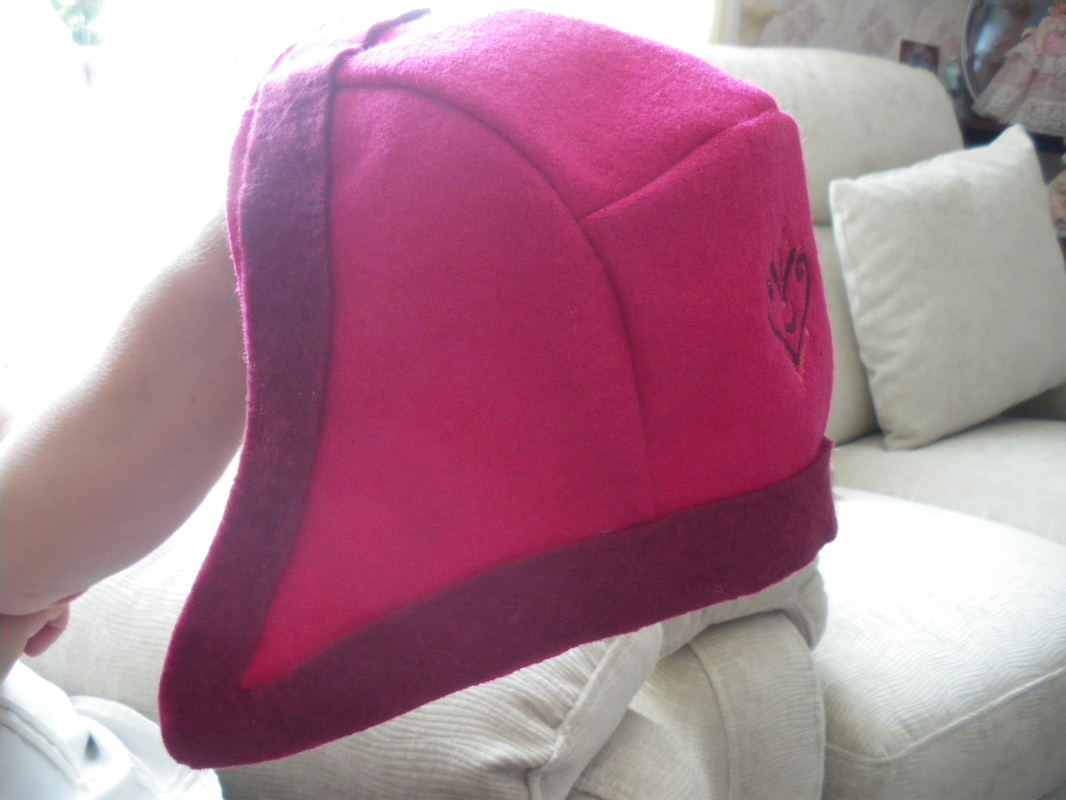
You should end up with these shapes and don't forget to cut out lining pieces. Before you cut them out, first of all embroider your design for the back piece, because its so small it won't fit in your hoop. Once its done, use your pattern template and draw the piece around your design and cut out. The motif should be approximately 6cm from the top Also remember, that the hat is designed to be small, so it doesn't come all the way forward on the head and you should be able to see at least 2" (5cm) of wig at the back of the neck.
|
|

Sew the middle sections right side to right side, then sew on the side pieces.
|

|
Sew the lining pieces together, then right side to right side, attach the liner to the hat. Leave a gap of approximately 2" (5cm) at the top edge for turning the hat the right way out.

|
|
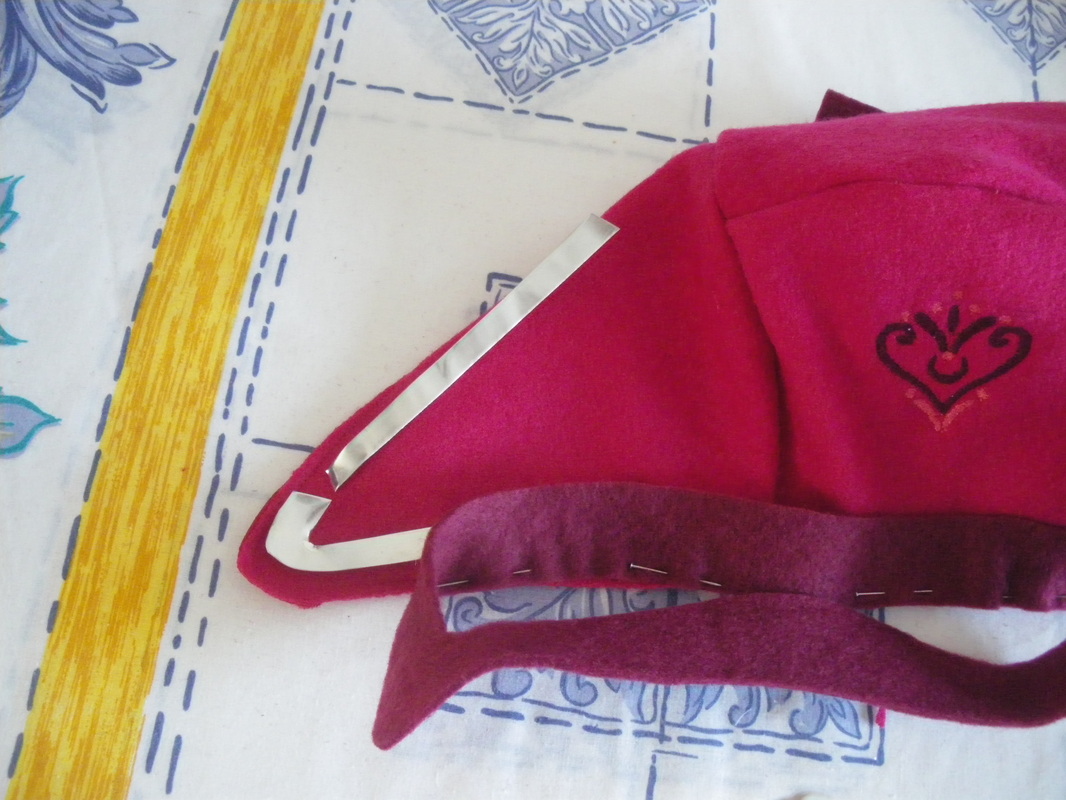
Hand sew the gap shut and machine all around the edge of the hat. Now on the video, I show two methods of getting the pattern for the trim. The one I used, was to take the mock up I made and cut a 1" (2cm) strip off around the edge, cut it open at the centre top, lay it on the felt and cut. Another way, (below), is to lay your completed hat on the felt, starting with the bottom, draw this line on the felt, then carefully place the hat following its contour as shown. Allow a little extra at the middle top.
|
|
This is when I hit a problem. The original hat, I'm sure, would have had ties. On trying the hat on, the side pieces stuck out quite a lot on top of the wig, so I tried putting some craft aluminium strips between the felt before I glued in on to help shape the pieces. This worked to an extent, but I'm not quite happy with it, so have decided to use a couple of pins to attach it to the wig plaits as I'm wearing it. If you have another idea, please feel free to let me know and I will include it in these instructions.
|
|
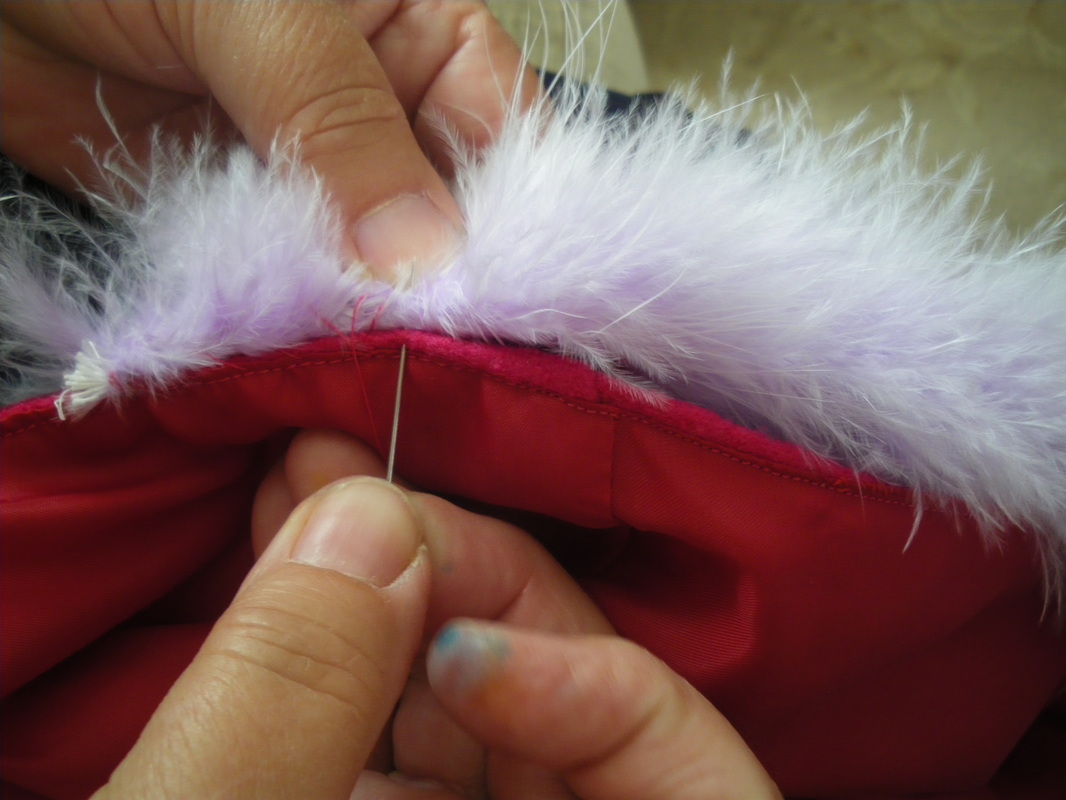
There are three ways to attach the marabou. The first is to sandwich it between the liner when you are putting the hat together (I think you may have a problem controlling the feathers!!!). The second, is to sandwich it between the hat and the felt as you are gluing it on. The method I used, was simply to catch stitch it to the edge.
|
|
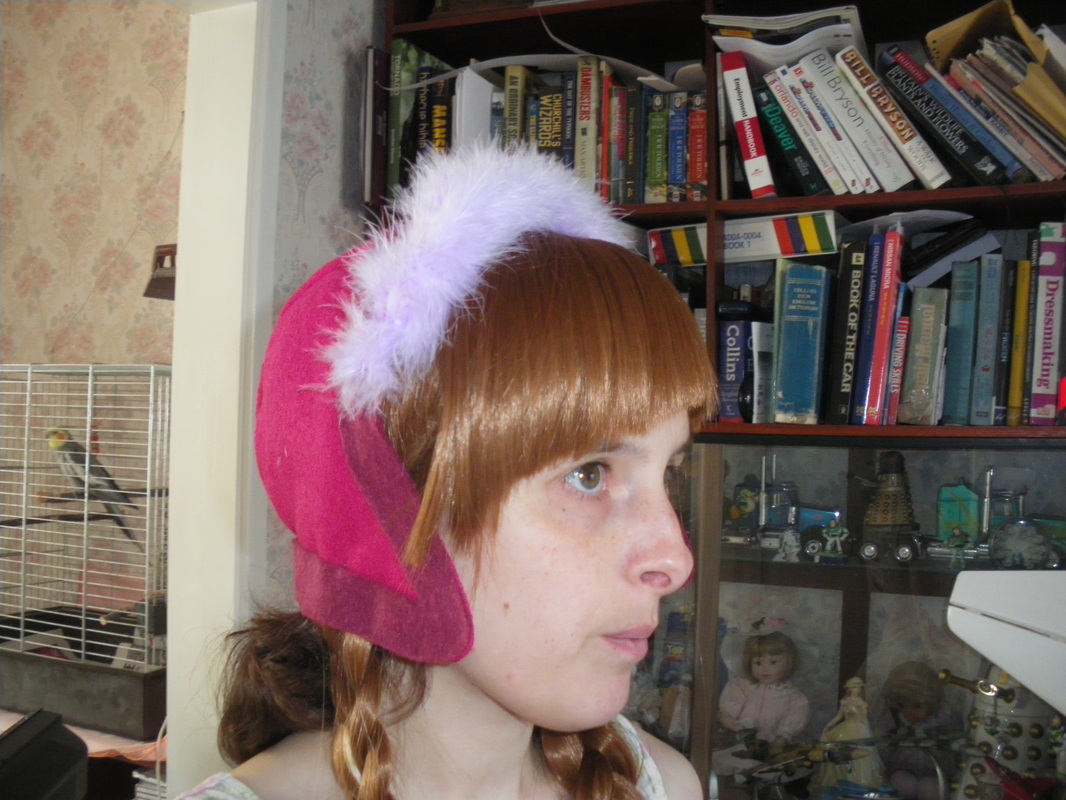
This completes the hat.
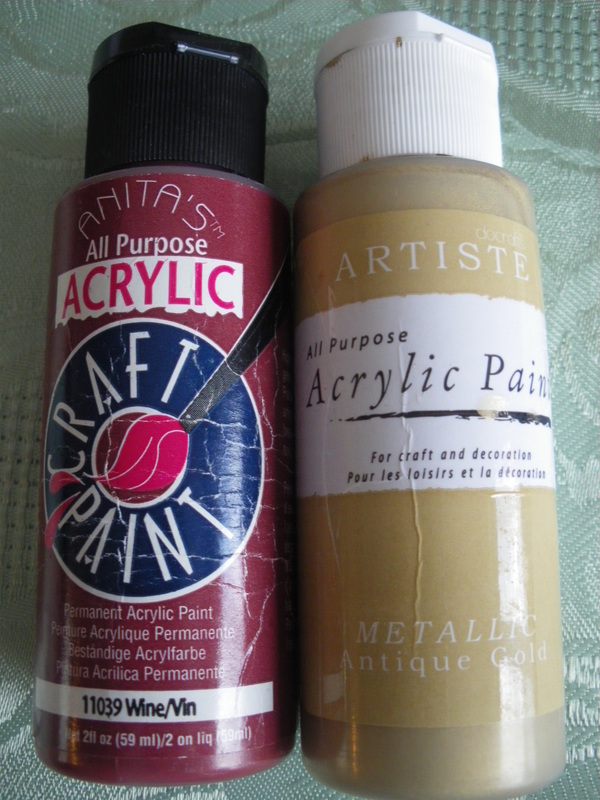
The Boots:
Look for slim boots with a side zip and low heel. I used Metallic Antique Gold and Acrylic for the design, andWine paint for the heel and sole.
The Boots:
Look for slim boots with a side zip and low heel. I used Metallic Antique Gold and Acrylic for the design, andWine paint for the heel and sole.
|
|
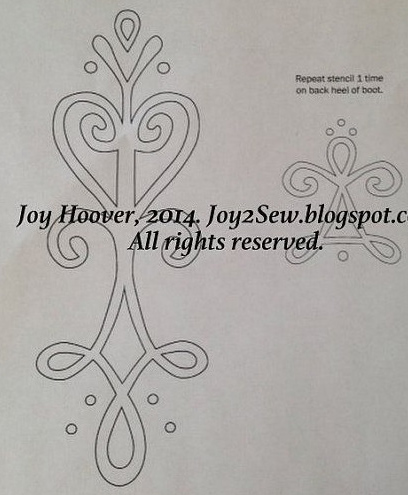
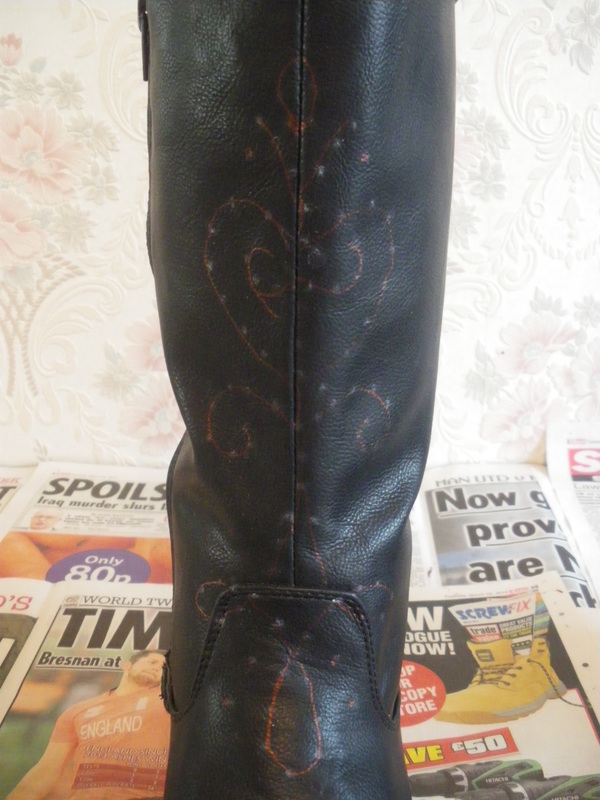
I pin pricked the design through the template and onto the boot with a biro.
|
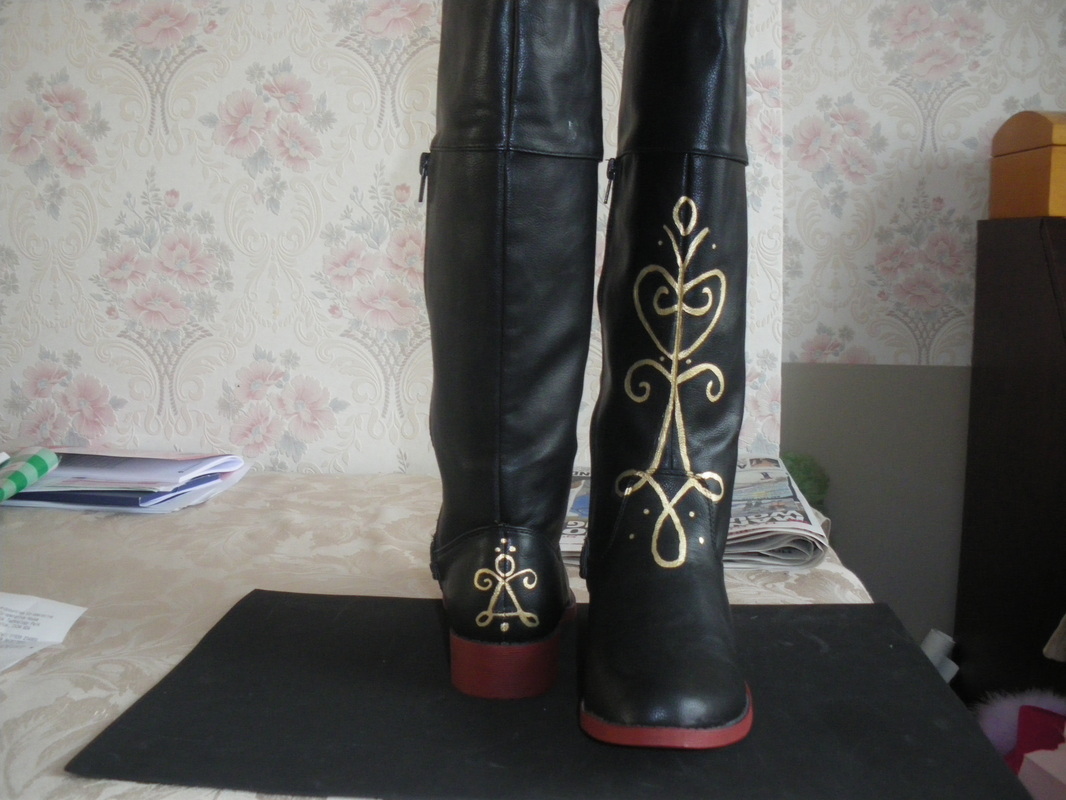
Join up the dots with the gold paint and paint the heel and sole.
This completes the boots. |
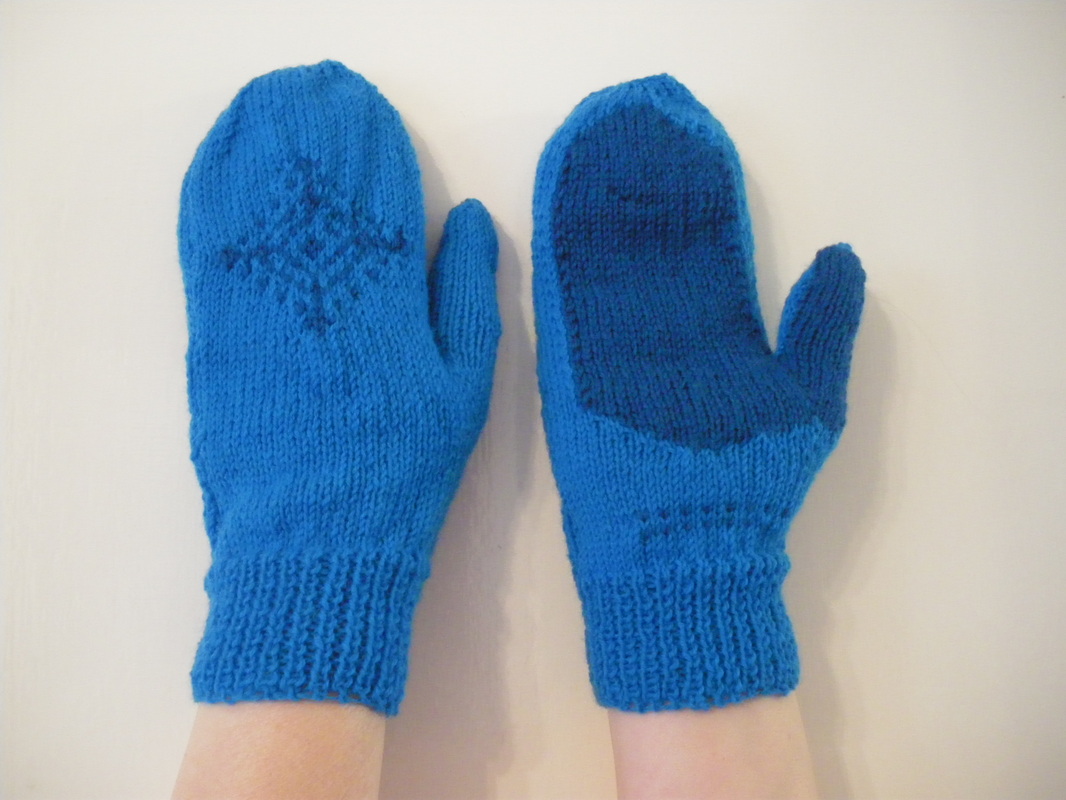
To Make the Mittens
|
It is a deep cuff of 2" (5cm), the length of the thumb and fingers, will be to suit your measurements. 1 started with 56 stitches
4 rows up from the cuff, there are two lines of dark blue stitches, 7 on the first row and 9 on the second. You are aiming to start your dark blue approximately 6 rows above these lines and by the time you have increased the 4th time on the thumb, you should be extending the blue line by line into the thumb itself. But go no further than half way. At the top of the thumb, you will need to decrease the dark blue line by line until you finish with a couple of rows of light blue. The same goes for the inside, by the time you are decreasing for the shape, you should also be decreasing the amount of dark blue. The snowflake patterns starts on the first row when knitting across the front and back of the mitten (hope this makes sense!!) |
|
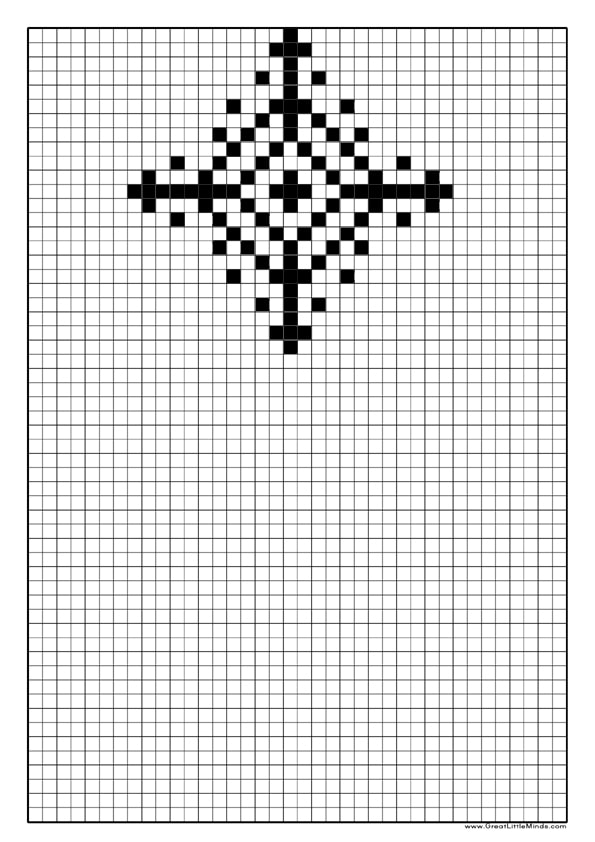
This is the snowflake pattern. You will need 3 light blue stitches spare before starting the middle row of the pattern. So if you have started with 56 stitches, the very first dark blue stitch on the first line of the pattern, should be stitch number 15 from the edge.
|
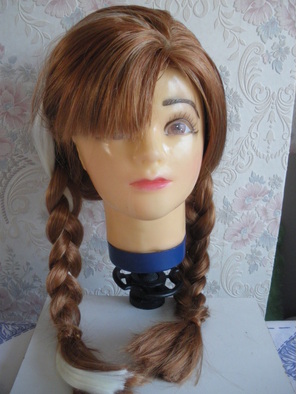
The Wig:
|

|
See video in "Video Tutorials" about this wig
