For this costume, you will require intermediate to experienced expertise.
Difficulty factor 5 - 10
Please note, that we do not make costumes to order or to hire. These are one off costumes designed for Tracy.
Please use these instructions in conjunction with our videos, as they contain more information on items needed, their sources and technique
Difficulty factor 5 - 10
Please note, that we do not make costumes to order or to hire. These are one off costumes designed for Tracy.
Please use these instructions in conjunction with our videos, as they contain more information on items needed, their sources and technique

Materials:
Grass Skirt:
White and Natural raffia grass (see video)
Jute Rope 6mm thickness
String to Bind Grass
Over Skirt:
3 Metres Basket Weave Burlap (Ivory)
Embroidery thread DMC
36 Tassels
6 Embroidered stars
Gold thread
Crop Top and Red Sash:
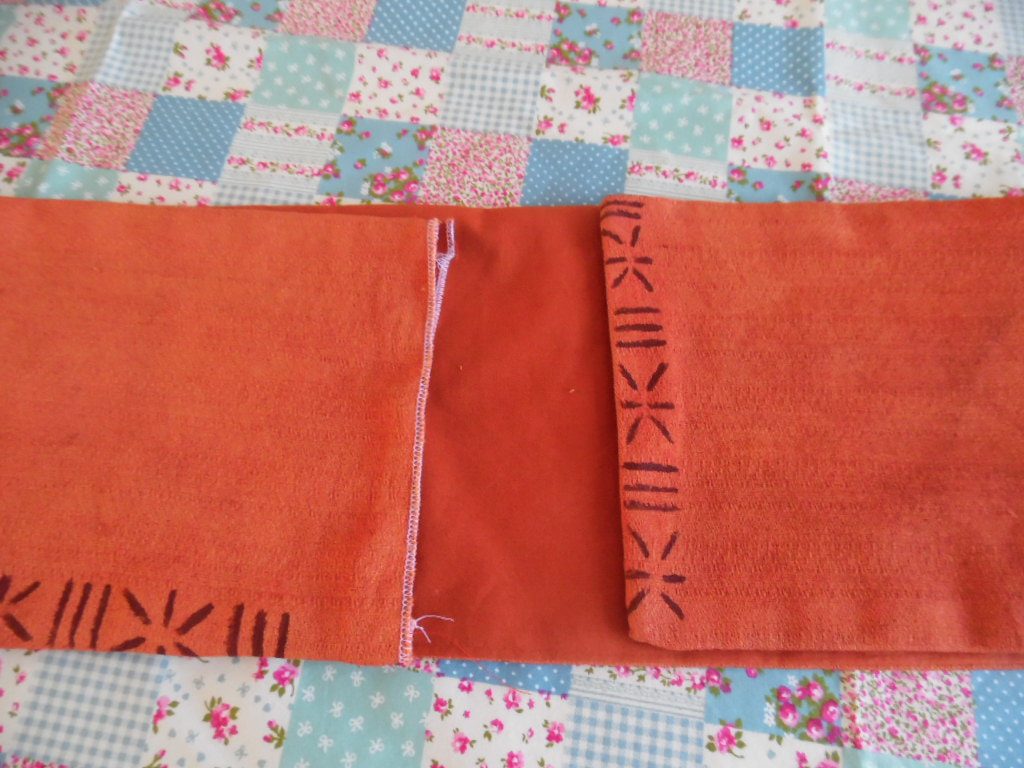
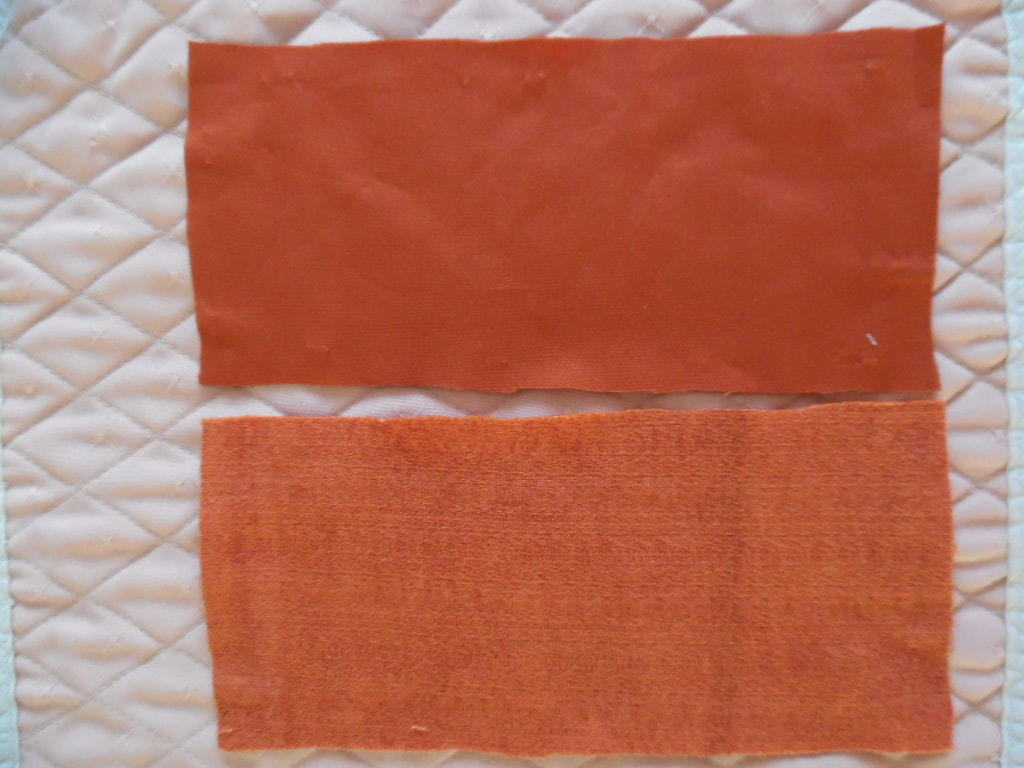
1 metre Bark Weave Cotton (bought in white, but dyed)
http://www.whaleys-bradford.ltd.uk/
1 Metre Cotton fabric to match dye
2oz tub of 419 Cayenne Red Acid Dye
https://www.dharmatrading.com/dyes/dharma-acid-dyes.html?lnav=dyes.html
Small piece of Velcro
Jacquard Textile Fabric Paint 132 Mars Red
Approx 80 Ivory cowrie shells approximately 2cm long
0.5mm Dark Brown Hemp Cord for bodice trim
I medium/large hook and eye
1-2 Metres Dark Brown Cord
Assorted beads
4 pieces plastic boning
Grass Skirt:
White and Natural raffia grass (see video)
Jute Rope 6mm thickness
String to Bind Grass
Over Skirt:
3 Metres Basket Weave Burlap (Ivory)
Embroidery thread DMC
36 Tassels
6 Embroidered stars
Gold thread
Crop Top and Red Sash:
1 metre Bark Weave Cotton (bought in white, but dyed)
http://www.whaleys-bradford.ltd.uk/
1 Metre Cotton fabric to match dye
2oz tub of 419 Cayenne Red Acid Dye
https://www.dharmatrading.com/dyes/dharma-acid-dyes.html?lnav=dyes.html
Small piece of Velcro
Jacquard Textile Fabric Paint 132 Mars Red
Approx 80 Ivory cowrie shells approximately 2cm long
0.5mm Dark Brown Hemp Cord for bodice trim
I medium/large hook and eye
1-2 Metres Dark Brown Cord
Assorted beads
4 pieces plastic boning
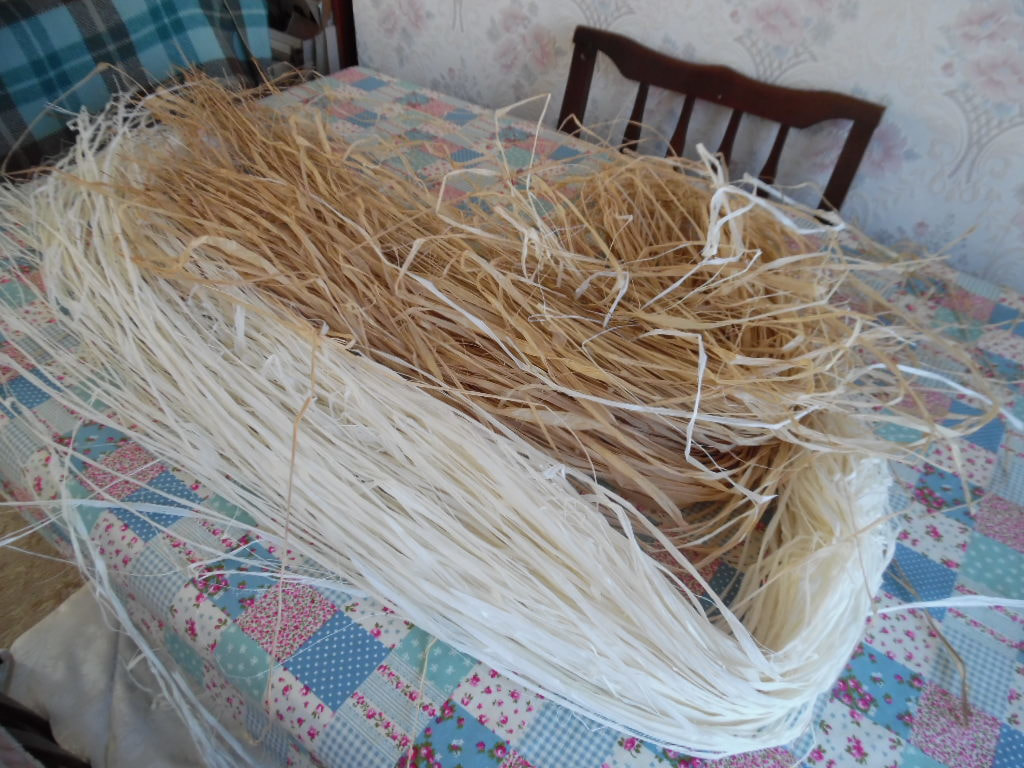
To make grass skirt:
|
I used more white raffia than natural, these need to be mixed together to create a random selection of raffia.
|
|
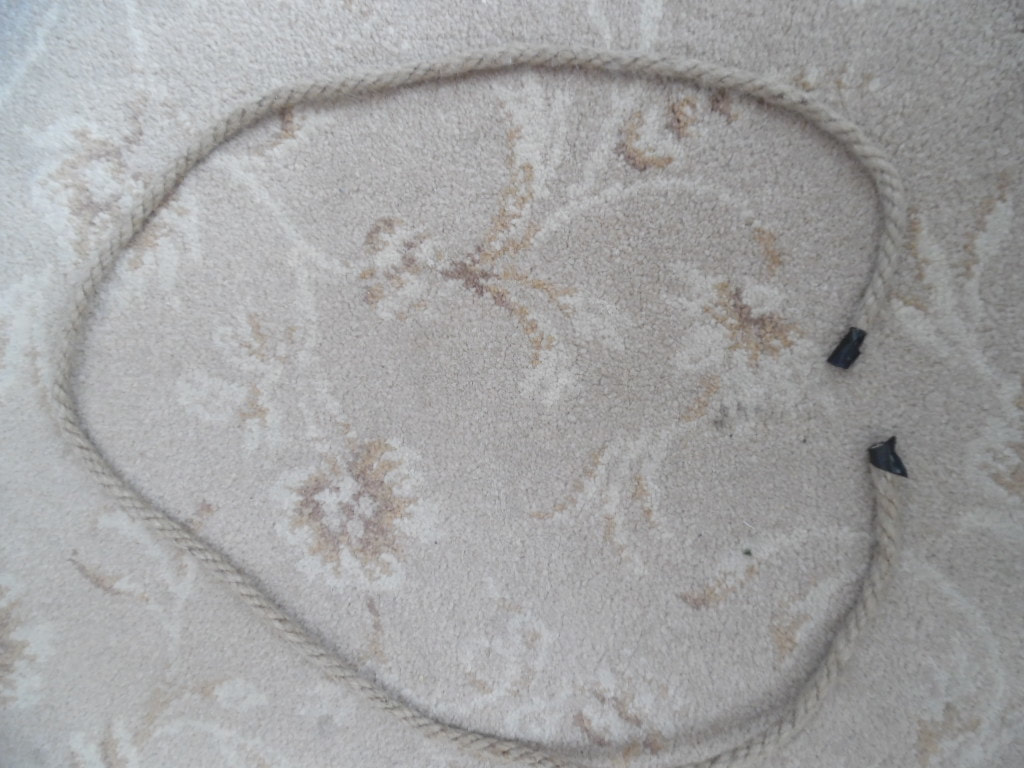
Measure your waist and add enough to be able to tie in a bow. Wrap some tape around the ends to stop fraying.
|
|
|
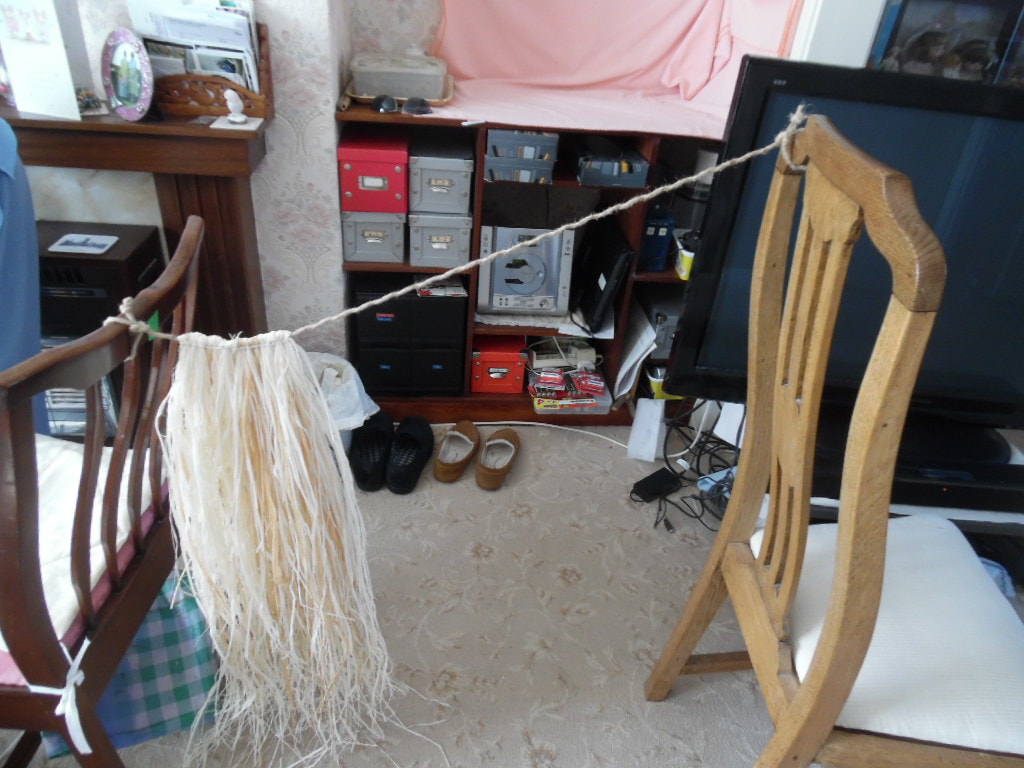
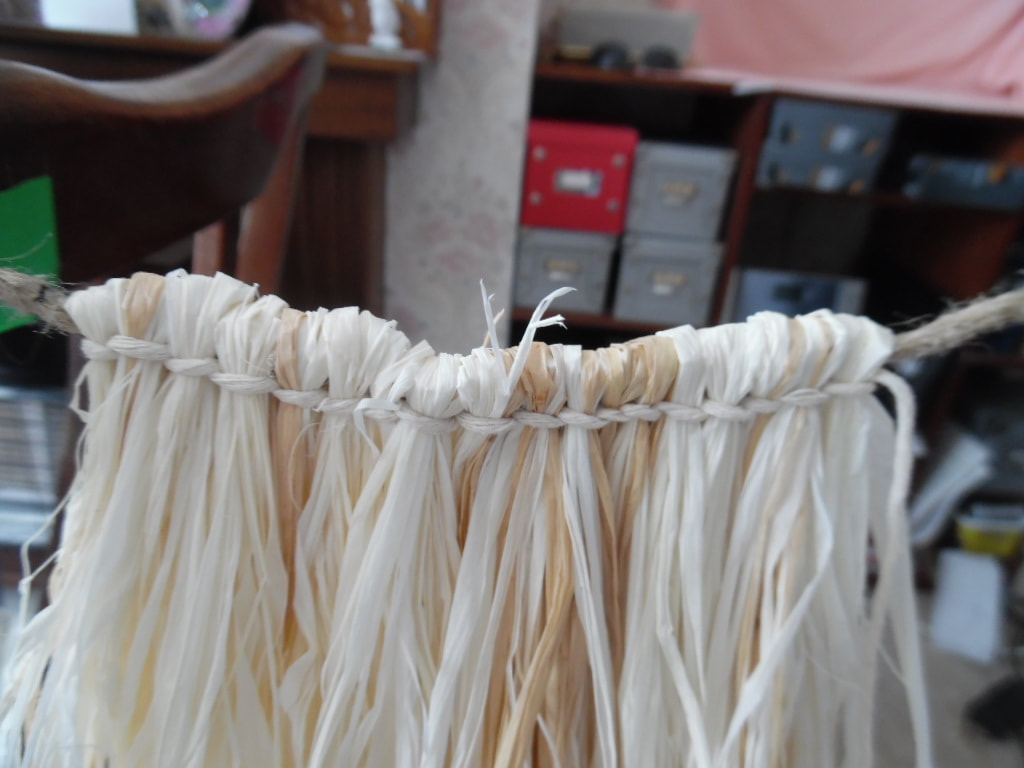
Tie your cord to something that is unlikely to move!! Then following the instructions on the video, braid the raffia bundles onto the cord.

|
Tie into a bow.
|
This completes the grass skirt.
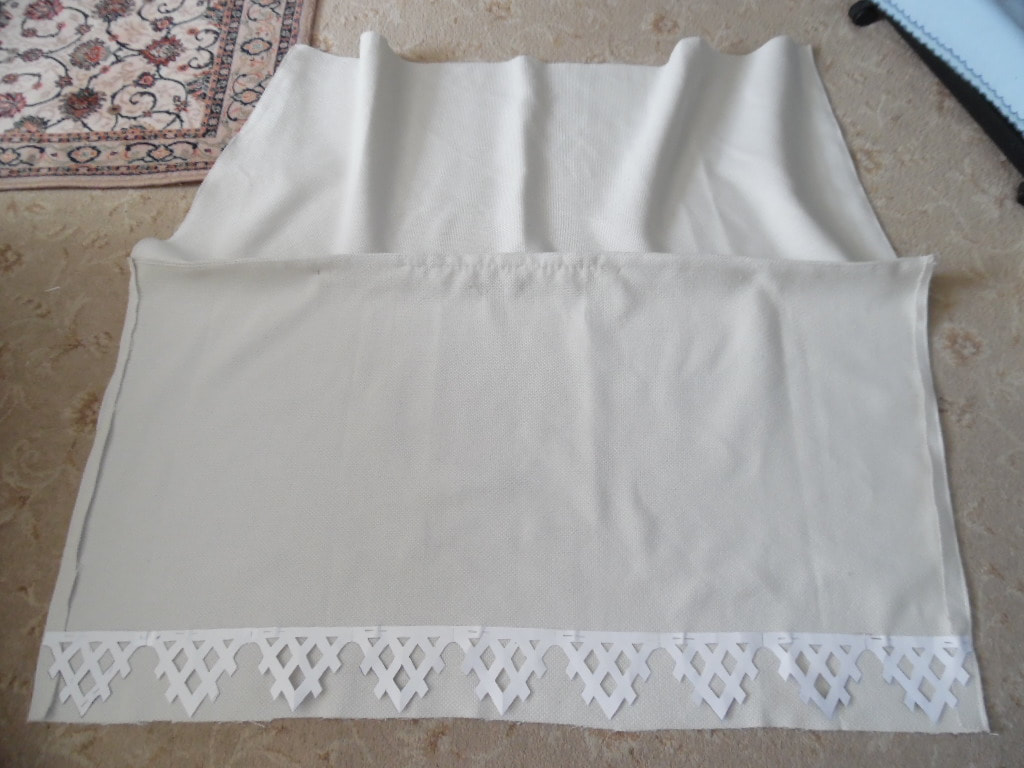
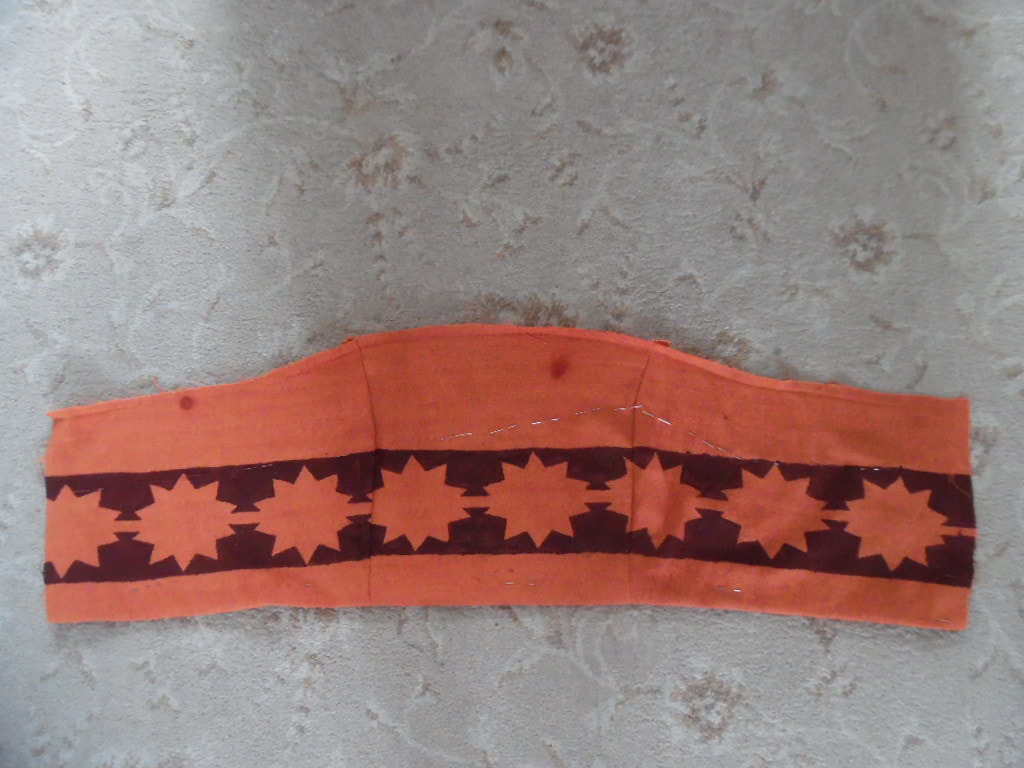
To make the skirt:
|
Following the instructions on the video, you will need to measure your length and remember to allow for the decorative finish at the bottom.
|
|
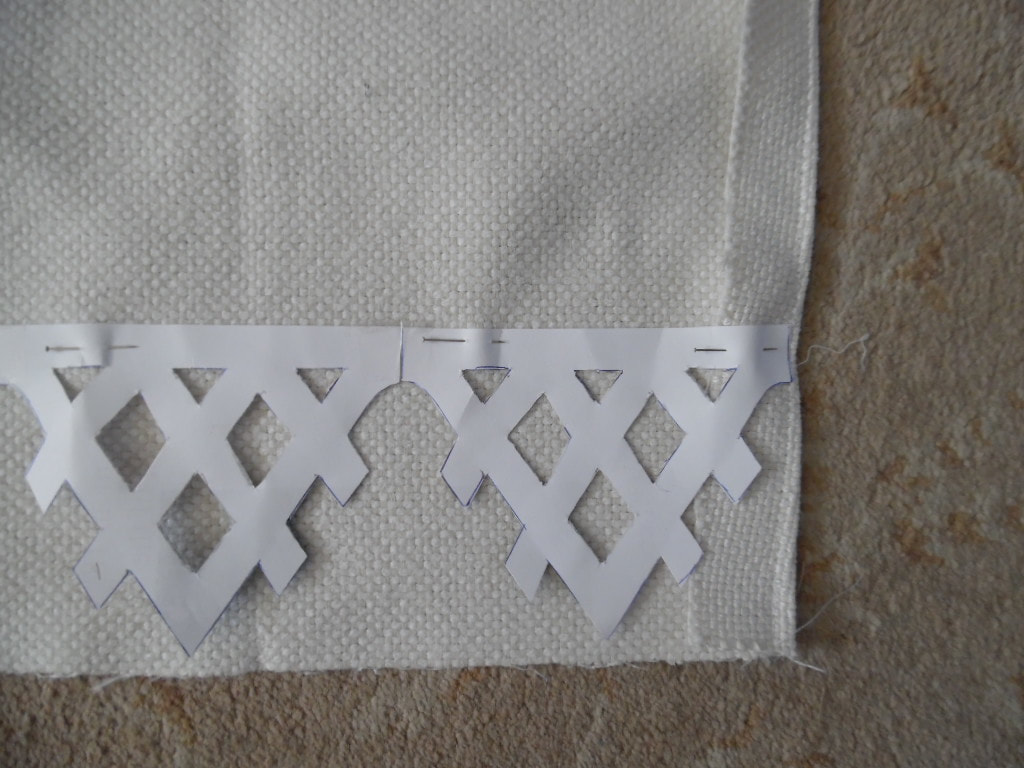
Attach your template to the inside of the skirt that cannot be seen, as you are going to draw around the template.
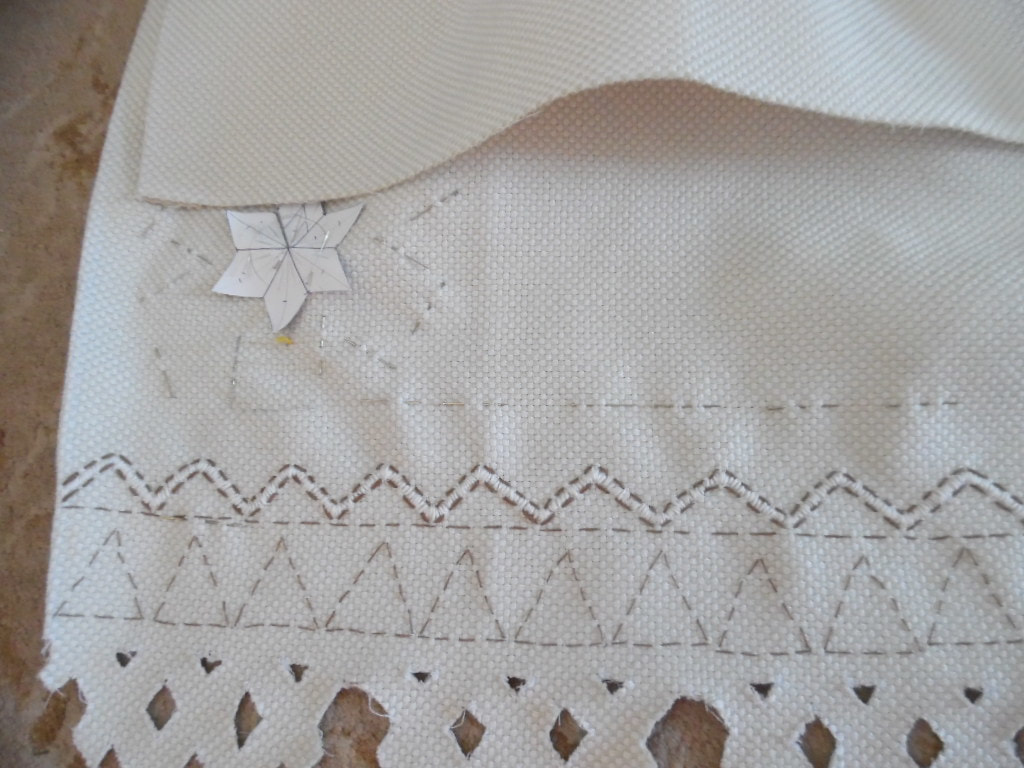
Each template is 12.5cm wide x 9.5cm high (will vary depending on the width of your skirt. Try and calculate how many templates will fit exactly to your fabric width measurement. |
|
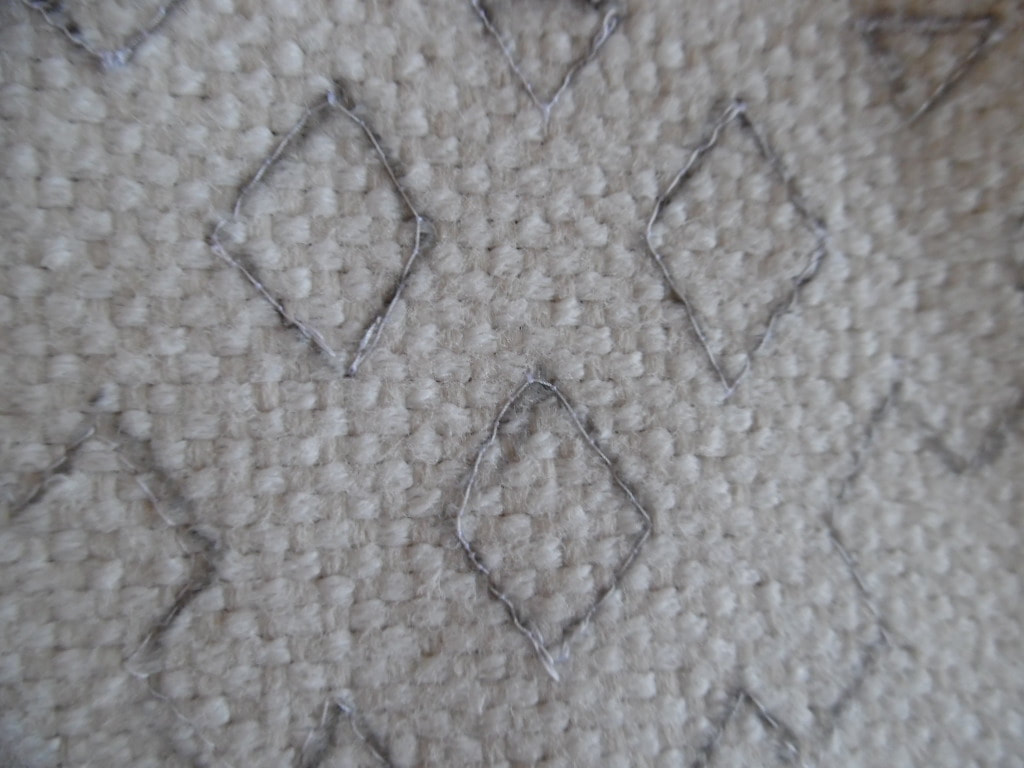
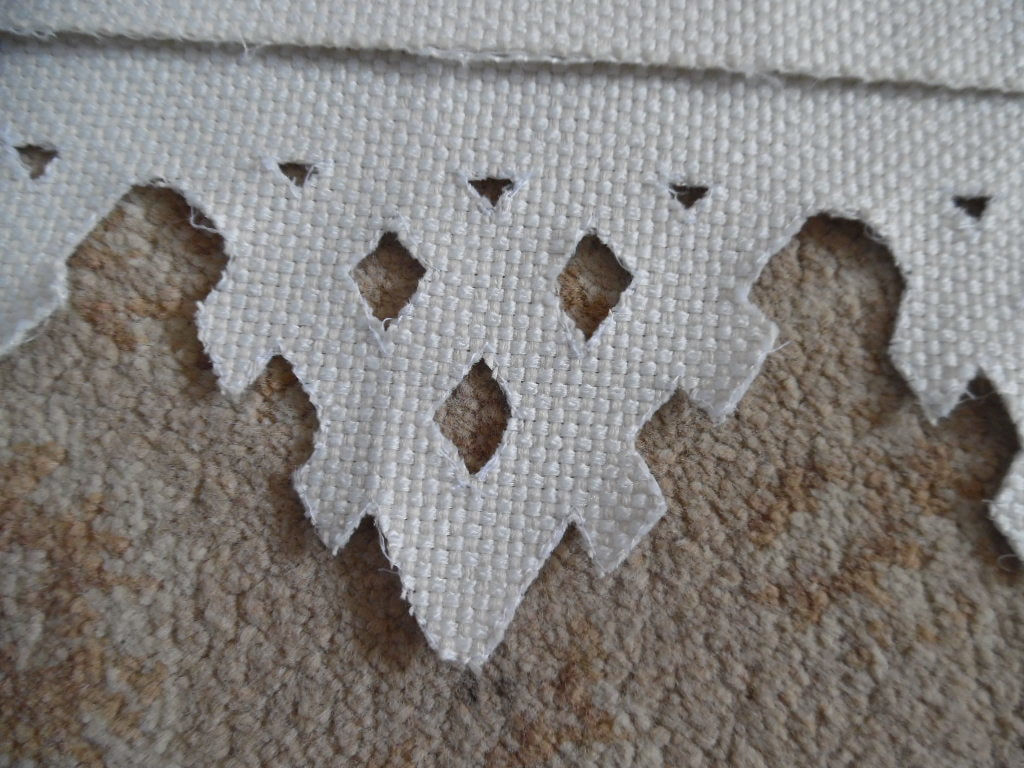
Draw around in pencil. Before you cut the template, either hand stitch or machine around the outlines and the edges, to prevent any fraying.
|
|
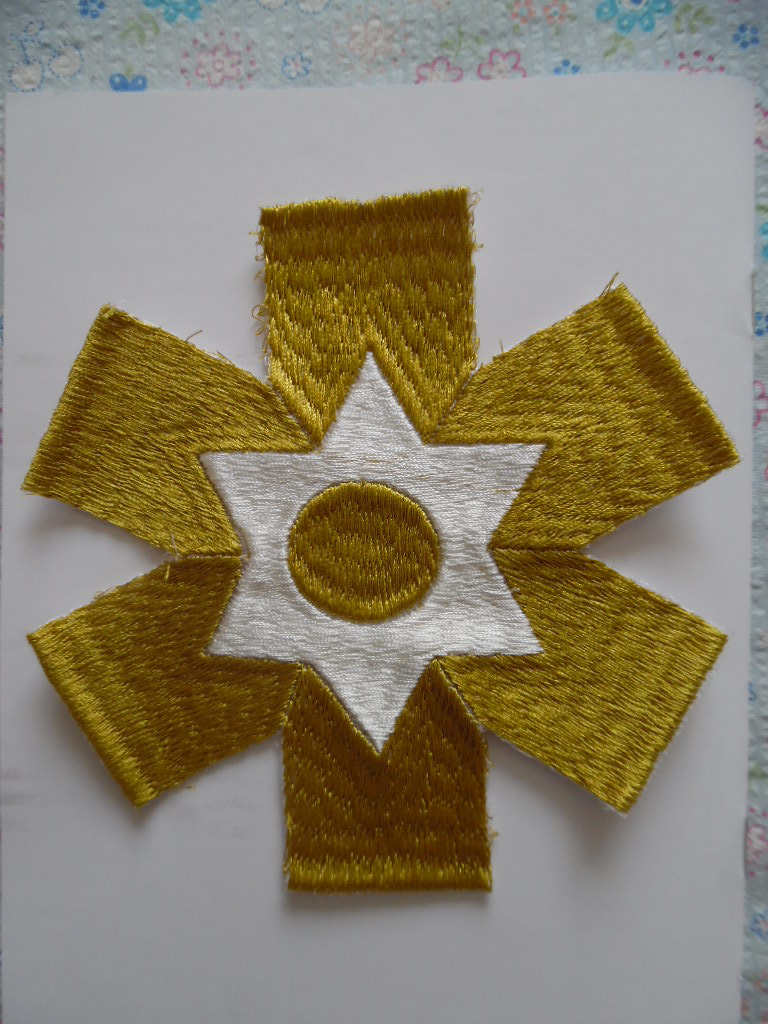
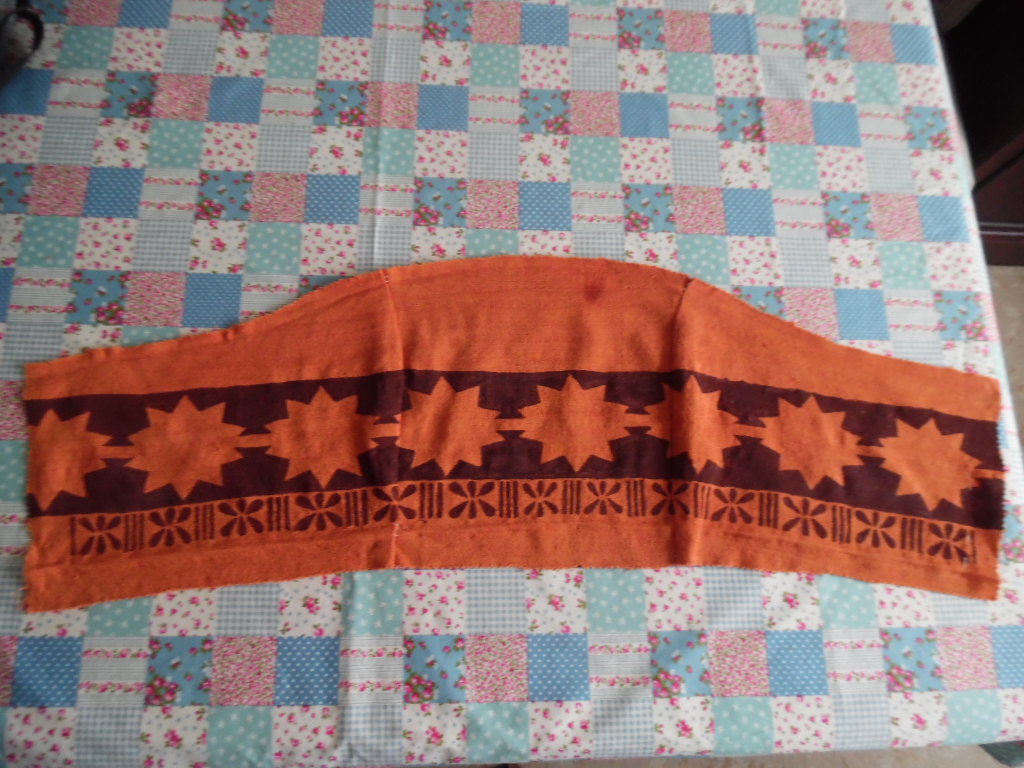
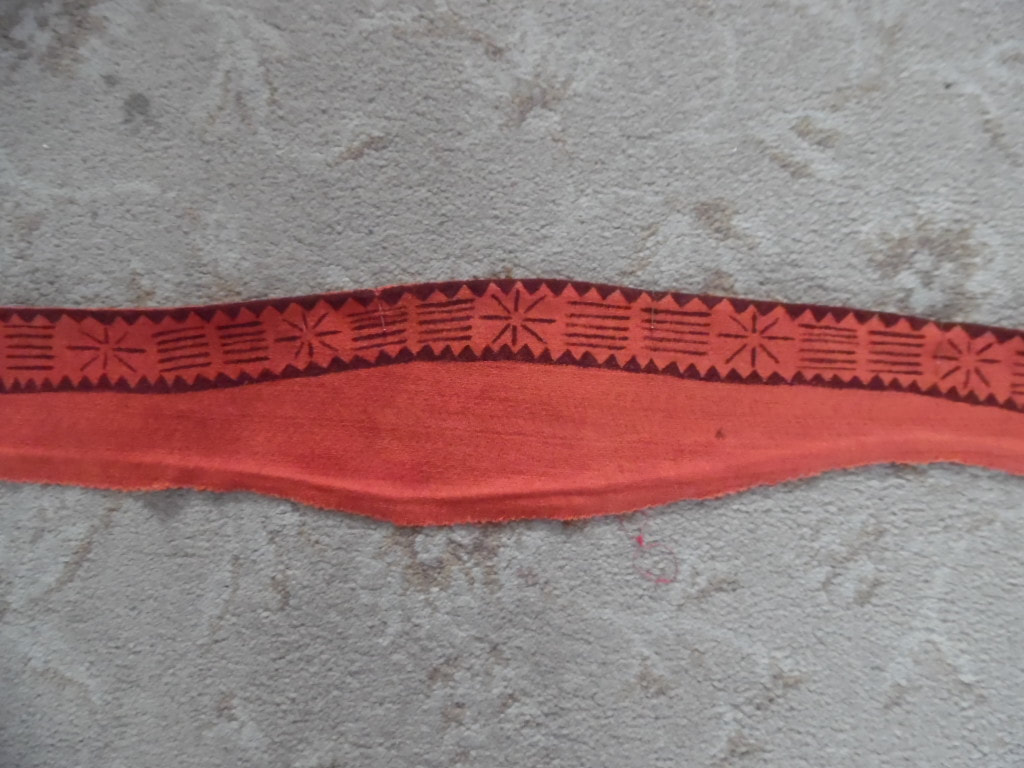
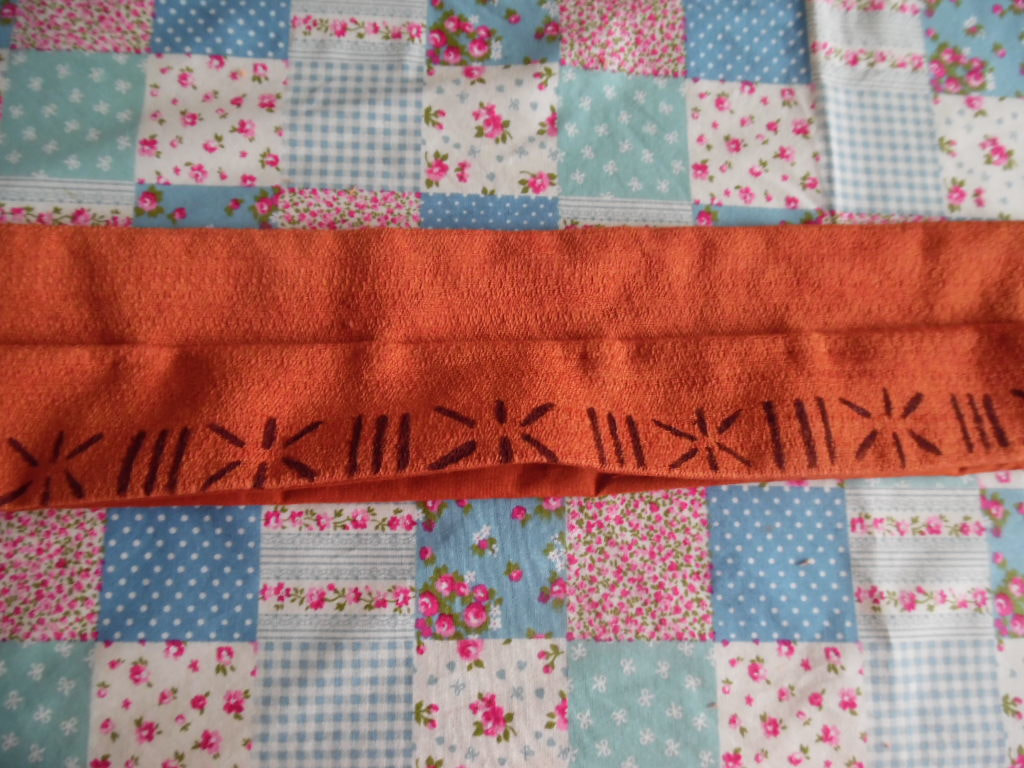
Make a triangle template approximately 3.5cm along the bottom and 3.25 high. Sew a running stitch using DMC thread number 25. Then draw a double zig zag and fill in with satin stitch using white. Place a line of pins approximately 2" (5cm) above the zig zag line to help place the embroidered stars. If you do not have access to an embroidery machine, then you will have to make your stars by hand (painting maybe?)
|
|
We made 6 stars altogether, but depending on the width of your material, you may have to make more. Make sure they are evenly spaced. Each one is 14cm in diameter. Sew onto your skirt using gold thread.
|
|
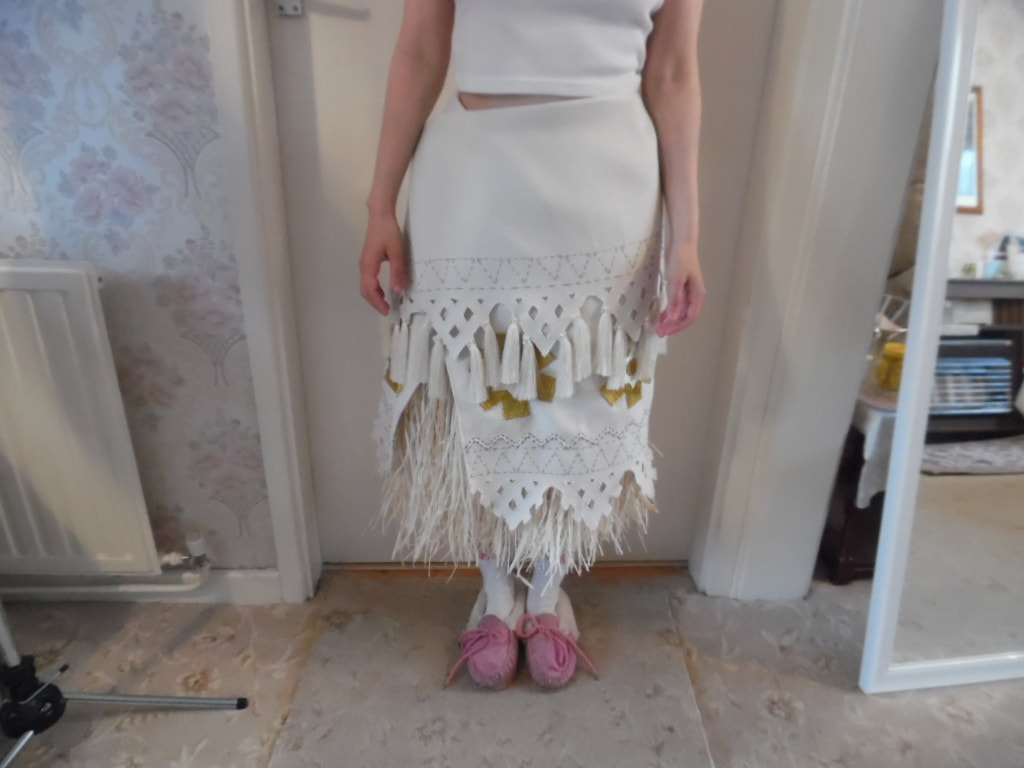
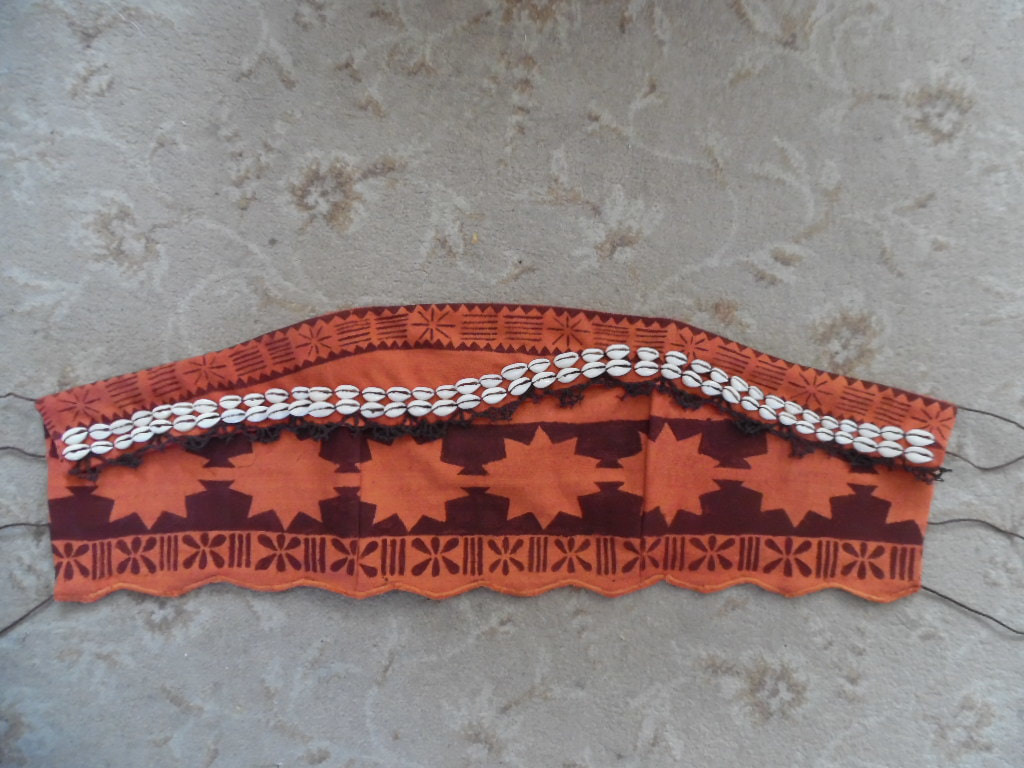
Following the video instructions, do exactly the same for the top layer. Only sew triangles about the templates. Sew on your tassels. Attach Velcro to the skirt to fasten.
|
This completes the skirt
To make the Crop Top:
|
I used a bodice pattern that had a princess line to create my pieces. Cut one set of bark weave fabric and one set of cotton liner. On the outer bark weave fabric, I temporarily sewed the seams together with a running stitch which could be removed, as I wanted to mount the sections separately after I had painted them. This will make more sense in the following pictures and also on the video.
|
|
I cut out a template of joined stars, each one measuring 9.5cm across, with a joining piece of 3cm.
|

|
Mask off with paper, any part you don't want to paint. You can use a sponge for this.
|
|
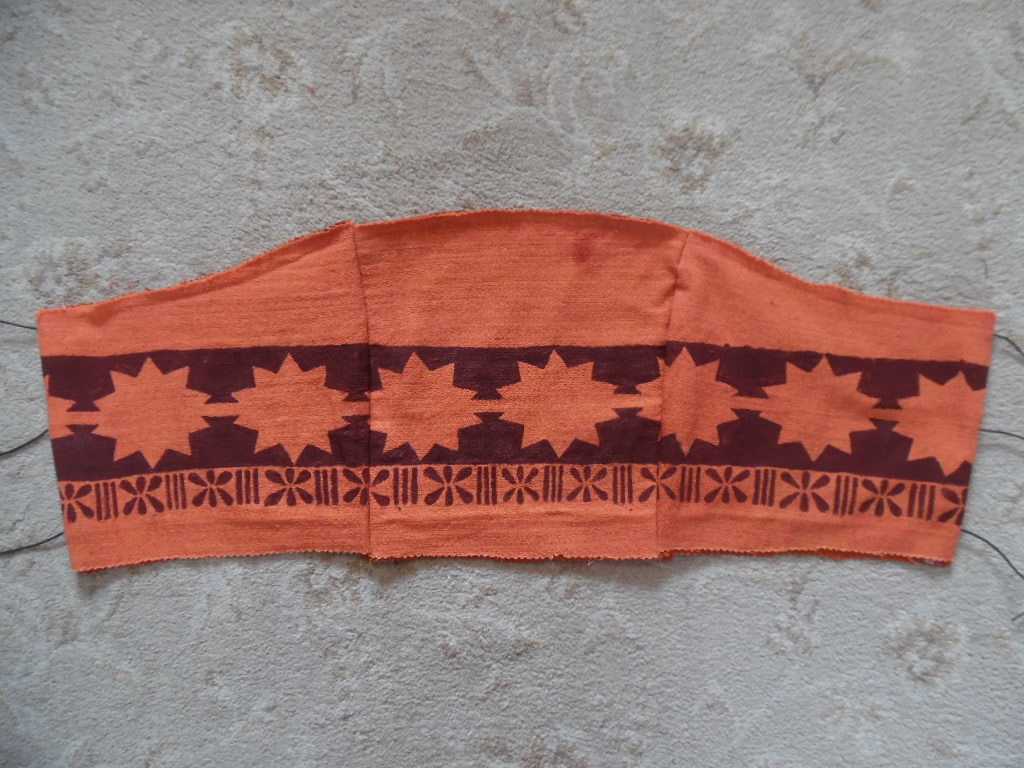
I have outlined with pins, the upper collar of the bodice and used this as my pattern. Cut out one set of bark weave fabric and one set of cotton liner.

|
|
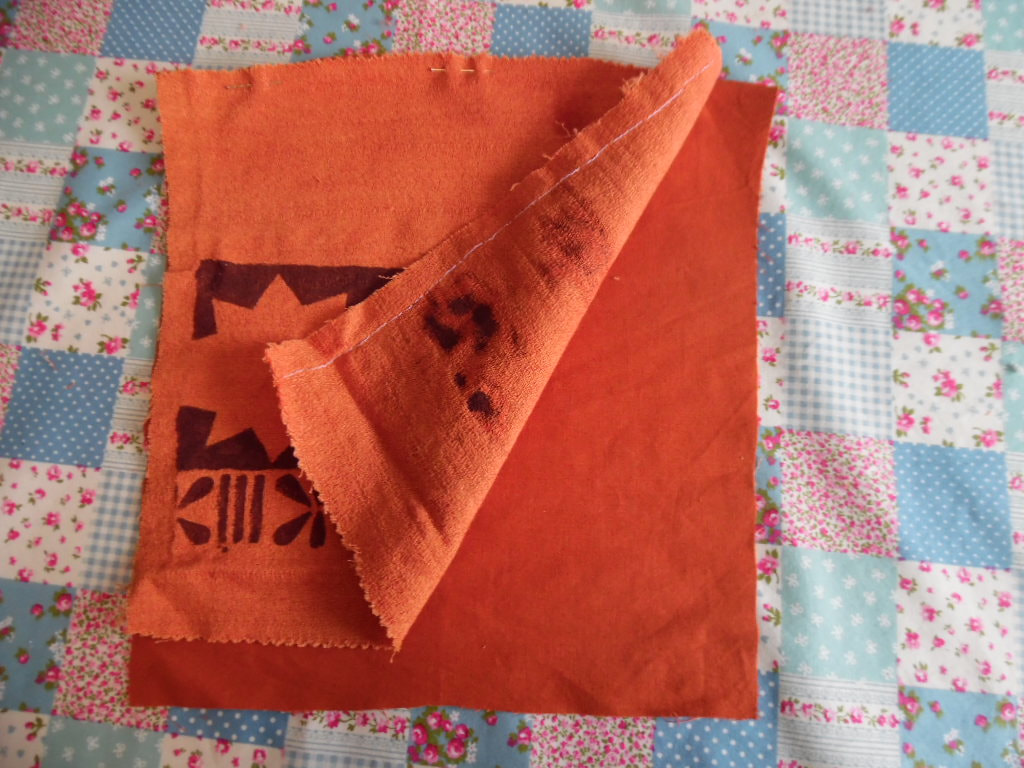
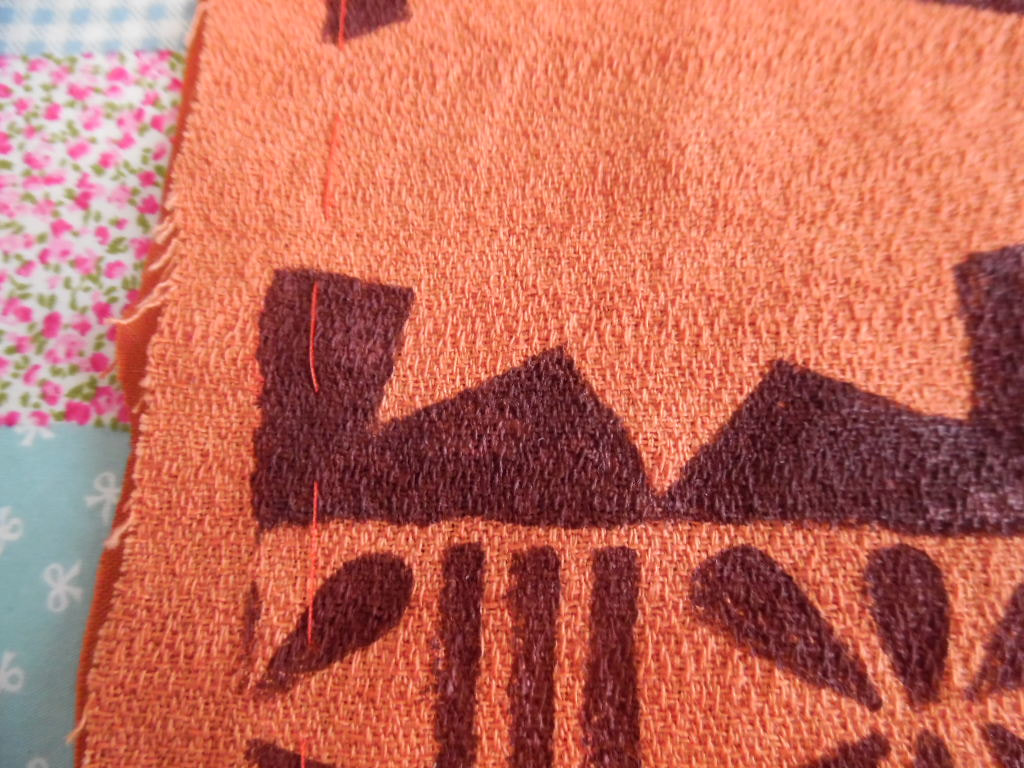
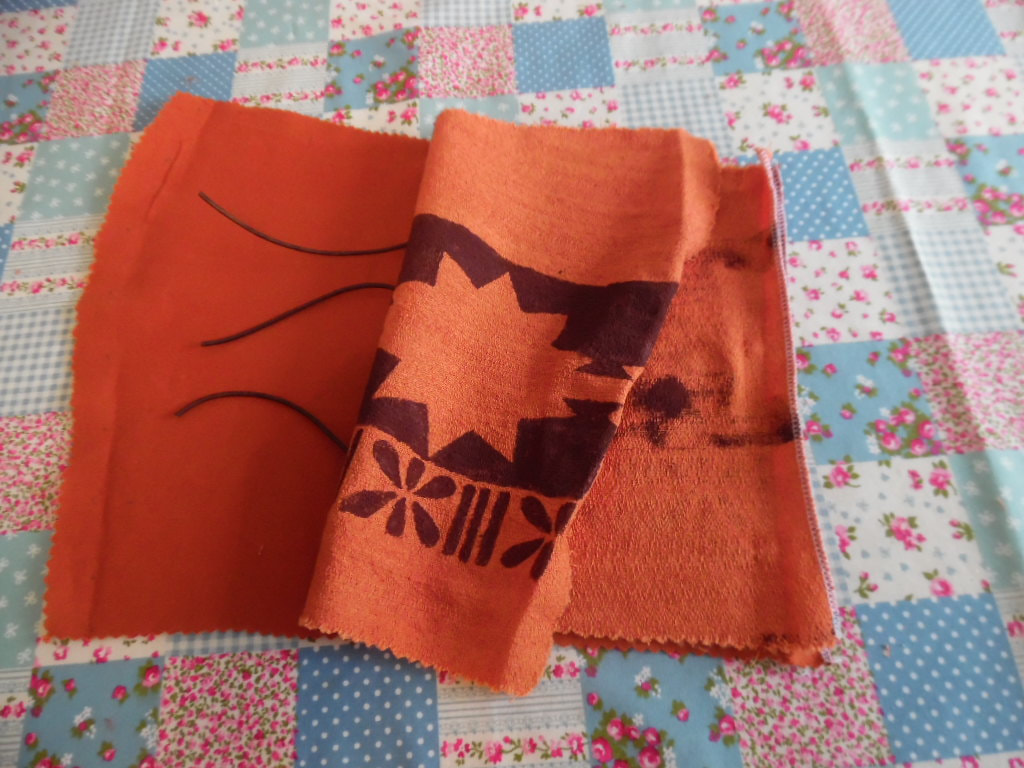
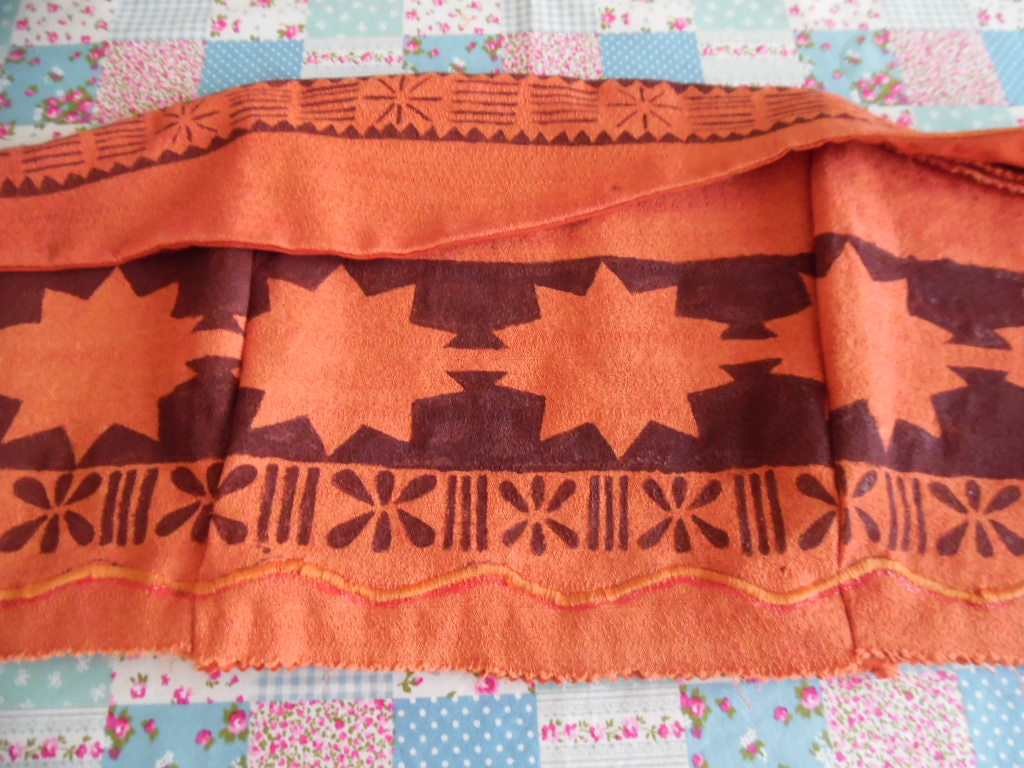
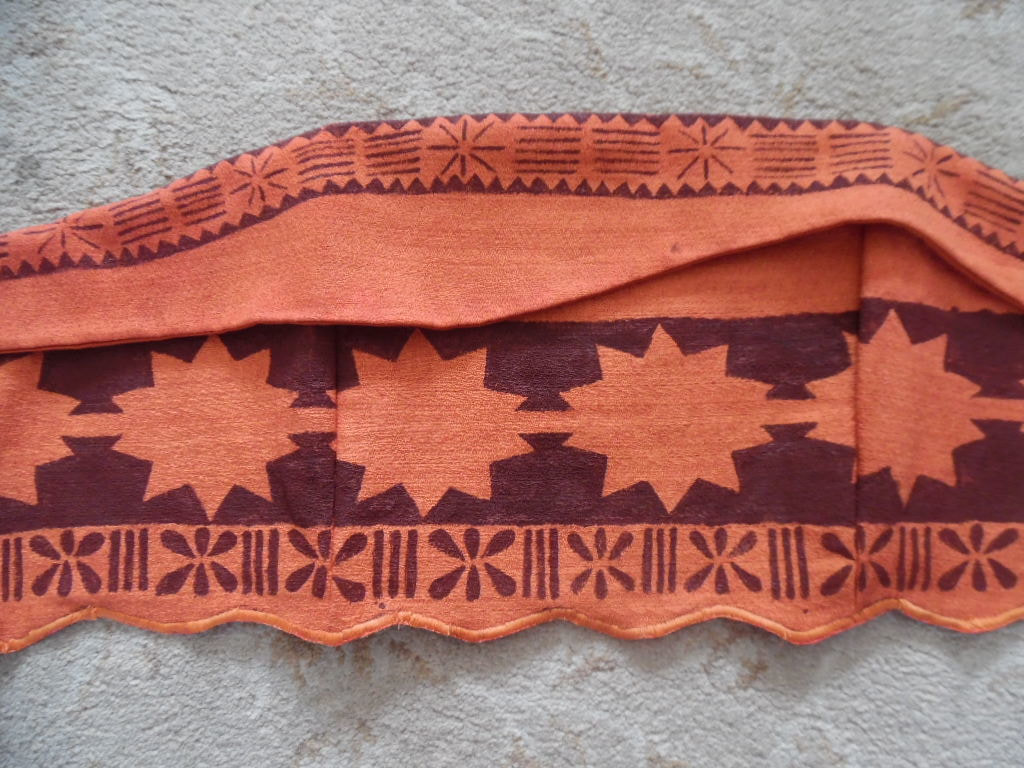
I then hand painted the bottom design and once dried, I will undo the seams that are holding it together.
|
|
Please note before I hand painted the design, There is a 1.5cm seam allowance across the top, which has been folded under for the photograph. The pattern has been free hand painted.
|
|
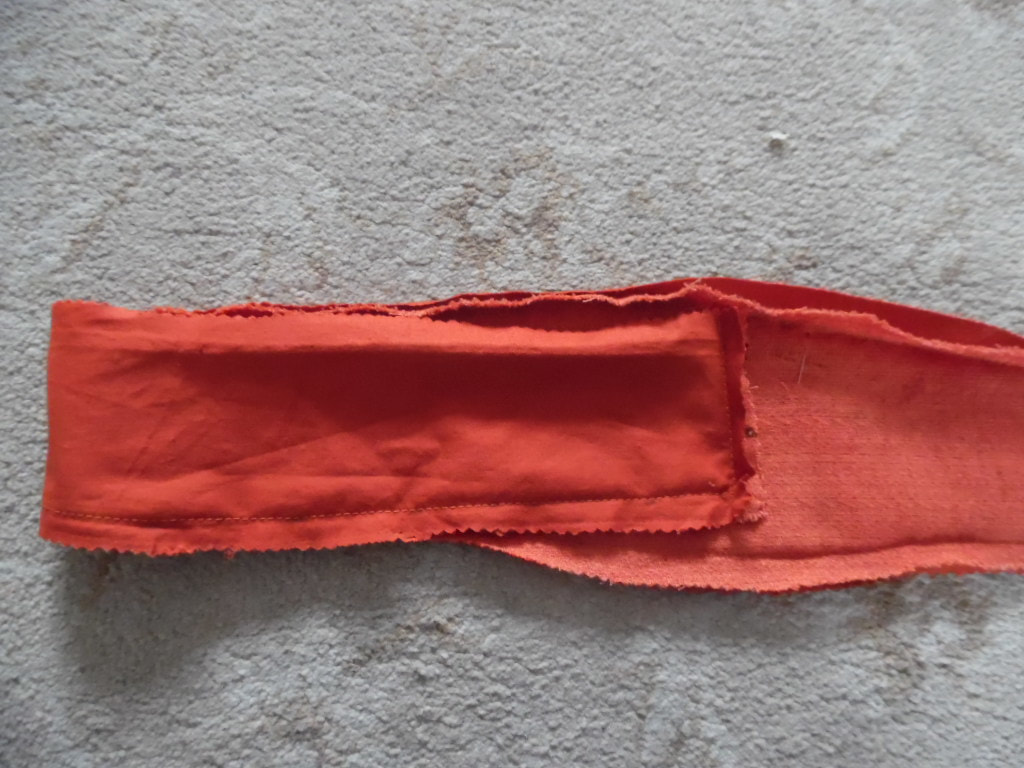
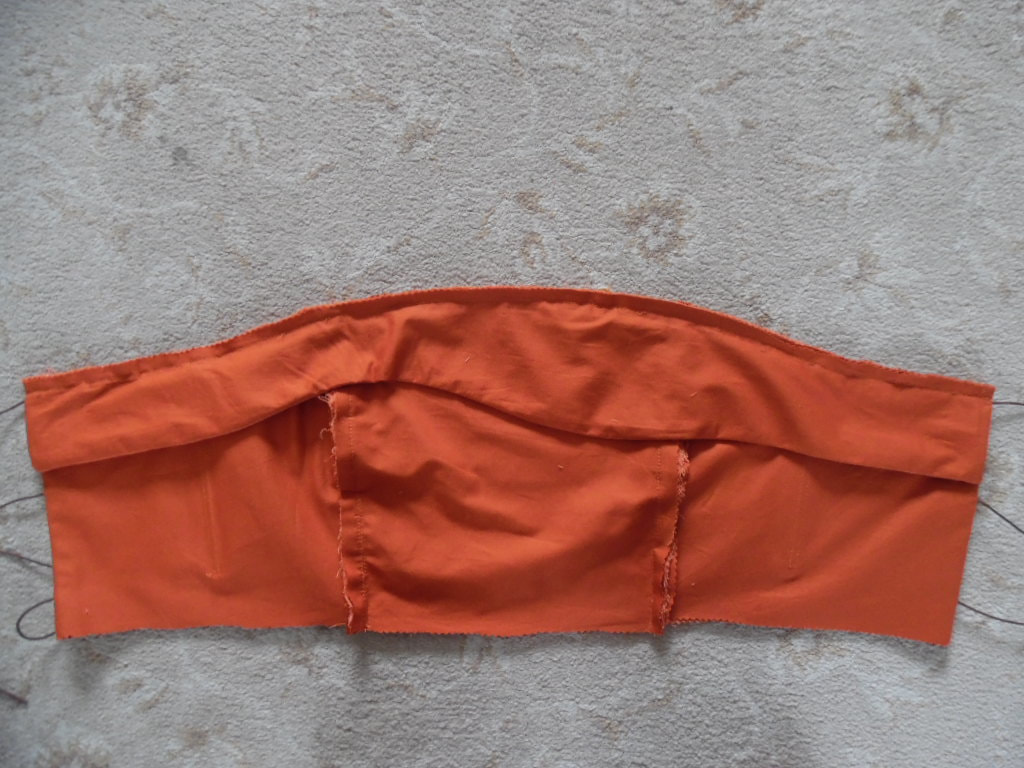
When sewing the liner to the collar, leave one end open to enable you to turn it the right way out.
|
|
Now the seams are apart, I "mounted" each piece separately to its liner. This image shows the centre front. The image below shows temporary tacking stitch holding the two pieces together, at least 2cm in from the edge.
|
|
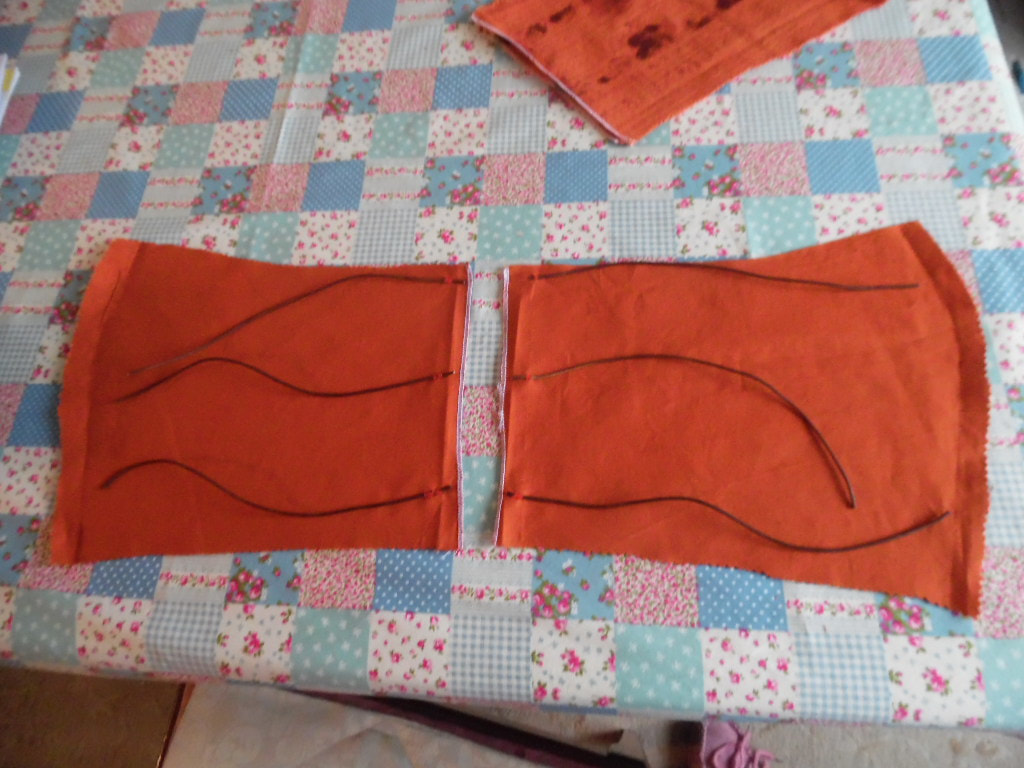
Sew the cords to the back liner pieces, then turn it over
to sew on the plastic boning. 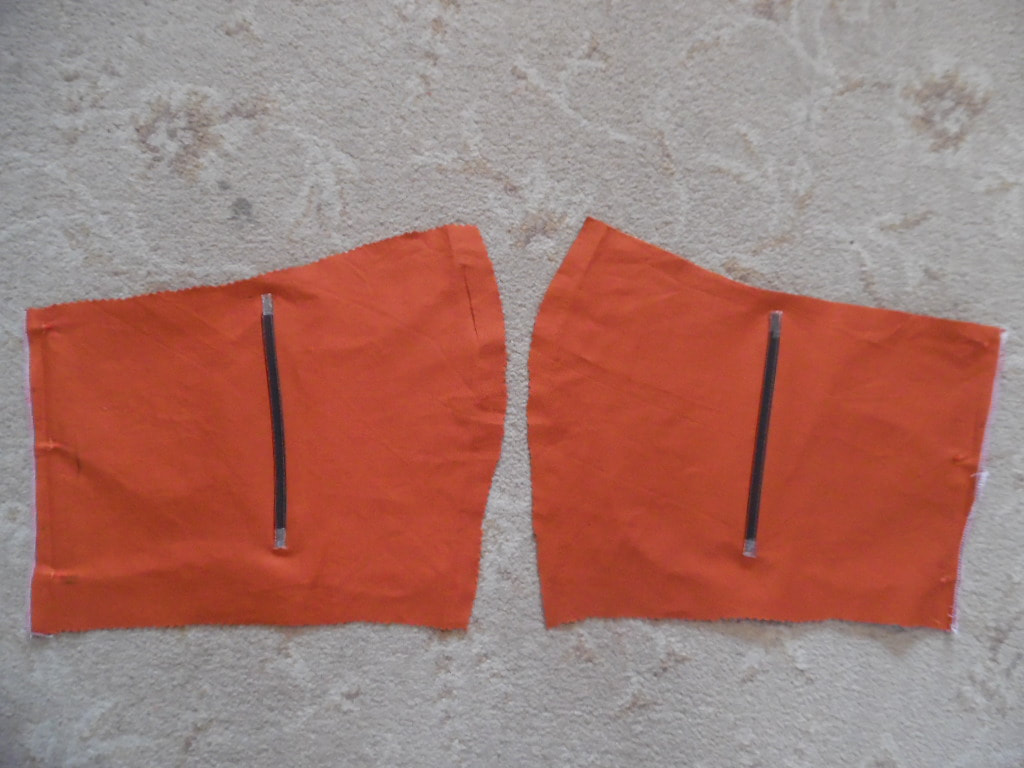
|
|
With right side to right side, sew the back sections together at the centre back.
|
|
Now sew the seams together.
|
|
Sew on the collar piece. The right side of the collar is underneath.
|
|
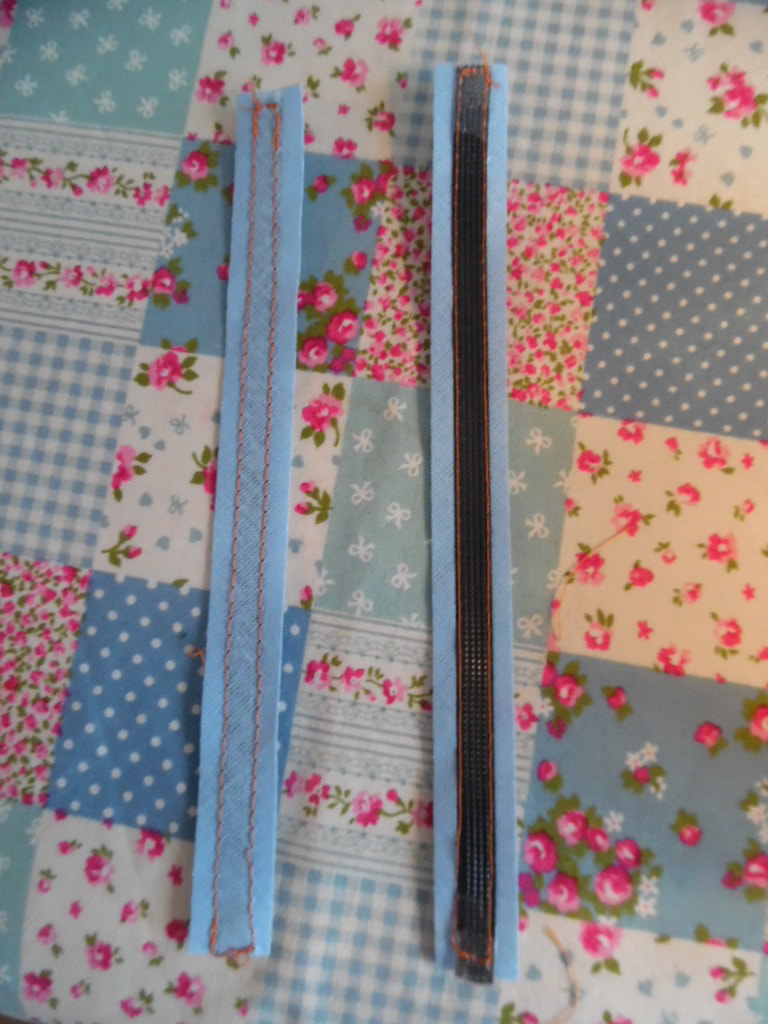
Sew the plastic boning to a piece of bias binding.
|

|
Sew these by hand, to the front seams. They must be approximately 2" (5cms) from the bottom of the seams, to allow for the scallops.
|
|
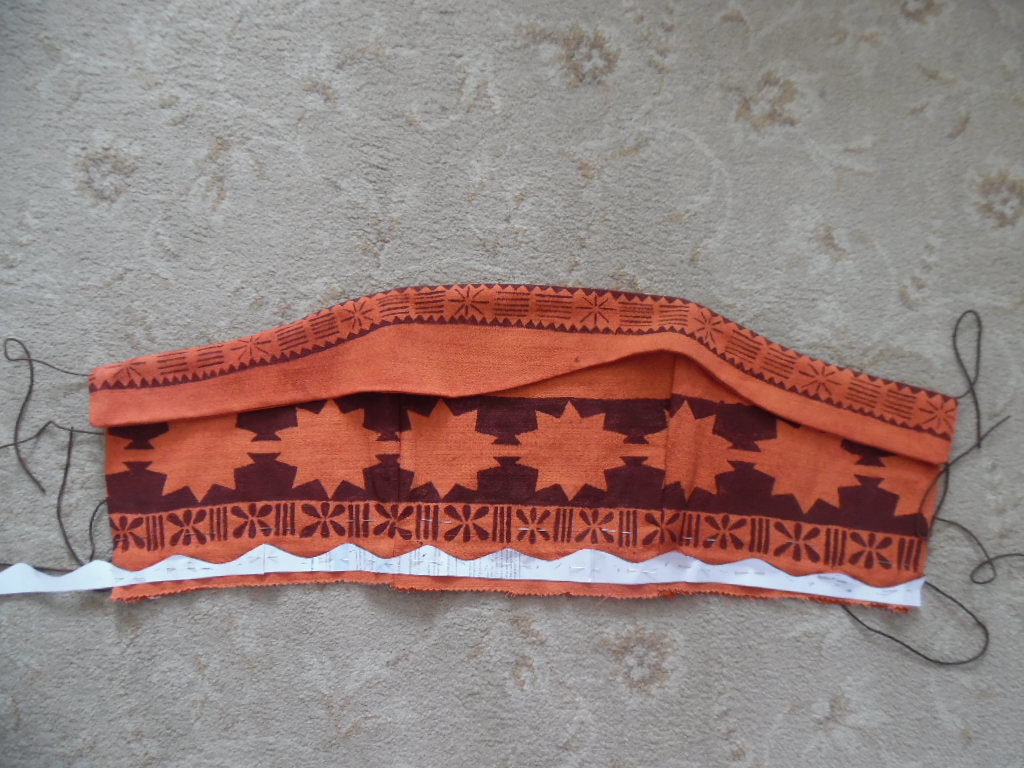
Pin the pieces together at the bottom, then make a scallop template, draw the line just below the line of painting.
|
|
Using your sewing machine free hand, set it to satin stitch and follow the drawn line.
|
|
Carefully cut below your line of stitching.
|
|
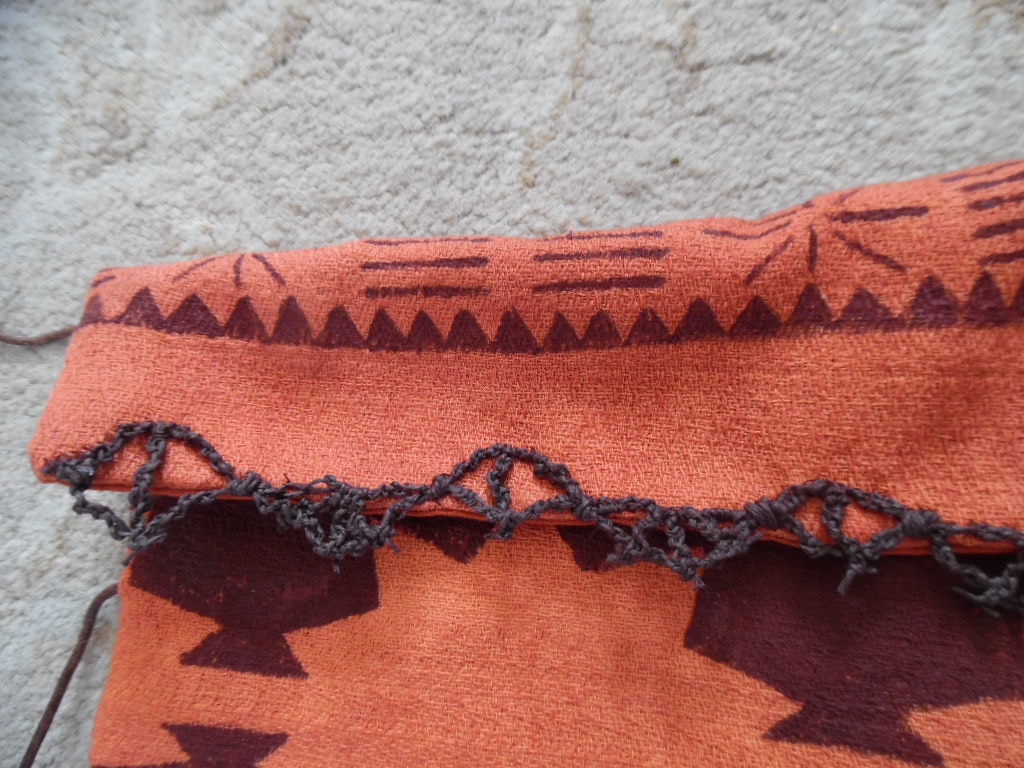
Please refer to the video showing how the trim was made.
|
|
Next sew on your cowrie shells. I used brown thread.
|
|
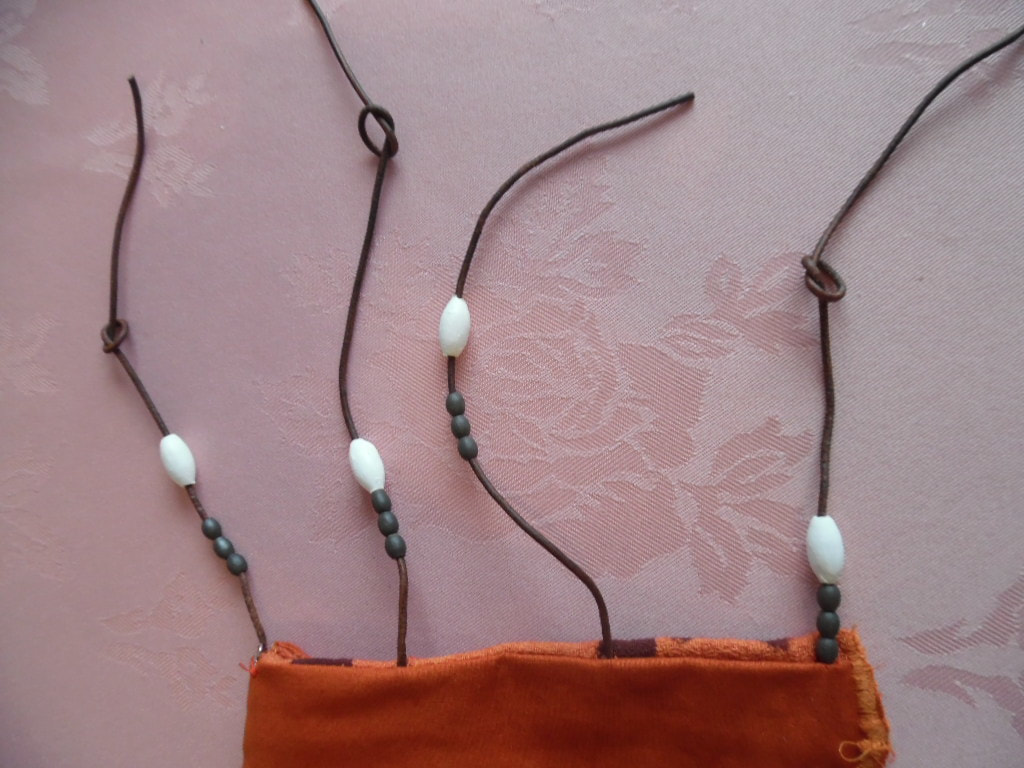
I bought the beads from a local shop, threaded them onto the cord and knotted them, you need to make sure you have enough cord to tie a double knot. Then cut off the excess cord.
|
To complete the bodice, I sewed on a medium sized hook and eye, which helped to pull the back together and will also help should the cord come undone and save me some embarrassment!
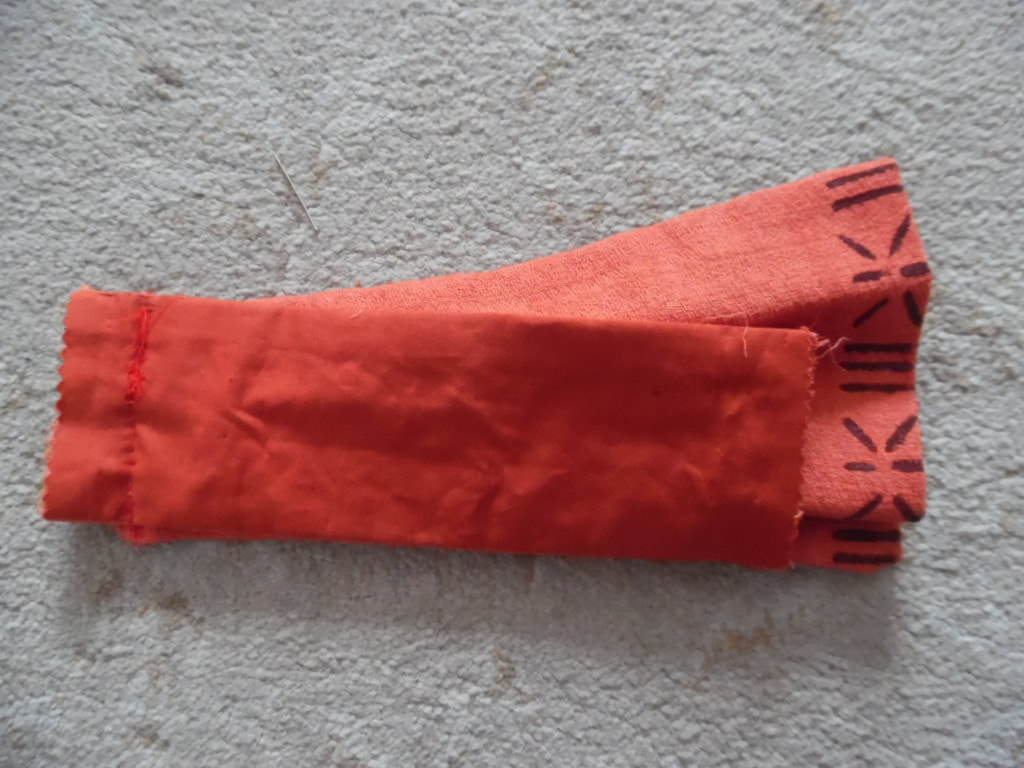
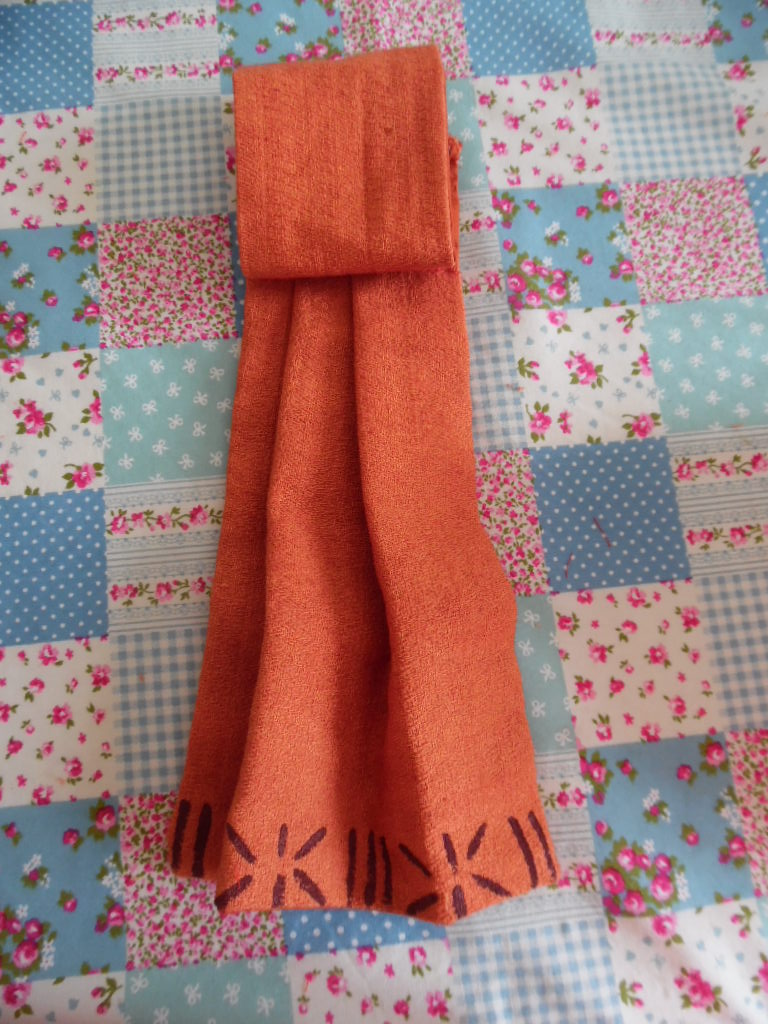
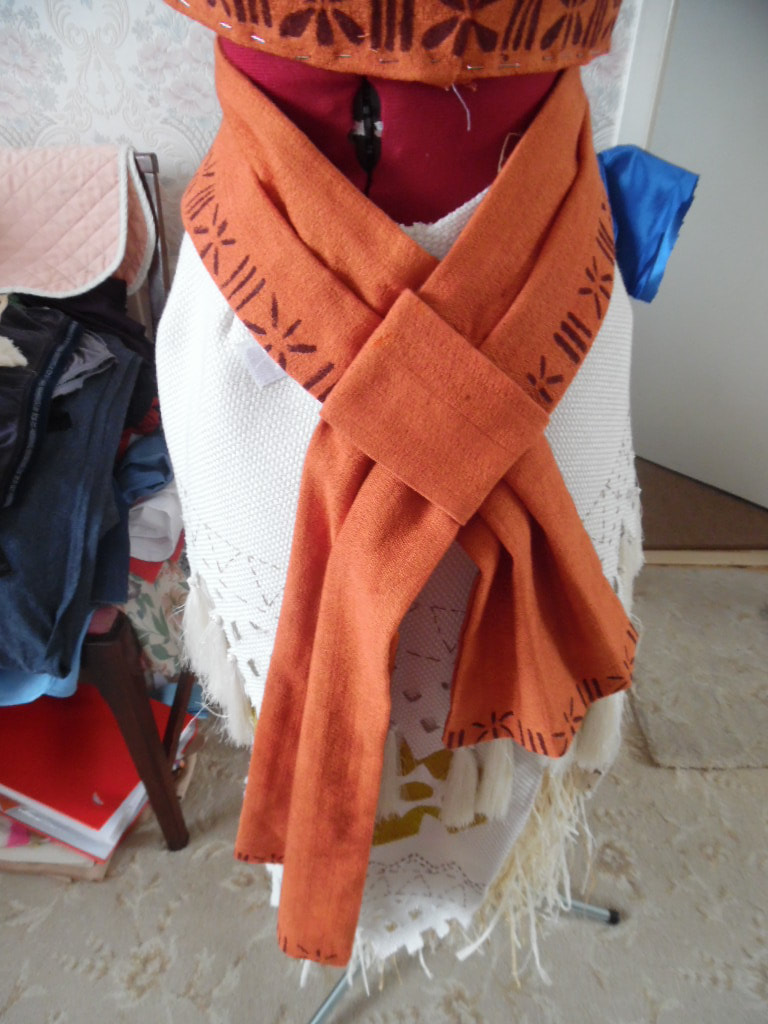
To make the Sash:
|
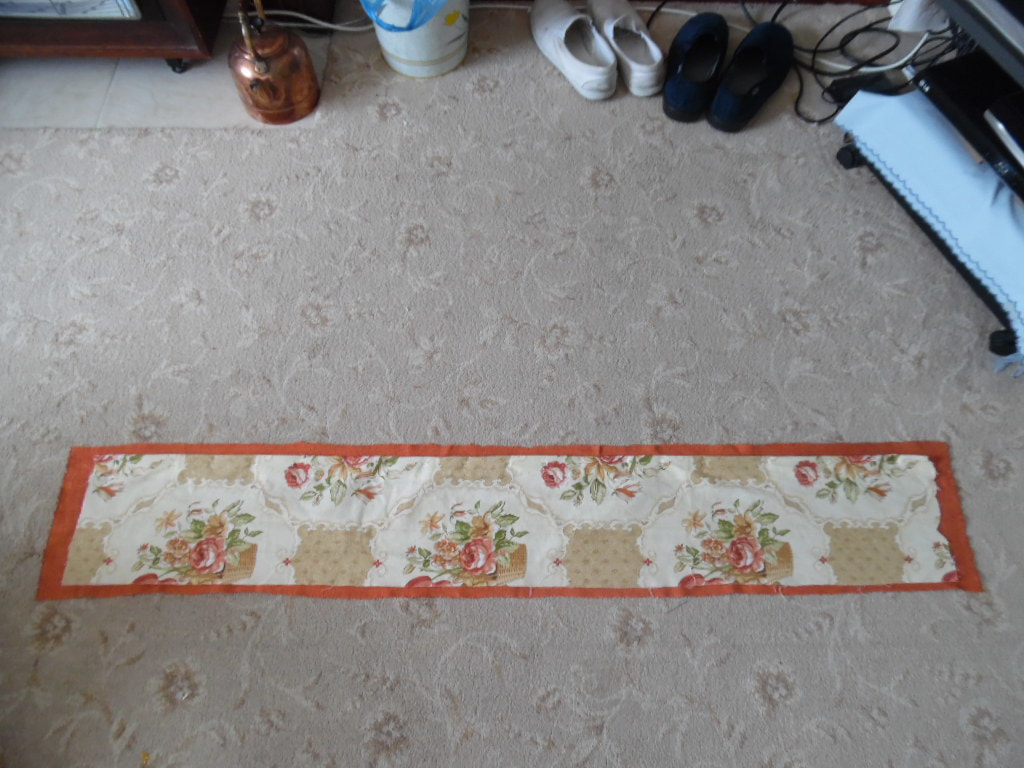
The patterned material is my pattern piece. You will need to have your grass skirt and over skirt on before ;you make any measurements. Measure around your waist and add a further 54cms to the length. The width is 22cm. Cut a piece of fabric and a liner.
|
|
Hand paint the bottom edge allowing for a 1.5cm seam allowance. You will need to paint approximately 1" (2cm) wide x 32" (81cm). This will depend on where your fabric buckle will be.
|

|
On the narrow edge at the other end of the sash, hand paint your pattern, allowing for seams allowances.
|
|
Line the sash, leaving one end open and turn to the right side and sew up the opening.
|
|
For the fabric buckle, cut fabric and liner 10cm x 22cm. Sew fabric and liner across the top and bottom only, turn the right way out.
|
Cut a piece of fabric and liner 26cm long x 23cm wide. to make a fake tie piece.
Paint the same design along the narrow edge. Sew the fabric to the liner and sew along three sides and turn the right way out.
Paint the same design along the narrow edge. Sew the fabric to the liner and sew along three sides and turn the right way out.
|
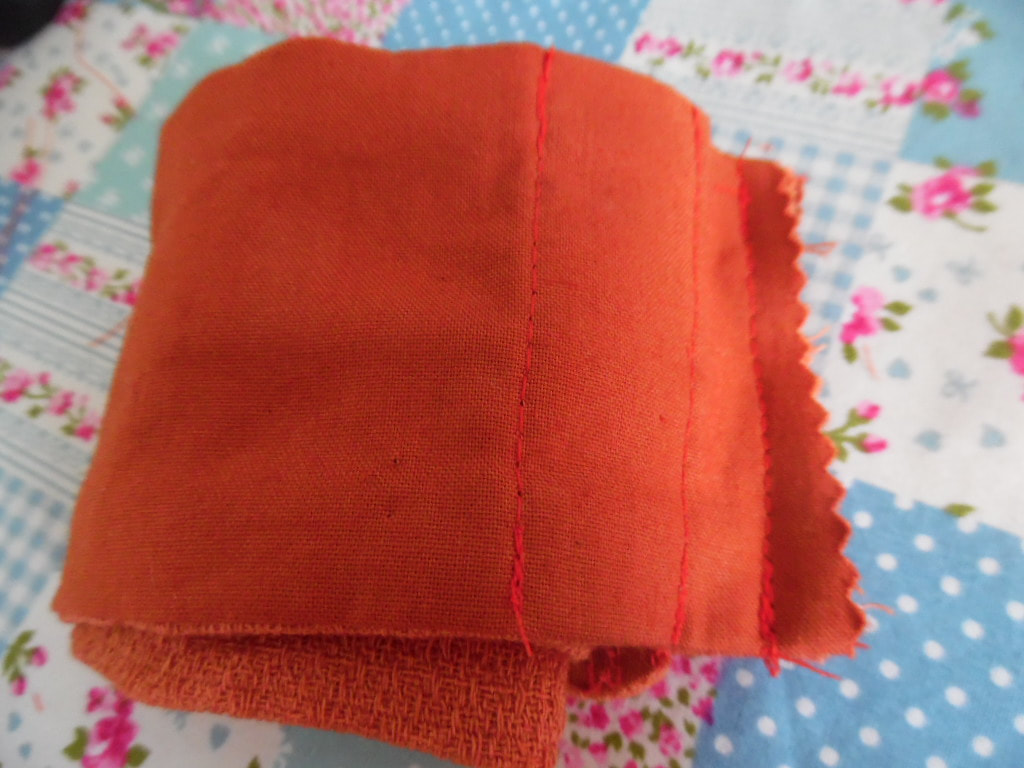
Once you have turned it the right way out, hand sew the opening shut. Put in two pleats and machine across.
|
|
Sew the fabric buckle to the top of the fake piece. Looking at the next picture. You can see that there is an extra seam allowance to allow the whole buckle to be closed. This will make much more sense on the video.
|
|
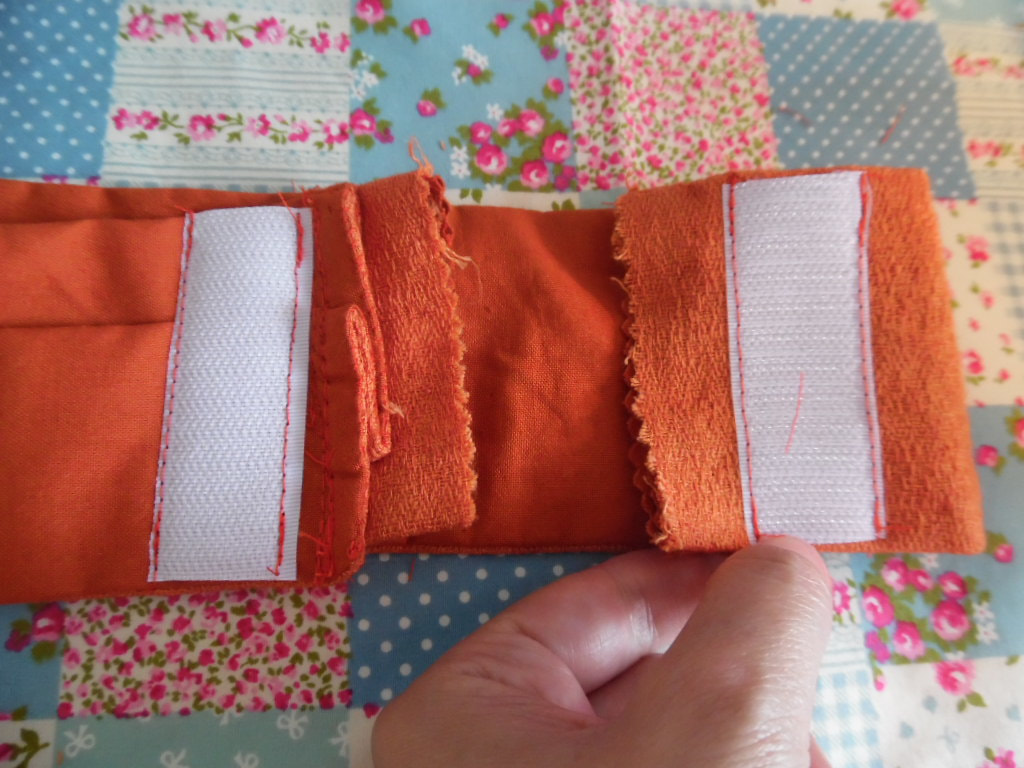
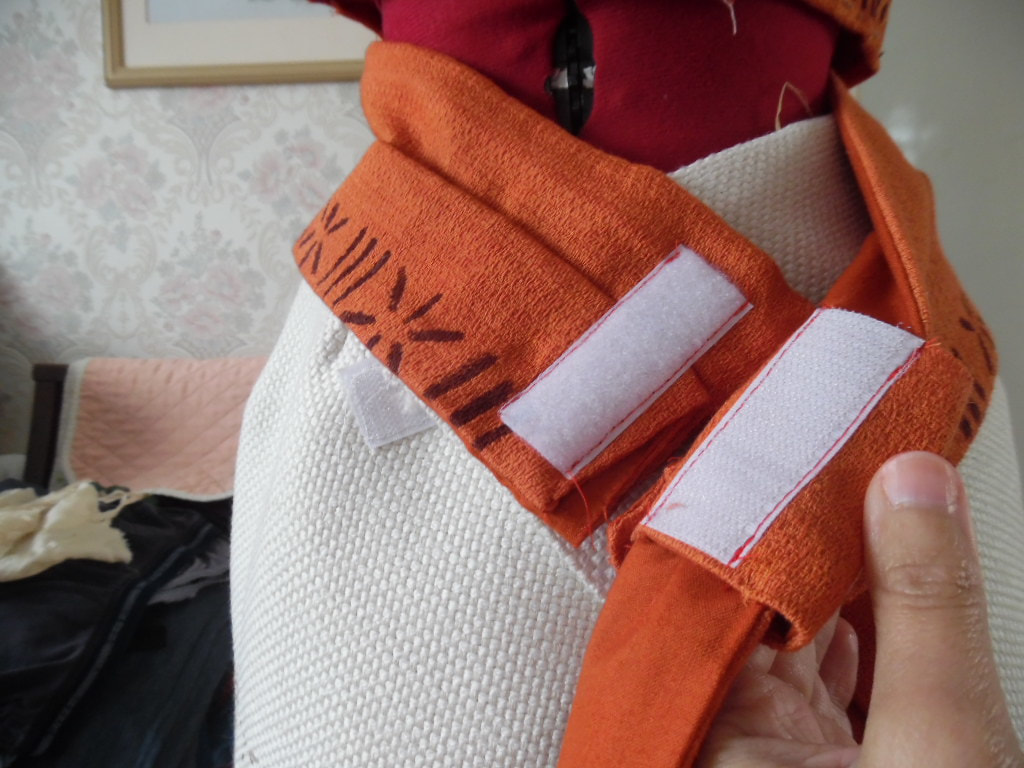
Attach a piece of Velcro to the top of the fake piece and the underside of the fabric buckle.
|
|
Following the instructions on the video. I now fold the whole piece so that I can create a seam to join it together. Once sewn, I can then turn the whole piece the right way out.
|

|
This shows the side view of the piece now it is turned the right way out.
|
|
Fold a large pleat along the length of the sash and catch stitch at intervals to make sure it does not unfold, but do not pleat the last section from the buckle.
|
|
Put the sash through the fabric buckle whilst wearing it and pin it in place where you want the buckle to be. Take the whole sash off and on the reverse of the fabric buckle, catch stitch the sash to the inside of the buckle.
|
|
The Velcro that was sewn onto the sash, can now have a corresponding piece on the sash itself to fasten it.
|
This completes the sash.
