For this costume, you will require beginner to intermediate experience in sewing.
Difficulty factor 7 - 10
All videos for making the complete costume can be found in our "video tutorials" link (TO FOLLOW)
Difficulty factor 7 - 10
All videos for making the complete costume can be found in our "video tutorials" link (TO FOLLOW)
Please be aware that
we do not make
costumes to sell or hire
we do not make
costumes to sell or hire
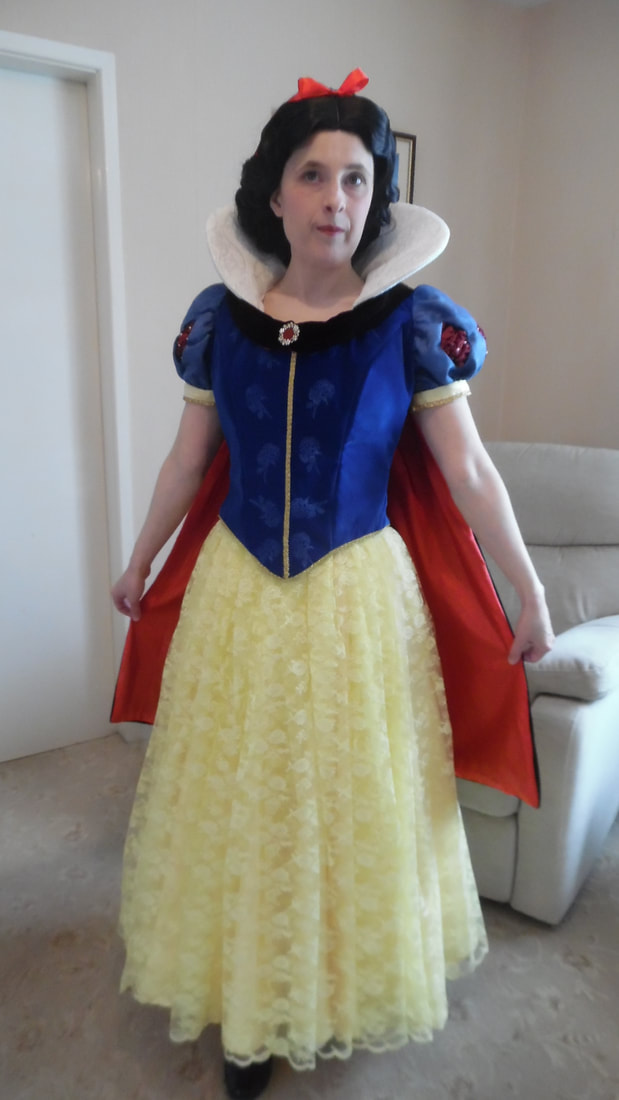
TUTORIAL FOR
MAKING
SNOW WHITE

Materials:
Ivory Petticoat:
5 Metres Ivory Cotton Fabric
Small piece of velcro
Netting
5 Metres Ivory Cotton Fabric
Small piece of velcro
Netting
Under Layer Skirt:
5 Metres light weight duchess satin
Webbing or Petersham
Hooks and Eyes
8" (20 cms) concealed/invisible zip
5 Metres light weight duchess satin
Webbing or Petersham
Hooks and Eyes
8" (20 cms) concealed/invisible zip
Over Layer Skirt:
5 Metres lacy yellow fabric
5 Metres lacy yellow fabric
Bodice:
Simplicity 2851
1/2 Metre Canvass
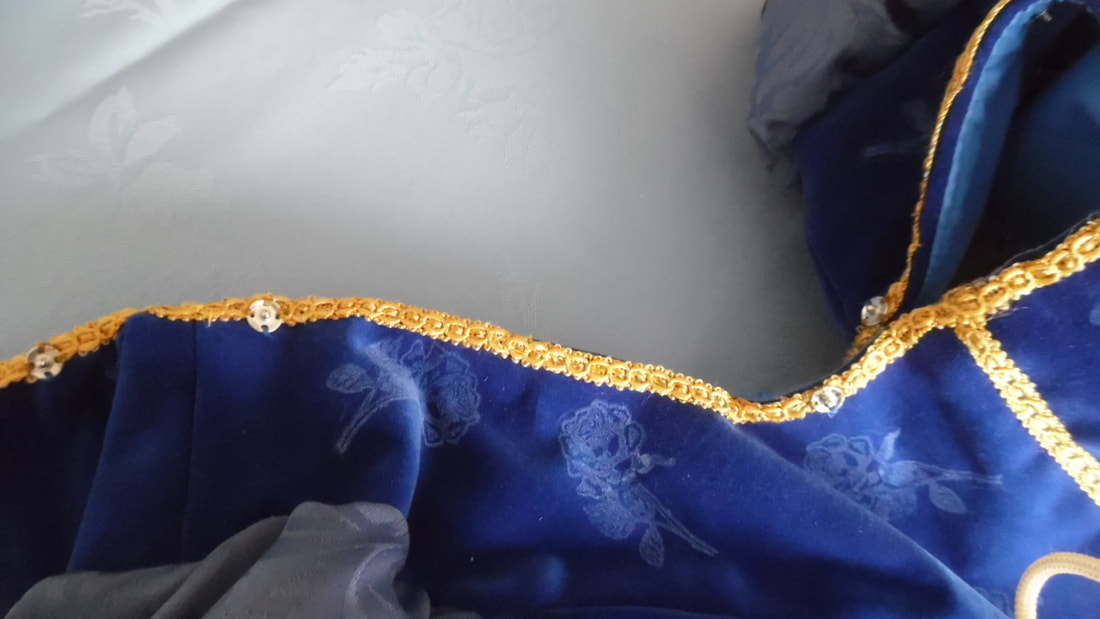
1 Metre Royal Blue Cotton Velvet
Hooks and sewn bars
Boning
Gold Trim
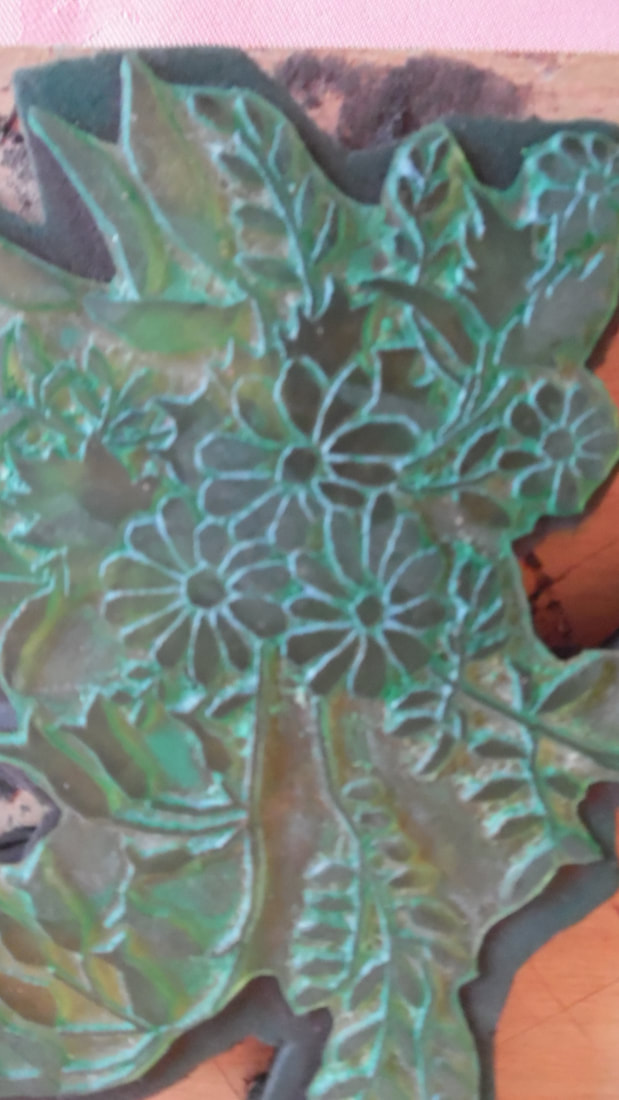
Flower Stamp
Versa Craft Baby Blue 142 craft ink
Dylon Fabric Paint No. 8 Royal Blue
2 Metres red dupion
Simplicity 2851
1/2 Metre Canvass
1 Metre Royal Blue Cotton Velvet
Hooks and sewn bars
Boning
Gold Trim
Flower Stamp
Versa Craft Baby Blue 142 craft ink
Dylon Fabric Paint No. 8 Royal Blue
2 Metres red dupion
Collar:
Fabric of choice
Synthetic Boning
Coutil
Scrap piece of white cotton fabric
Snap Fasteners
Fabric of choice
Synthetic Boning
Coutil
Scrap piece of white cotton fabric
Snap Fasteners
Cape:
1 metre Micro Crown Velvet in Brown
1 metre Habotai Polyester in red
Snap Fasteners
Brooch
1 metre Micro Crown Velvet in Brown
1 metre Habotai Polyester in red
Snap Fasteners
Brooch
WIG:
Obtained from Etsy TwigsbyCharlotte
Obtained from Etsy TwigsbyCharlotte
To make the petticoat:

|
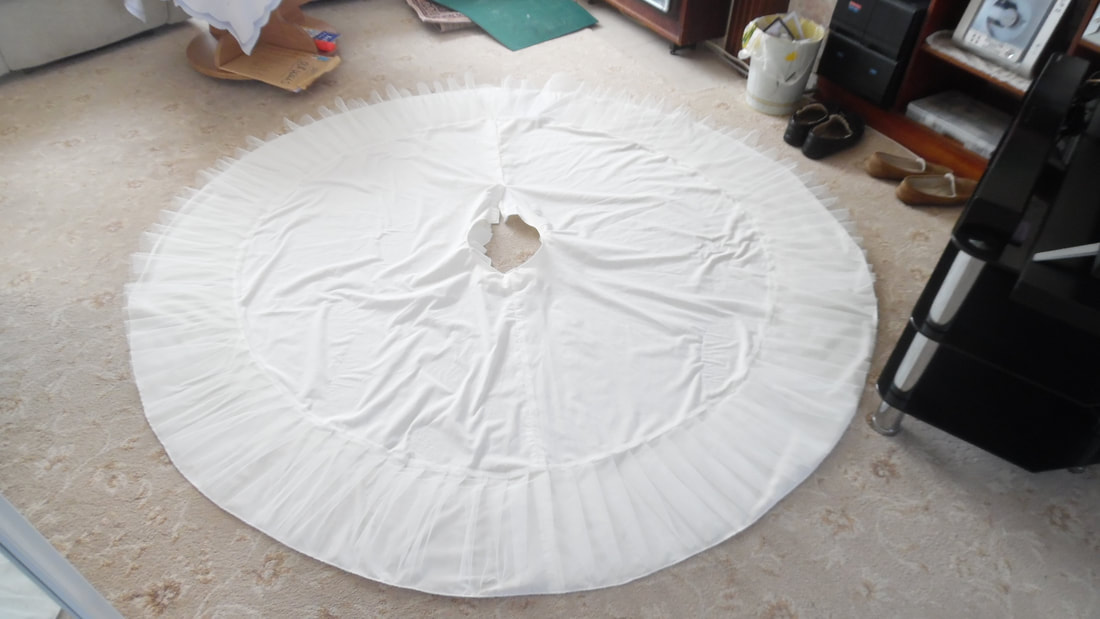
For the Petticoat and Under Layer Skirt. They both start off as half circles. Fold the fabric in half to get two layers. Measure the length you want the skirts to be and draw and cut to this measurement. Measure your waist and halve this, add on 5 cms to the measurement and cut a half circle at the mid way point..
|

|
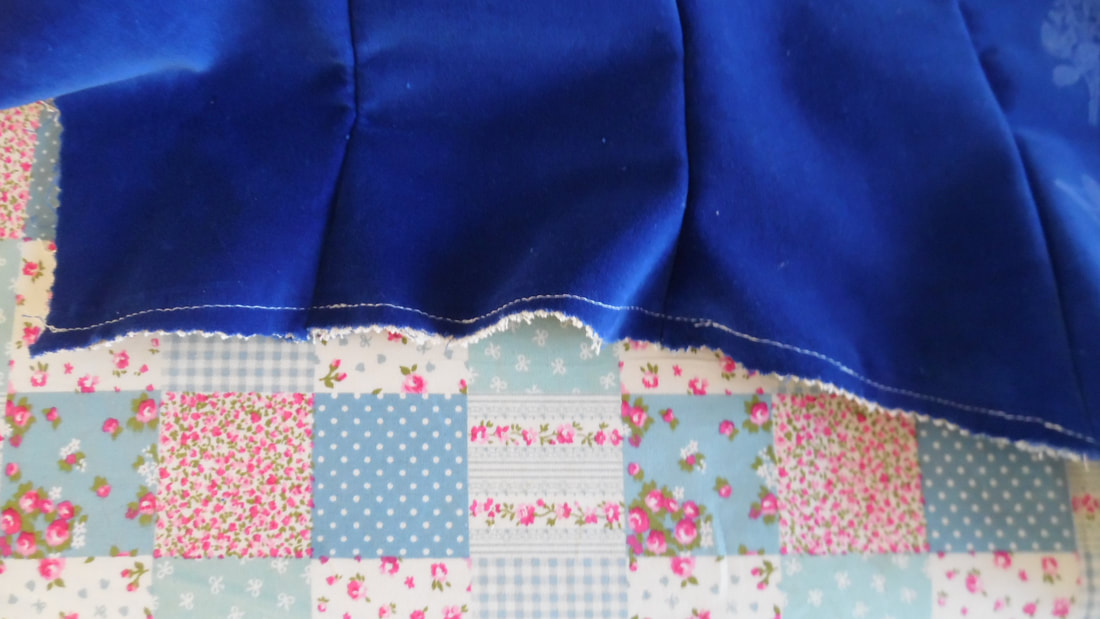
This shows marking the half circles on both fabrics.
|
|
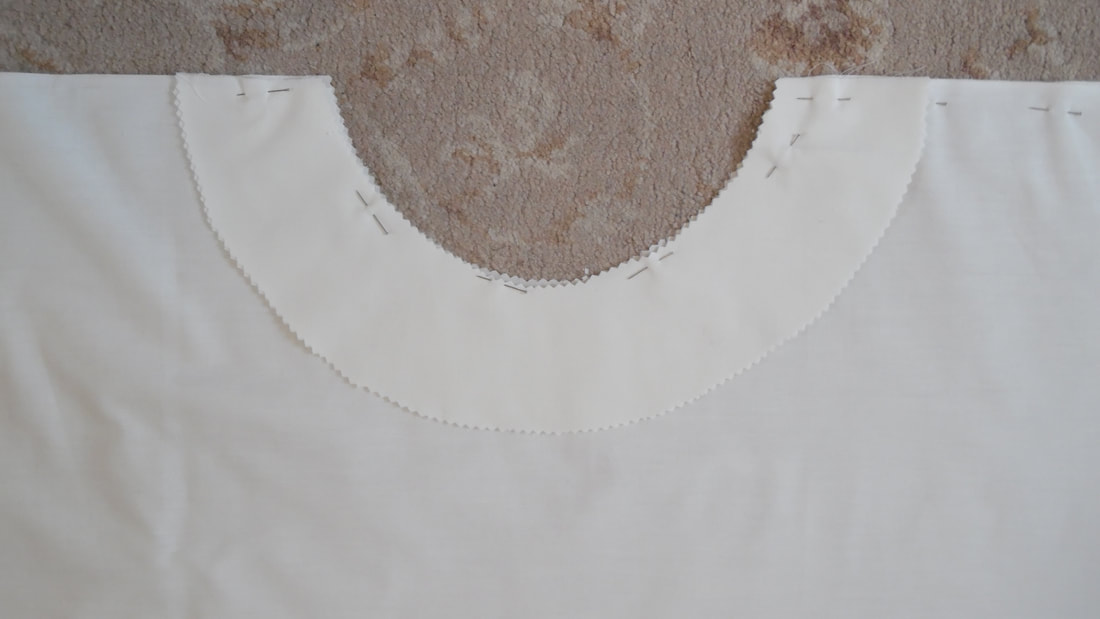
For the ivory petticoat only, cut out two yolk pieces approximately 2" (5 cms) wide.
Sew one side seam of the petticoat and one side seam of the yolk piece. |
|
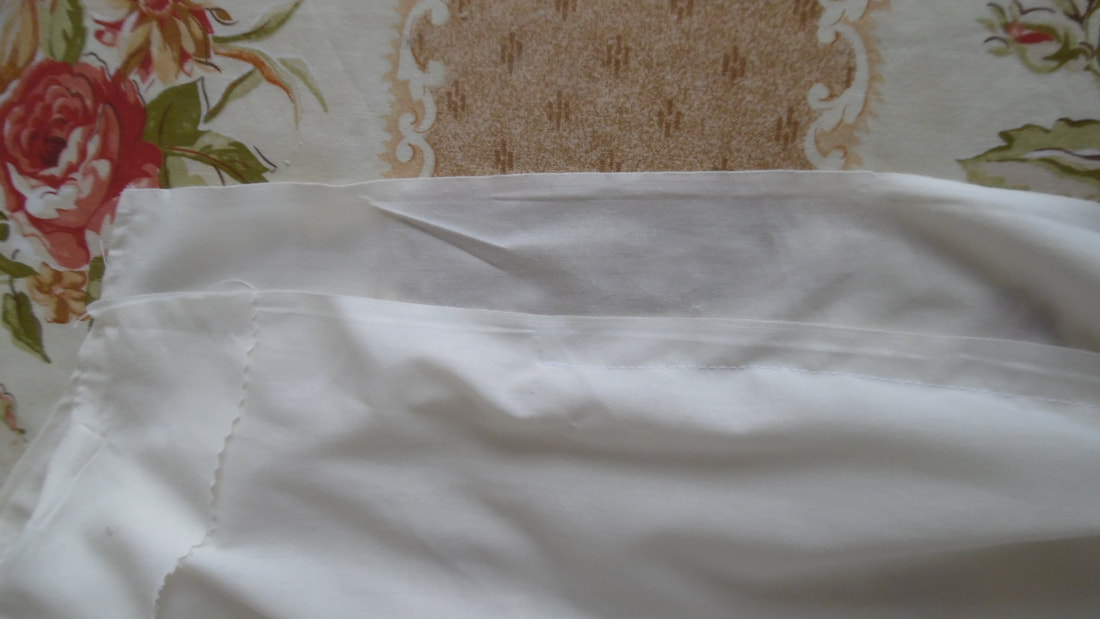
Sew the yolk to the waist of the petticoat, then sew up the other side seam. Please note that this seam is "off set" by approximately 2" (5 cms) finish sewing the side seam approximately 6" (15cms) from the waist, you need to be able to get this over your head, so your measurement may be different.
|
|
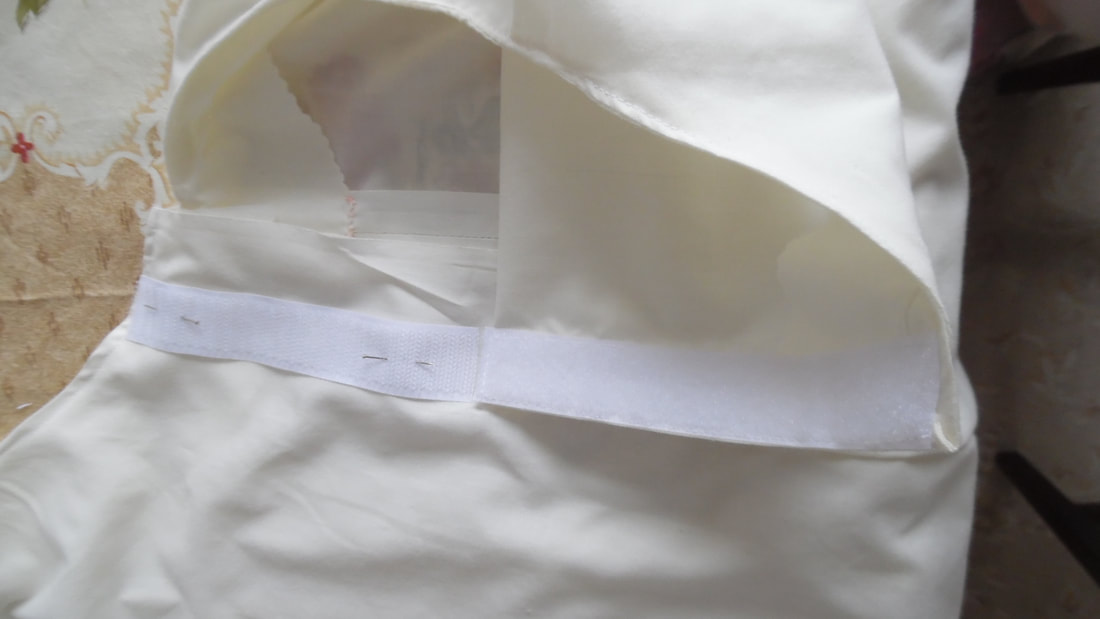
You could if you wanted, make this with a waistband, we have chosen to use a piece of velcro. Sew one piece to the edge of the opening and the other on the "off set" piece.
|
|
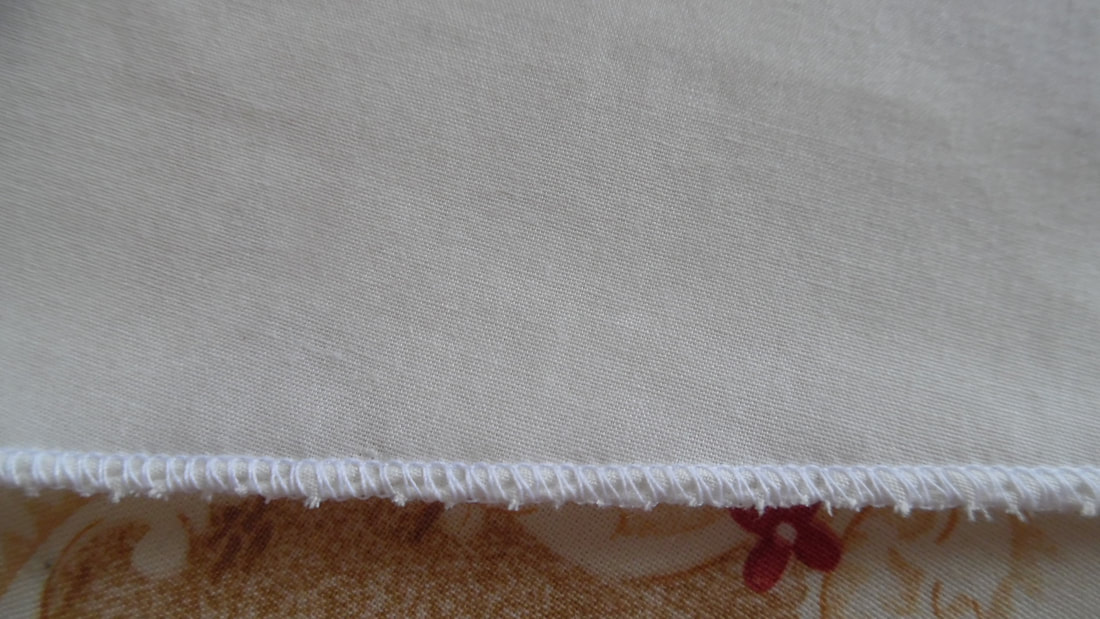
Over lock the hem. Or if you don't have an over locker, just turn the hem twice.
|
|
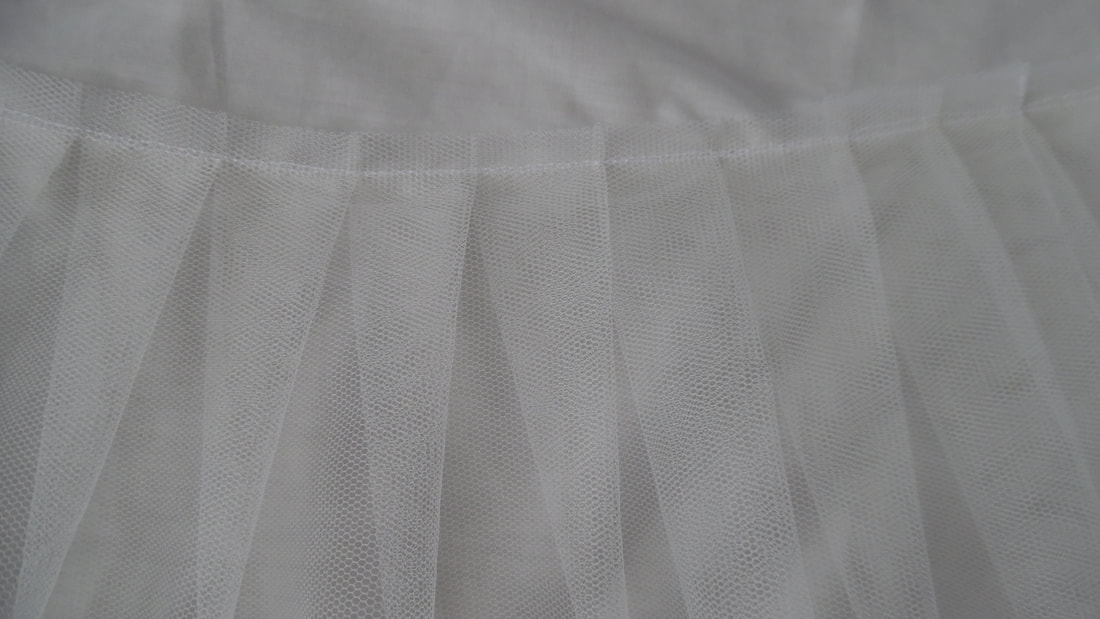
We cut a piece of netting approximately 9.1/2" (24 cms) wide and using a light pleat, sew this to the bottom of the skirt.
|

This completes the petticoat.
Under Layer Skirt:

|
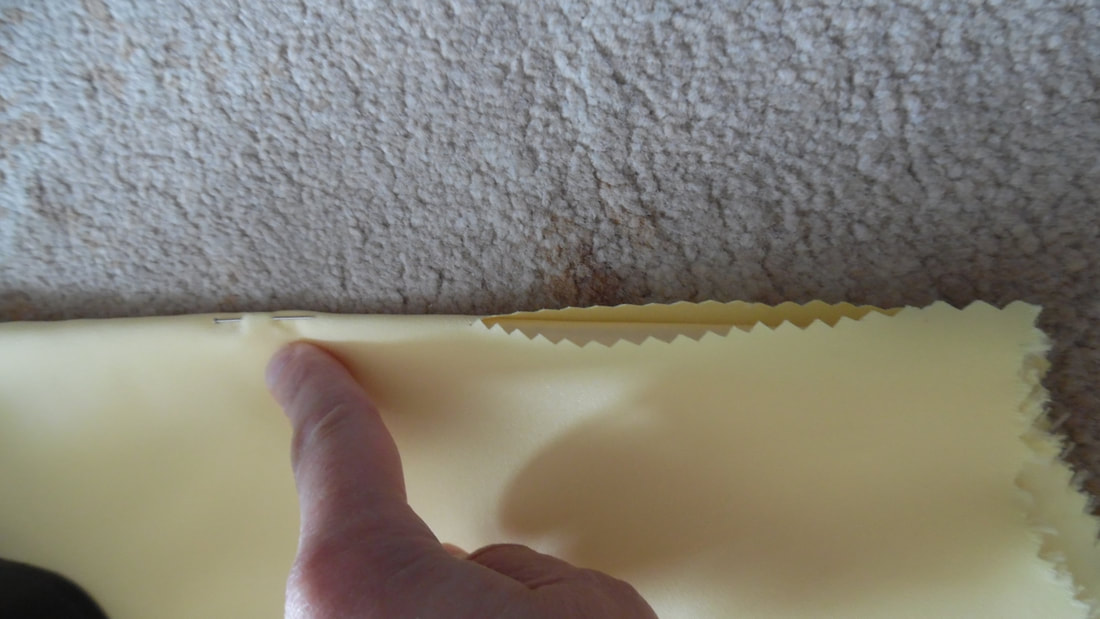
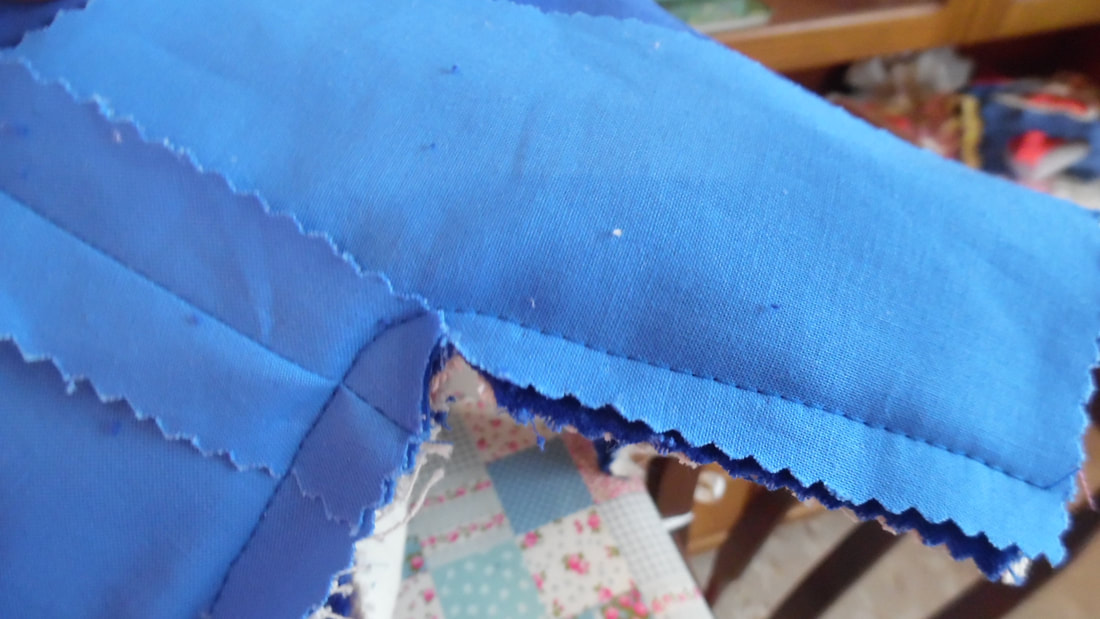
This will be a back opening skirt. So sew up both seams, then fold the skirt into a quarter
|
|
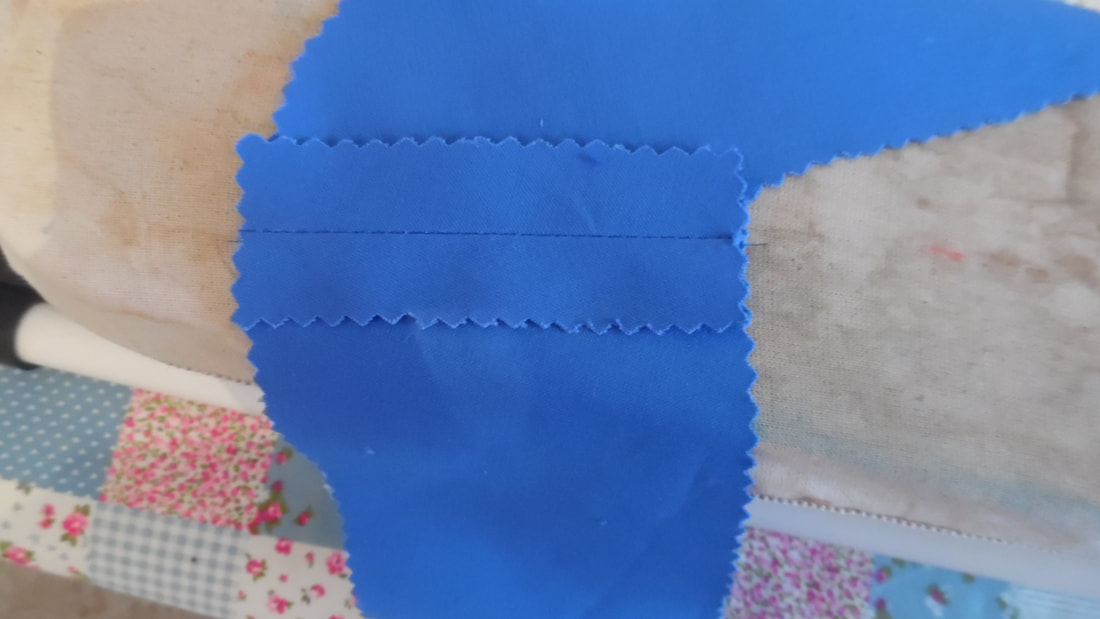
Using pinking shears, if you have them. Cut through ONE layer only at the fold all the way down to the bottom.
|

|
Sew in an 8" invisible/concealed zip, then sew up the back seam.
|

|
Over lock the bottom of the skirt and turn a hem. If you do not have an over locker, turn a hem twice.
|
|
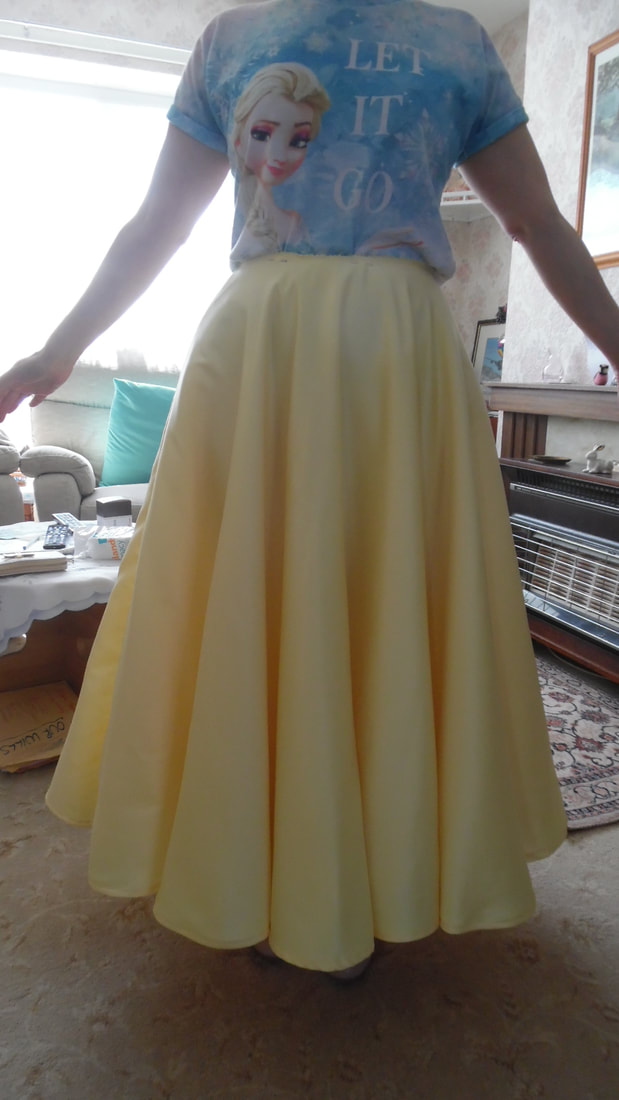
This shows the first layer finished (Minus the waistband)
|
|
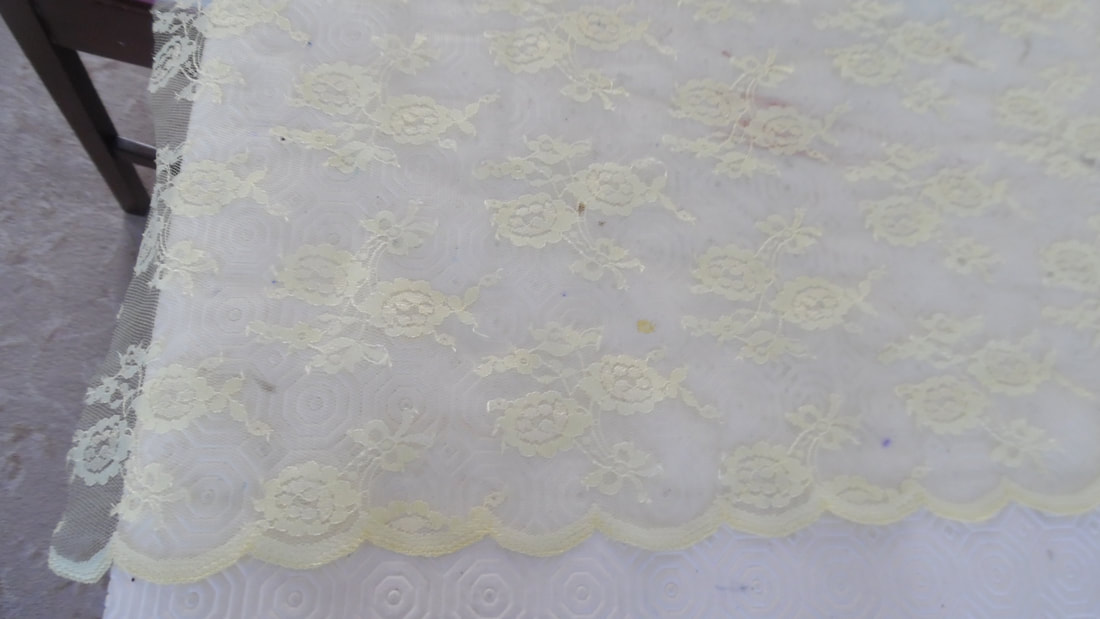
We bought 5 metres of pretty lacy fabric with a scalloped edge.
|
|
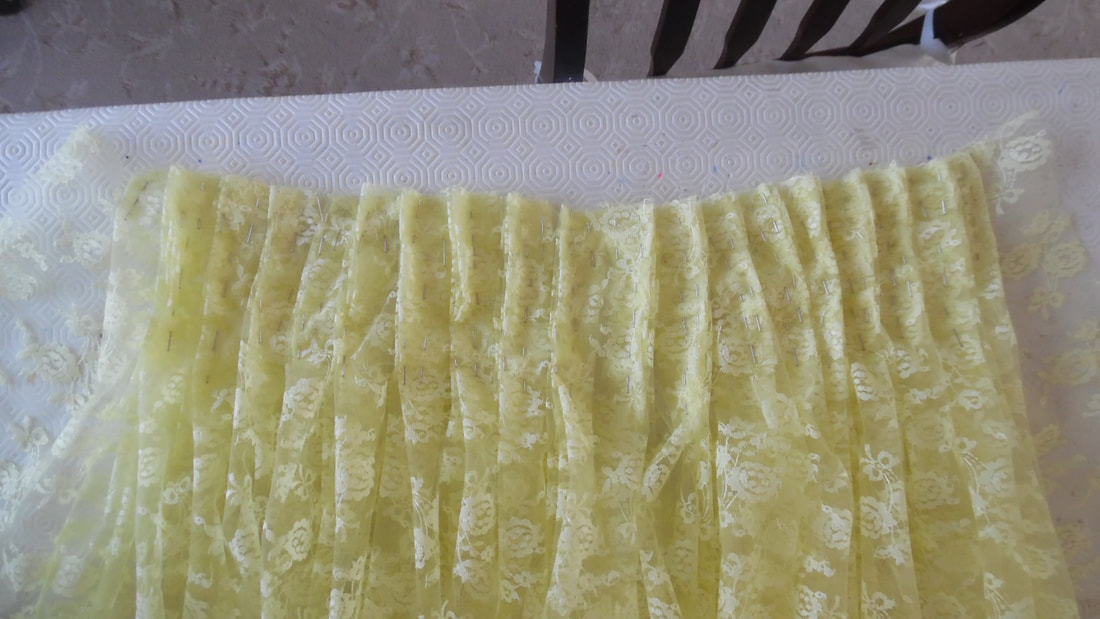
We needed to stack 4 pleats on top of each other to use up the whole 5 metres. (Instructions on the video). Leave the last part un-pleated. It will help to run two rows of stitches across the top to hold this in place.
|
|
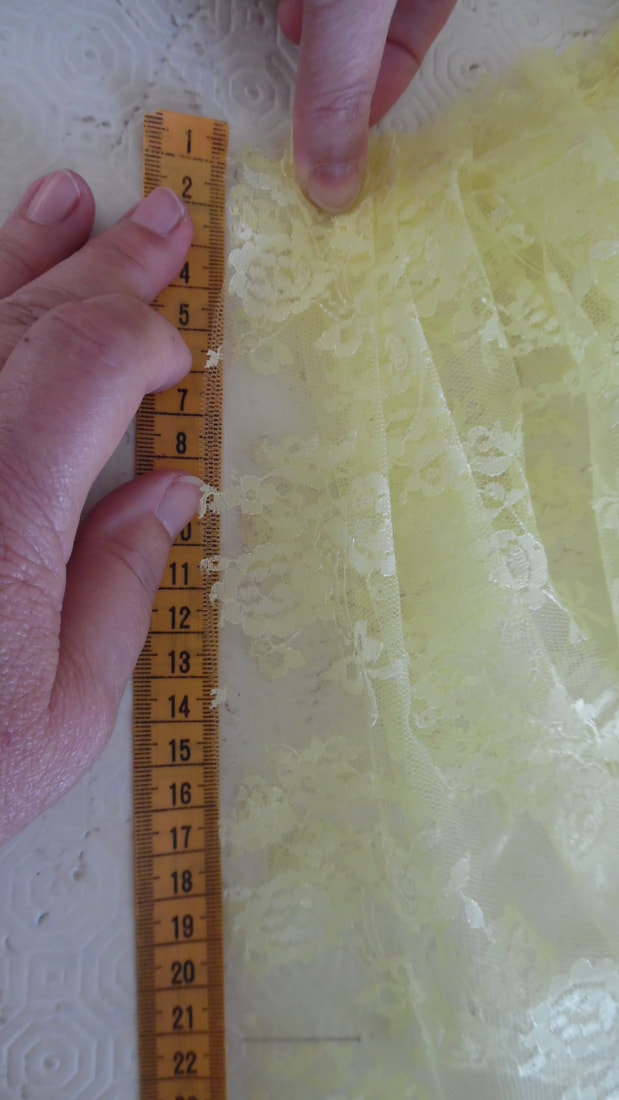
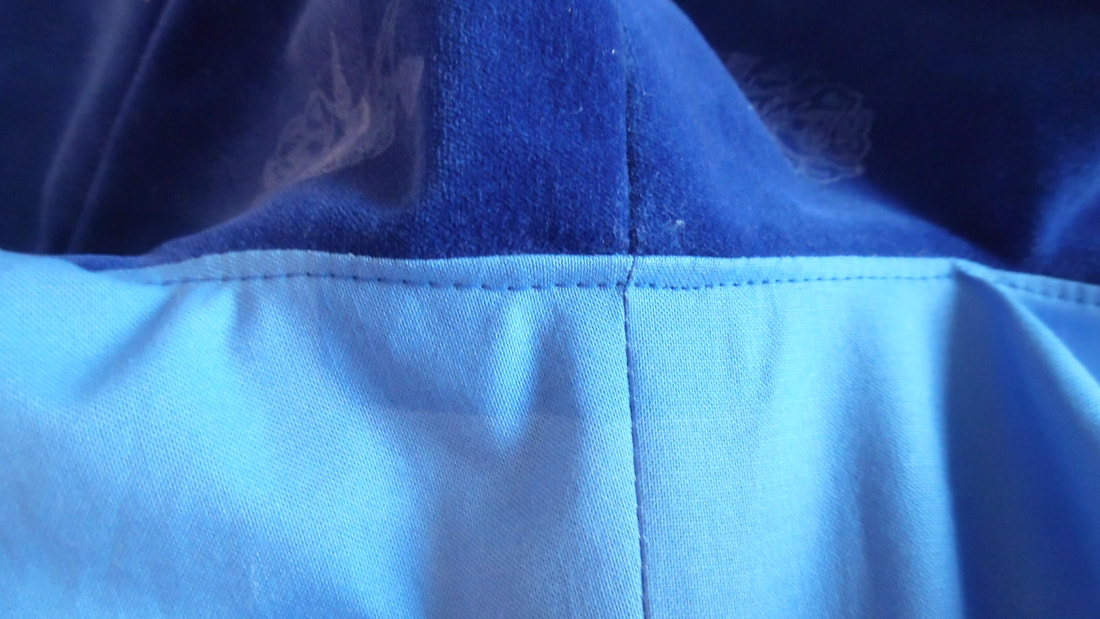
Lining up both edges of the fabric, measure down the length of the zip, then sew from that point to the hem.
|
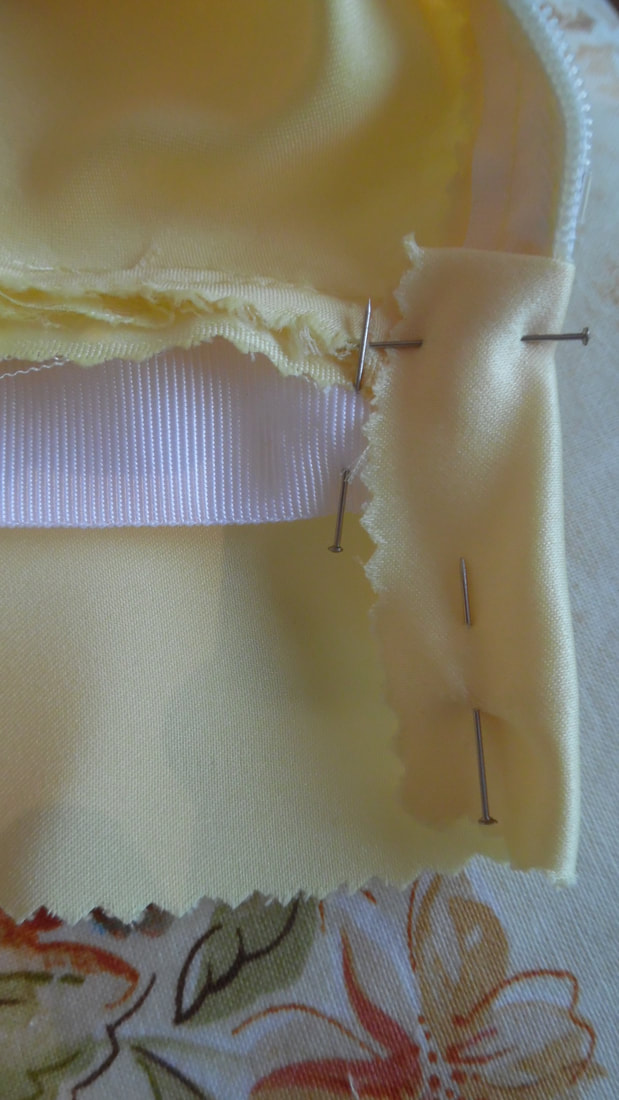
After sewing the seam, turn it the right way out and turn a seam and hand sew this to the zip opening, being careful not to sew too close as it will get stuck in the zip. Pin both fabrics together at the waist opening.
|
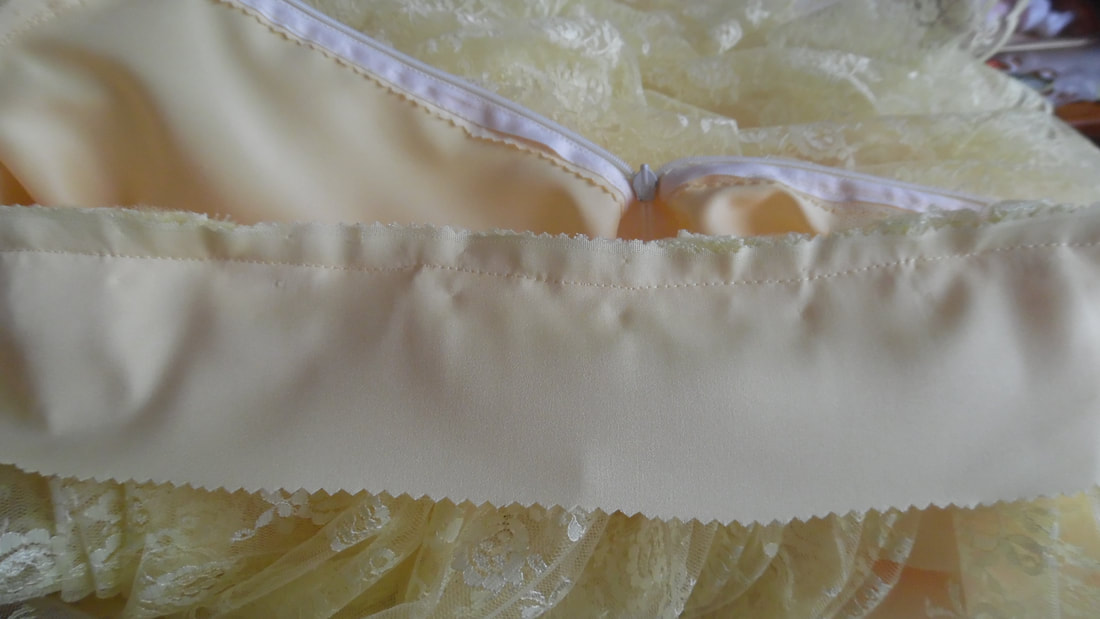
Cut a piece of fabric to your waist measurement and add 2" (5 cms) and sew this on
|
|
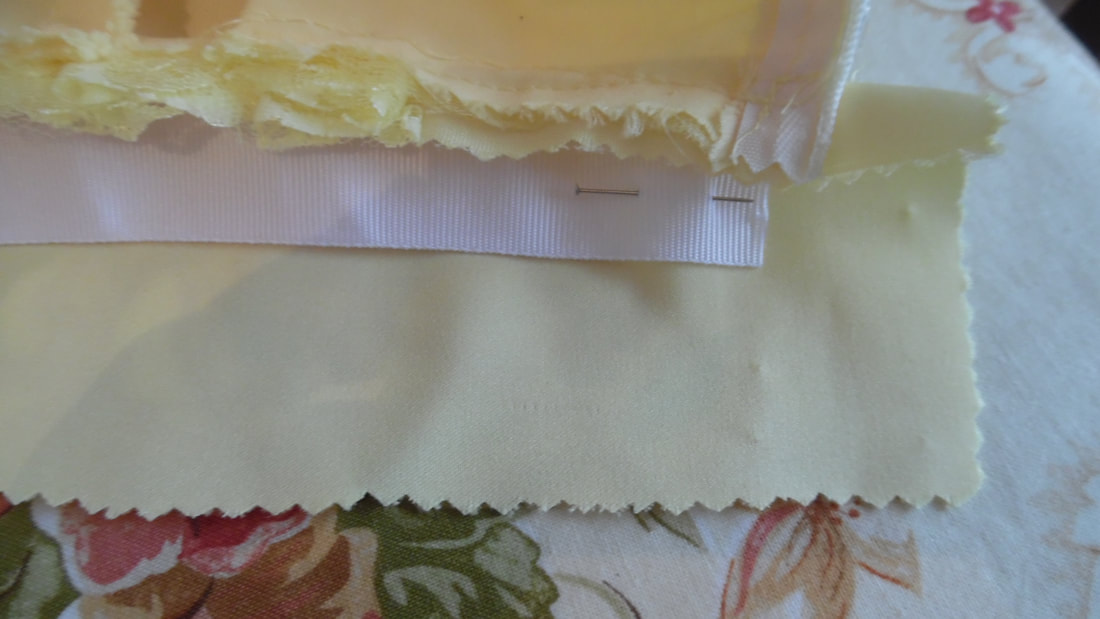
Cut a piece of webbing/Petersham and fit this snuggly behind the seam folds, there should be approximately 1" (2 cms) overhang
|
|
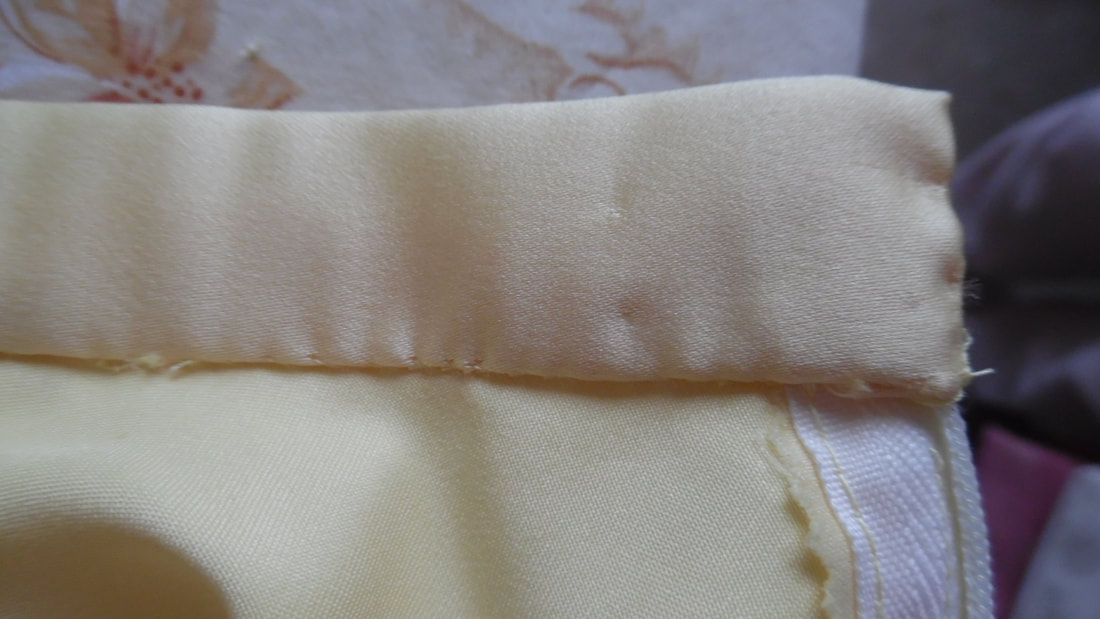
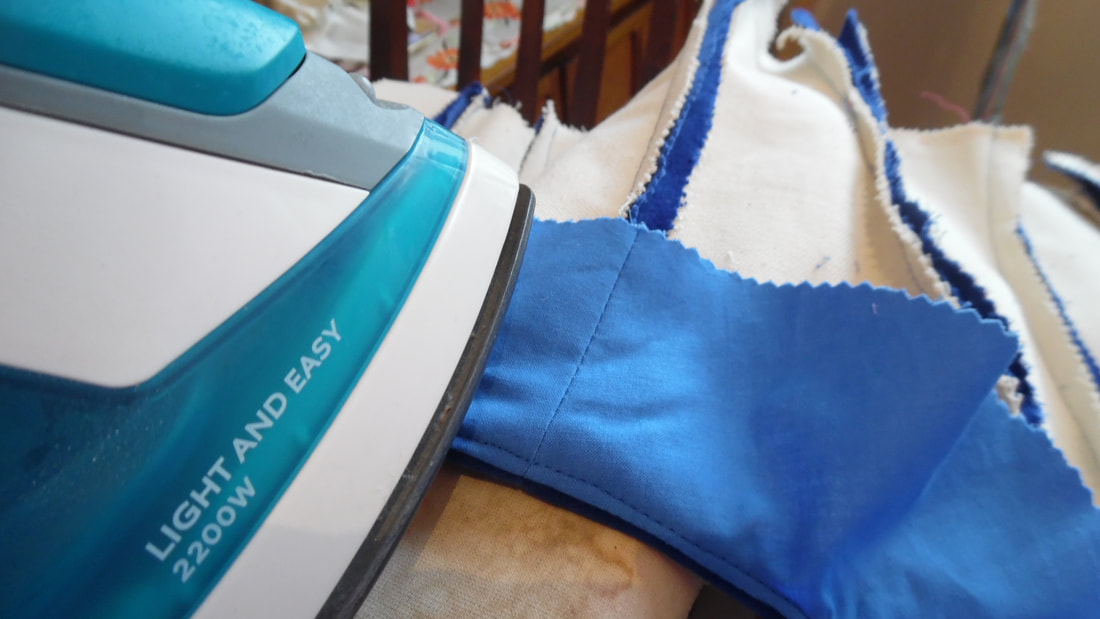
Turn in the edge, then turn a 1 cm hem then turn again. (Instructions of the video to show how this is done.
|
|
Close the end and hand sew to the inside of the skirt.
|
|
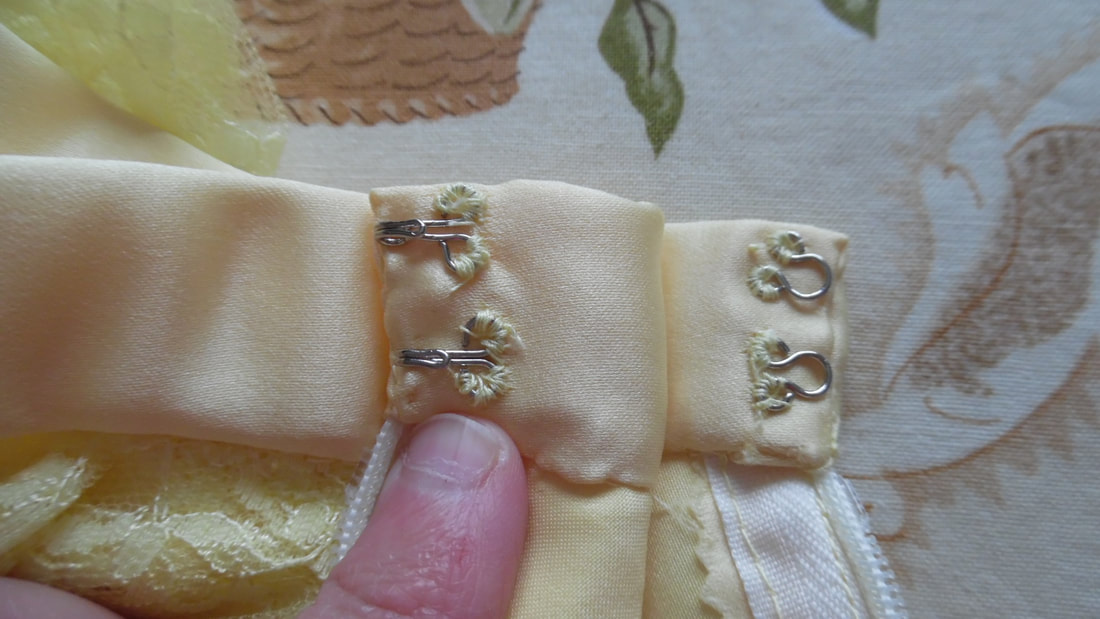
Sew on hooks and eyes.
|
This completes the skirt.
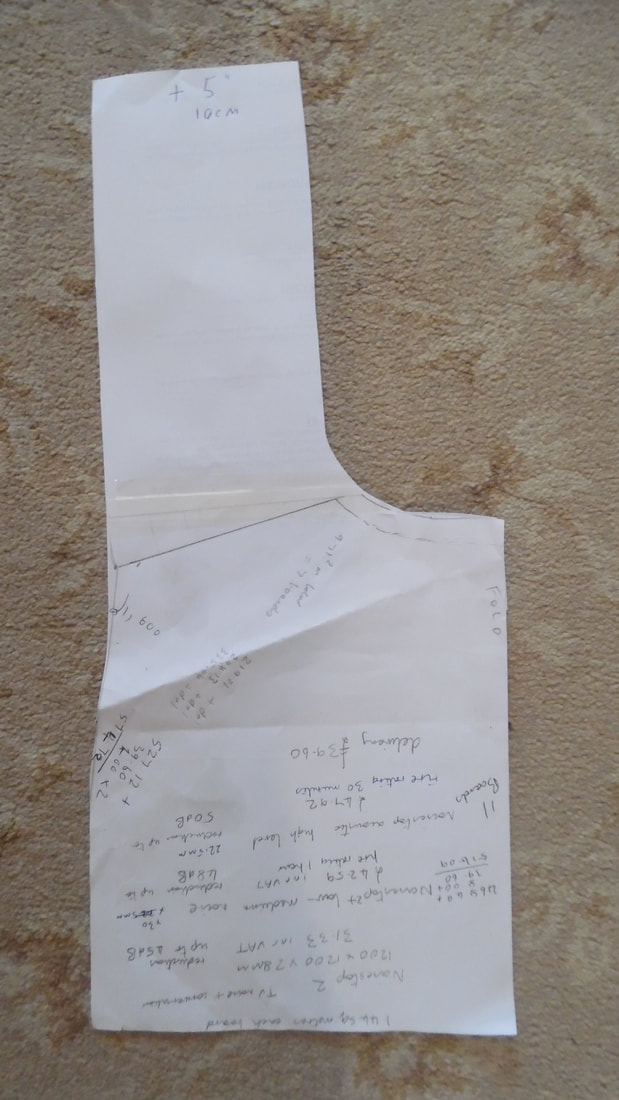
To make the bodice:
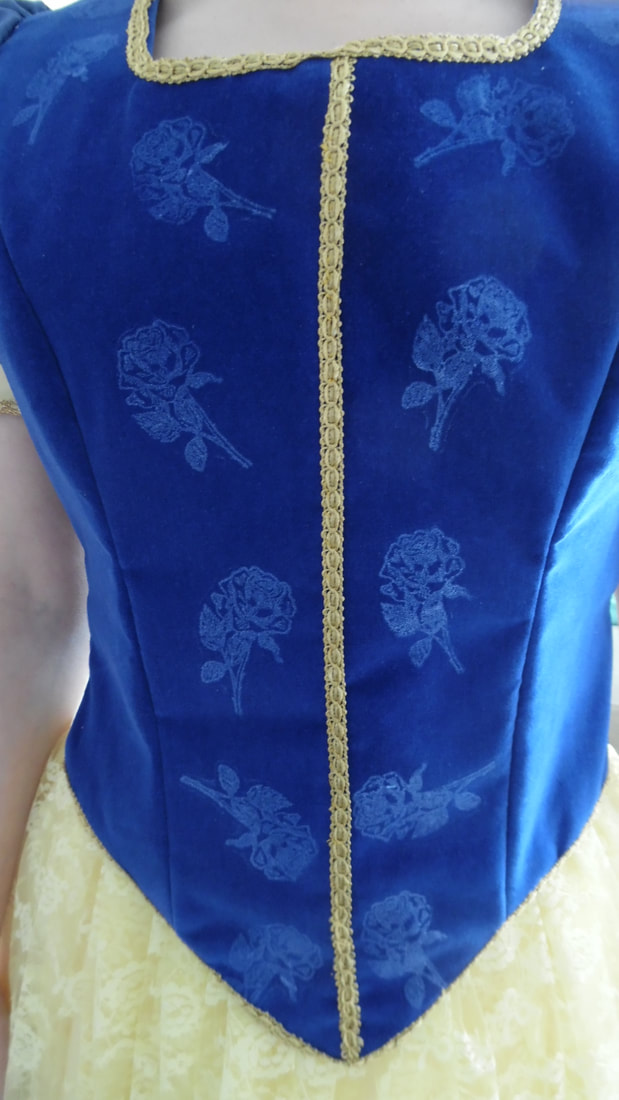
Using tried and trusted Simplicity 2851 (with a few minor alterations) I came up with this pattern for the bodice:
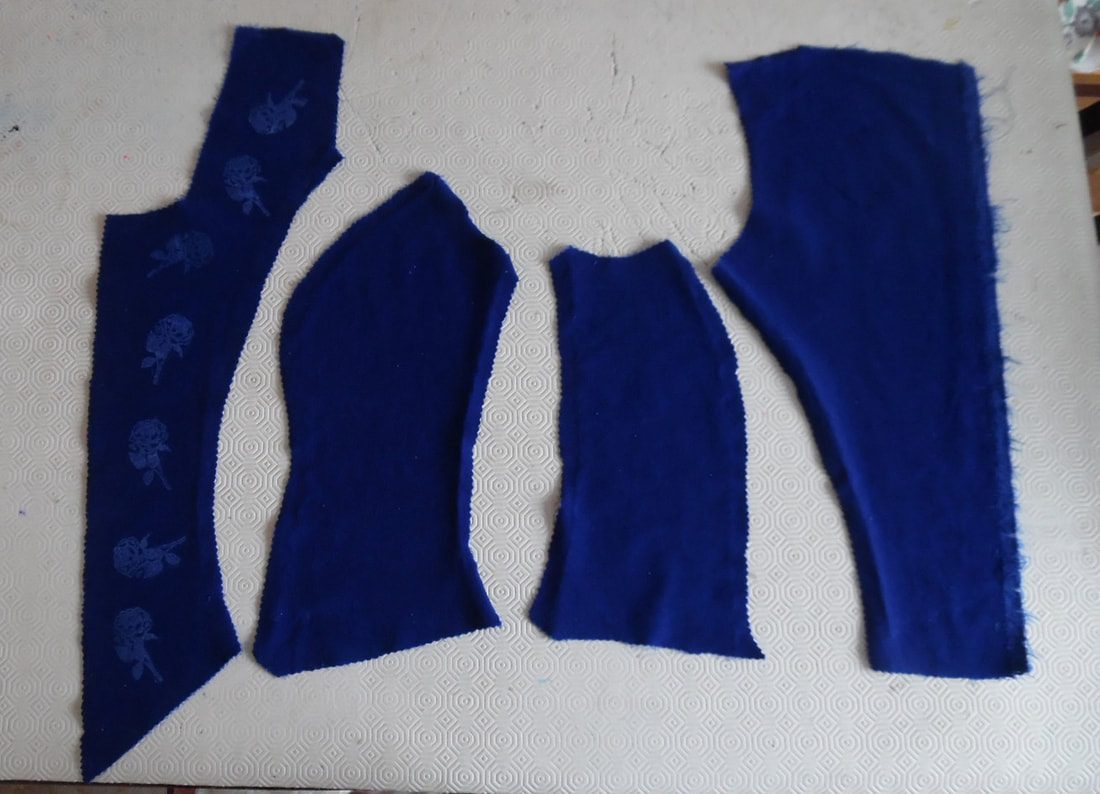
To make it a bit more interesting to look at, I used a rose design with Versa Craft Baby Blue 142 craft Ink on the front two panels. I will also make an identical set made from canvass and mount them before assembly. The front two sections have been block printed.
|
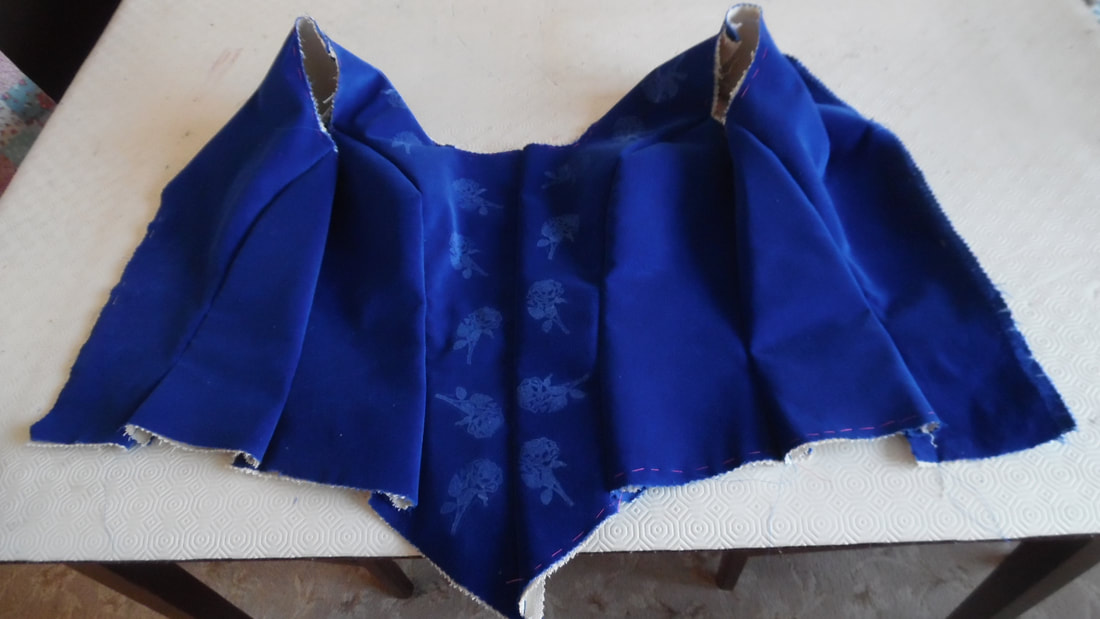
Sew all the sections together, including the shoulder seams. Press the seams open on the inside.
|
|
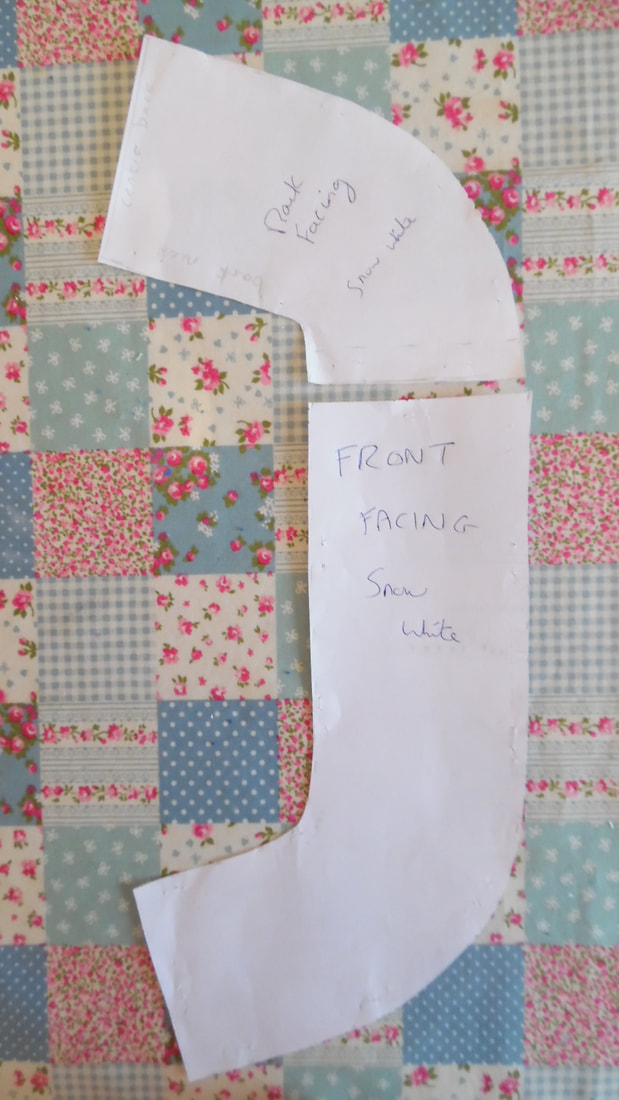
Using the bodice as a template, I made a facing pattern from the front and back pieces.
|
|
After sewing these pieces together, make sure you iron the seams.
|
|
Attach the facing to the bodice neck line and clip the corners. Iron the facing away from the bodice.
|
|
Under stitch approximately 2-3 mm away from the seam line along the whole facing. Under stitching, forces the fabric over so it won't show on the outside.
|
|
Finally, iron the facing.
|
|
Velvet frays very easily, so to stabilise it until I'm ready to sew the bottom, I have run stitching around the hem.
|
Leaving the bodice now and onto the sleeves
|
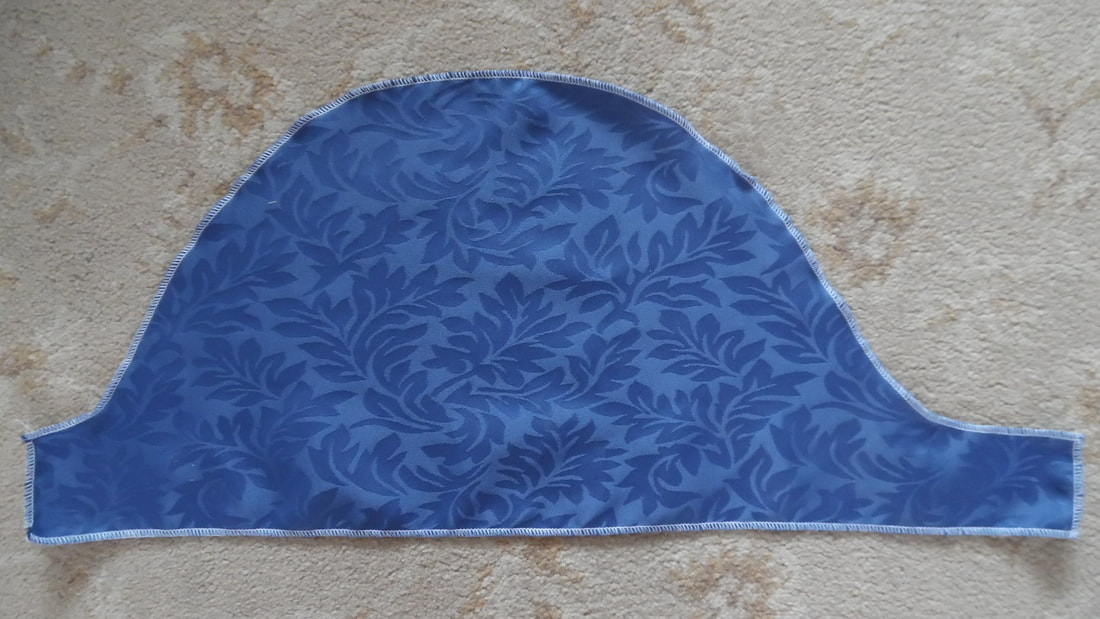
I am using a conventional sleeve pattern
|
To fit me the overall length is approximately 55cm and height of 25 cm. I have overlocked it to reduced fraying.
If you are using a fabric with a right and wrong side, don't forget to make your sleeves opposites, otherwise you will end up with two sleeves exactly the same.
If you are using a fabric with a right and wrong side, don't forget to make your sleeves opposites, otherwise you will end up with two sleeves exactly the same.
|
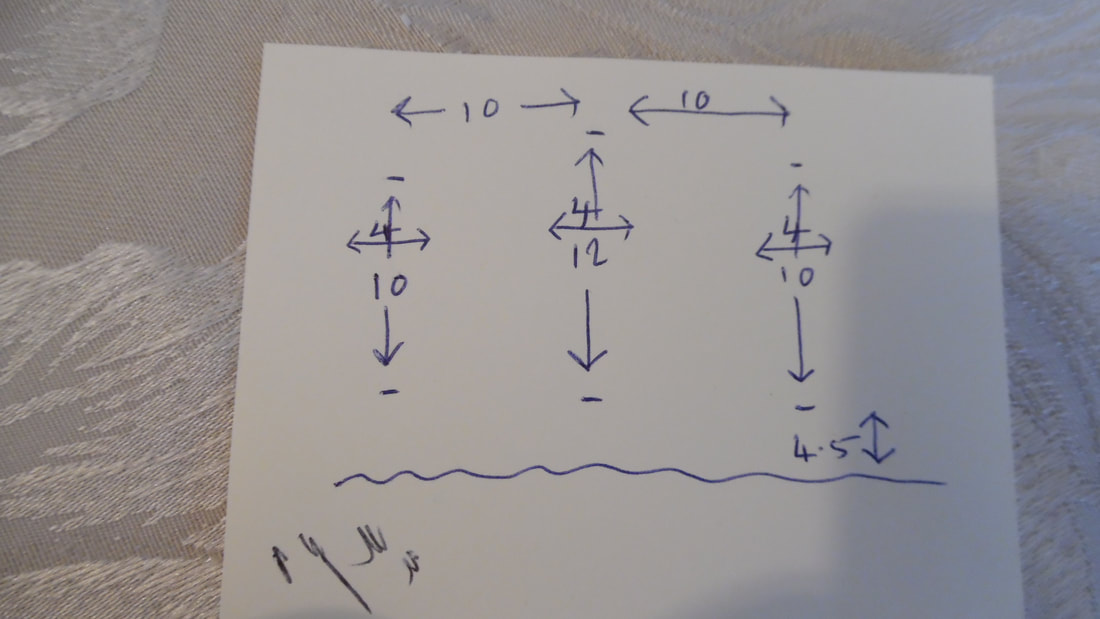
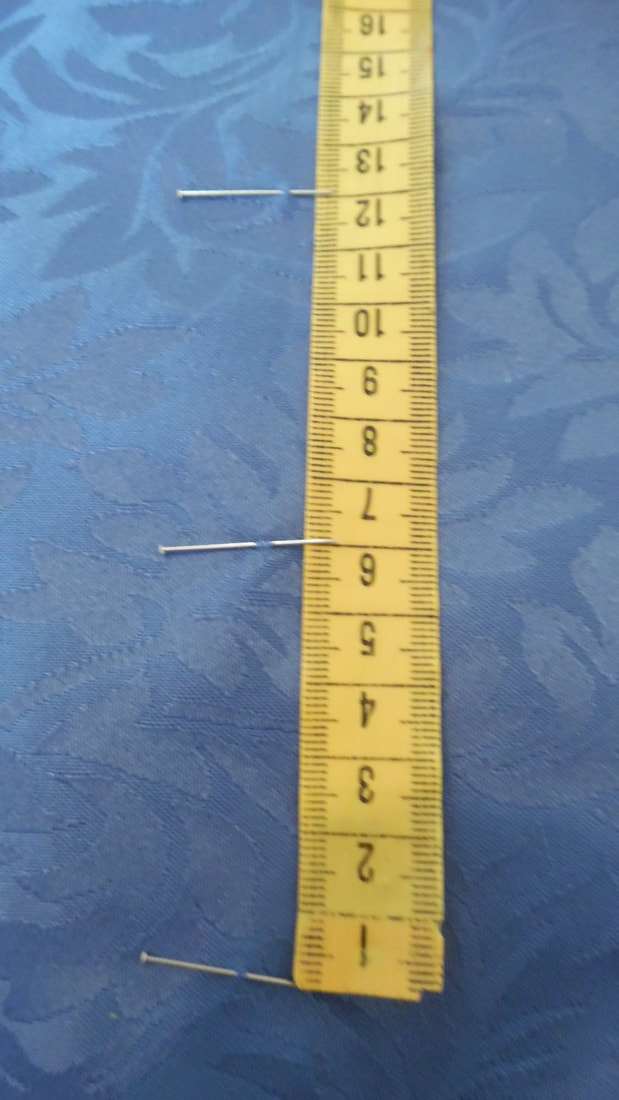
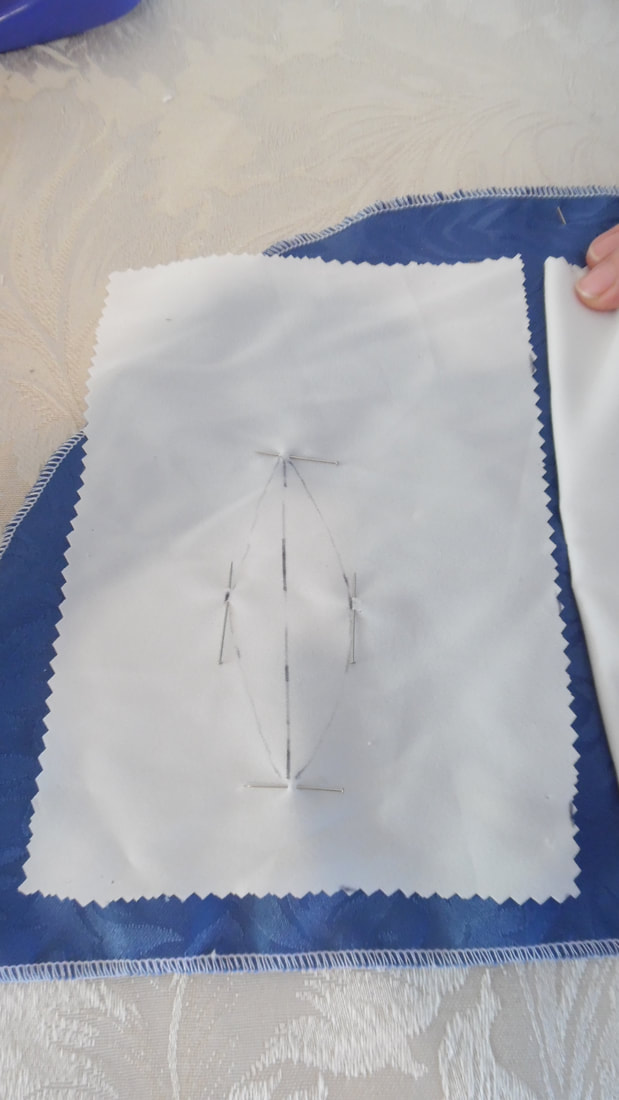
These are my measurements to place the slits.
|
|
Mark the half way points first. Notice that the bottom edge does not meet up, you are only folding the sleeve shape.
|
|
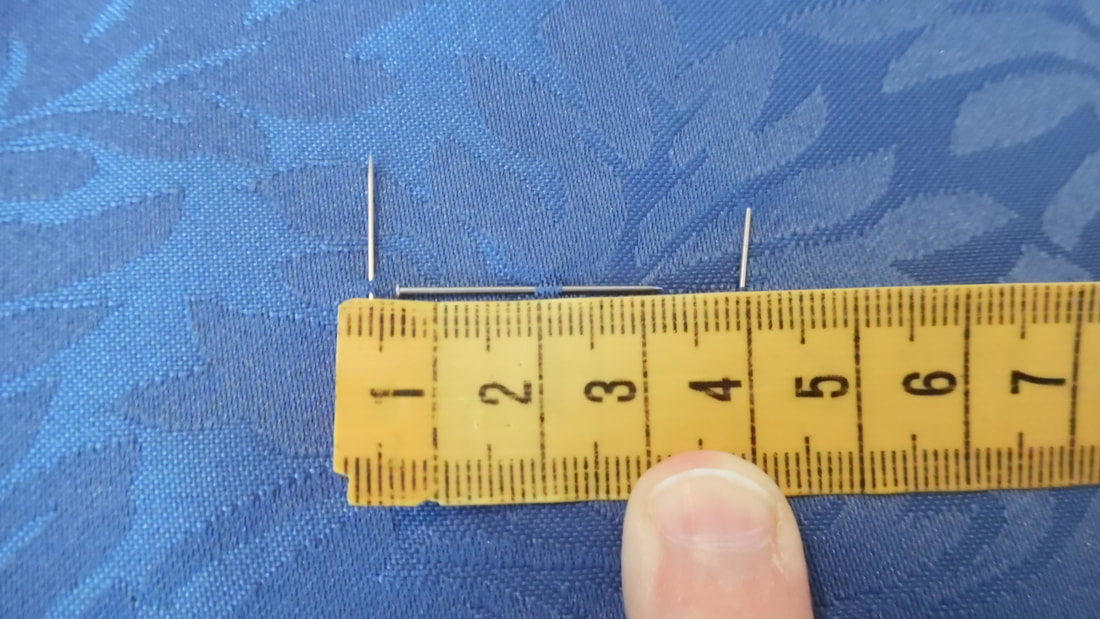
Measure 4.5cm from the bottom edge at the centre mark you put in.
|
|
Place a mark 12 cm above the first pin.
|
|
Mark the half way point.
|
|
From that half way point measure out 2cm either side of pin and mark.
|
|
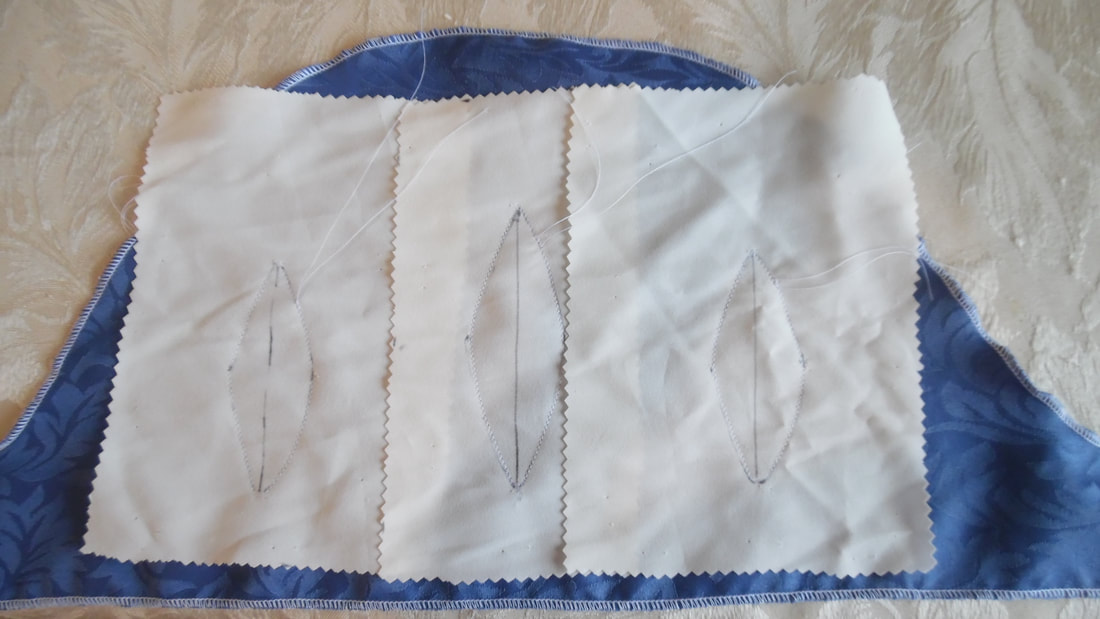
Draw an horizontal line and draw a curve.
|
|
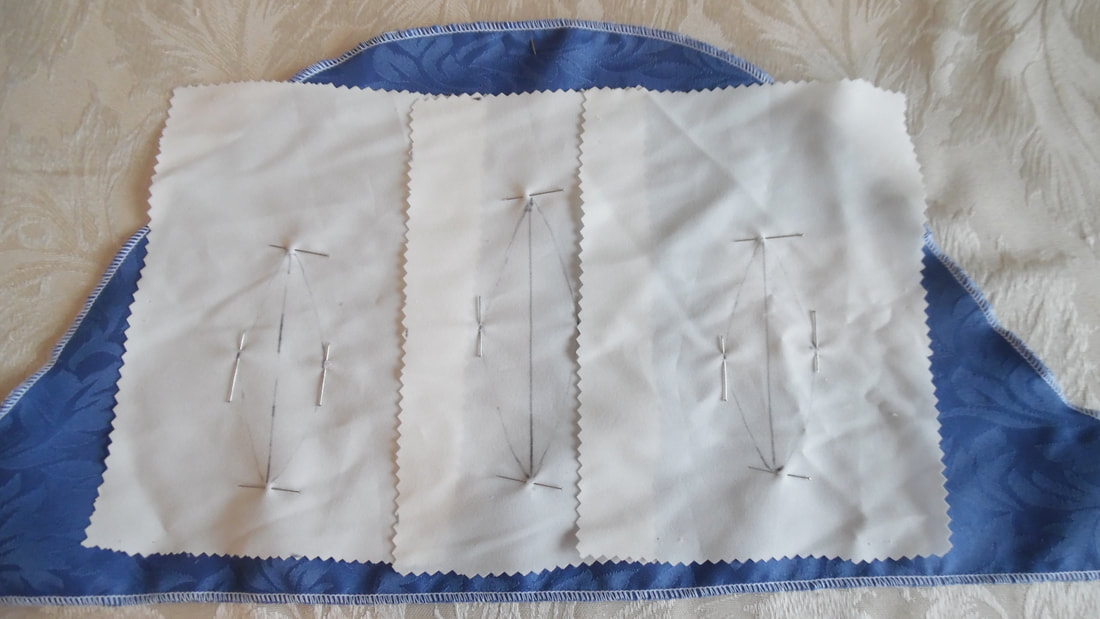
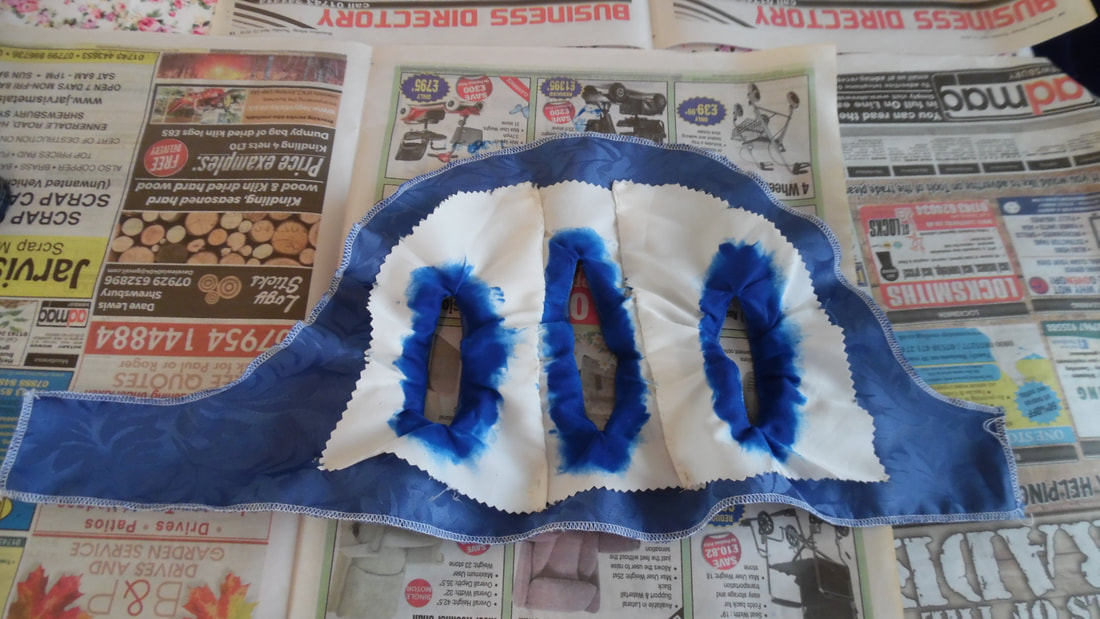
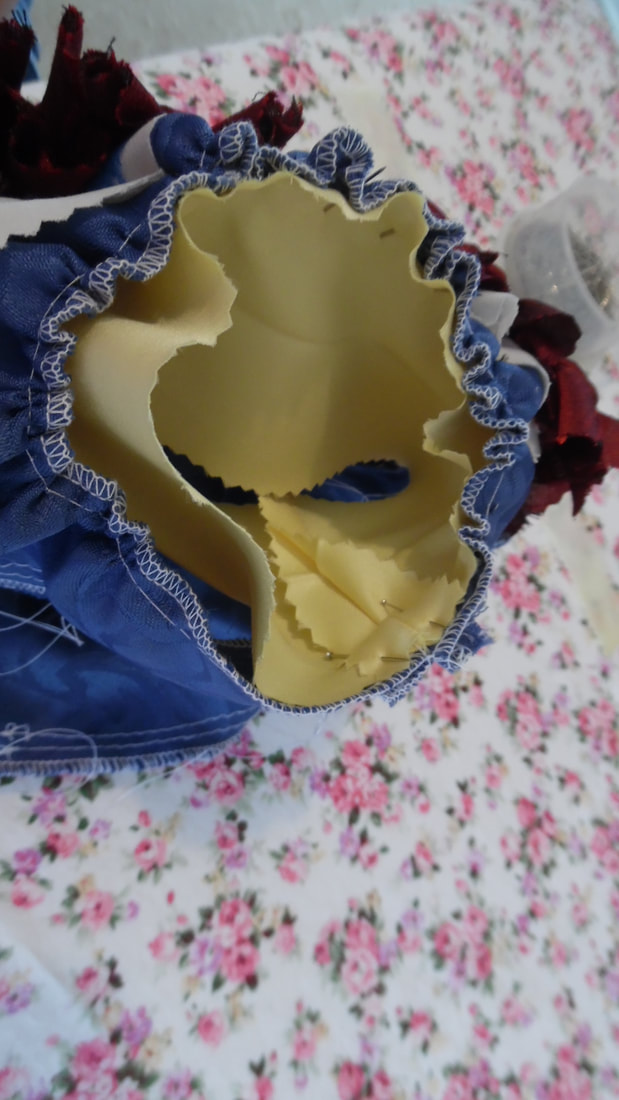
To line the slits you can use whatever you have to hand that colour matches your sleeve, or as I have done, used some scrap polyester crepe. The colour is irrelevant as I will be dying the edges later to match my sleeve. These pieces need to be large enough to overlap each other by about 3cm with enough extra fabric all round. I then transferred my markings onto these pieces. I did it this way because its more difficult to try and pin and draw on pieces that keep sliding all over the place to get my original pattern.
|
|
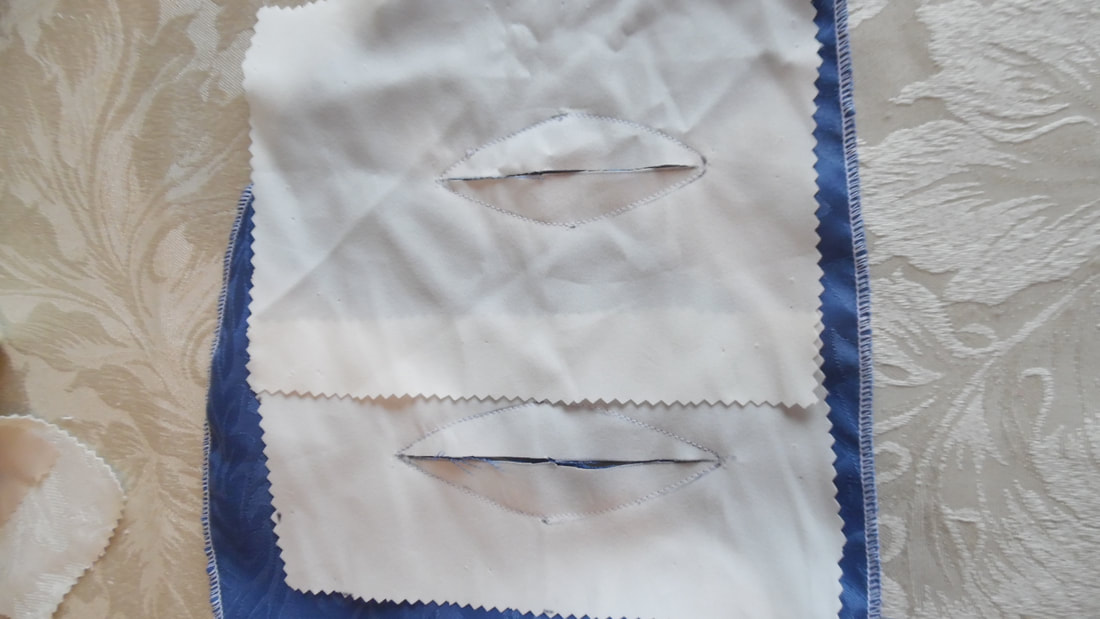
After sewing your curves, you can now cut through both fabrics being careful not to cut your stitches.
|
You don't have to understitch the slits, but we find it forces the liner to the inside a bit easier. Best to watch the video on how to do this as its a bit fiddly.
You can see now why you need three individual pieces of fabric. Turn these to the inside of the sleeve and secure in place. Where the pieces overlap hand stitch these together (only the liners, not through the sleeve itself). You can then neaten around the outside. You don't want any fabric near where you will be gathering your sleeve at the top, or the cuff at the bottom. Once you have sewn the pieces, you can take all the pins out and give it a good press. You can if you want prick stitch this to the sleeve to hold it in place, you won't need to do many.
|
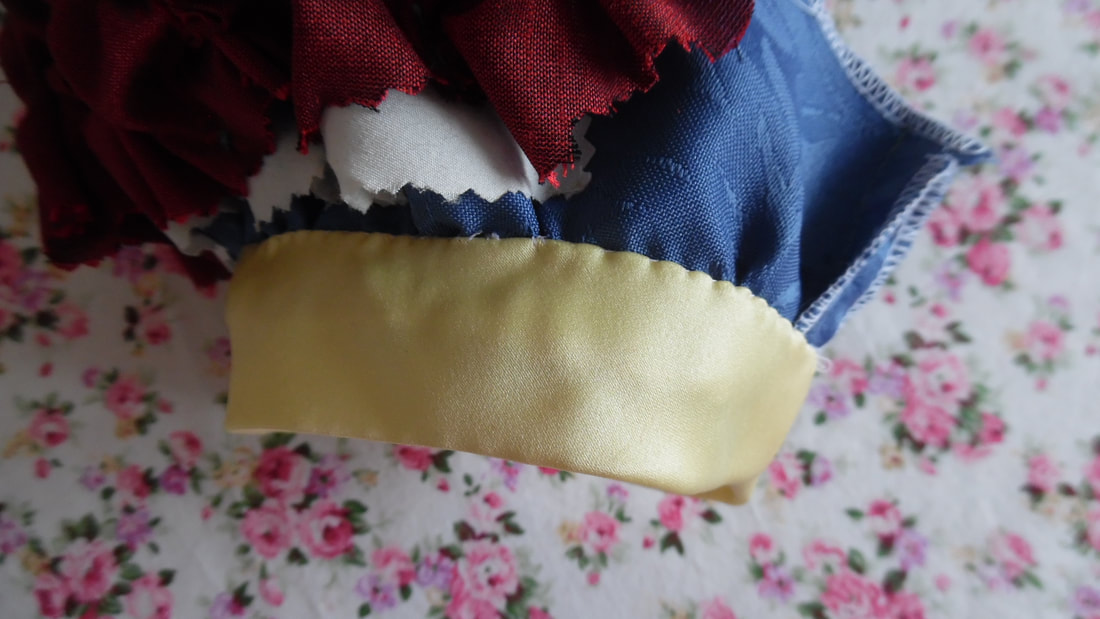
I then used the Dylon to paint around the slit to hide the white, I don't need to do all of it.
|
|
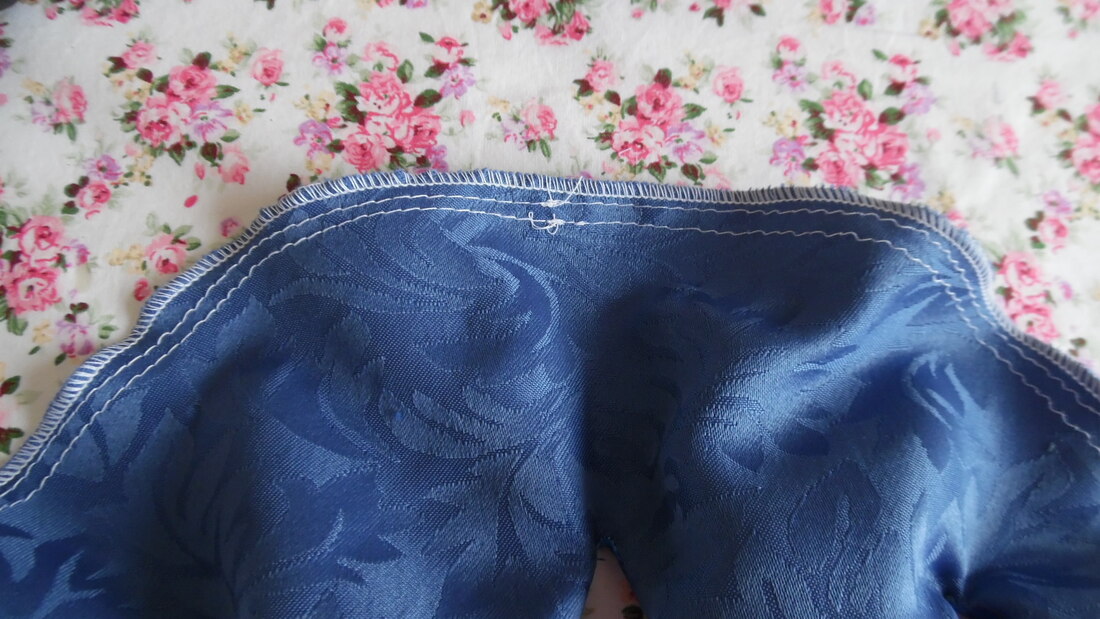
Stitch two rows of gathering stitch on the sleeve top and also along the cuff.
|
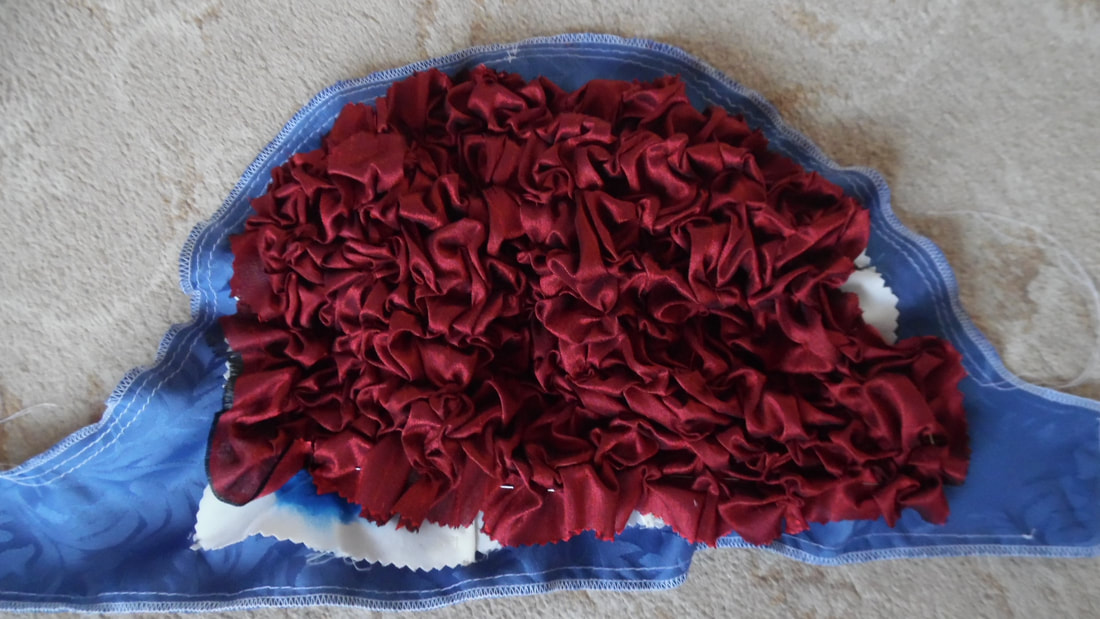
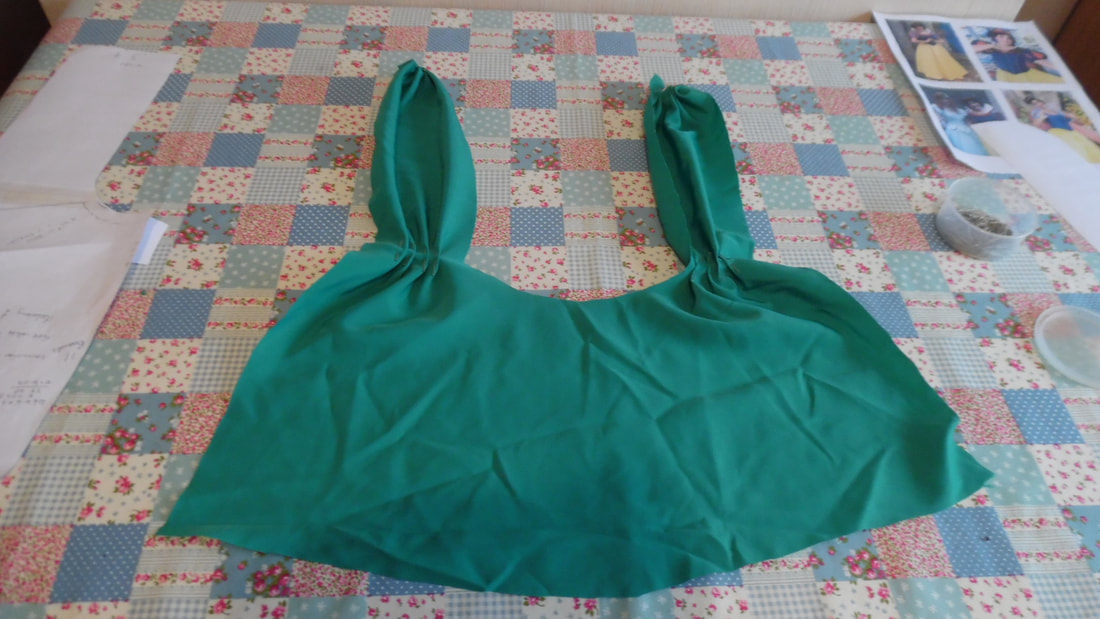
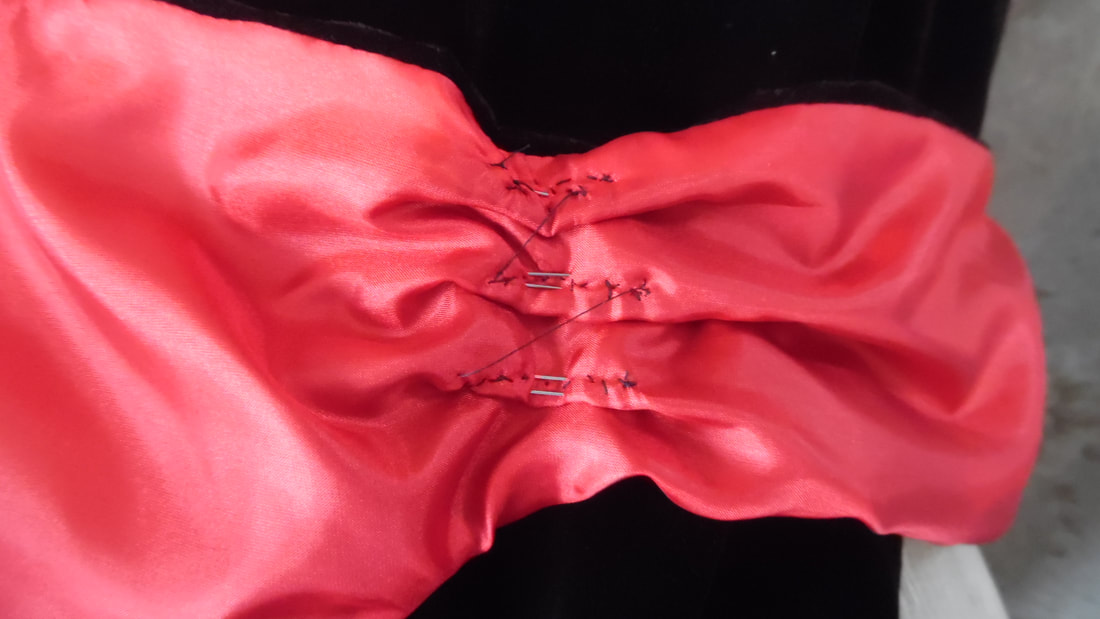
I want a more regal look, so I shall be doing a large amount of bunch quilting. The video will show how this is done. First I marked 1" (2 cm) squares.
This is what the finished result will look like, it will give the sleeve a more padded look.
|
Once made I can cut this down to fit the sleeve. I don't want it to interfere with the gathering at the top and bottom of the sleeve. Pin prick in places around the piece. And neaten your edges
|
|
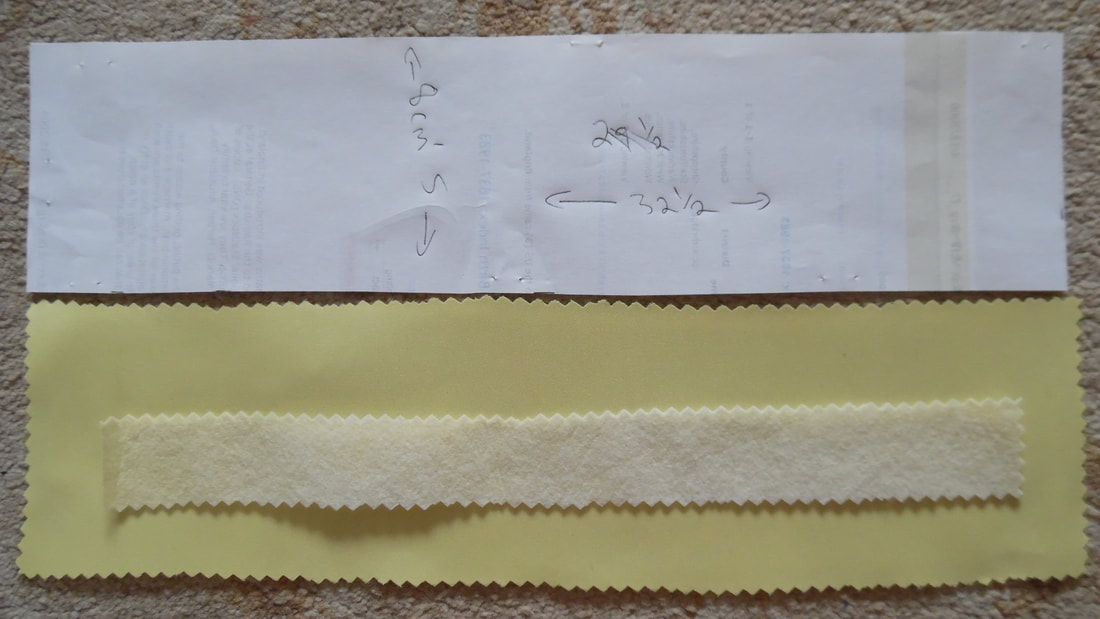
Measure around the arm for a comfortable fit for the cuff, you don't want it too tight nor too loose. Cut a piece of stiffener 3 cm less than the overall length. Fold this in half lengthwise, with the right side outer most and press.
|
|
Gather the sleeve to fit the cuff.
|
|
Insert the interfacing, turn a seam then turn again to the inside of the sleeve and hand stitch in place. Gather the sleeve to fit the bodice.
|
|
Finish the bodice turning up a seam all along the bottom. I then added gold trim around the neck, front seam and at the bottom of each sleeve cuff.
|

|
Sew on hooks and corresponding bars.
|
|
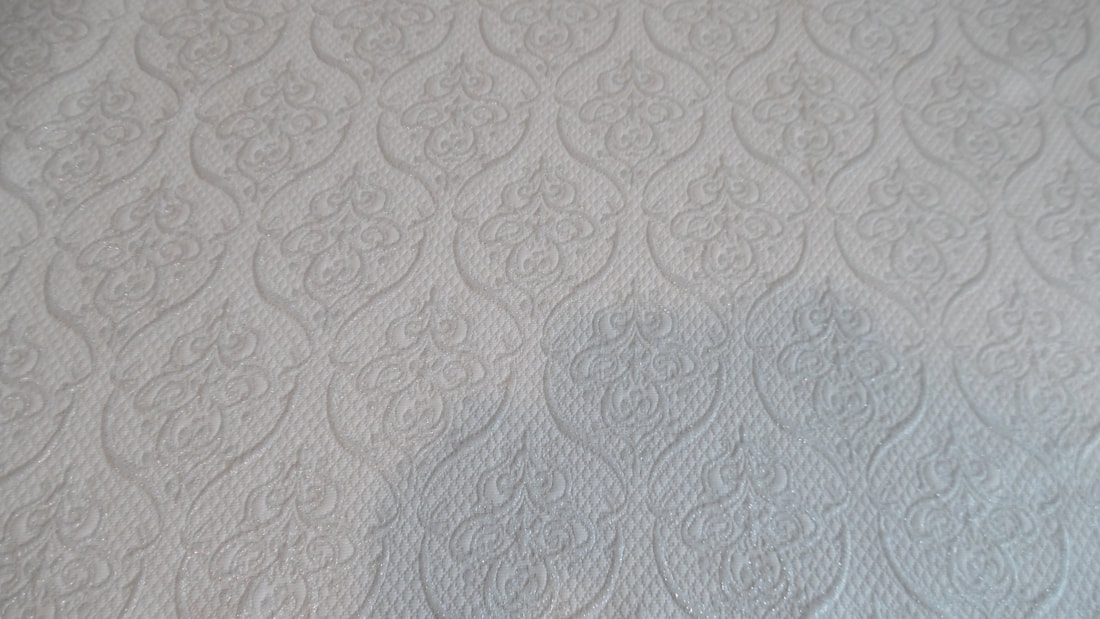
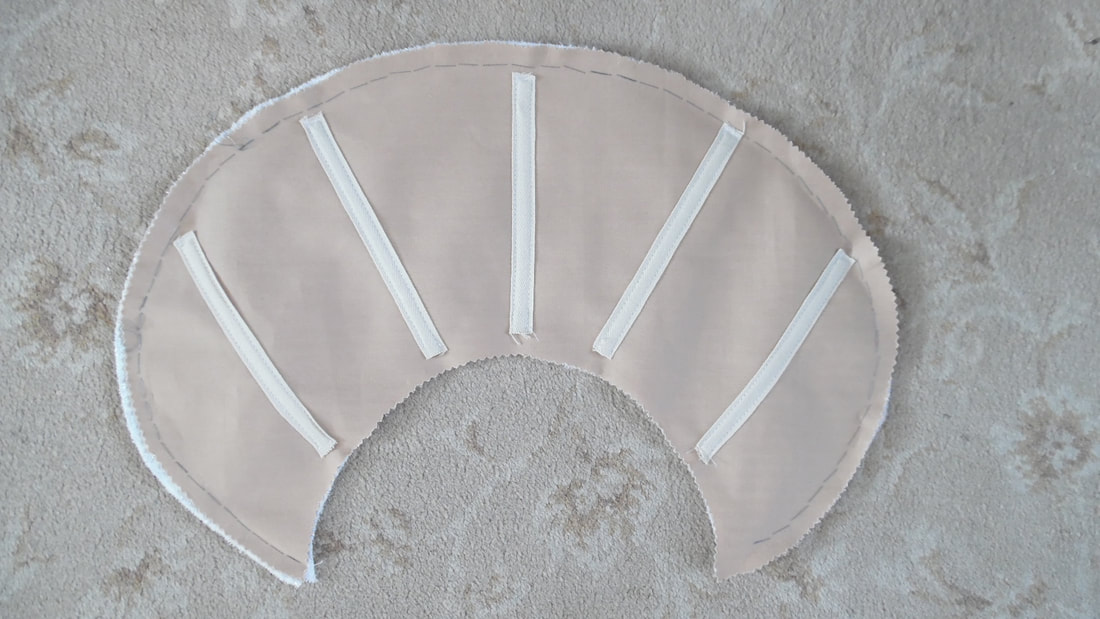
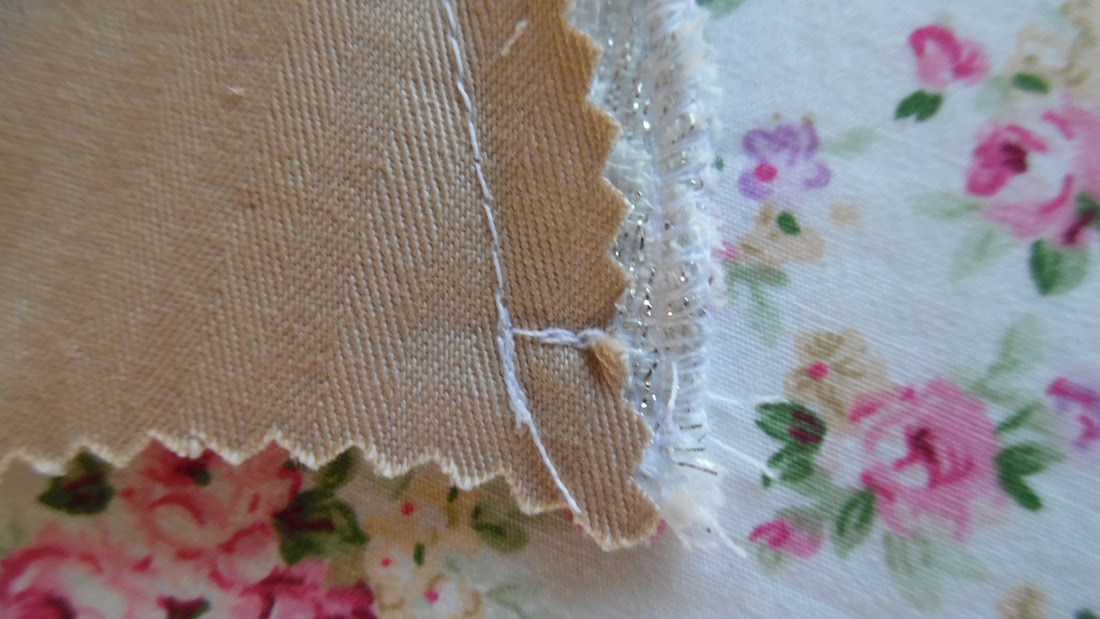
The fabric I chose was a random buy which has silver stitching. You can choose anything your want to make your collar. Cut two
|
|
I also need a layer of coutil, which was used to sew on some boning strips. I used synthetic boning.
|
|
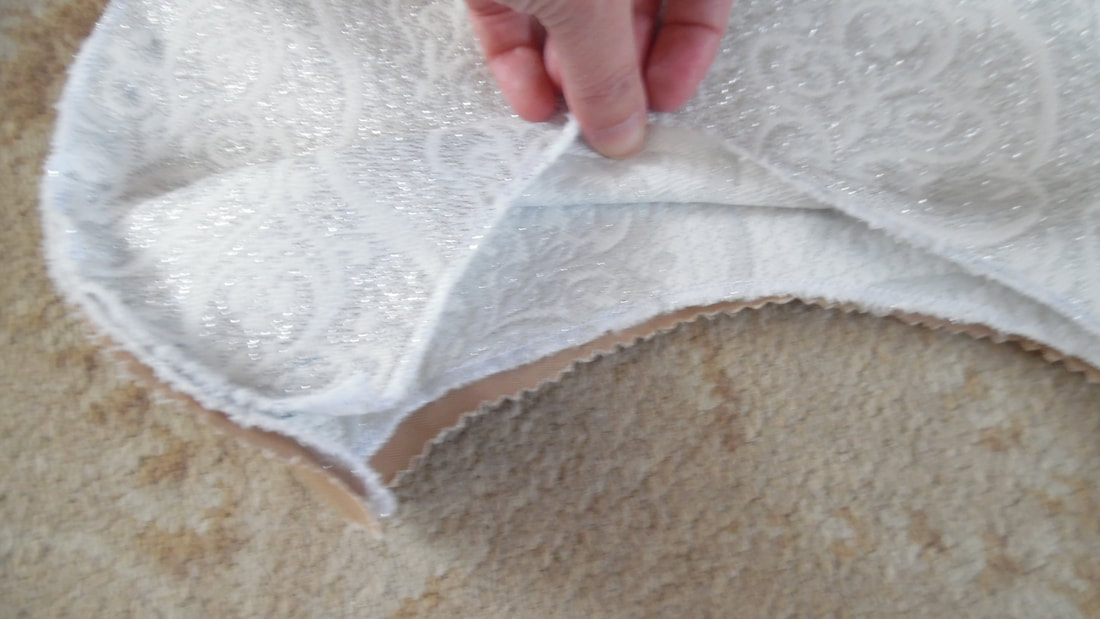
Place your fabric right side to right side and then the coutil layer and sew a seam on the outer edge, cut back the coutil.
|
|
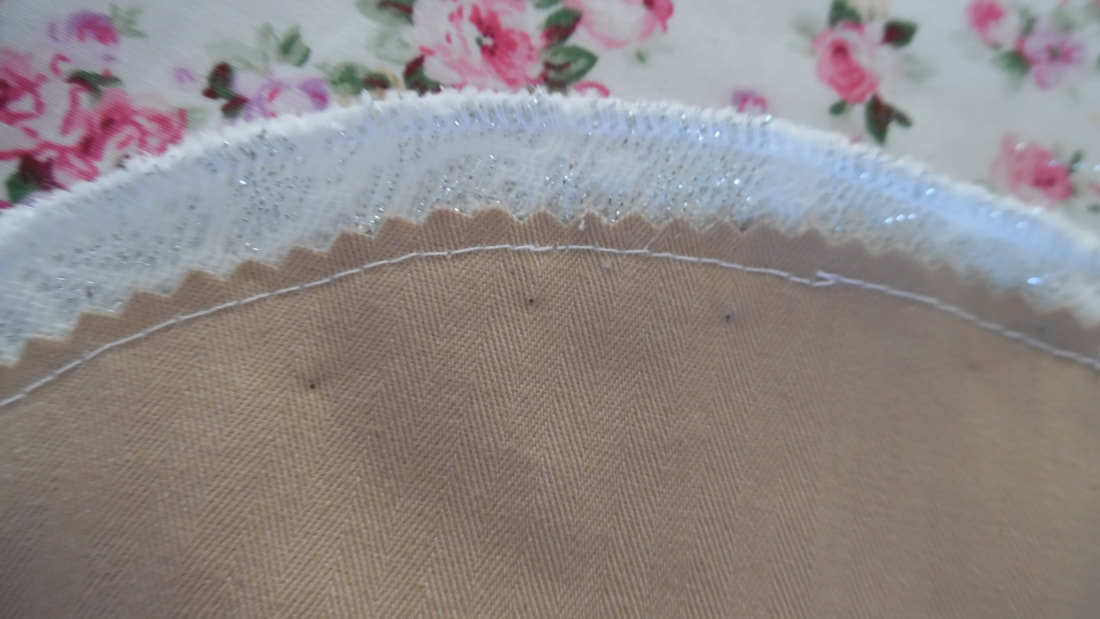
Cut back the coutil to reduce bulk.
|
|
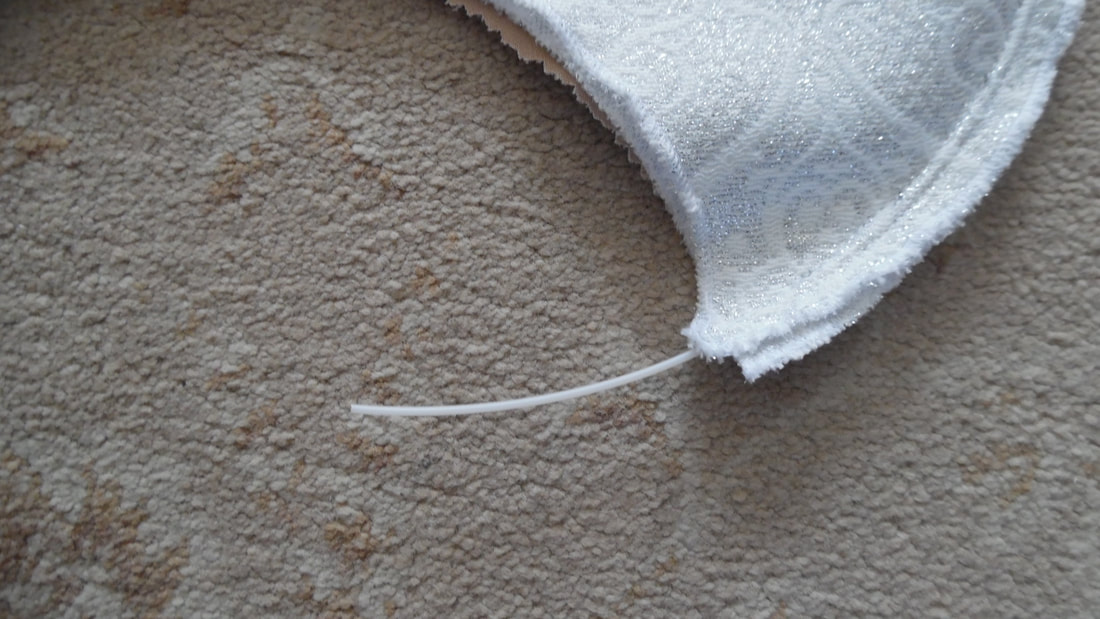
Sew a second row of stitching to take a piece of plastic or very narrow synthetic boning.
|
|
So that the boning does not come out, sew across the bottom of the channel.
|
|
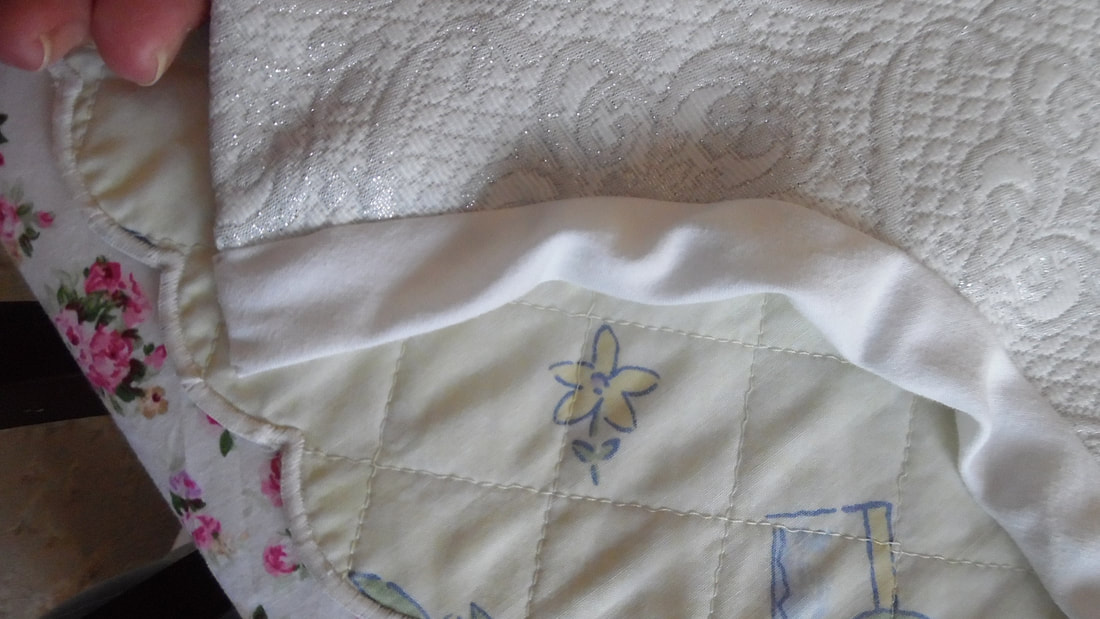
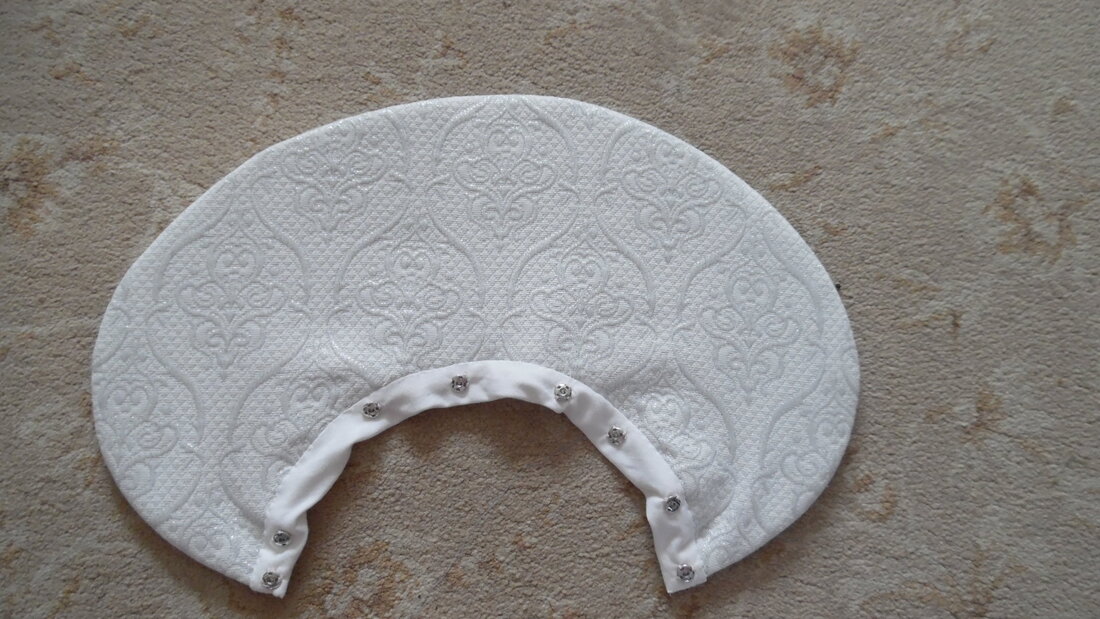
Cut a length of cotton fabric on the bias and attach to the bottom curve like a cuff or waistband. This may look untidy at this stage, but this cuff will be turned under the neck of the bodice.
|
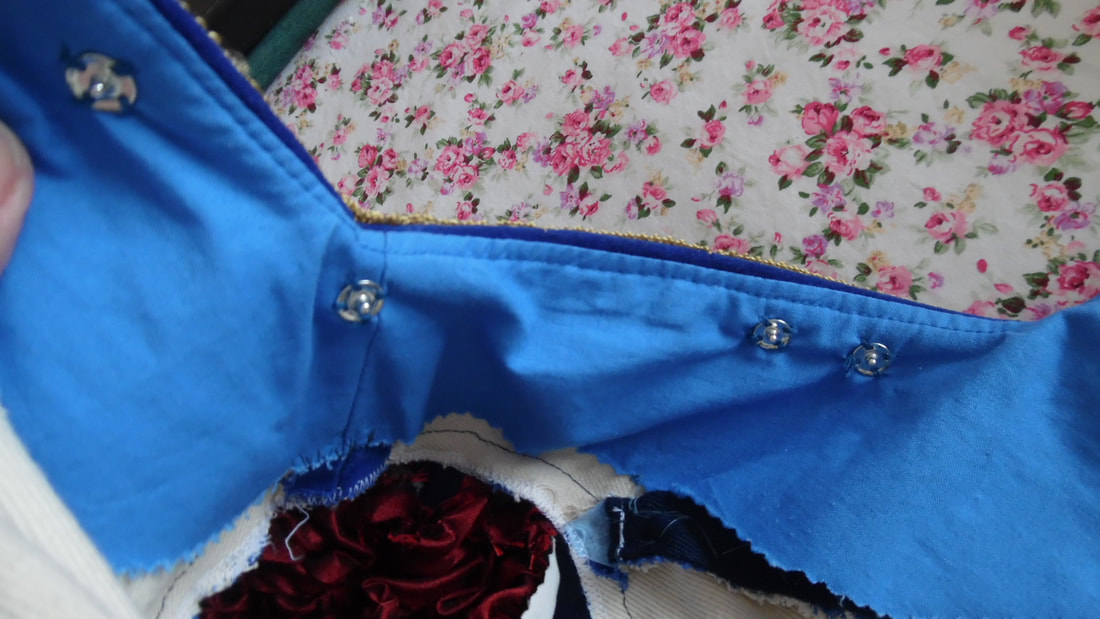
Sew snap fasteners to the inside of the bodice neck and corresponding ones onto the collar.
|
|
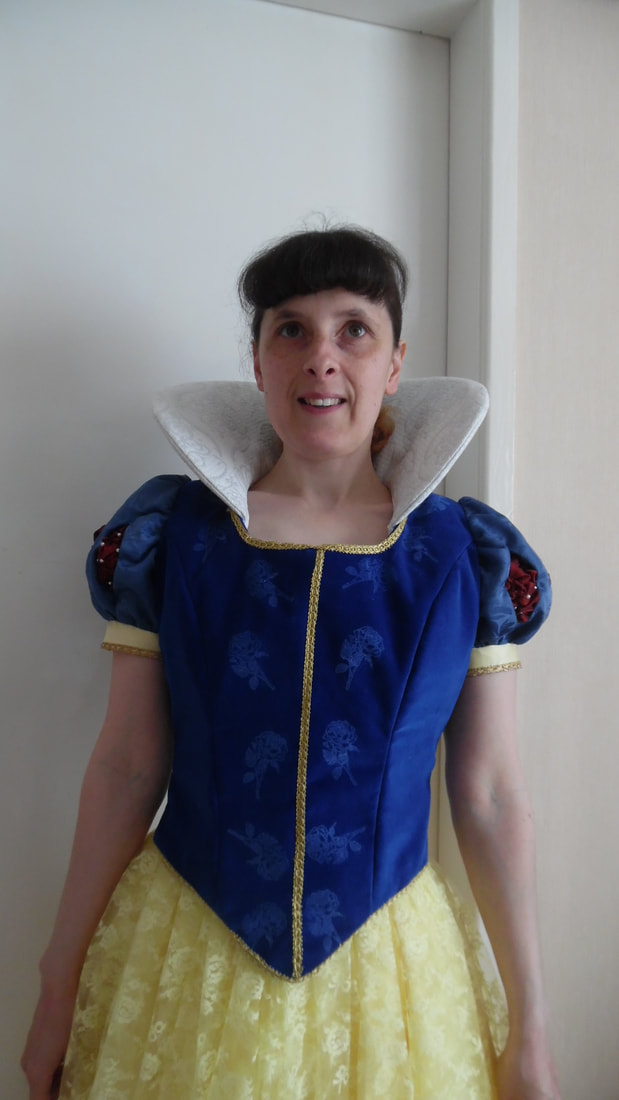
This completes the bodice and collar.
The Cape
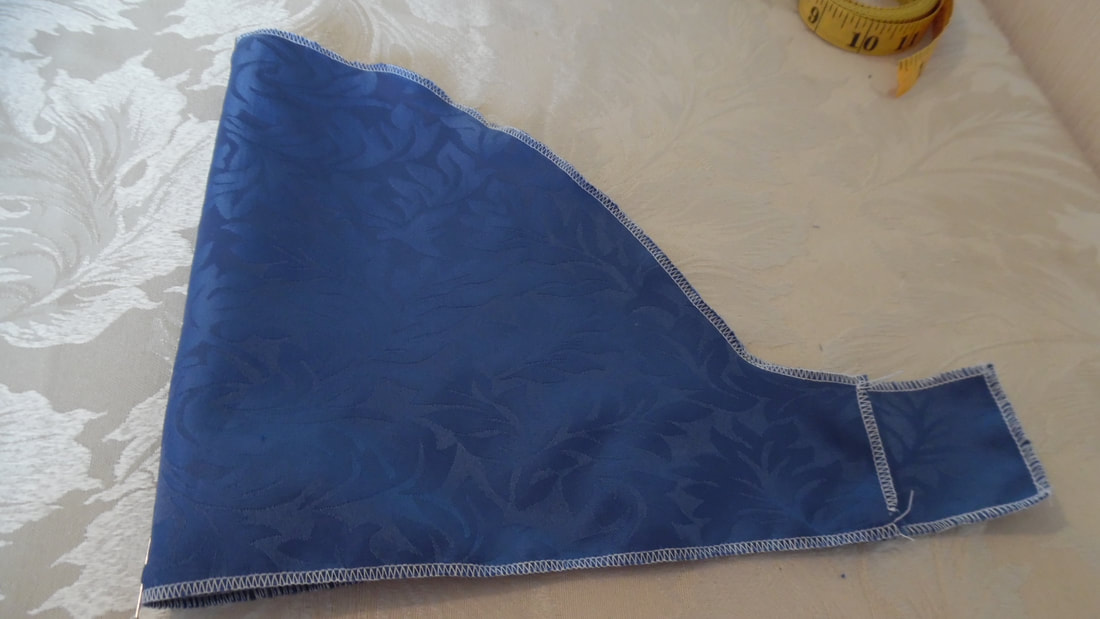
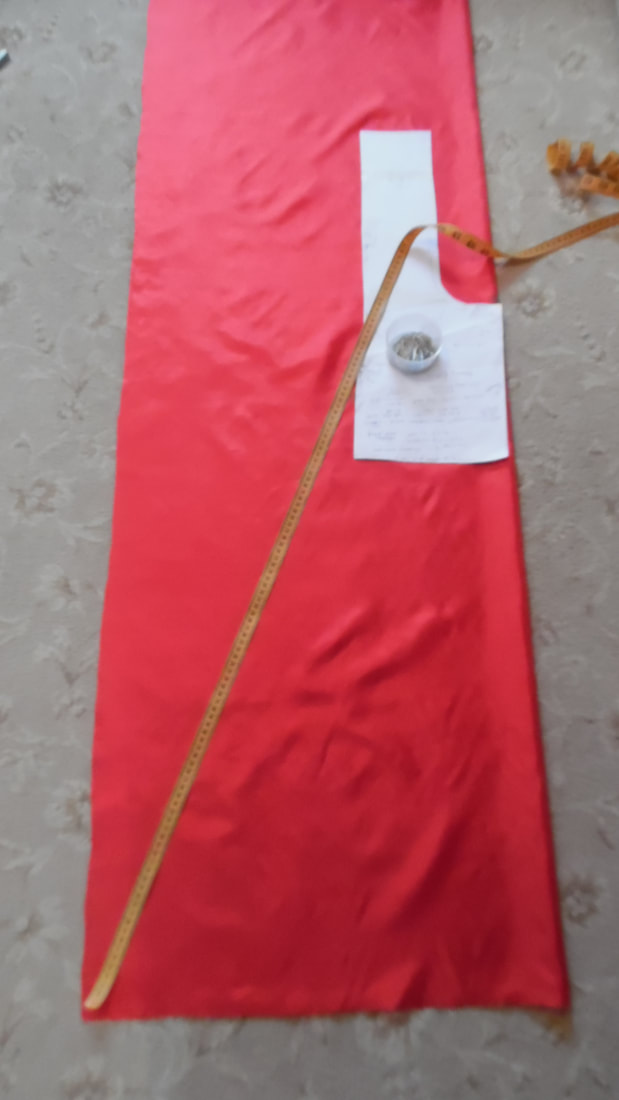
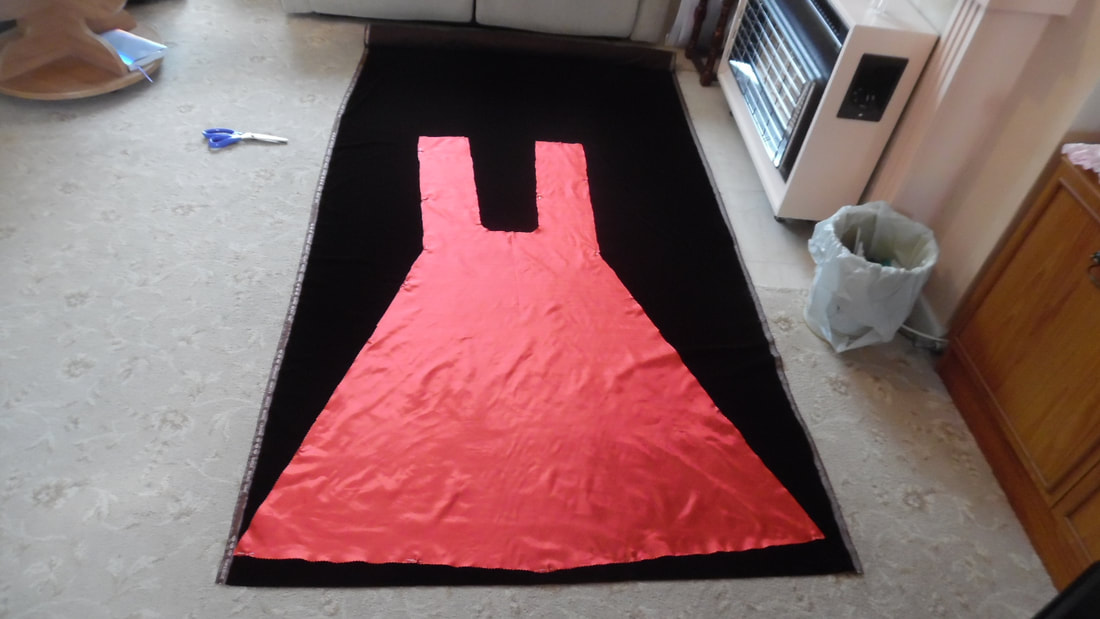
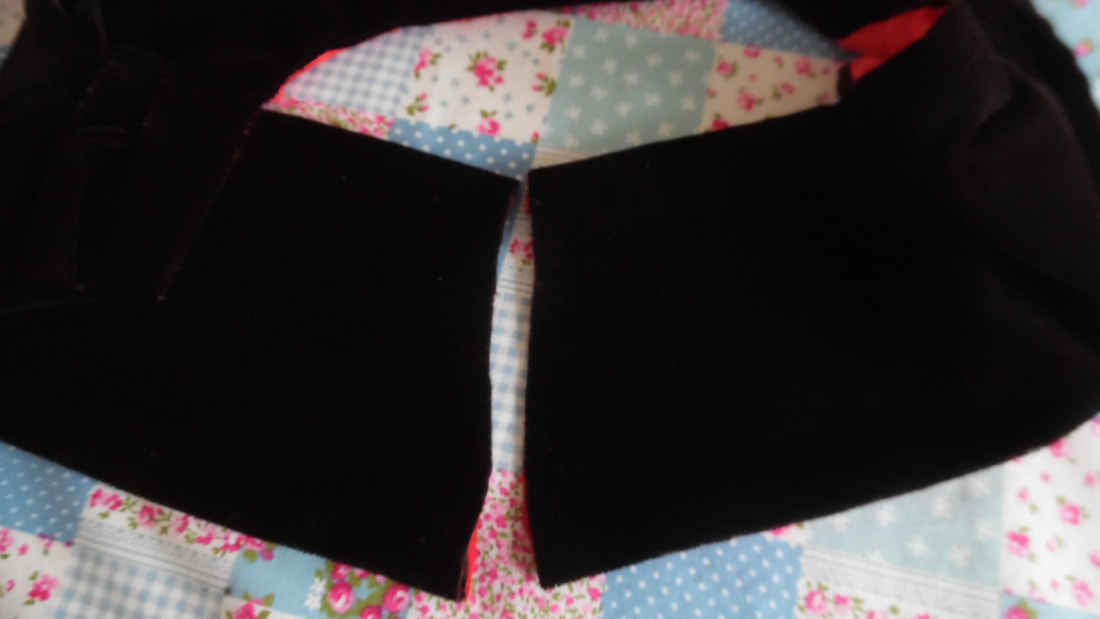
We had to produce the cape pattern from scratch, by tracing the shape of the neck from the actual bodice and the straps that come around the front are basically two straight pieces. The whole cape will be cut in one go. Now that we had our mock up, it gave us a good idea on dimensions. We want to create an "A" line cape, so across the top is approximately 50cm, whilst the bottom of the cape will be the width of our fabric, 110 cm. The straps are approximately 16 cm wide, but we will have to allow for a 1.1/2 cm seam all round. The length of the cape is from the neck to the knee. For Tracy that is about 90 cm. The picture below is our practice mock up using the pattern we got from the bodice neck
Starting with the liner. Fold the fabric, then measure up from the bottom for the length of the cape. Place the pattern piece neck at this point. Using a straight rule or tape measure, place it diagonally down the the bottom left edge. Cut this out.
|

|
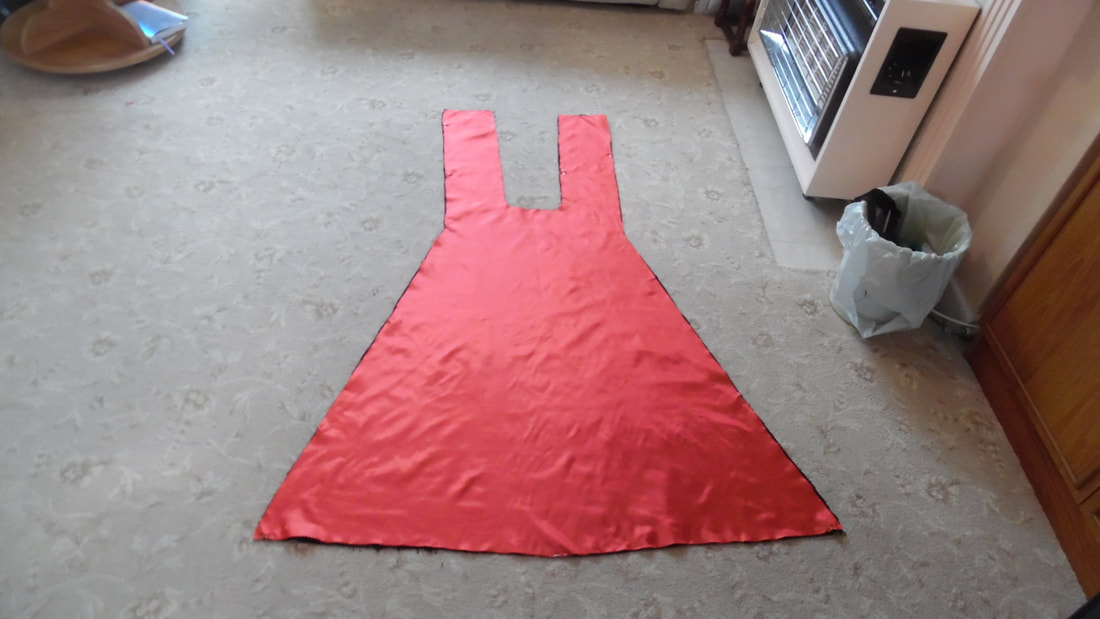
Measure down the diagonal, the same length as the centre fold and cut his off. We added a few centimetres onto the strap just in case, this can always be shortened later after the first fitting.
|
We can now lay this onto the velvet. If you are using velvet, DO NOT FOLD!!!
|
|
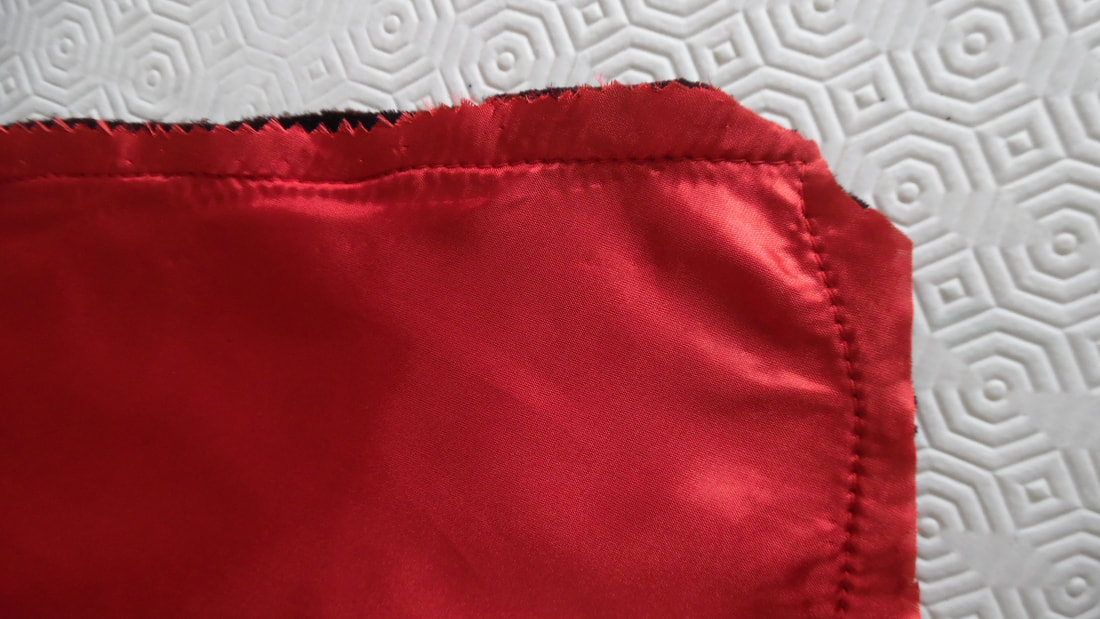
Sew together all the way round and the inside of the straps, DO NOT sew up the ends of the straps, you will need to turn it to the right side.
|
|
After turning the right way out, sew up the shoulder openings.
|
Before turning to the right side, cut the corners, being careful not to go too close to the sewing line and also cut into the curve at the neck edge.
|
|
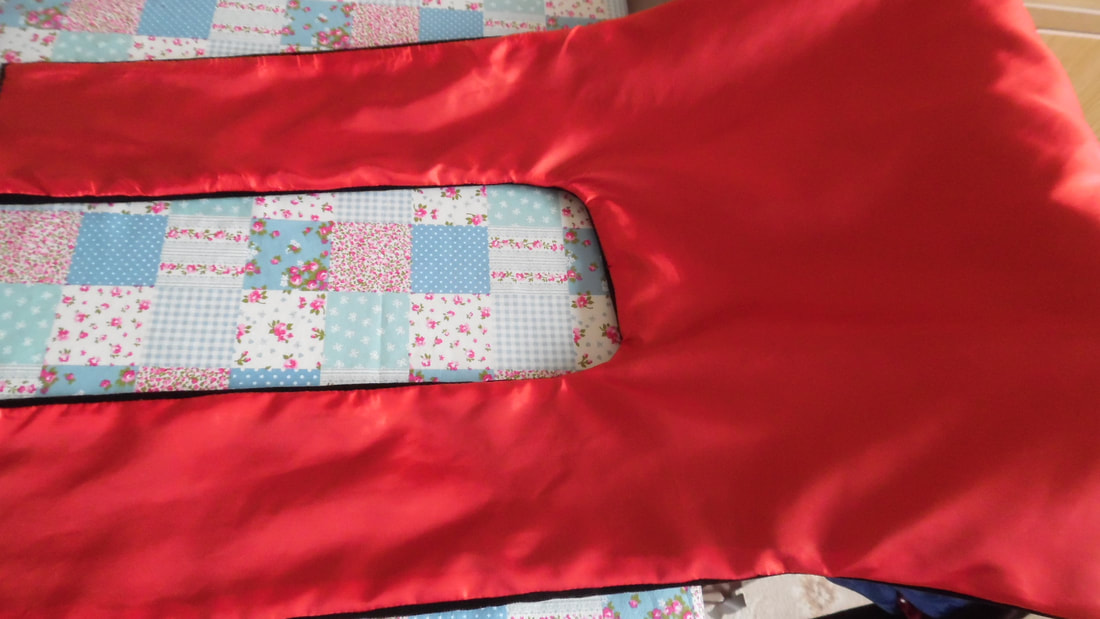
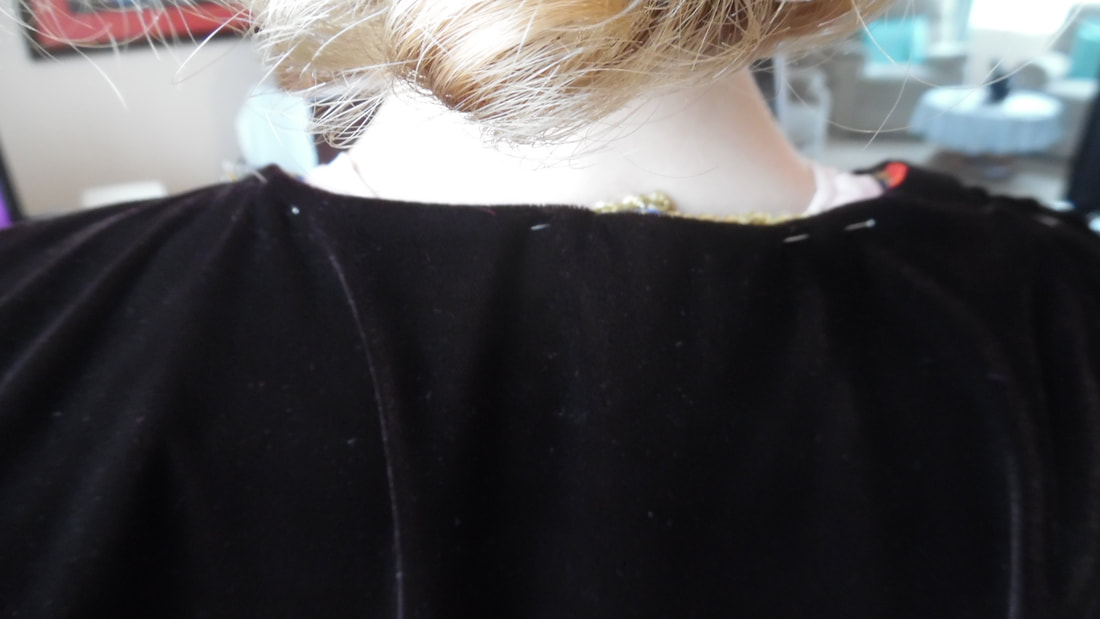
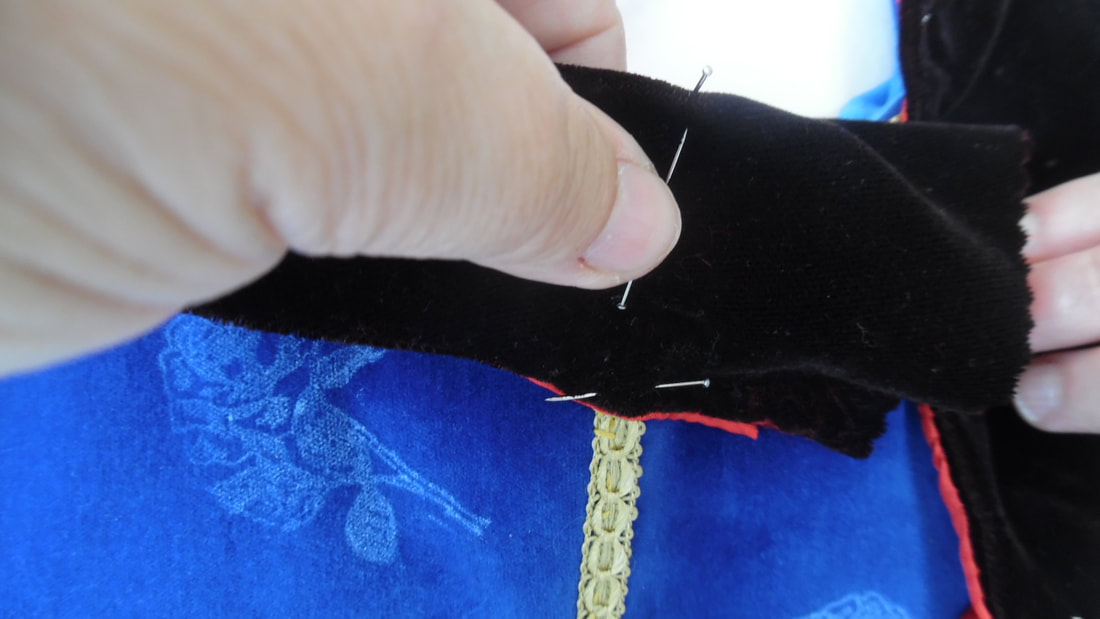
Pin the cape to the back of the bodice along the neckline.
|
Pleat both thicknesses of fabric at the shoulder and pin. Hand stitch the pleats in place.
|
|
|
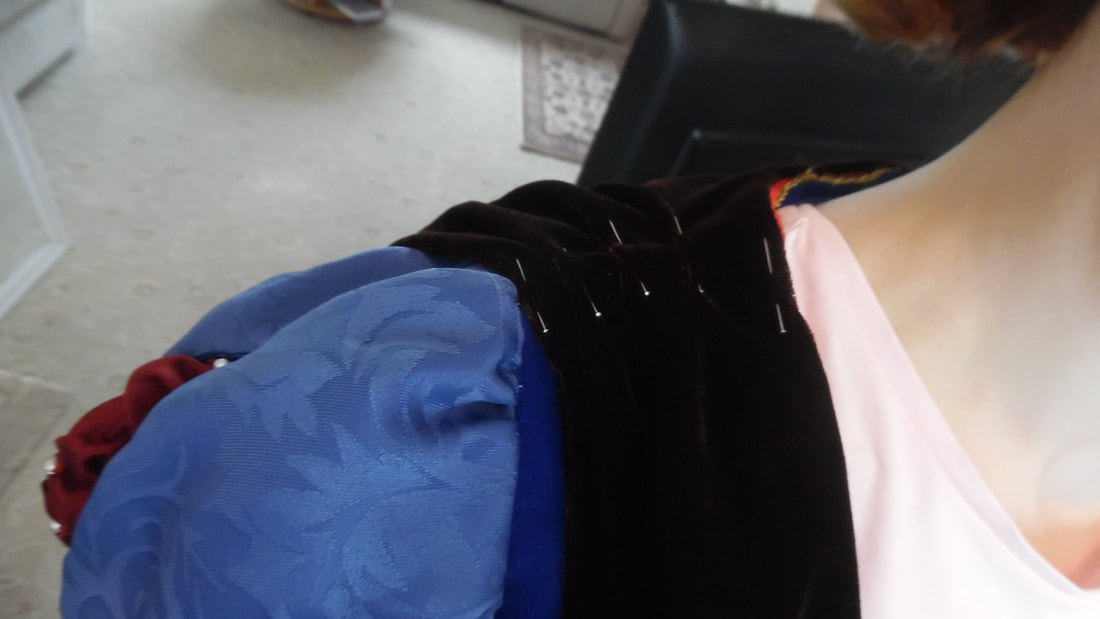
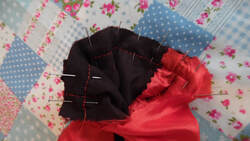
Pin the strap along the bodice neckline to the centre.
|
|
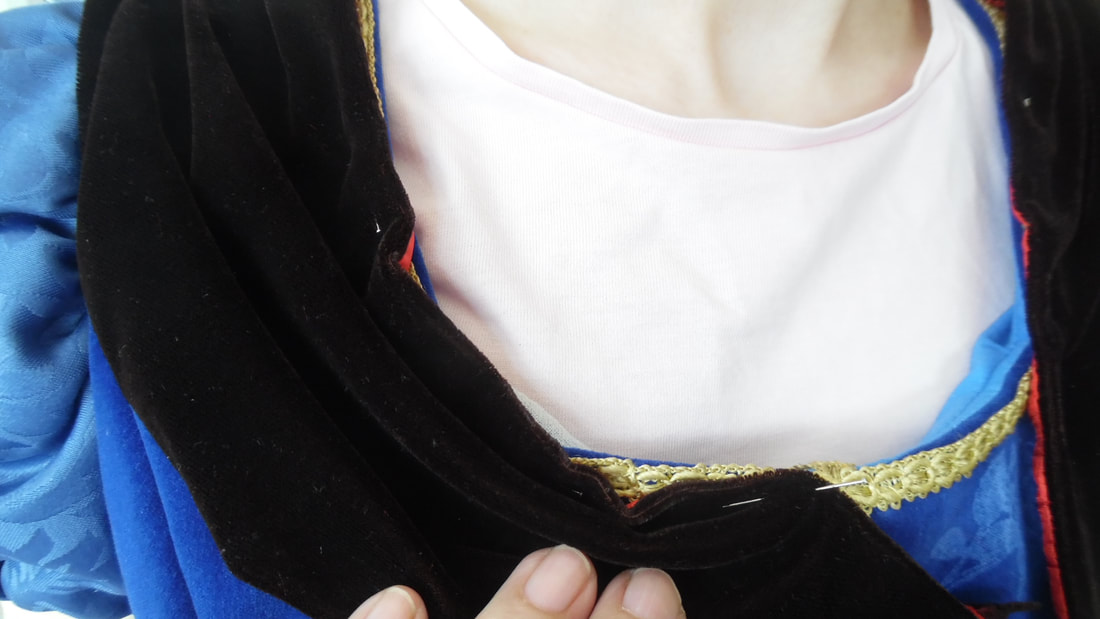
Let the strap naturally hang in a swag and mark where the centre of the bodice is, allow and extra approximately 1.5 cm and cut through all the layers.
|
|
Your cut line will be at a slight angle.
|
Sew the velvet seams together and hand sew the lining shut.
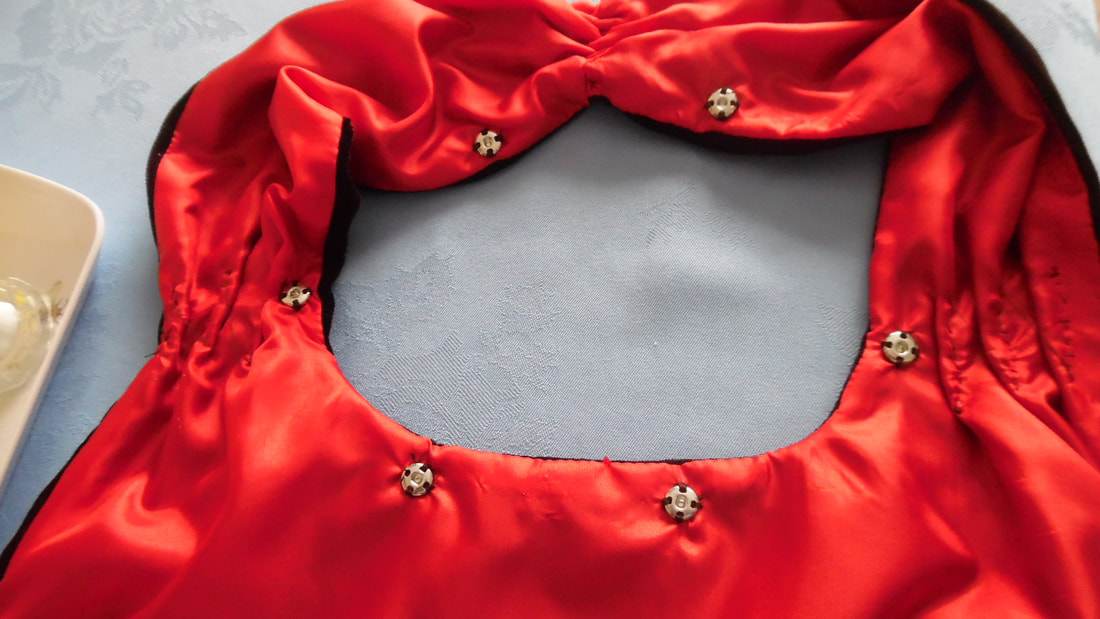
Sew on snap fasteners. Two at the back, two at the shoulders and two at the front. Sew on corresponding fasteners onto the neck of the bodice.
|
|
To finish off the cape, I used a piece of costume jewellery from Christine's jewellery collection, added some red fabric from the sleeves behind the clasp.
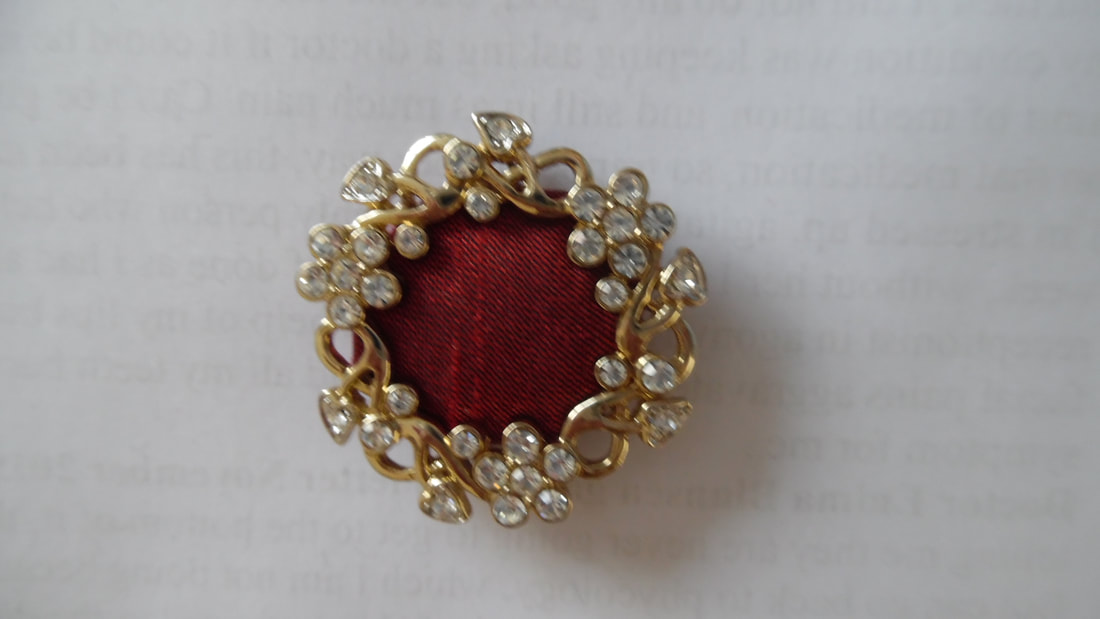
This finishes the cape and the costume.
