For this costume, you will require intermediate to advanced experience in sewing, with skills for corset making and using a machine ruffeler.
All videos for making the complete costume can be found in our "video tutorials" link
Difficulty factor 10 - 10
All videos for making the complete costume can be found in our "video tutorials" link
Difficulty factor 10 - 10
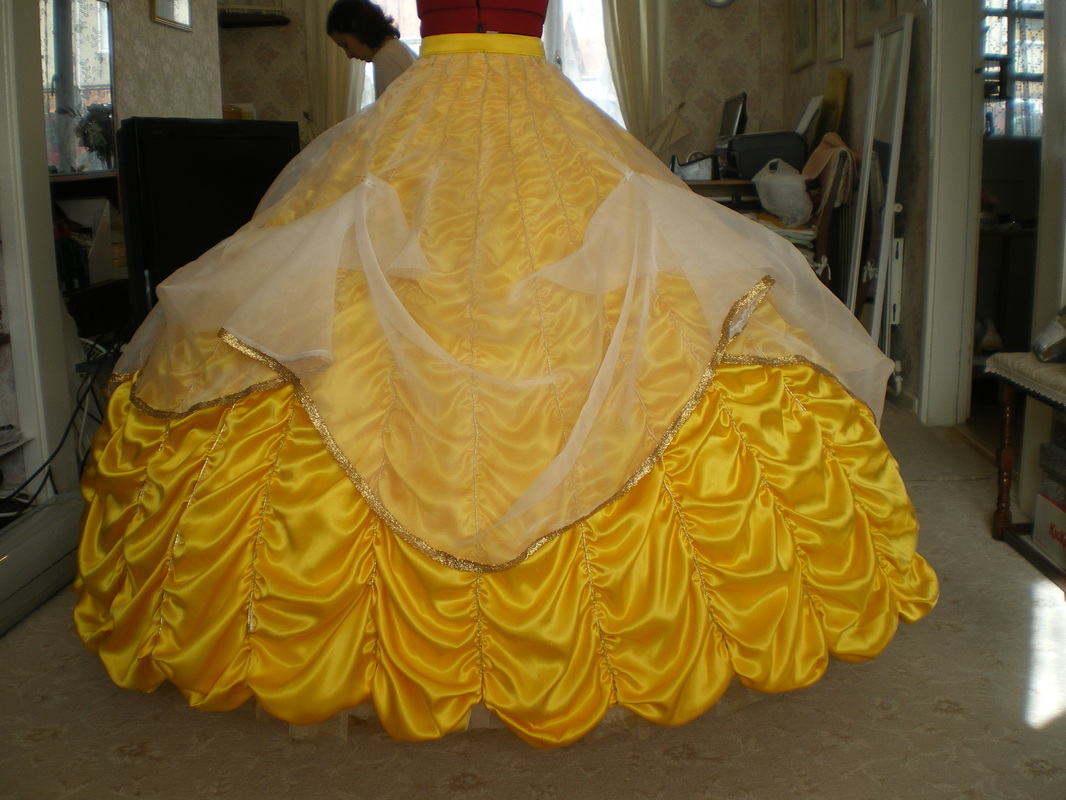
Belle's Gold Ball Gown
From Beauty and the Beast
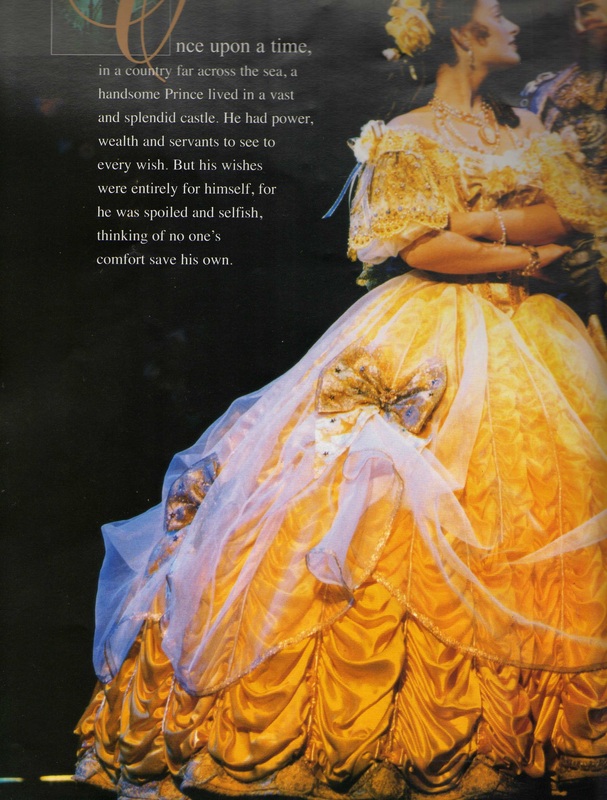
Inspired by Disney's Beauty and the Beast and the Broadway Musical
Skirt
Materials:
14 Metres Gold Silk Satin Charmeuse
31 Metres of ready made or hand made piping
6 Metres Off White Silk Organza
1 Metre Petersham
6 Metres Gold metallic Trim 10-13mm wide.
2 metres of gold lace fabric
Large and Small Hooks and Eyes
8" invisible (concealed) zip in yellow
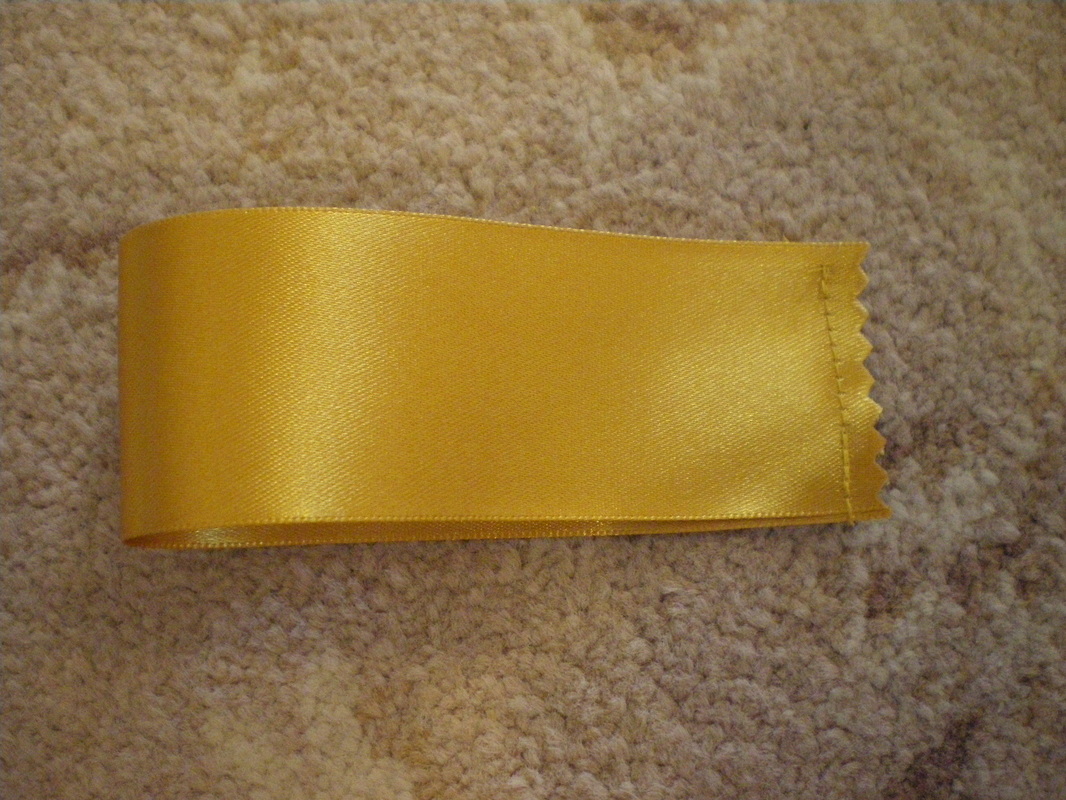
6 metres x 3.5cm Gold Ribbon or trim
Under Skirt
5 metres yellow Polyester Satin
1.1/2 Metres Gold Silk Crushed Velvet
1-2 metres of medium weight sew on interfacing
5-6 metres x 5mm Upholstery Rope Barley Twist, Golden Yellow
5 metres x 2mm wide Rattail cord in Antique Gold.
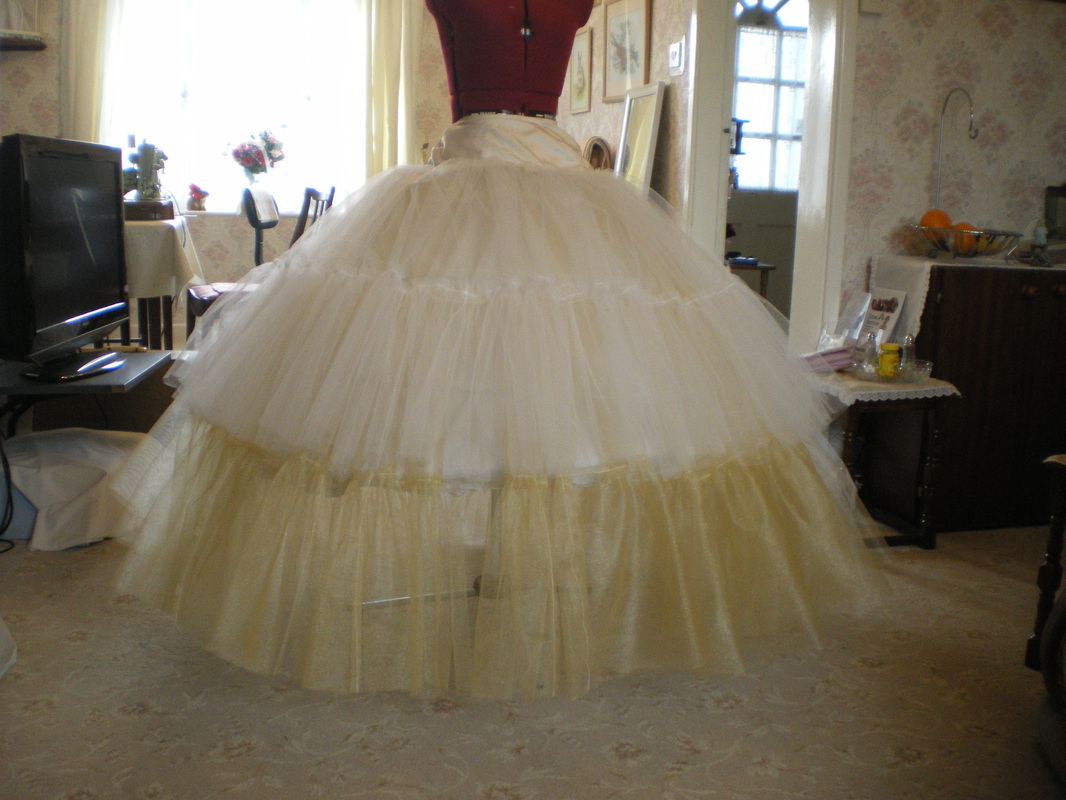
Net Petticoat
8 Metres medium stiffness white net
6 Metres Gold Mesh net
Velcro
Small piece of white polyester for yoke
Bodice:
New Look 6480 and Simplicity 4479
1 metre gold lace fabric
1 metre Gold Silk Satin Charmeuse
1 metre corset coutil
1 metre yellow cotton lining
Approximately 28 - 30 eyelets
Boning
Gold Cord for Lacing
1/4" wide elastic
Shearing elastic
Decorative flower
4 large hooks and eyes, or stud fasteners
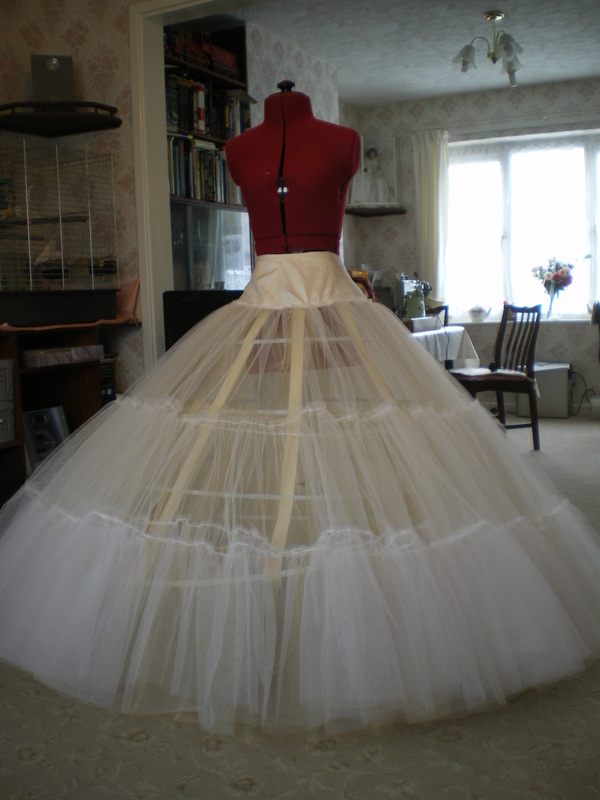
Hoop:
We made our own, or you can buy one. To get the correct measurements for the paneled skirt, always measure over your hoop and netting. The making of our hoop can be found in our "video tutorials" link
Materials:
14 Metres Gold Silk Satin Charmeuse
31 Metres of ready made or hand made piping
6 Metres Off White Silk Organza
1 Metre Petersham
6 Metres Gold metallic Trim 10-13mm wide.
2 metres of gold lace fabric
Large and Small Hooks and Eyes
8" invisible (concealed) zip in yellow
6 metres x 3.5cm Gold Ribbon or trim
Under Skirt
5 metres yellow Polyester Satin
1.1/2 Metres Gold Silk Crushed Velvet
1-2 metres of medium weight sew on interfacing
5-6 metres x 5mm Upholstery Rope Barley Twist, Golden Yellow
5 metres x 2mm wide Rattail cord in Antique Gold.
Net Petticoat
8 Metres medium stiffness white net
6 Metres Gold Mesh net
Velcro
Small piece of white polyester for yoke
Bodice:
New Look 6480 and Simplicity 4479
1 metre gold lace fabric
1 metre Gold Silk Satin Charmeuse
1 metre corset coutil
1 metre yellow cotton lining
Approximately 28 - 30 eyelets
Boning
Gold Cord for Lacing
1/4" wide elastic
Shearing elastic
Decorative flower
4 large hooks and eyes, or stud fasteners
Hoop:
We made our own, or you can buy one. To get the correct measurements for the paneled skirt, always measure over your hoop and netting. The making of our hoop can be found in our "video tutorials" link
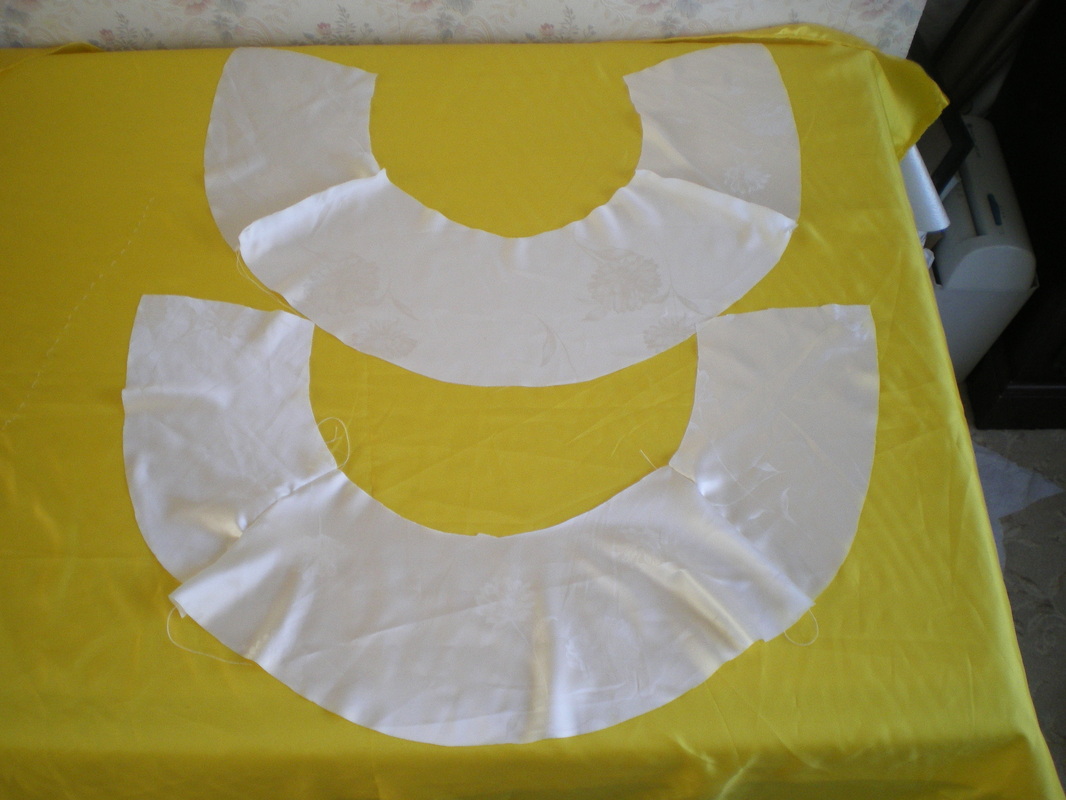
To Make The Net Petticoat
|
First you will need a yoke to attach the net to, this can be made from any light weight material, we chose a scrap piece of polyester. Take your waist measurement and add 5cm, Cut a pattern in three sections, approximately 6" (15cm wide). Ours was made in three sections with 2 pieces made of each section. Make them up separately then sew them together right side to right side. Clip the curves and turn the yoke the right way out. You must remember to leave a small gap unsewn, so that you can turn it the right way out.
|
|
Take a measurement from the bottom of the yoke, diagonally down to the floor and split this measurement into 3. Cut the gold netting to this measurement and make it one continual strip, adding more strips to the length. You will probably need a total length of at least 12 metres. Gather the net or ruffle it and sew it to the bottom of the yoke. Close the back seam, but leave the back seam of the yoke open. Then add another tier until you have three tiers in total. Each tier gathered onto the next.
Do the same with the white netting. Start at the yoke and add two more tiers. You will need to make three layers altogether. If you want your petticoat even larger, just add more tiers. This picture shows progress on the first layer of white netting. |
To finish, sew a strip of velcro to the yoke opening
To Make The Paneled Skirt:

|
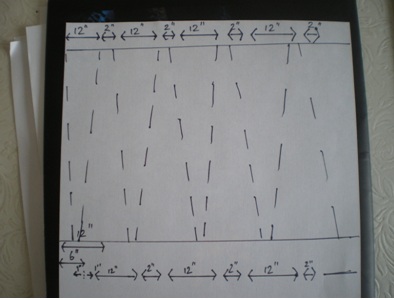
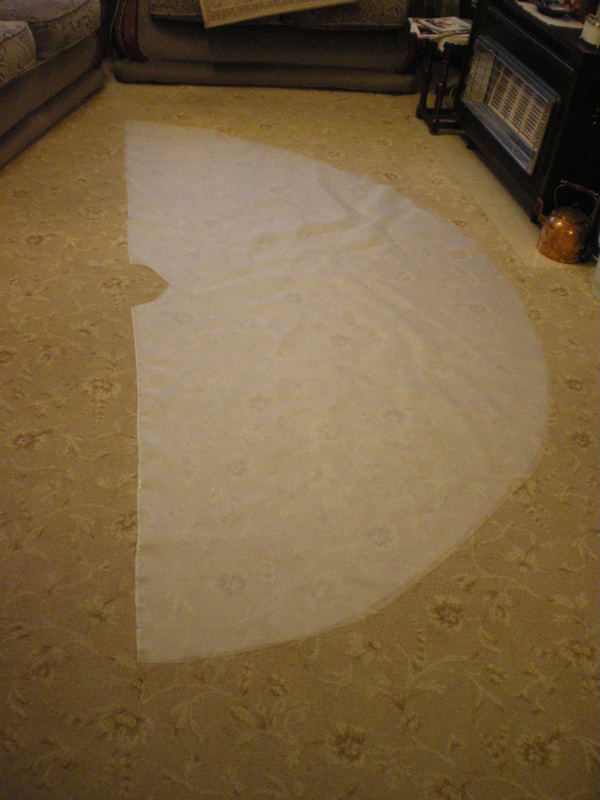
It has been quite difficult to try and explain how the pieces were cut out of the satin, so I made a diagram (which is not to scale), hopefully it will make sense?
Take a measurement from the waist to the floor on a diagonal, add half this measurement again. Cut out a strip of satin to this length. Along the top, measure 12" (30cm) make a mark, measure 2" (5cm) make a mark, continue to the end of the fabric. At the bottom of the fabric, measure 12", mark the half way point and mark it, now measure 1" (2cm) on either side of this mark. remove the middle pin and remove the pin you put at 12". Now mark 12", then 2", then 12" to the end of the fabric. There should be some excess left over that cannot be used. Join up the marks as in the diagram, with pins or chalk and cut out the pieces. |
Because the satin frays a lot, I went over the edges with my overlocker, or you could use pinking shears to cut the sections out.
|
After ruffling, you are aiming for a length just touching the floor, always measure this over your hoop and petticoat. It doesn't matter if all your lengths aren't the same, as long as they are no shorter.
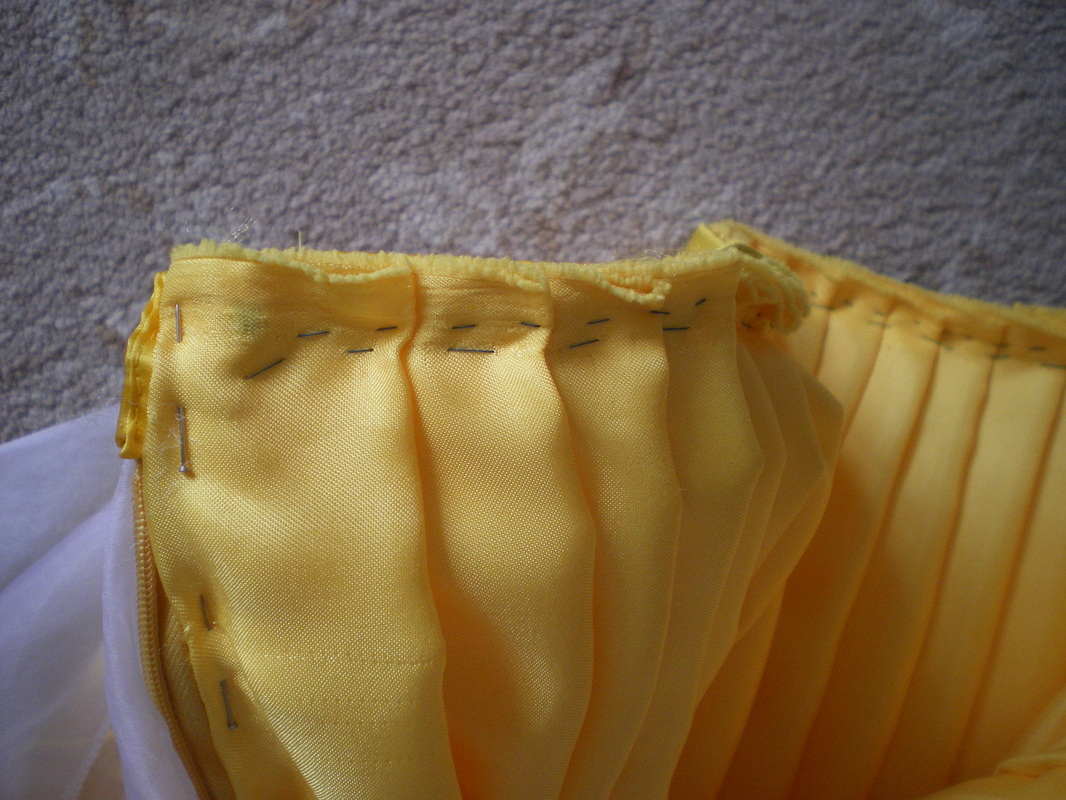
The top of my panels are going to be 1" (2cm) wide when they have been put together, so I shall need approximately 26 altogether, you may require more or less, depending on your waist. Make an extra one or two, just in case. I didn't ruffle the top 2" (5cm), as this was going to be put into a waistband. |
|
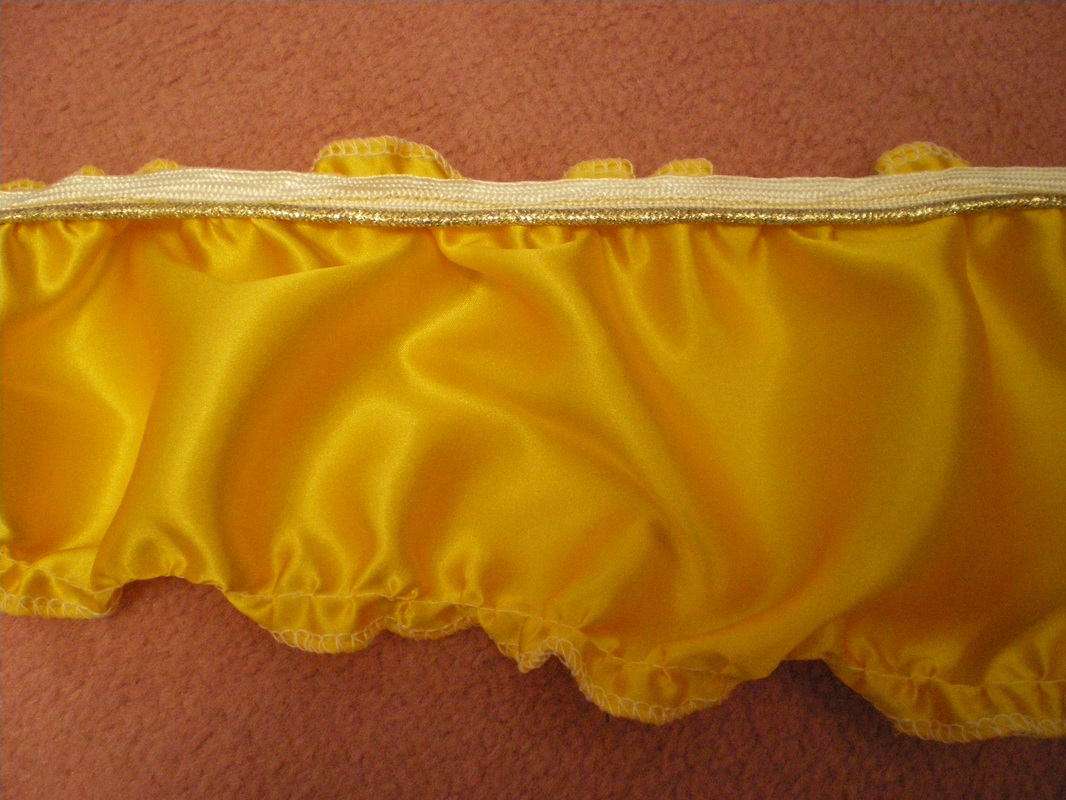
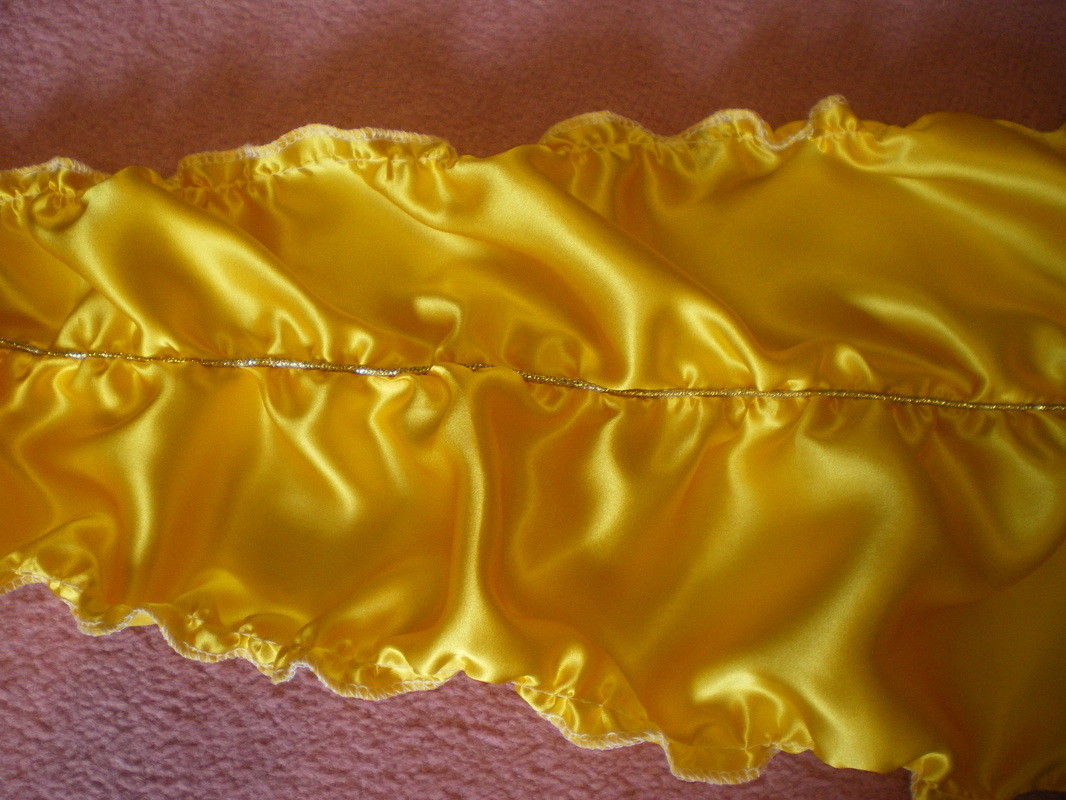
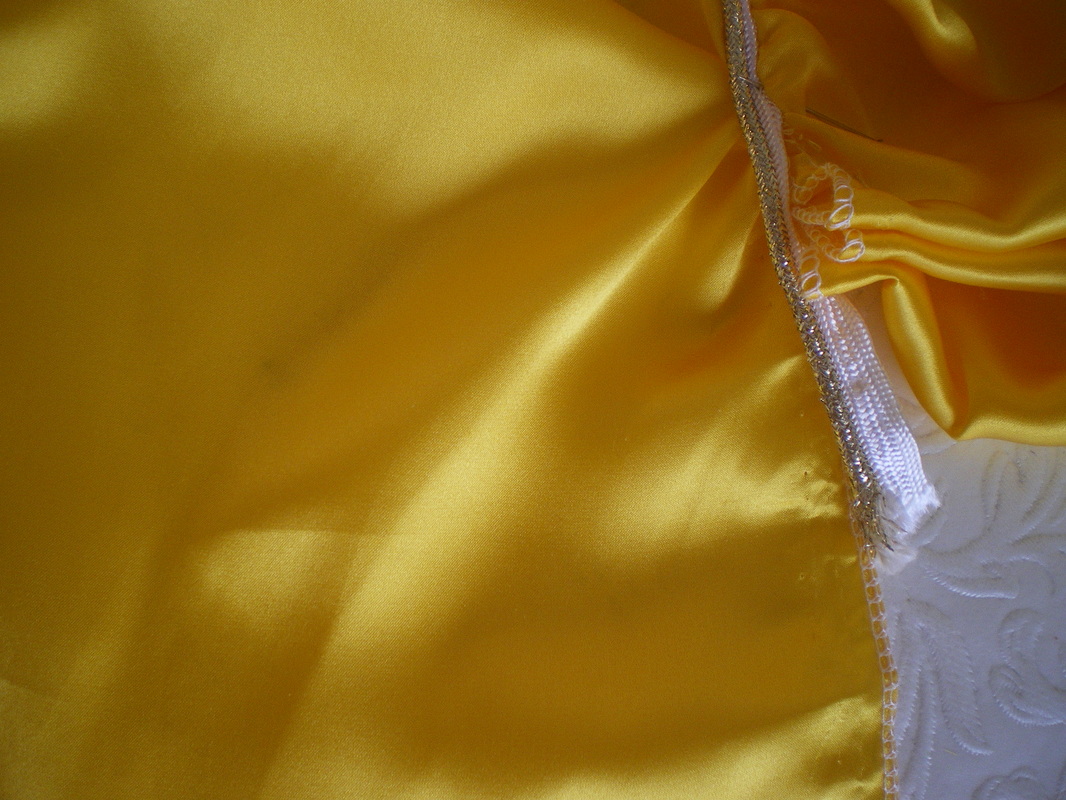
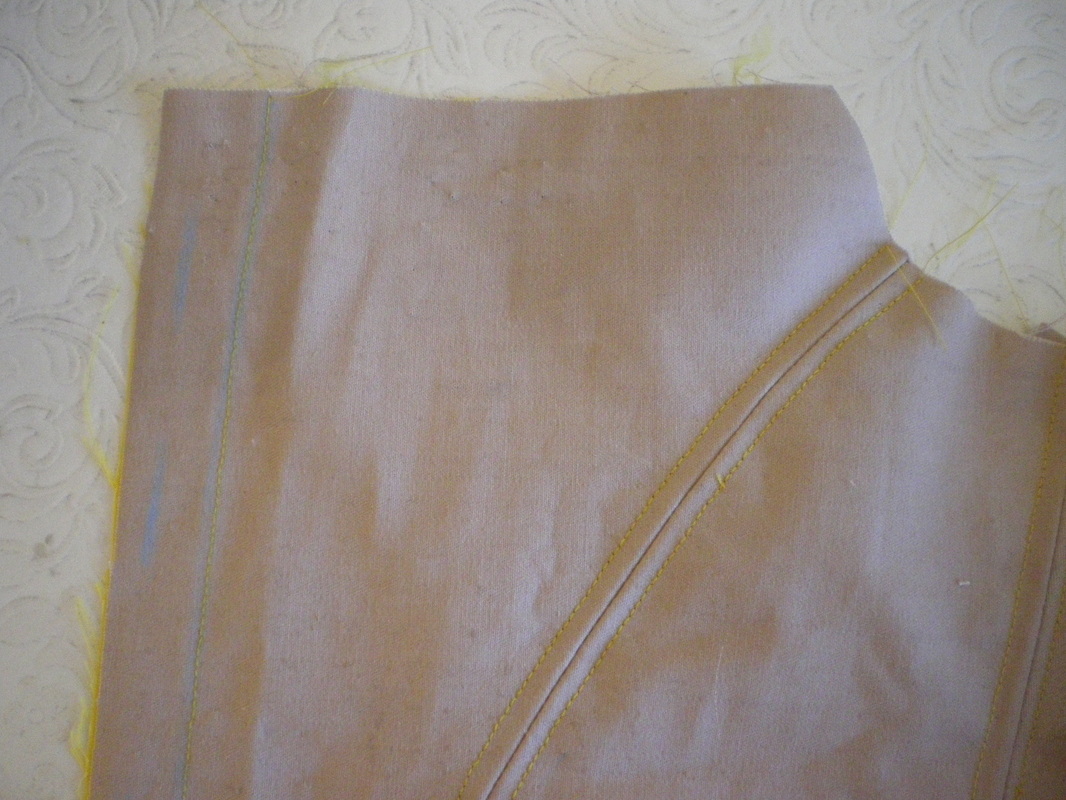
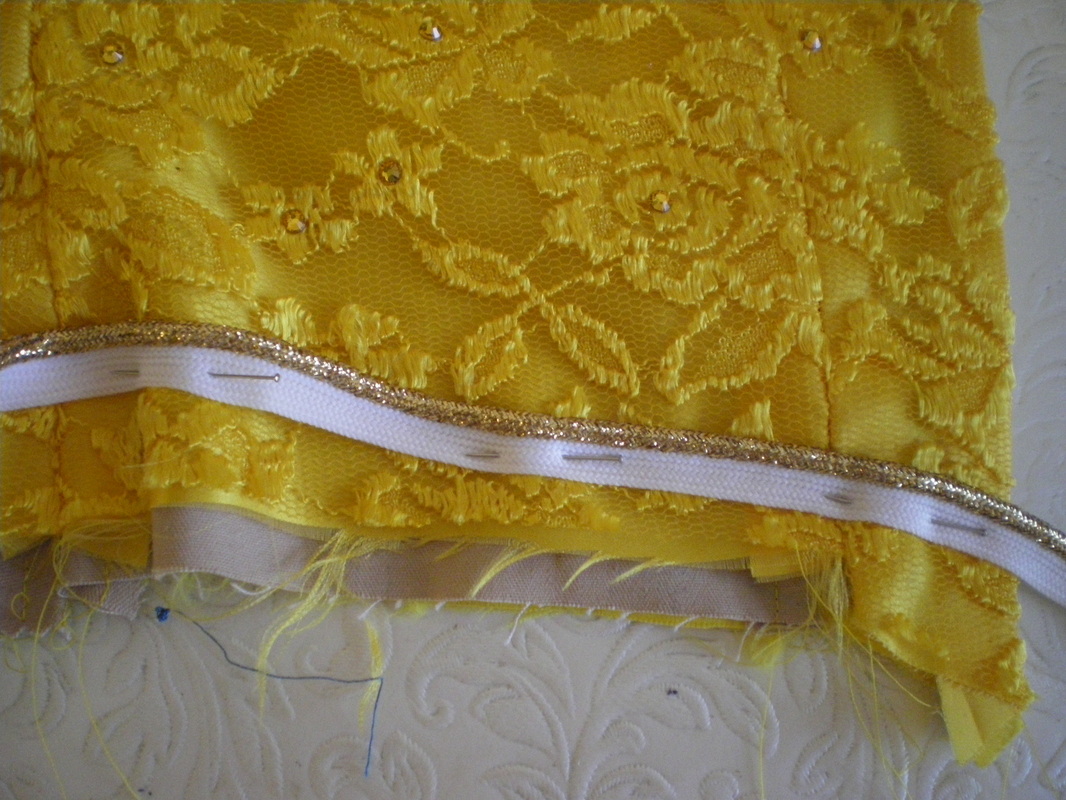
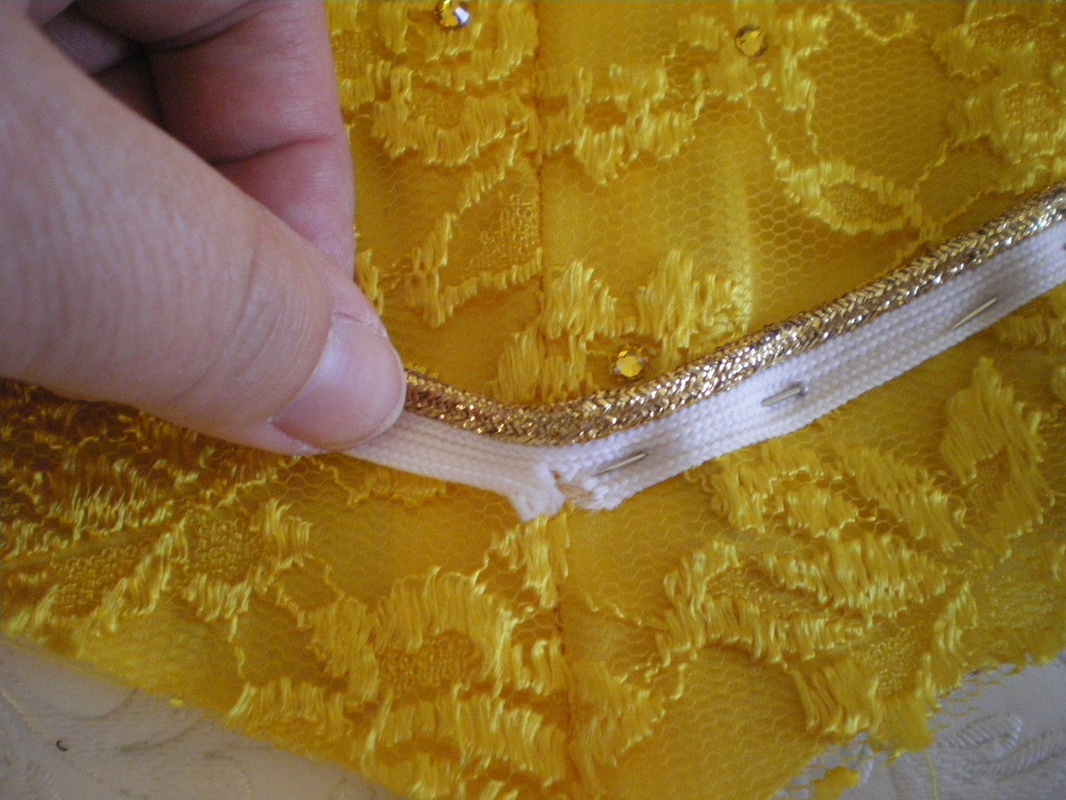
Sew the piping to the right side of the satin, starting about 2" (5cm) from the top. Sew it far enough in so you can't see the sewing made by the ruffler.
|
|
Sandwich the piping using another panel, so that when you open it out, all you see is the piping. Continue doing this until you have completed all the panels, if you have added too many panels, you can always take one off at the end.
|
|
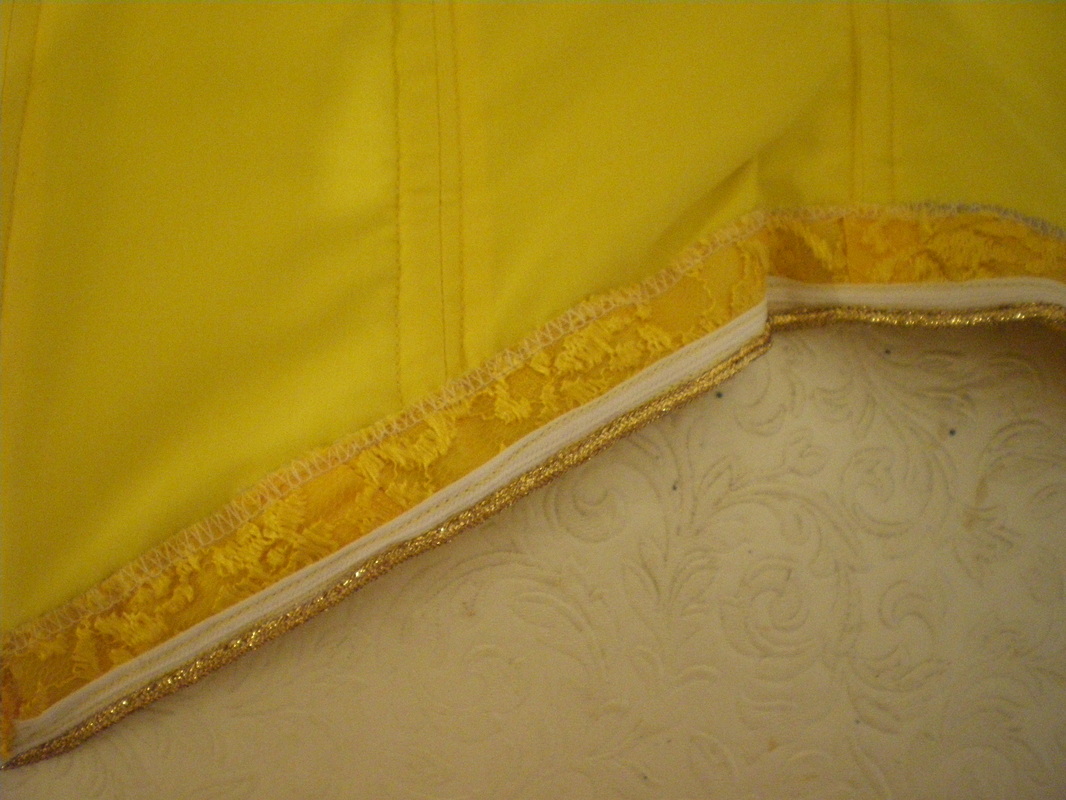
Using a double thickness of Organza, measure from the waist to the floor and cut a half circle. Using your waist measurement, cut a circle the same circumference at the centre. Sew up to seams. I am using an 8" (20cm) zip, so cut a slit from the centre (don't cut this on the seam as you want these seams to be on the side of the dress)
|

|
Cut a straight line across the top of your panels to neaten and tack the Organza onto the skirt
|

|
Insert the zip into the back and fold the Organza under and catch stitch it, making sure it won't get caught in the zip. Sew up the back seam of the dress.
|

|
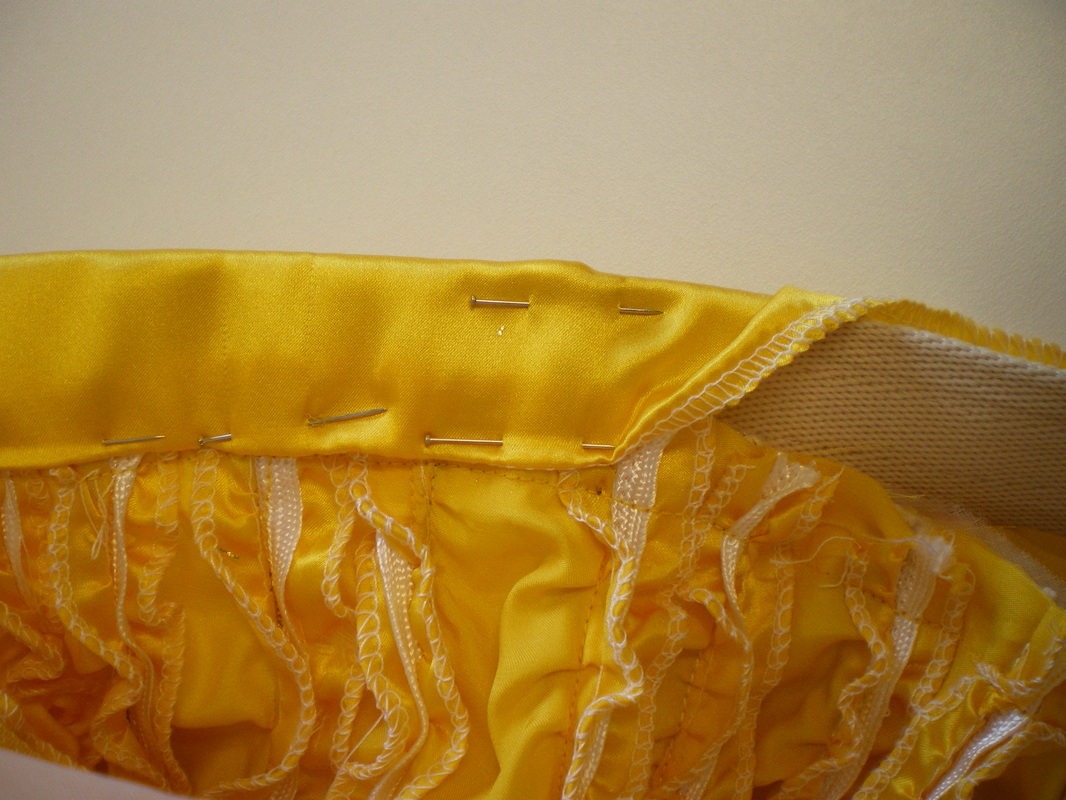
Cut a strip of satin 3" wide (7cm) to your waist measurement and add 2.1/2" (6cm). Cut a strip of Petersham 1" (2cm) shorter than this measurement.
|
|
Sew the strip to the top of the skirt allowing 1/2" (1.5cm) over at one end and 2" (5cm) at the other as an overlap. Insert the Petersham and fold the waistband over, sewing a catch stitch to the inside. Sew up the ends to neaten.
|

|
The back of the skirt should look like this showing the overlap. Sew on some hooks and eyes or stud fasteners to close.
|
|
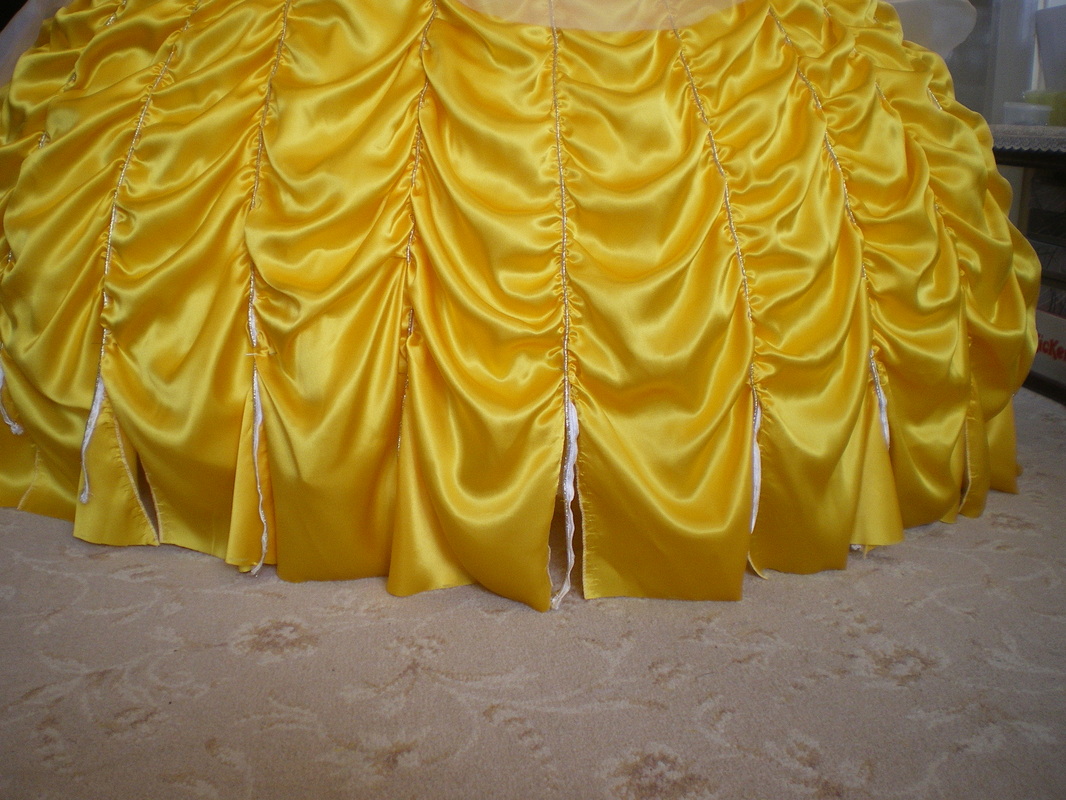
I found it very difficult to get all the swags to fall at the same level and angle, so decided to undo the bottom of each panel, up to 6" (15cm) off the floor, I was then able to cut all the panels to exactly the same length.
|
|
Hand pleat the panel and sandwich the piping back into the panel.
|
|
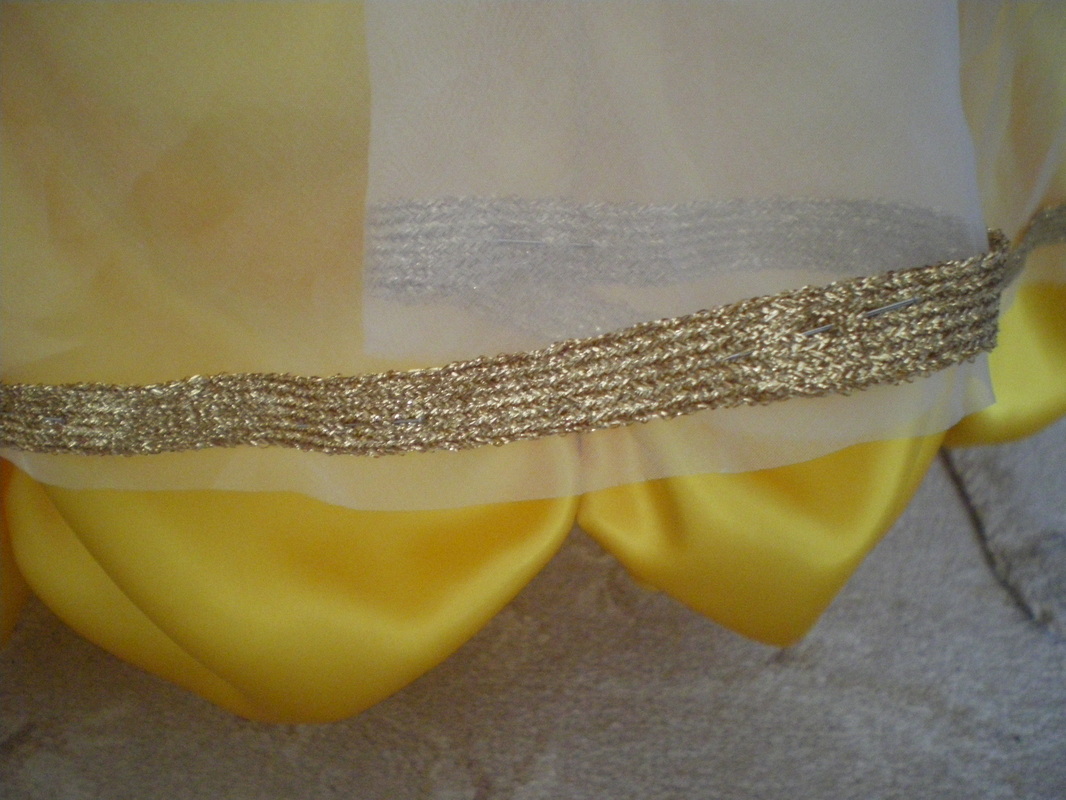
Sew the trim to the edge of the Organza, then cut off the excess.
|
|
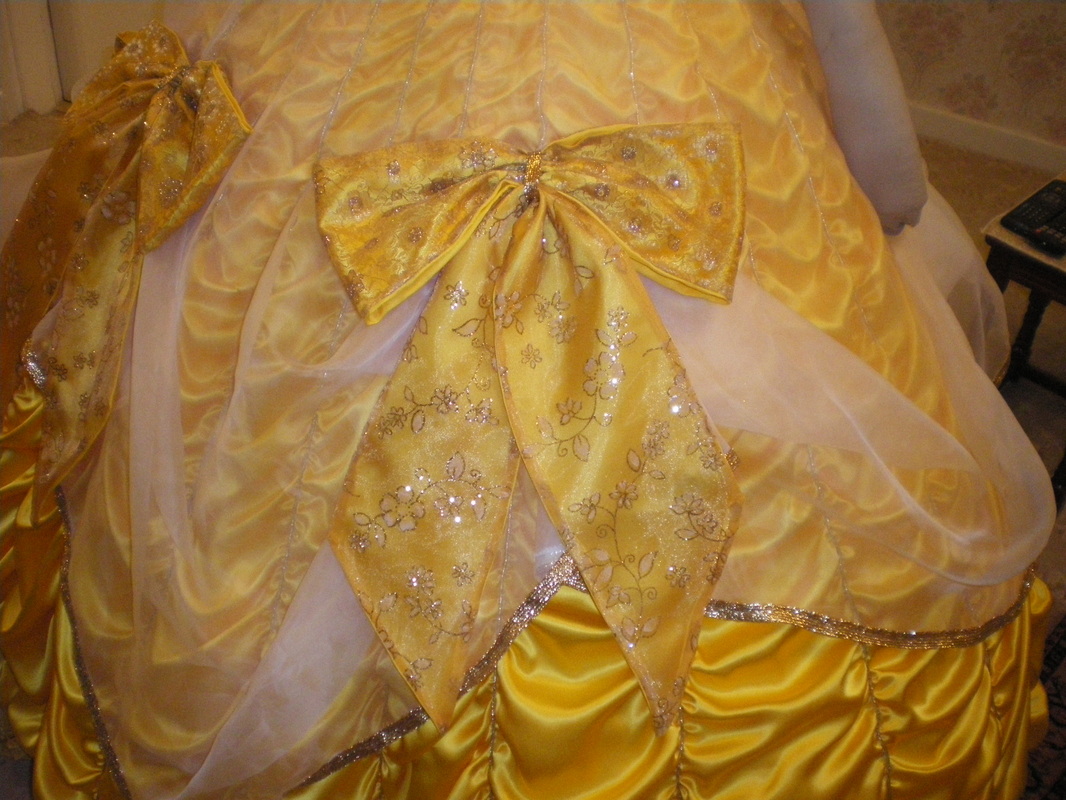
Pull up the Organza to form a swag. The position of the bows needs to be equally spaced apart, do this again for the side swags, but 6" (15cm) lower than the front ones, and again the rear two swags need to be 6" lower.
|
|
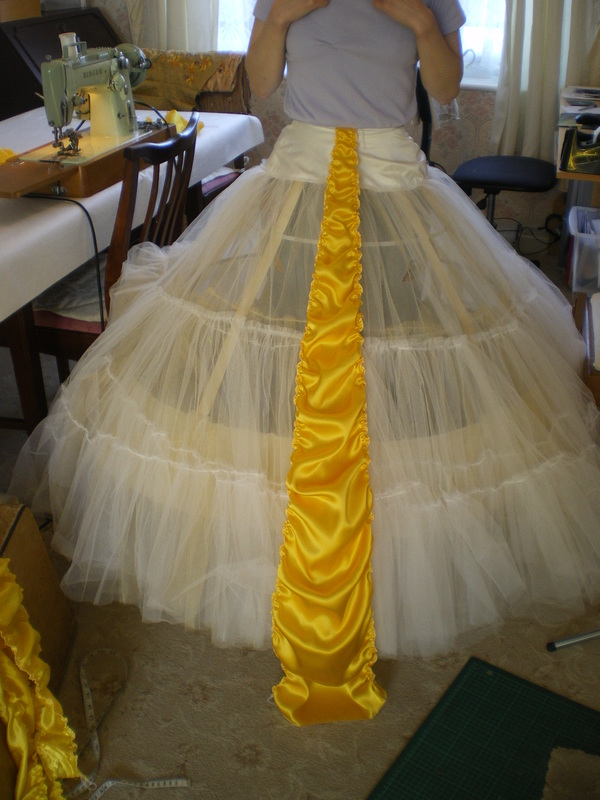
We bought 5 metres of Polyester Satin, cut it to the same length as the skirt to make a petticoat and pleated the whole 5 metres into the waistband. It was neatened at the zip and a back seam was sewn.
|
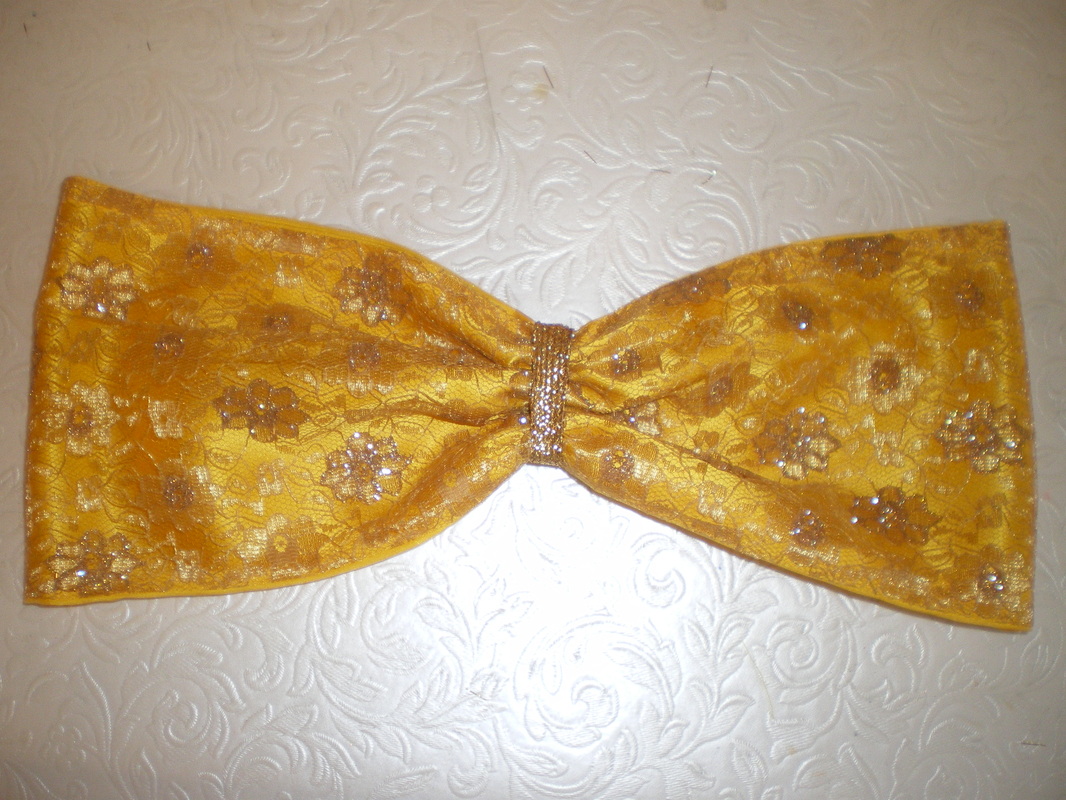
To Make the Bows:

|
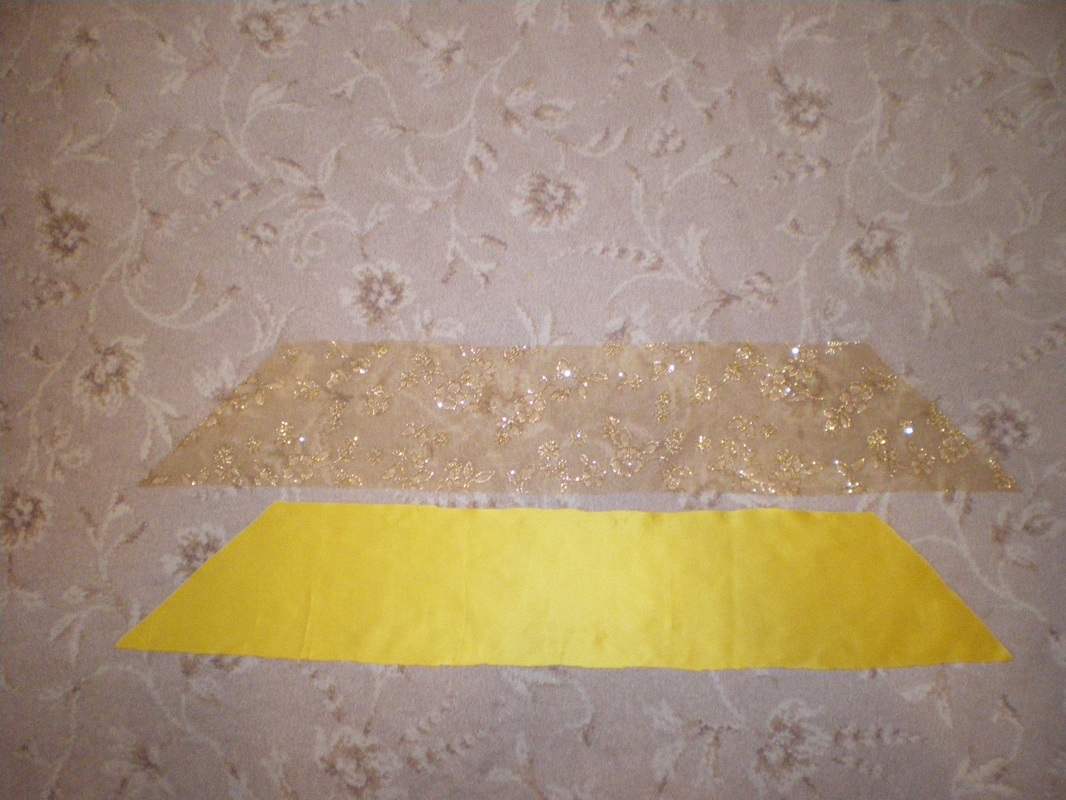
Cut a strip of Satin and one of gold lace approximately 24" (61cm) x 6" (15cm) and sew all the way round, but leave a small gap in the middle to turn it to the right side. Sew up the gap and iron
|

|
Sew a seam and place it at the centre back.
|
|
Run a gathering stitch up the middle and sew a band of trim around it.
|
|
Each tail is made up of two pieces of fabric. You will need 2 long tails 59" (1.5m) x 6" (15cm) and 4 short tails 34" (88cm) x 6" (15cm). Cut an angle of 45 degrees at each end of the pieces, sew them together, leaving a small gap at the middle to turn it the right way out.
Sew up the gap and iron. |
|
Pass the tail through the bow trim and secure on the back with a few stitches. I want to be able to remove my bows for storage, so I sewed on a stud fastener on the back. Place two short tailed bows at the front, two long tails on the sides and two short tails at the back.
|
|
I have made 26 bows to go at the bottom on each piped panel on the skirt using the 3.5cm wide gold ribbon. Cut each strip 8" (20cm) long and sew a seam.
|
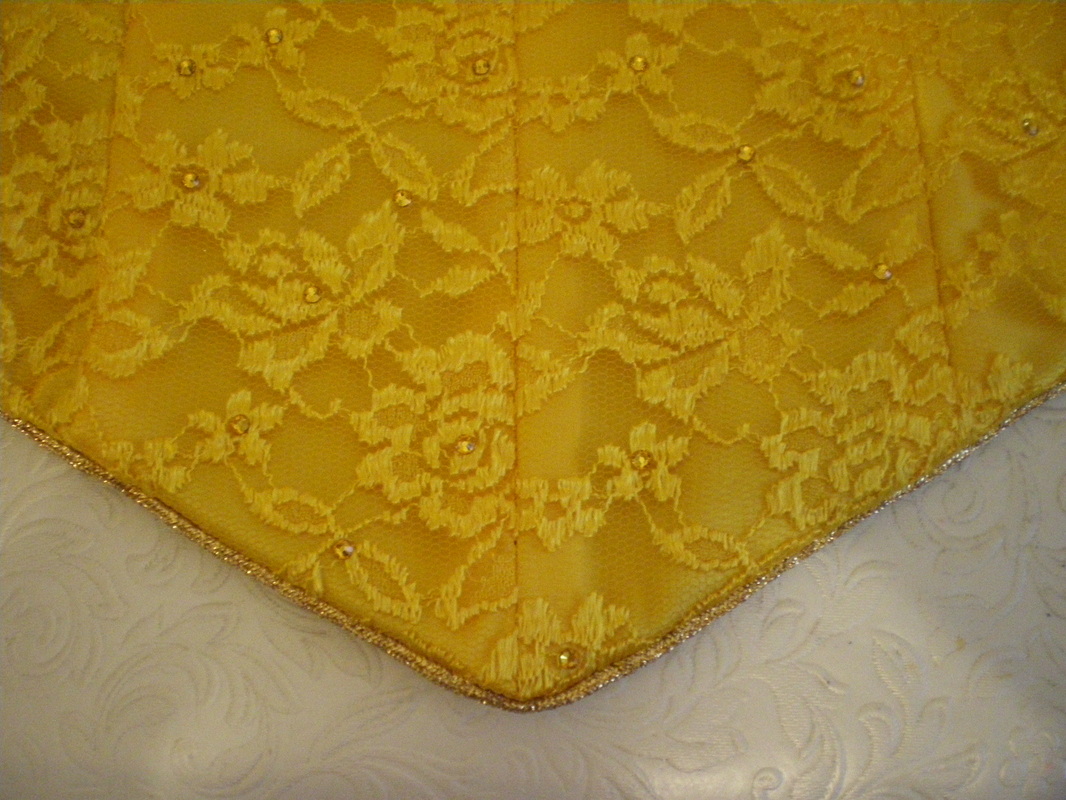
This completes the skirt
To make the Bodice

|
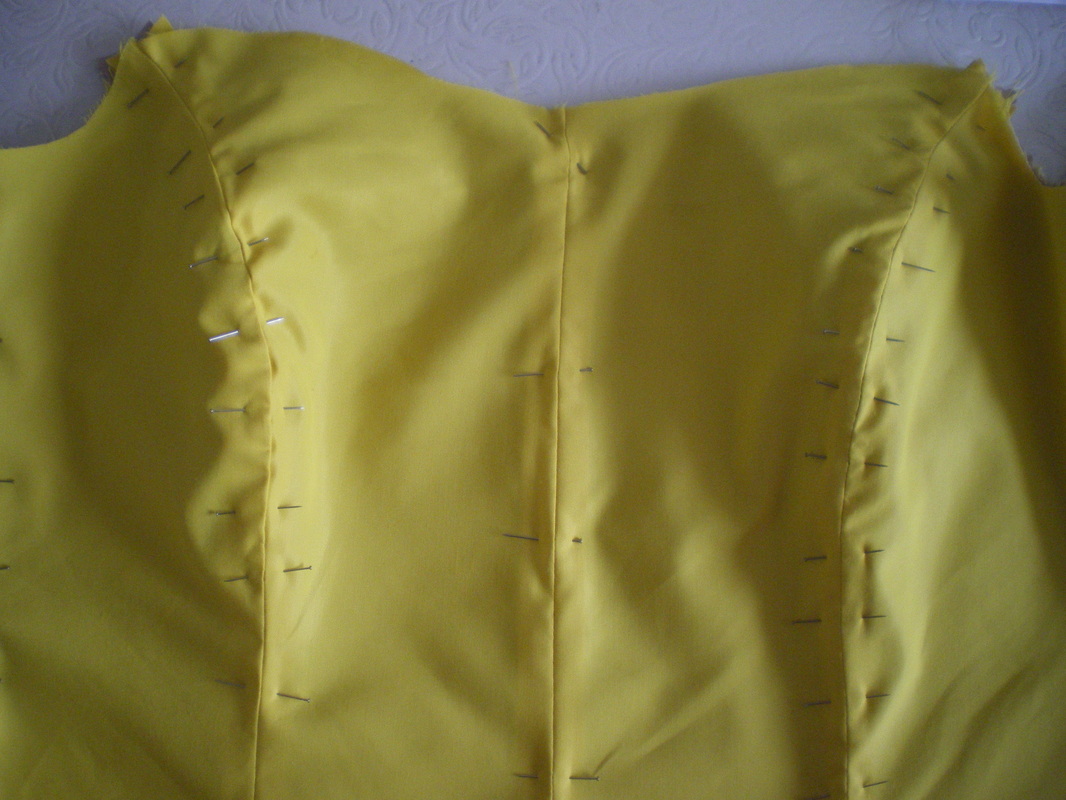
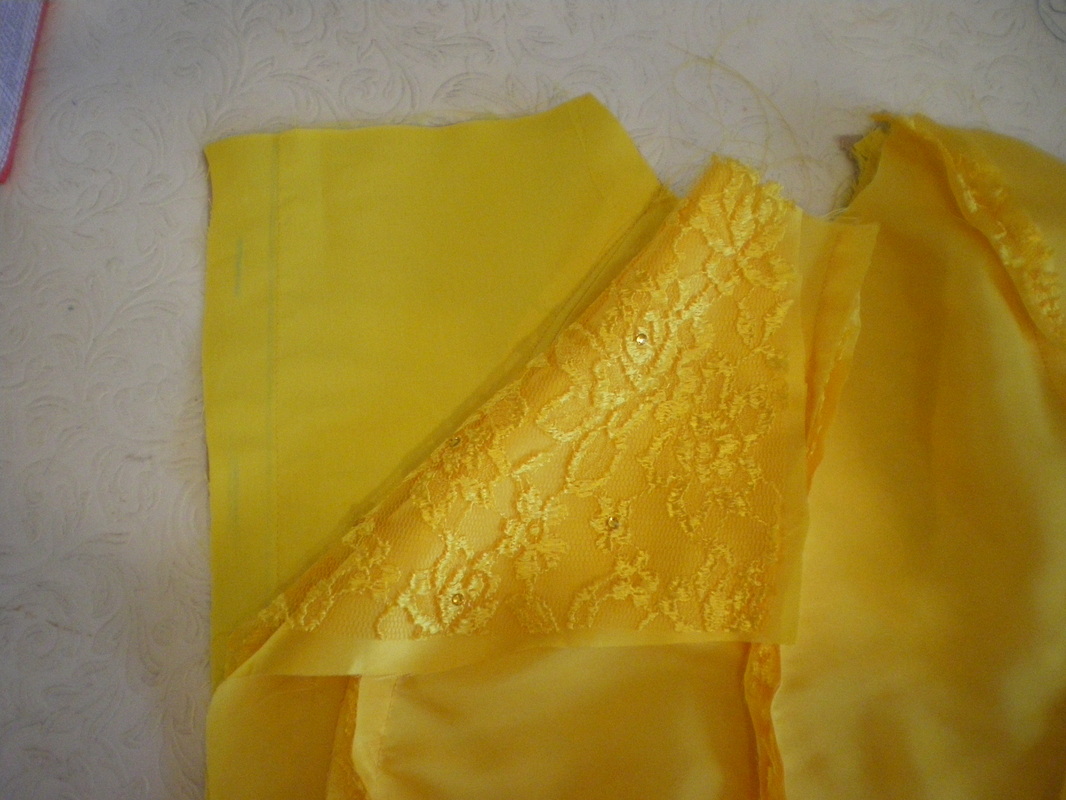
I used New Look 6480 for the front pieces and Simplicity 4479 for the back pieces as I liked the style of Christine Daae's corset at the back. After some small alterations to the patterns, I cut 4 sets of bodice pieces, I gold net, 1 gold satin, 1 coutil and 1 yellow cotton liner. Tack all the lace pieces to the satin so they don't move when you assemble the corset. Then sew up the seams
|

|
When sewing your seams, make sure they all match keeping the seam allowance exactly the same. Snip the curves on all three pieces and iron flat.
|
|
Join the coutil to the cotton liner with the seams facing together, make sure they are flat and pin down all the seams and then tack.
|
|
I will use the seams for my boning channels, so sew a channel 1cm wide at each seam, plus I will need an extra channel at the centre back. The first blue line is the seam allowance, the second blue line is where I will sew to create a channel.
|
|
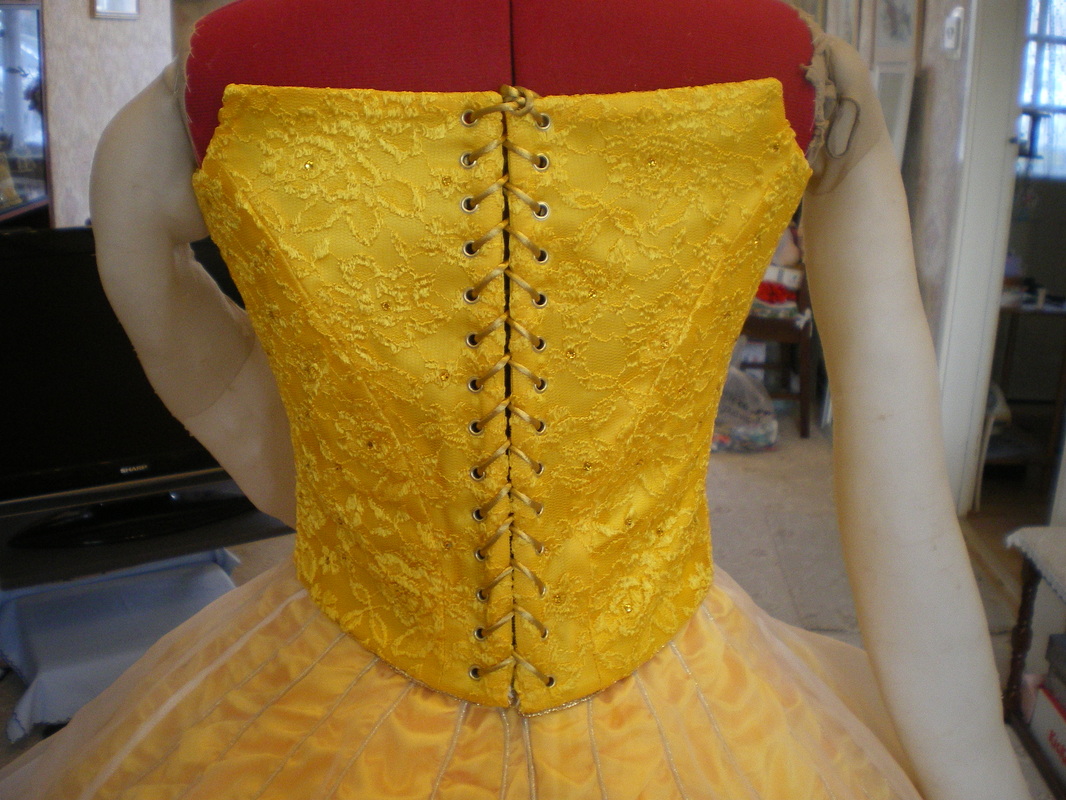
With the lining facing up, lay the lacing facing down. Pin tack and sew up the centre back, all the way along the top and down the centre back.
Remember to cut the corners and snip any curves before turning the right way out and iron. |
|
To measure your boning, turn up the bottom of the corset to the required length and place a pin along the bottom edge. I wanted a slight curve to my bodice at the back, but the front it pointed.
Measure from the top of the corset to the pins where the boning channels are, and deduct 2cm from the measurement. |
|
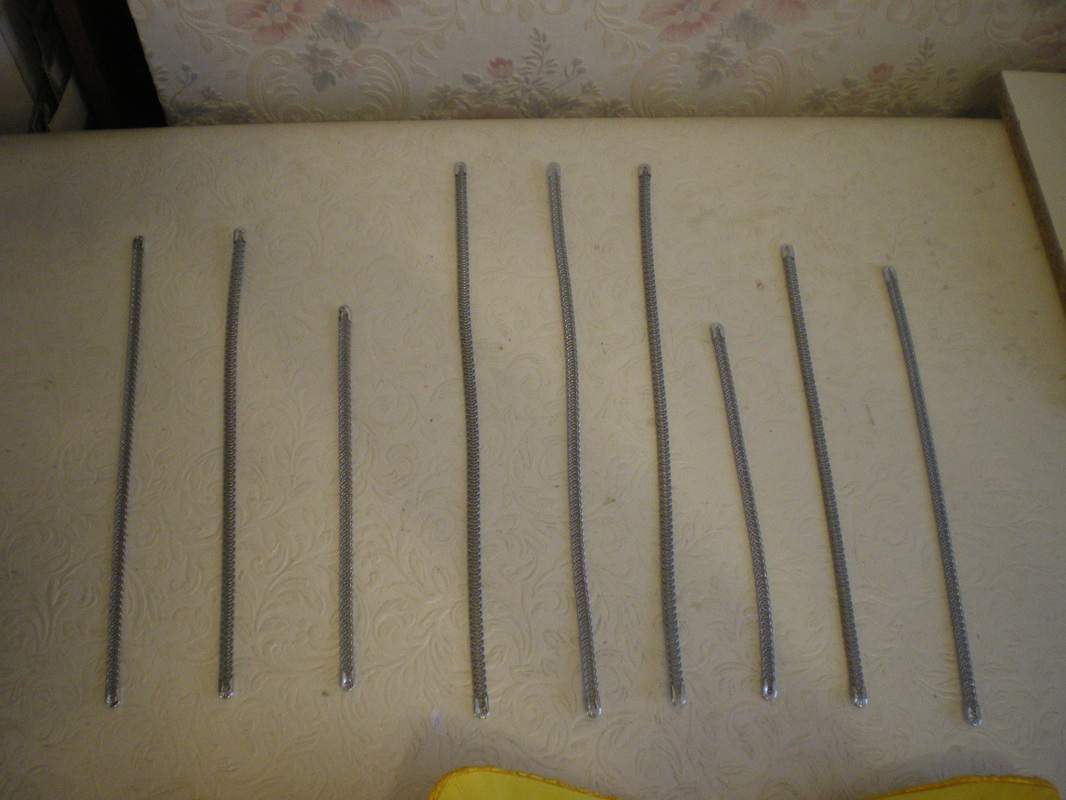
I am going to use spring boning for all the channels. I usually buy my boning by the metre, which means you will have to buy end caps. You can buy it custom made, but it will cost more. My boning is 7mm wide.
Arrange your boning in the order you will put them in. |
|
Push the boning up at far as it will go in the channels, to get it out of the way for the time being. Along your line of pins, sew a line of stitching through all the layers. Pin, tack and sew your piping to follow this line, allowing for an overlap of piping.
|
|
At the front, snip the piping to allow it to be turned on the angle. Sew VERY close to the piping edge, I then sewed an extra line underneath
|
|
Cut off any excess fabric from the bottom, allowing 2cm. Either use pinking shears or overlock. Turn to the inside and catch stitch to the liner.
|
|
Finished piping.
|
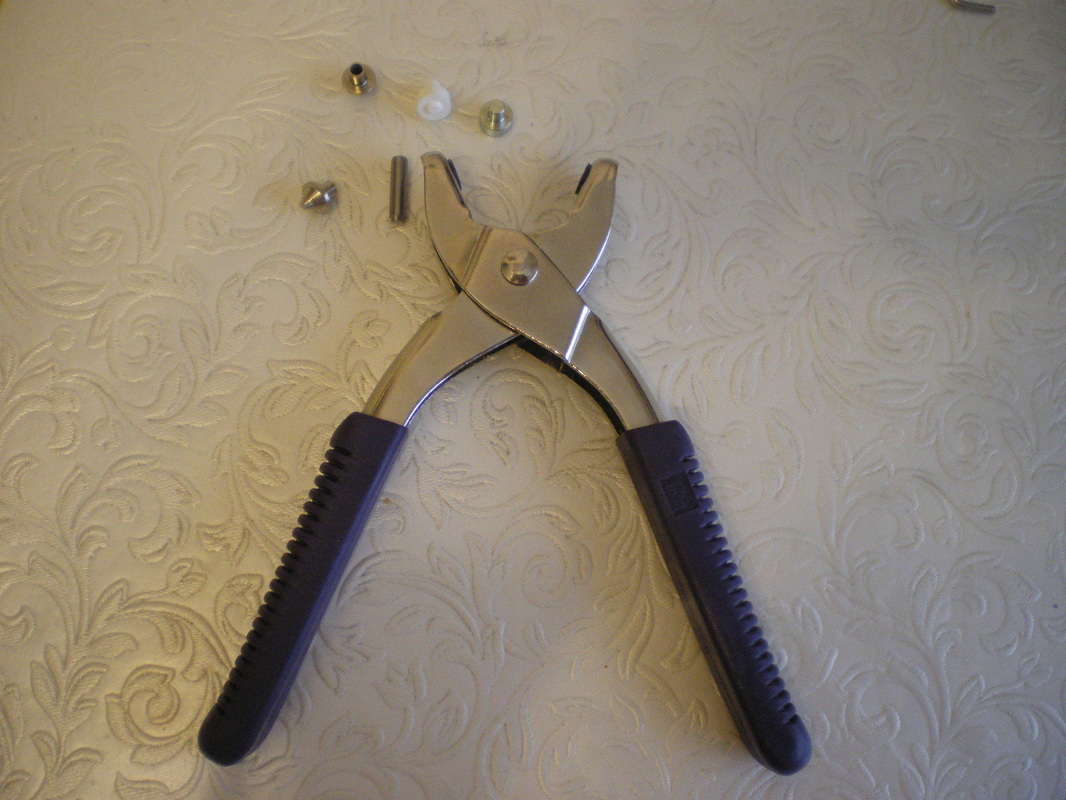
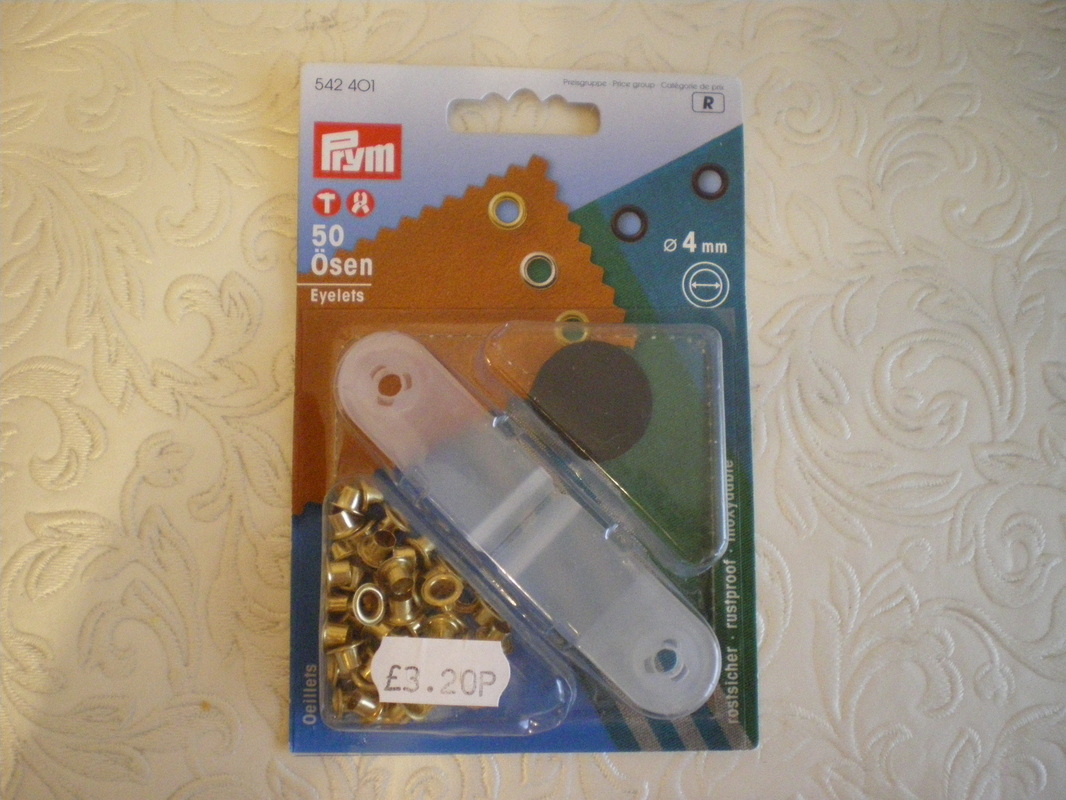
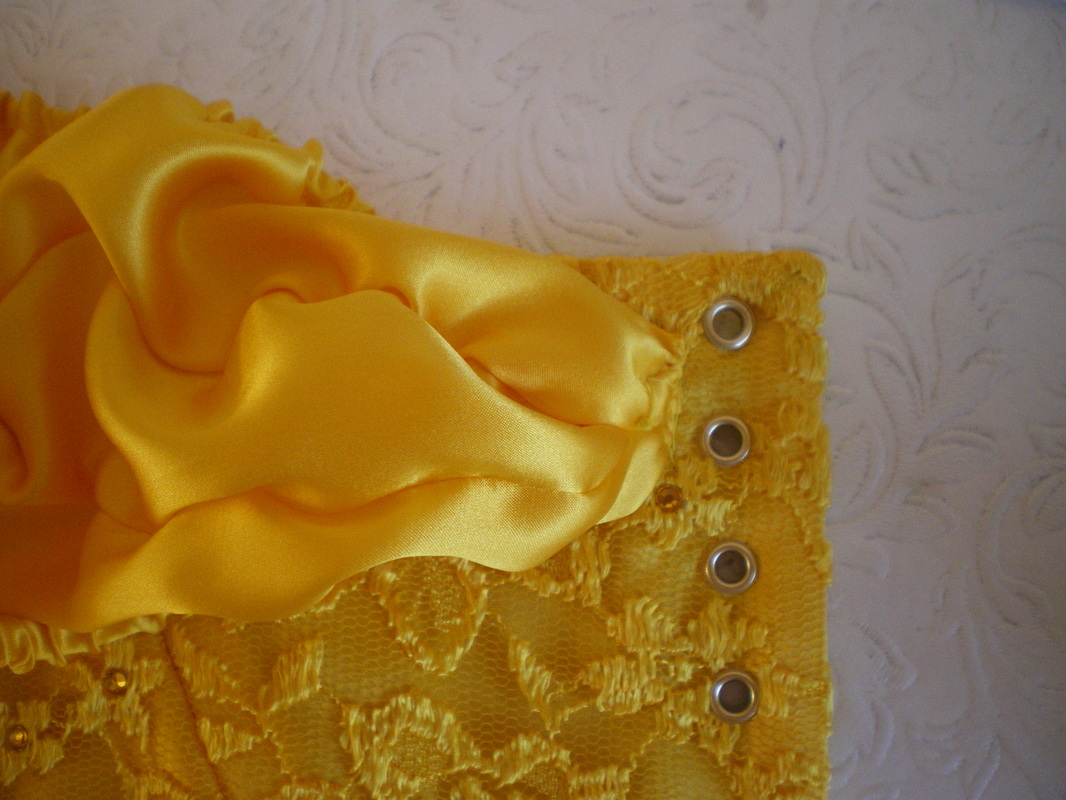
To make the eyelets, it might be worthwhile investing in an eyelet maker tool if you plan on making more than one corset. The eyelets are 4mm and come as a kit. If you don't have this tool, then a plastic tool is provided in the kit, but you will need a hammer to fix your eyelets
|
|
|
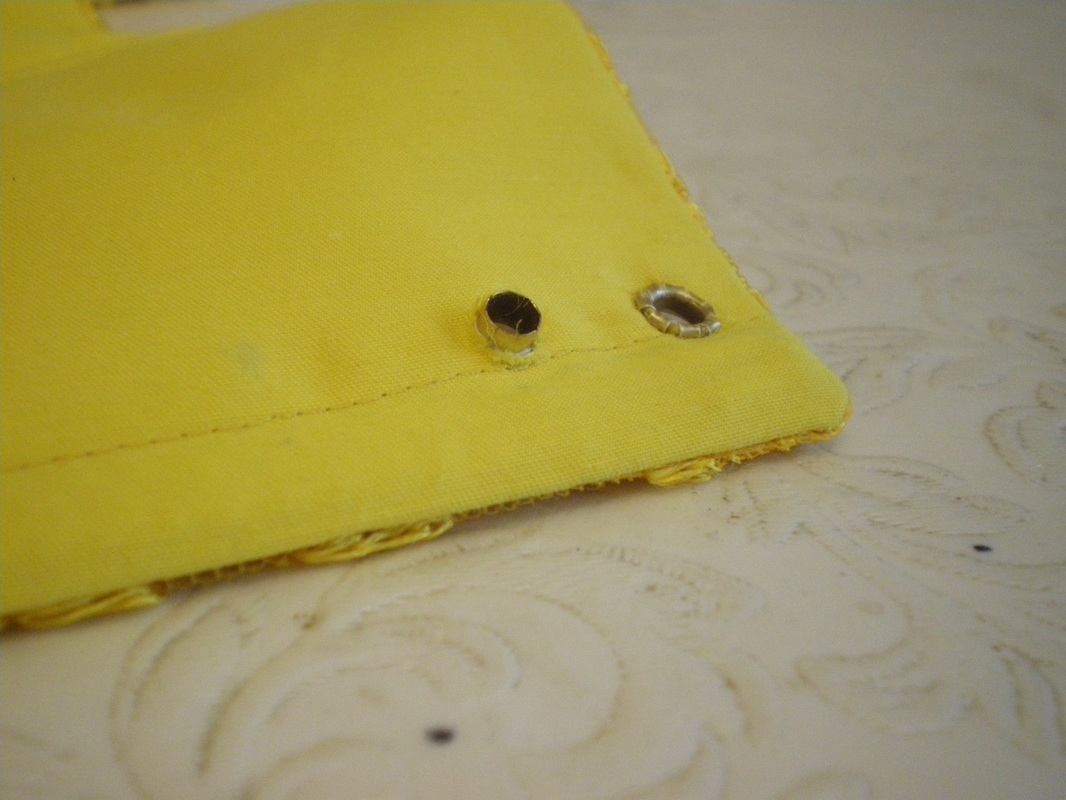
Mark every 2cm along the edge, make a hole and put the "top hat" through from the front. Making sure that you can see the shaft. |
Use your tool to flatten the eyelet (or use your hammer and plastic tool. |
|

|
|
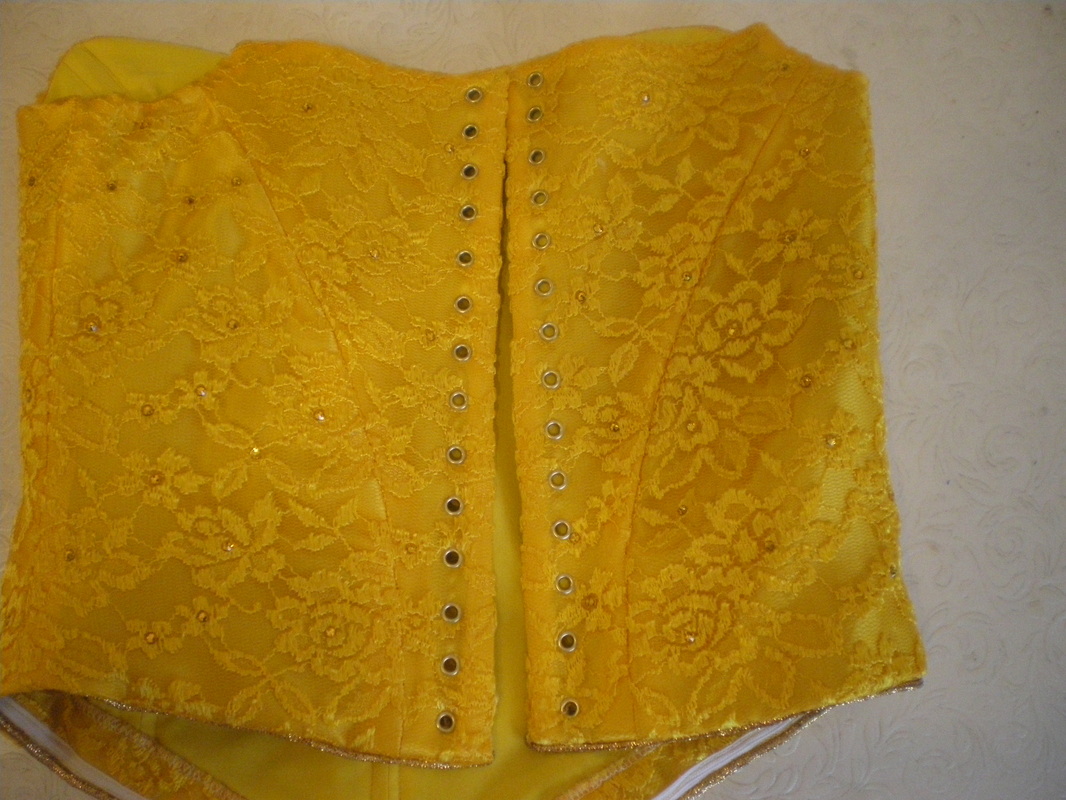
The finished eyelets.
|
|
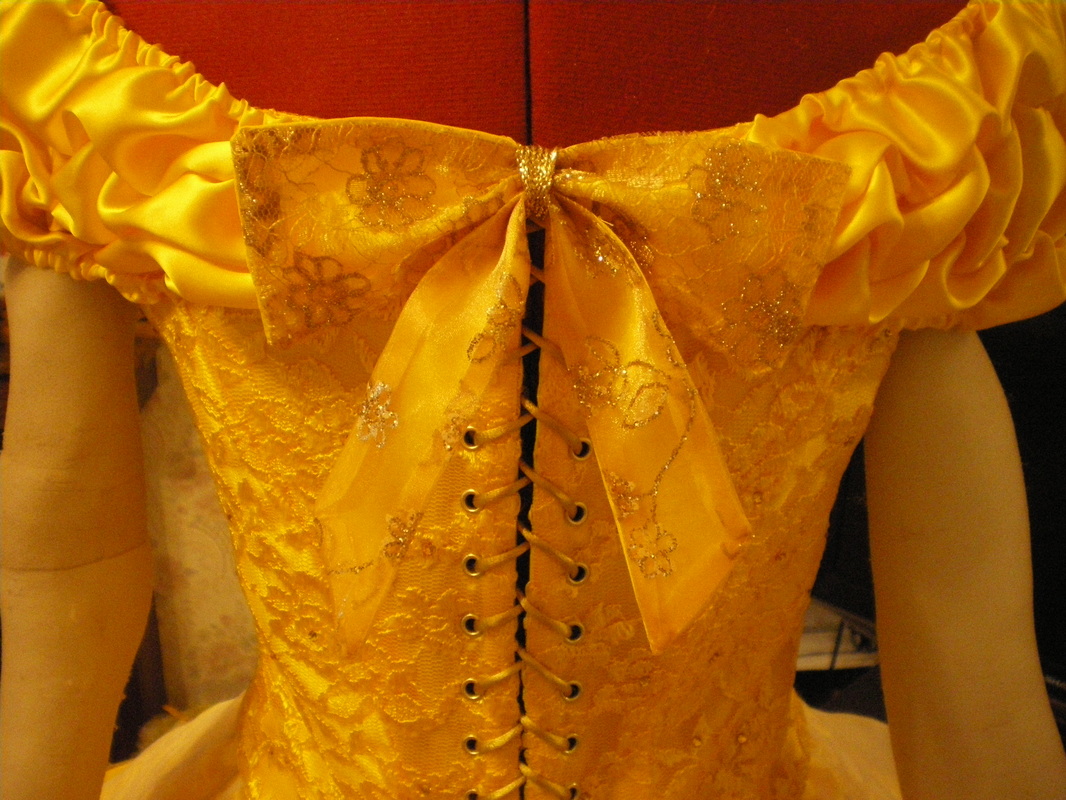
Use the rattail cord to lace from the bottom to the top and tuck the ends into the corset.
|
|
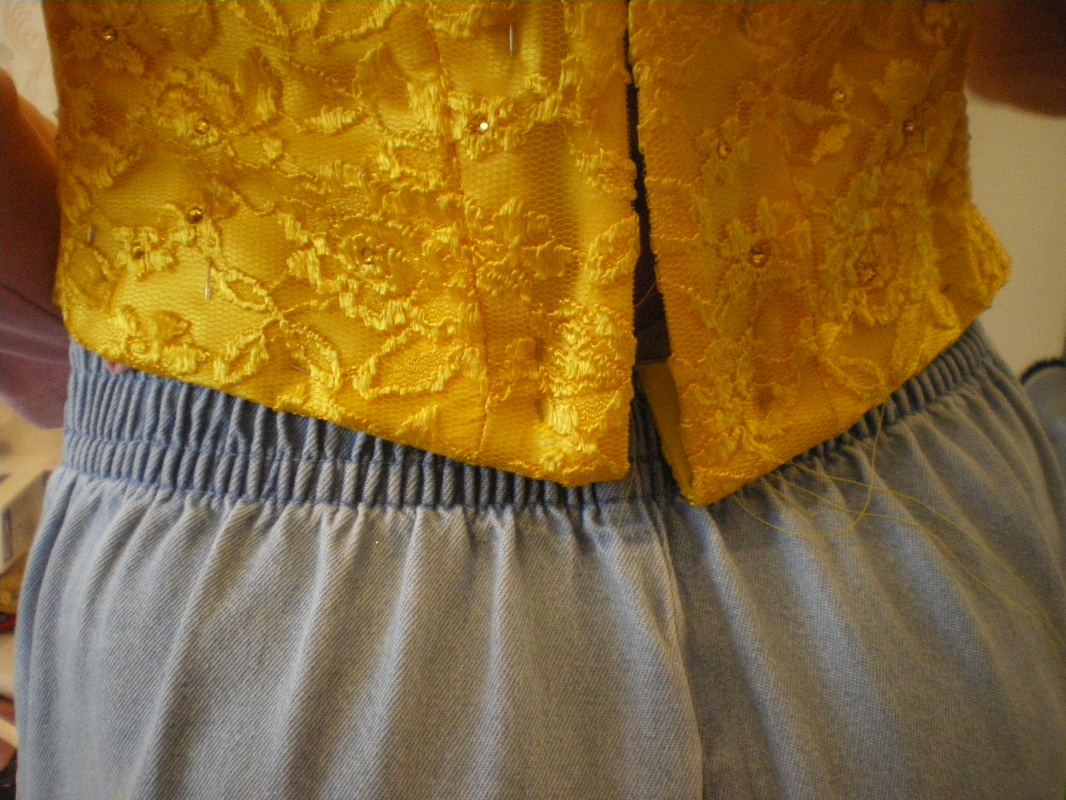
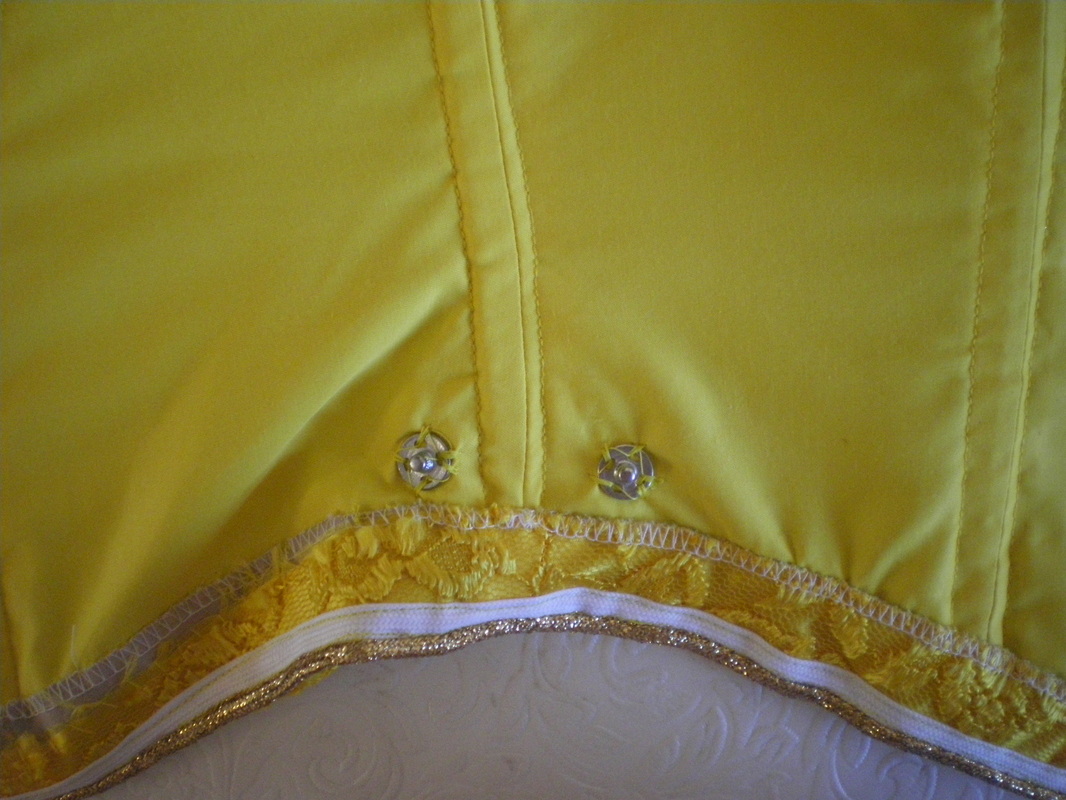
The bodice is attached to the waistband using stub fasteners, but you could use hooks and eyes. Sew corresponding eyes or fasteners to the waistband.
|
|
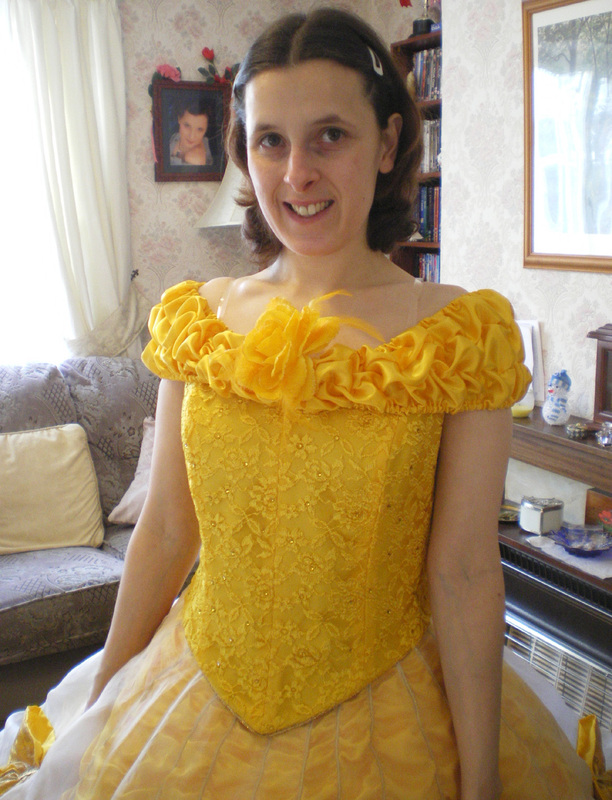
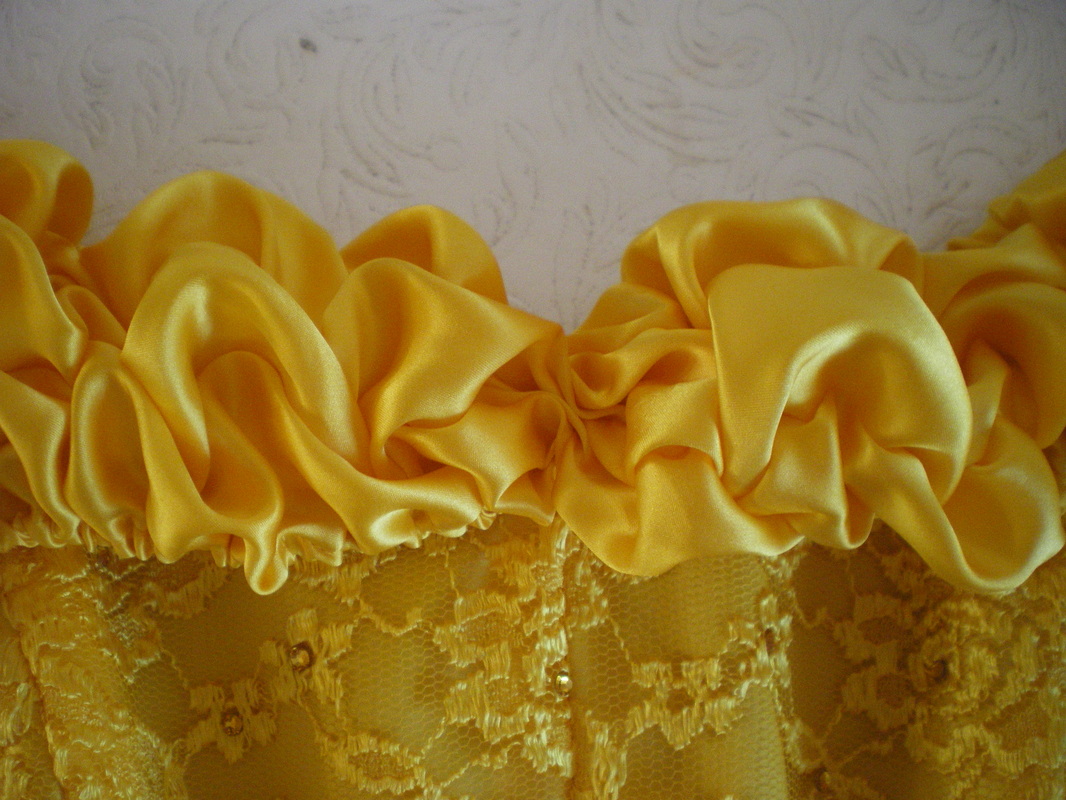
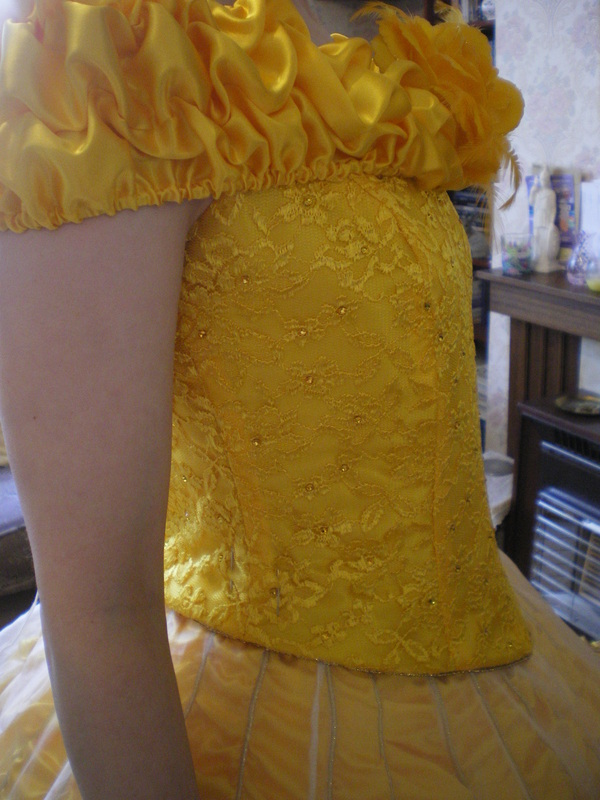
I have looked at a lot of different ideas to make the shoulder piece and decided that the Broadway version was too elaborate and the Disney version was too plain. I want to mirror the paneling on the skirt, so decided to make a ruched shoulder piece.
|
|
Cut a strip of Satin 10" (26cm) wide x 68" (173cm). Make a hem top and bottom wide enough for 1/4" elastic. Divide the width into 3 and equally space two more channels.
|

|
Thread 1/4" elastic through the top and bottom channels and shearing elastic through the middle two. Pull equally on all four and fit to the shoulders. It needs to be snug, but not too tight and not too loose.
|
|
Turn under the ends and secure to the bodice.
|
|
Find the half way point and put in a gather and secure to the front of the bodice.
|
|
I don't want the sash to ride up when I raise my arms, so I have put a few securing stitches to the bodice to prevent it. Clip on the flower.
|
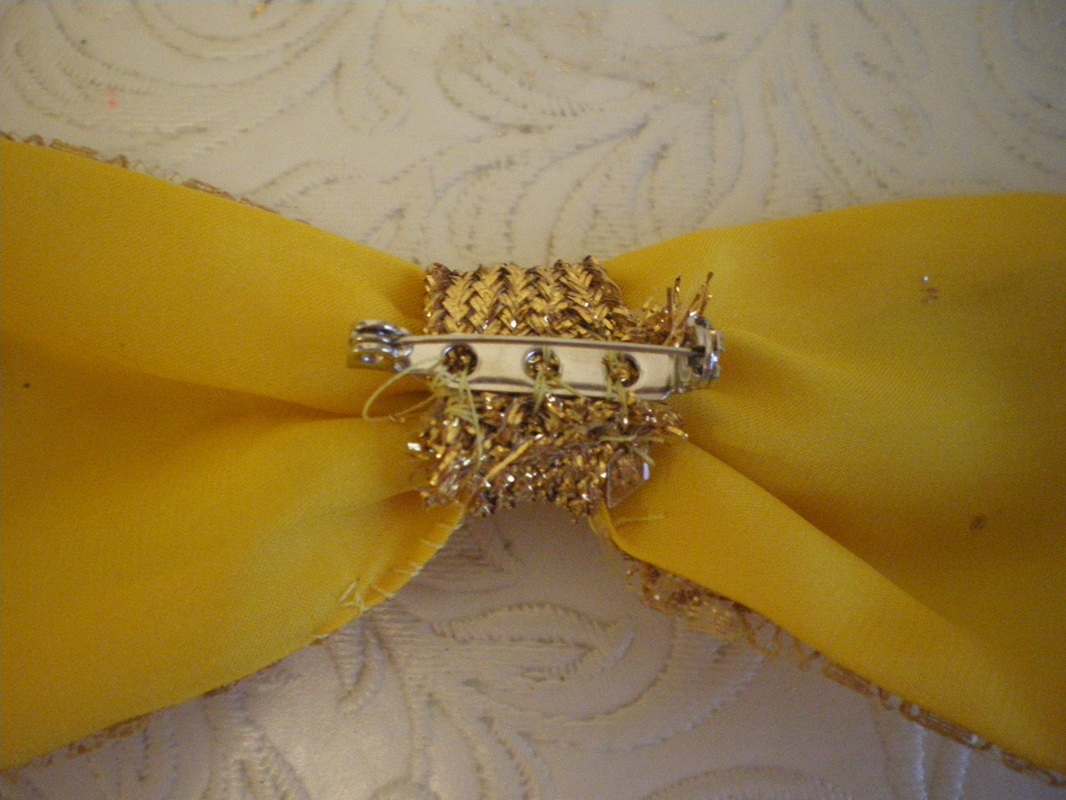
Although the wig may cover the top of the bodice, I made a smaller version of a bow to cover the gap, sewing on a brooch clip to the back to secure it.
|
|
The costume is complete.
