For this costume, you will require beginner to intermediate experience in sewing
and experience with putting in eyelets.
All videos for making the
complete costume can be found in our "video tutorials" link
Difficulty
factor 5 - 10
and experience with putting in eyelets.
All videos for making the
complete costume can be found in our "video tutorials" link
Difficulty
factor 5 - 10
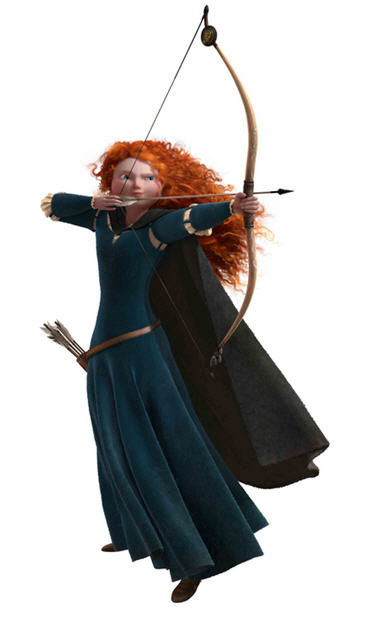
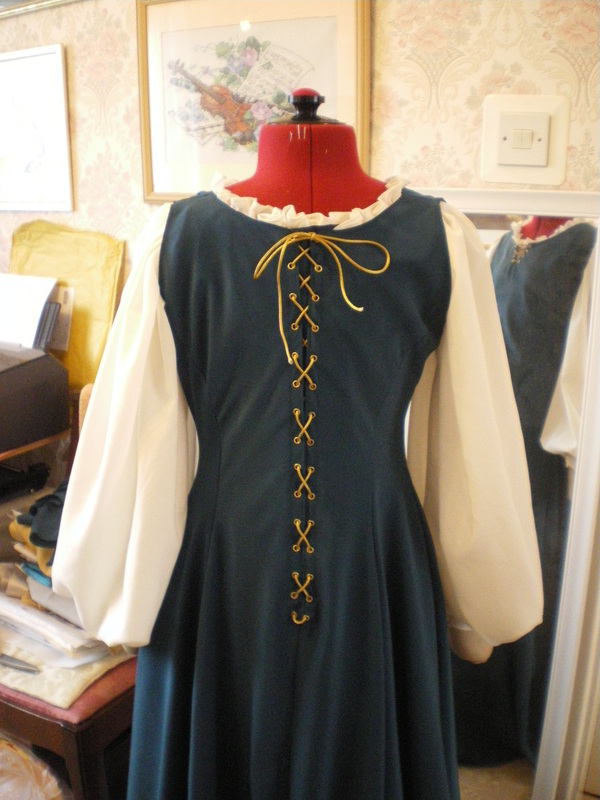
Merida
From Brave
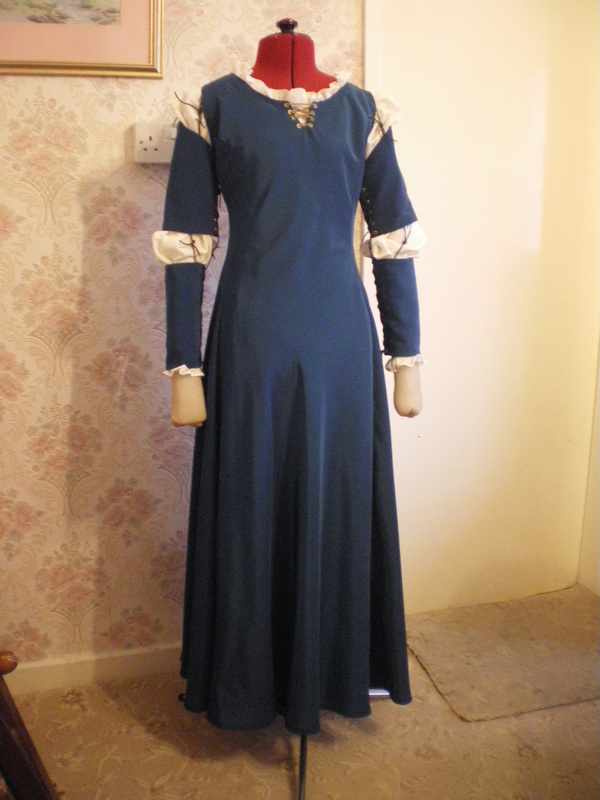
Everyday Teal Dress
From Brave
Everyday Teal Dress
Materials:
Pattern:
McCalls 9456
Chemise/Petticoat:
3 metres Ivory Crepe
Small piece of Ivory Ribbon
2 small buttons
Dress:
6 Metres Teal Crepe (Online Fabrics UK Ltd)
Approximately 40 gold eyelets
9 metres dark brown cord
1/2 metre suede thong
1/2 metre of sew-in interfacing
Cape:
Any cape pattern
Suitable dark fabric
Extras:
Disney Bow and Arrow set
Brown Leather Belt
Merida brooch can be bought from
Martin Taylor Costumes on facebook
This dress is made almost exactly the same as Merida's Blue Formal Dress. If you are unclear on any instructions, you may find them in this section. The wig instructions can be found in "video tutorials" and also how to remake the Disney arrows.
To make the Chemise/Petticoat
To make the Chemise/Petticoat
|
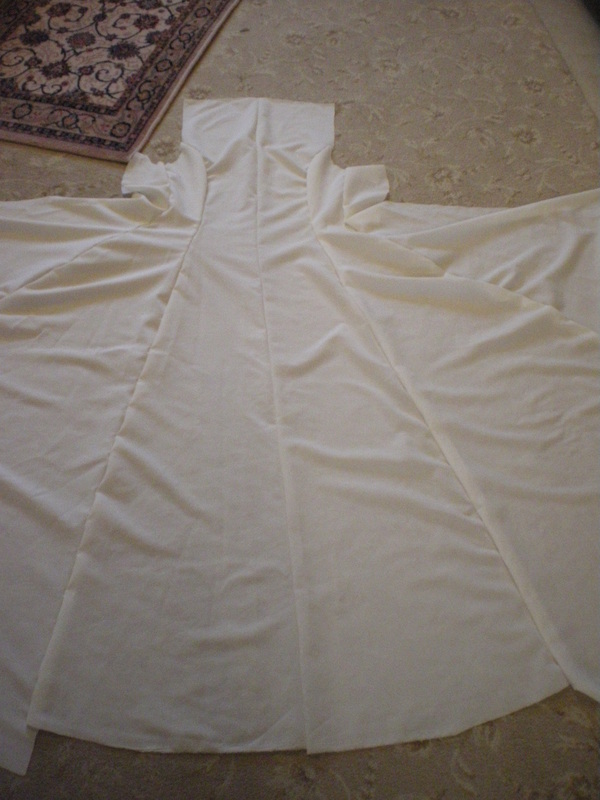
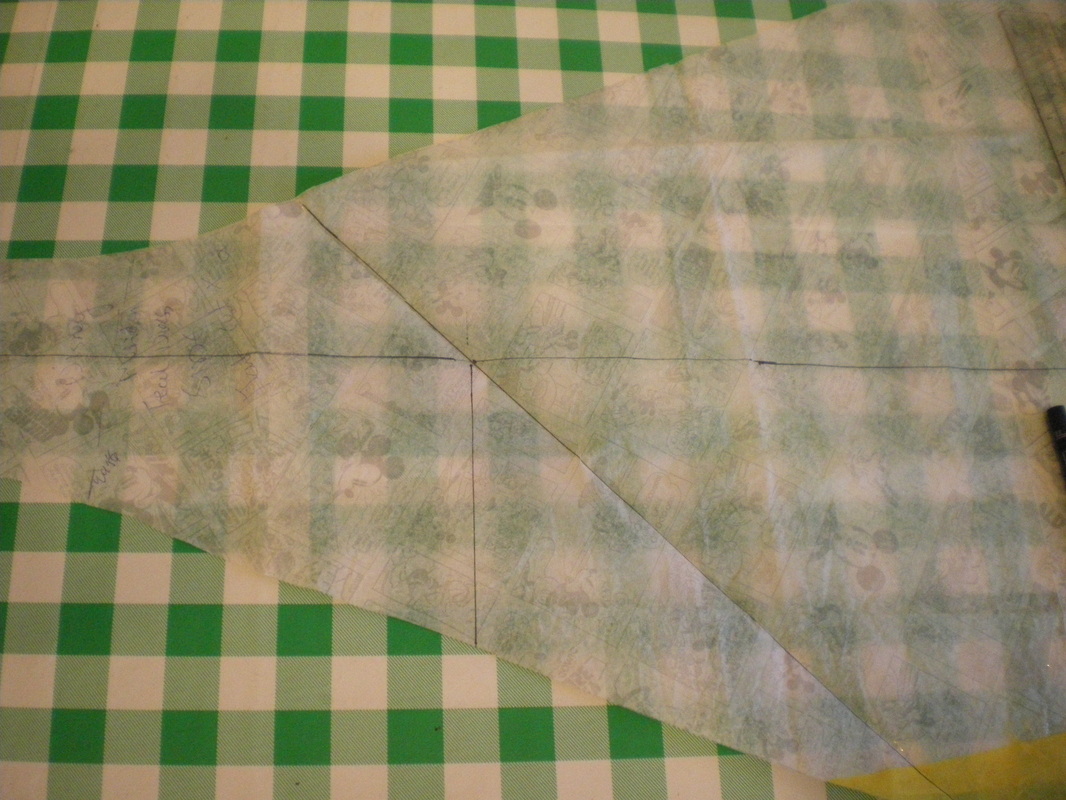
To begin with, we added 4" to the bottom width of each section. The centre seam you can see in the picture was a mistake on my part, as I mistook this for the centre back, so had to sew up the front seam (Oops)!!
The chemise is made exactly the same as the Blue dress instructions, except the scoop of the dress was made a little higher than the pattern and slightly lower for the back sections. The back section is cut on the fold without a seam, as I want to create a "slash" opening. |
|
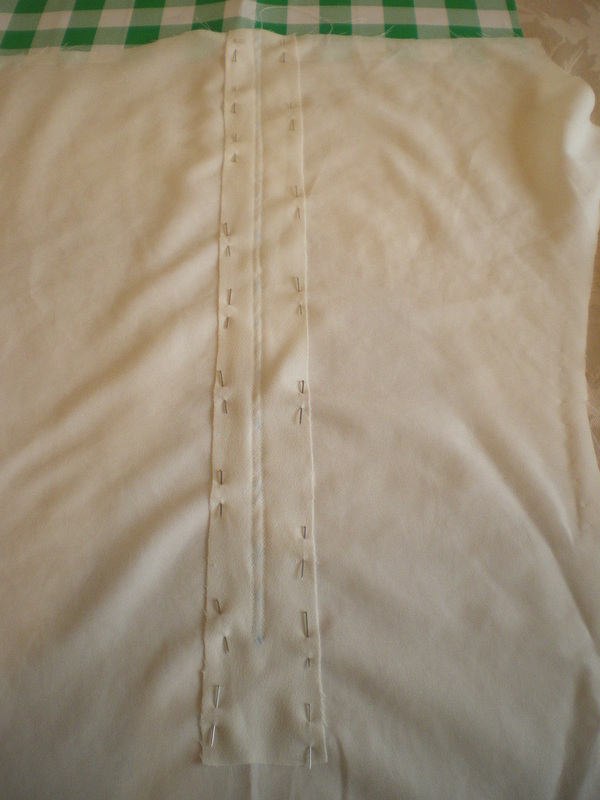
Cut a piece of material approximately 3" (8cms) wide by the measurement to the hips. Pin this at the centre back, then sew down to where the dress will open at the back. Do 2 stitches at the bottom at 90 degrees, turn the fabric 90 degrees again and sew up the other side.
|
|
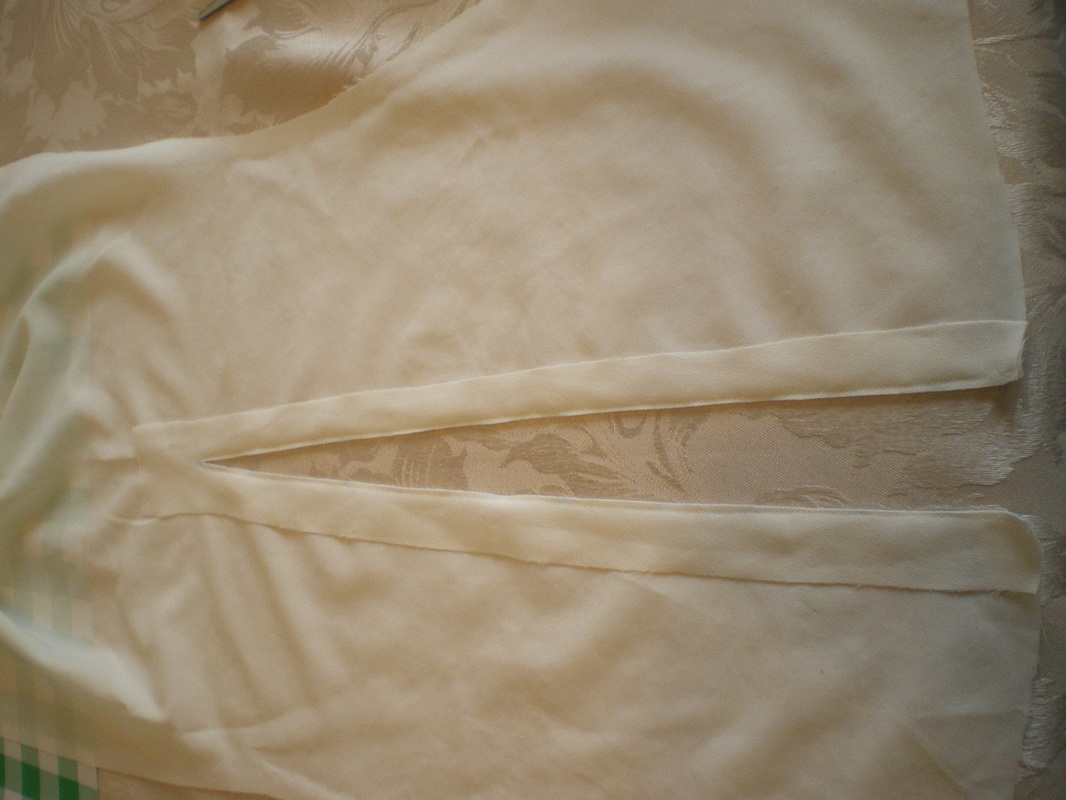
Cut down between the sewing lines as close to the bottom as possible. Turn the facing to the inside, then sew a 1cm line down one side and up the other
|
|
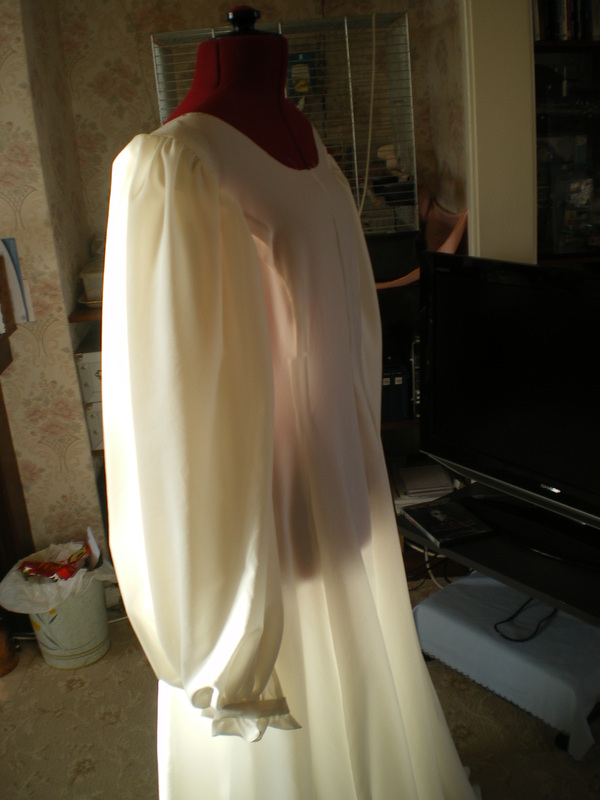
The sleeves need to be wider than the pattern and I added 6" (15cm) to the width, but kept the top of the sleeve the same height, or you could use a pattern that has frilly sleeves if you have one.
|
|
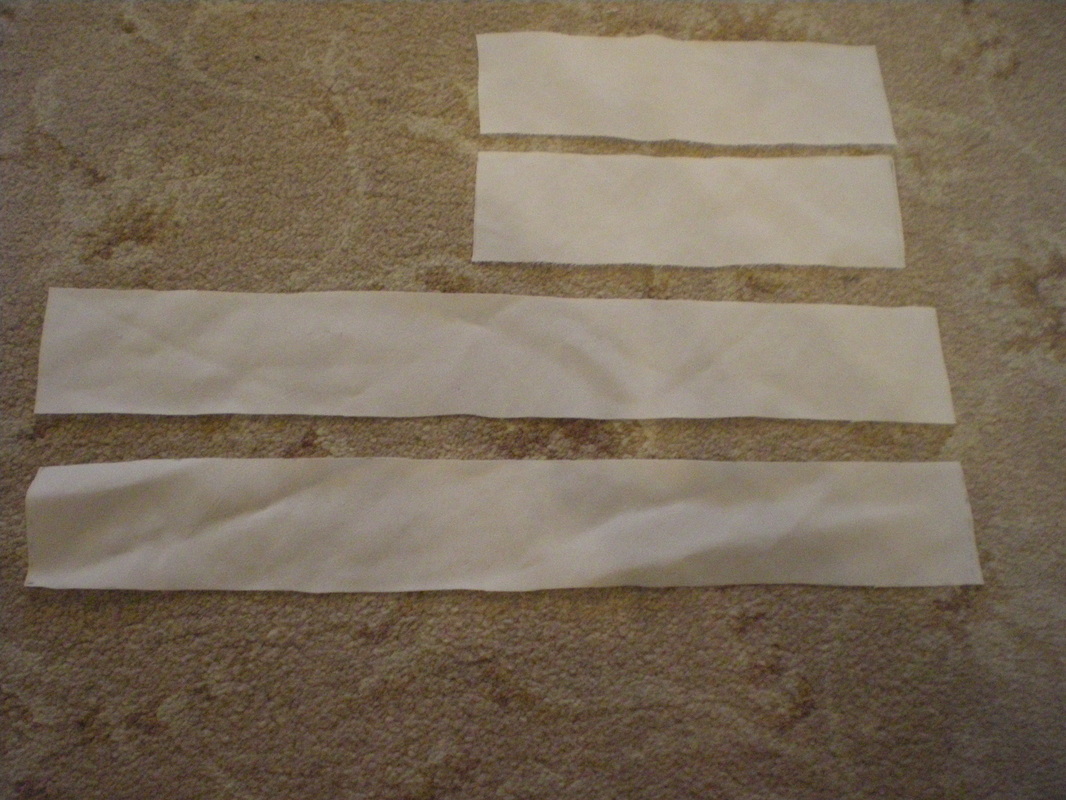
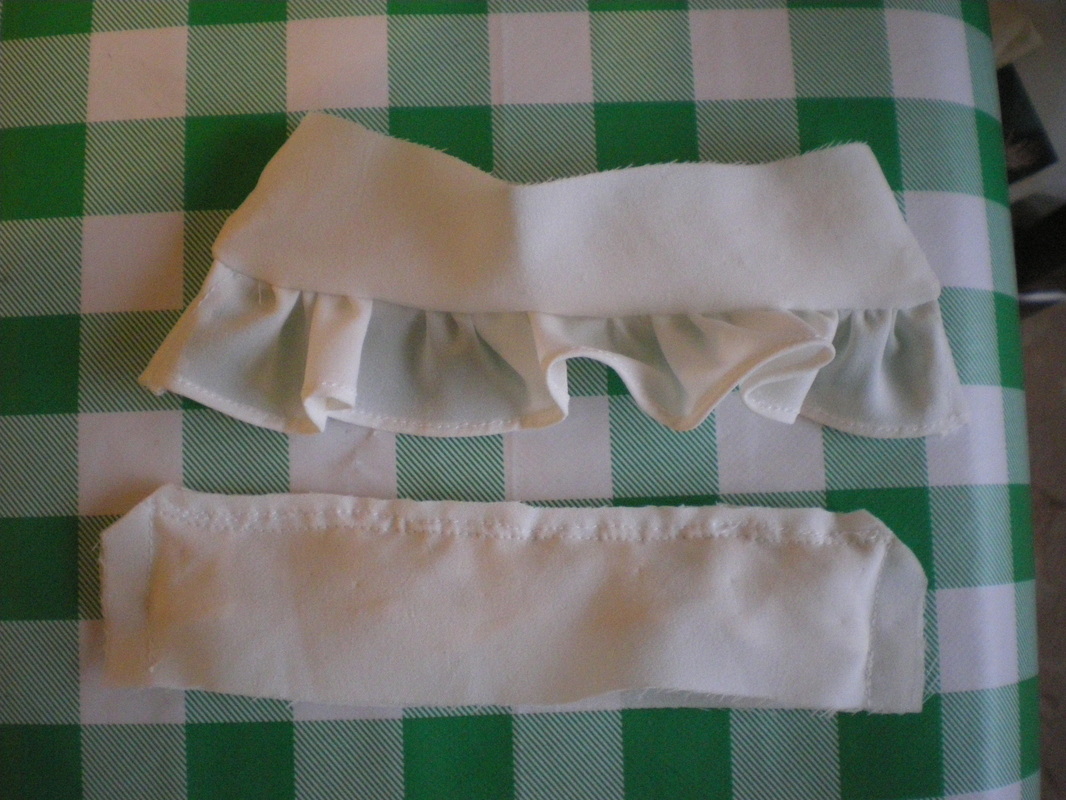
For the cuffs, measure loosely around the wrist and add 2" (5cm). Cut two pieces of fabric to this width x 1.1/2" (4cm) for each sleeve. Then cut 2 pieces of fabric twice the width x 1.1/2" (4cm). You will need one of these for each sleeve.
|
|
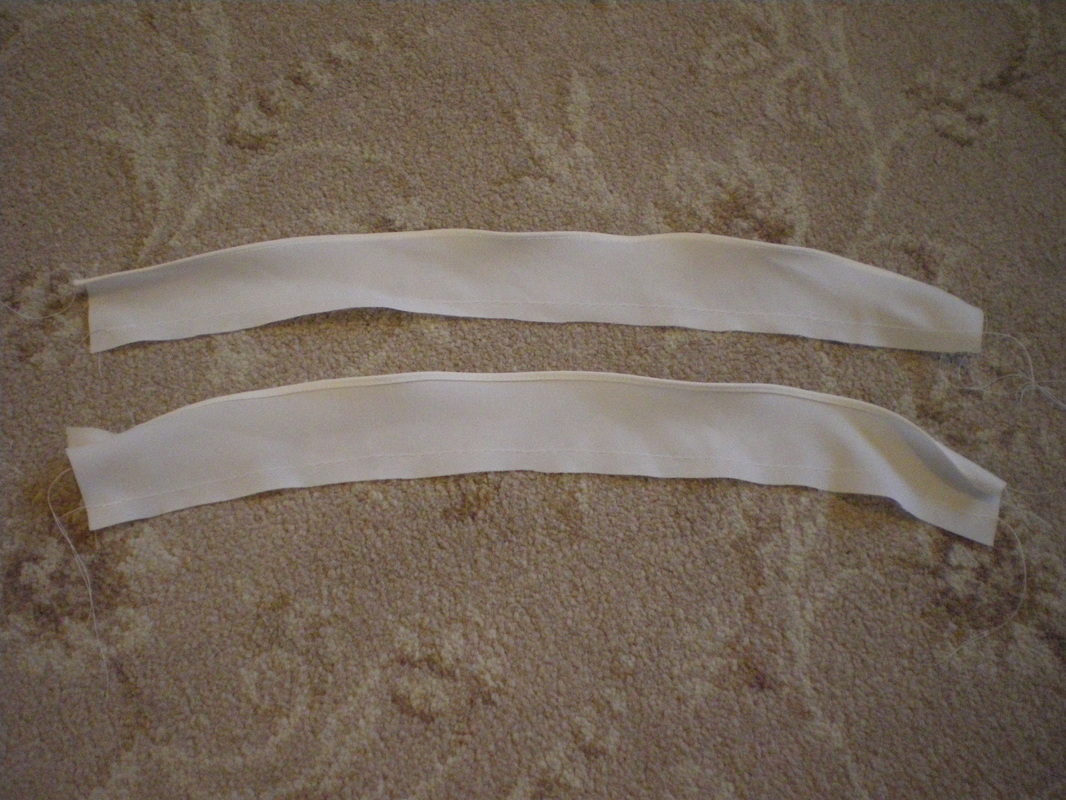
Using a Roll Hem Foot, turn each long piece along one side only. Sew a gathering stitich olong the bottom of each piece
|
|
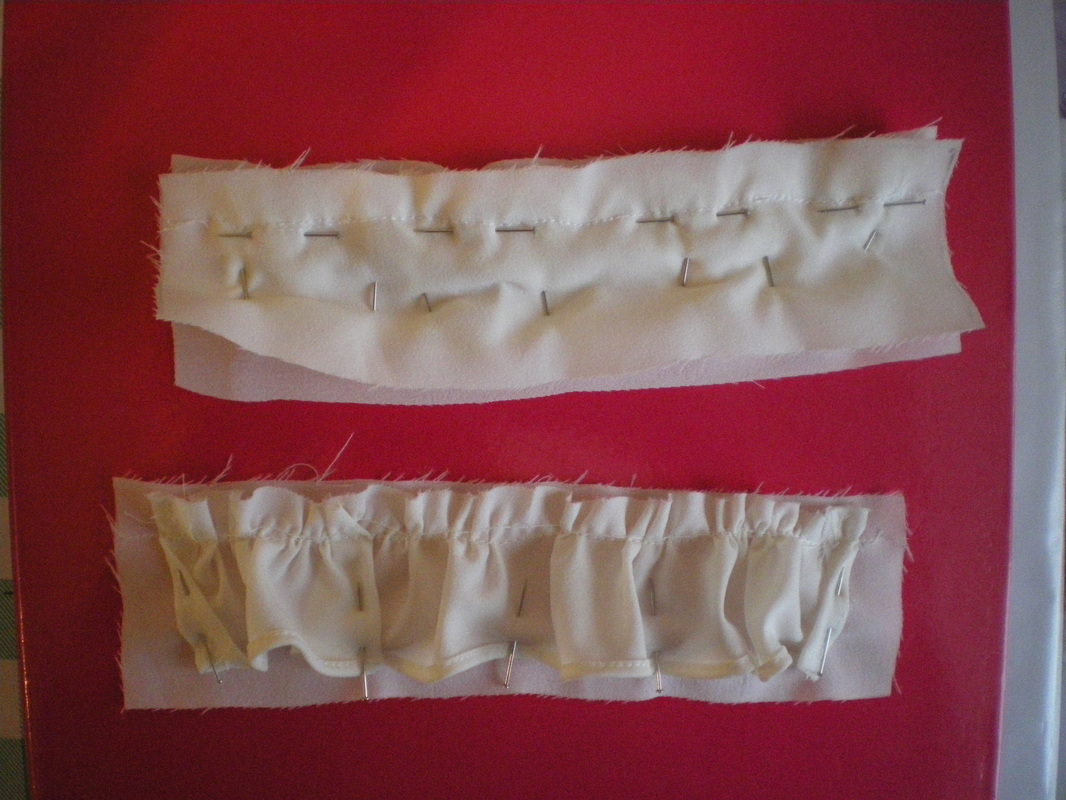
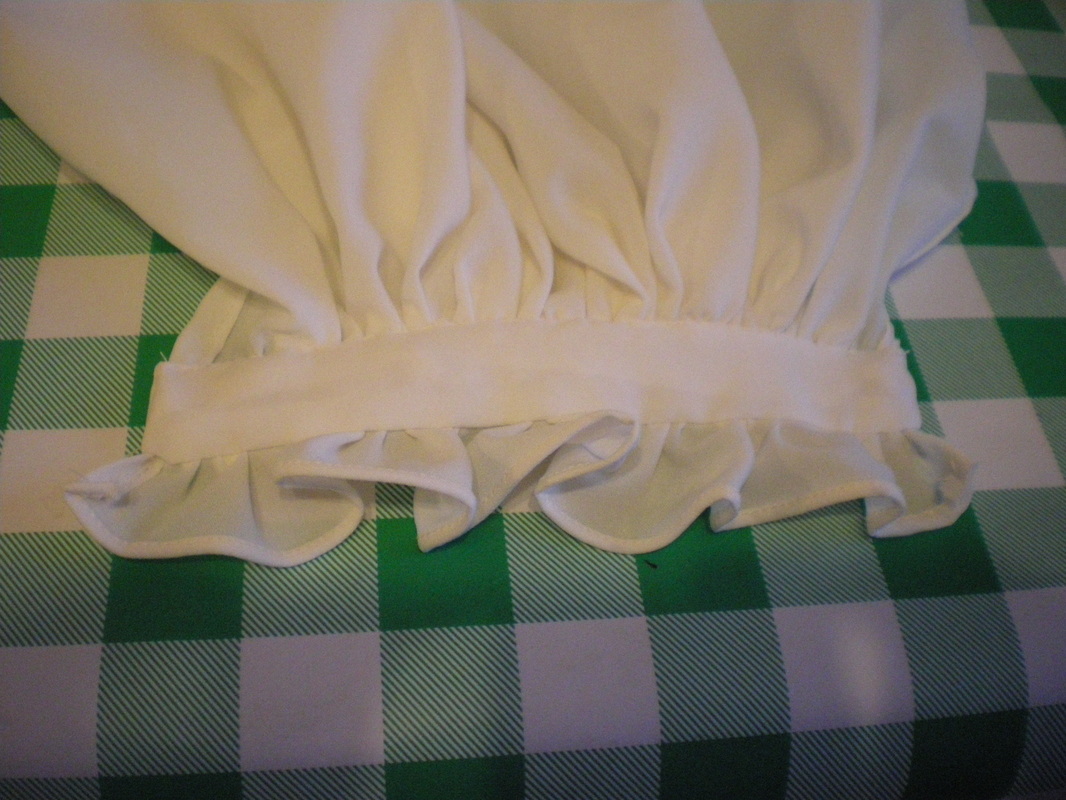
Gather the long piece and sandwich it between the two shorter pieces. I have placed pins to stop the frill from interferring with the sewing.
|
|
Sew up the sides and along the top, snip the corners and trim the edges, then turn the right way out.
|
|
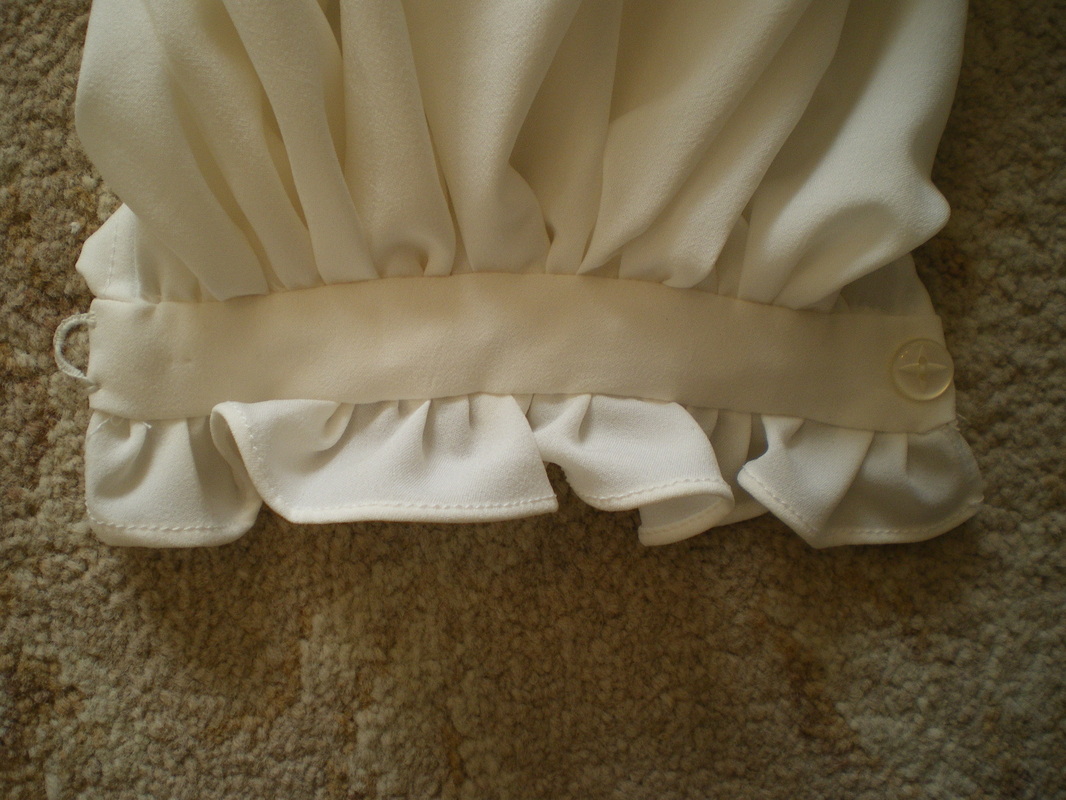
Gather the bottom of the sleeve and fit this into the band. Because this was a bit fiddly to do, I have a youtube video at:
http://www.youtube.com/watch?v=LiFn2WMe6FU Showing how I made Jack Sparrows shirt, at 4:11 into the video, it shows how the sleeve was gathered and inserted into the band. |
|
Because there was very little room to sew a botton hole using my sewing machine, I decided to sew a loop for the button fastening. This is made using blanket stitch.
|
|
Sew up the sleeve and insert into the opening.
|
|
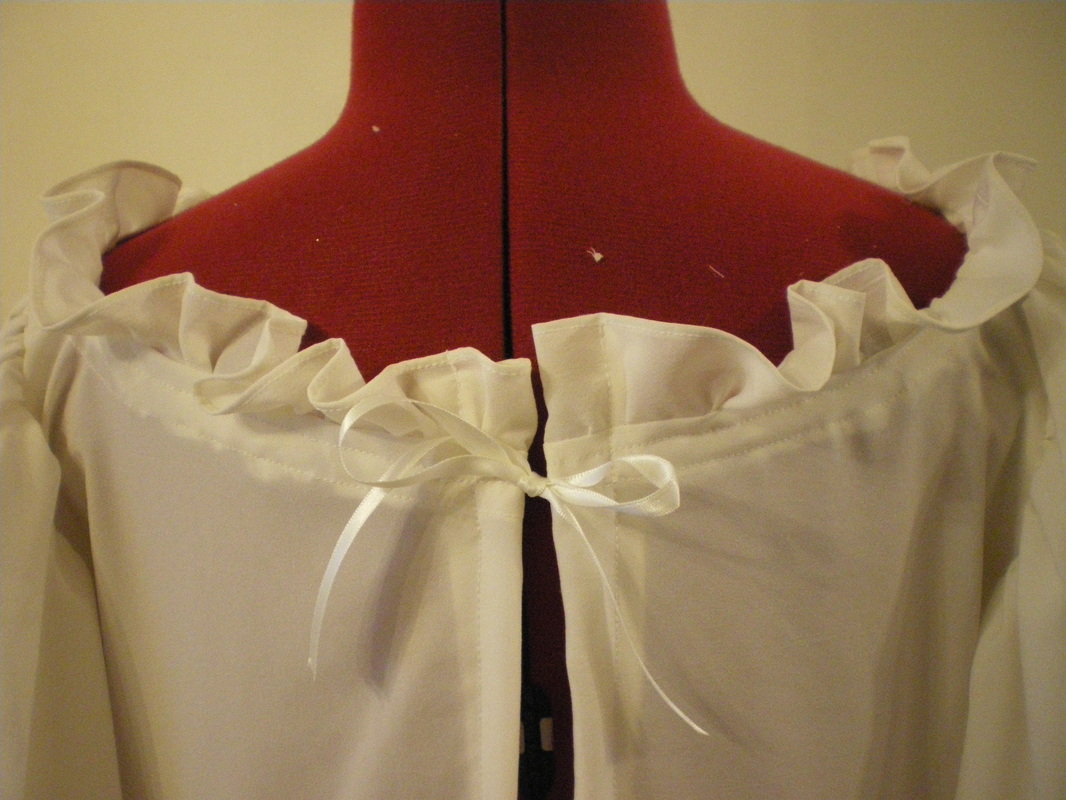
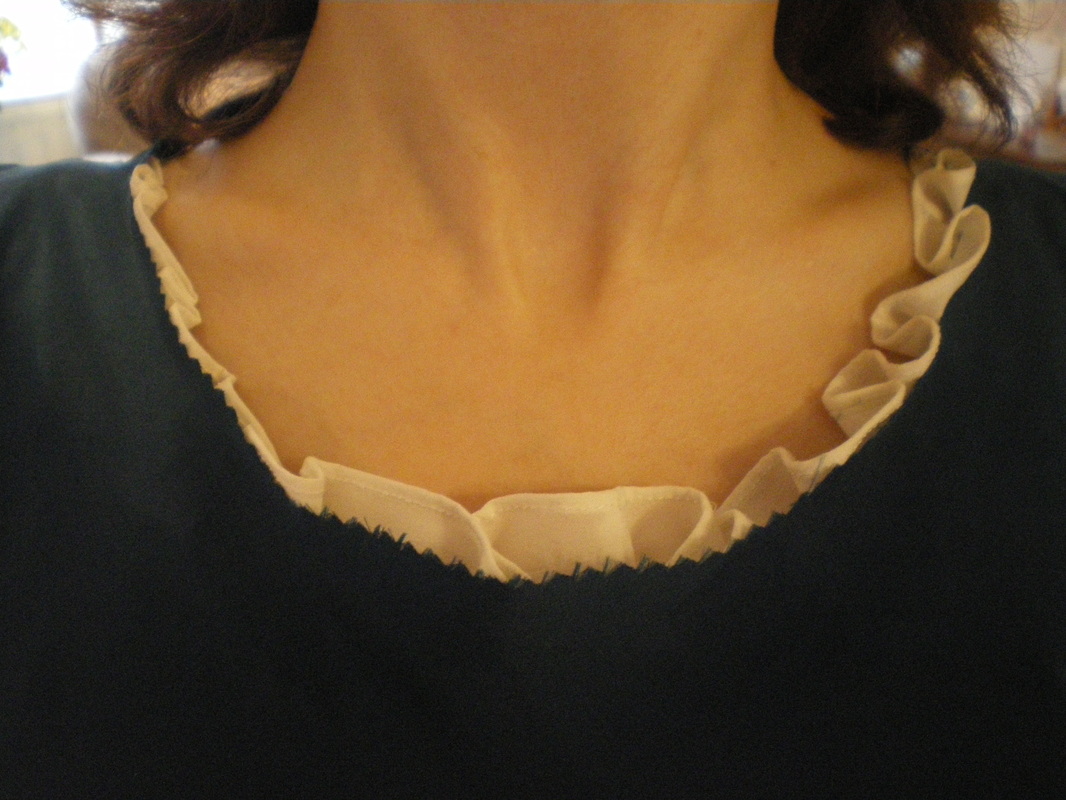
Measure around the neck opening and double the measurement. Cut a piece of fabric to this length x 1.1/2" (4cm). Roll hem on long side, put in a gathering stitich and evenly gather to fit the neck opening. Once sewn in place, run another sewing line on the outside to hold the gathers down against the petticoat. Sew on a short piece of ribbon to each side of the opening and tie to close. I decided to have a fully opened back to this petticoat, but you can close it with stud fasterners, hooks and eyes or velcro, the choice is yours.
|
Turn up the hem.
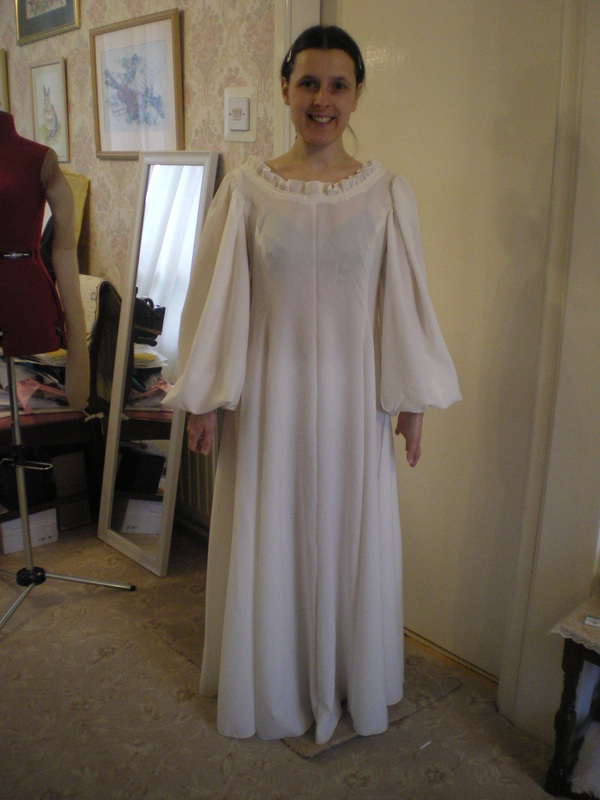
This completes the chemise/petticoat
To make the dress:
This completes the chemise/petticoat
To make the dress:
|
Using the same pattern, I increased the width at the bottom by 8" for each section.
I also wanted to cut the fabric on the bias, this gives the final dress a better "hang". But you can cut it on the straight grain to save fabric. I have included a video of how to find the bias line in my "video tutorials". (which will be added to the page when ready) |
|
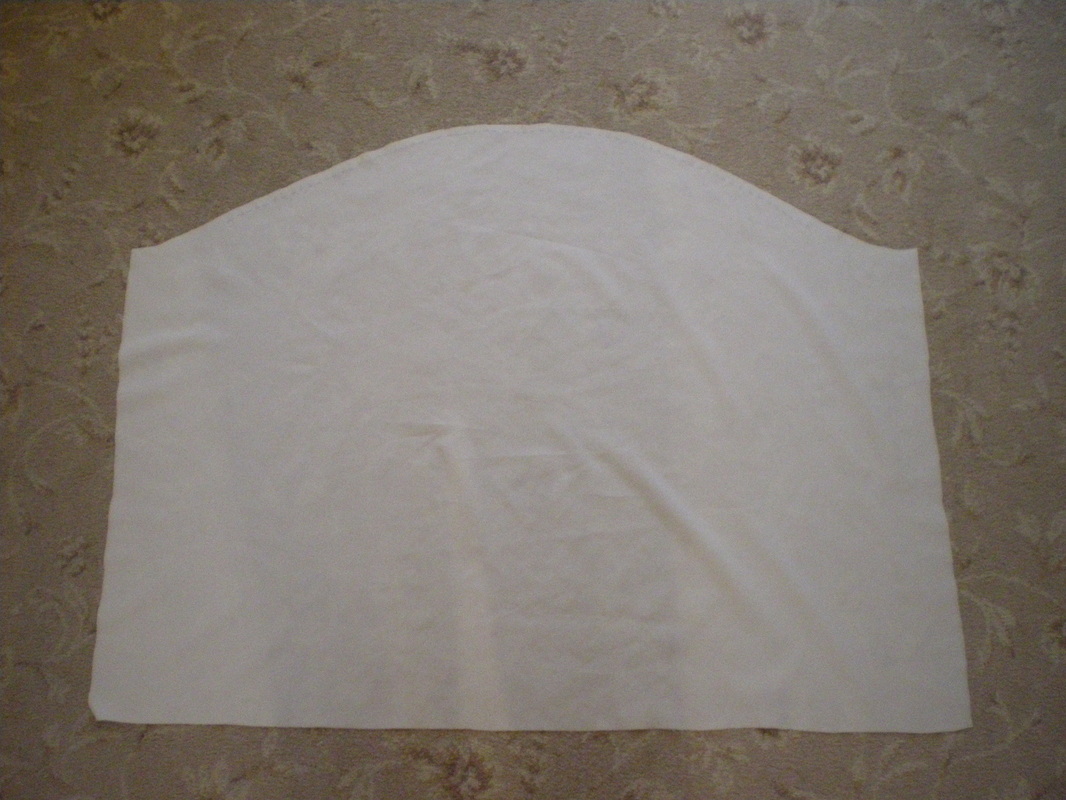
I found the best way to cut the curve for the dress, was to cut the line whilst wearing the petticoat, you just need to see about 1cm of frill showing.
|

|
Using the same instructions as the Blue formal dress, you will need to make interfacing pieces for the top of the dress, once made, attach to the dress. All instructions for doing this are on the video.
|
|
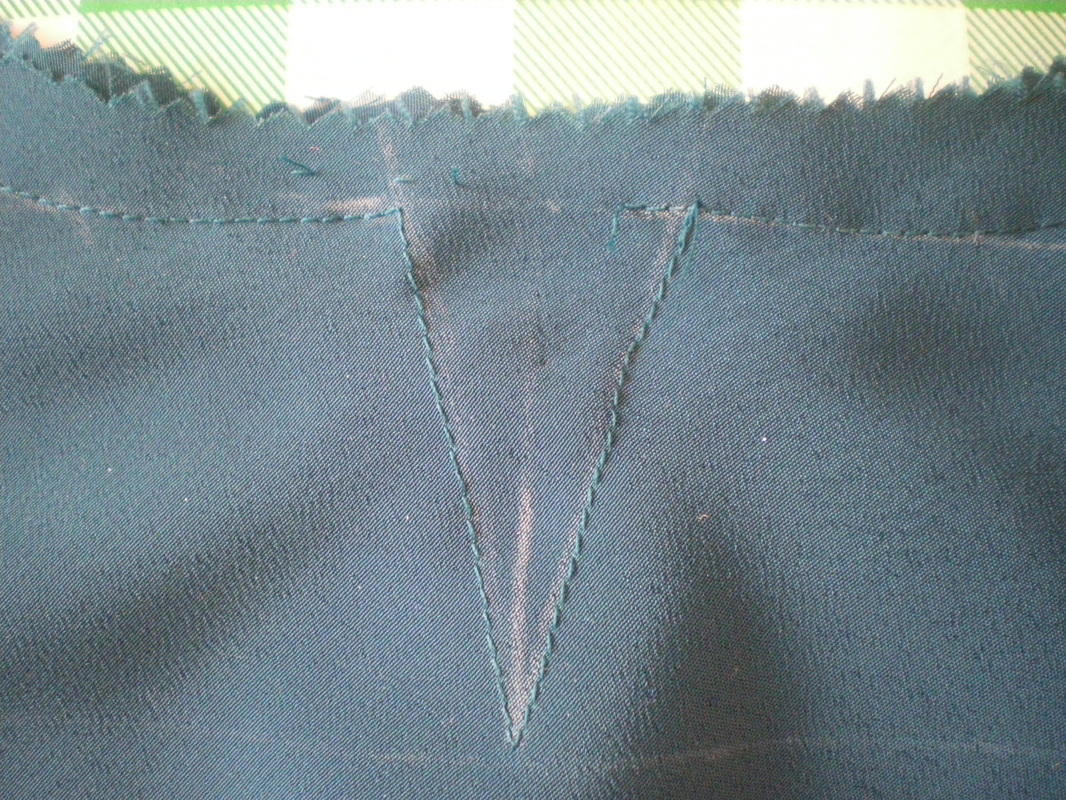
When attaching the facing to the neck, you will need to sew a point, approximately 2.1/2" (6cm) long. Cut down to the point very carefully, reduce the excess around the neck and snip all corners and curves.
|
|
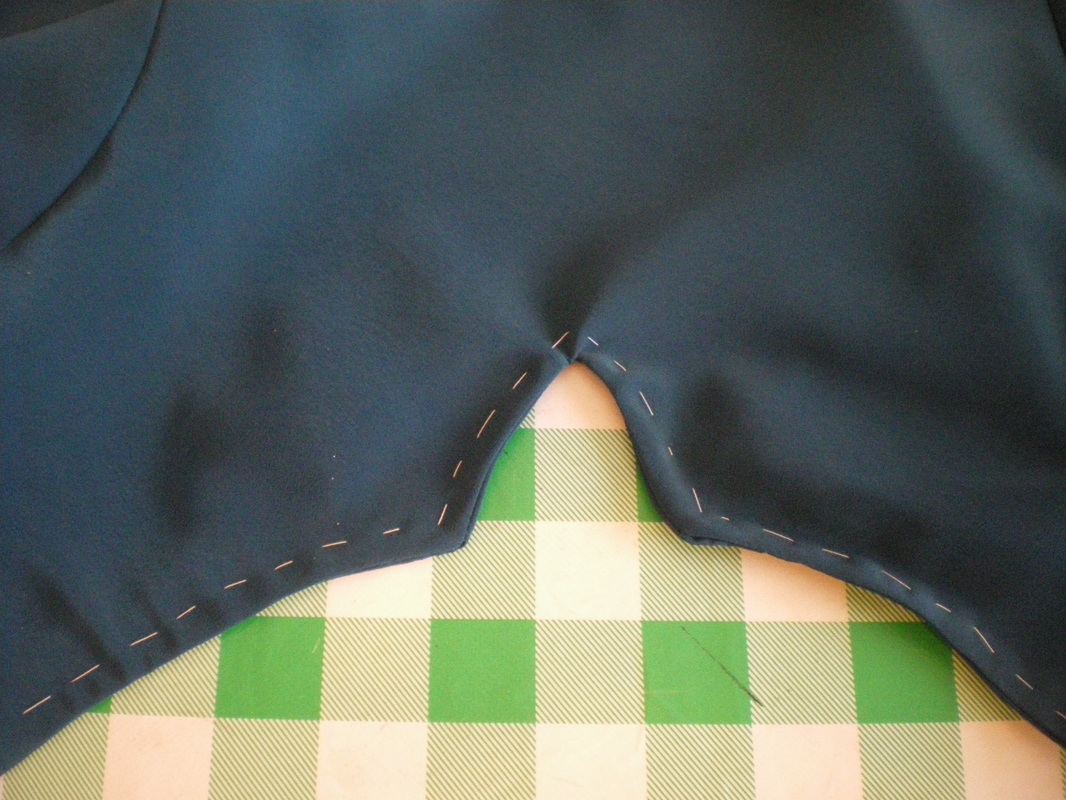
When you have turned the facing to the right side, tack around the neck and arms, and run a sewing stitch around them.
|
|
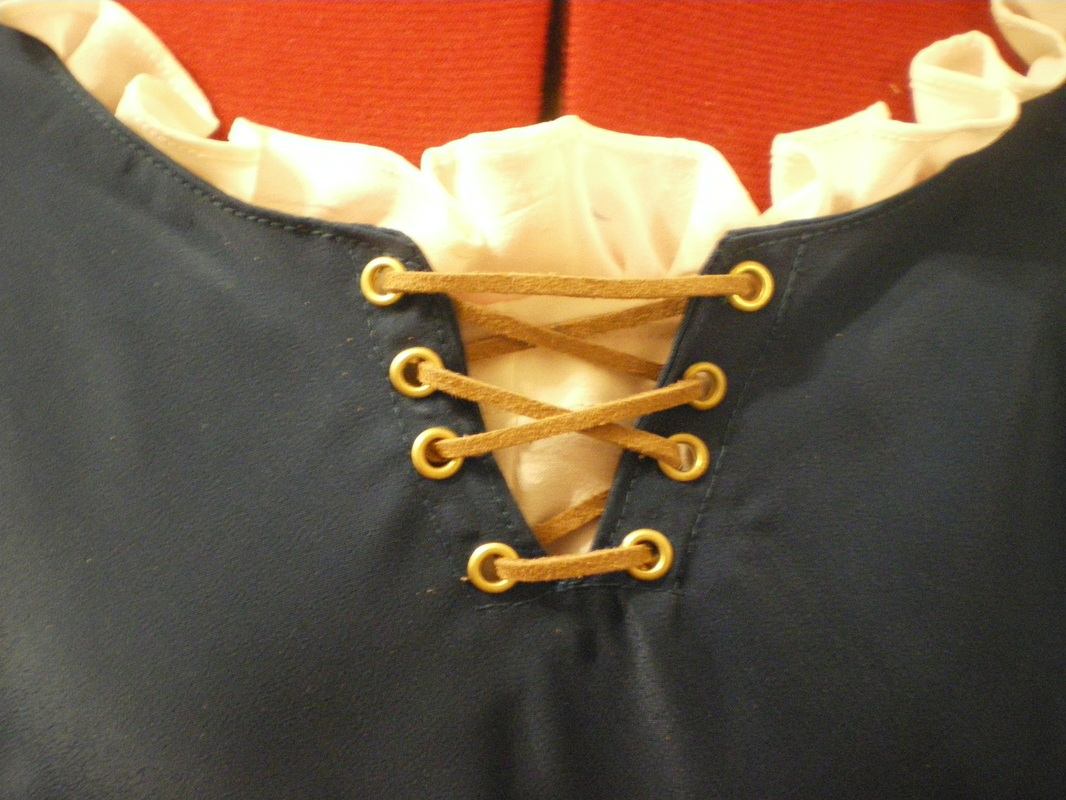
Sew an extra line wide enough to place the eyelets. 8 eyelets should be enough, lace up with suede thong.
|
|
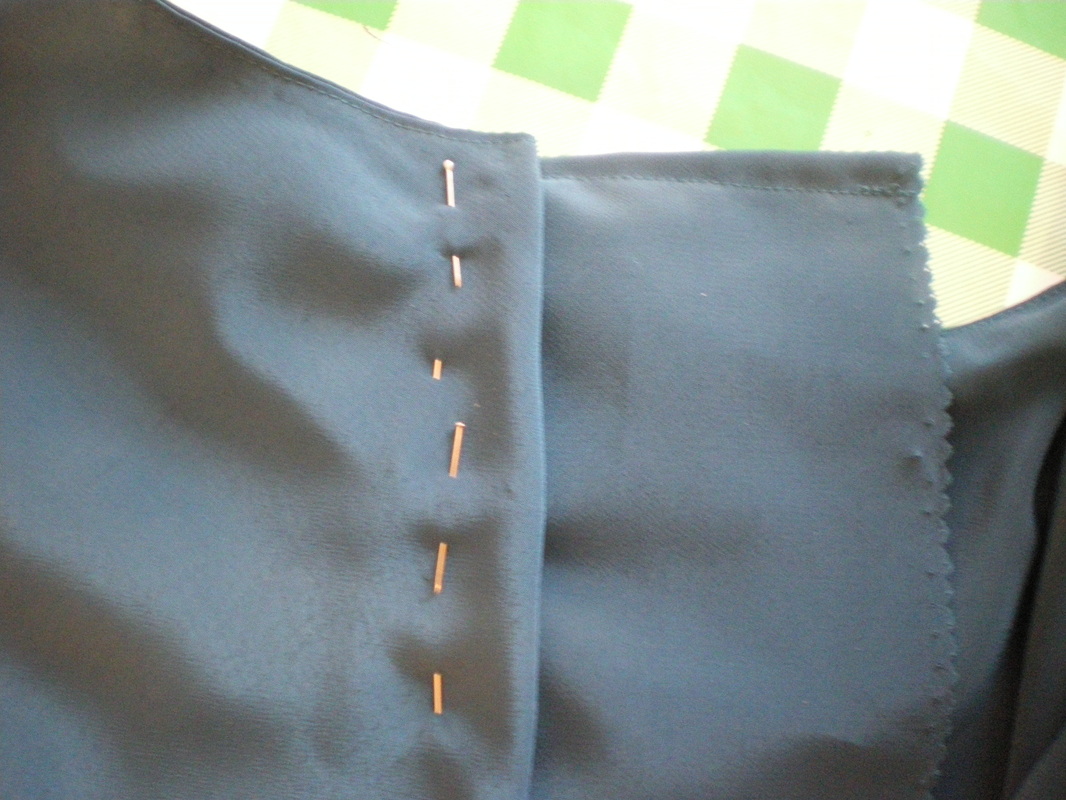
Using exactly the same method as the Blue formal dress, sew up the back seam up to the hips, insert strips of interfacing at the centre back opening.
|
|
Insert a placket in exactly the same way as the Blue formal dress.
|
|
Insert the eyelets using the same instructions as the Blue formal dress. This gold cord was put in temporarily for the photo.
|
|
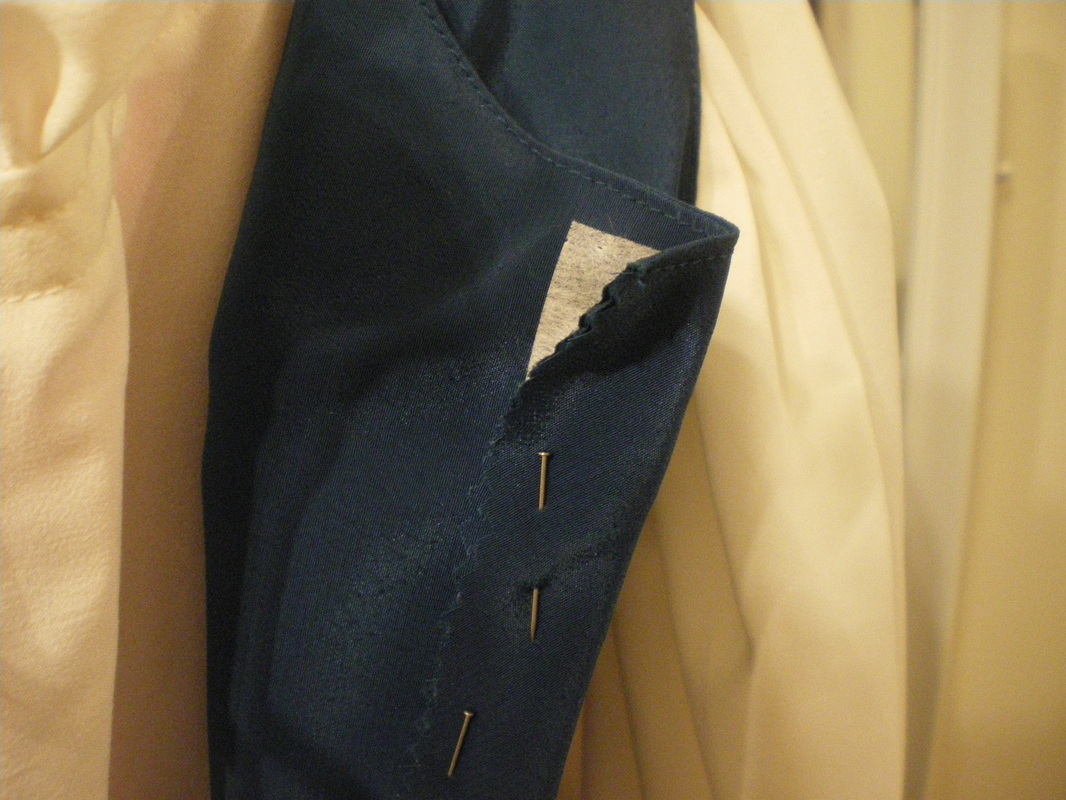
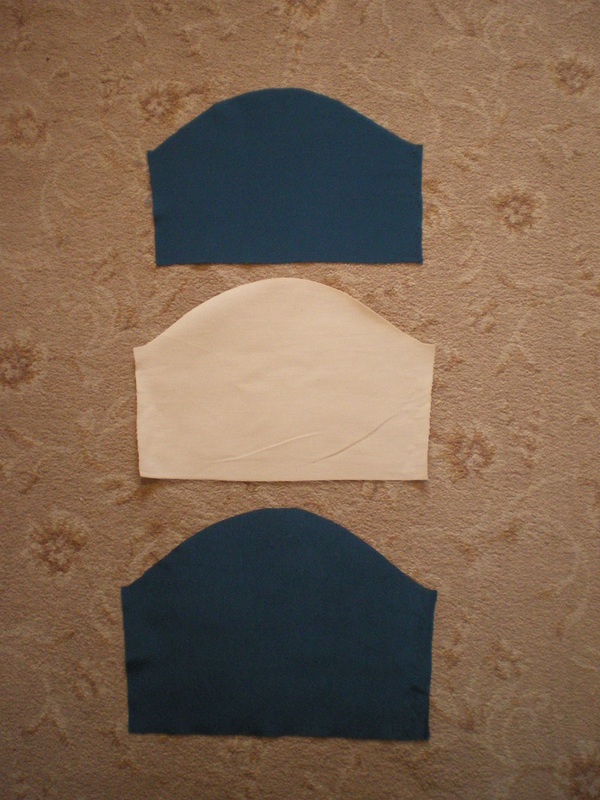
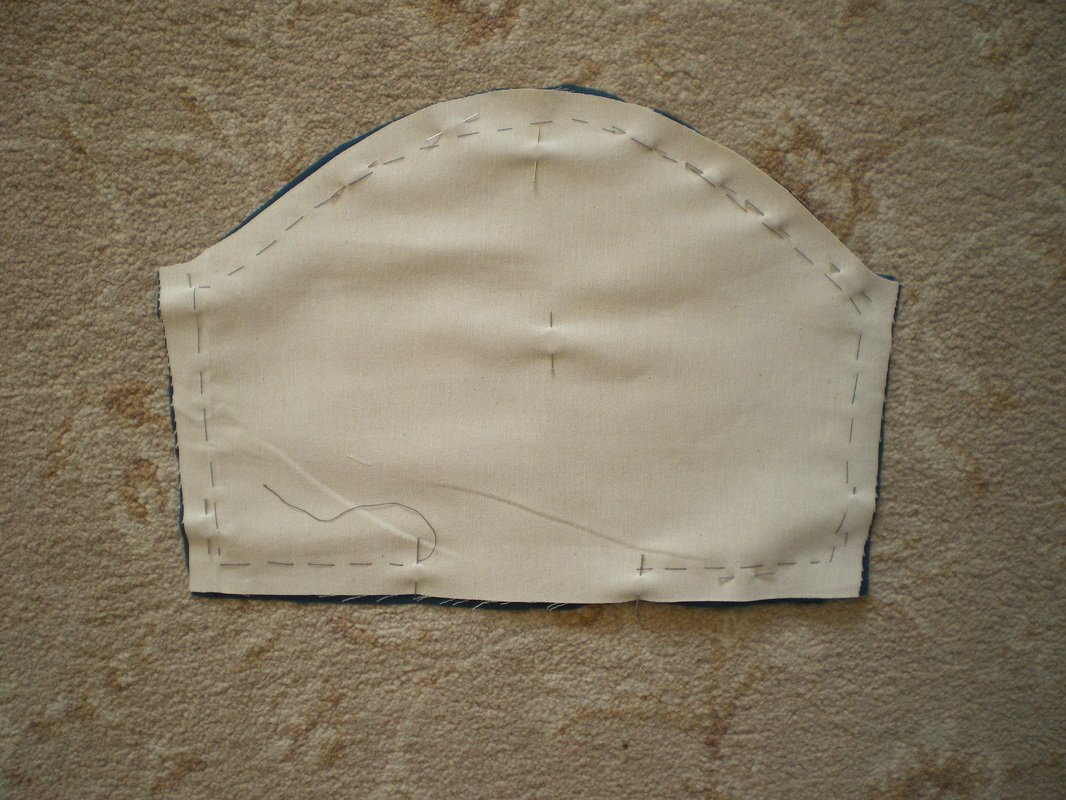
To make the upper arm gauntlets. Use the same sleeve pieces as the pattern. Cut the sleeve in half and reduce again in length. When this is wrapped around the arm, its needs to be approximately 2" (5cm) above a bent elbow.
You will need 2 pieces of fabric and one piece of sew-in interfacing for each gauntlet. |
|
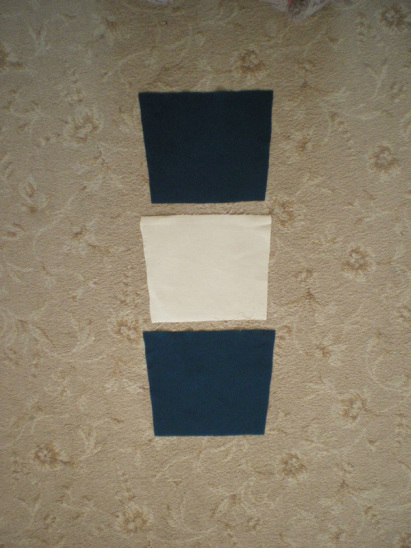
For the lower gauntlet, it needs to taper towards the wrist and fit around the arm comfortably without being tight. The finished length needs to be below the elbow.
Cut two pieces of fabric and one piece of interfacing for each gauntlet. |
|
Place in this order - 2 pieces of fabric, 1 piece of interfacing.
Sew around all four pieces, leaving a small gap at the bottom of each to turn the right way out. Reduce the excess fabric, snip the corners and curves. Turn the right way out. |
|
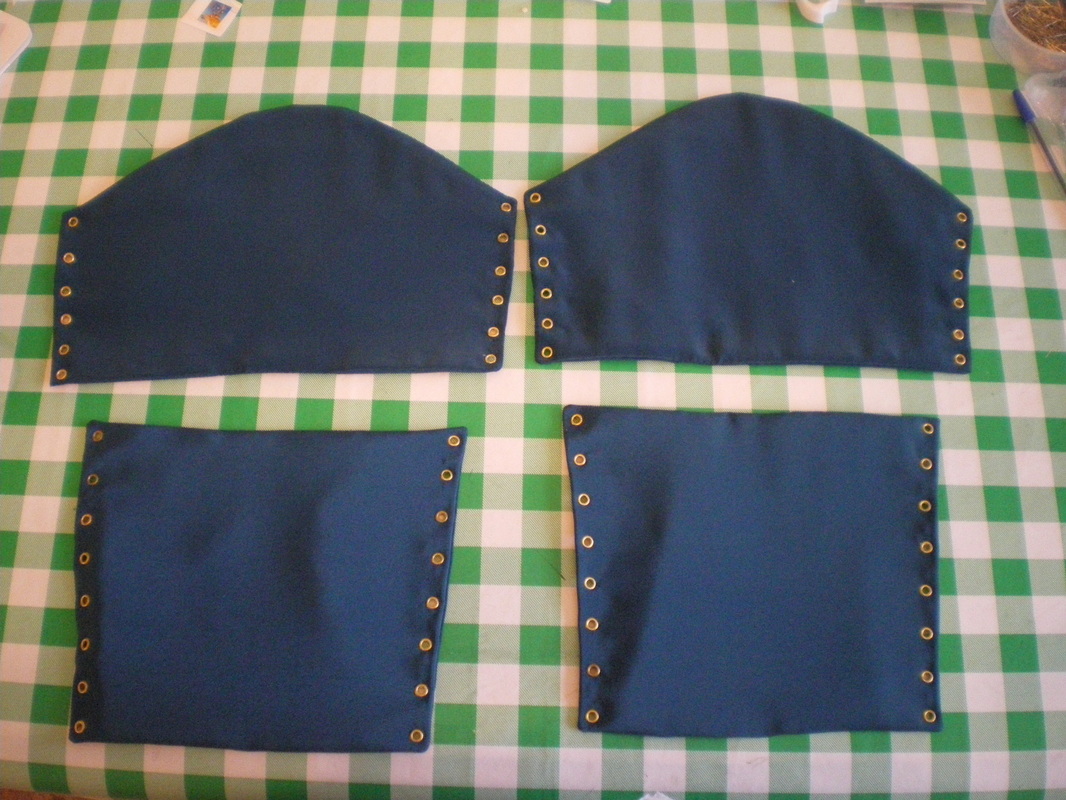
Hand sew the openings shut.
Insert eyelets to all sections. |
|
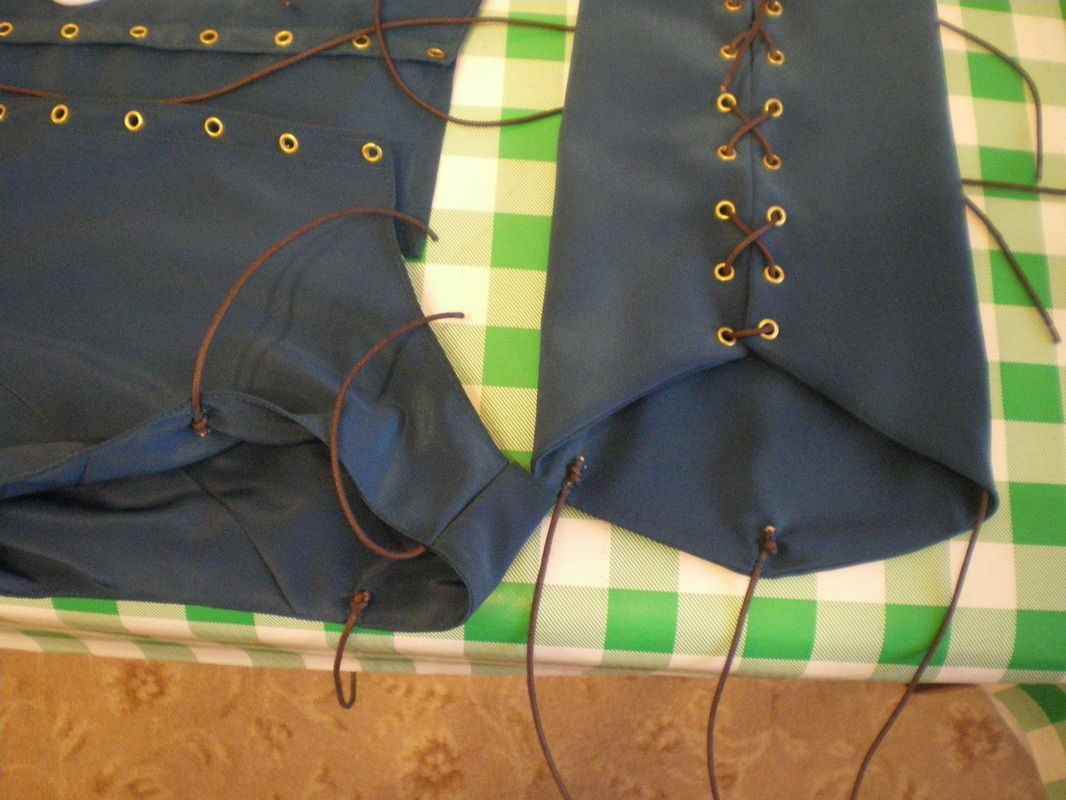
Cut pieces of brown cord, tie a knot at one end and hand sew three pieces to the arm of the dress (one at the shoulder seam, the others approximately 5" (10cm) apart.
Sew three to the top gauntlets, three to the bottom of this gauntlet. Three to the top of the lower gauntlet. Lace up the gauntlets to the required tightness and knot the cord so it does not come undone. |
|
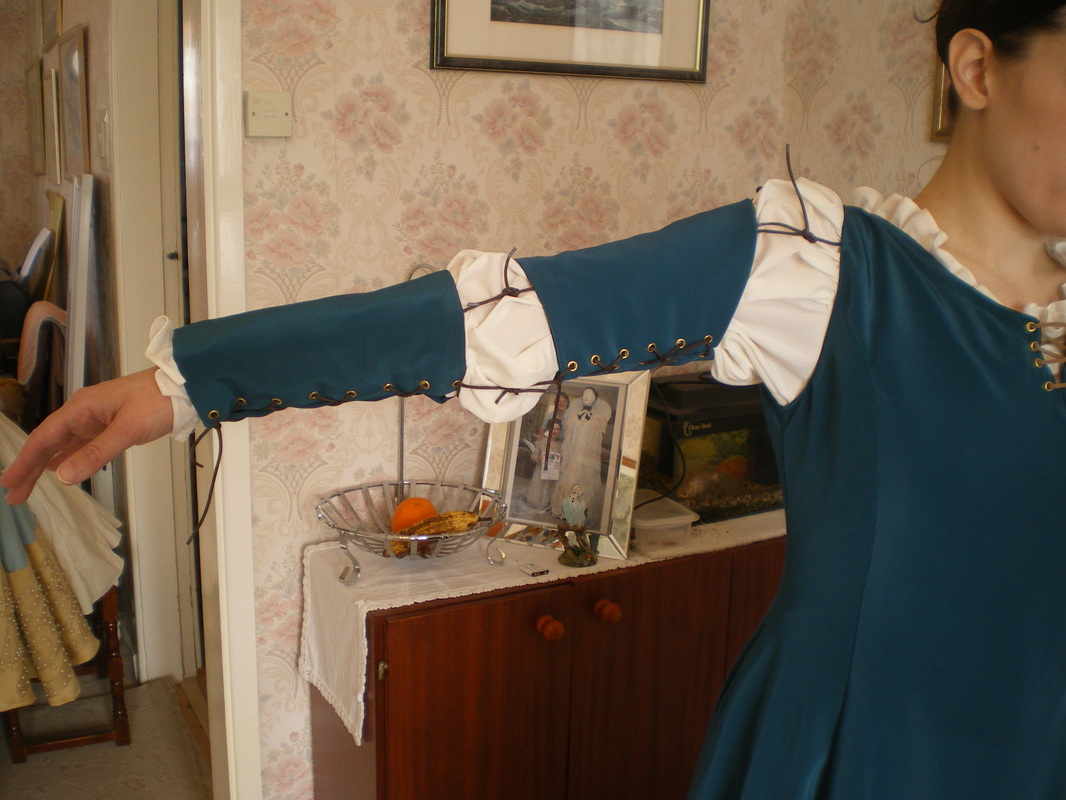
Showing all the cords tied.
Turn up the hem. |
This completes the dress
To Make The Cape:
To Make The Cape:
|
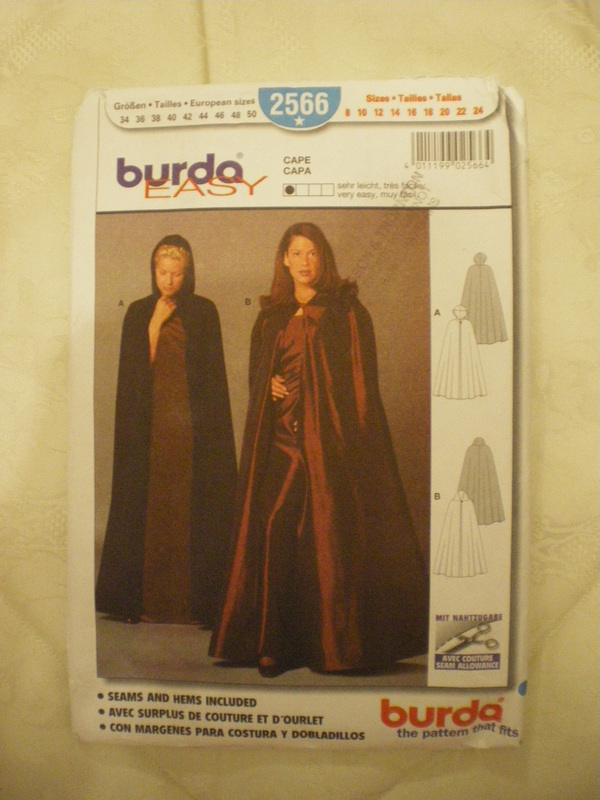
I used Burda Easy 2566 for the cape, but it can be any cape pattern, you can also use any dark fabric to make it.
|
|
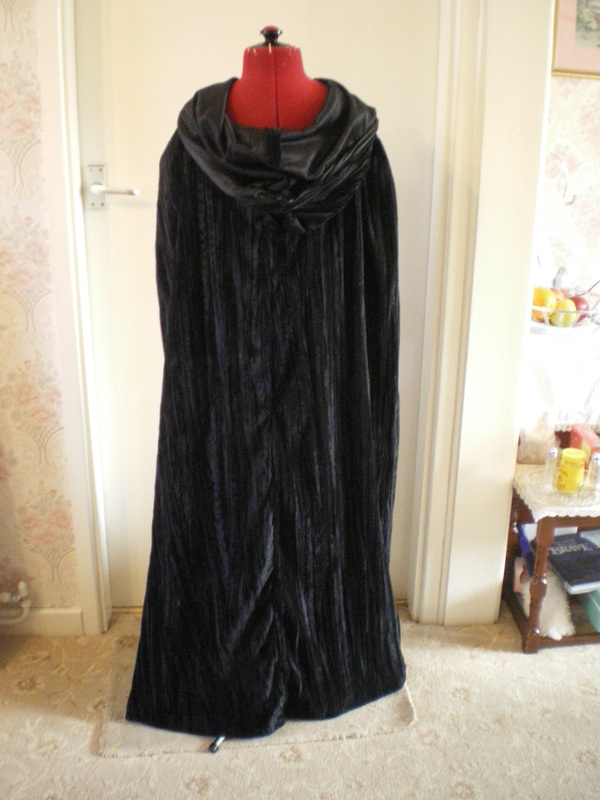
Because the wig is quiet big, you will probably have to make the hood bigger.
|
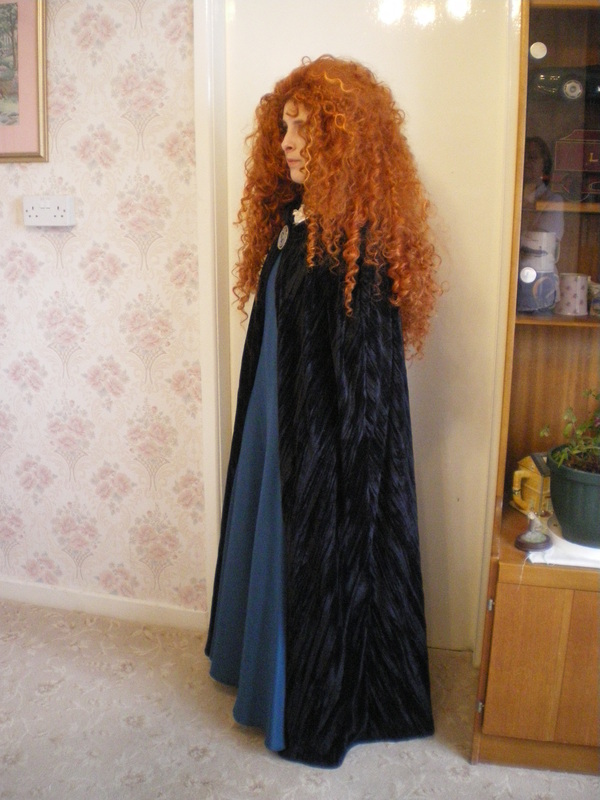
This completes the cape.
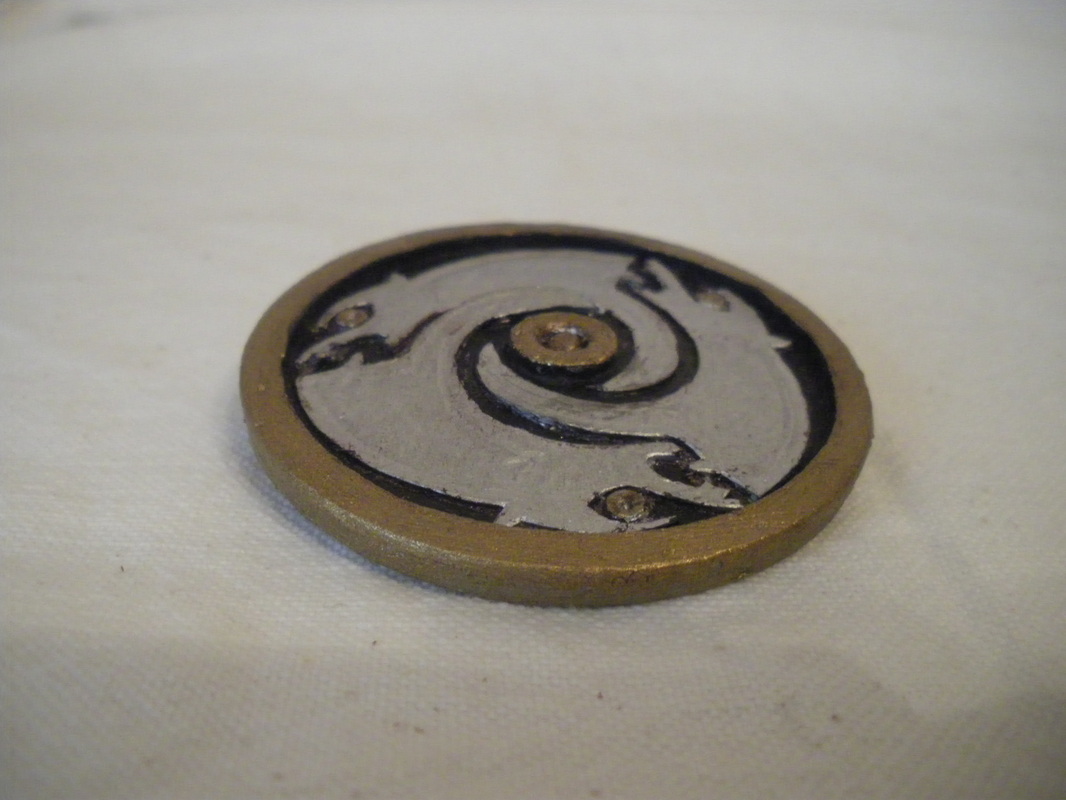
To make the brooch
To make the brooch
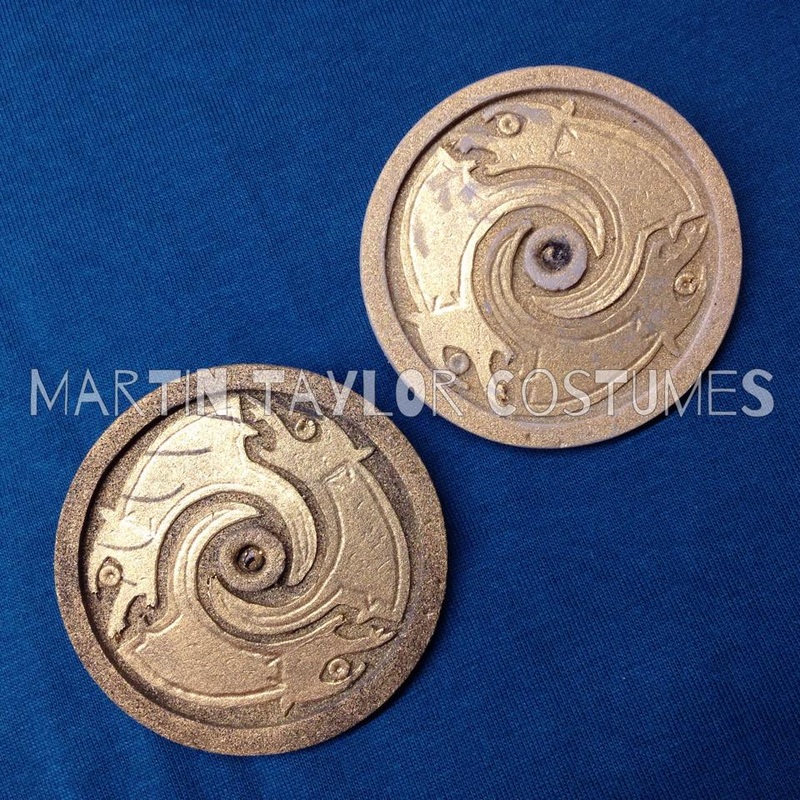
Our brooch making skills leave a LOT to be desired and decided to seek professional help from a very good friend of ours - Martin Taylor. He can be found on facebook by searching for Martin Taylor Costumes. He can use various media for his work, resin and metal. This is the finished result:
|
|
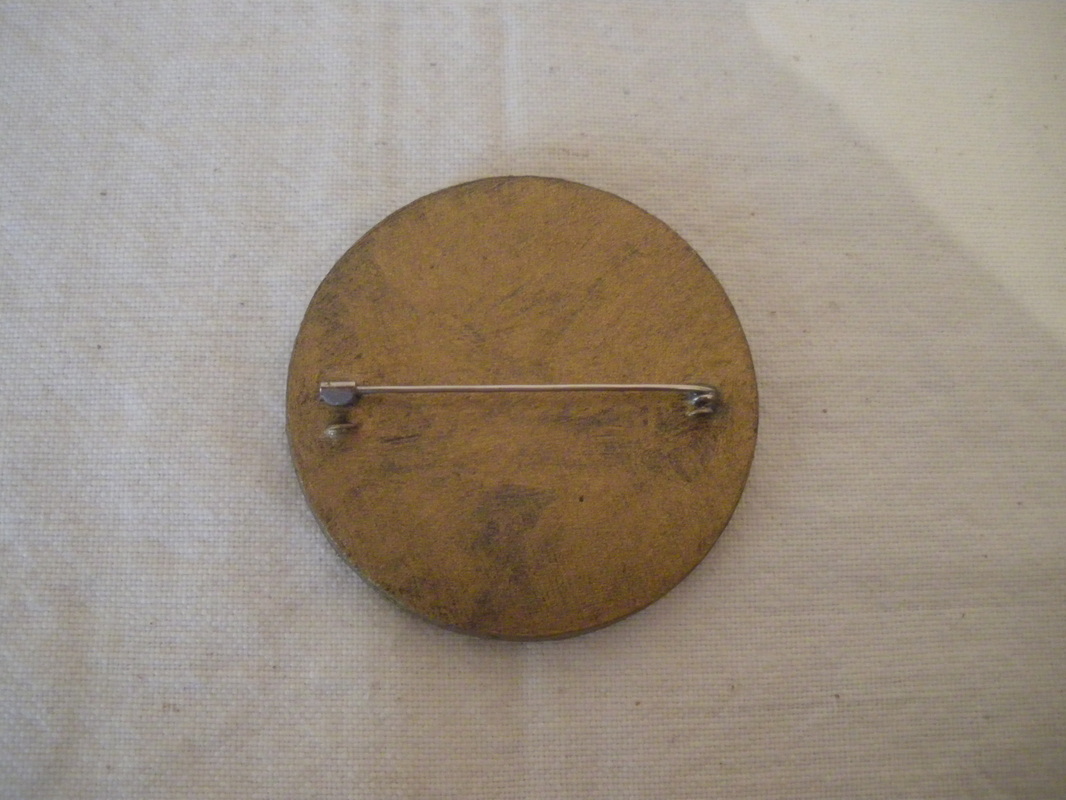
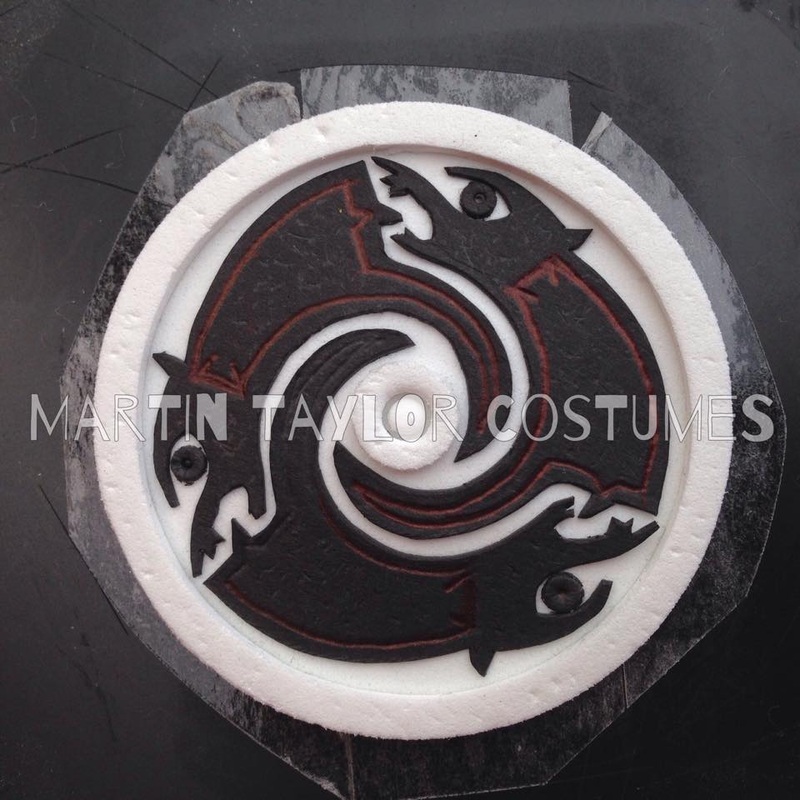
It started off with a silicon mould and was worked in antique gold resin and then painted. The brooch pin has been embedded into the resin.
|
|
