Tracy's Costuming World
  • Home
  • Photos
    • 17th Century Costume
    • Snow White Disney
    • Georgian Sacque Back Gown
    • Moana
    • Claudia, Interview With The Vampire
    • Aurora
    • Elsa from Frozen
    • Anna From Frozen
    • Padme >
      • Padme Lake Dress
      • Padme Picnic Dress
      • Padme Packing Gown
      • Padme Parade Gown
    • Dorothy Gale
    • Danielle De Barbarac
    • Disney Giselle
    • Rapunzel
    • Ariel "Kiss The Girl"
    • Belle
    • Merida Blue Dress
    • Merida Teal Dress
    • Cinderella
    • Scarlett O'Hara BBQ Dress
    • Scarlett O'Hara Prayer Gown
    • Christine Daae
    • Snow White
    • Glinda
    • Anna Coronation Dress
    • Live Action Cinderella
  • Video Tutorials
    • Cosplaying
    • 17th Century Costume
    • Disney Snow White
    • Georgian Sacque Back Gown
    • Scarlett O'hara Ruffles
    • Moanna
    • Live Action Cinderella
    • Anna Coronation Dress
    • Aurora, Sleeping Beauty
    • Elsa from Frozen
    • Padme Packing Gown Bands
    • Padme Parade Gown Wig
    • Padme Picnic Dress
    • Giselle's Ruffled Petticoat
    • Rapunzel
    • Christine Daae Tutorial >
      • Christine Daae Wig
    • Scarlett O'Hara White Prayer Gown
    • Ariel Blue Kiss The Girl Costume
    • Belle's Gold Ball Gown >
      • Belle's Ball Gown Wig
    • Merida Blue Formal Dress and Wig
    • Merida Teal Dress
    • Cinderella
    • Snow White
    • Anna From Frozen
    • Claudia Interview With The Vampire >
      • Claudia Wig
  • Costume Tutorials
    • 17th Century Costume
    • Snow White
    • Georgian Sacque Back Gown. How to measure >
      • Georgian Shift >
        • Georgian Stays
        • Georgian Pocket Hoops
        • Georgian Under Petticoat
        • Georgian Over Petticoat
        • Georgian Bodice
        • Sacque Gown
        • Georgian Stomacher and Sleeve Flounces
        • Georgian Hat
    • Cinderella Live Action >
      • Cinderella Shoes and Wig
    • Lake Dress >
      • Making the Lake Dress Wig
    • Picnic Dress >
      • Making the Picnic Gown Wig
    • Parade Gown >
      • Making the Parade Gown Wig
    • Packing Gown >
      • Making the Packing Gown Wig
    • Dorothy Gale >
      • Dorothy Shoes, Wig & Basket
    • Giselle >
      • Making the Giselle Wig, Tiara and Necklace
    • Rapunzel >
      • Making Disney Rapunzel Wig and Tiara
    • Scarlett O'Hara BBQ Dress >
      • Making Scarlett's Wig and Necklace
    • Christine Daae >
      • Christine Daae Wig and Mask
    • Danielle De Barbarac >
      • Making Danielle De Barbarac Wig and Shoes
    • Claudia Interview With The Vampire >
      • Claudia Wig
    • Anna Coronation Dress >
      • Anna Wig and Necklace
  • More Costume Tutorials
    • Moana >
      • Moana Wig
    • Scarlett O'Hara White Prayer Dress >
      • Scarlett O'Hara Wig
    • Ariel's Blue Sight Seeing Dress >
      • Ariel's Wig
    • Belle's Gold Ball Gown >
      • Making Belle's Wig
    • Merida Blue Formal Dress >
      • Merida's Wig
    • Merida Teal Dress
    • Cinderella >
      • Cinderella Choker and Wig
    • Young Snow White >
      • Wig
    • Anna From Frozen
    • Elsa from Frozen >
      • Elsa Shoes and Wig
    • Aurora >
      • Wig and Crown
  • Making A Corset
  • Previous Costume Events
  • Contact
    • Facebook
    • Email
  • My Rabbit Cocoa
  • Dora the Rabbit
  • The Rabbit Welfare Association
  • ITEMS/MERCHANDISE FOR SALE
  • Tracy's sayings
  • Symington 1890 corset for sale
  • Disney Moana Costume For Sale
  • DOROTHY RUBY SLIPPERS FOR SALE

      MAKING THE PACKING
               GOWN WIG
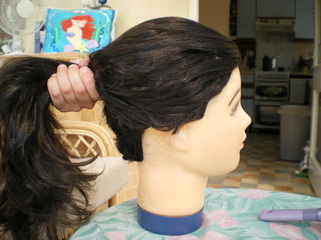
You will need two wigs, one for the main wig and one to make the ear pieces.
The wig should be dark brown with no fringe.


Picture
.
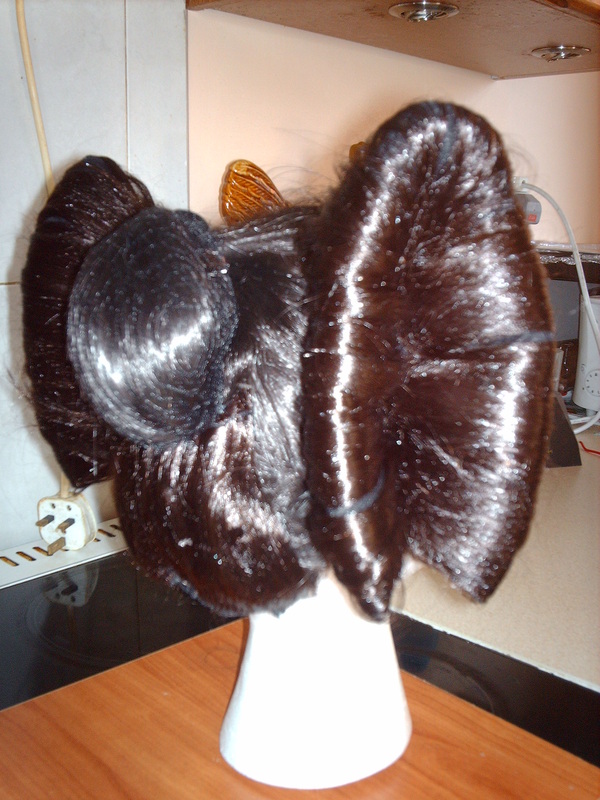
The hair is pulled back into a pony tail, wrapped around into a bun and secured with a dark net and pins.


Picture
.
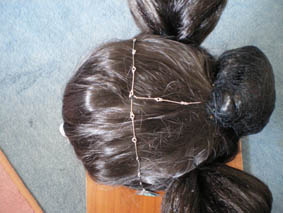
This top shot shows the bun in place.


Picture
.
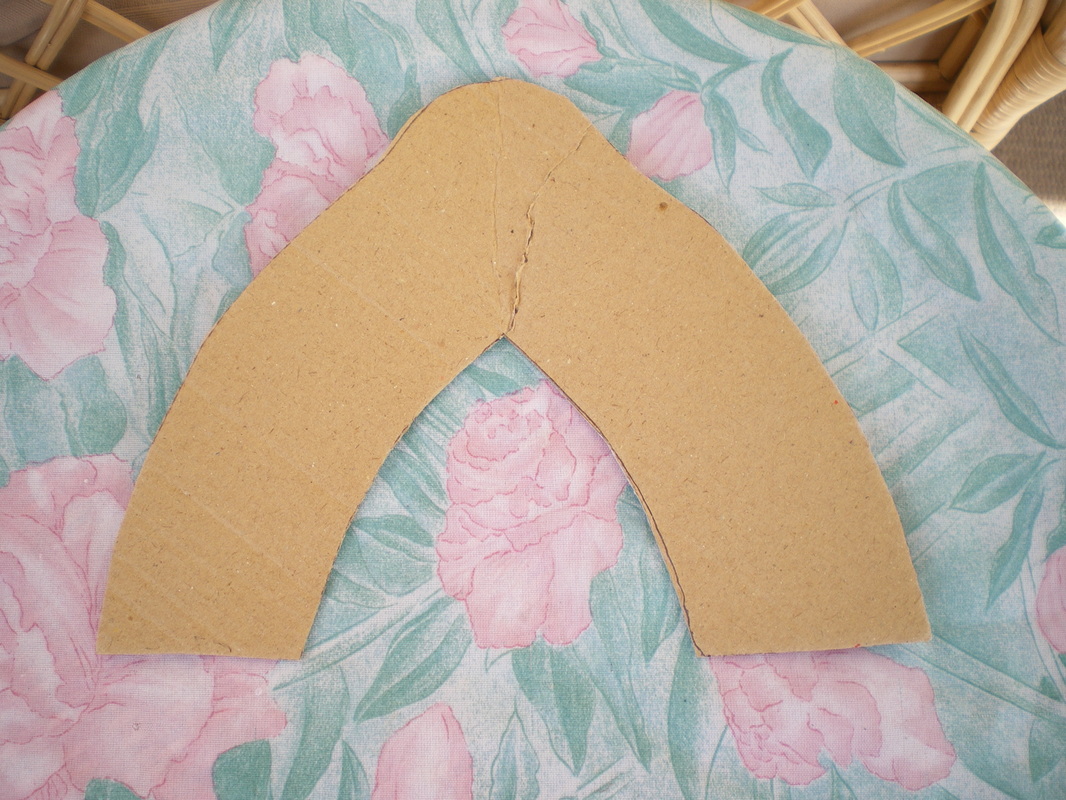
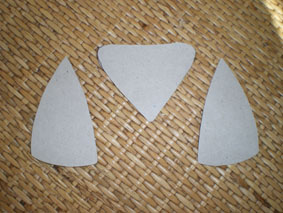
After experimenting with various shapes for the "ears", we came up with this shape, make sure it is not too big, by folding it in half, placing it on the side of the head. The width of the final design needs to be narrow as it will be covered in felt and then have hair wrapped around it, so you could end up with enormous "ears", try a practice one first if you have a spare wig you don't need.


Picture
.
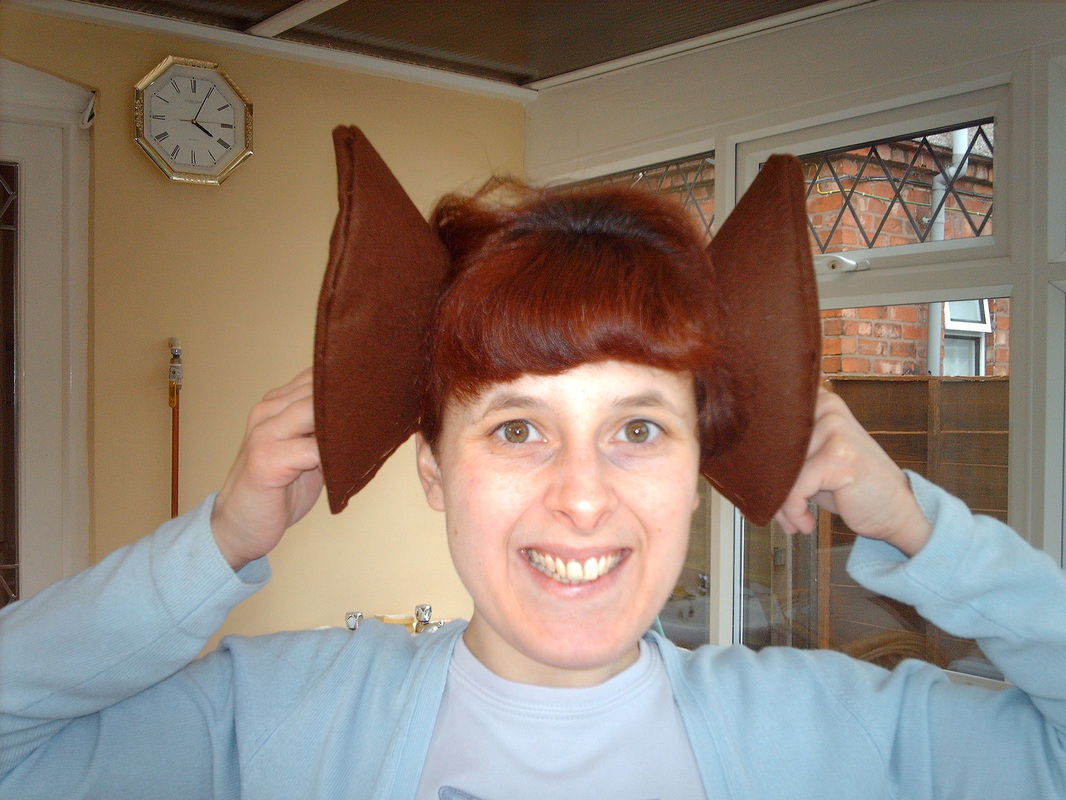
Cover the cardboard cut out with dark felt, if you have black it would be better.
Picture
.
Using your second wig, part the section right down to the net and cut between the sewing lines, then cut the wig into widths of managable sections
Picture
.
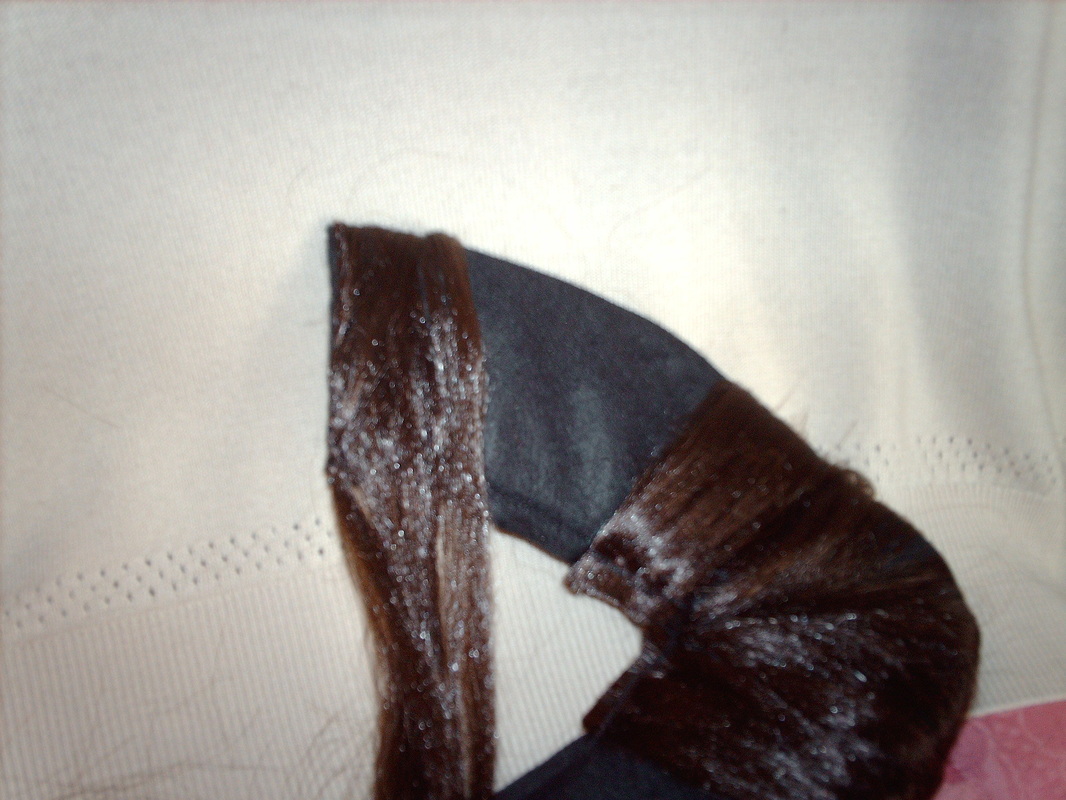
Sew the net to the inside edge to start, then wind the hair around the cut out. Try to end at the inside edge where you will sew it down. Before cutting, take another section, starting with the net, sew it to the inside edge, then continue winding until you have completely covered the cut out. I then over stitched the hair at the ends to stop it falling off.
Picture

Bend the cut out, leaving the bottom open, then sew the "ear" to the wig netting very securely,  keep checking to make sure they are symetrical and as the same height.
To make the head jewellery.

Picture
.
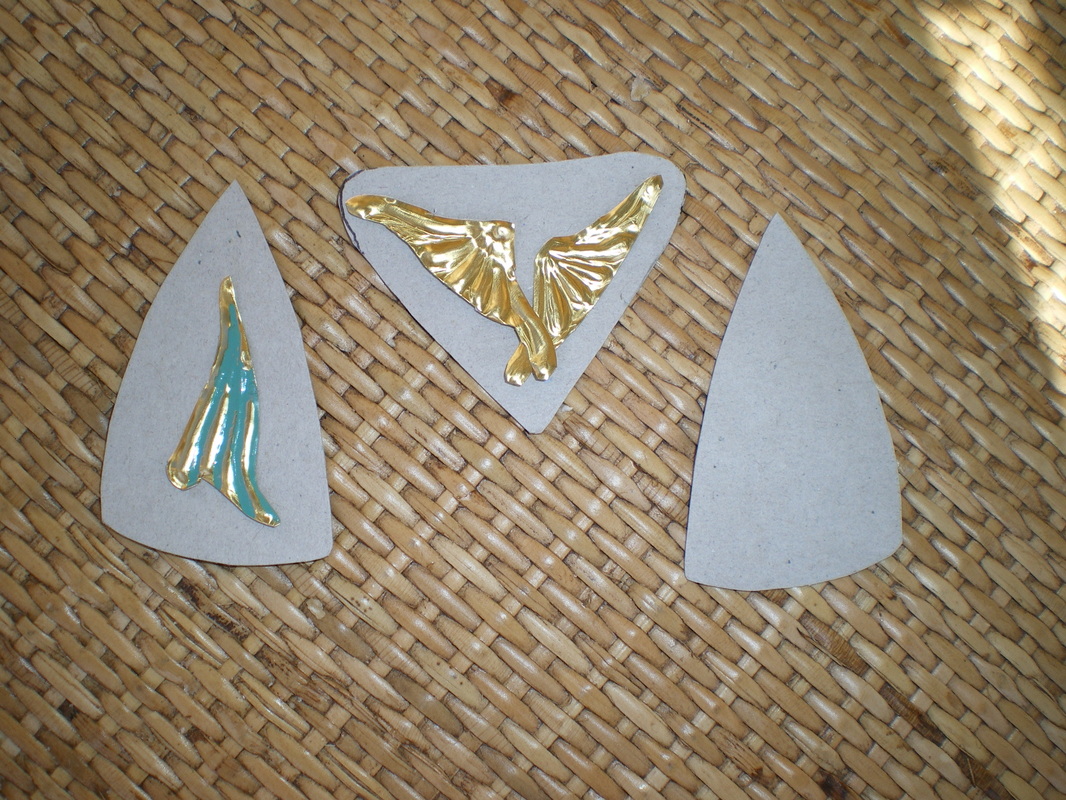
Before cutting the pieces out of aluminium, I did practice pieces using card, check reference pictures for the actual size.


Picture
.
I used some scraps of metal to do my practice motifs to get the size right. These were embrossed on the reverse then highlighted with turquoise paint. When I was happy with the design, I cut all the pieces out of alumiunium and did it all again!! You will need to puncture small holes into the top of the ear pieces.


Picture
.
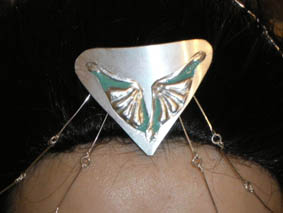
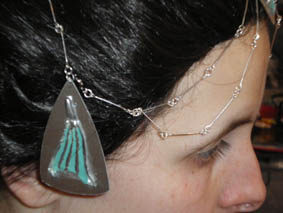
Start at the ear piece with a jump ring through the hole. Using craft pliers, turn each end of the pin into a circle. add a jump ring, then attach another pin, working your way over the top of the head to the ear piece on the other side. I wanted this piece to be permanently attached to the wig, so it was sewn into place. The ear piece, should just cover your ear.


Picture
.
Starting at the middle position, continue making links as far as the bun, these were sewn onto the wig again.
Picture
.
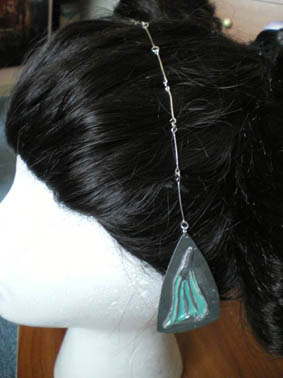
Having made some more chain links, these were attached to the back of the triangle using heaving duty sticky tape to make sure they didn't come off. Also on the reverse, I attached a hair extension clip (as I did with the "tie" on the Parade Gown), I want to be able to take this piece off when the wig is stored, and it also makes it easier to put the wig on without this piece being in place.


Picture
.
Connect up the links with the bottom one sagging slightly. Make one more link to the ear piece, but this time, connect it to a necklace clasp because I need to be able to remove it.
Picture
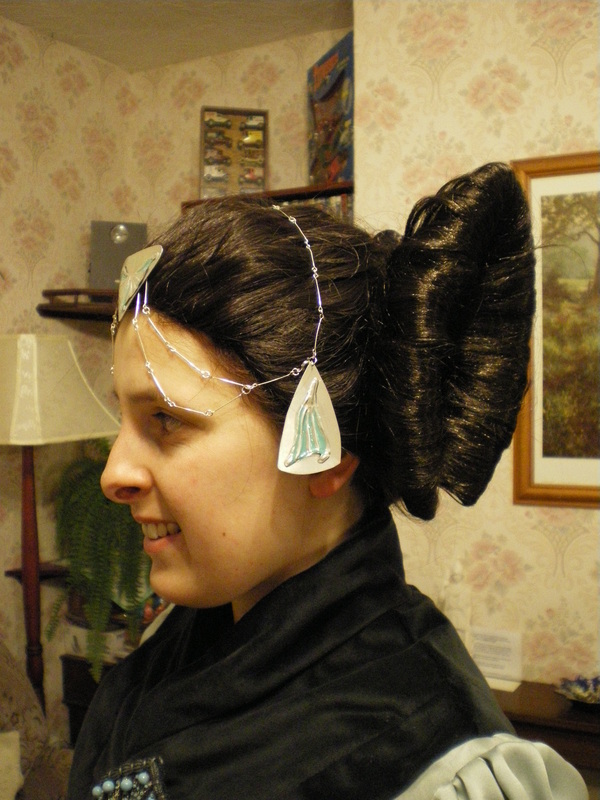
This completes the wig and hair piece.
Powered by Create your own unique website with customizable templates.