For this costume, you will require experience in bead work and ruffling.
Difficulty factor 8 - 10
Unfortunately, I didn't video the making of this dress as I didn't have a video recorder at the time, but there is a video on making the ruffled skirt in my "video tutorials"
Please be aware that
we do not make costumes
to sell or hire
Difficulty factor 8 - 10
Unfortunately, I didn't video the making of this dress as I didn't have a video recorder at the time, but there is a video on making the ruffled skirt in my "video tutorials"
Please be aware that
we do not make costumes
to sell or hire
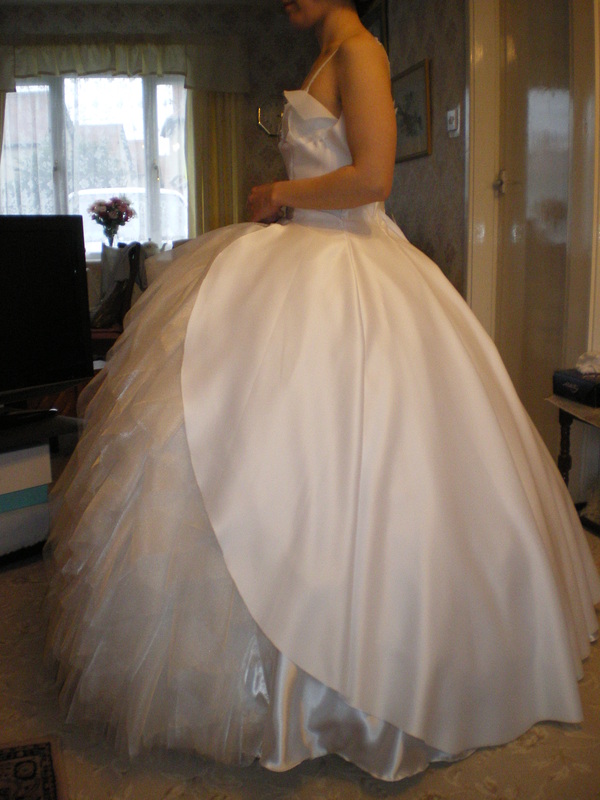
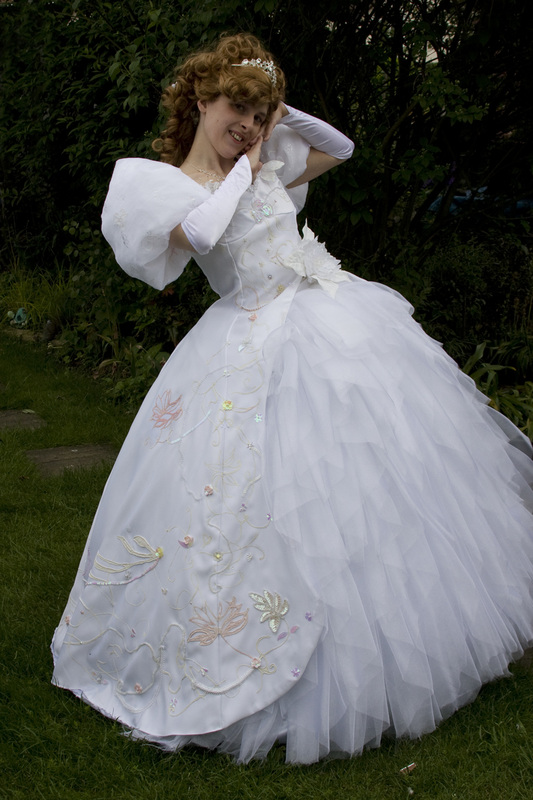
Making Giselle's Wedding
Dress
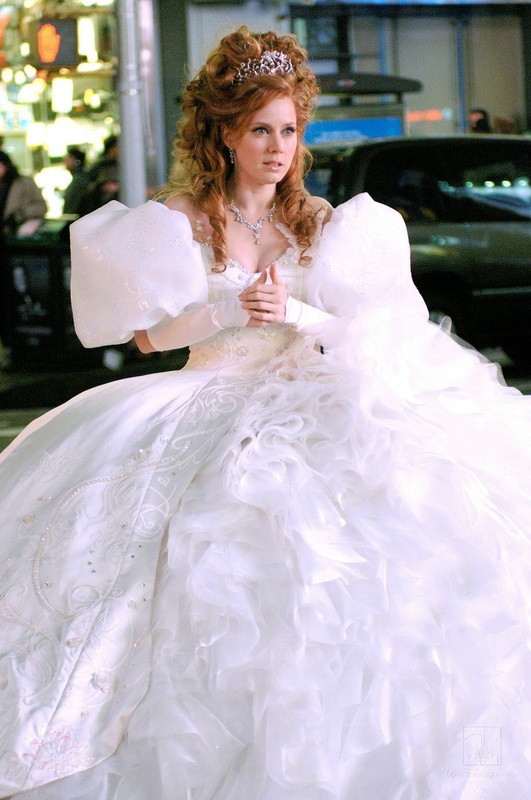
The original costume worn by Amy Adams as the character Giselle from the film Enchanted.
Hoop:
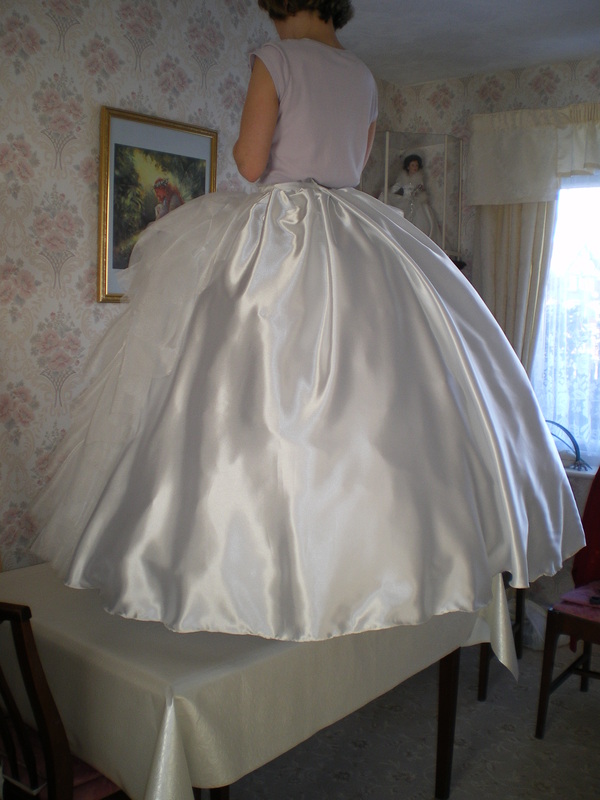
We bought a 6 boned hoop and cut it down to a 5 boned one. Really though, you need a 7-9 boned skirt to take all the weight.
Circumference: 168"
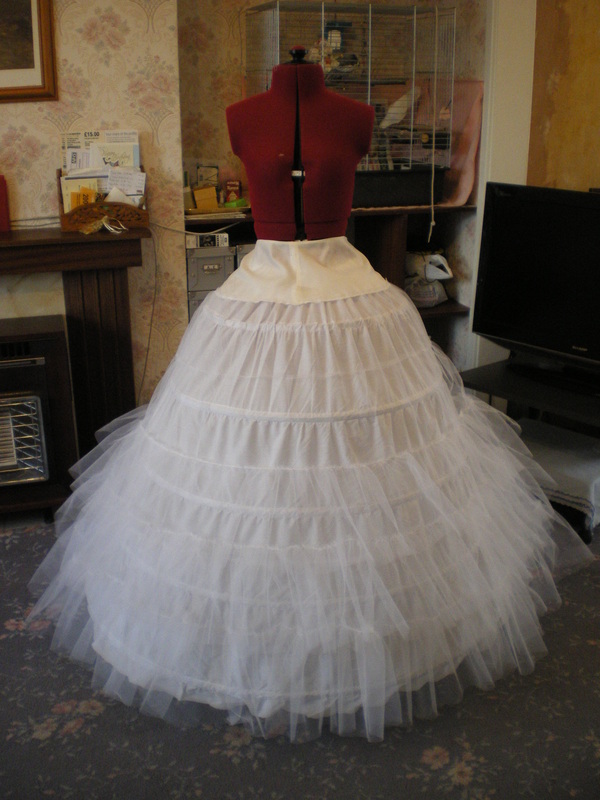
Base Petticoat:
4 metres Good quality white bridal net
Small piece of white fabric to make yoke
Piece of velcro
1.1/2" white ribbon
Ruffled Skirt:
5 metres white liquid polyester Satin
2 x 25 metre rolls White Sheer Soft Crystal Organza x29cm wide
Piece of velcro
Sleeves:
1 metre Explosion Organza
1 metre White Organza
1 metre stiff net
White cotton lawn for lining
Overdress:
6 metres good quality matt Satin
2 metres white lining for Bodice
White 18" concealed zip
Additional:
1 Large silk or feather butterfly
Several medium butterlies
Several small butterflies
Small flower motifs
1 metre x 2cm lace for top of bodice
Home made or shop bought crystal spray
Very large white flower for waist decoration
White and pink puff paint
powdered glitter
Sequins
Pearl Beads
Crystal Beads
Edging ribbon
Trim of any description
30 small white ribbon flowers
White seed beads
Holographic sequins
Flat back Swarovski crystals
Large white flower

I used Butterick B4131 for the bodice, unfortunately, this did not have separate cups, so when I cut up the pattern I made my own (see later instructions)
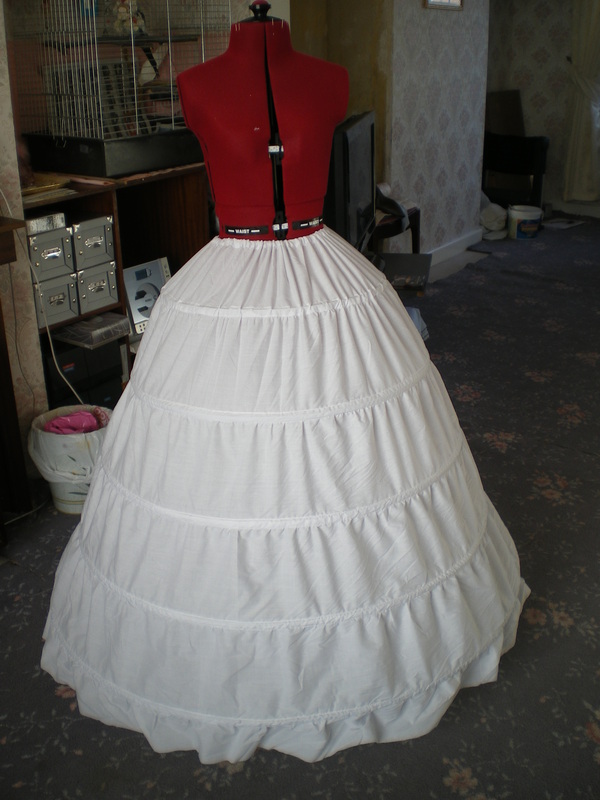
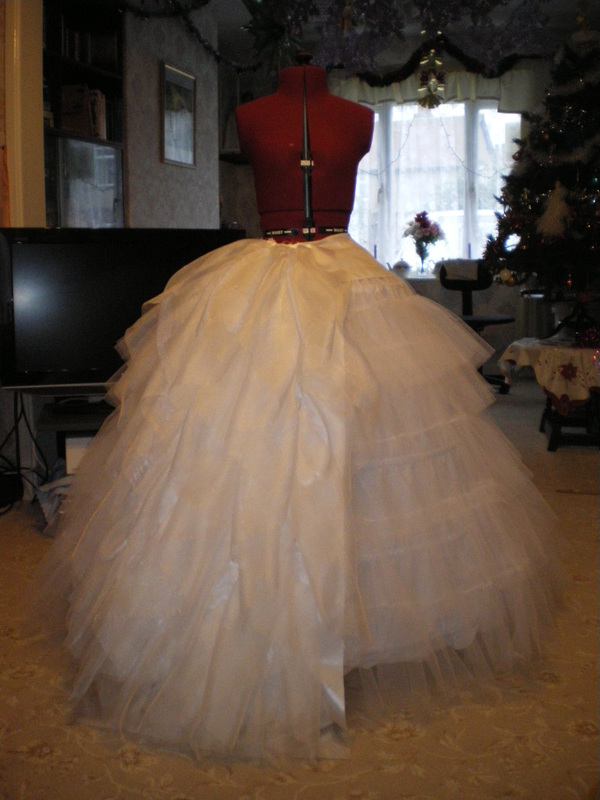
This is the hoop I used, but ideally it needed more boning.

To make a base for the petticoat, I started with a wide yoke to reduce bulk at the waist. Then ruffled 20cm wide net. When it has reached the desired length for the hoop, sew up the back seam, leaving a gap.
Then, starting from the bottom, cut and ruffle, 20cm wide net and attach to the base. If I were to make this again, we would put a lot more layers into the net. You can also see my video tutorial for the ruffled skirt in my link.
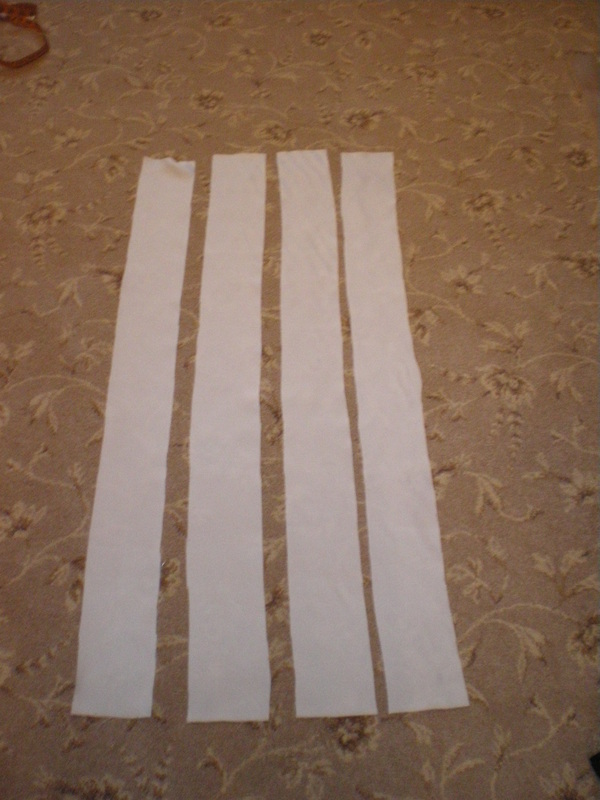
Take a measurement from the waist, diagonally down over the hoop to the floor, then cut strips of white polyester satin to this length x 10cm wide. You will need approximately 25 - 30 of these, but you can always add to them later if needed.
|
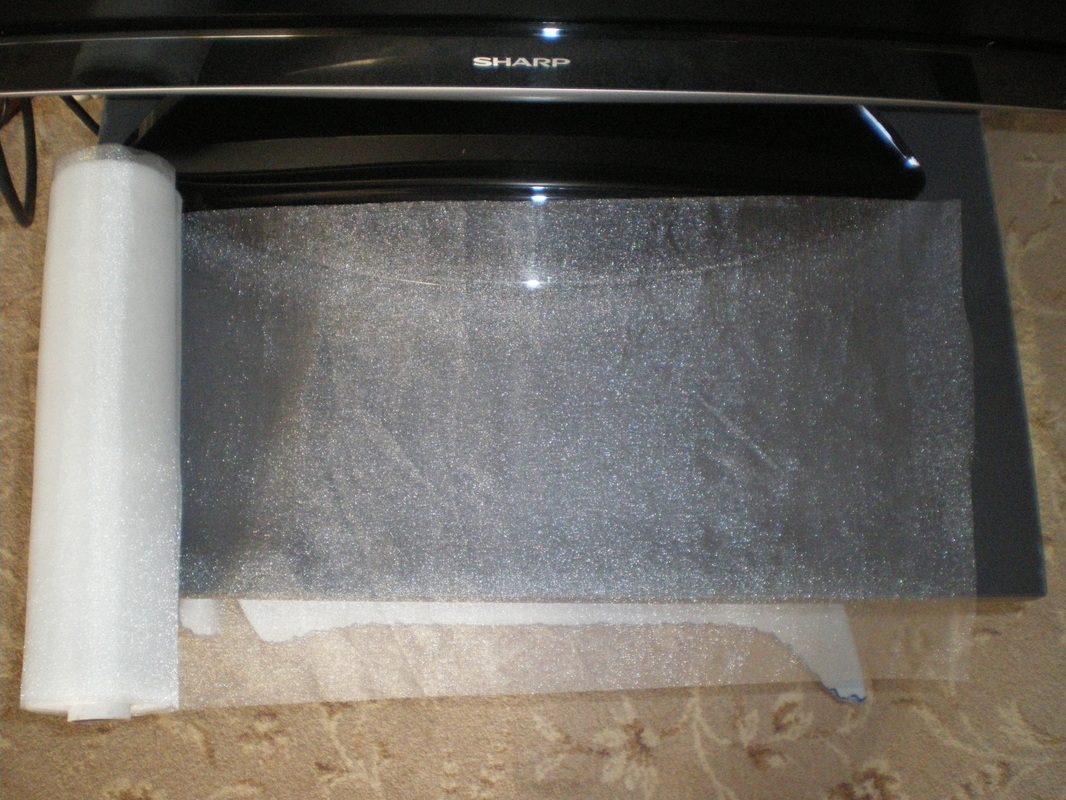
Invest in a ruffler for your sewing machine, you will need to ruffle ALL 50 metres of white crystal organza.
|
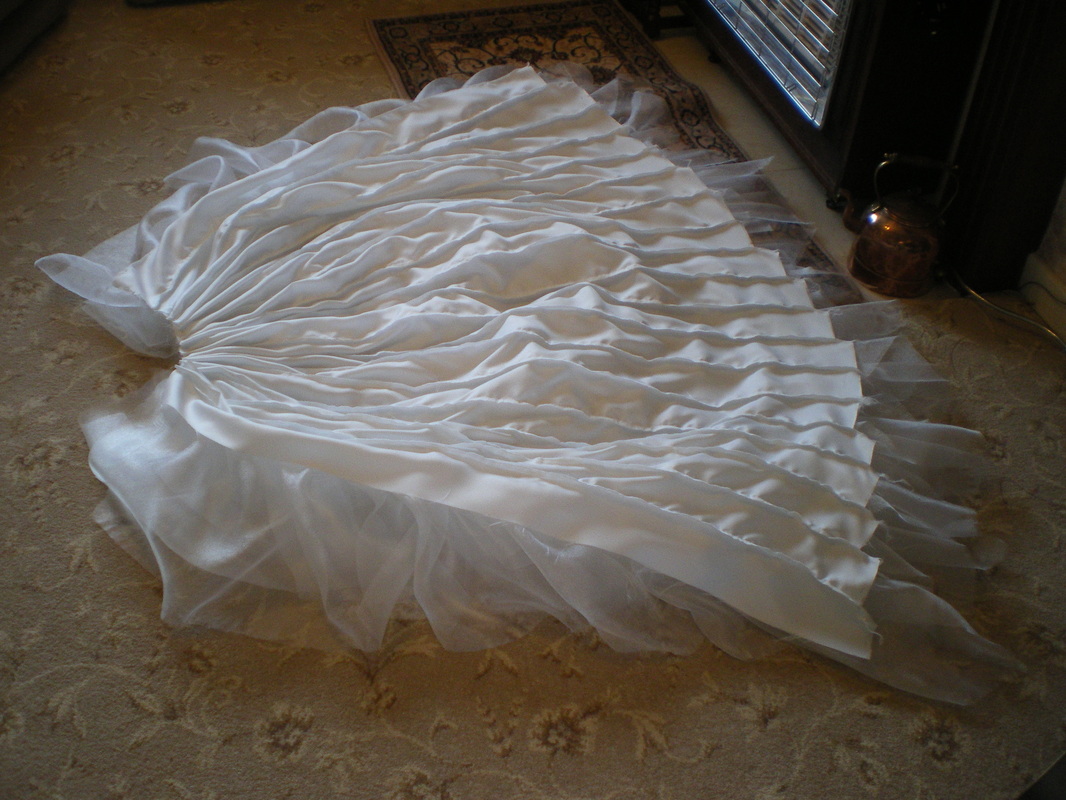
You are now going to create a satin and organza sandwich!
I have made reference tutorials for Youtube for this ruffled skirt, these links will be included at the end of this tutorial.
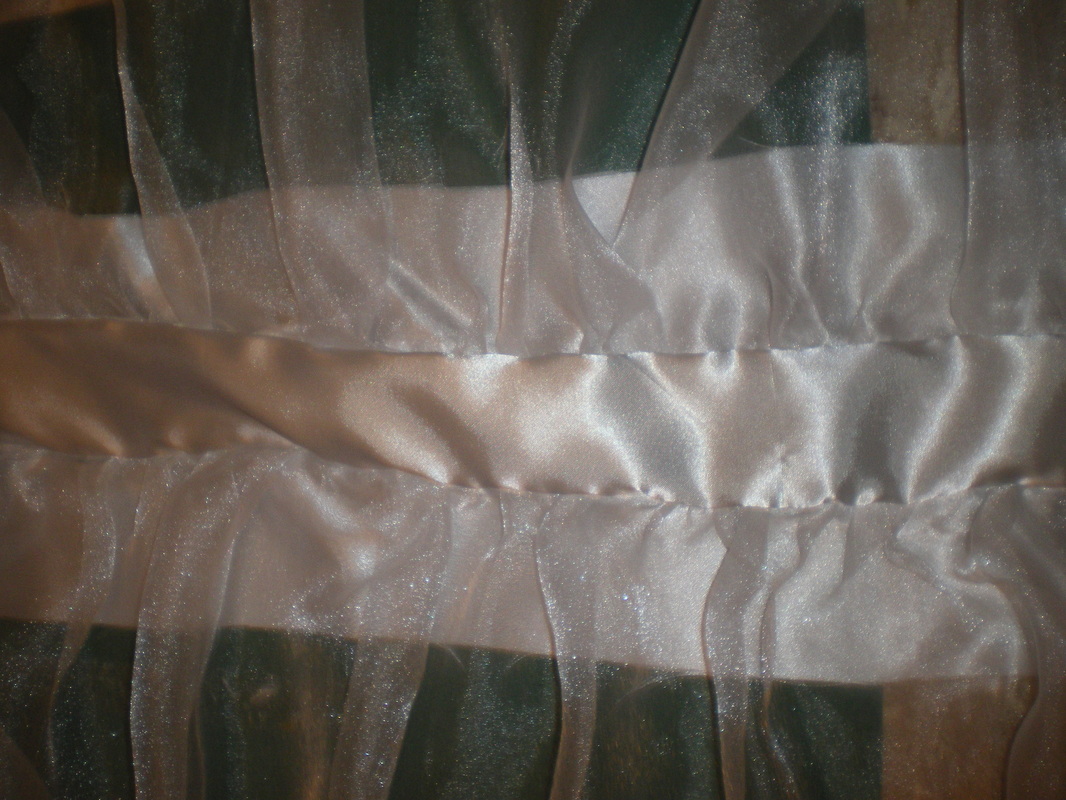
First, lay a strip of satin face up, then take a section of ruffled organza and pin it to the top edge. Lay another piece of satin face down and sew the three layers together.
Continue in this way until you have created enough strips to go half way around the hoop.
First, lay a strip of satin face up, then take a section of ruffled organza and pin it to the top edge. Lay another piece of satin face down and sew the three layers together.
Continue in this way until you have created enough strips to go half way around the hoop.
After a few strips, this is what the reverse looks like. I will overlock all the seams for neatness.
|
Half done! Keep going until you reach the other side of the waist.
|
I didn't bother going all the way around, because the rear of the skirt will not be seen.
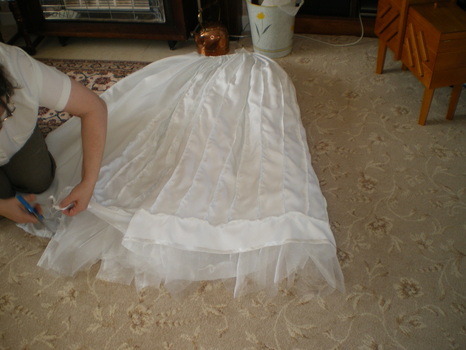
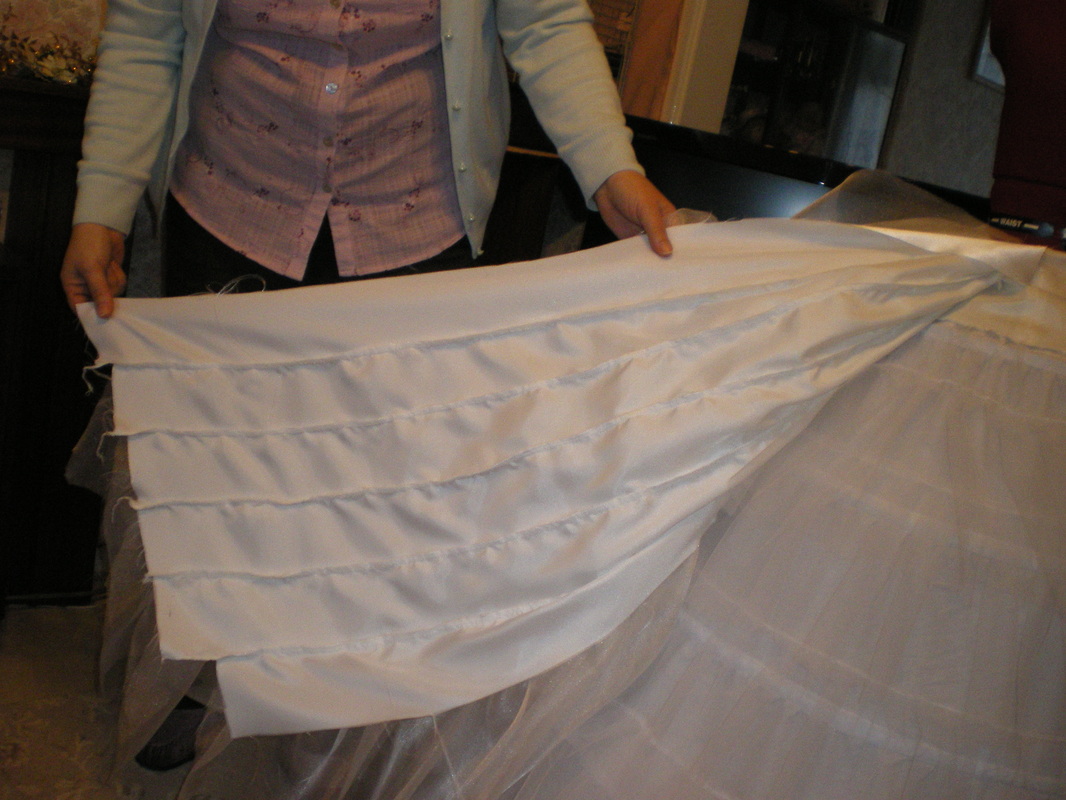
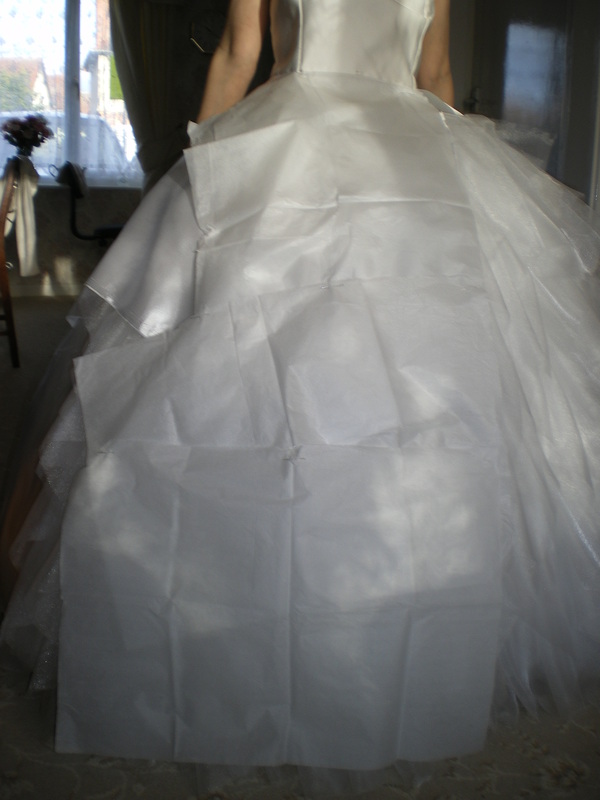
To neaten, cut a 4" strip of satin to level the skirt, cut off any net that is dragging on the floor.
Each strip needs to be more than halved in width when pleating the waist.
Cut 2 back sections. Sew to the last ruffled strip on both sides. The back is sewn up, leave a gap at the top to get in and out of the skirt. The whole skirt is then pleated onto the wide ribbon and a piece of velcro is used to close.
This completes the ruffled skirt.
(see) http://www.youtube.com/watch?v=3YNbSQxNvpQ
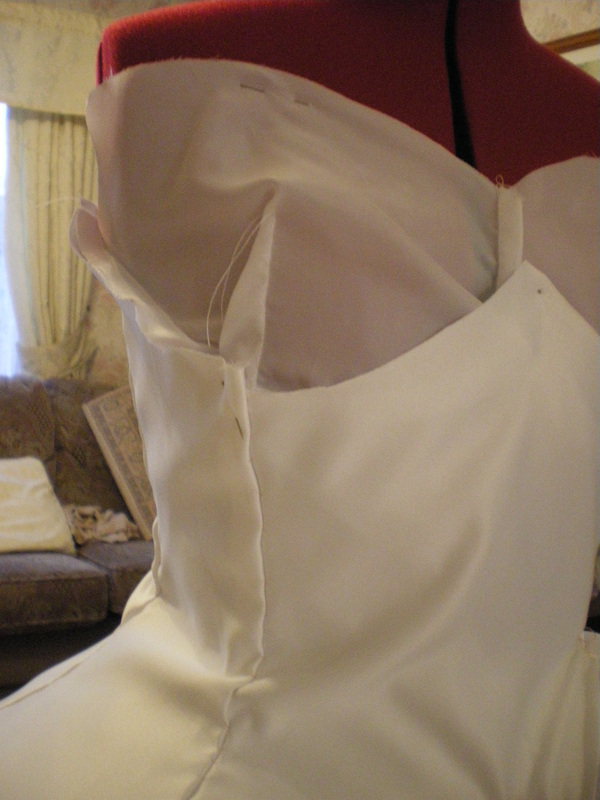
To create the bodice, it needed a slight alteration.
(see) http://www.youtube.com/watch?v=3YNbSQxNvpQ
To create the bodice, it needed a slight alteration.
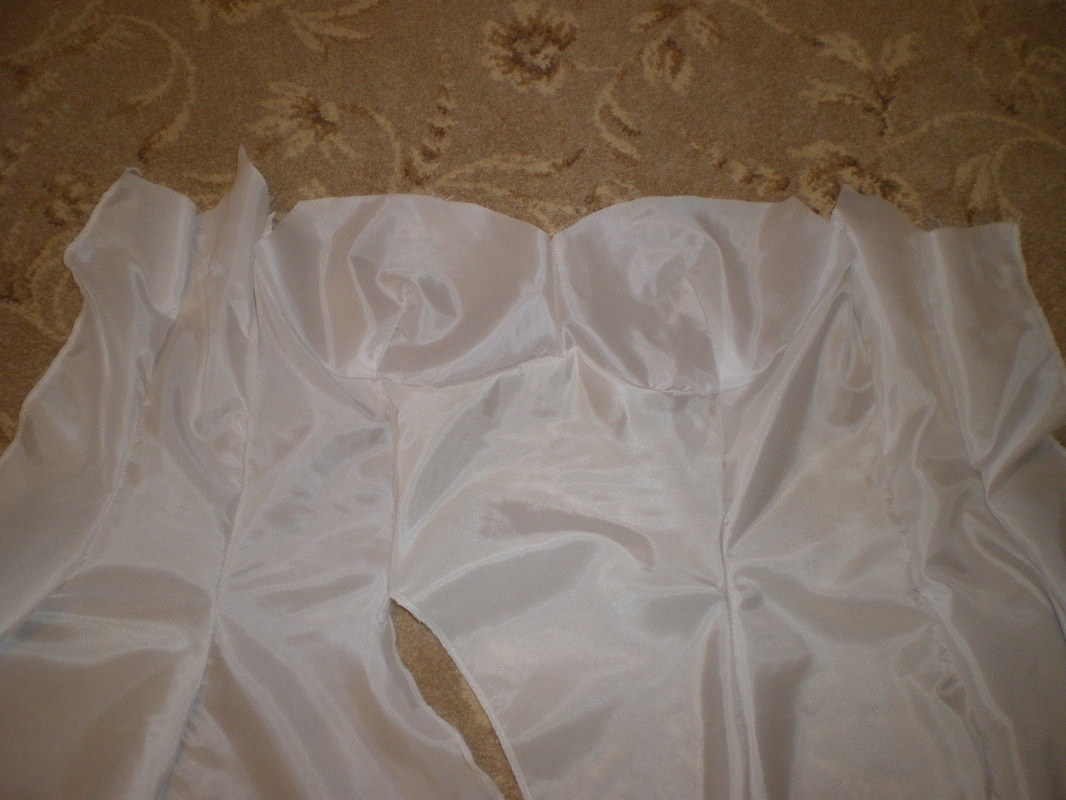
Two "U" shapes were cut from the original pattern, cups were made, then sewn back onto the bodice. The biggest alteration was the length of the bodice. No pattern exists for the outer dress, so I covered Tracy with tissue paper and drew the pattern directly on her! The bodice has to continue without a break into the whole dress.
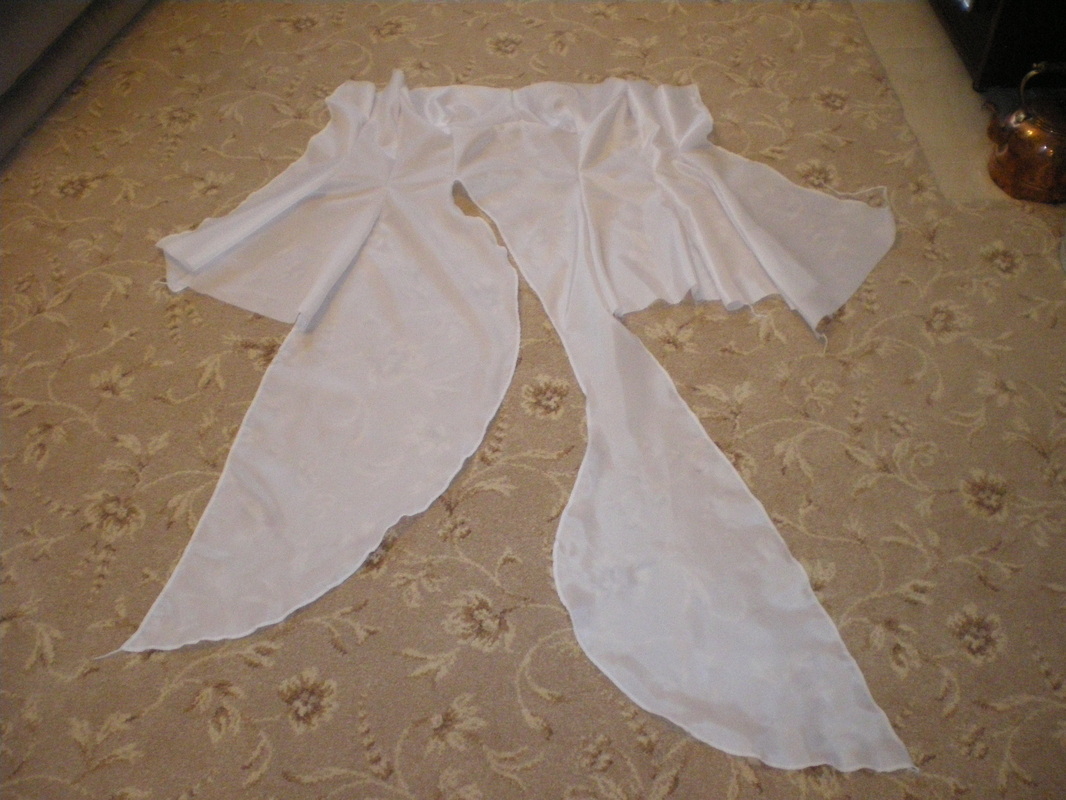
This is how I created the 2 swept back sections!!
To line the bodice, only the two very front sections were fully lined, all the other sections were only lined as far as the hips. The lining was cut exactly the same as the dress.
To line the bodice, only the two very front sections were fully lined, all the other sections were only lined as far as the hips. The lining was cut exactly the same as the dress.
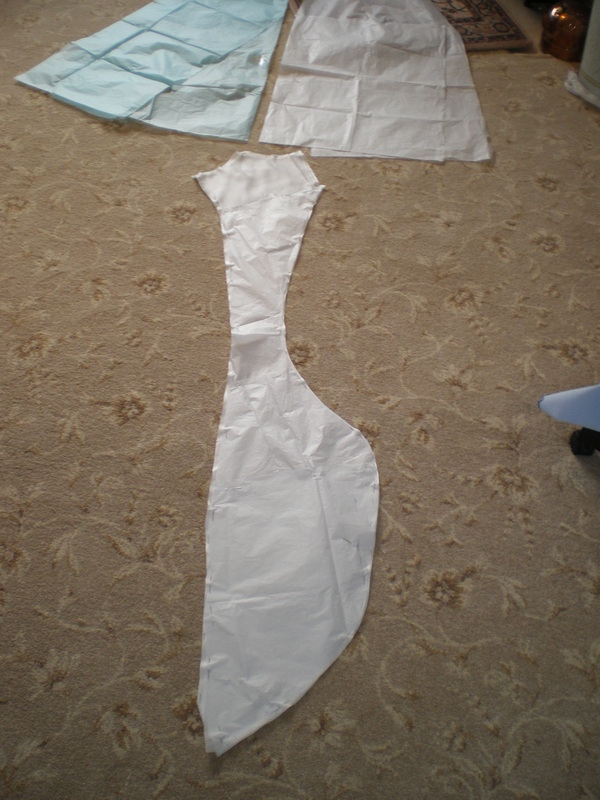
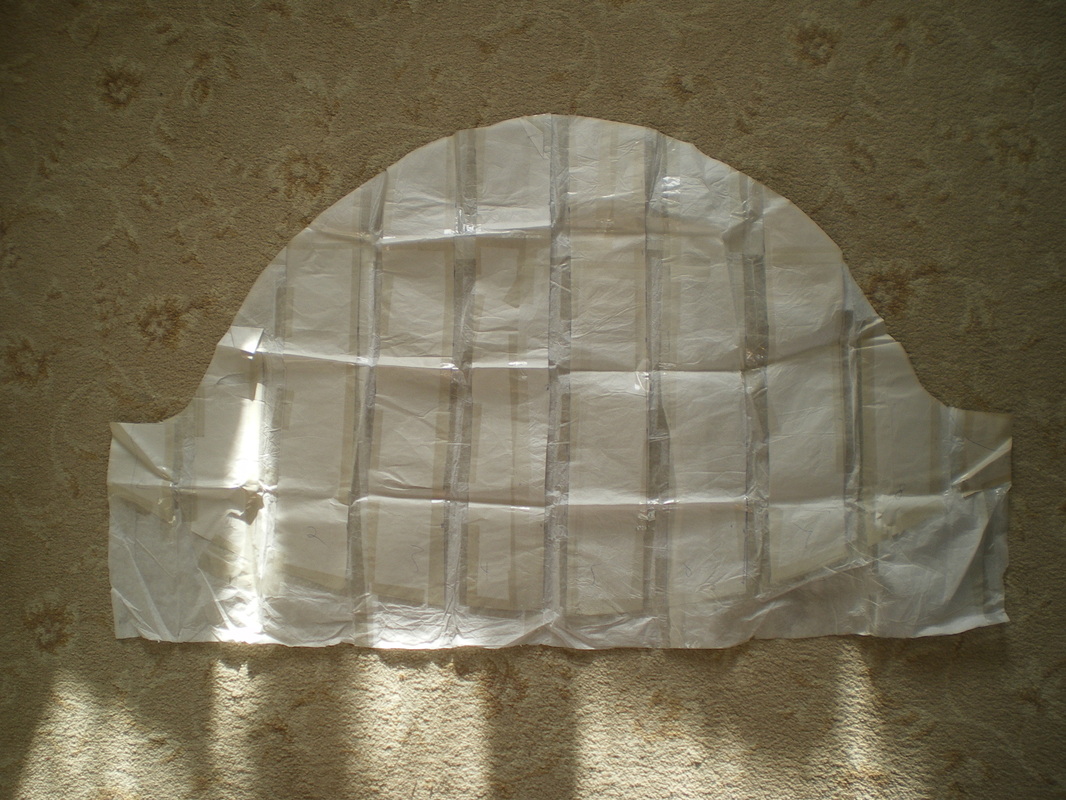
This shows the pattern needed for the right hand section, it goes all the way up to the cups. The cups will be cut separately.
This shows all the lining pieces sewn together, it is a reverse of the top layer, as all the seams need to be on the inside. The two front pieces are extended all the way down, whereas the rest of the panels allow for a slight flare down to hip level.
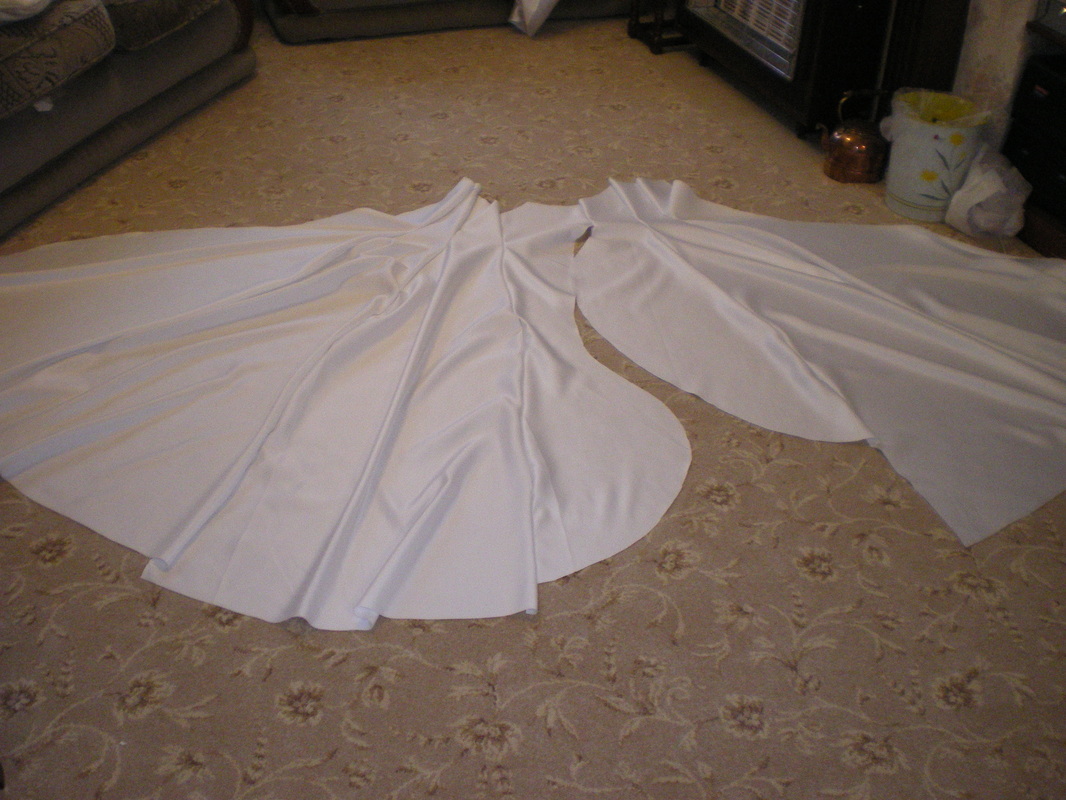
This shows all the satin pieces sewn together minus the cups, these will be put on before the lining is sewn to the satin pieces. Match all the pieces together right sides to right sides and sew all the way round except for the back seam, leave this open for now.

|
|
|
This is how it looks after the hem has been turned up.
|
This shows the curve for the first panel, the second panel also has a slight curve to the floor. As there was still a gap without any ruffles, I sewed some directly onto the petticoat.
|
|
The lining for the bust before it was put together and sewn onto the top of the bodice.
|
|
Sleeve pattern piece.
|
|
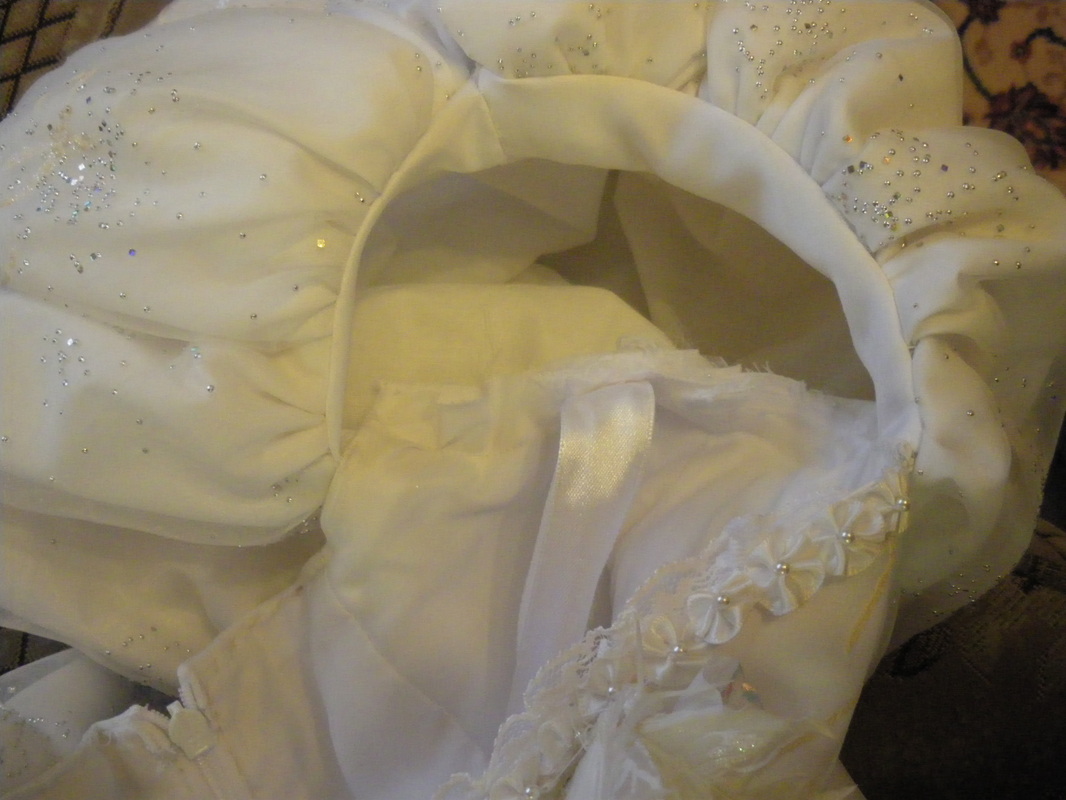
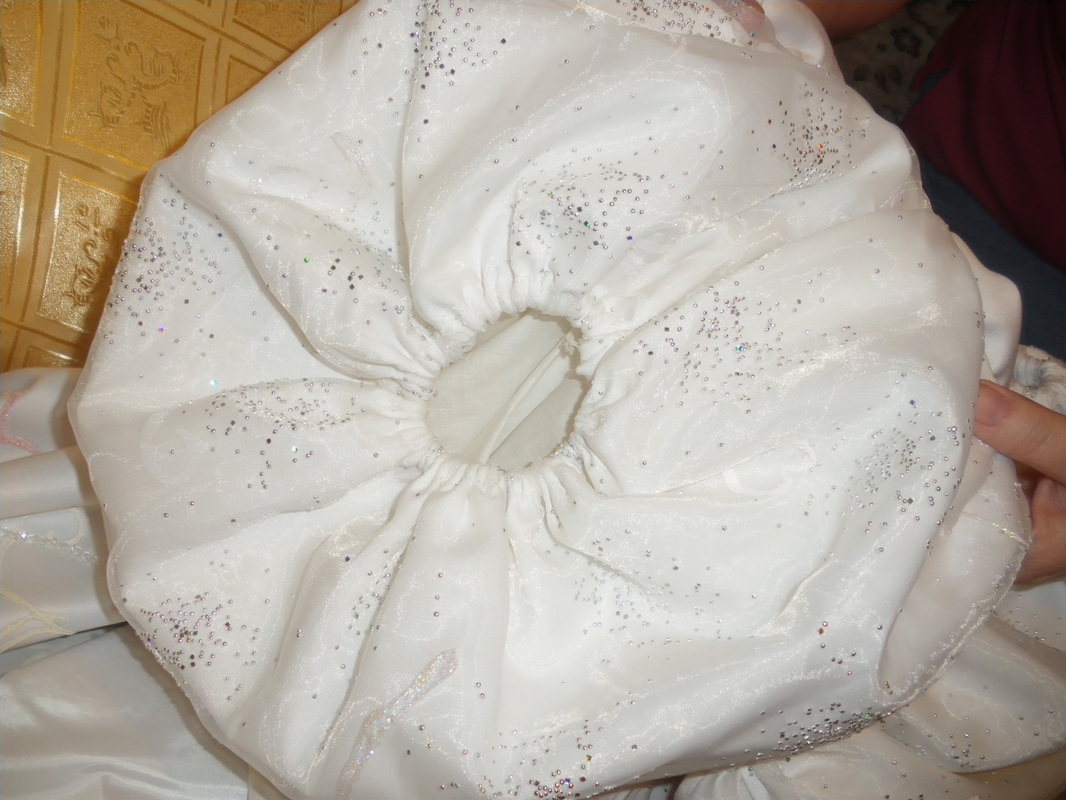
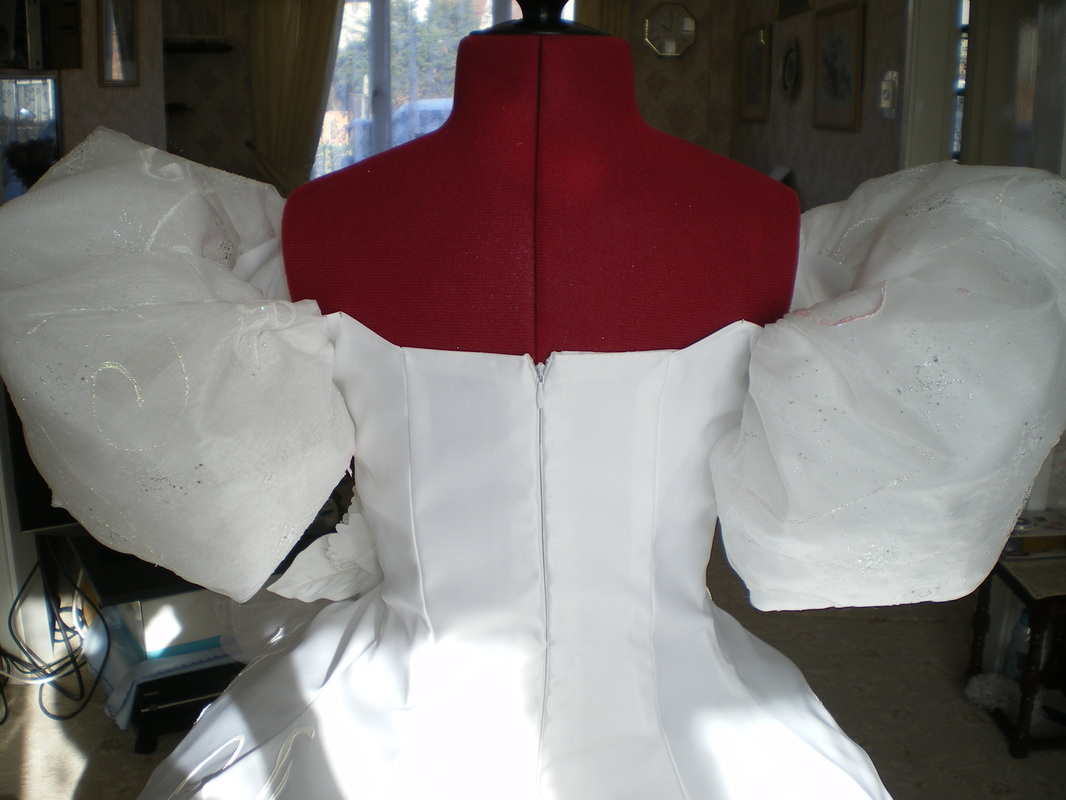
Having already made Dorothy Gale's dress from Simplicity 4136, we used Glinda's pattern to make the sleeves. The top layer of Explosion Organza was painted with swirls and leaves using white fabric paint. Underneath was a layer of white organza, then a VERY stiff net and on the inside was white lawn. I later remade the sleeves much bigger. Lay all the pieces together and tack or sew then all together around the edge.
|
|
|
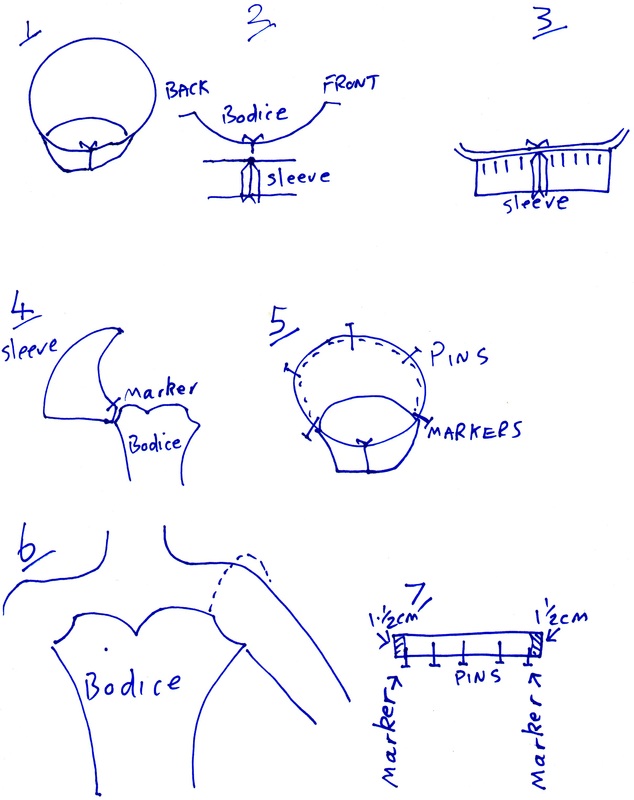
Step by step instructions for making and attaching the sleeves
Step one
Sew the side seam of the sleeve, turn the sleeve the right way out so the seam is on the inside.
Step two
Line up the sleeve seam to the bodice side seam
Step three
Pin the sleeve to the bodice starting from the seam and working outwards until you run out of bodice armhole.
Step four
Place a marker with a pin (front and back) on the sleeve itself to show where you will start gathering. Unpin the sleeve from the bodice
Step five
Using pins or a marker, section your sleeve into sections. Please note the bottom of the sleeve WILL NOT be gathered. Sew a gathering stitch around the sleeve but don't go any further than your markers. Gather your sleeve doing one section at a time
Step six
Put the dress on and do a tight measurement from the front of the bodice to the back. Add 3 cm onto that measurement and either cut out a piece of fabric or use 2 cm ribbon (1")
Step seven
Divide the ribbon into sections with pins, starting at the half way point, then quarter points and finally a marker pin 1.1/2cm from the ends.
Step eight (or as I would call it - the difficult bit)
Match up the pins. Start at the top marker of the sleeve and attach the ribbon at ITS centre marker, do the same for all the other pins. For placement of the ribbon see ....
Step Nine.
You will be pinning the ribbon to the OUTSIDE of the sleeve and sewing a 1cm seam to attach it to the sleeve. Gather the sleeve to fit the ribbon, this is now going to be a very difficult operation as you are now working in a very confined space.
Step ten
This is what you should end up with.
Step eleven
Join the side seam of the bodice to the sleeve again, using the same method as in Step two. Right side to right side and sew it on.
Step twelve
Shows what it should look like, you will have a flat part under the arm and all the gathers are now just floating in mid air above the shoulder. It is at this point you will do another fit to make sure your gathers are tight enough.
Step thirteen
Fold the ribbon to the inside of the sleeve and hand sew it to the inside.
Step fourteen
Remember those tabs, they can come in very useful for doing last minute alterations to the fit. If you find the sleeve is loose, pull the tabs to the inside of the bodice reducing the size. If the sleeve fits fine, just leave them be.
Finally, do that channel for the elastic on the sleeve cuff.
The following pictures show what it should look like

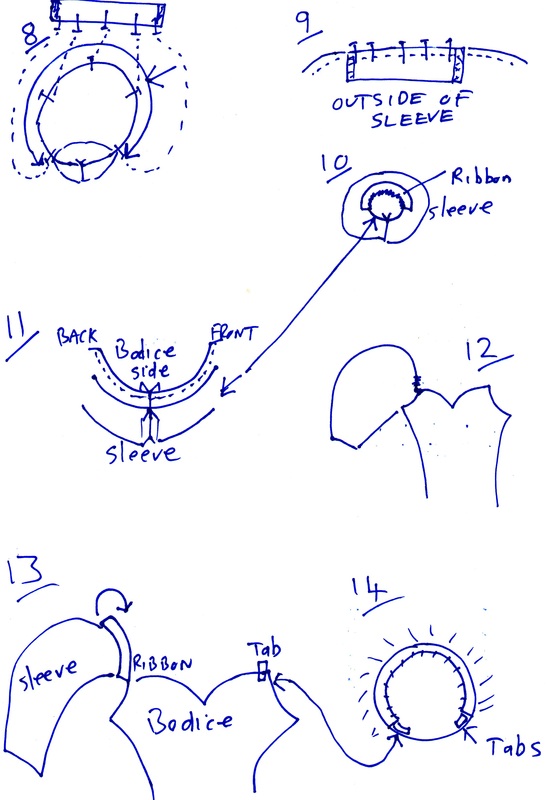
|
Sew the side seams of the sleeves and sew the bottom part of the sleeve to the bodice only.
Run a gathering stitch around the rest of the sleeve ready for gathering in at the top of the shoulder. Measure from the front of the bodice over the shoulder and to the back of the bodice and add 3cm. Cut a strip of fabric or use ribbon for this. Gather the sleeve across the top and sew onto the edge of the ribbon, leaving a small gap at either end of the ribbon. |
|
When you are happy with the fit, turn the ribbon inside the sleeve hole and hand sew in place. The extra tabs that are at either end of the ribbon are sewn inside the bodice front and back.
In this picture I have attached a loop of ribbon to enable the dress to be put on a hanger. For the cuff of the sleeve, fold the edge over twice to create a channel to thread some elastic through. Remember to leave a small gap to enable you to insert the elastic, pull the elastic to fit. |
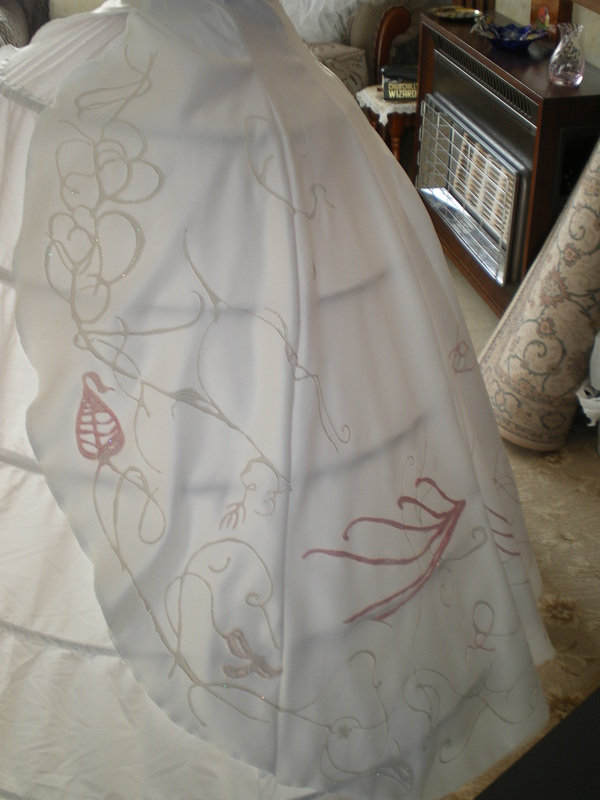
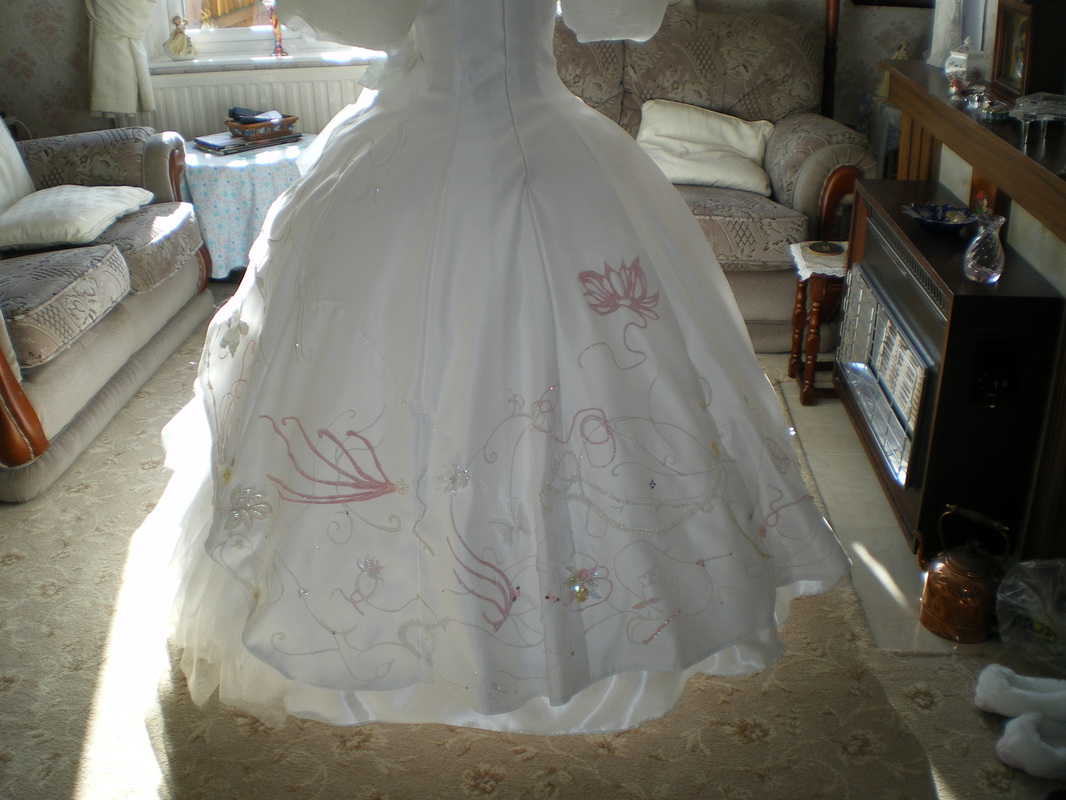
Decorating the Dress:
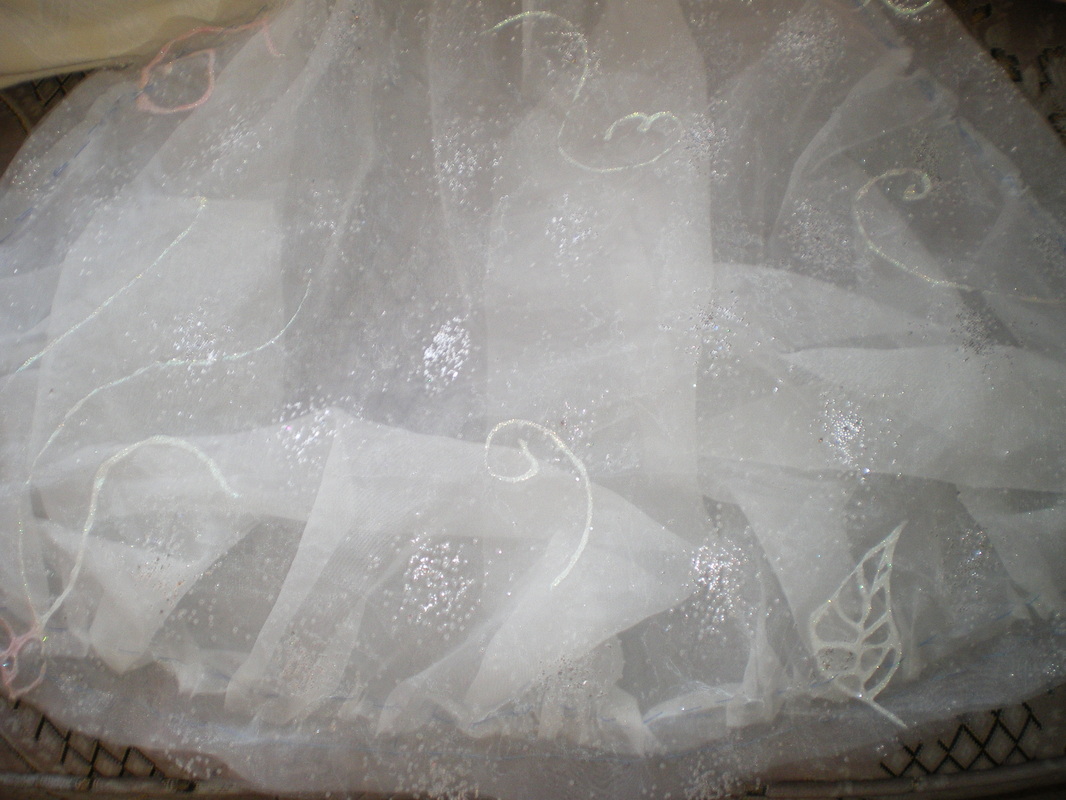
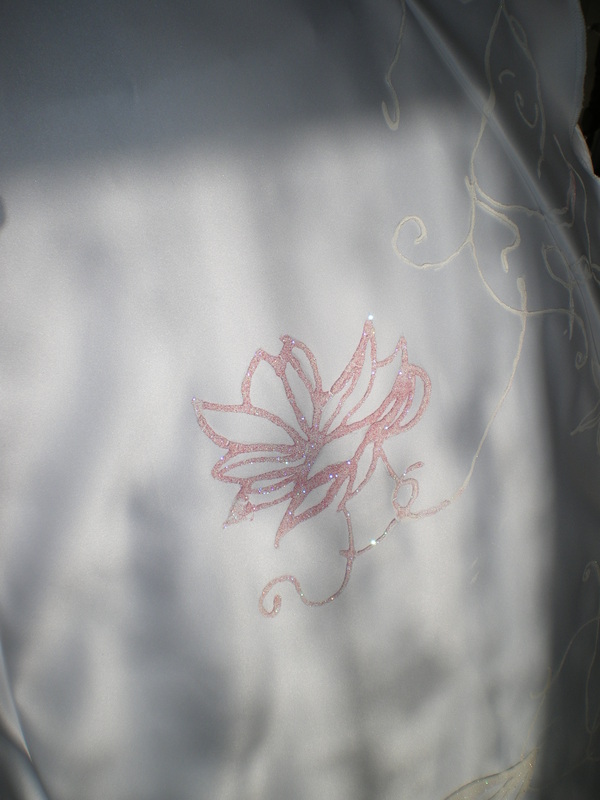
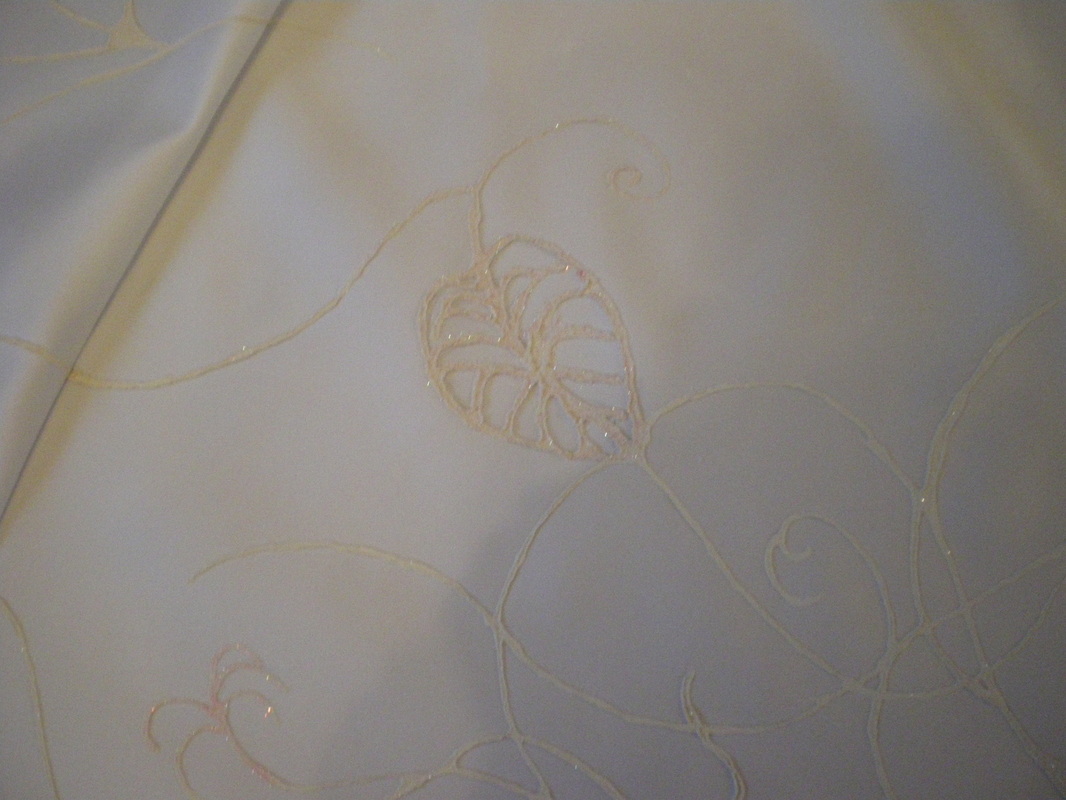
Certain patterns on the dress were copied exactly from the movie, especially the large pink and white designs. These were applied using white and pink fabric paint. As soon as the lines were drawn, powdered glitter was immediately applied to flatten the paint.
|
|
|
|
|
|
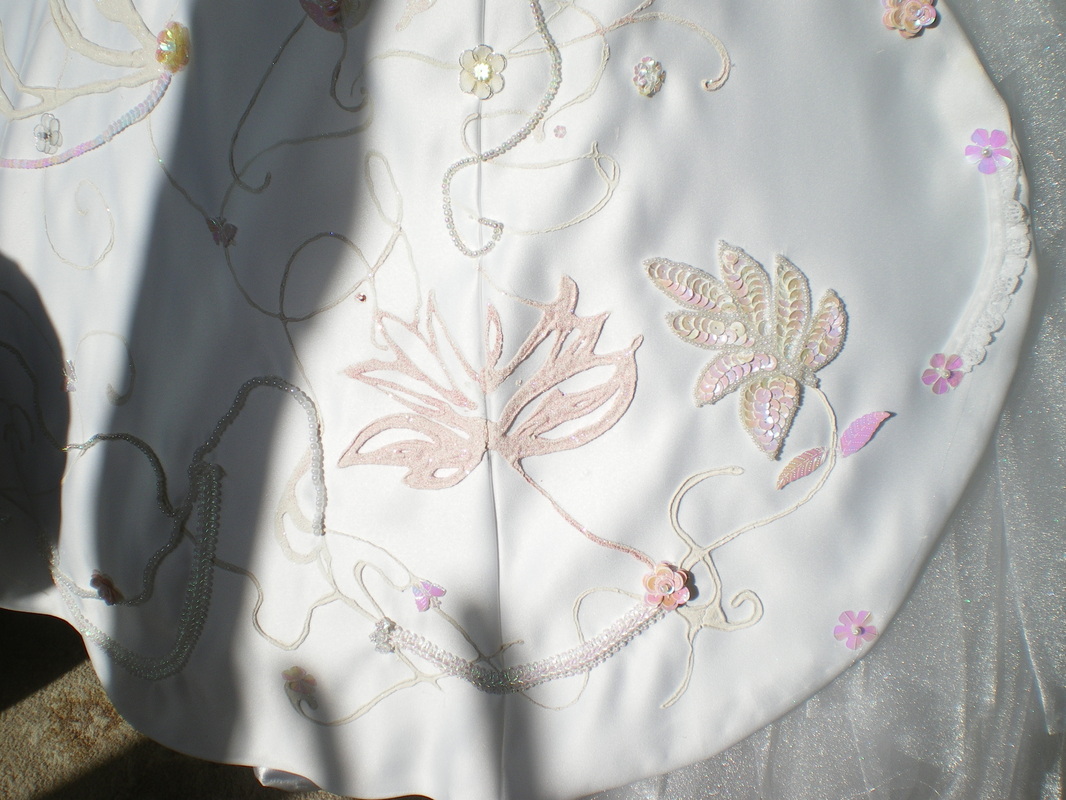
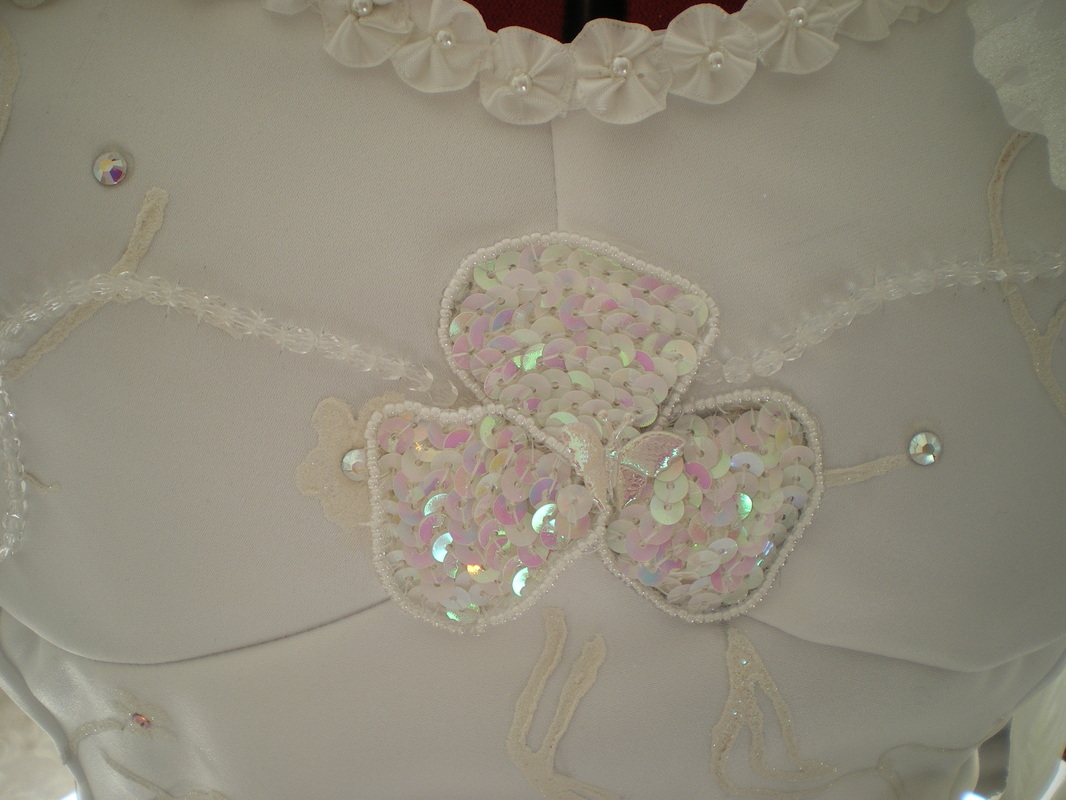
The front motif was made by cutting out three leaf shapes, edging with white seed beads and filling in with holographic sequins.
|
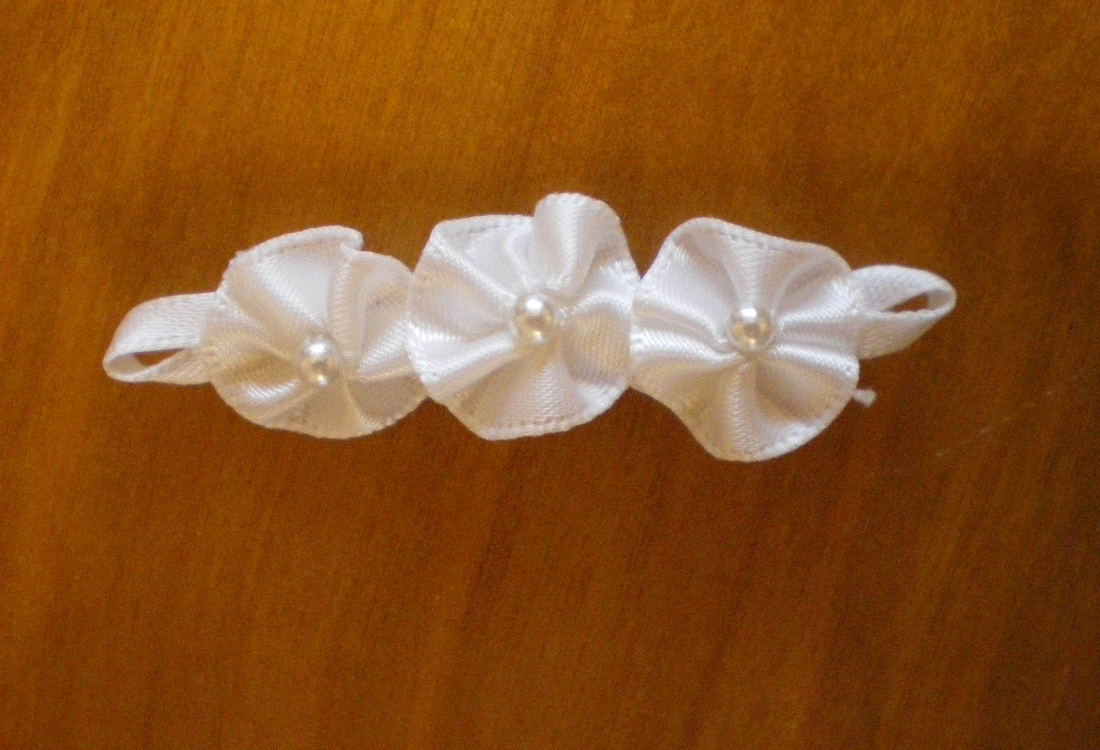
I used white ribbon flowers to go around the edge of the bodice.
|
|
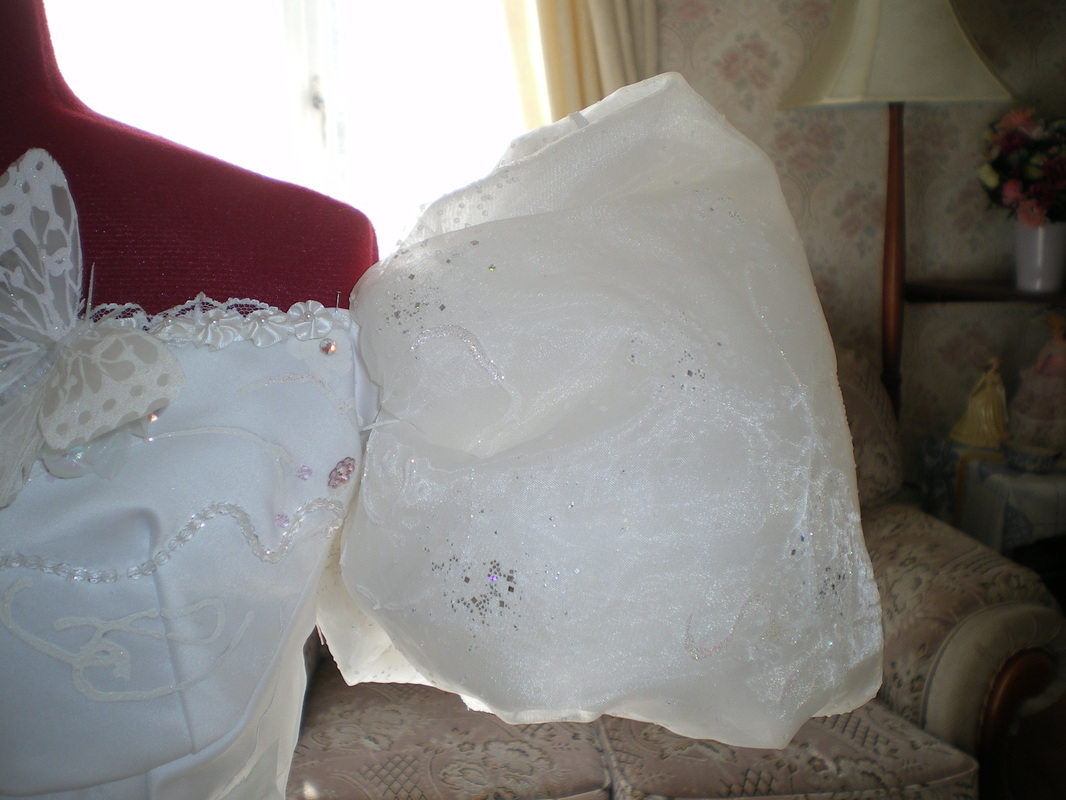
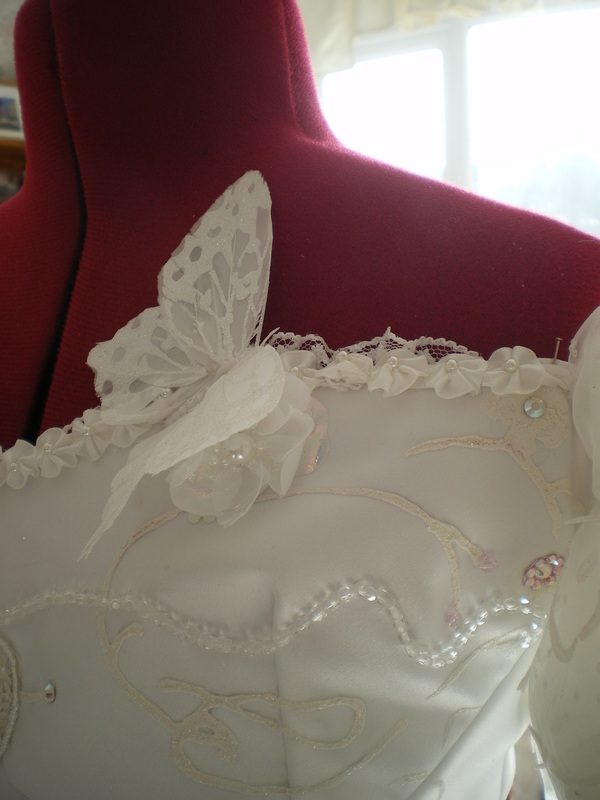
I used a butterfly made from feathers and also noticed there was a white flower under the wing. You can just see some lace peeking out on the bodice.
|
|
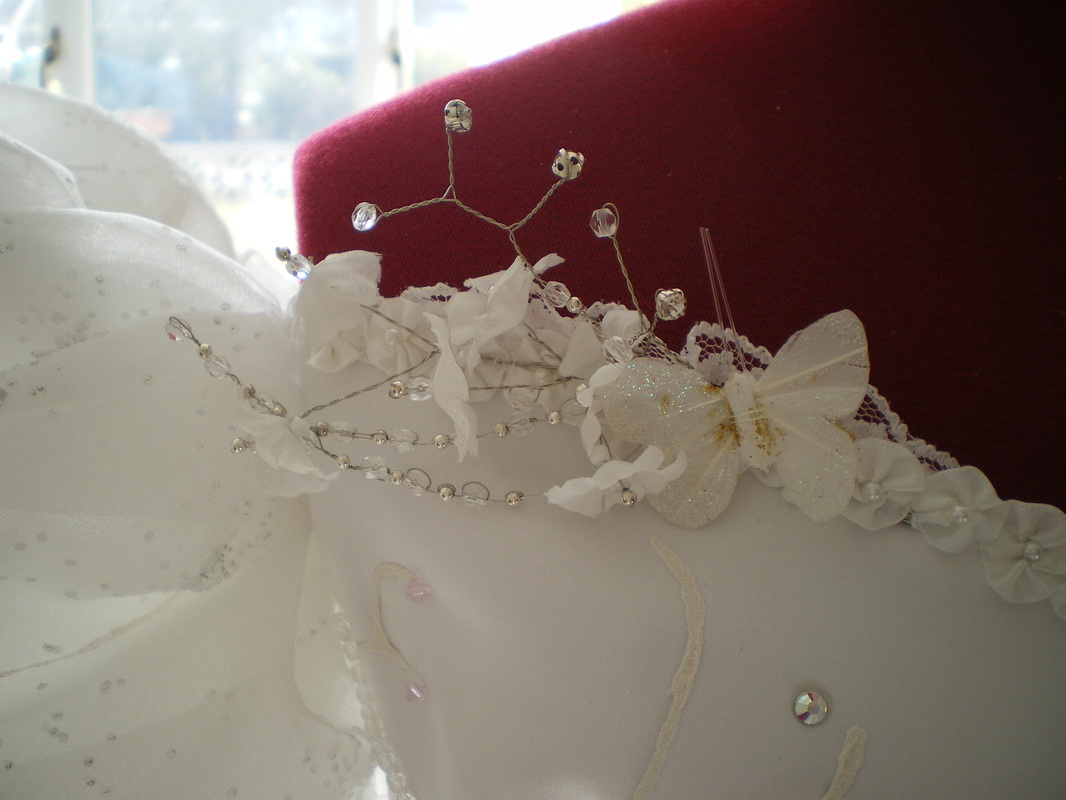
We made our spray from craft wire, crystals and small flowers, but I expect you can buy one ready made. We added a medium sized butterfly made from feathers and you can just see that lace again peeking out behind the bodice.
|
Now for the best part!!
Head off to the haberdashery and just buy ANYTHING that looks pretty to decorate the dress, beads, pearls, crystals, lace, trimmings, small flowers, small butterflies, just let your imagination run riot!!
Head off to the haberdashery and just buy ANYTHING that looks pretty to decorate the dress, beads, pearls, crystals, lace, trimmings, small flowers, small butterflies, just let your imagination run riot!!
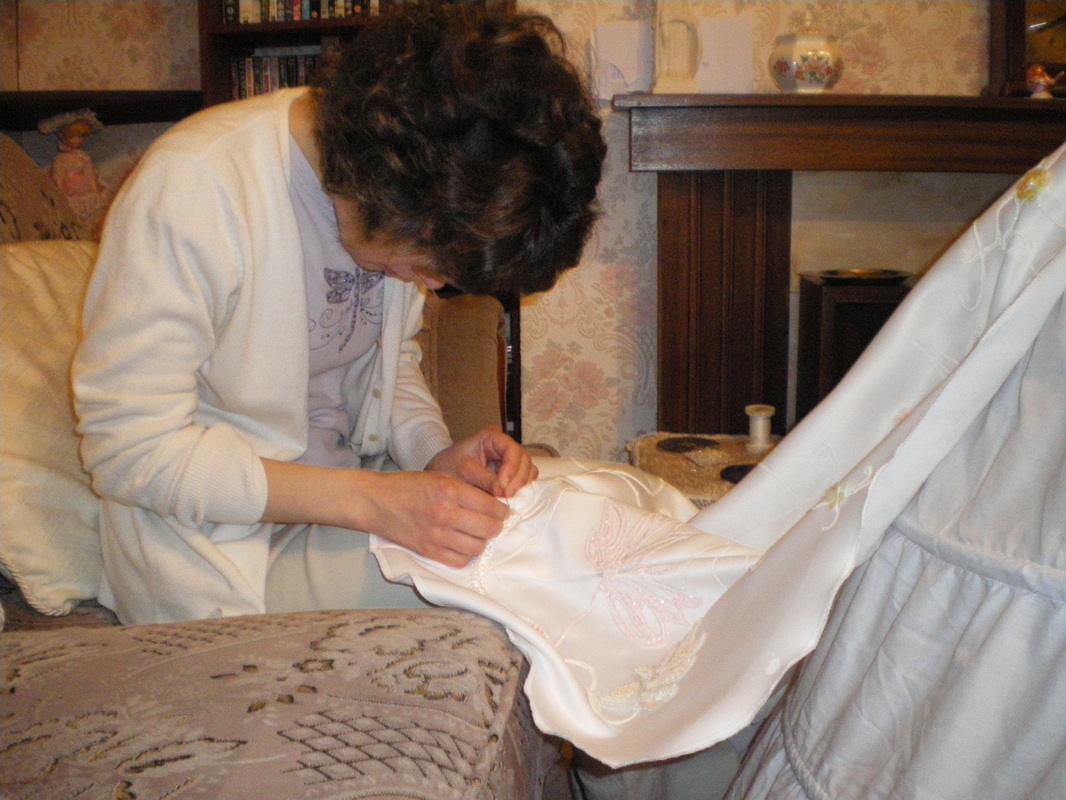
Here I am with many, many hours ahead of me sewing on all the trimmings!!!
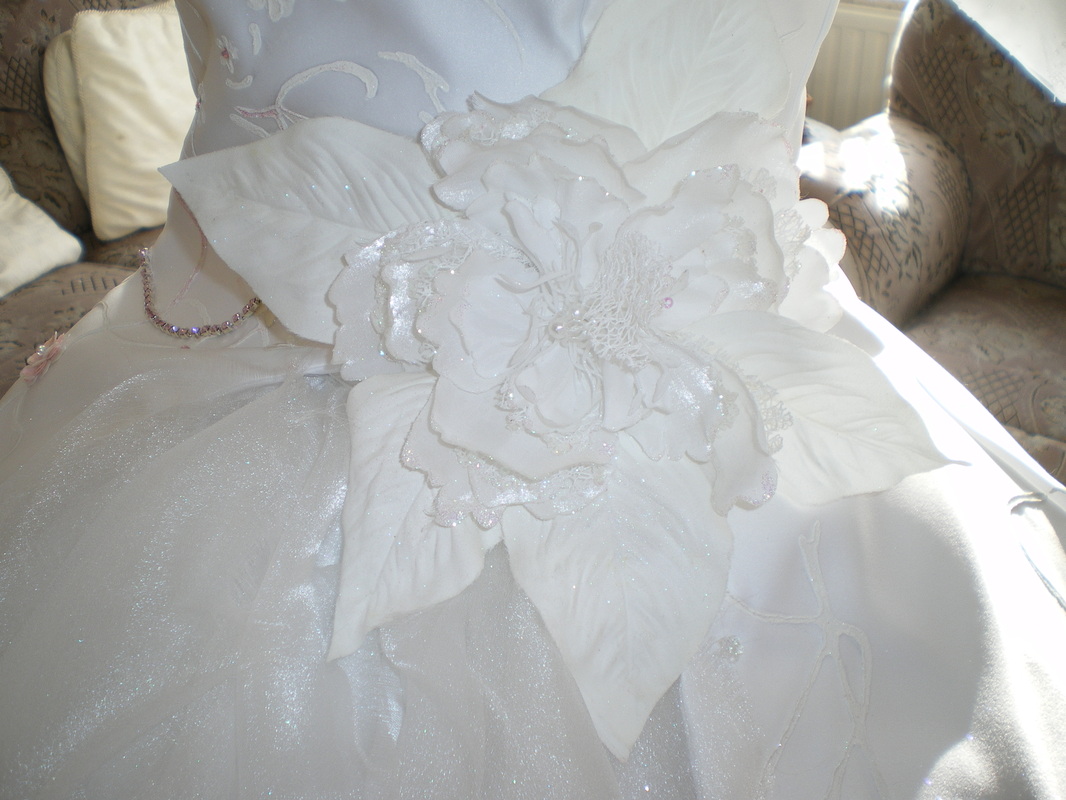
The final touch.
I bought 2 or 3 large white flowers with leaves, took them to pieces and reassembled them as the flower needs to be quite flat. I then sewed on a safety pin on the back, then the flower is pinned at the top of the gap on the dress.
I bought 2 or 3 large white flowers with leaves, took them to pieces and reassembled them as the flower needs to be quite flat. I then sewed on a safety pin on the back, then the flower is pinned at the top of the gap on the dress.
This completes the costume.
Additional information: 11 different versions of the dress were made for the movie
Additional information: 11 different versions of the dress were made for the movie
