For this costume you will require experience in soldering and dying.
Difficulty factor 10 - 10
Difficulty factor 10 - 10
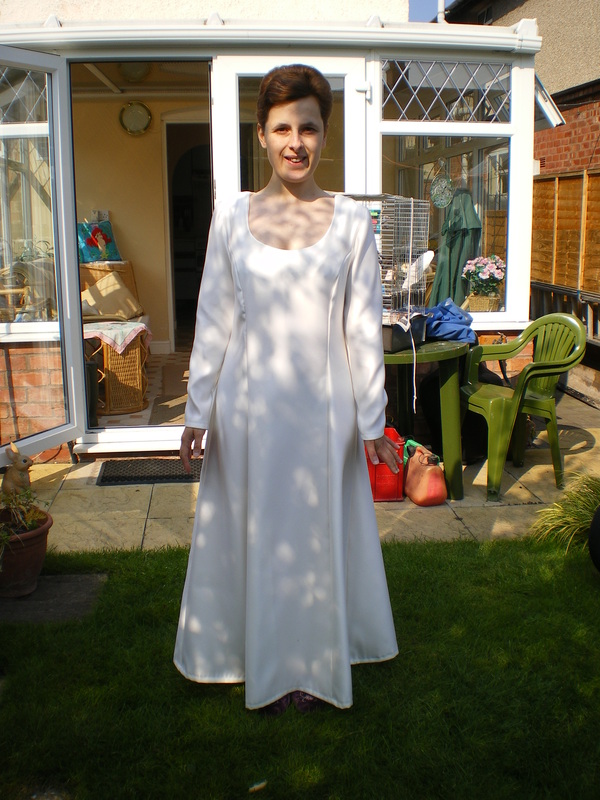
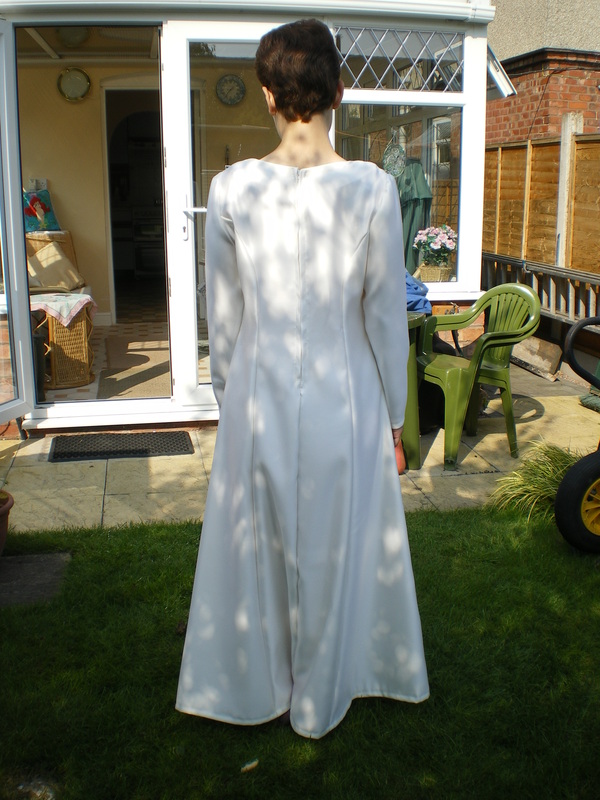
Padme's Parade Gown
Instructions
Materials:5 metres of ivory top quality Bridal Satin (dress is cut on the bias)
1 cream zip to suit
3 metres of ivory lining of your choice
Cape:
10 metres of light weight ivory polyester chiffon
Pink and yellow fabric dyes for the petals
As long as the pattern you choose is a "Princess Line" with a scooped neck line, any pattern will do, the sleeves are straight. I used McCalls 9456
Please be aware that
we do not make costumes
to sell or hire

The original costume worn by Natalie Portman as the character Padme Amidala from the film Star Wars 1
|
|
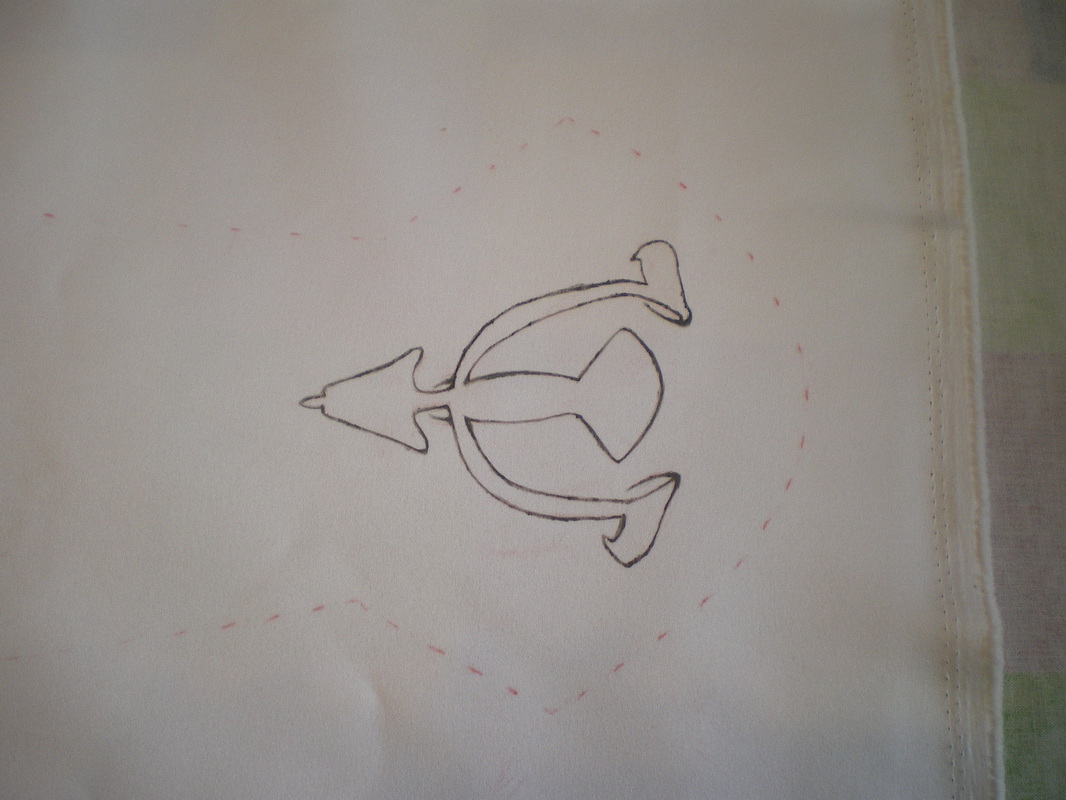
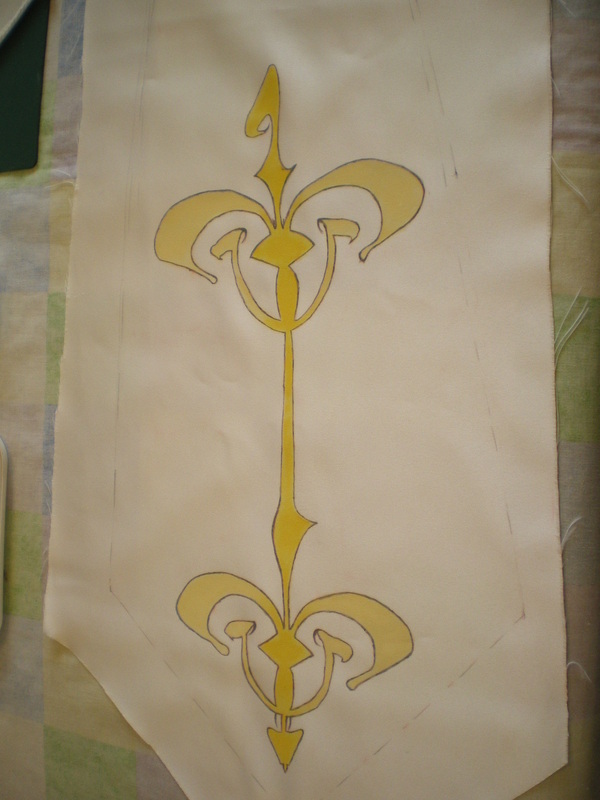
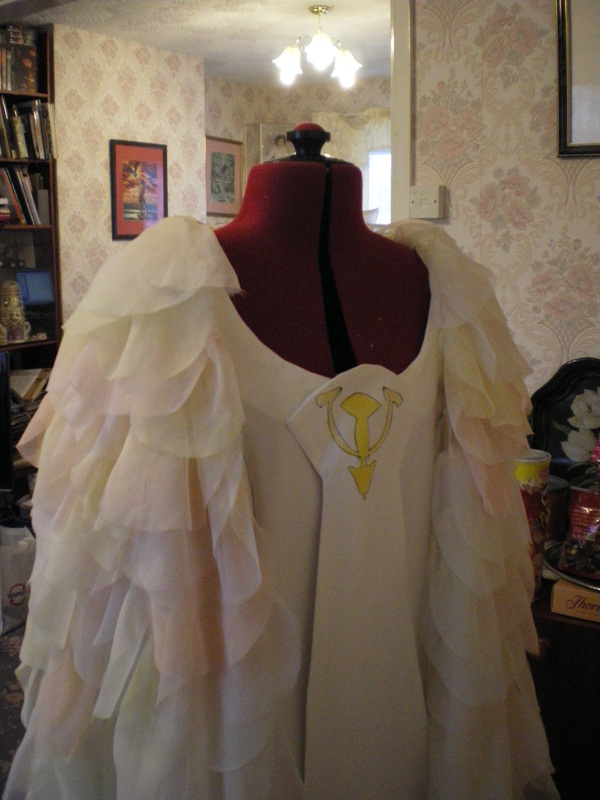
I scanned the design for the tie from the internet, then used Trace Down paper to copy it onto a tie shaped piece of fabric, which was finally lined.
|
|
.
Go over the lines with black fabric paint and fill in with yellow

.
To finish, I used ivory lining on the reverse. The finished length should be approximately 20cm off the floor.
|
.
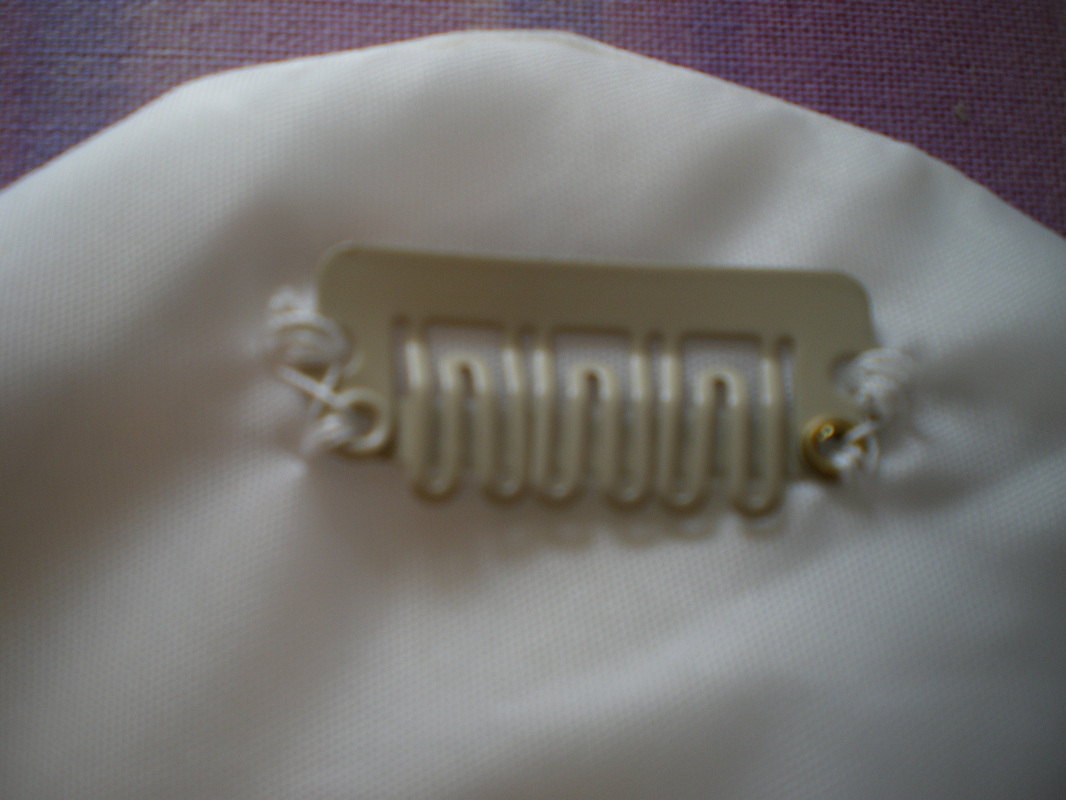
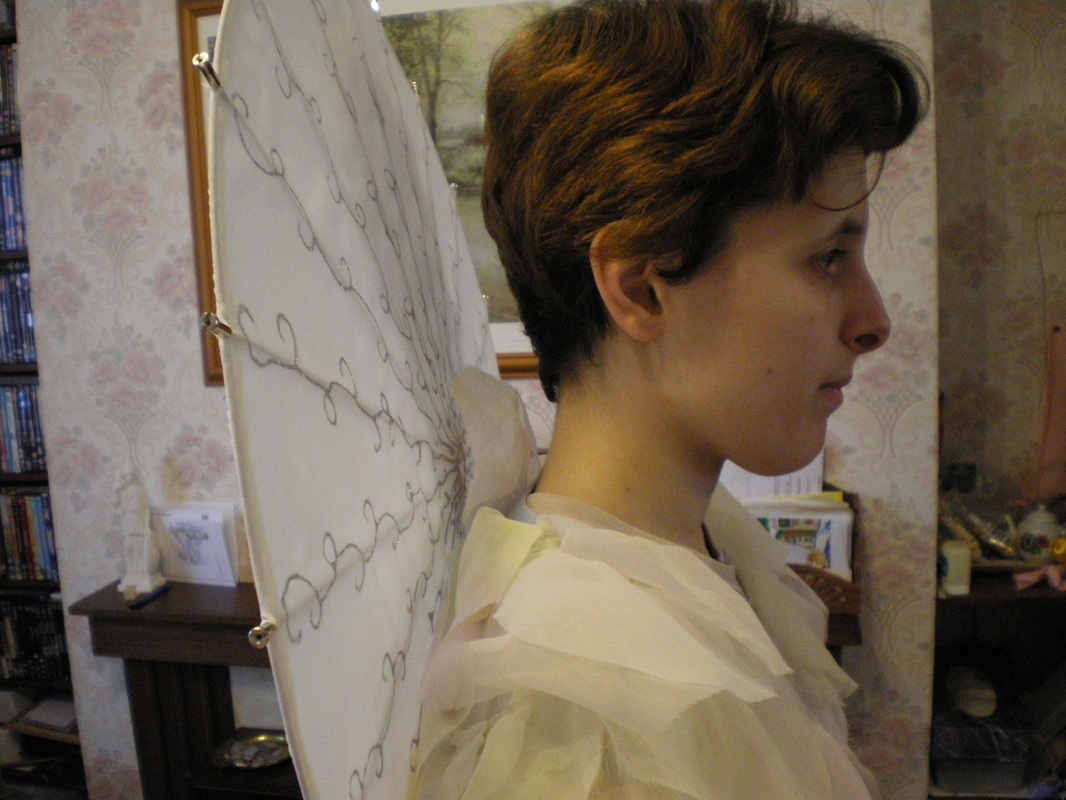
At the top on the back, I sewed on a hair extension clip to attach it to the dress.
|

.
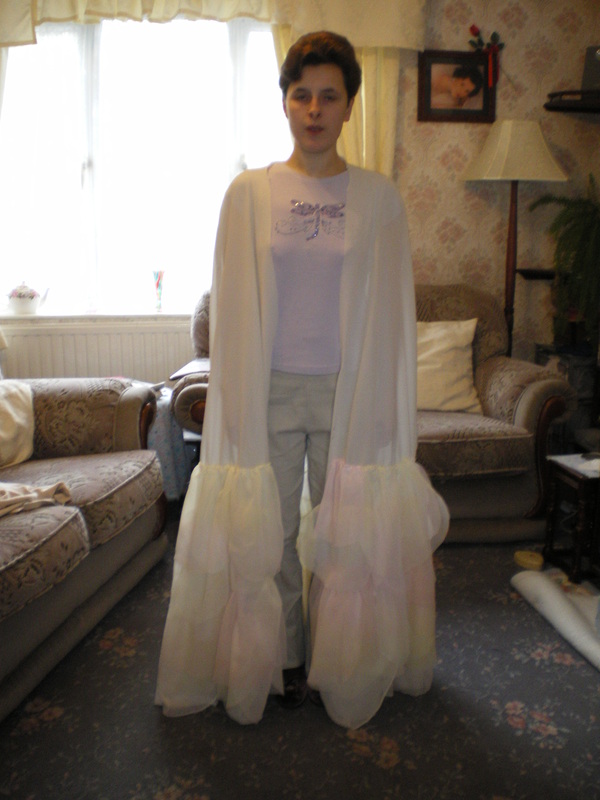
This is the finished dress and tie. A very simple costume to make.
For the cape, I got a standard cape pattern, but slightly altered the front edge so that it curved very gently from the shoulders.
.
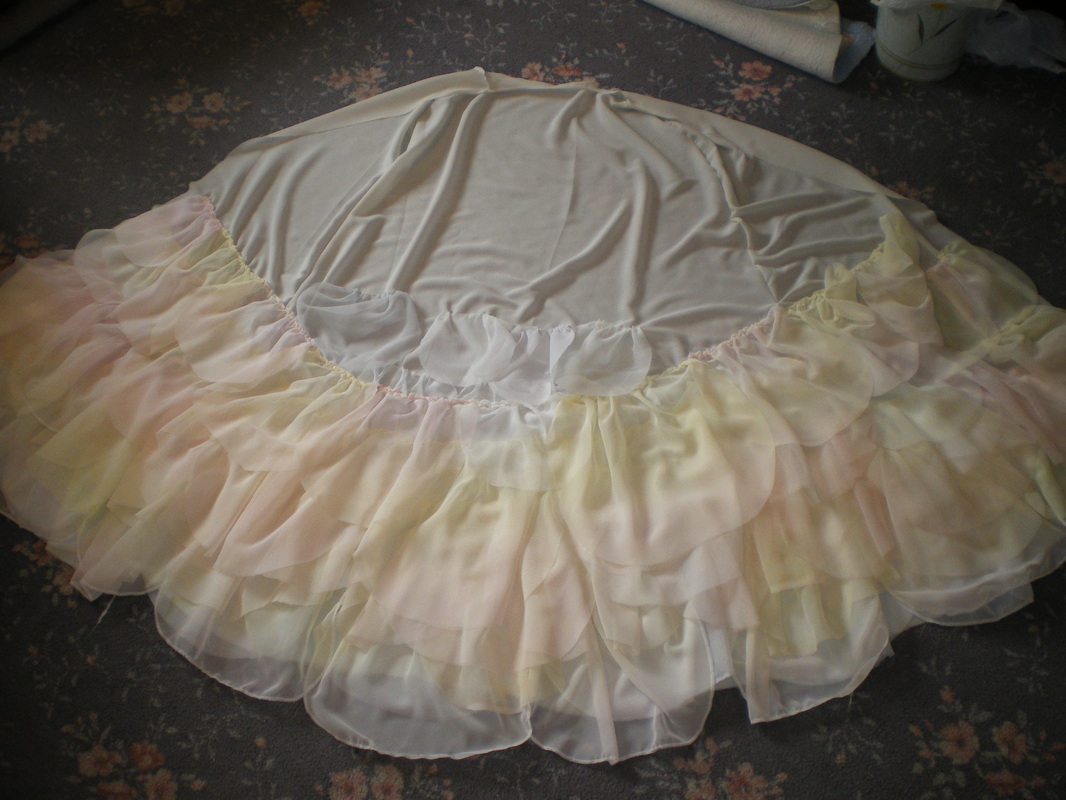
This shows the shape at the top and the first rows of petals. The cape was made from one layer of chiffon for lightness. By the time the cape is finished, it will be VERY heavy.
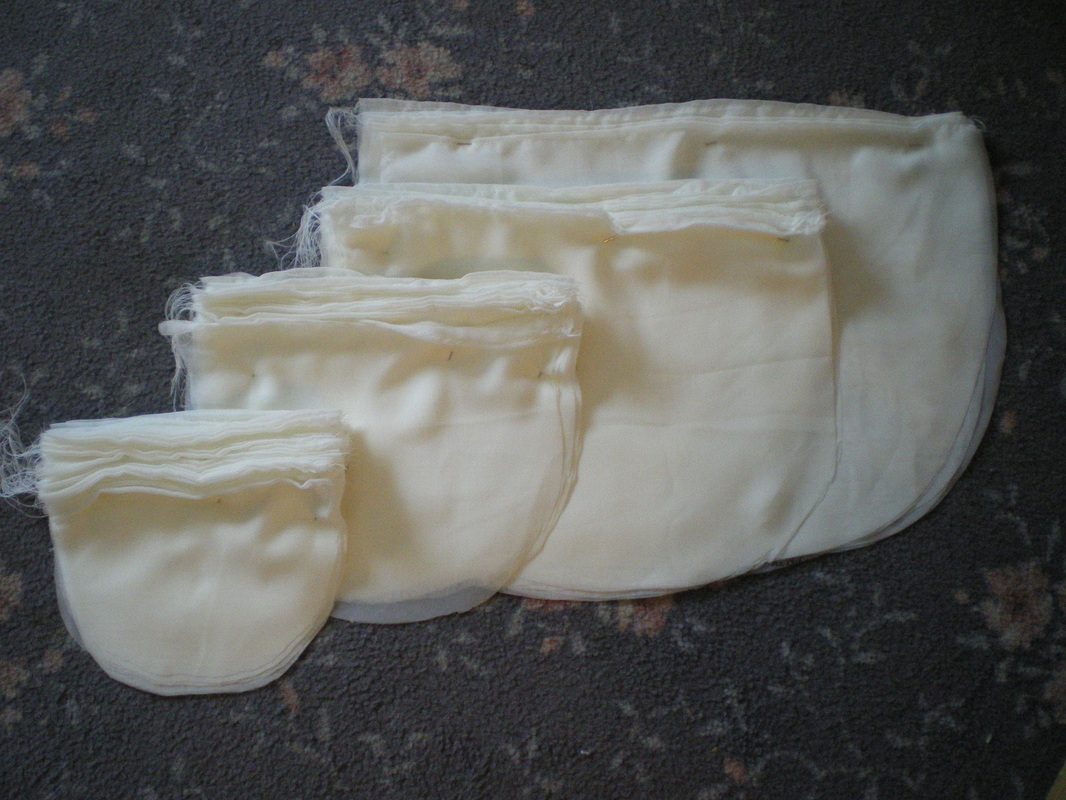
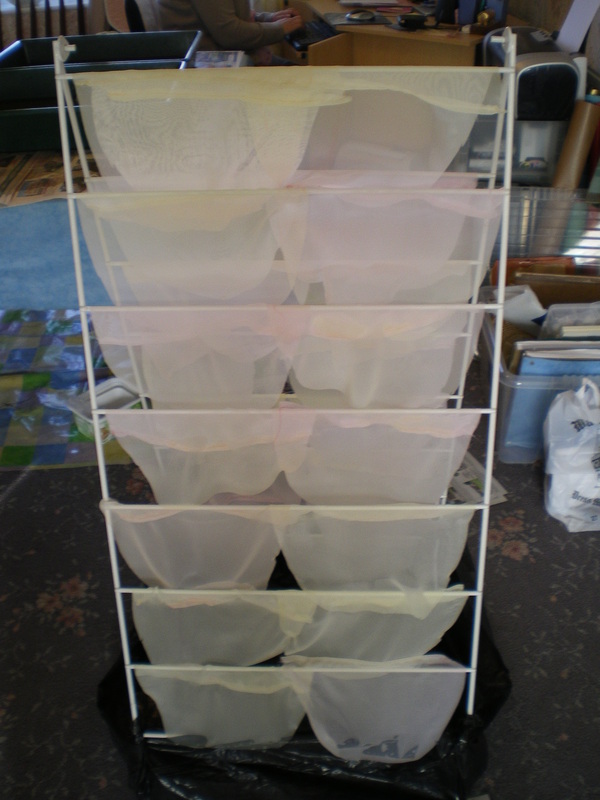
For the cape petals, we cut 6 different sizes, ranging from very large (approximately 30cm wide) to small (10cm). You will need about 300 petals altogether. After cutting, each petal had a running stitch put into the top to gather them. Then, using pink and yellow dyes, everyone was spray painted, some had vertical strokes, others had horizontal, some were just painted in one colour and others were left their natural colour. These were mixed up in different orders, so that no two adjacent petals were the same.
.
Cut 6 different sizes
|
.
Some of the petals hanging up to dry. This was a very slow process as there were so many to do!
|
.
Starting at the bottom with the largest petals, sew on 2 rows, each one has to be gathered first and follow the line of the cape as you go further up. Each petal has to overlap the next by at least half. By the time you are half way up the cape, you will have reduced the size of the petals you use. The finished length needs to be just past floor length.
For the bottom row of petals, I neatened the edge, as this was going to take the most punishment when worn.
.
Save the smallest petals for around the neck. To finish, secure a narrow ribbon at the shoulder seam inside in the cape, this will be used to tie underneath the arms to keep the cape on when you are wearing it.
The "Parasol" was by far the hardest thing to make. Having studied many versions on the internet, this is how we constructed ours.
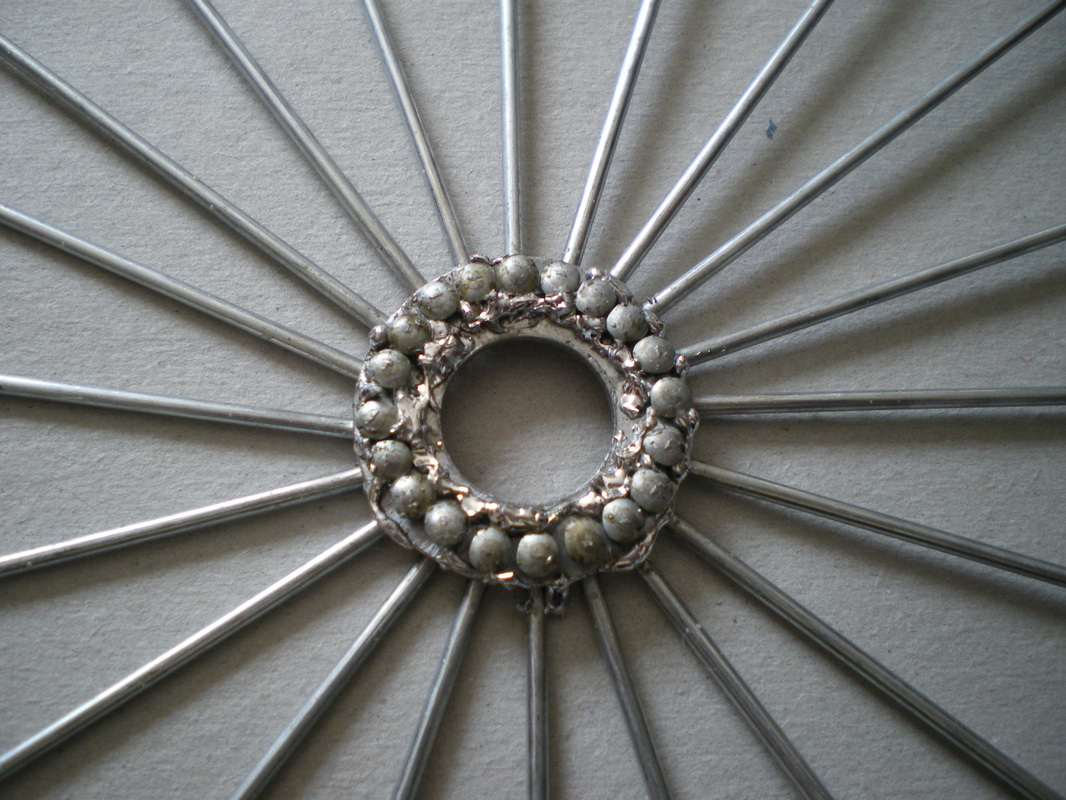
You will need, a metal ring with 20 holes
20 18" bike spokes and nipples
Spray glue
3 metre string of 5mm white sequins
Glitter glue
First of all, I got my Dad to make a metal disc with 20 holes in it, then obtained 20 x 18" spokes and "nipples" from our local bike shop.
You will need, a metal ring with 20 holes
20 18" bike spokes and nipples
Spray glue
3 metre string of 5mm white sequins
Glitter glue
First of all, I got my Dad to make a metal disc with 20 holes in it, then obtained 20 x 18" spokes and "nipples" from our local bike shop.
.
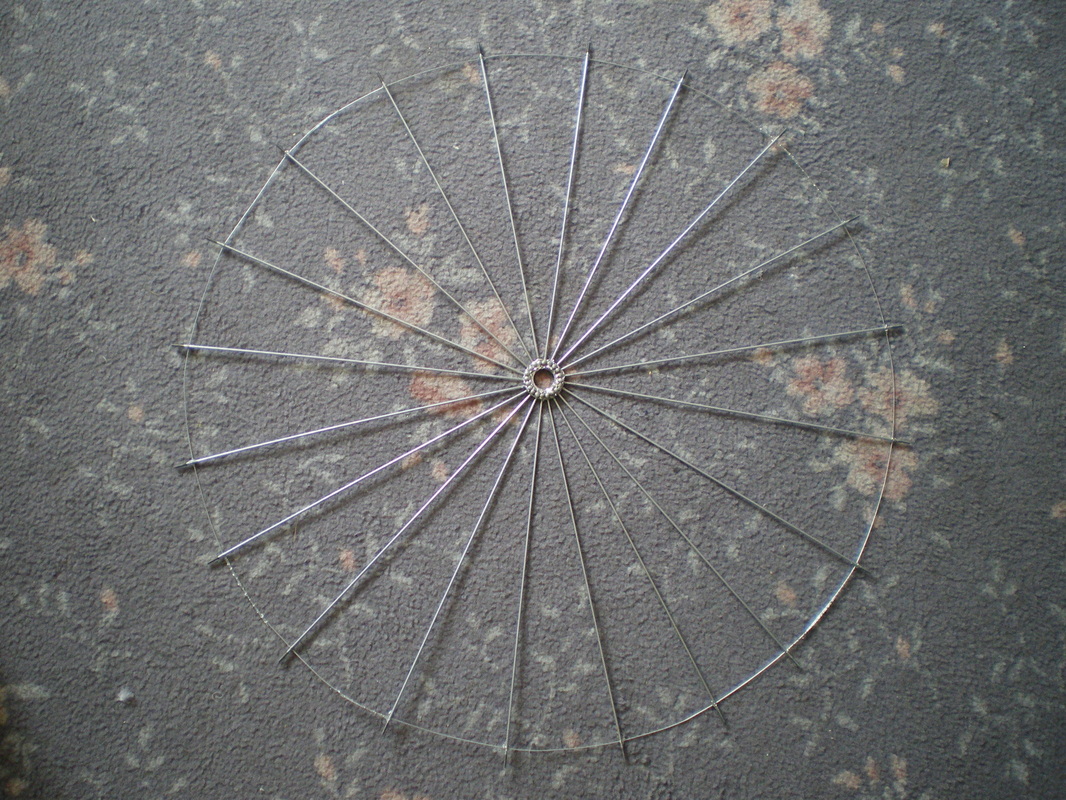
Solder each spoke in place, evenly spreading the spokes into a circle.
|
.
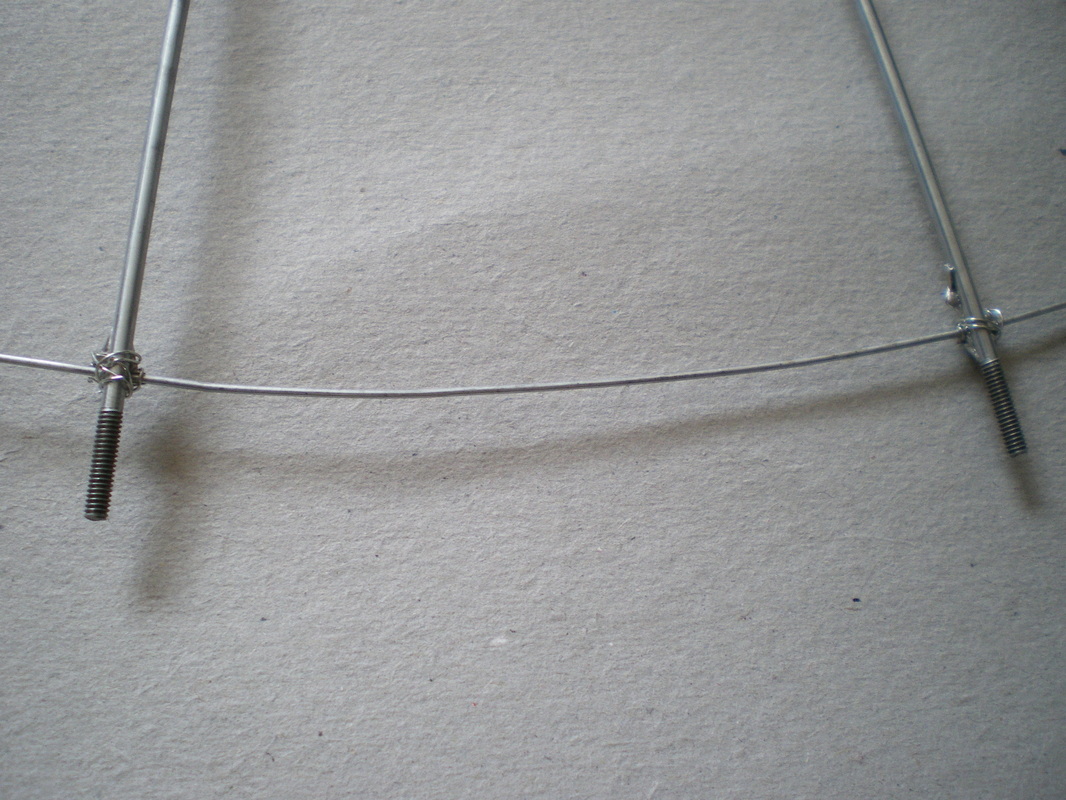
Using craft wire, join each spoke just below the screw end and solder in place.
|
.
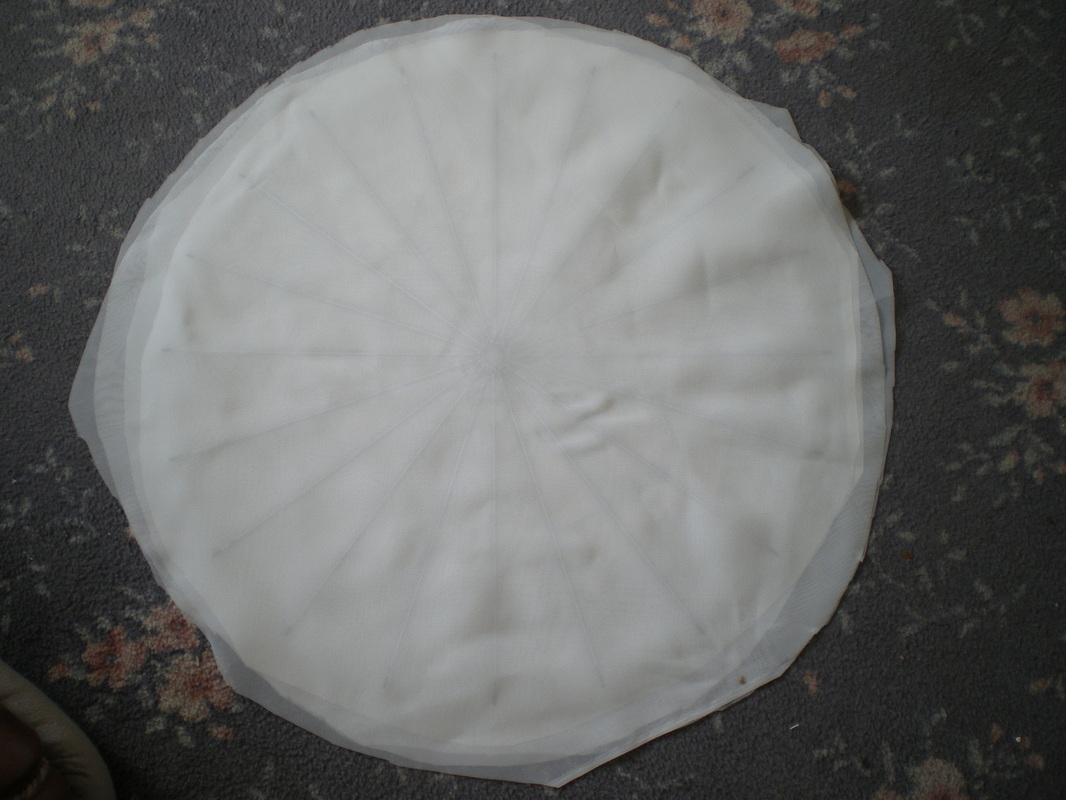
Cut out 4 circles of undyed chiffon, two for each side of the spokes. Make sure you leave a margin around the edge for neatening.
|
.
Spray glue one circle of chiffon, place the second circle on top (smooth down). Place the spoke wheel on top of that. Spray glue on and place another circle of chiffon on the wheel, spray again and place the last circle on top, effectively making a "spoke sandwich"!
|
.
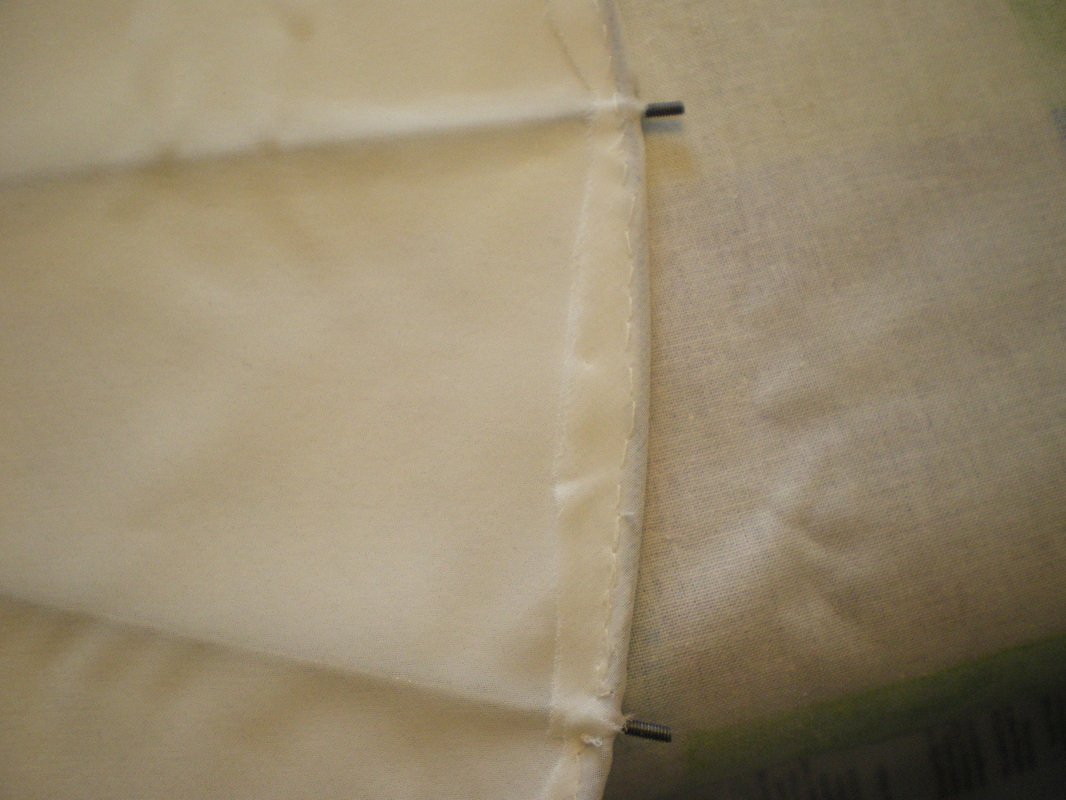
Turn over the edge and hand sew. Make a small slit to expose the spoke and secure the fabric. Cut off the excess material.
|
.
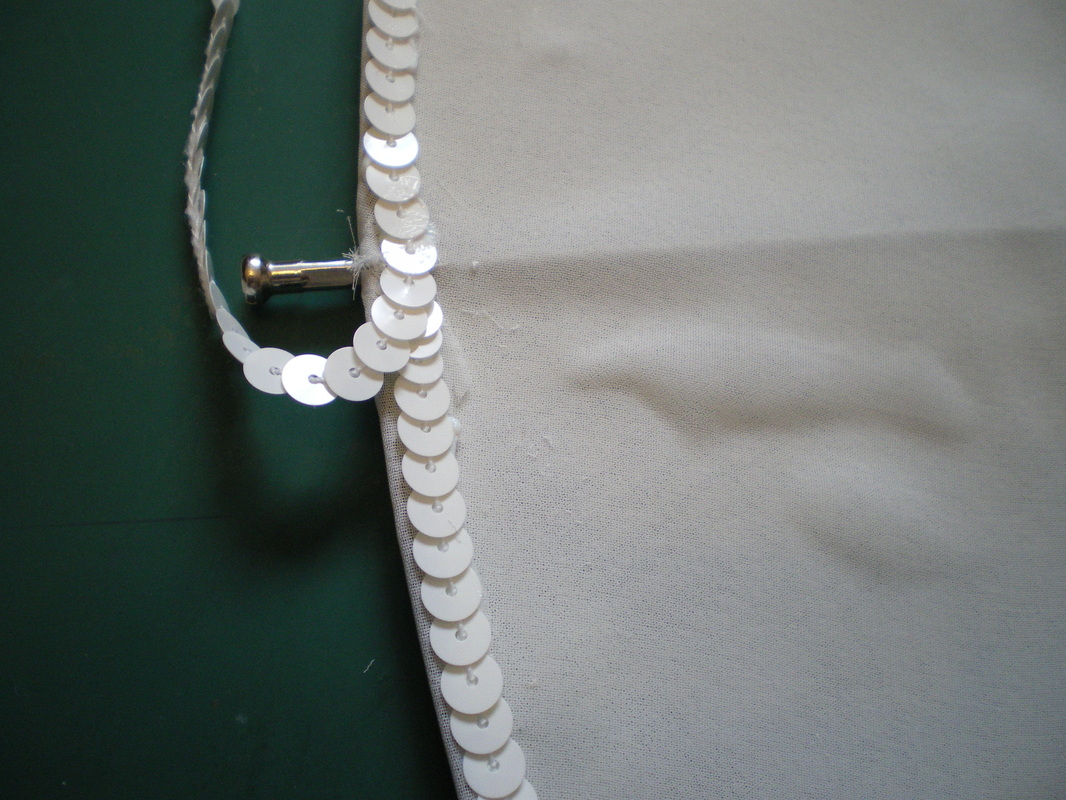
Sew the sequins to the edge on the front and back of the parasol, then screw the nipples on very tight.
|

.
Using a pencil, we sketched the curly design down each spoke and went over it with glitter glue. Do the same for the reverse following the lines exactly.
|

.
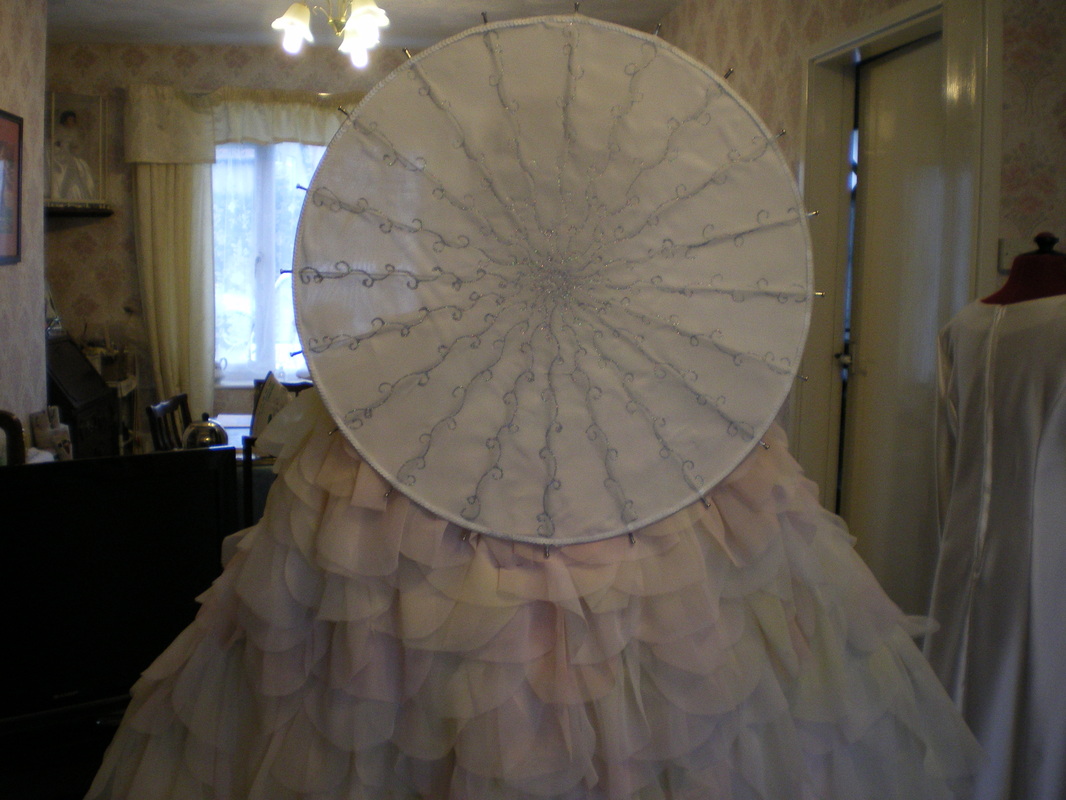
The finished parasol, as you can see, it is very see through.
|
Other people on the internet, have tried all sorts of contraptions to apply the parasol to the cape, including shoulder holsters made from metal and placed over the shoulders like a rucksack. But nothing could be siimpler than a needle and thread!!
Get someone to hold the parasol against your back, the centre needs to be level with your neck. Put some pins in place to hold it temporarily. Place the cape and parasol on the floor, then using the line of the spokes, sew through the parasol and onto the cape, but only use the five spokes at the bottom, you won't need to sew any more than this, making sure there is a centre spoke at the bottom in line with the middle of the back. Sew in place almost up to the centre wheel.
Get someone to hold the parasol against your back, the centre needs to be level with your neck. Put some pins in place to hold it temporarily. Place the cape and parasol on the floor, then using the line of the spokes, sew through the parasol and onto the cape, but only use the five spokes at the bottom, you won't need to sew any more than this, making sure there is a centre spoke at the bottom in line with the middle of the back. Sew in place almost up to the centre wheel.
.
Lift up the back petals to lie against the neck.
|
|
This completes the costume.

To make the Jewellery head piece you will need:
A packet of blue tack or similar (used for putting up posters on glass and walls)
Approximately 40 x 4mm loose diamante stones
3-5 5mm loose diamante stones
A strip of 2mm diamante stones (joined)
Solder
Medium thickness craft wire
14 x 5mm jump rings
Sterling silver Figaro chain (as used in the movie)
I have never soldered before and thought this would be difficult to make, but as you can see from my instructions, its not that difficult to do.
.
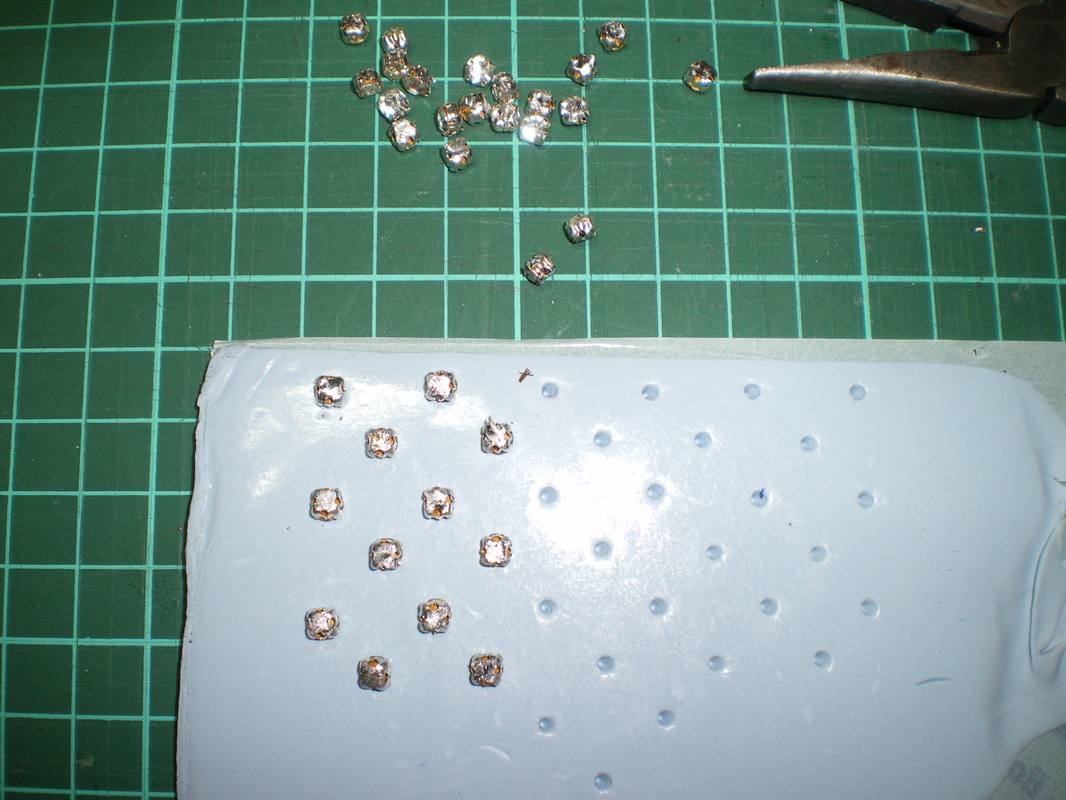
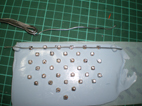
The first thing to do, is measure the available space on your forehead where the head piece will fit. Lay out your blue tack. Lay the 4mm crystals upside down it, spacing them equally across the top and down the sides.
|
.
Solder the wire to the top row, with an overlap either end. I placed a blob of blue tack under the ends to keep the wire flat. Then place wires diagonally from the top, going left and right.
|
.
When all the stones are joined, turn the wire on the third stone out. (Please note, I chose the wrong wire on the left hand side, this should be the third stone down, I corrected this before continuing).
|

.
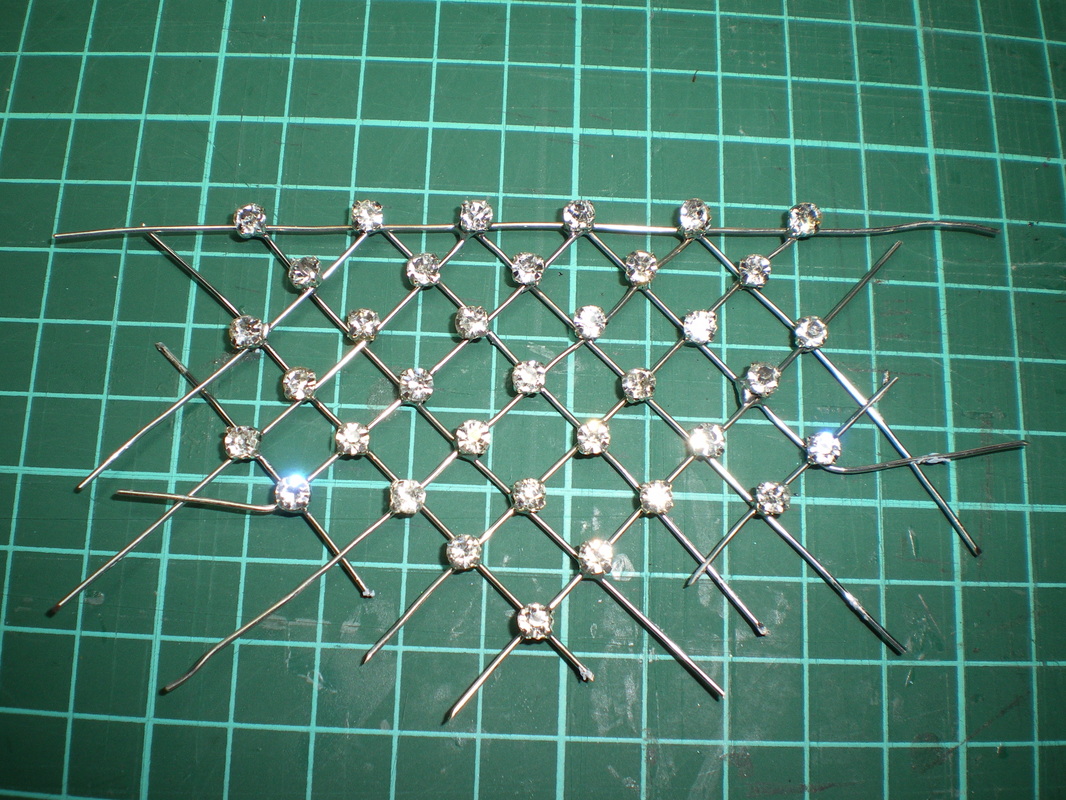
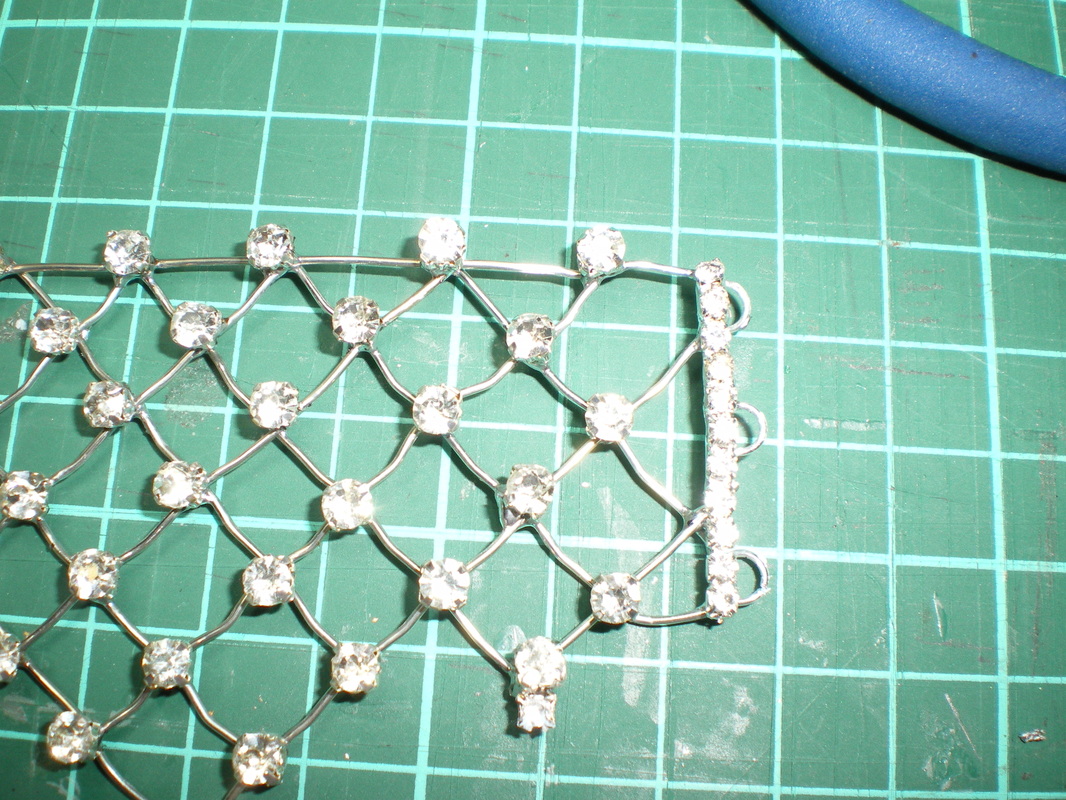
Taking the 2mm linked crystals, solder them shut in a line and solder them approximately 1cm from the last crystal on the top line, solder them to the free wires and finish 1cm from the bottom stone. While you have it in this position, solder 3 jump rings to the back. You can now cut off any excess wires.
|
.
This picture shows a 2mm single stone soldered to the second stone in at the bottom. Do this to the bottom middle and corresponding left hand side. You will then solder a 5mm stone to the bottom of each.
|
.
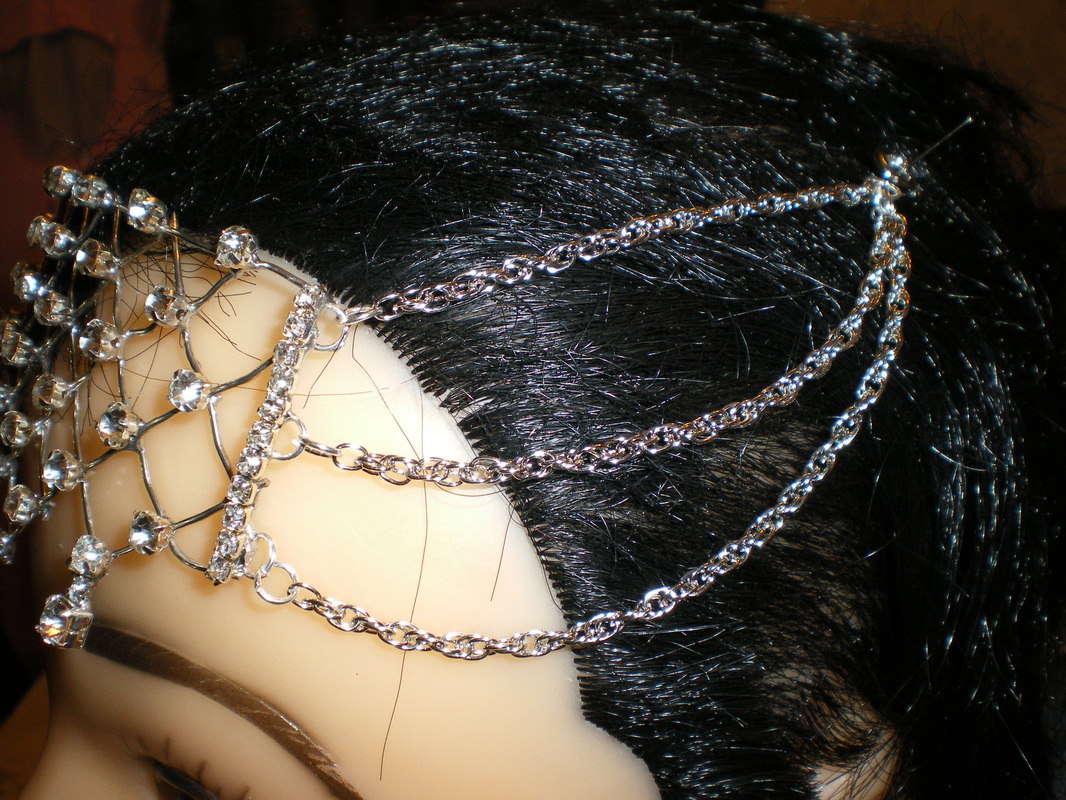
Cut your Figaro chain into lengths, the top one has to be straight, then allow a slight droop on the last two. Attach to the jump rings at the head piece, then connect all the chains to a single jump ring.
|
Carefully bend the head piece to fit around your forehead. We connected a short piece of black elastic to the jump rings at the back to allow a little flexibility when putting in on the head. We then used a couple of hairpins to hold the elastic in place.

.
This completes the headpiece
