For this costume, you will require experience in bead work, embroidery and embossing.
Difficulty factor 10 - 10
Difficulty factor 10 - 10
Tutorial for Making
the Packing Gown
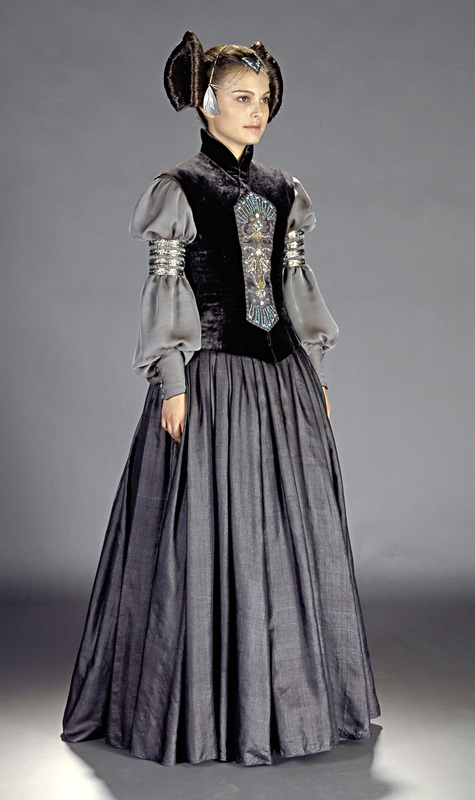
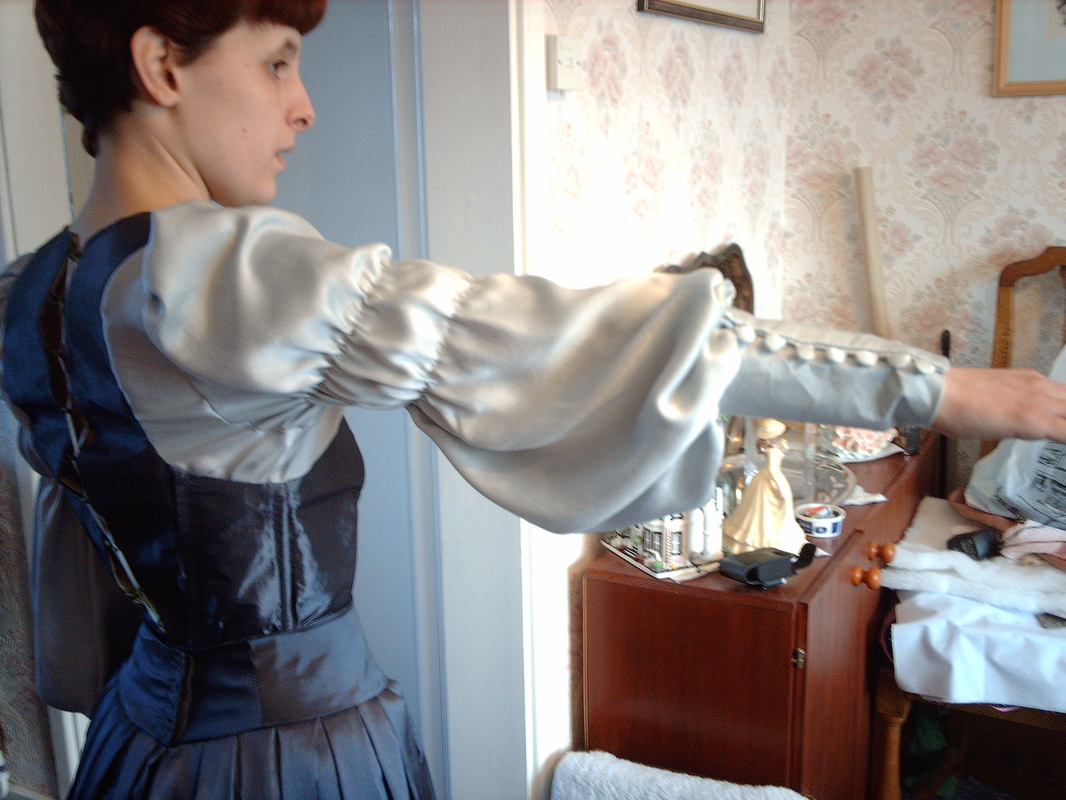
The original costume worn by Natalie Portman as the character Padme Amidala from the film Star Wars 2.
Please be aware that we do not make costumes to sell or hire
Please be aware that we do not make costumes to sell or hire
Materials:
6 metres of grey/blue Polyester Taffeta
1 metre Charcoal Grey cotton velvet
1 metre Sandwashed Silk Satin
Dylon cold dye, Grey
2 metres plastic sew-in boning
3 metres 1/4" ribbon for lacing and loops
1 metre grey lining
14 shank buttons (these will be covered with fabric)
1" wide velcro
1 metre iron on interfacing
Motif Materials:
White seed beads (size 8)
Gold seed beads (size 8)
Turquoise beands (6mm)
Pearl beads (6mm)
Turquoise seed beads (size 11)
Dark grey embroidery thread
1/4 metre blue/grey wool mix material
Small amount of backing material
Long dark grey shoelaces
Medium sized stud fasteners
Gold metallic thread
Armbands:
Craft aluminium
Embossing tools
Turquoise paint
Piano wire
Felt
Head Piece:
Craft alumiunium
2" silver plated craft pins
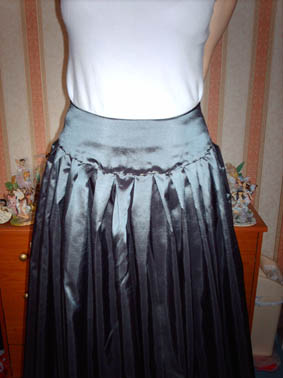
For the skirt, I didn't follow any pattern, just boxed pleated 4 metres along one edge. I cut a 4" yoke to reduce the bulk at the waist.
.
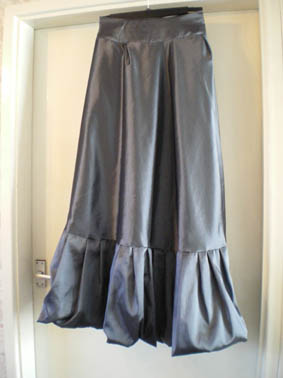
I didn't cut any material off the length as I need to turn it to the inside to give the illusion of a double skirt.
Turning the skirt inside out, I added a short skirt to the yoke then attached the excess skirt material to it after gathering the edge.
|
.
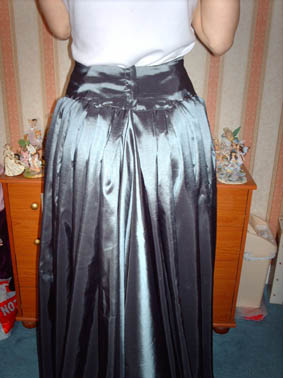
Join the back seam, but leave a gap at the top to get in and out of the skirt. Attach a length of velcro to the yoke.
|
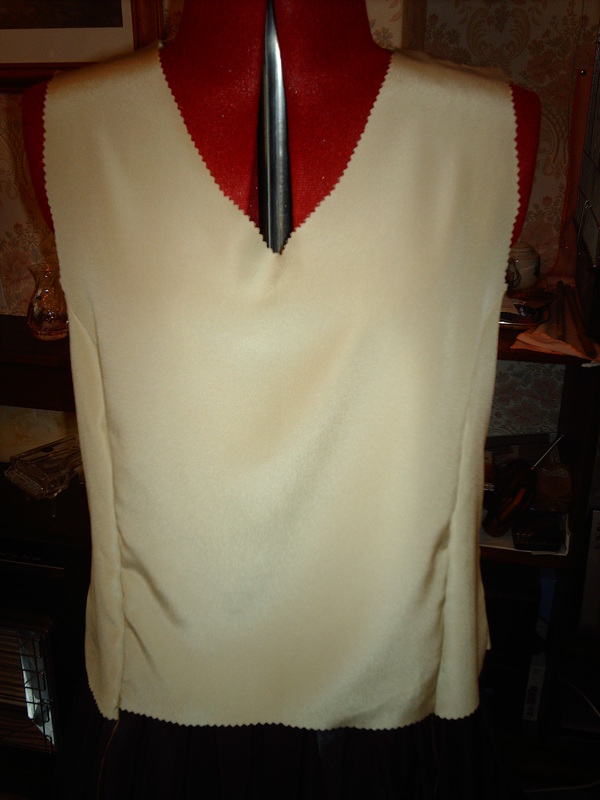
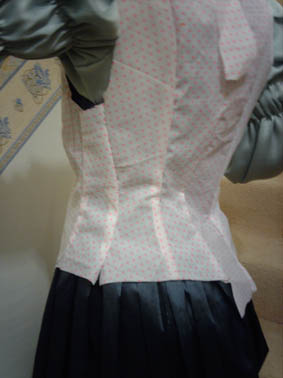
For the vest, I used Butterick B4736, view C, leaving off the fancy trim. I cut the middle front completely open, then restitched it with a slight shape to fit the contours of the body. On the inside, I used iron on interfacing, then boned the seams.
|
.
For the lining, I left it as it was with a centre back opening. I then joined the two pieces together
|
.
I am demonstrating this with a T-shirt underneath.
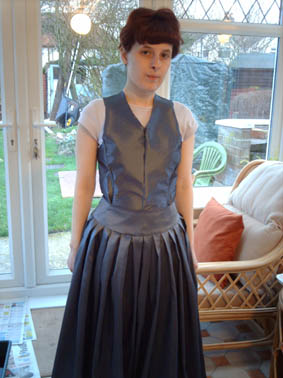
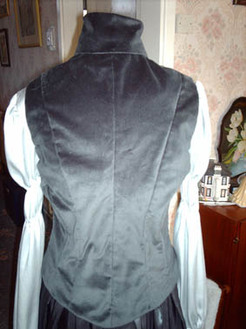
At the centre back of the waistcoat, I sewed on some loops so I can lace it up tight with some ribbon.
.
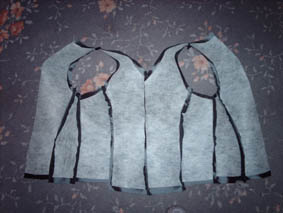
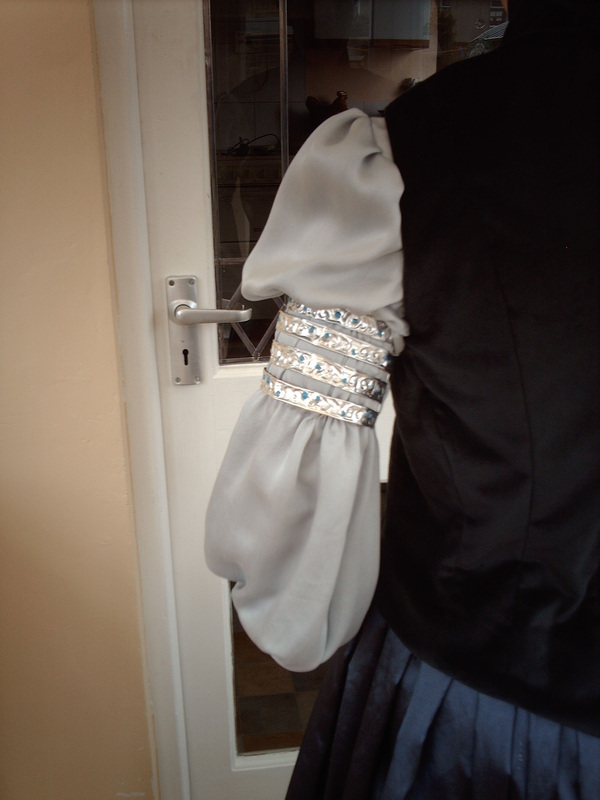
Okay, several things happening in this picture. First, the sleeve inset. I don't want to see the waistcoat showing through when the jacket is on, so I cut back about 2" of the waistcoat, then extended the sleeve to fit. I then ran shearing elastic around the upper arm, this is where the armbands will be.
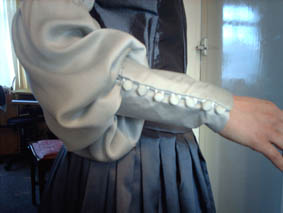
For the sleeves, I used New Look 6732. I didn't have a pattern for the cuffs so I made one up.

.
You can see from the previous picture, how long the cuff has to be and it has to fit tight around the arm. I then added 8 loops to the edge of each sleeve and covered shank buttons with the same fabric.
|
|
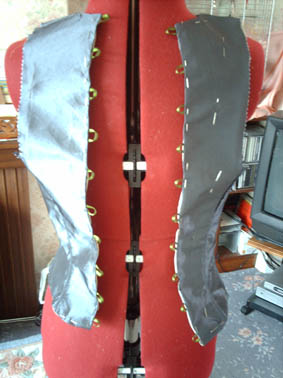
Making the Jacket. Every single piece on every costume we make is made as a mock up first before the final costume is made. Just about every costume I make does not have a standard pattern and so a lot of remaking is often done, especially in close fitting garments. This jacket was no different. The pattern for this does not exist, so I chose a 12 panel corset pattern, New Look 6480 and extended the pieces to fit. Every seam had to be adjusted, the arm hole had to be extended over the shoulder more and a new pattern cut for the cross over at the front. A collar also had to be constructed. Hopefully, the following pictures will show how it was done. I shall start off with the mock ups I made to the corset pattern.

.
The final length was shorter than seen here.
|
.
The seams are pulled in to fit and the bottom on the jacket will have a slight scoop.
|

.
Stud fasteners are used to close the jacket.
|
|
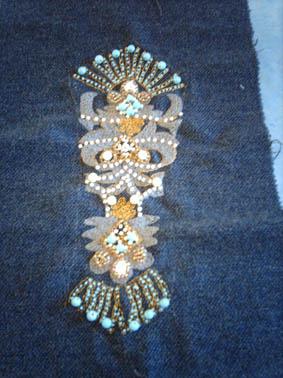
To make the motif will require some hand sewing skills, especially the chain stitich. I got a picture of the motif and blew it up to 4 times its normal size. Then scaled it down to fit the jacket front.
.
I drew all the outlines of the grey with tailors chalk then filled in with chain stitch and then applied all the beads. At this stage, the whole pattern is done without a border, I just kept to the measured height and width to do the motif.
|

.
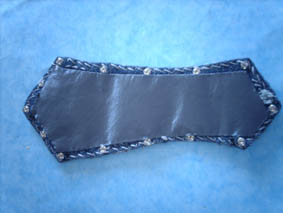
I searched everywhere to find some grey stripey laces for the edging and eventually found some football laces which were perfect!
|

.
I fastened the lace to the edge, by using grey thread and oversewing the lace to the edge every 1cm. The edge was then turned over to neaten.
.
Showing the reverse of the motif, I used a spare piece of Taffeta and put stud fasteners around the edge to attach it to the jacket.
|

.
Showing the motif in place. It is totally detachable. Now we will move onto those arm bands!
|
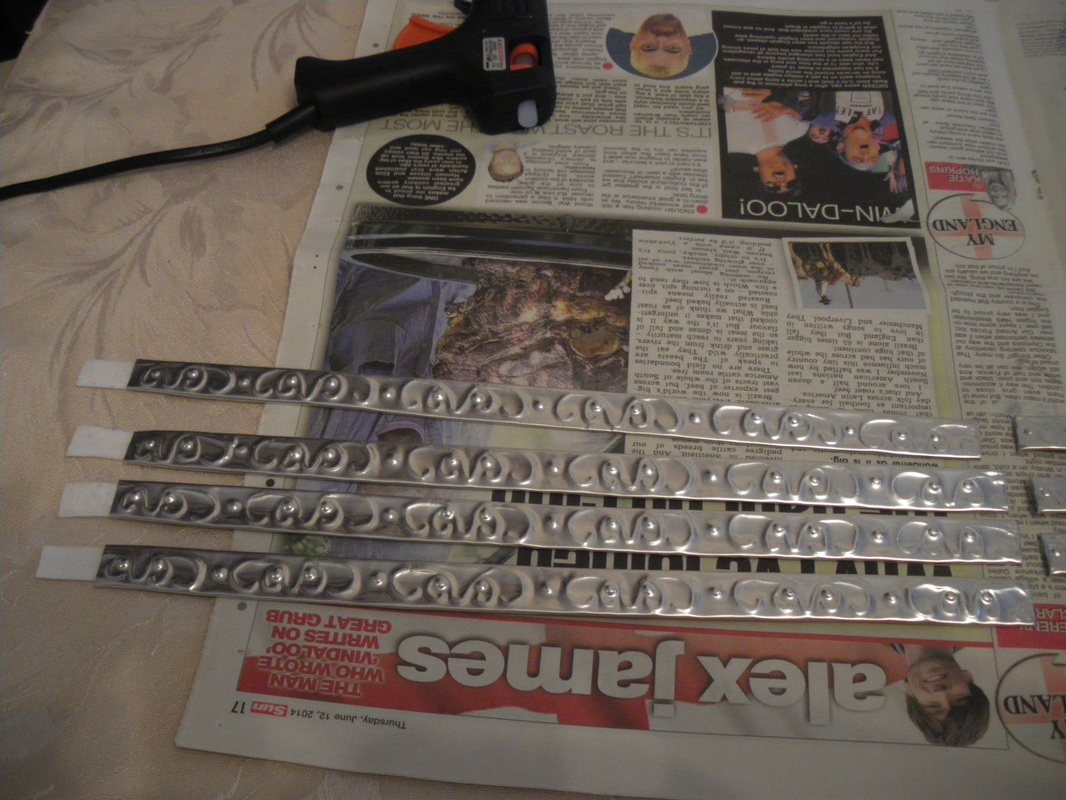
This is my first time using embossing tools, so I did a few practice pieces first to get the hang of it!
NOTE:
This costume is now 7 years old and has been worn quite a few times. Over time, the bands have deteriorated from constantly being opened and closed and have started to crack. This is the original method we used back in 2007 to make the bands. After this section of the tutorial, I have posted an updated version and a different way of making the bands.
.
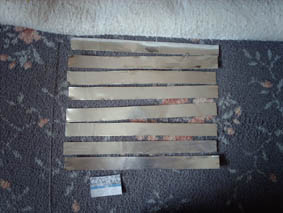
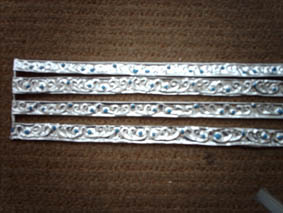
You will need 8 strips of aluminium, cut from an A4 sheet. Each strip is 30cm long by 2cm wide. Measure around the upper arm and allow extra for turning over at the ends. Also allow extra on the width for turning over to neaten. Draw a line 5mm in from both sides as your margin, in between this margin emboss your pattern.
|
.
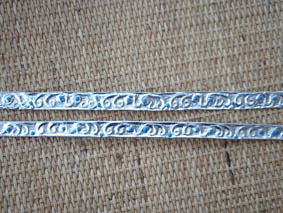
Tracing the pattern from a picture, emboss from the back. The pattern repeats every 4cms. Turn over the edges to neaten.
|
.
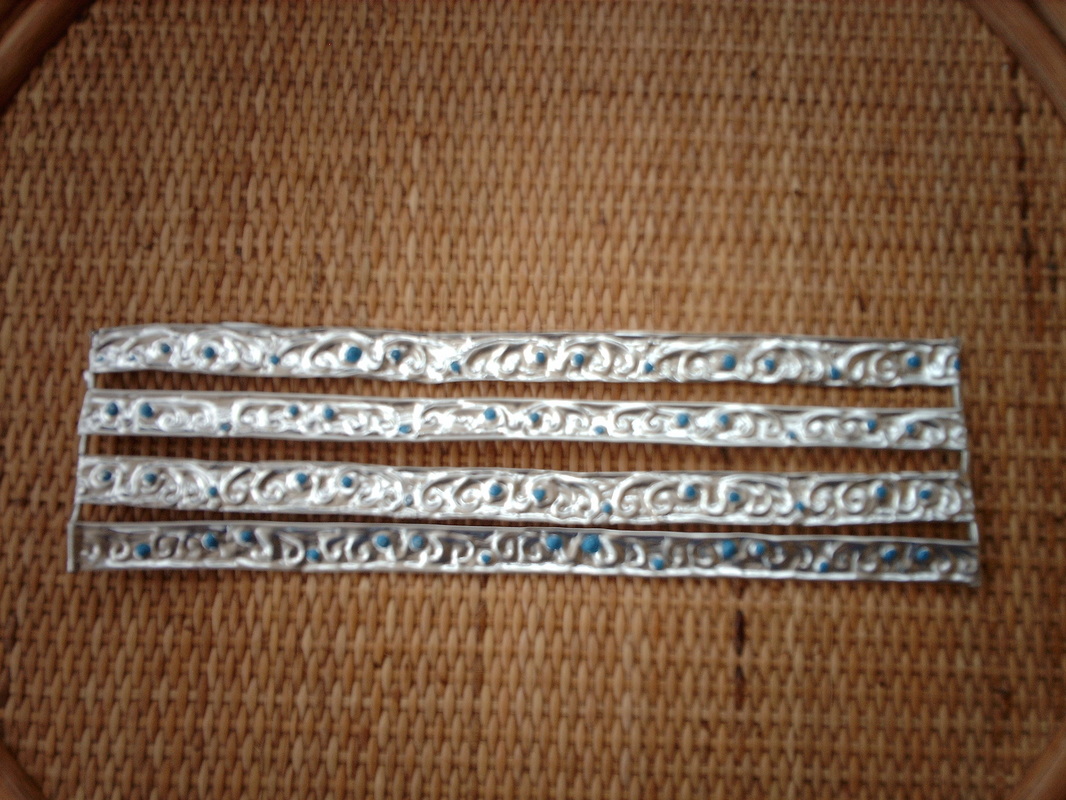
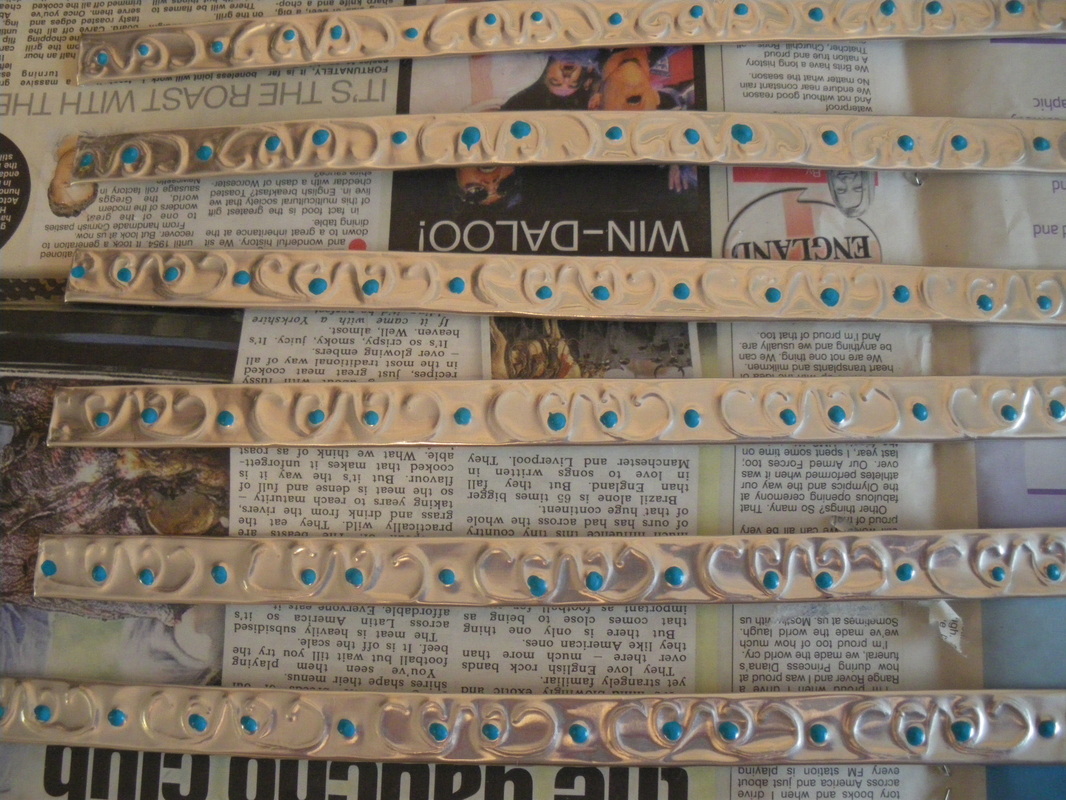
I used turquoise paint on the "balls" of the design. Using the piano wire, curl the ends into a small tube and thread onto the wire, also curl small spacers to go between the strips. Finish off the ends of the piano wire by turning it over at the top and bottom.
|
.
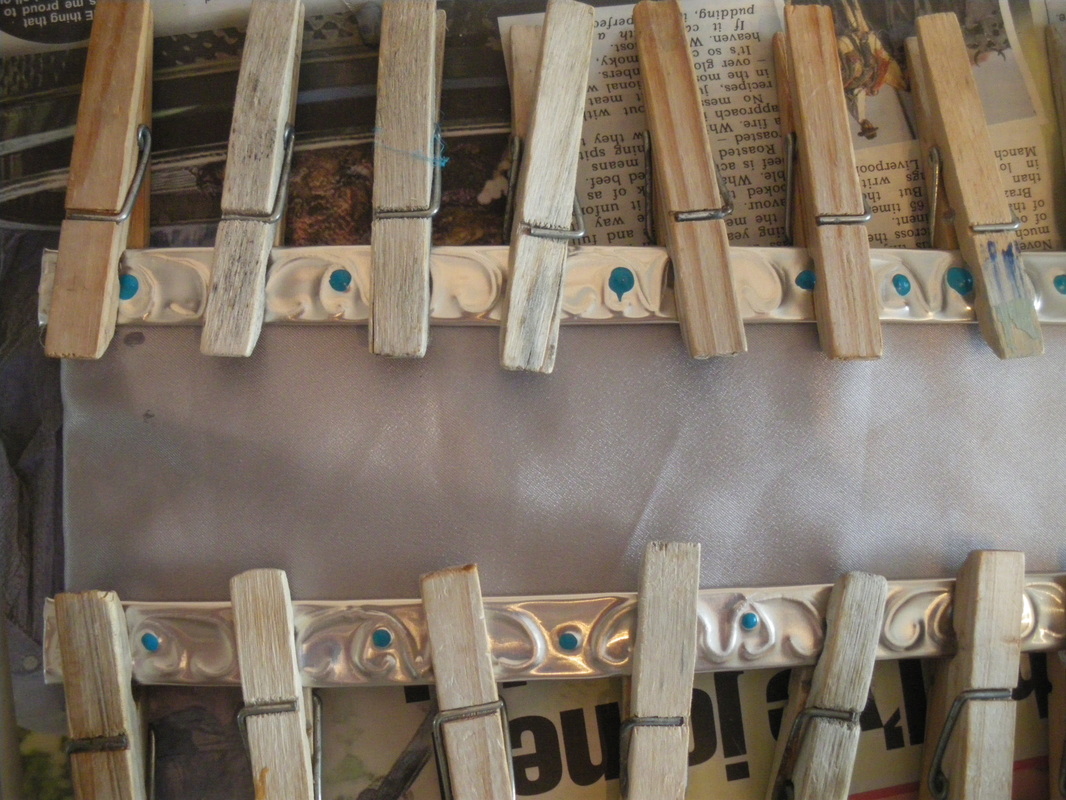
Showing the reverse, I glued some scrap felt onto the backs to prevent the raw metal edges from catching the blouse. You can now complete the other end using the piano wire.
|
|
.
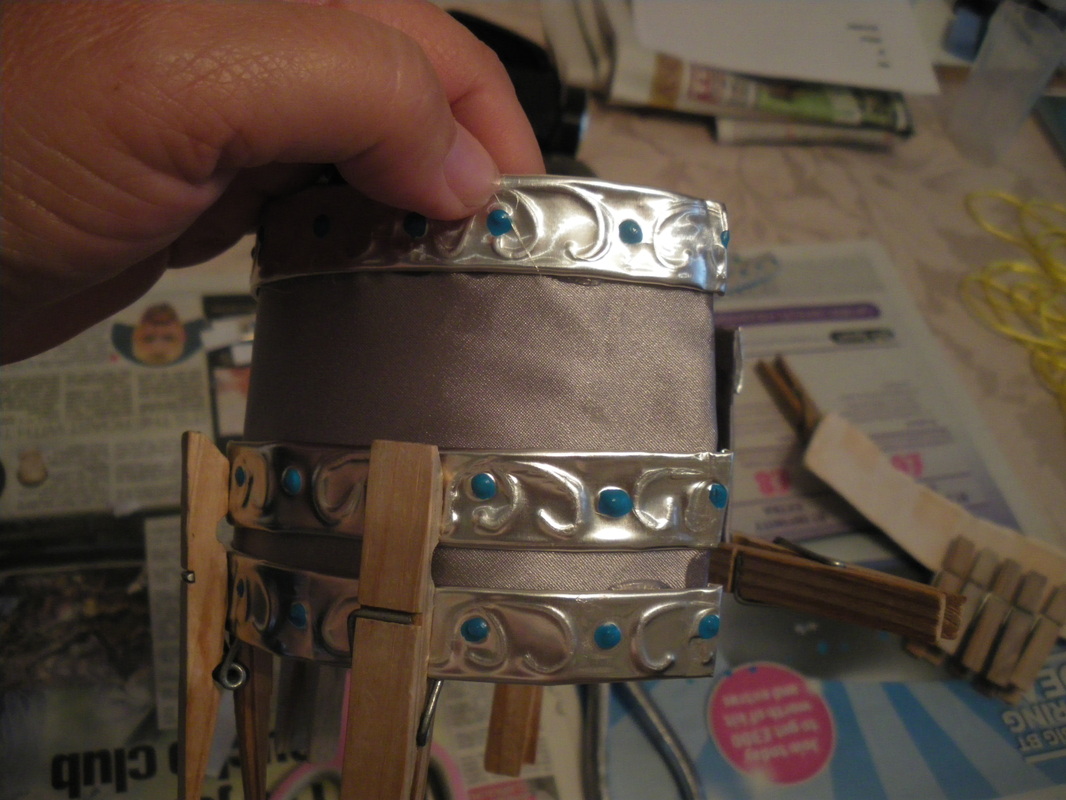
The finished arm band fits between the shearing elastic on the blouse. The bands are tied together just using short tie wraps, the opening is turned to face the body so you don't see where it joins. Tip: I used a can or jar to wrap the armbands around first before fitting them on, this gives them a round shape. After wearing they are straightened out for storage.
|
NEW VERSION
|
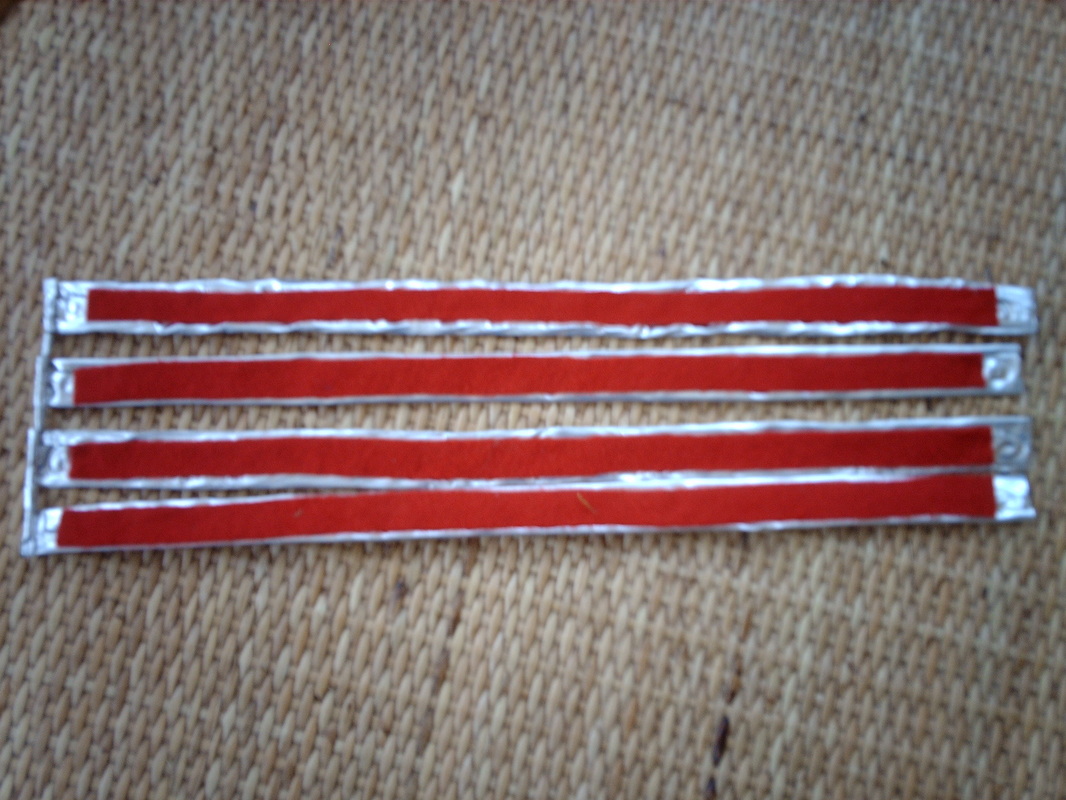
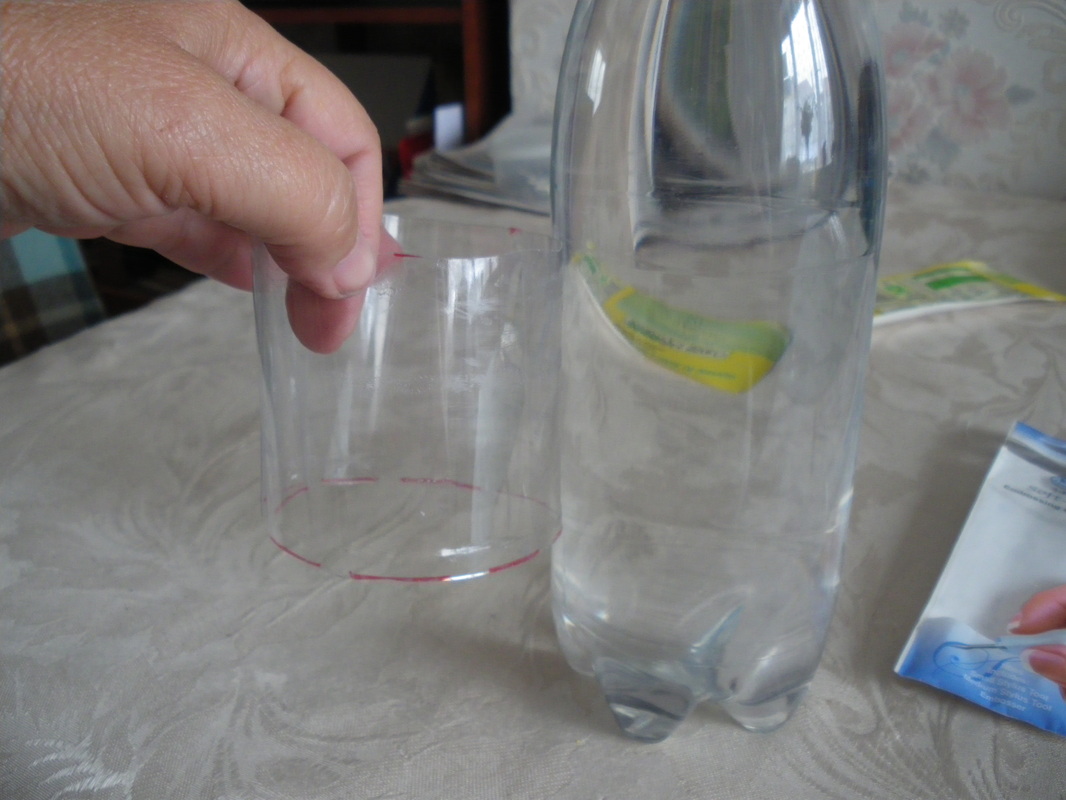
Measure loosely around the upper arm, then find a plastic bottle with straight sides, that has the same (or larger) circumference, cut a section 7cm wide x the measurement of your arm.
|
|
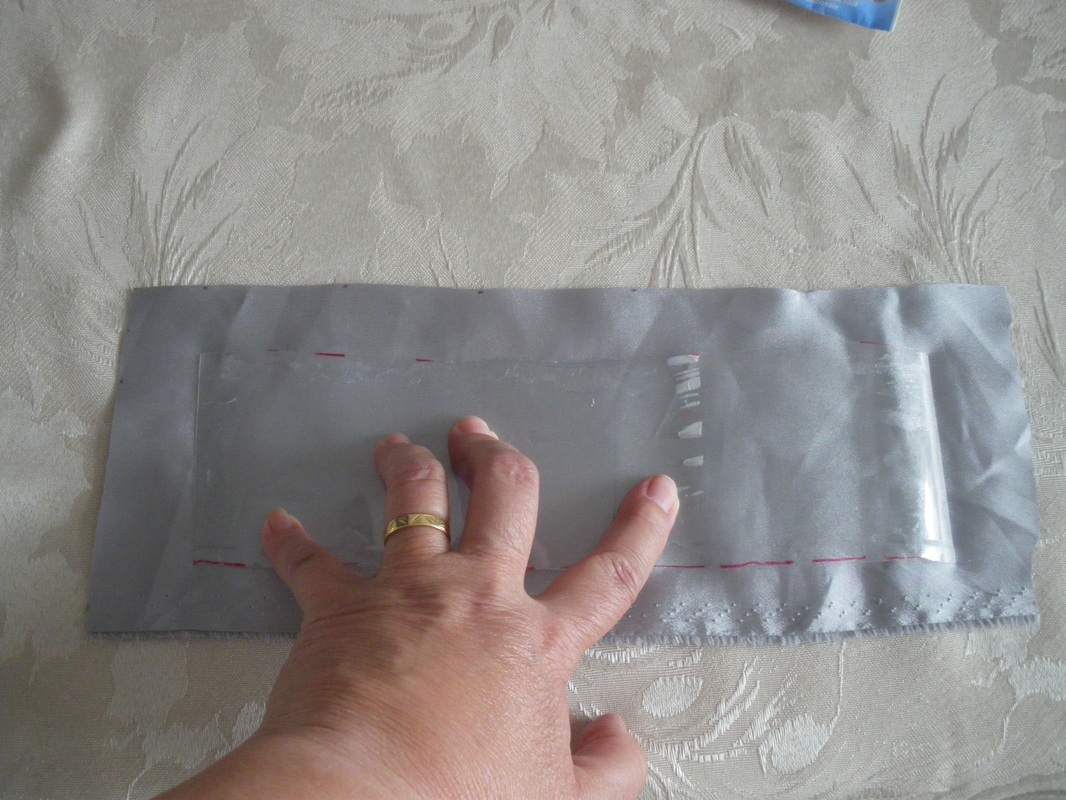
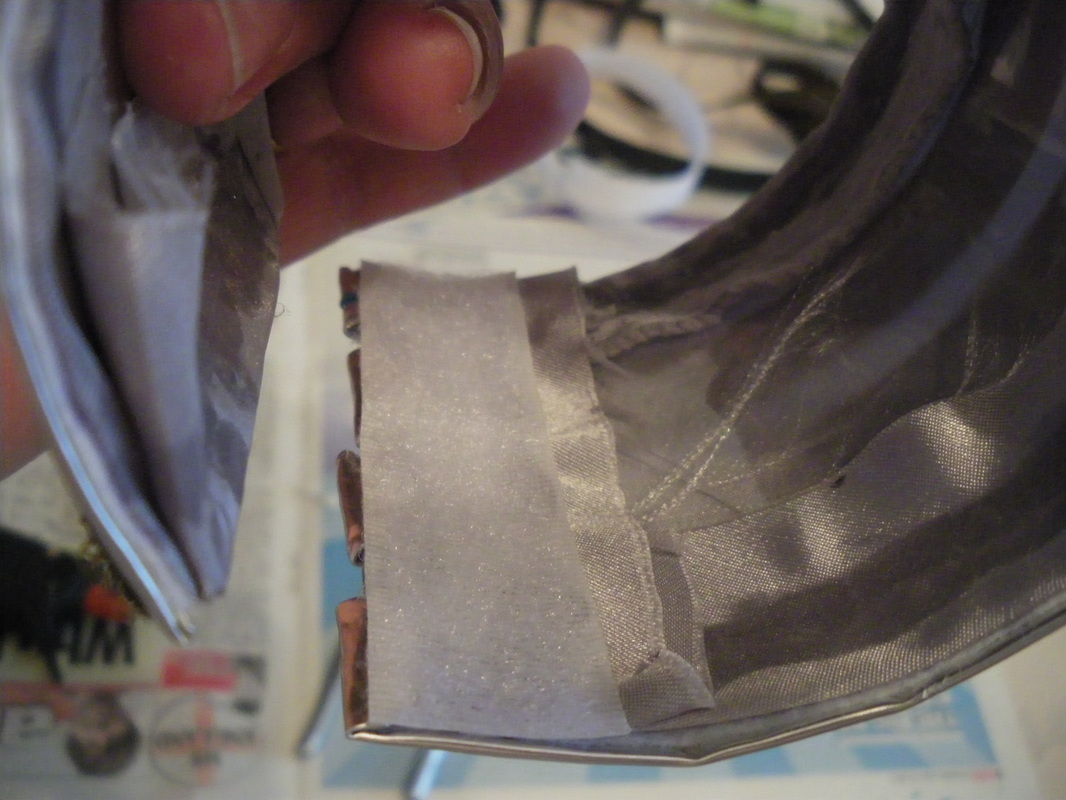
Cut out a rectangle of blouse material wider than the plastic section, turn the edges in and glue them to the inside of the curve.
|

|
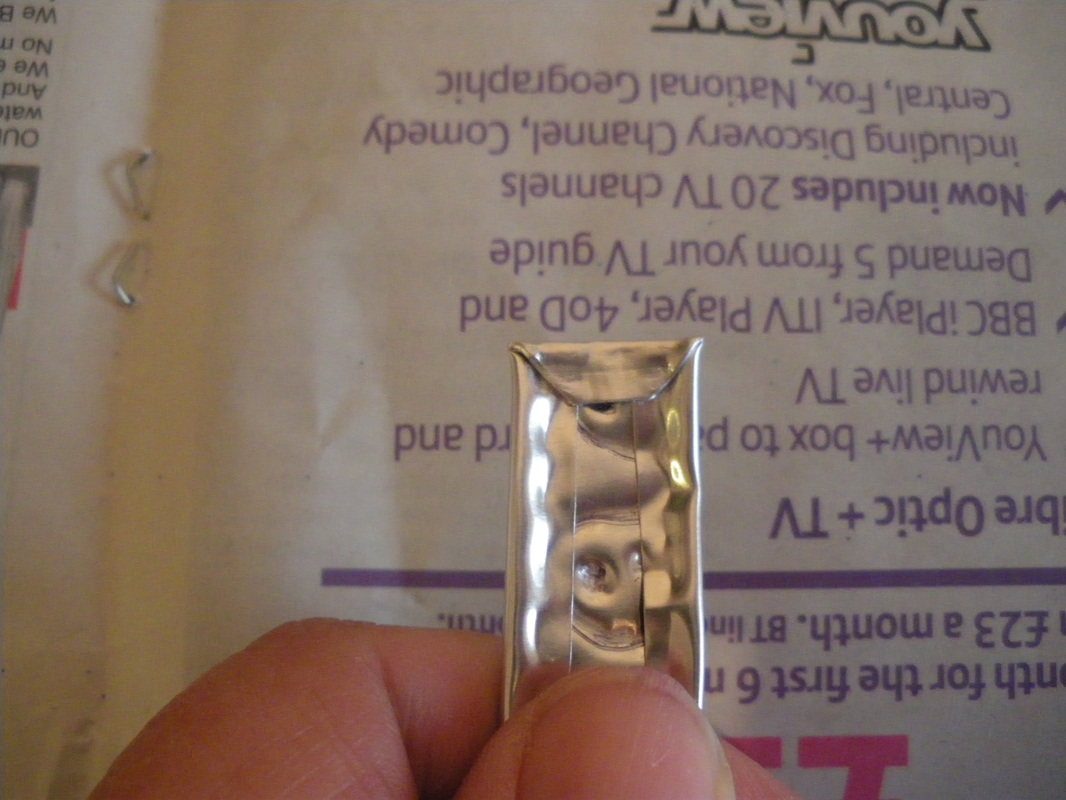
After cutting out the strips and embossing them, turn over the sides edges, then crimp 5mm at one end
|
|
Turn in both sides to create small triangles, then turn the top down and crimp closed. Don't worry about the other end of the strip just now, just leave it as it is.
|
|
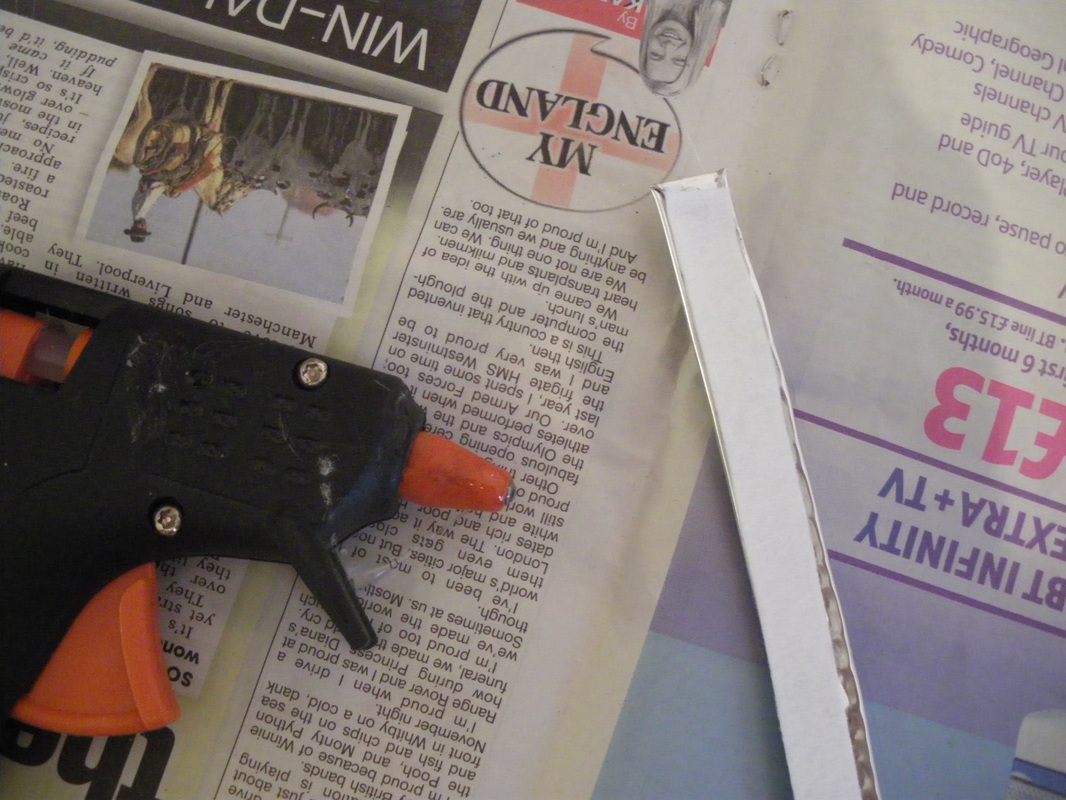
Glue a strip of felt onto the back of the metal band. Don't worry if the felt is too long, this can be cut later on.
|
|
Using turquoise acrylic paint, paint the dimples.
|
|
Glue the outer bands on first, when completely dry, cut the other ends of the bands and neaten using the same method as before. Get a bottle, similar to the original then gently bend your band around the bottle.
|
|
Now glue the middle bands, gently curving the metal band around the plastic as you go. At the end of each band, cut and neaten the ends as before. Make sure the design is the right way up.
|
|
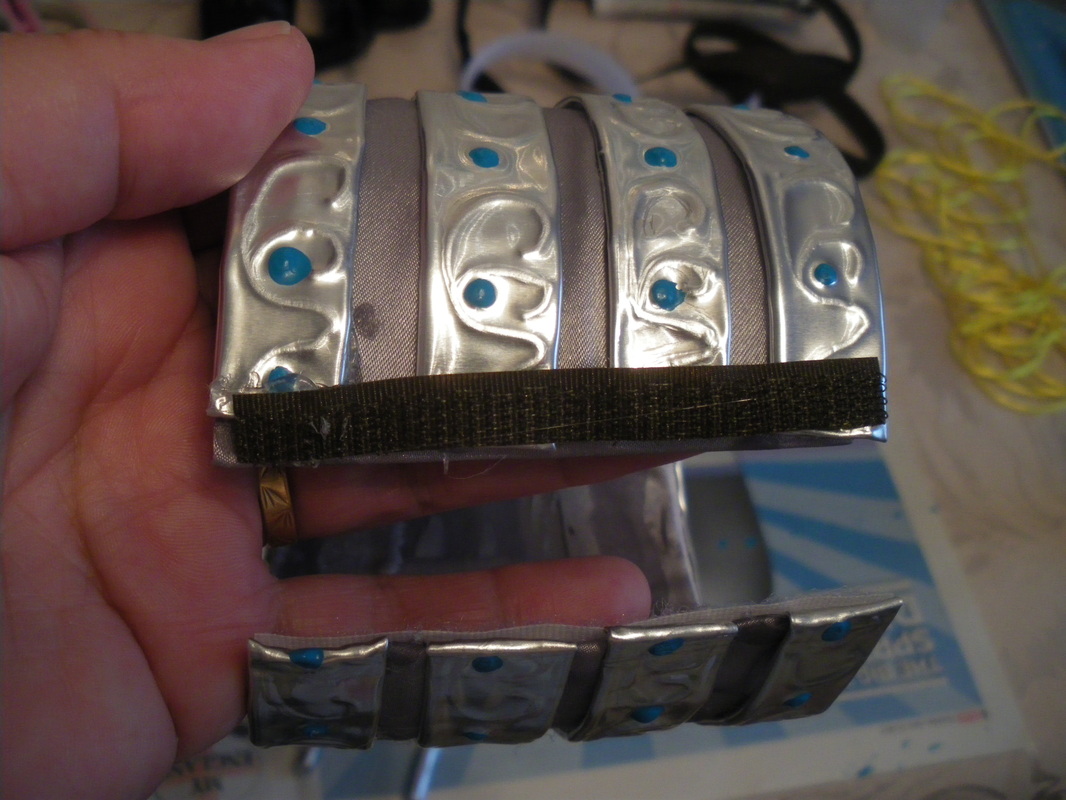
Cut a strip of hooked velcro to the width of the band, but cut the velcro strip in half. If you stuck your hooks on this side of the band, remember to glue it to the opposite side of the other band, so all the designs run in the same direction.
|
|
Cut a strip of fabric velcro to the underside at the other end of the band, you don't need to reduce the width of this one.
|
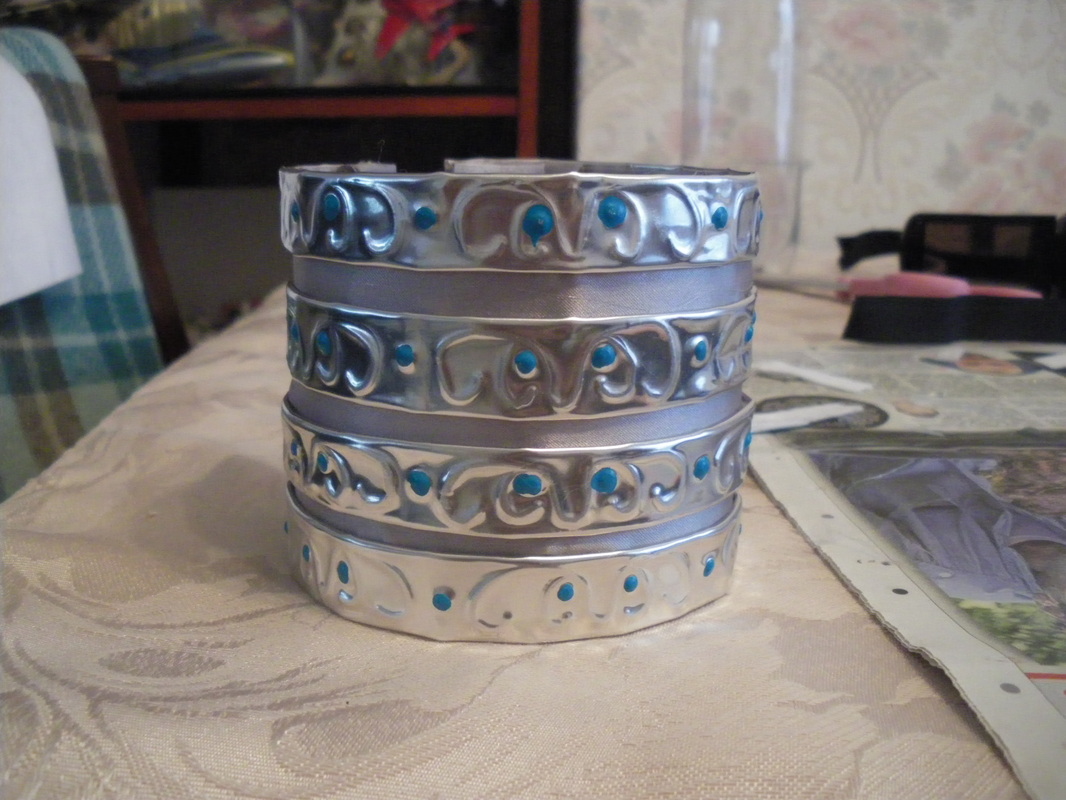
The finished band. A video of the making of the band has been put in our "Video Tutorials"
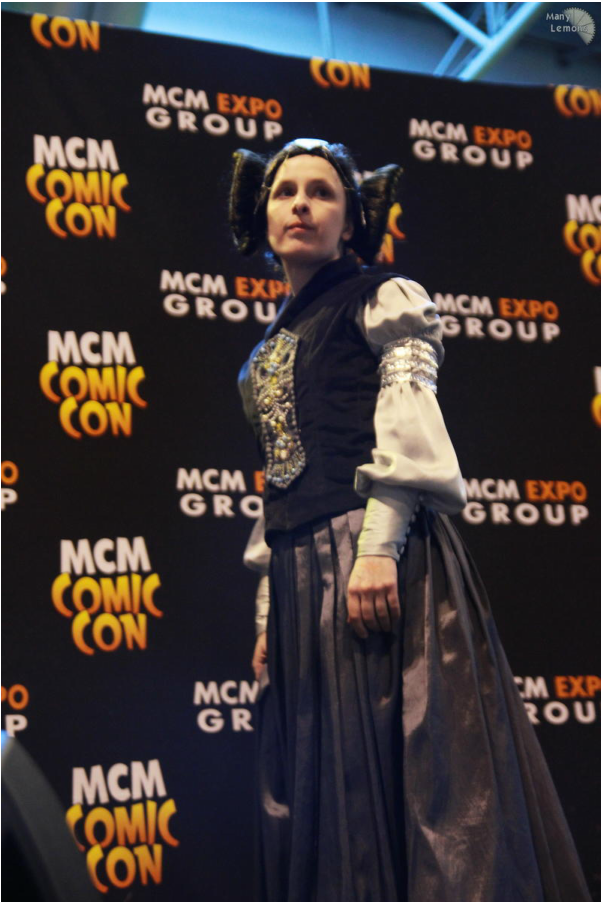
The completed costume
