For this costume, you will require some experience in making a corset (or you could buy one). with intermediate to advanced ability in sewing
Difficulty factor - 8 - 10
All videos for making the complete costume can be found in our "video tutorials" link
Difficulty factor - 8 - 10
All videos for making the complete costume can be found in our "video tutorials" link
BEFORE WE BEGIN, PLEASE
NOTE, THAT WE DO NOT
MAKE COSTUMES
TO SELL OR HIRE
NOTE, THAT WE DO NOT
MAKE COSTUMES
TO SELL OR HIRE
Scarlett O'Hara's
BBQ Dress
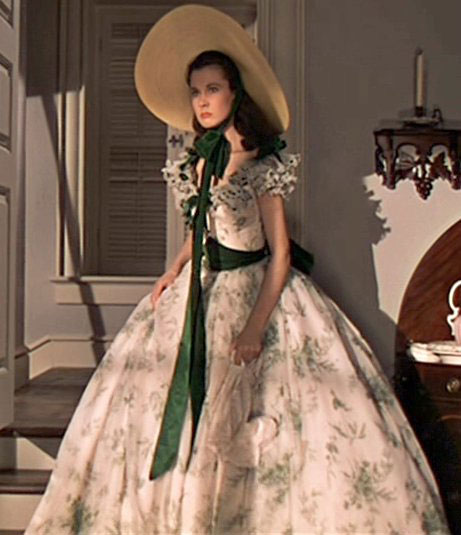
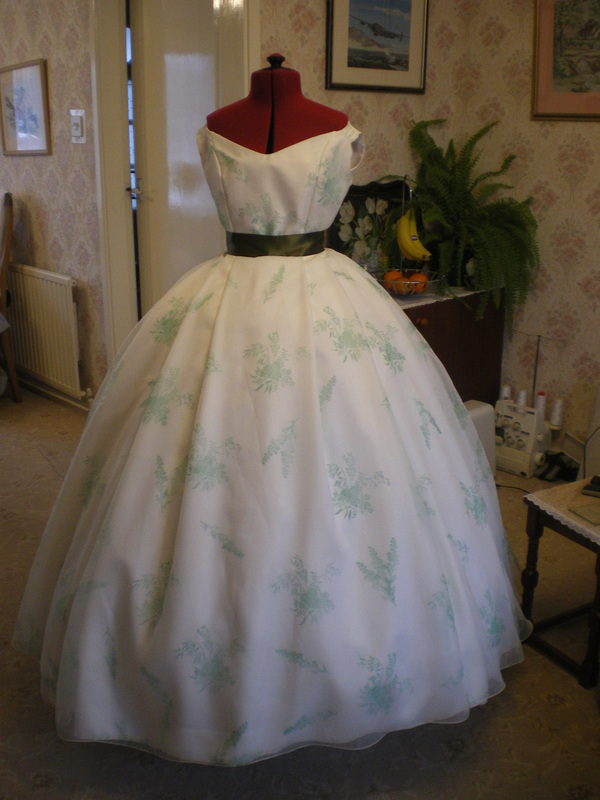
The original costume worn by Vivien Leigh as the character Scarlett O'Hara from the film Gone With The Wind.
5-6 hooped skirt. (Ours had to be cut down because Tracy is quite short)
Materials:
Corset: (we made ours pink, but you can make it any colour you like, just substitute the fabric and binding.
Pink bias binding
2 metres Pink Satin fabric
6 metres sew-in boning
Eyelet/grommet set
3 metres flat lacing cord
Chemise:
1 metre white cotton
Petticoat:
6 metres broderie anglaise cotton cut into 9" strips.
Length of white petersham
2" ribbon
5-6 metres 6" wide cotton flat lace trim
Dress Skirt:
6 metres cream soft cotton lawn (layer 1)
6 metres soft light weight cotton (layer 2)
6 metres Ecru polyester organza (top layer)
2" wide dark olive green ribbon for the waistband
Block stamps
Bodice:
1 metre Ecru polyester organza
1 metre interfacing
1 metre white polyester
Velvet Bow, wide waistband and hat ribbon:
3 metres 1" moss green ribbon
11 - 13 metres x 7mm moss green ribbon
52" x 2 metres moss green cotton velvet
1 metre of a similar coloured lining
Inkpad VersaCraft in the colour Forest (see)
www.bladerubbercraft.co.uk/accessories/inkpads/fabric-inkpads-versacraft.html?limit=36
Making the Chemise:
|
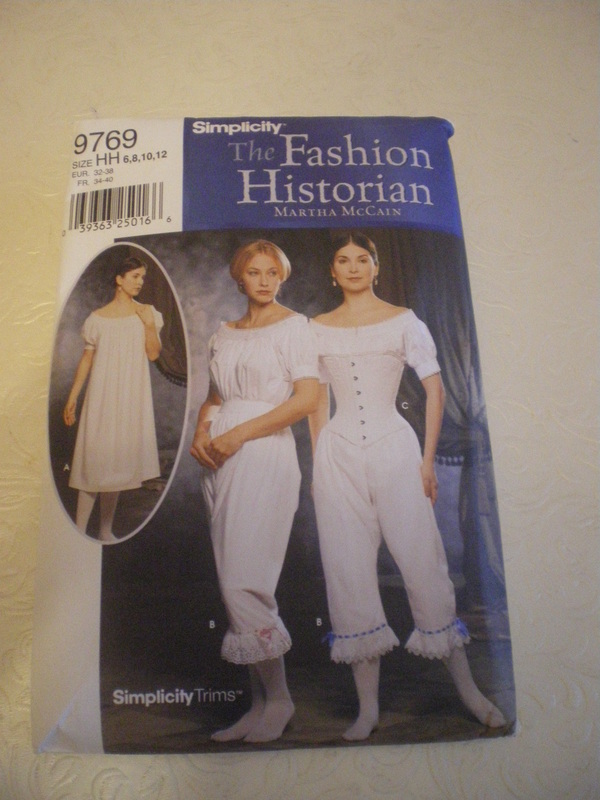
I used Simplicity 9769 for the chemise and corset, the chemise was shortened and I left off the sleeve and decoration. Later on in the instructions, I attached stud fasteners to the chemise sleeve to the dress as the sleeves kept dropping down! The corset was made up exactly the same but I had a back opening instead.
|
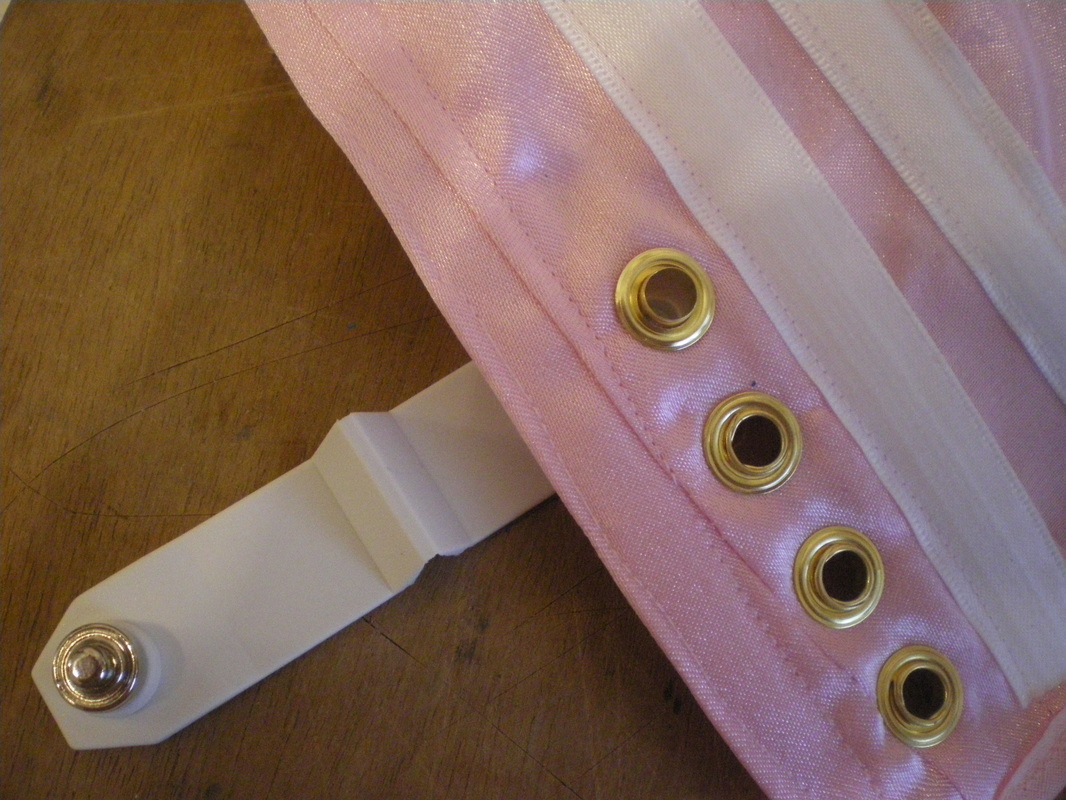
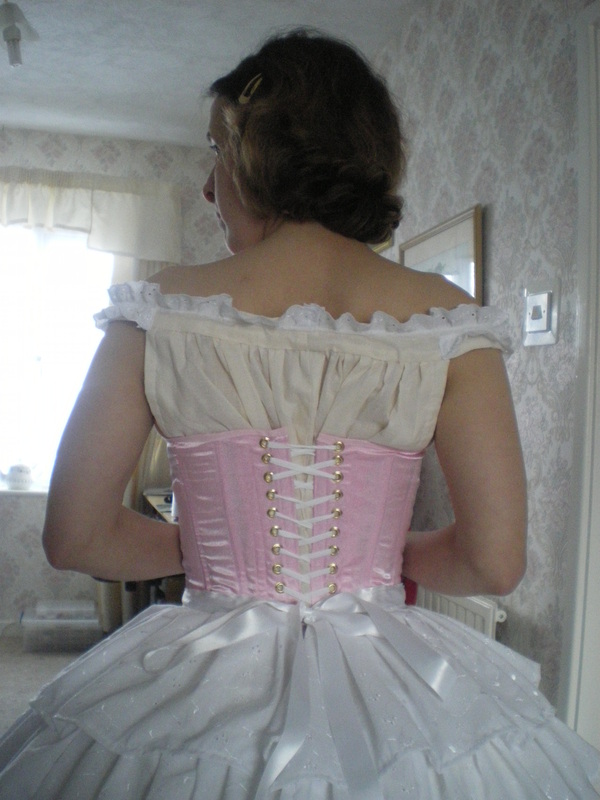
Instructions for applying the grommets to the corset:
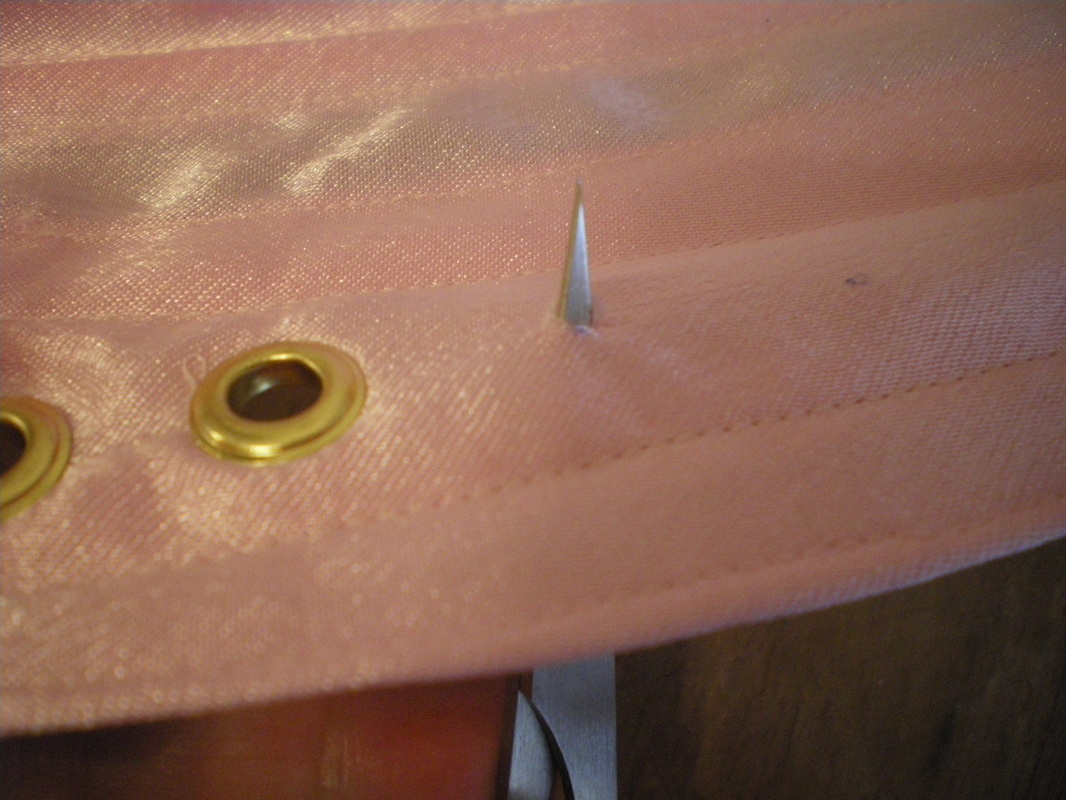
Starting 1.5cm from the top, mark 1.5cm spaces. Coming up from the back, use sharp scissors or an awl to make a small hole.
|

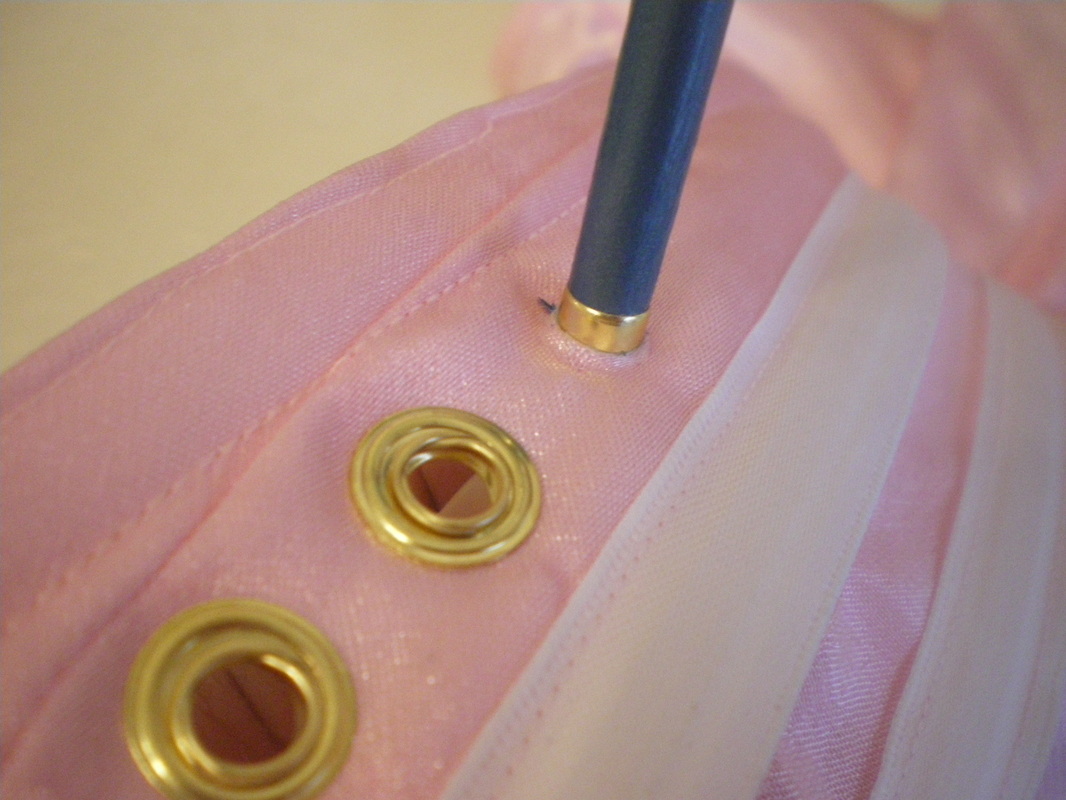
Get a pencil or paintbrush that is tapered, put the "top hat" onto it, then push the stick through the hole you made, make the hole slightly larger if the stick will not fit.
|
Push the "top hat" down the stick, turn the corset over and make sure it comes through the fabric on the other side, carefully remove the stick leaving the "top hat" in place.
|
Place the tool underneath the "top hat", put the ring on the stud, fold the tool in half to cover the grommet and hit it squarely with a hammer 1-2 times.
|
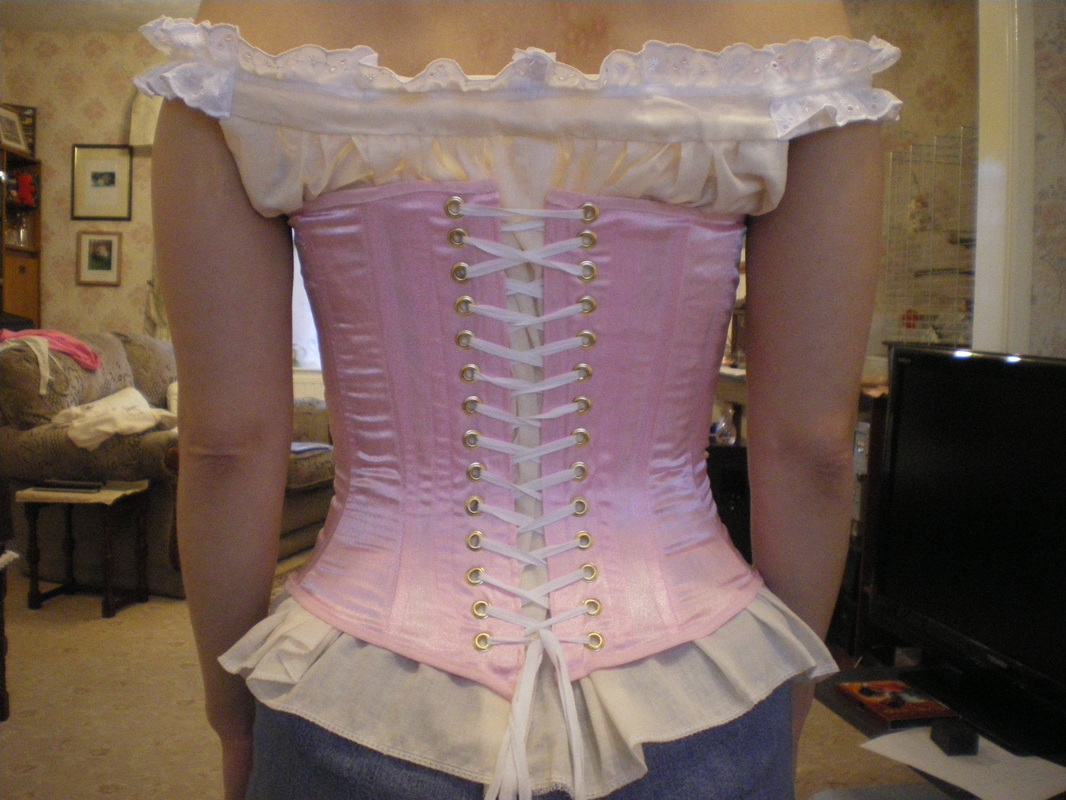
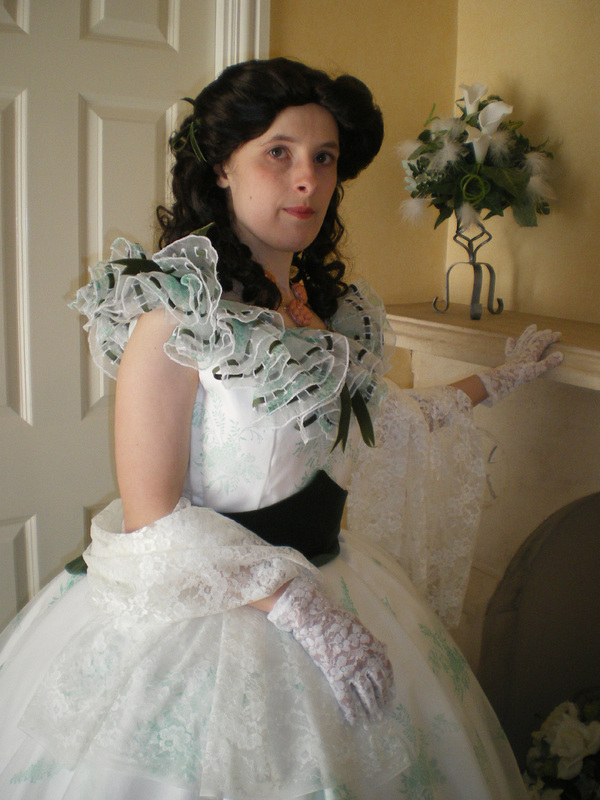
Please note: I put lace around the chemise, but later removed it as it showed under the dress too much. Lace up your corset and its finished. Try to aim for an even space all the way down the opening.
Making a Bustle:

|
You don't need to be too accurate with your measurements as long as it fits across your back. The amount of filling will depend on how much of a bustle you require.
Once your have sewn up your two pieces of fabric, sew on a length of narrow ribbon to tie. |
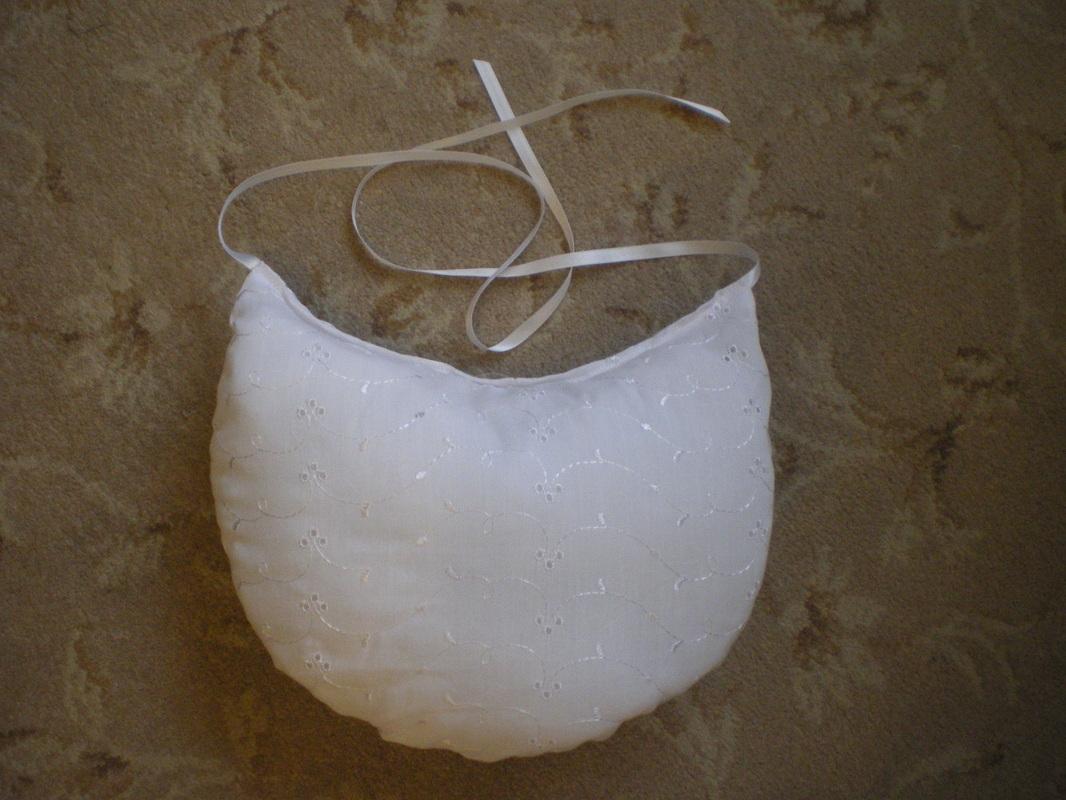
Using scrap material, fill it with wadding and attach the narrow ribbon.
Making the Petticoat: |

|
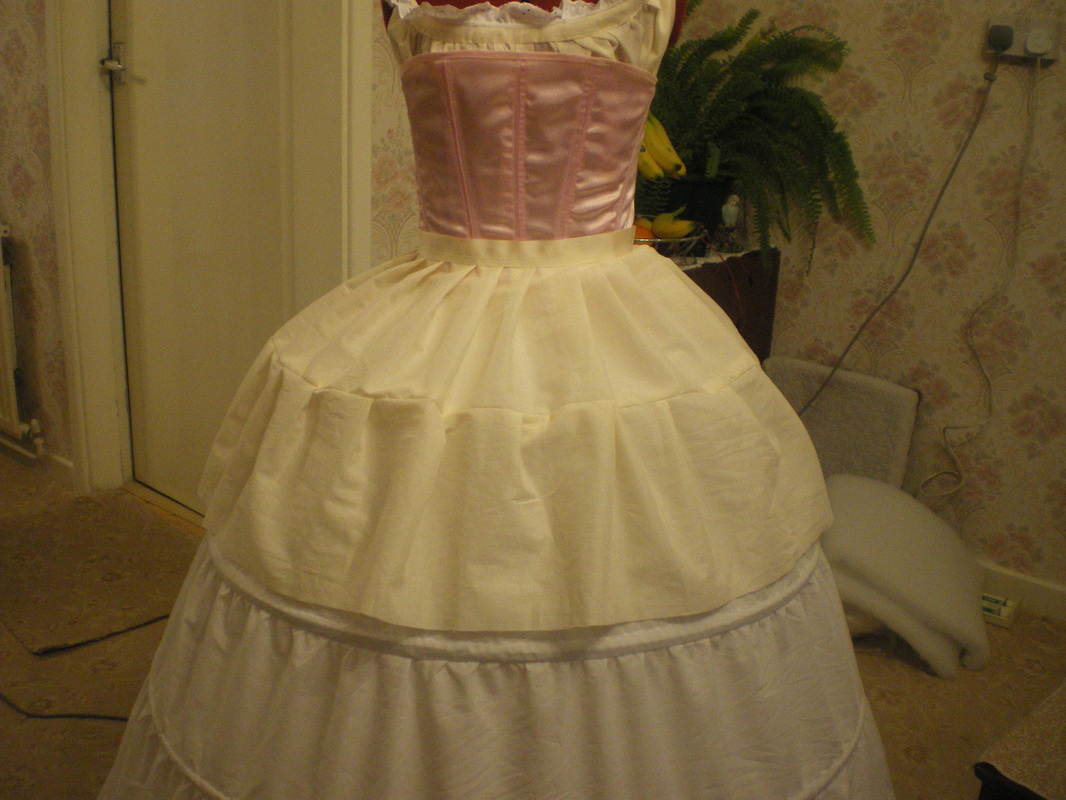
You can if you want, get a petticoat pattern to fit the hoop, but I decided to make it in strips. Starting from the Petersham, gather enough fabic to just clear the hoop. For the top tier, leave the back open, gather another strip and put it on the first, but close the back seam, carry on down until you have the required length.
|
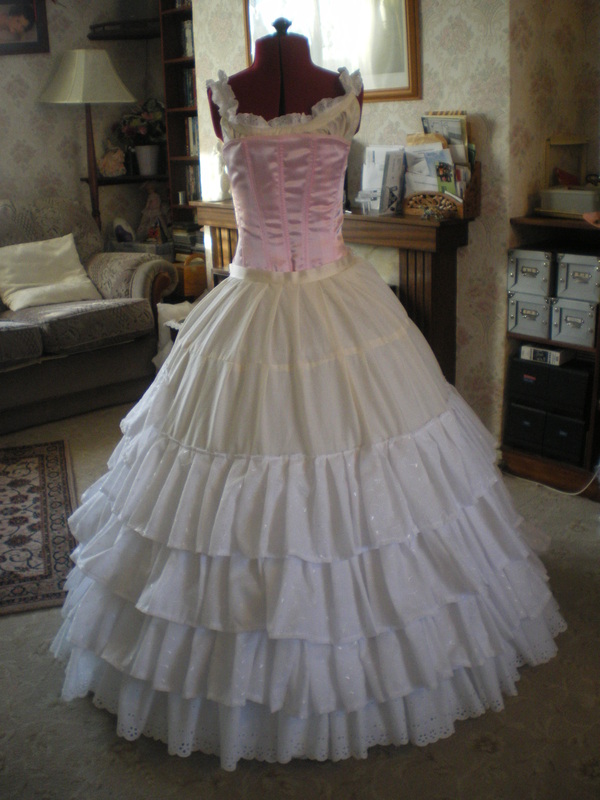
Starting from the bottom gather 6" wide broderie anglaise lace (adding a strip of white fabric 3" wide to the flat lace) and sew onto the petticoat base, then cut strips of broderie anglaise fabric, gathered and neatened until you reach the top.
|
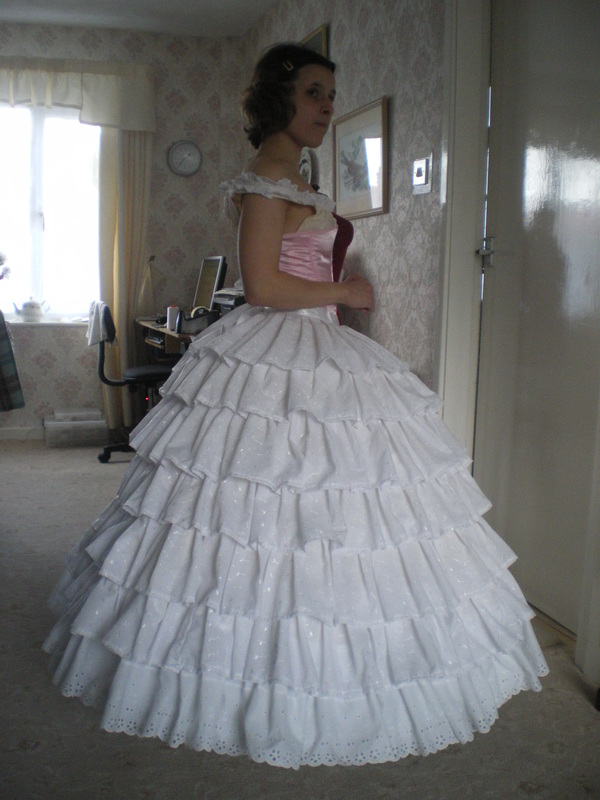
In this order, put the chemise on then put the corset on, then the bustle, hoop and then petticoat.
|
Sew on a wide ribbon to tie the petticoat at the back.
|
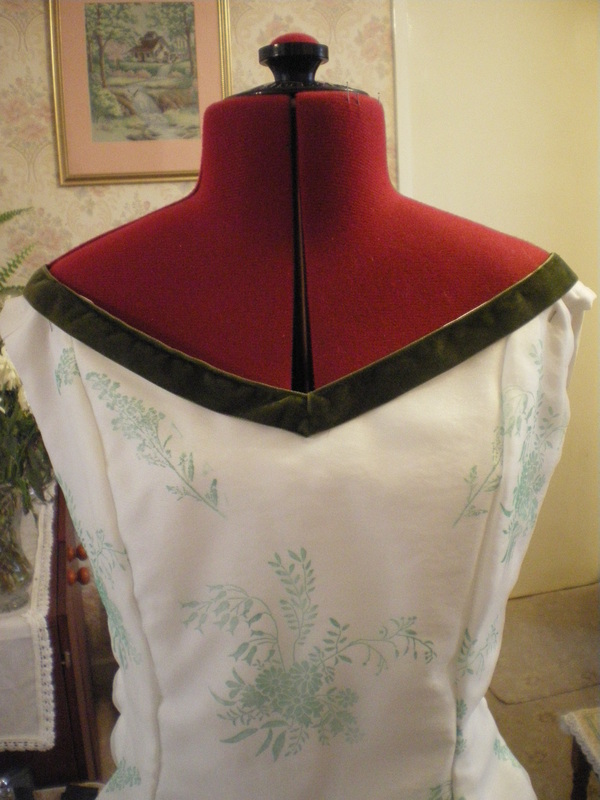
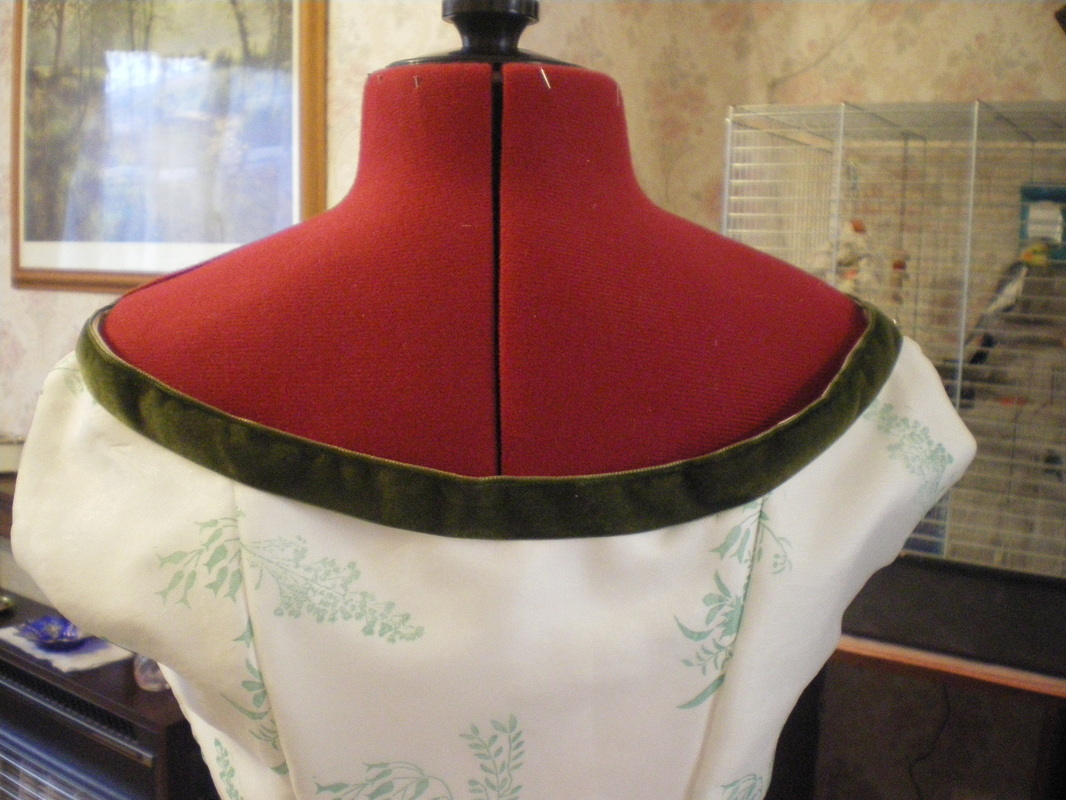
Making the bodice:
Fortunately, there is a pattern for making the BBQ dress, McCalls 3597. This will need a few minor alterations. I didn't use their ruffle design because this wasn't correct and we had to make the skirt bigger to fit the hoop I was using. The skirt was made in three layers and we used a side zip on the bodice.
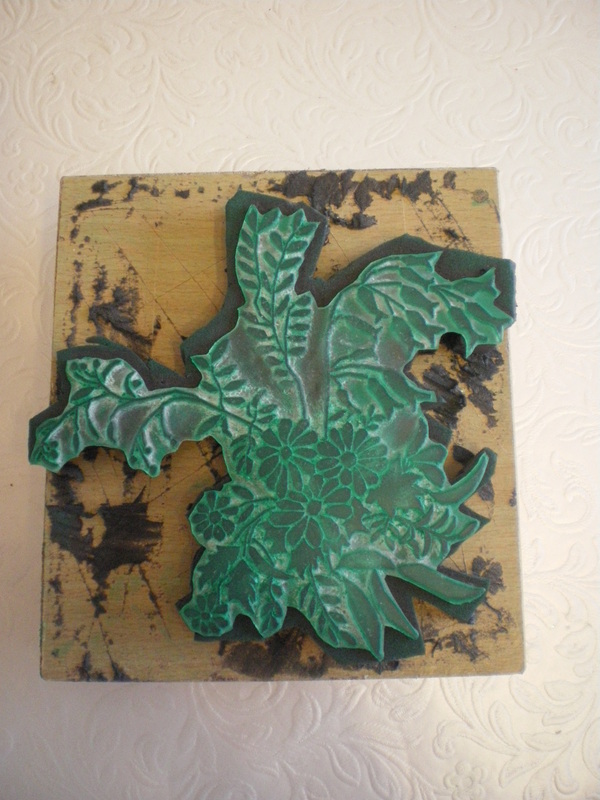
First of all, I had to obtain a stamp to make the motifs. I found the best picture I could on the internet of the large flower design, blocked the leaves and flowers in Adobe so all the pieces were separate, then sent the design off to a silicon stamp company. We bought another stamp ready made from Hobby Craft, of a fern. The ink we used was Fabrico from http://www.bladerubberstamps.co.uk/site/fabrico.php, the colour was "forest".
Fortunately, there is a pattern for making the BBQ dress, McCalls 3597. This will need a few minor alterations. I didn't use their ruffle design because this wasn't correct and we had to make the skirt bigger to fit the hoop I was using. The skirt was made in three layers and we used a side zip on the bodice.
First of all, I had to obtain a stamp to make the motifs. I found the best picture I could on the internet of the large flower design, blocked the leaves and flowers in Adobe so all the pieces were separate, then sent the design off to a silicon stamp company. We bought another stamp ready made from Hobby Craft, of a fern. The ink we used was Fabrico from http://www.bladerubberstamps.co.uk/site/fabrico.php, the colour was "forest".
|
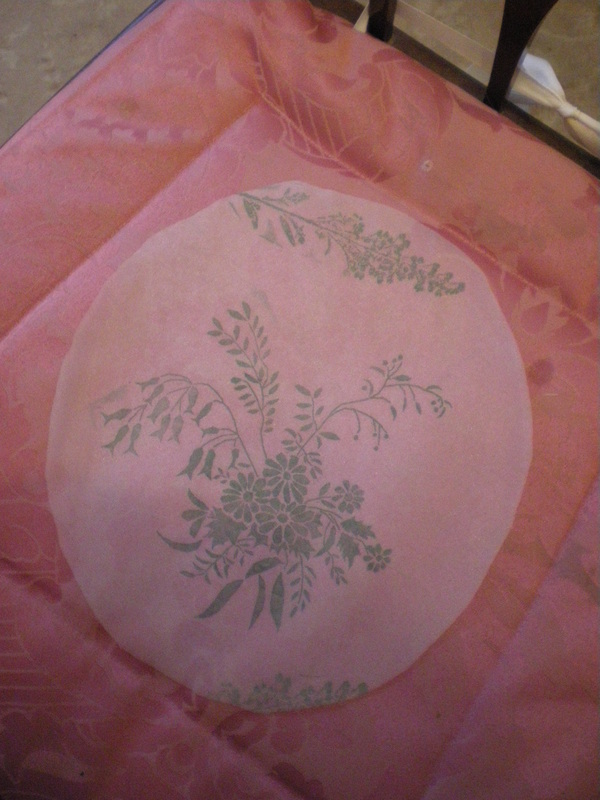
I cut away the stamp around the edges, then glued the design onto hard foam, then glued that onto a piece of spare wood, I put a wooden block on the top to serve as a handle.
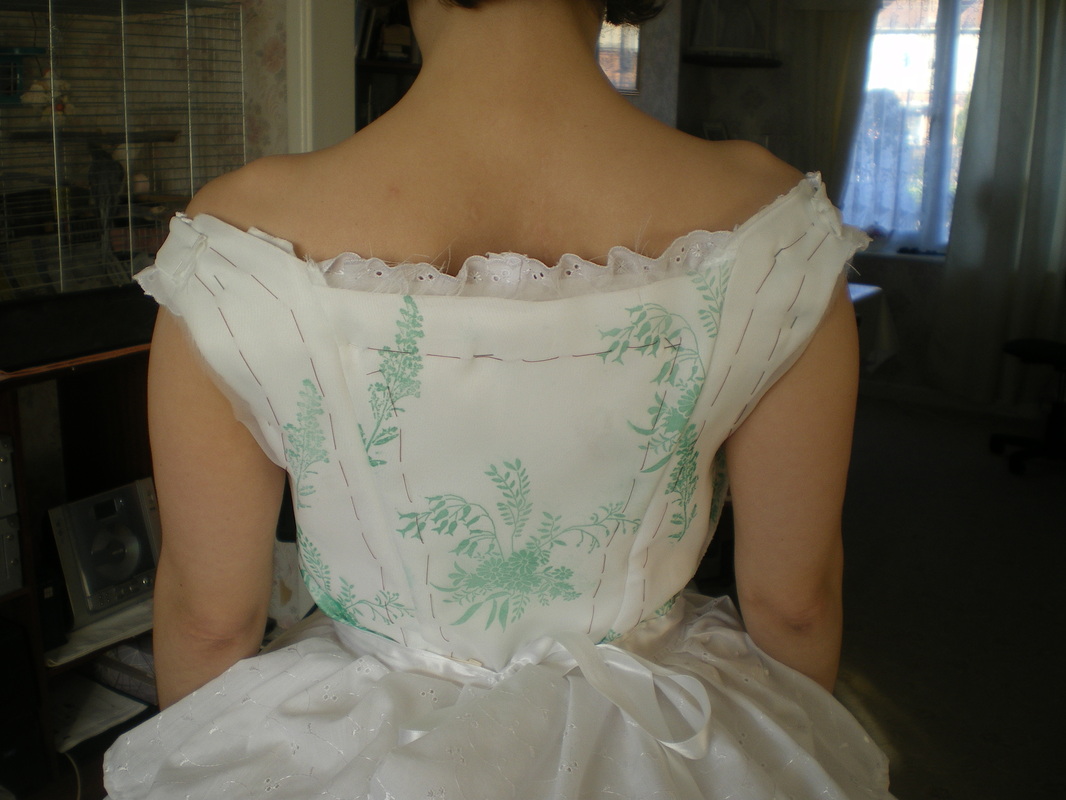
When all the pattern pieces have been cut from the polyester Organza, I printed the pattern randomly over the fabric. |
|
This is when we noticed that the chemise lace was too high for the bodice, so I removed it.
|
|
I attached the 1" ribbon and inserted a side zip to finish the bodice
|
To make the ruffles:
As well as the written instructions, we have also made a video to show how the ruffles are made.
|
Cut about 30 circles of Organza, 16cm in diameter and block print randomly on all the pieces.
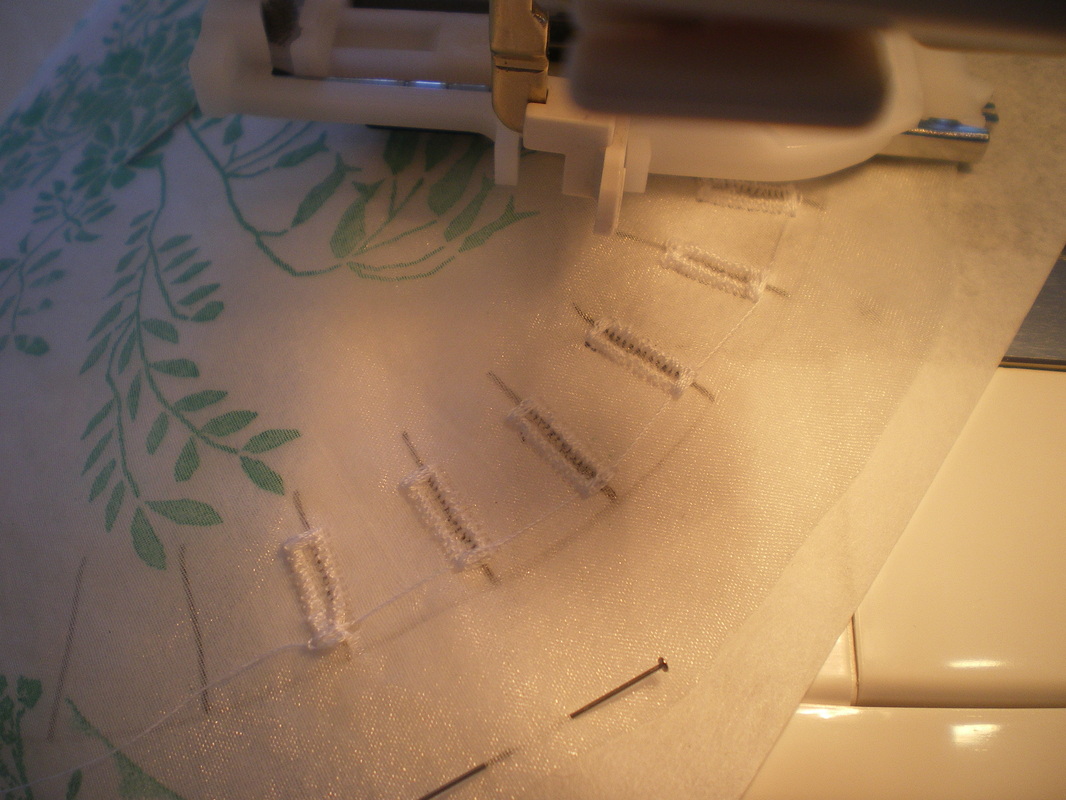
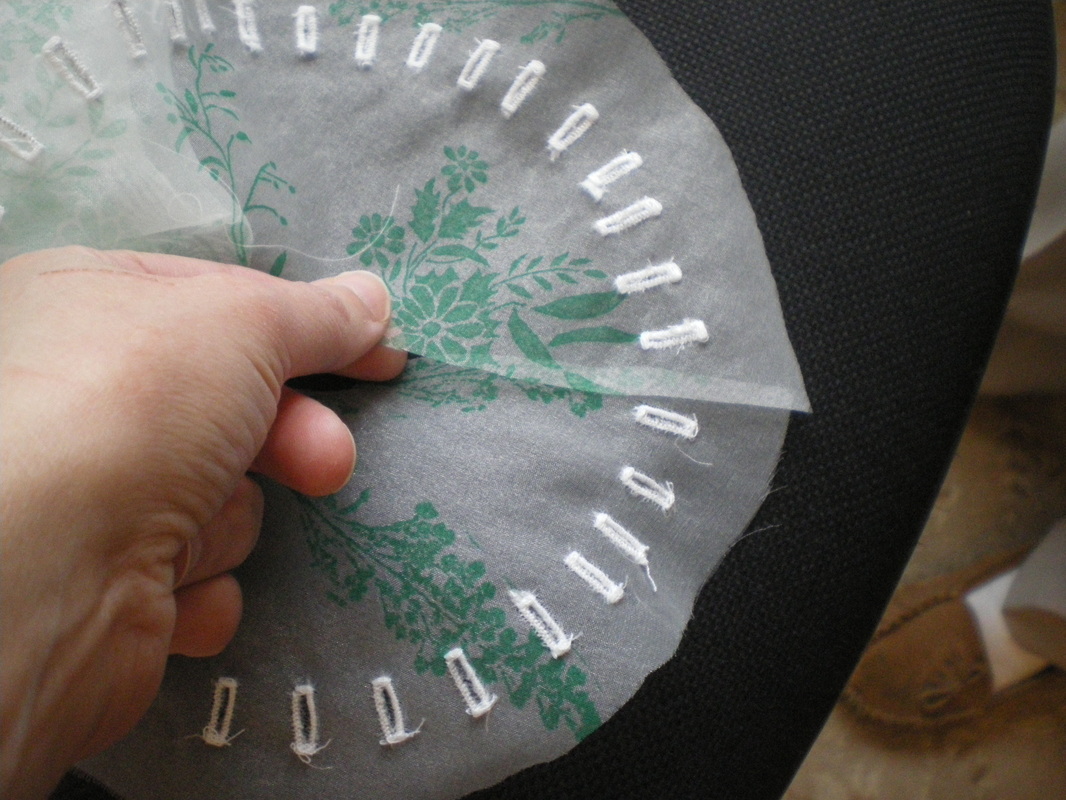
Now you're going to wish you had a buttonholder for your machine!! I put in approximately 1,000 small buttonholes. |
|
Because the Organza was very thin, it needed a backing before putting in the buttonholes, so I got a length of embroidery stabilizer to use as backing, this was removed after the buttonholes were done.
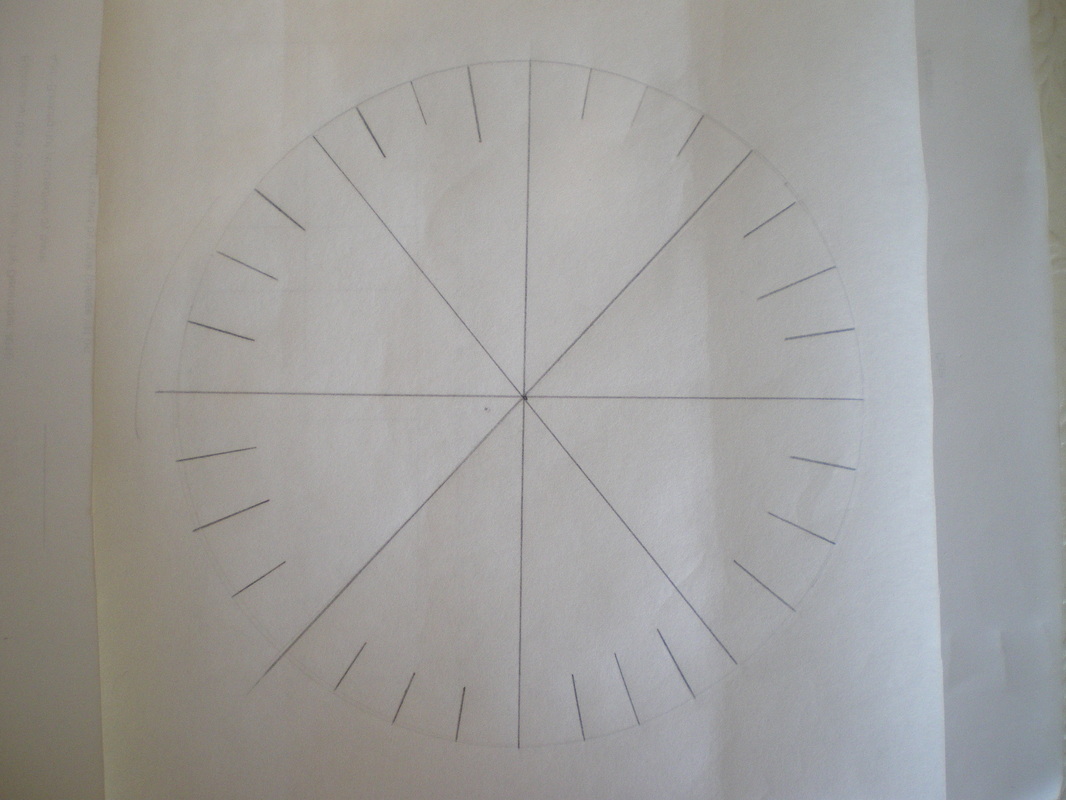
Using a compass, mark a 16cm diameter circle and disect this into 32 segments, cut out the circles. |
|
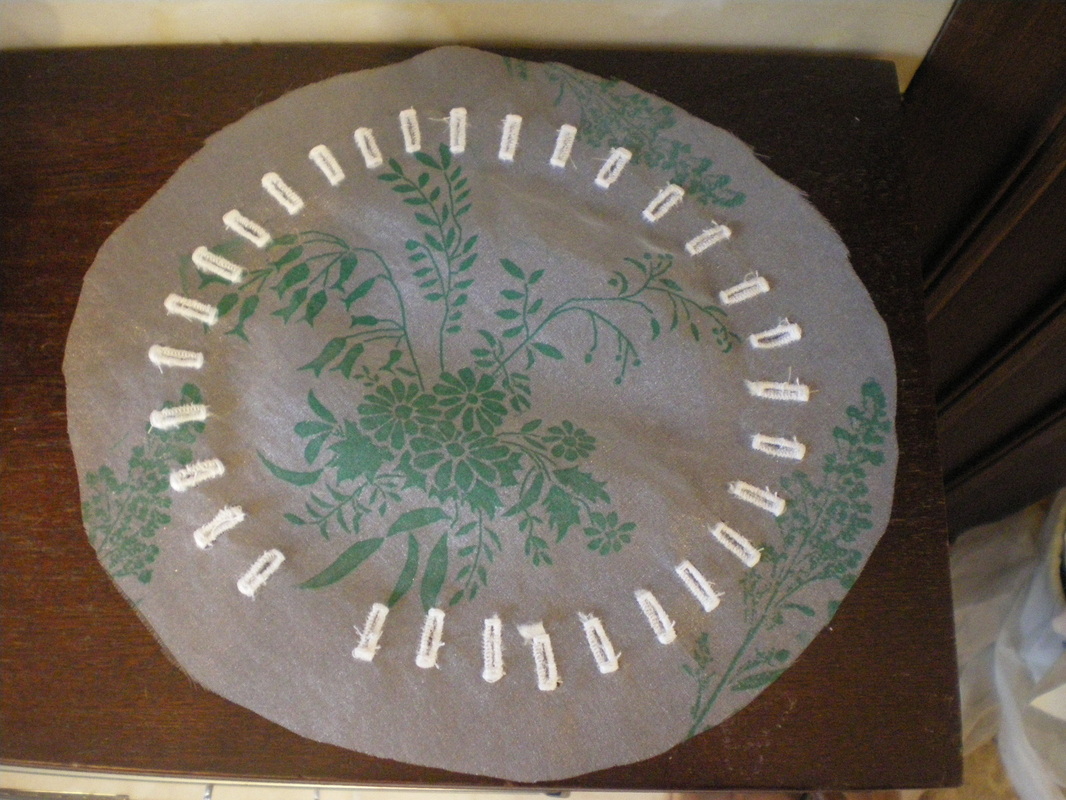
Pin or tack a template to the back of each Organza circle, then make 1cm buttonholes where the marks are, approximately 1.1/2cm from the edge. On each circle you will need to leave ONE mark not done, this is where another circle will be joined, so it will be a waste of your time sewing a buttonhole here. Now very carefully remove the backing, taking care not to tear the buttonholes.
|
|
Use a seam ripper to cut an opening into every buttonhole.
|

|
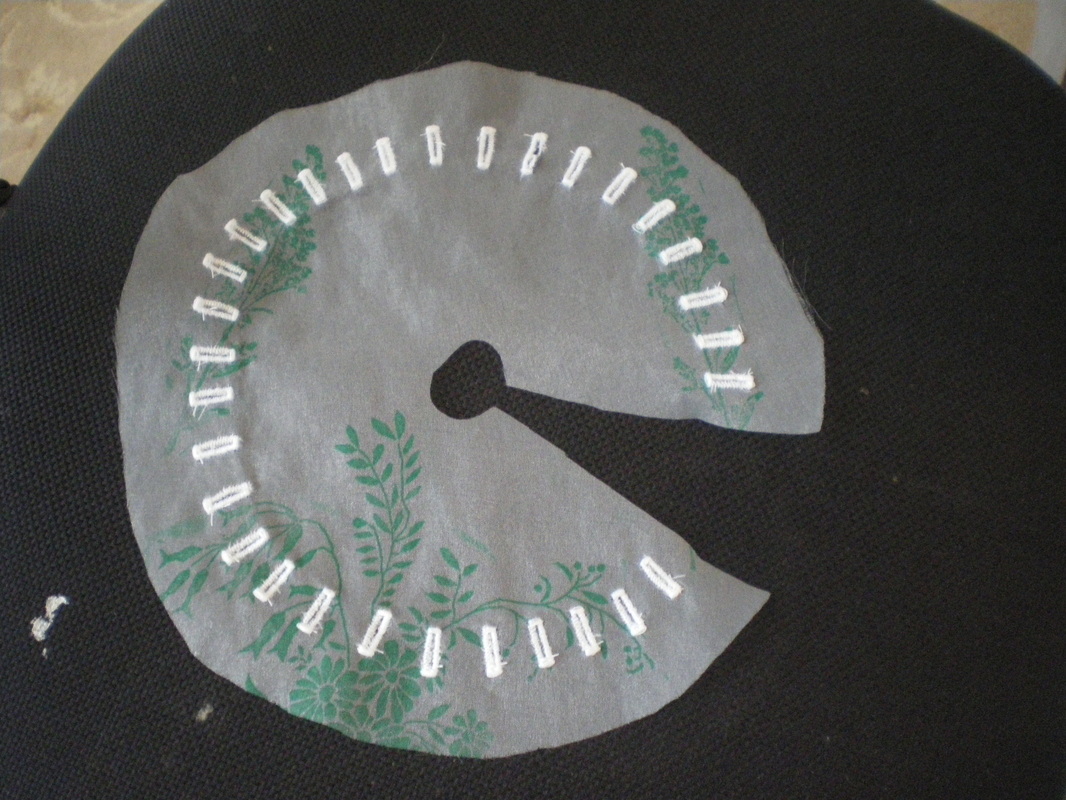
Fold each circle in half and then quarter. Cut a 1cm curve at the corner.
|
|
Cut a slit up to the small circle.
NOTE: (The inner circle is the part of the ruffle that will be sewn to the bodice ribbon). Where all the ruffles are attached to each other, there will be a seam line, it is at the seam line that will be catch stitched to the bottom of the bodice ribbon. Half way around the circle, this is where it will be catch stitched to the top of the ribbon, hopefully this will all make sense further on!) |
|
Taking the slit, join this to the next circle, keeping the outside to the outside. I overlocked all my sections, but whichever method you use to neaten the edge, make sure all the seams are on the same side of the fabric. Join all the pieces together.
NOTE: Please see instructions for making the ruffles. |
|
Once you have joined all your circles together, follow the instructions in the video above.
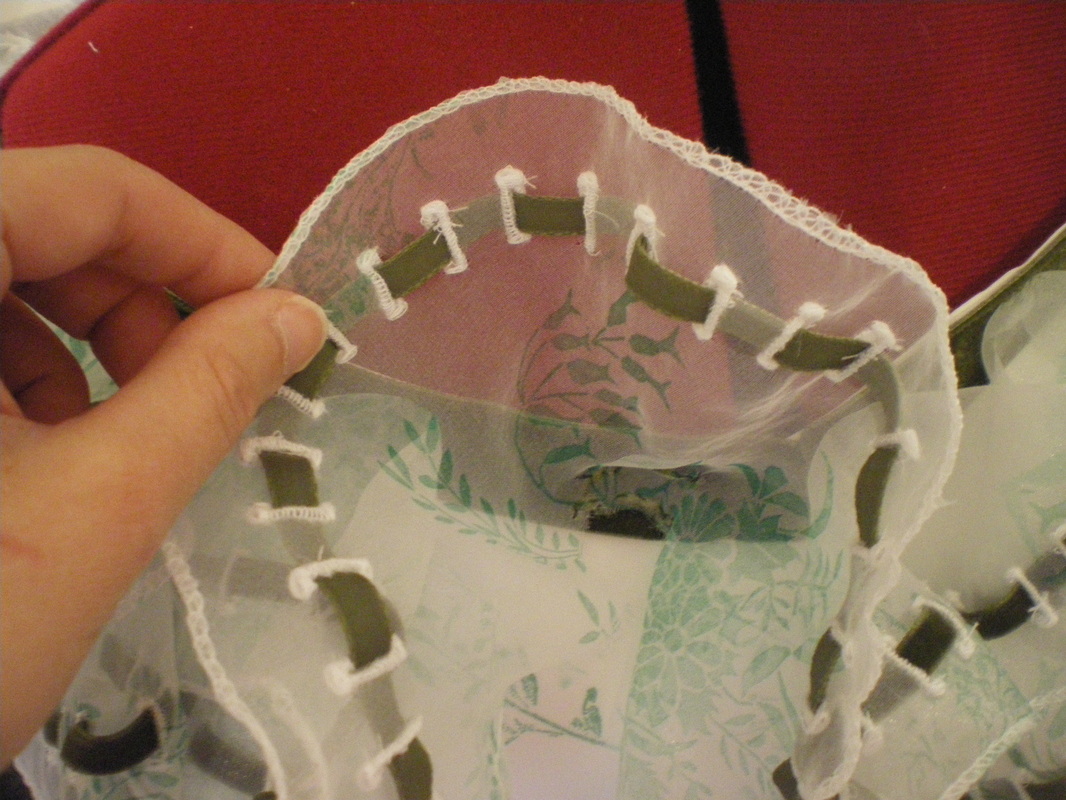
Using a narrow setting, overlock the complete length 1cm from the buttonholes. Then weave the 7mm ribbon in and out of the buttonholes. |
Taking the inside circle edge, start at the centre back of the bodice and catch stitch the beginning of the ruffles to the bottom of the ribbon. Half way around the circle, catch stitch it to the top of the ribbon, the following seam will be attached to the bottom of the ribbon. Try keeping a distance of about 3cm between each catch stitch. Every time you come to a seam, this has to be attached to the bottom of the ribbon.

|
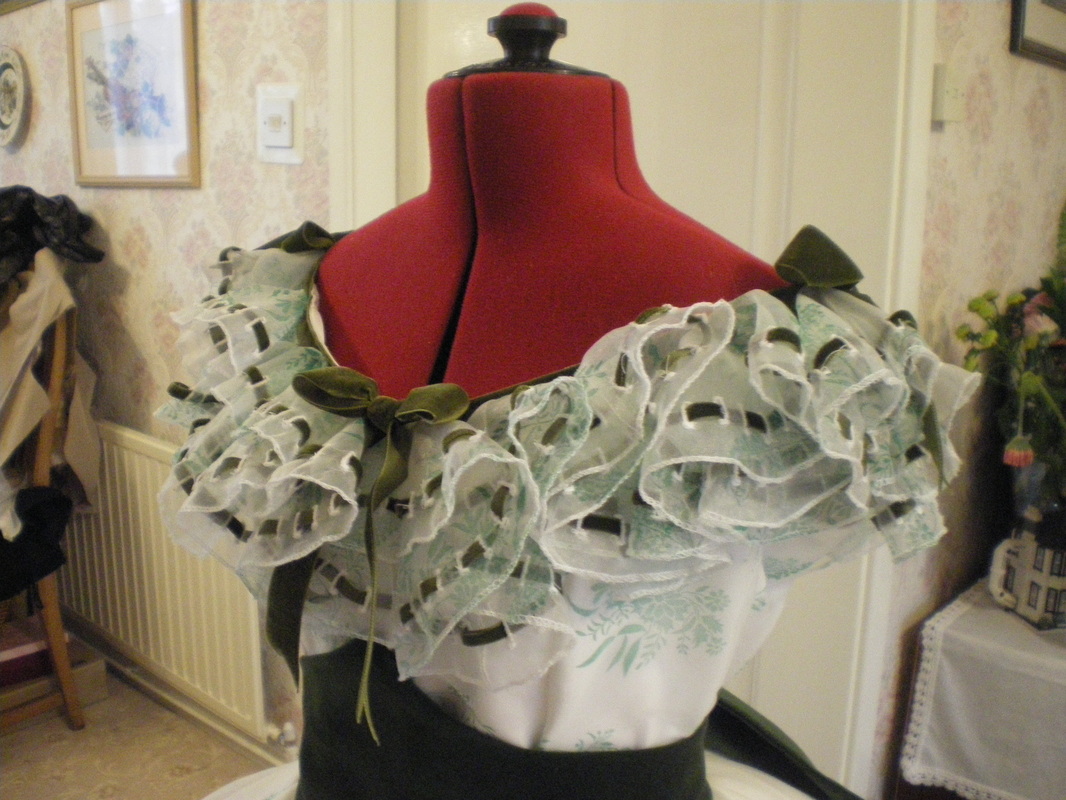
On the original dress there are 5 bows on the bodice front, I thought this looked too crowded, so I only put three bows on.
|
This completes the bodice.
|
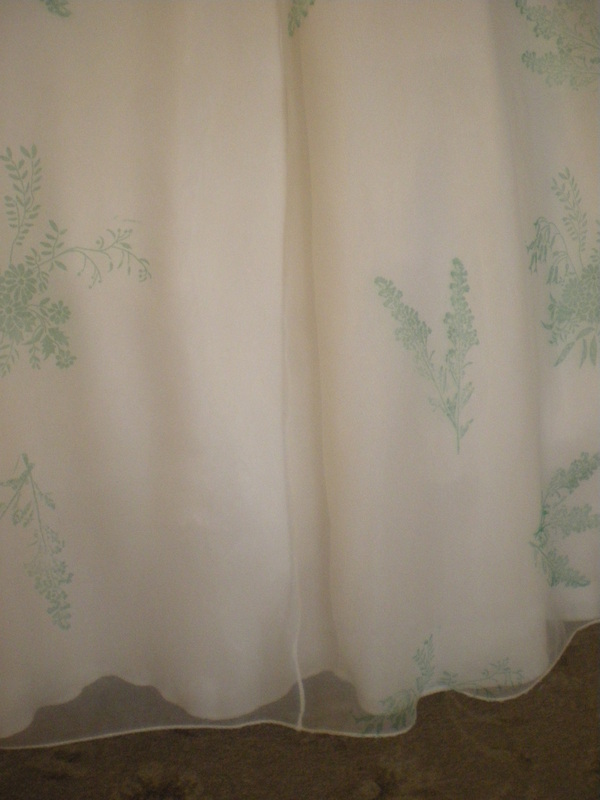
Make up the skirt as per the pattern, but change the width to fit your hoop and allow extra. There are three layers to the skirt which have to be made up individually:
1 layer of light weight cotton 1 layer of white polyester 1 layer of Organza When made up, treat them as one skirt and sew all three together and pleat onto the 2" wide ribbon. Leave a flat piece of approximately 6" at the front before you start pleating. Leave a gap at the back seam. Sew a piece of velcro onto the ribbon to close. |
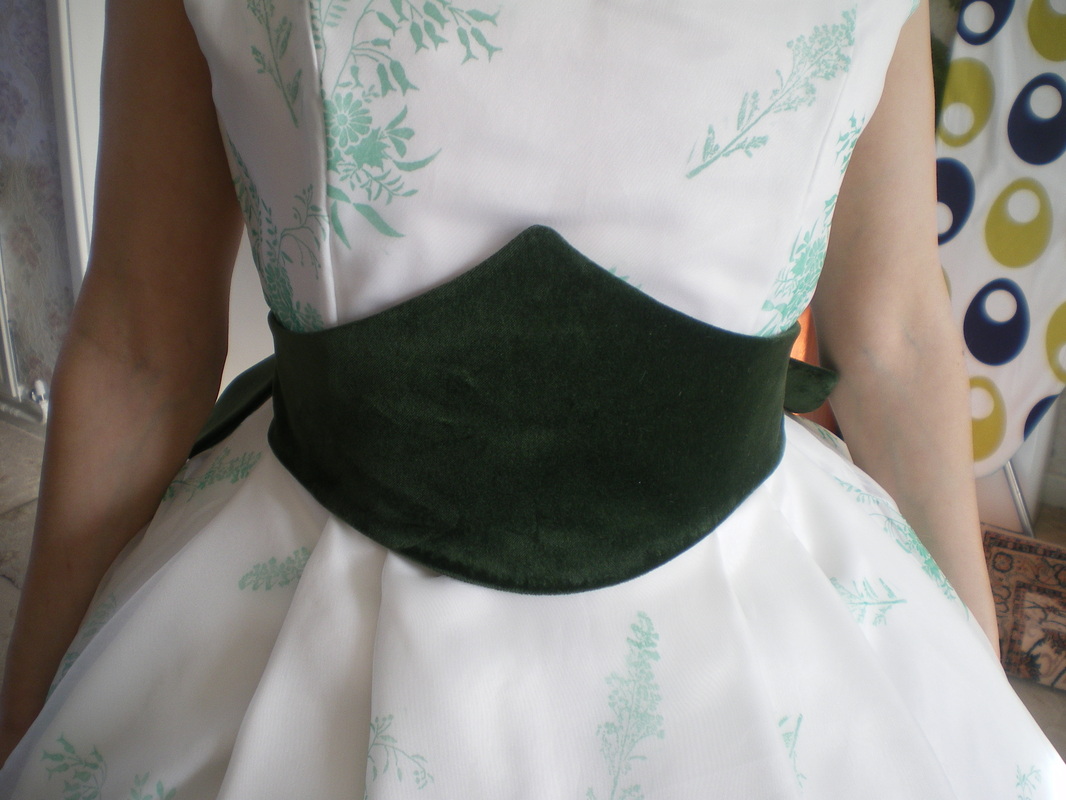
Making the belt and bow. |
Sew a narrow overlock on the individual skirt hems to finish.
This concludes the skirt. |
|
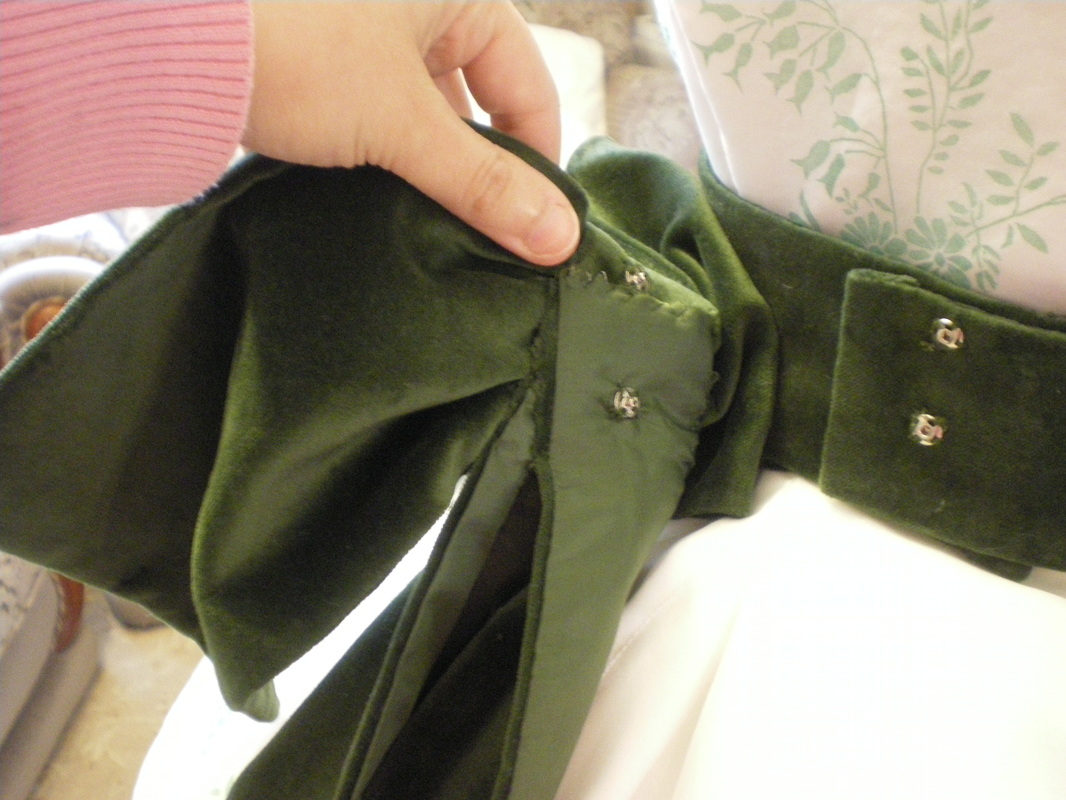
I made a lined belt as per the pattern, except we gave the bottom a slight curve. The belt is fastened using 2 stud fasteners.
|
|
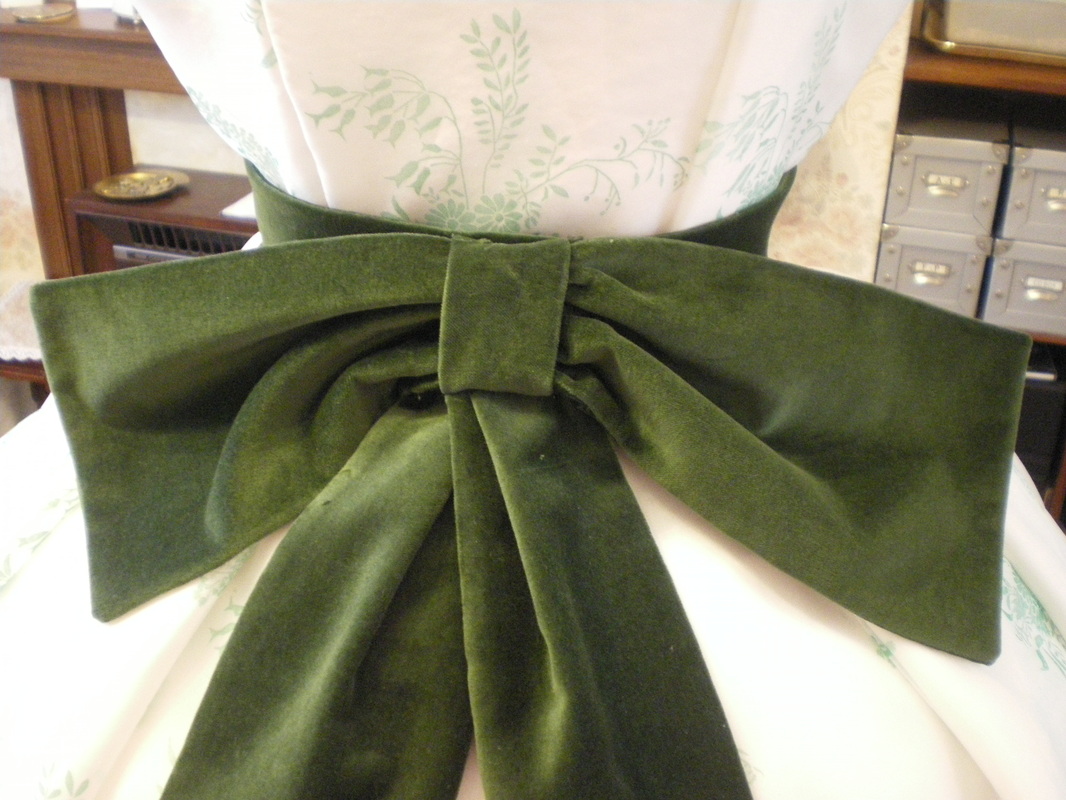
The bow is made in 4 pieces and each piece is lined. I used a simple oblong for the bow, wrapped a narrow strip around the middle, the tails are attached at the back.
|
|
Attach the bow using 2 stud fasteners attached to the belt.
|
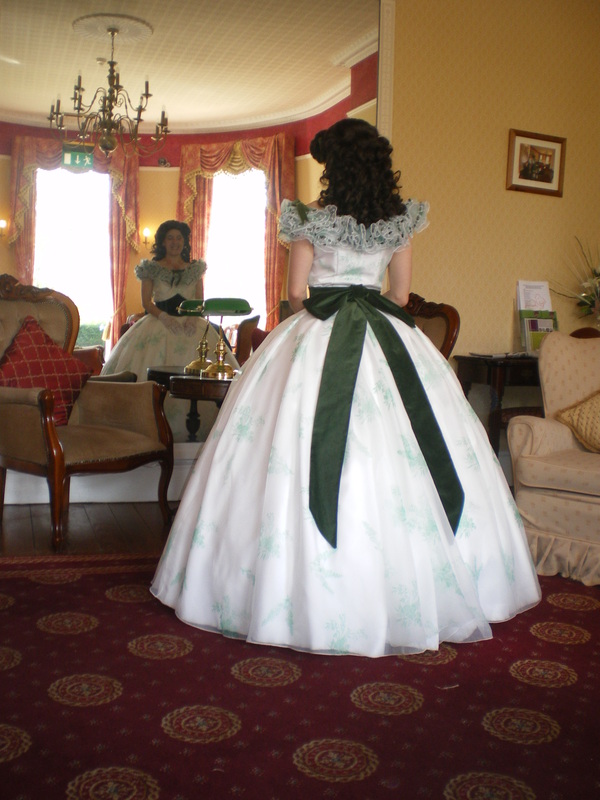
This completes the dress.
