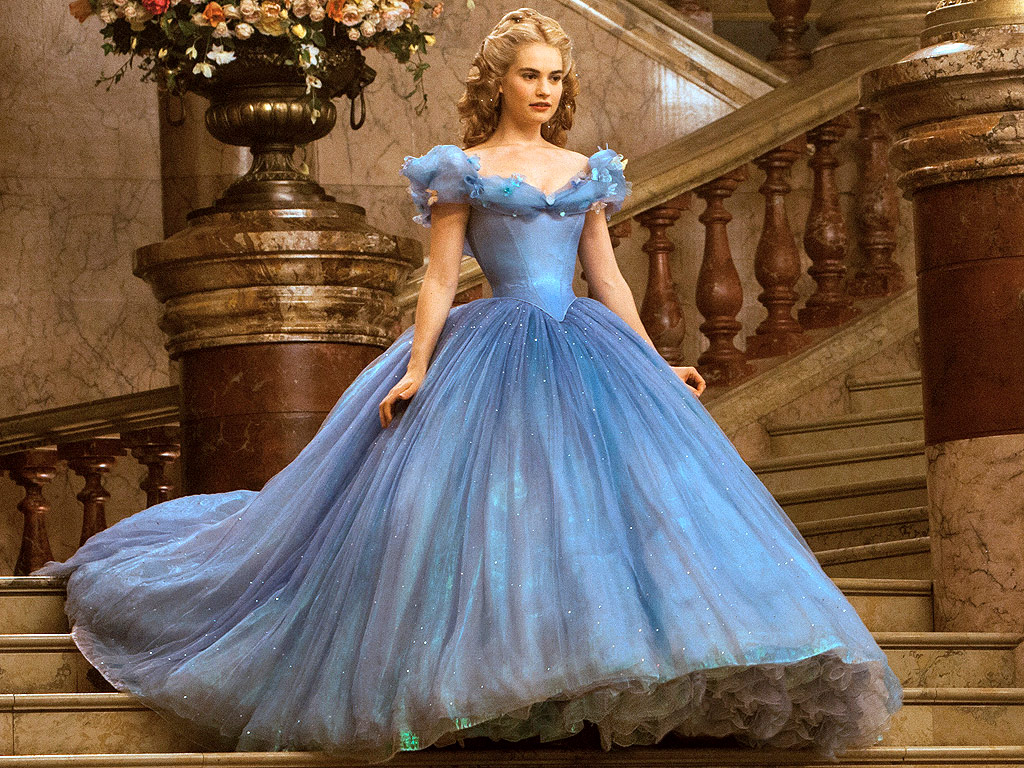
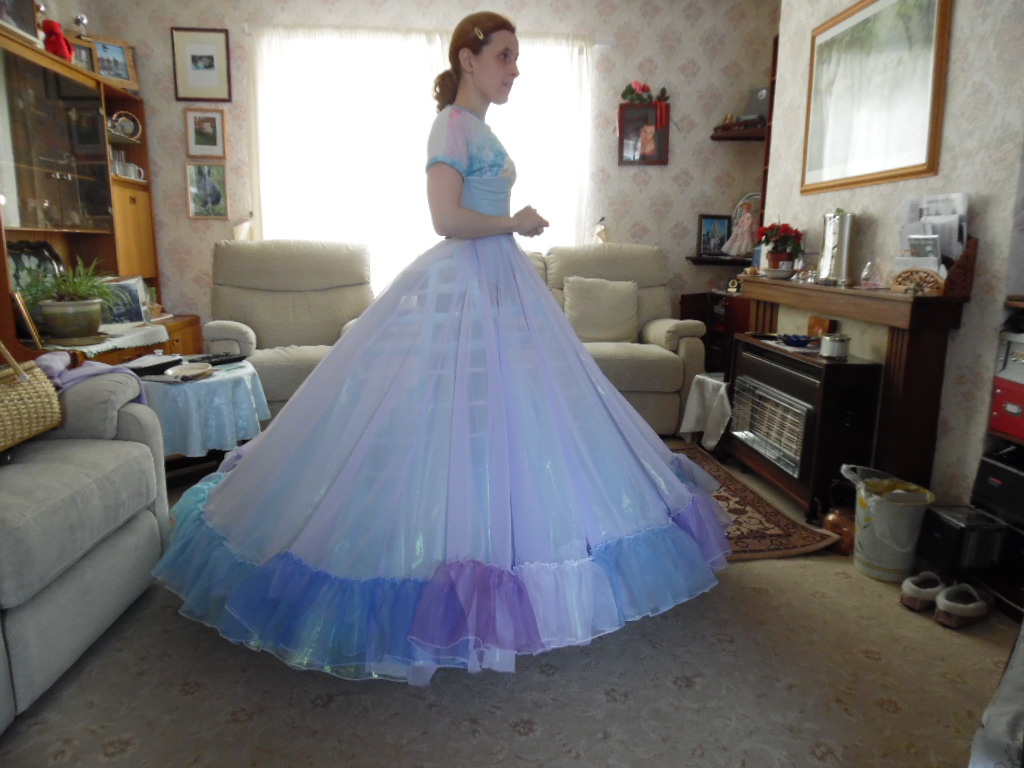
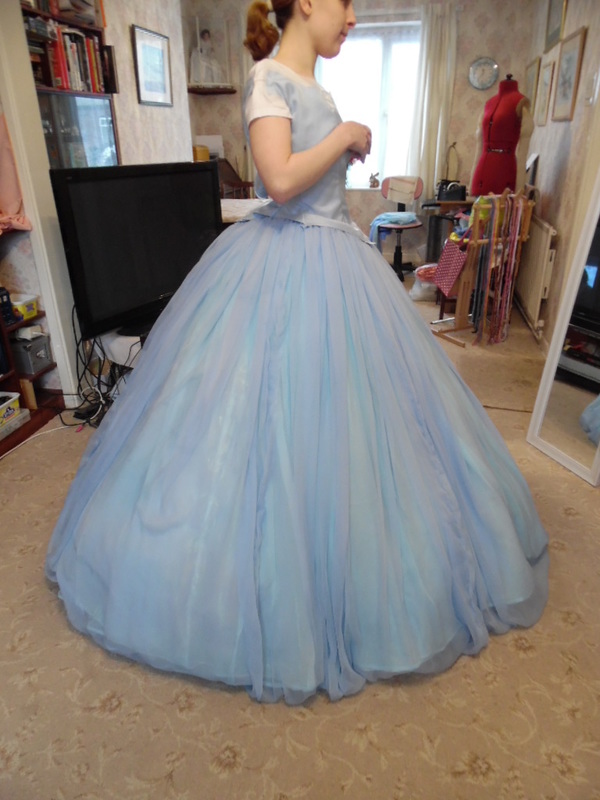
Cinderella
Live Action
Version
Live Action
Version
For this costume, you will require intermediate to experienced expertise in sewing, bodice making, Crinoline making and use of an overlocker.
Difficulty factor 10 - 10
Please note, that we do not make costumes to order or to hire. These are one off costumes designed for Tracy.
Please use these instructions in conjunction with our videos, as they contain more information on items needed, their sources and technique
Difficulty factor 10 - 10
Please note, that we do not make costumes to order or to hire. These are one off costumes designed for Tracy.
Please use these instructions in conjunction with our videos, as they contain more information on items needed, their sources and technique
Materials:
Crinoline Cage:
1865 Elliptical Cage Crinoline TV103, available from Truly Victorian. www.trulyvictorian.com
Scrap of material approximately 1 metre, to make the bag at the bottom
28.5 yards (26 meters) boning of your choice mine was bought from:-
https://corsetmaking.com/steel-hoop-boning-white-plastic-covered.html
14.25 yards (13 meters) bone casing
7.75 yards (7 Meters) grosgrain ribbon
Tie strings
Belting, or suitable grosgrain webbing for waistband
Foundation Petticoat
Approximately 10 meters Ivory polyester organza (with a sheen) (this was also used to make frills)
8 metres white silk organza
6 metres blue synthetic polyester organza (with a sheen)
13 metres iridescent organza
http://www.ebay.co.uk/itm/320669344470?_trksid=p2055119.m1438.l2648&ssPageName=STRK%3AMEBIDX%3AIT
Hooks and Eyes
Second Petticoat layer:
6-7 metres pale lilac polyester chiffon
Scrap of Blue or lilac cotton fabric to make a waistband
Hooks and Eyes
Fishing Line
Triple layered full circle skirts:
5 metres white polyester organza
5 metres blue polyester organza
5 metres iridescent organza
Scrap piece of blue or lilac cotton fabric for the yoke.
Main Outer Skirt:
25-26 metres of white silk gauze (3mm weight) 55" wide (www.dharmatrading.com/)
Half was dyed using Dharma acid dye 424 True Turquoise
Half was dyed using Jacquard acid dye 621 Sky Blue
Scrap of Blue cotton fabric for the yoke
Hooks and Eyes
Small piece of interfacing
Bodice:
Simplicity 1026
1 Metre silver polyester dupion ( www.ebay.co.uk/itm/191752716584?_trksid=p2057872.m2749.l2648&ssPageName=STRK%3AMEBIDX%3AIT)
1/2 metre Pale blue cotton for liner
1/2 metre Sky Blue cotton for outer layer
1/2 metre Pale Blue crystal organza to mount
Bias binding for boning channels
7mm Spring Boning sufficient for all the boning channels
Boning ends
Hooks and eyes (or make bars)
1 metre waist tape
1-2 metres piping cord
Bertha:
2 metres Pale Blue Sheen organza
Various fabrics for making the butterflies
Fabric paints
Embellishments:
Swarovski crystals:
Flat back, clear, sizes SS10, SS8
Total used 2,642
(If you are on a budget and can't afford Swarovski, you can use Czech DMC crystals, which are half the price and just as good.)
To make crinoline:
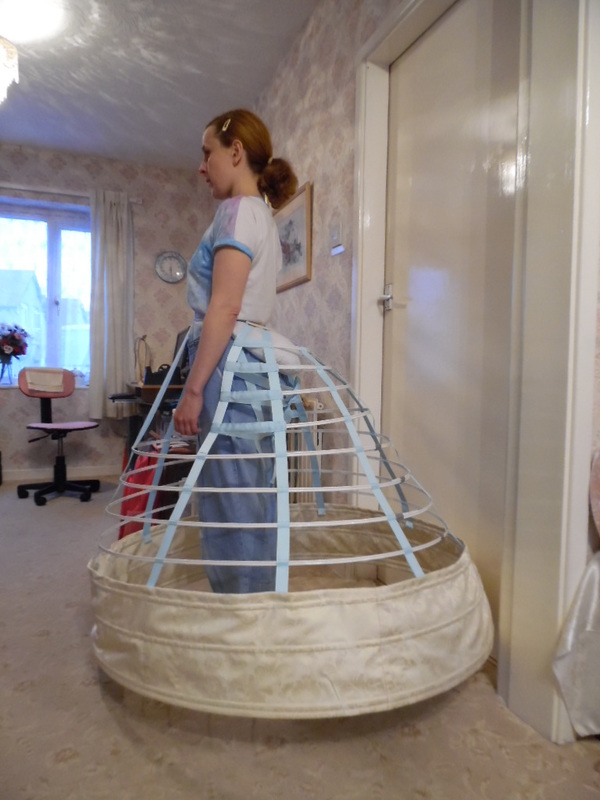
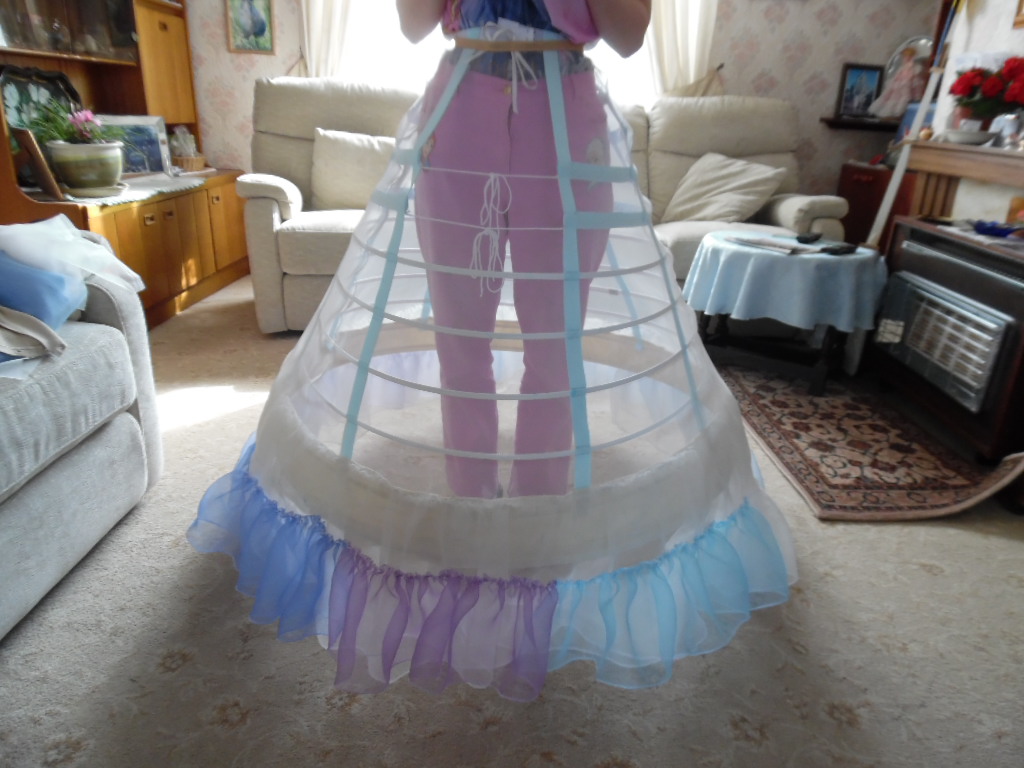
Make up as per instructions. We had to make alterations to the final result, by shortening the length, extending the top two boning channels and adding two ties to the front
Make up as per instructions. We had to make alterations to the final result, by shortening the length, extending the top two boning channels and adding two ties to the front
|
This shows our original construction. The ties were supposed to be at the back of the legs, but this doesn't work when you want to twirl. The cage was NOT invented to go waltzing or anything vigorous!! |

|
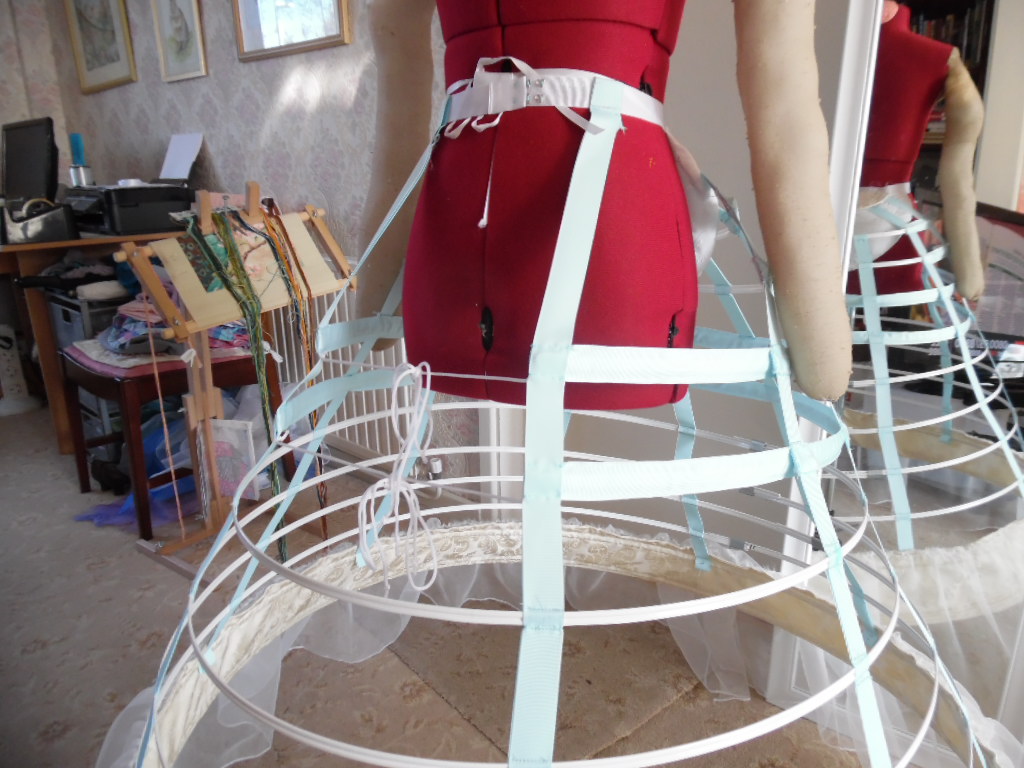
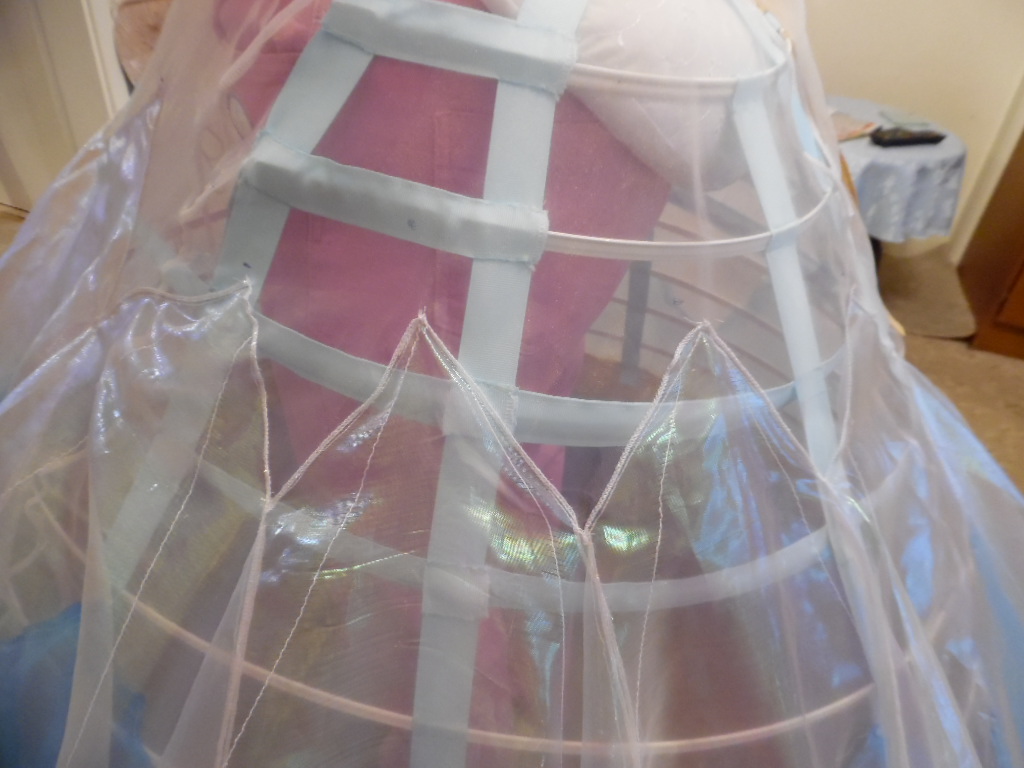
Our shortened version, plus we extended the top two boning channels to the front tapes. Then put the ties on the front.
|
Foundation Petticoat:
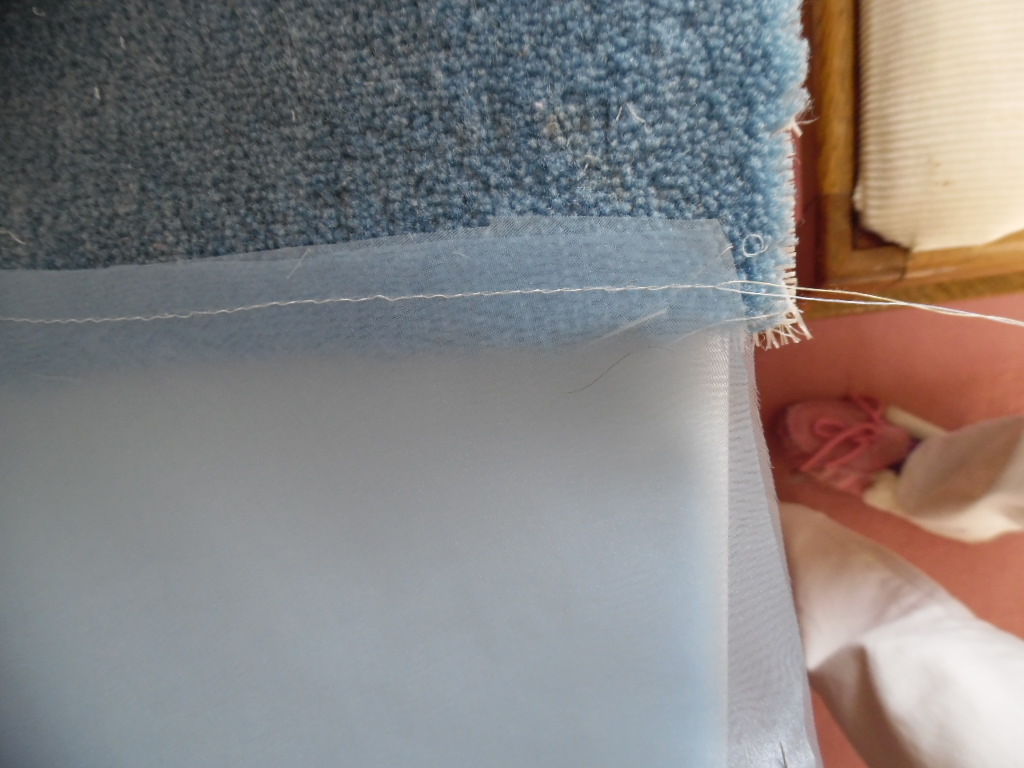
Using your own measurements of your crinoline, construct your foundation layer using the polyester organza. Leave a gap at the centre back for opening. I then overlocked around the hem and around the top to prevent fraying. To facilitate trying it on several times, I temporarily sewed on a strip of bias binding around the waist line to prevent any stretching. This was taken off later.
|
|
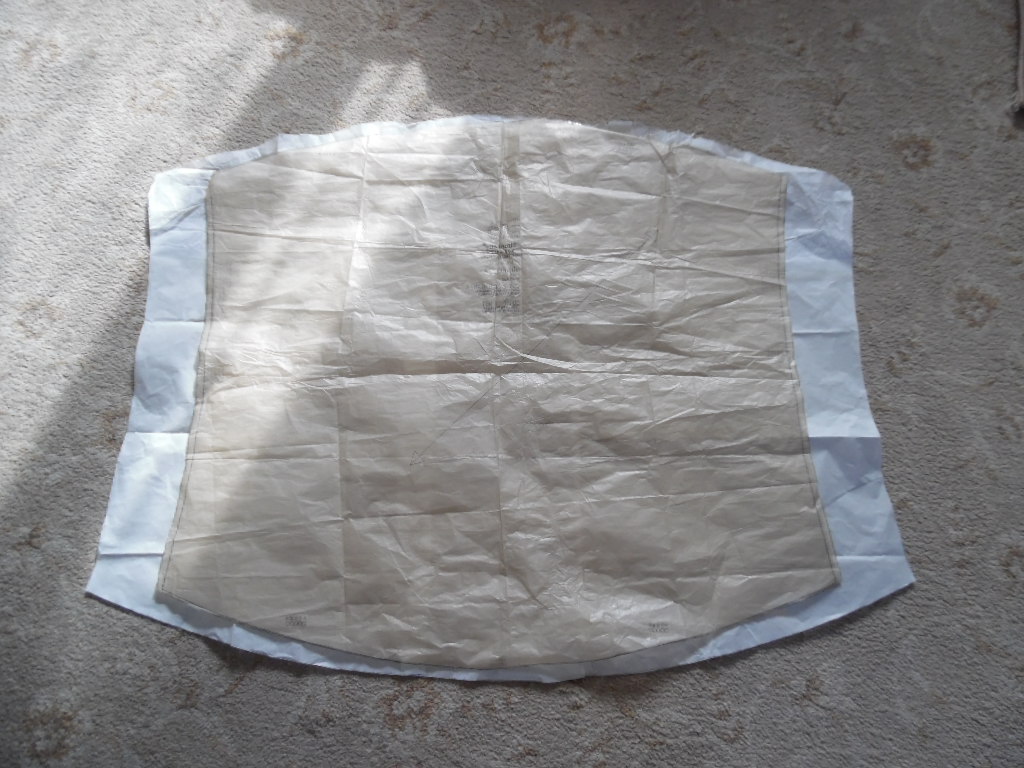
We were fortunate enough to acquire this picture of the foundation layer and on closer inspection, saw several sewn lines where the layers would be attached, you can see it better in our video

|
Using the same lines, we drew them onto our skirt for reference. (please see video)
|
|
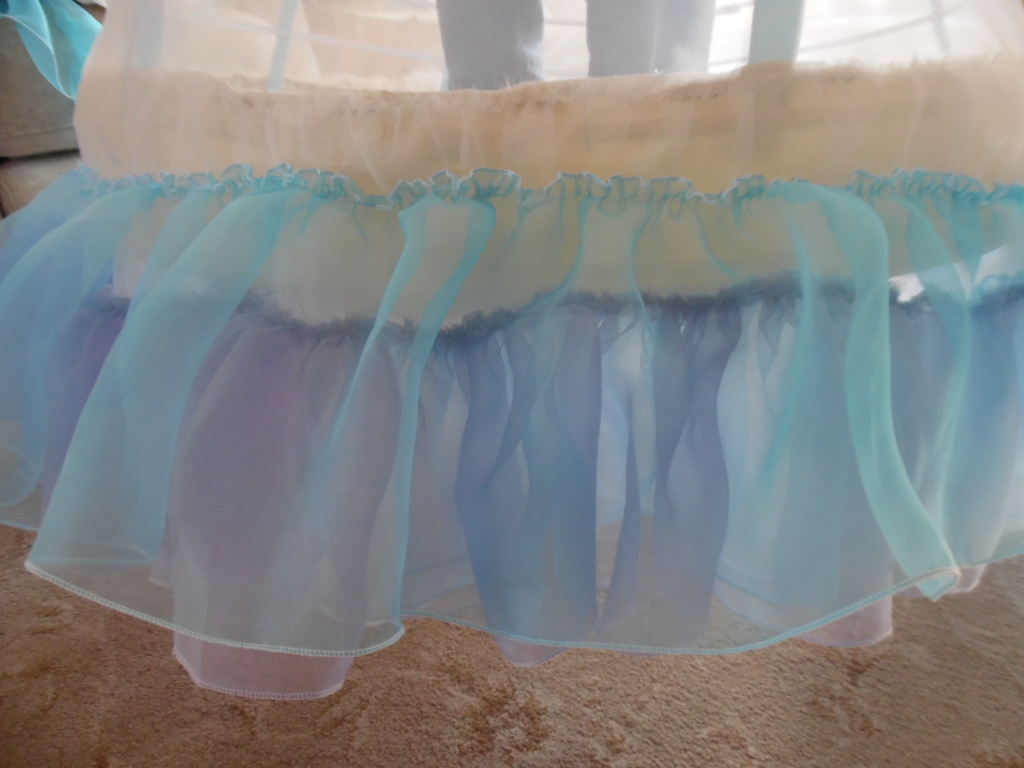
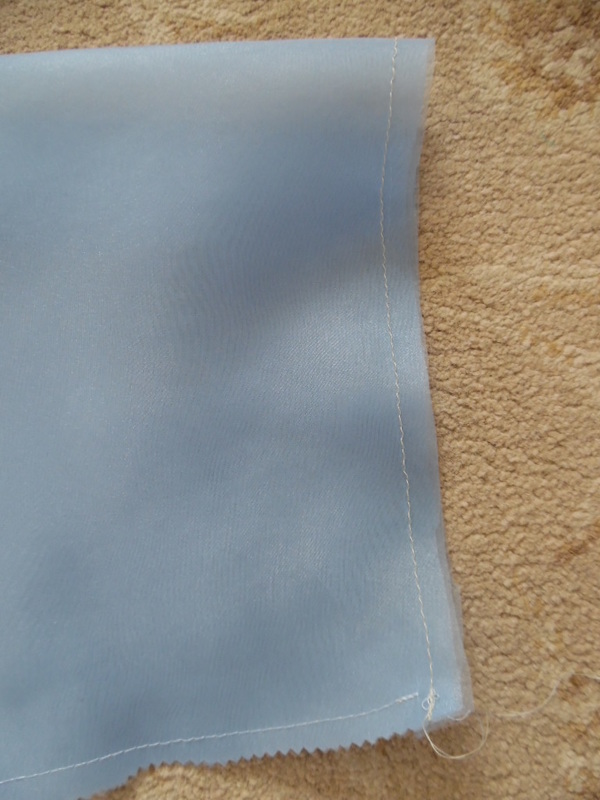
For ALL the frills, we used a combination of polyester organza and silk organza. As we didn't keep an accurate record of what we used, these figures are only approximate. (the two frill layers shown in the left photo, used a strip of approximately 42 metres long and 8" wide before ruffling)
This bottom frill was made up of all the colours. Some of the white silk organza was dyed, using Dylon china blue, and turquoise. This was cut 8" wide (20 cm) and overlocked top and bottom. All the sections were sewn together and ruffled using a medium setting. You don't want it too tight or too loose. This was sewn approximately 5" (10cm) up from the hem of the foundation petticoat hem. |
|
A second layer of frills was sewn on approximately 2" (5cm) higher than the first and was 9" (23cm) wide.
At no time during the construction of the layers were we able to make them exactly straight and level, (near enough is good enough!) |
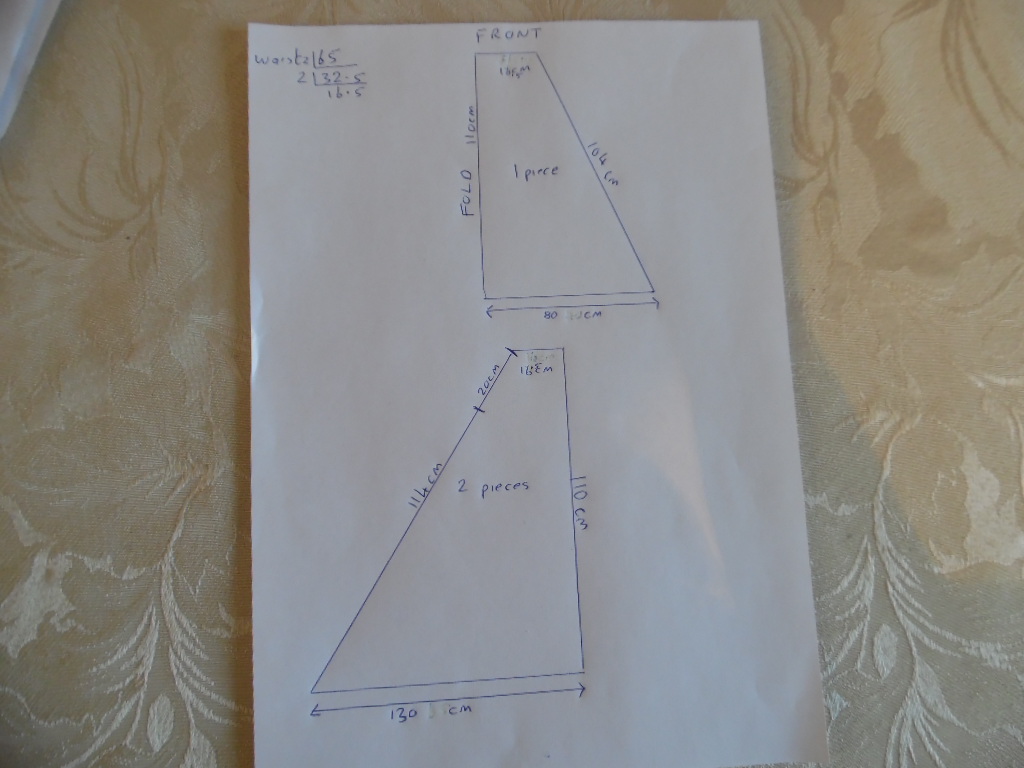
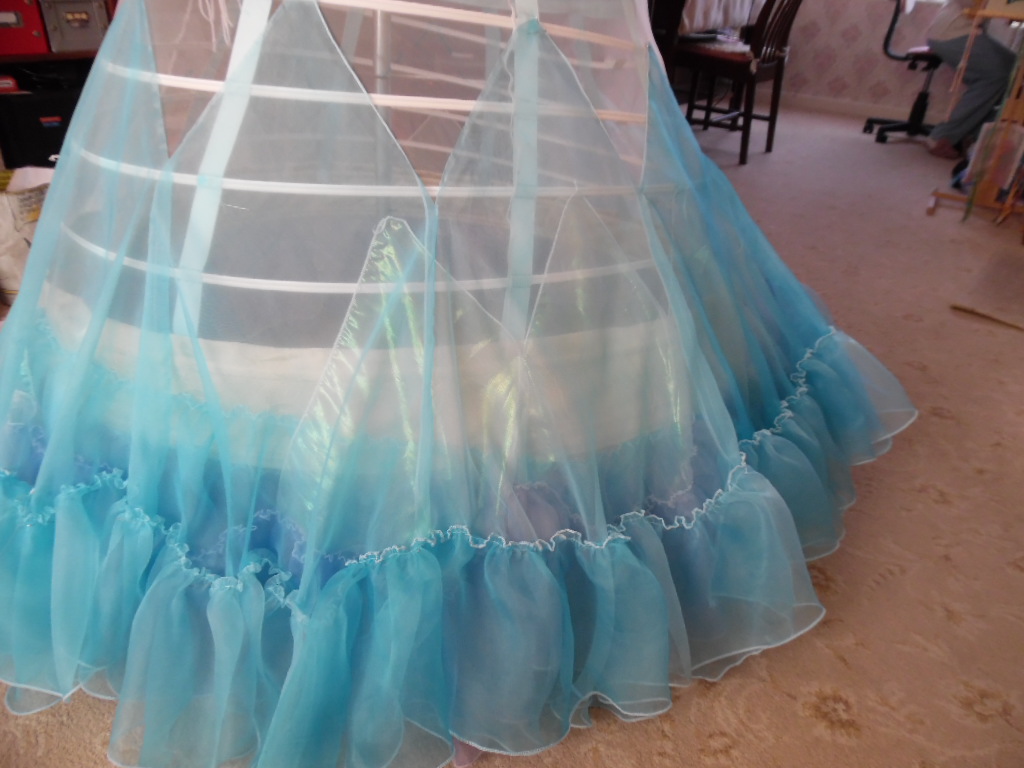
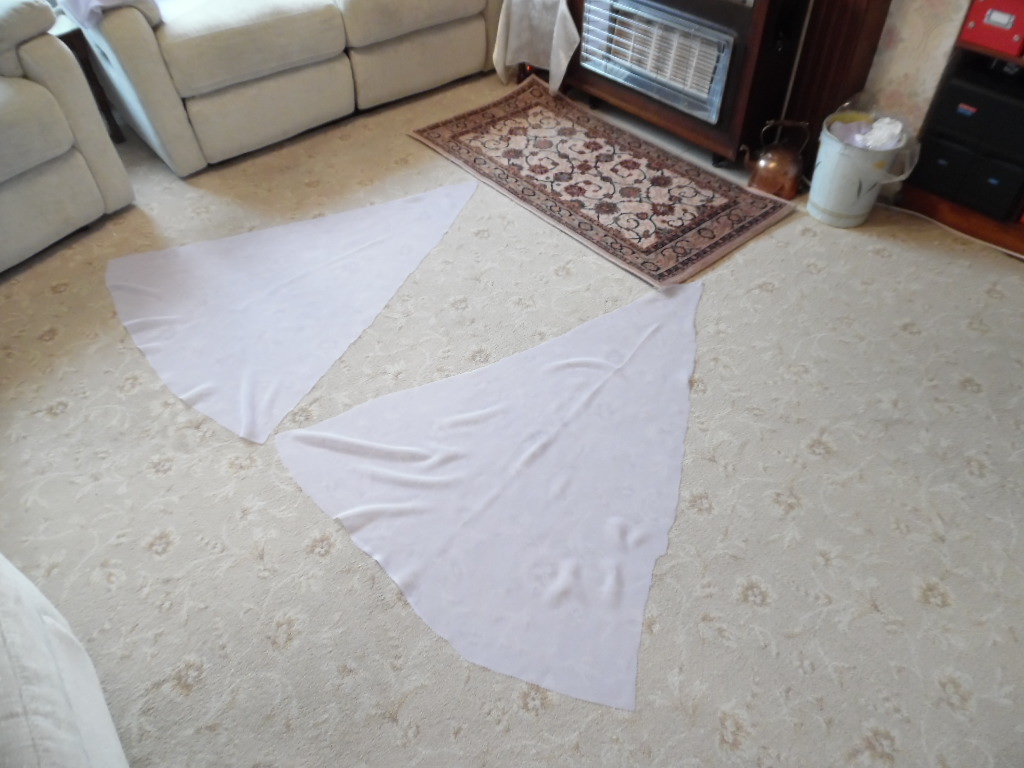
The first layer of godets. These were triangles, with the straight sides each 30cm with a curve at the bottom. Cut all your godets on the straight grain from the top of the triangle to cut down on any stretch.
After cutting them out, overlock all around the edges trying not to stretch the fabric, then join together approximately 6" (15cm) from the top. If you watch the video, you will see where these are attached to the foundation petticoat.
|
|
|
Before attaching, sew on a frill around the bottom approximately 9" (23cm) wide. (or as long as the first two layers. The finished length needs to be about 2" (5cm) off the floor.
PLEASE NOTE: When putting the godets on, don't stretch them, if you find you have room to fit another one in, just move all the triangles closer, don't do the opposite and pull them to fit. |
|
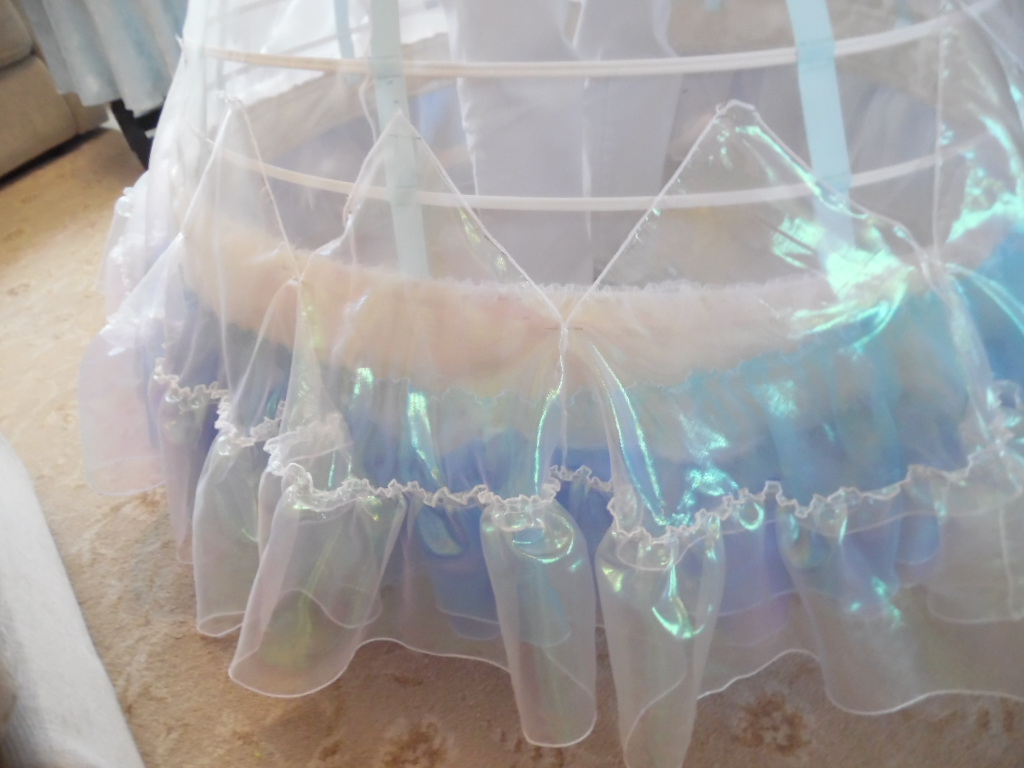
Using the white silk organza, dyed Turquoise, make your triangles with 70cm sides. This is attached approximately half way up the foundation petticoat. As this was awkward to get to, this was hand sewn on. Before attaching, don't forget to make your frills for the bottom out of the same material.
PLEASE NOTE: The back of the crinoline is at an angle and you must arrange your godets so they start to get lower towards the back. (This also applies to the final layer of iridescent fabric) |
|
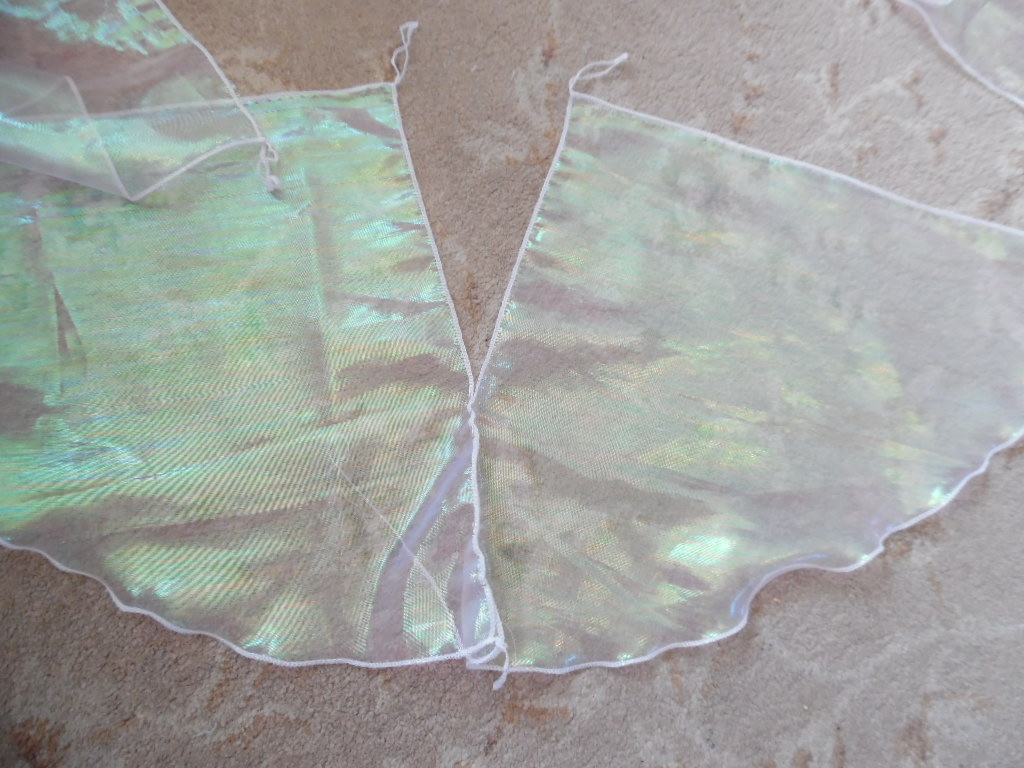
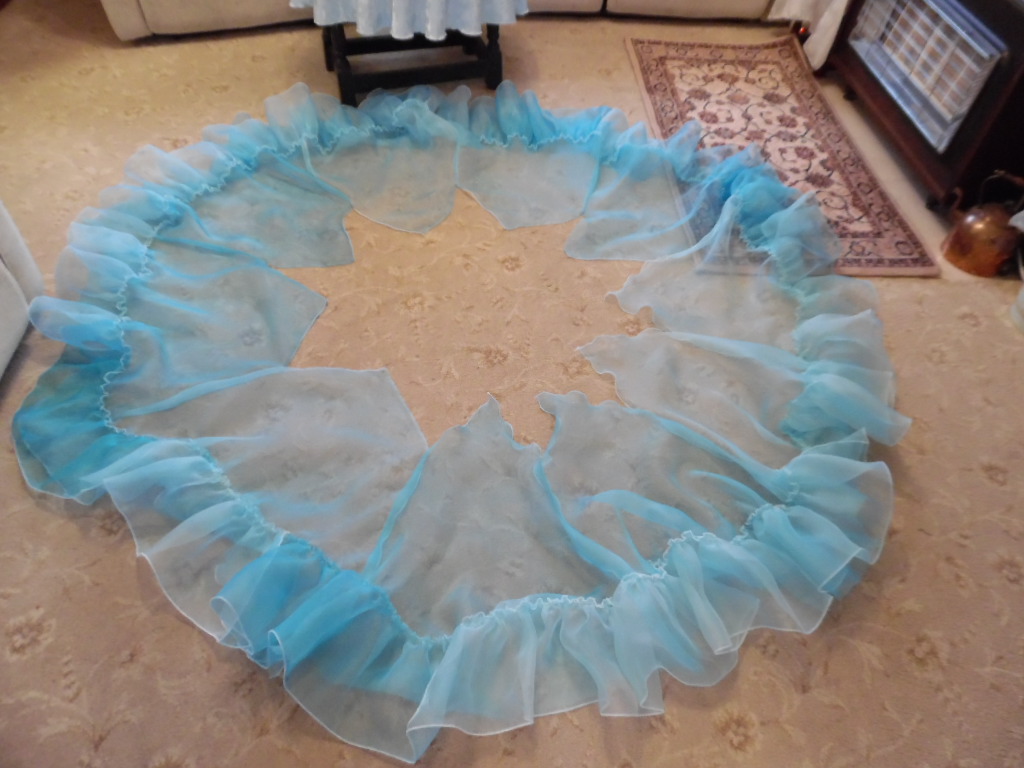
This shows what it looked like before attaching. Start the gap at the top approximately 9" (23cm) down when sewing them together.
|
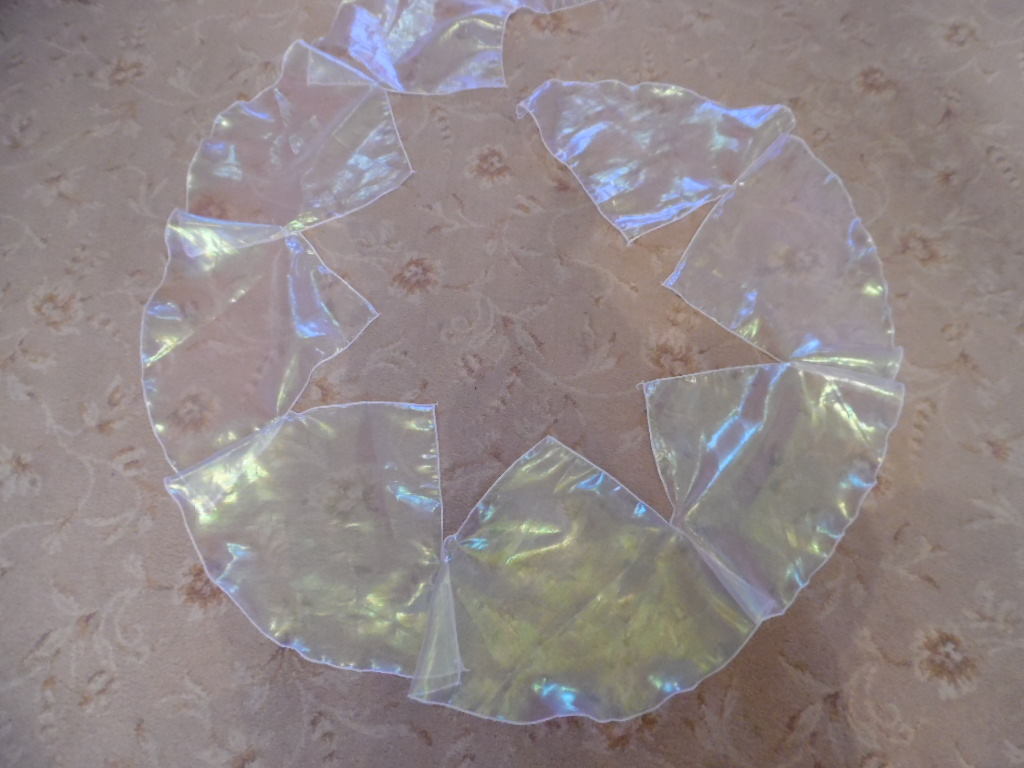
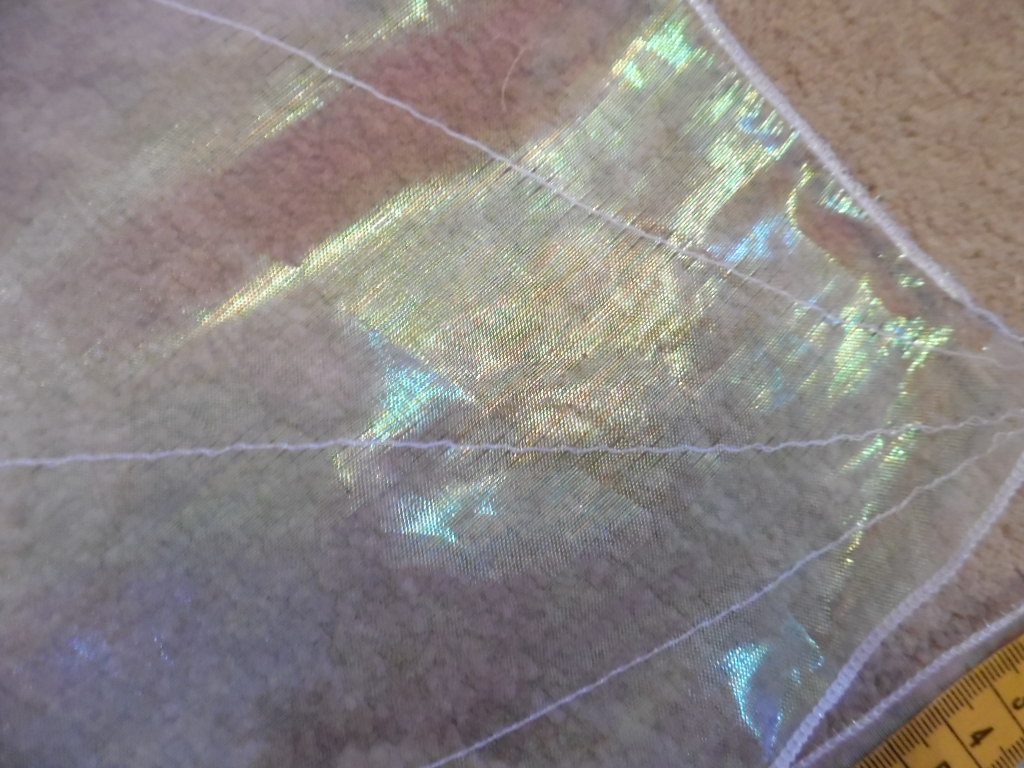
The last layer on the foundation is made using the iridescent organza, each triangle being approximately 70cm along the sides. Sew on a frill appxoximately 7" wide (18cm). We found that it was starting to stretch with the weight, so I sewed three lines down the triangle from the top to the bottom, this seems to work. The gap at the top should be approximately 4" (11cm).
|
|
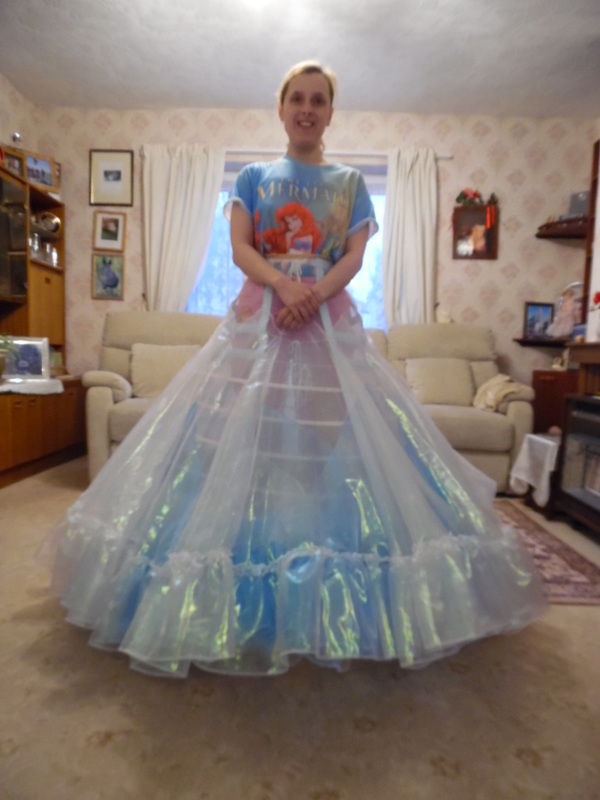
This completes the foundation petticoat layer.
Second Petticoat Layer:
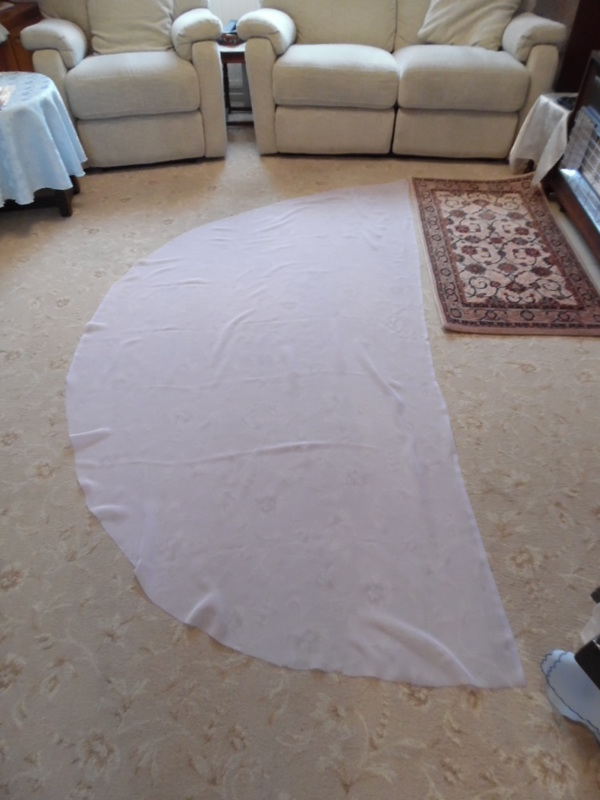
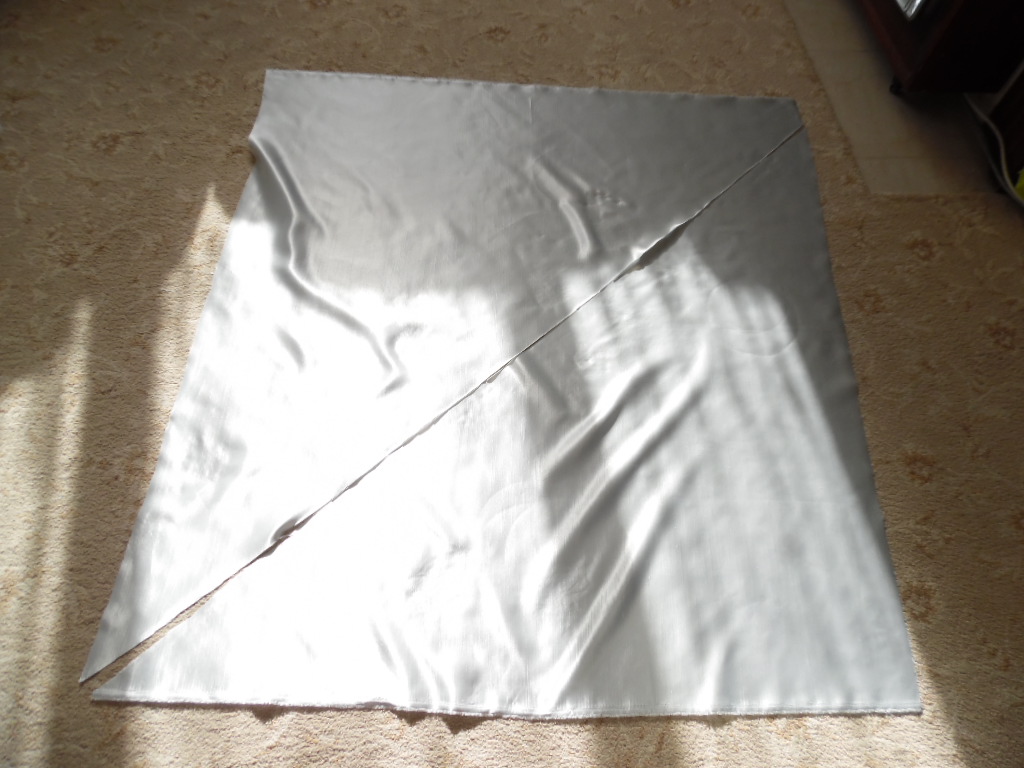
Cut two half circles using the lilac chiffon and two 1/4 section godets of lilac chiffon. These are "in fills" to make it bigger than a full circle skirt.
Cut two half circles using the lilac chiffon and two 1/4 section godets of lilac chiffon. These are "in fills" to make it bigger than a full circle skirt.
|
|
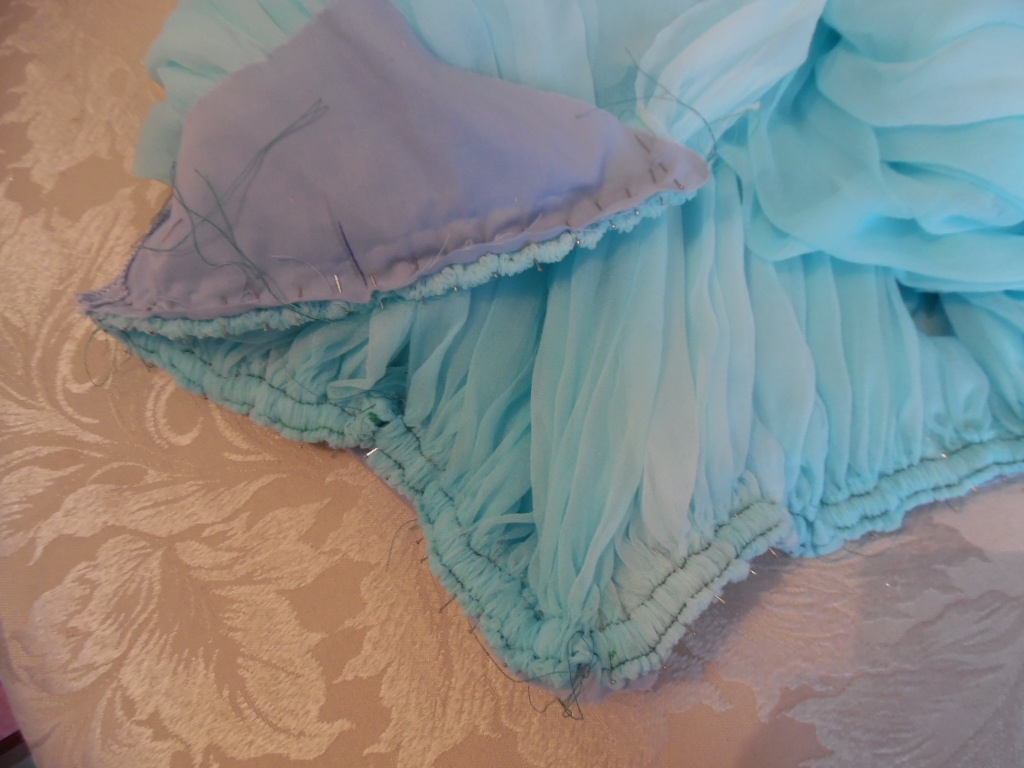
Sew the sections together leave a gap at the centre back of approximately 6" (15cm). Then using a combination of all the fabrics, sew on a frill approximately 7" (22cm) wide.
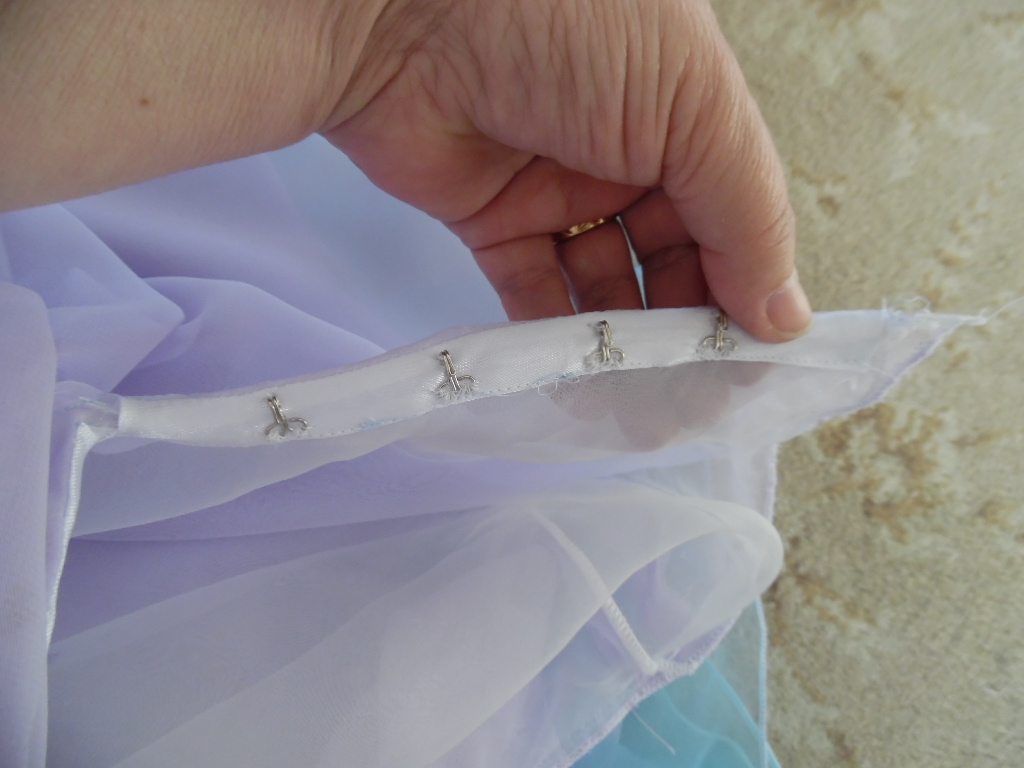
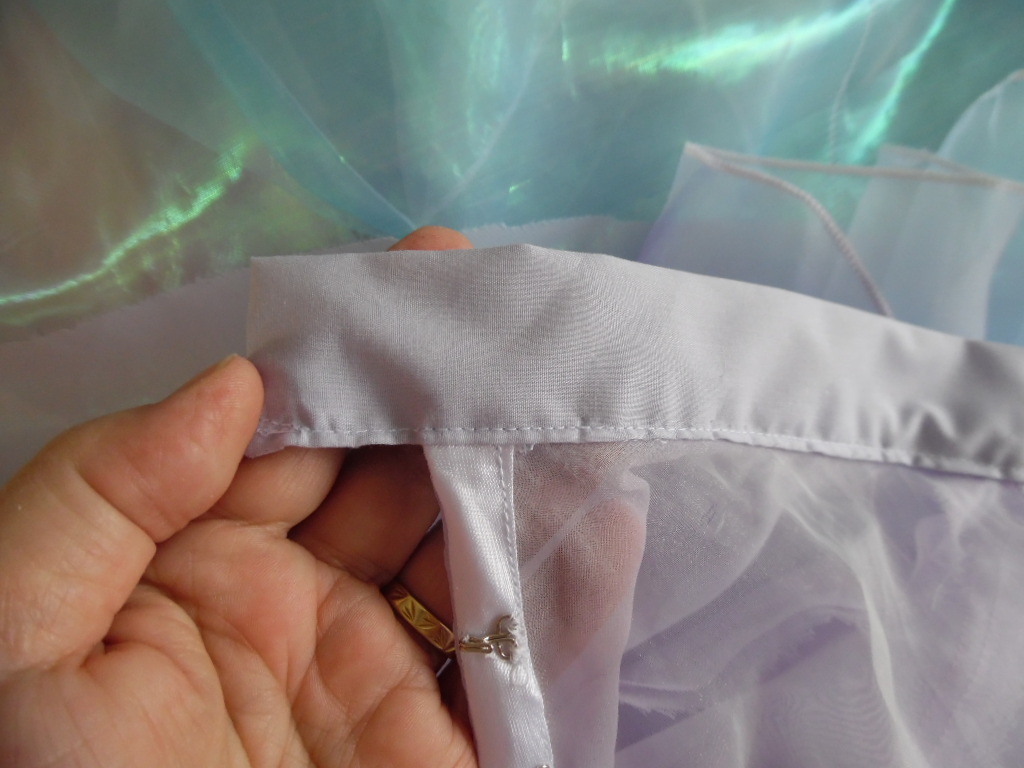
Now you can put the foundation petticoat layer and this layer together at the waist. I then attached a strip of bias to reinforce the gap as it is now very heavy and added hooks and eyes to close it. This was then put on a waistband with two more hooks and eyes.
So now we have two layers of skirts put into one waistband.
|
|
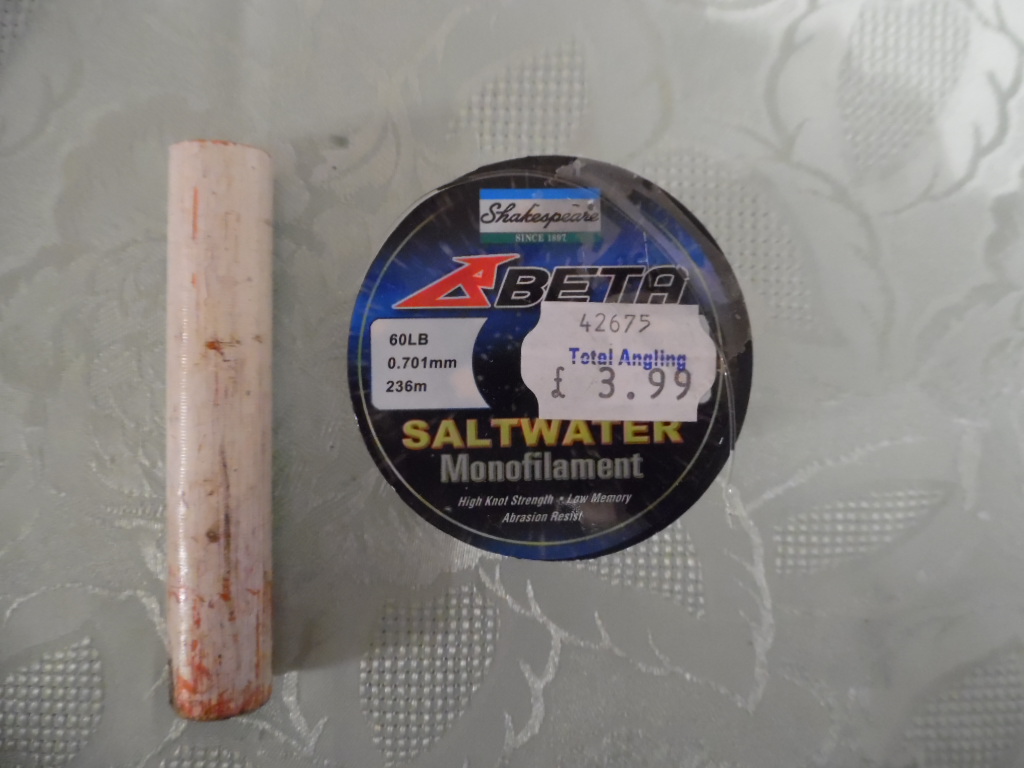
Now we need to put fishing line into a couple of the layers of frills. We didn't do all of them, we just needed to do enough to make it separate the layers. We show on the video how we turned the fishing line into tighter coils. If you just sew in the fishing wire as it is, is won't curl the fabric. This was then sewn into the hem of the frill whilst it was being rolled.
|

|
This completes the second layer.
Triple Layered Full Circle Skirts:
|
|
|
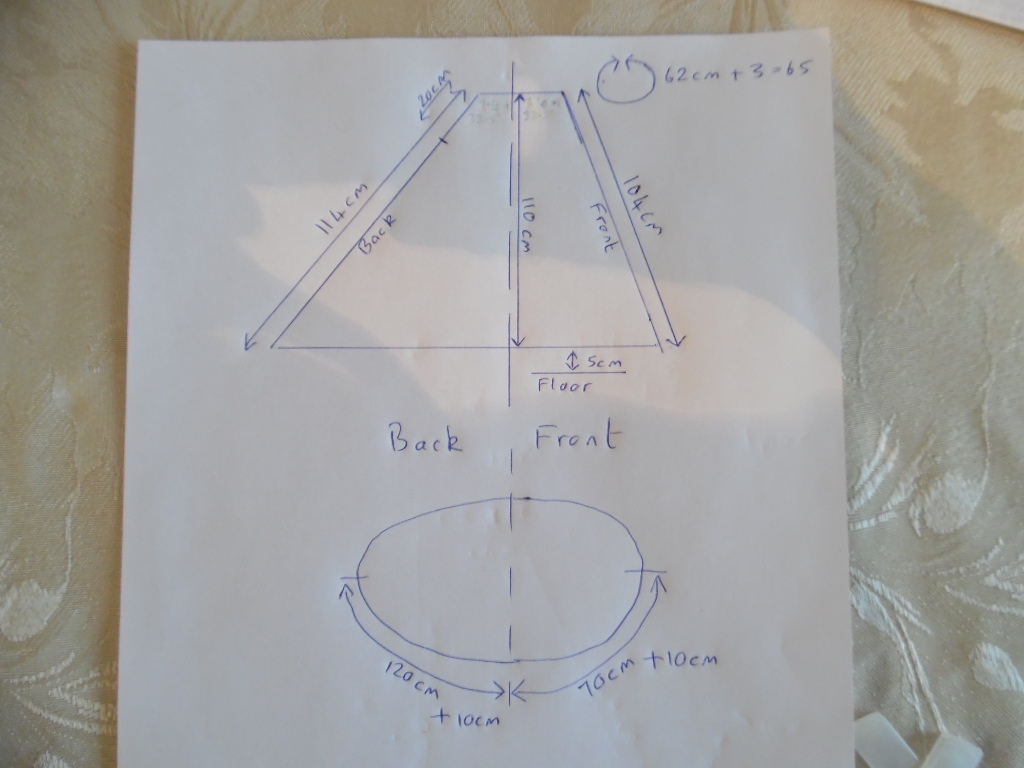
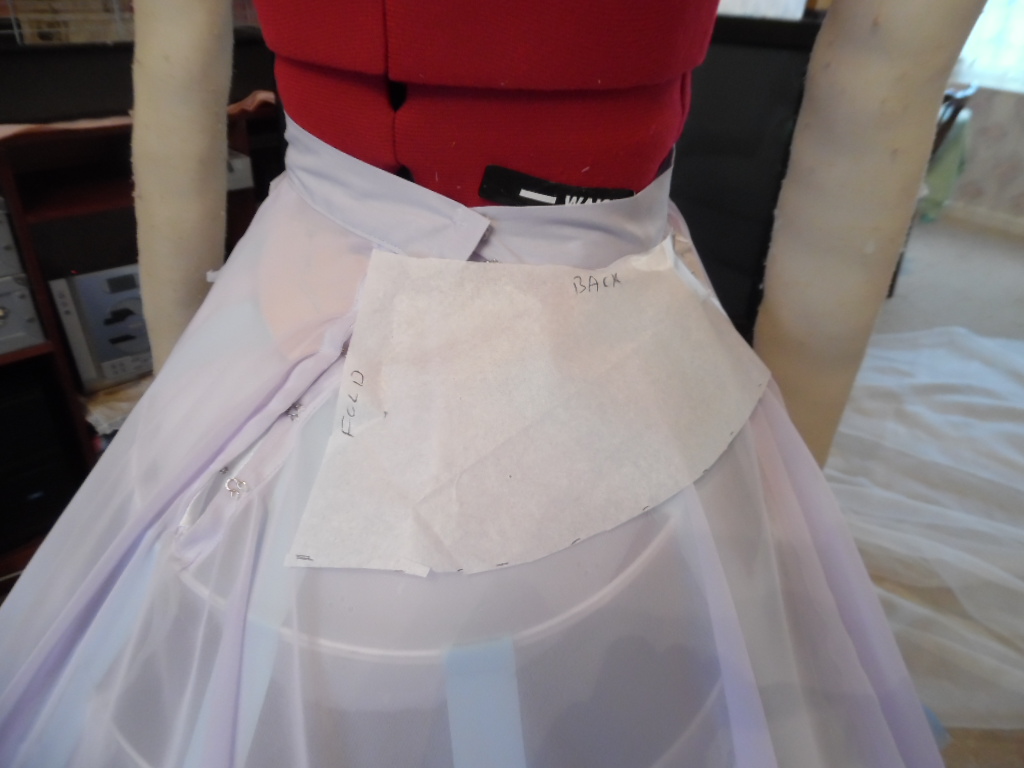
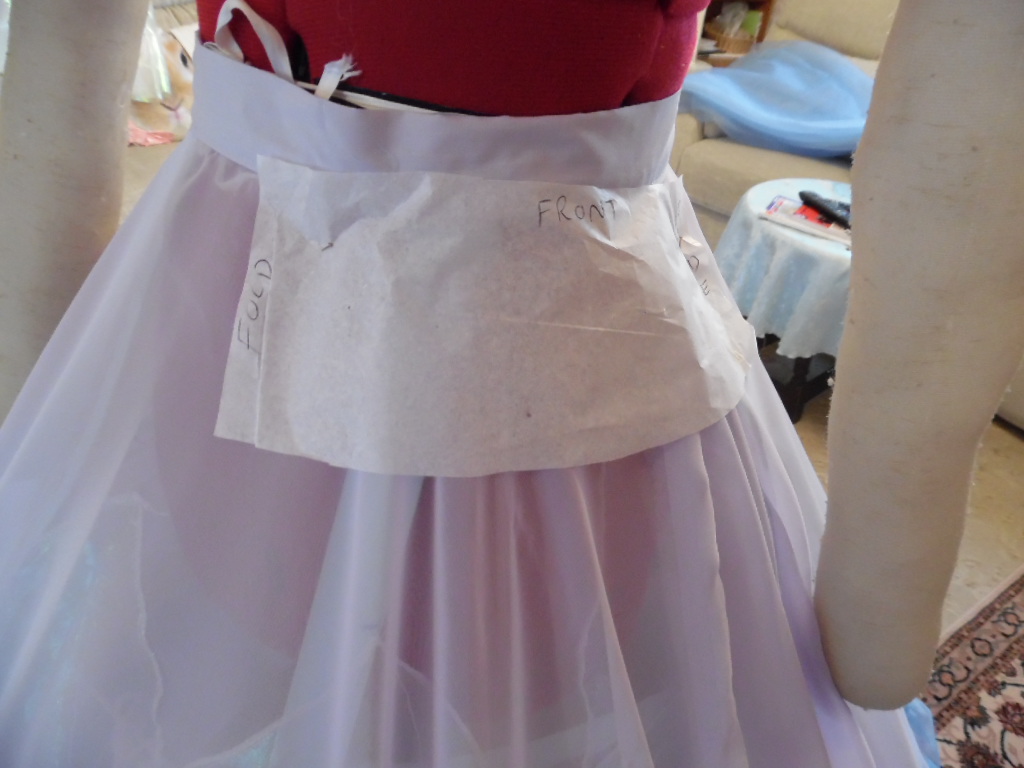
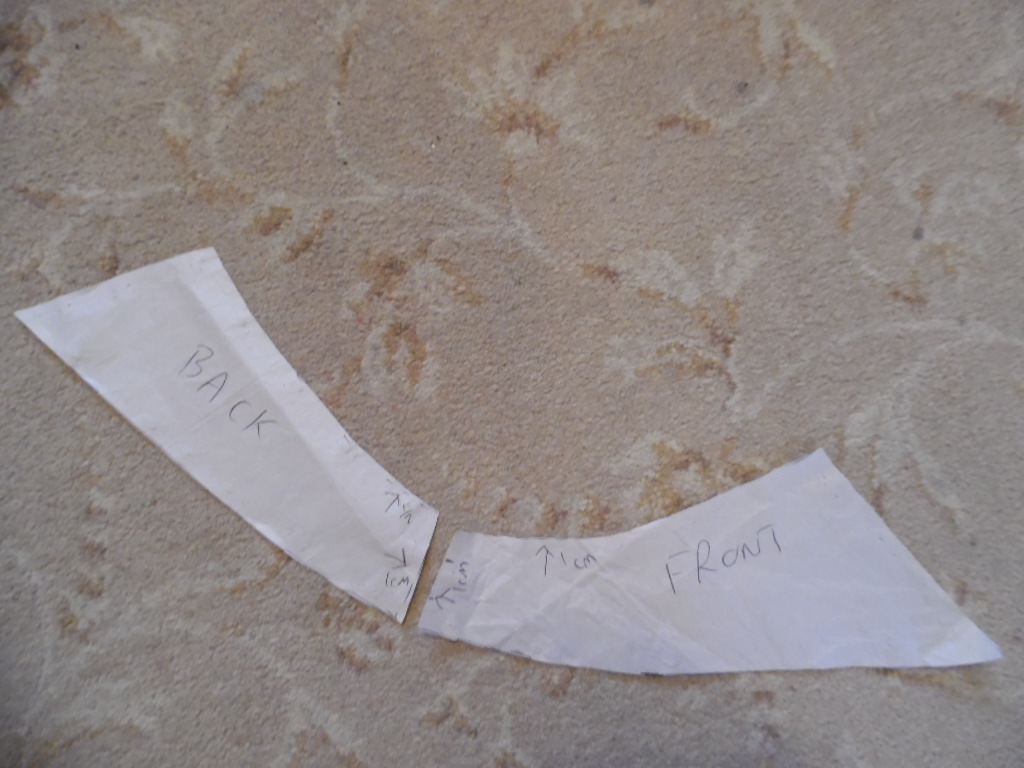
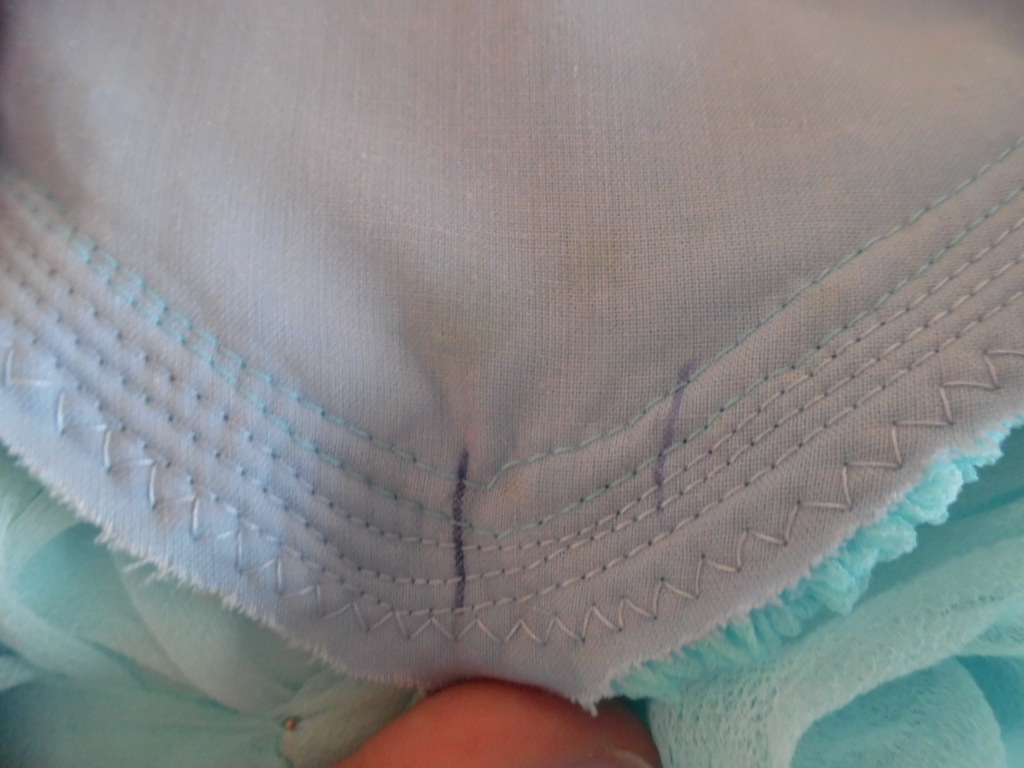
This shows the pattern we used for the yoke, slightly longer than was needed to allow for seams. You will need to make two sets. Ours has a side opening and was put together as per the photo. Sew the two yoke pieces together along the top and down the sides.
|
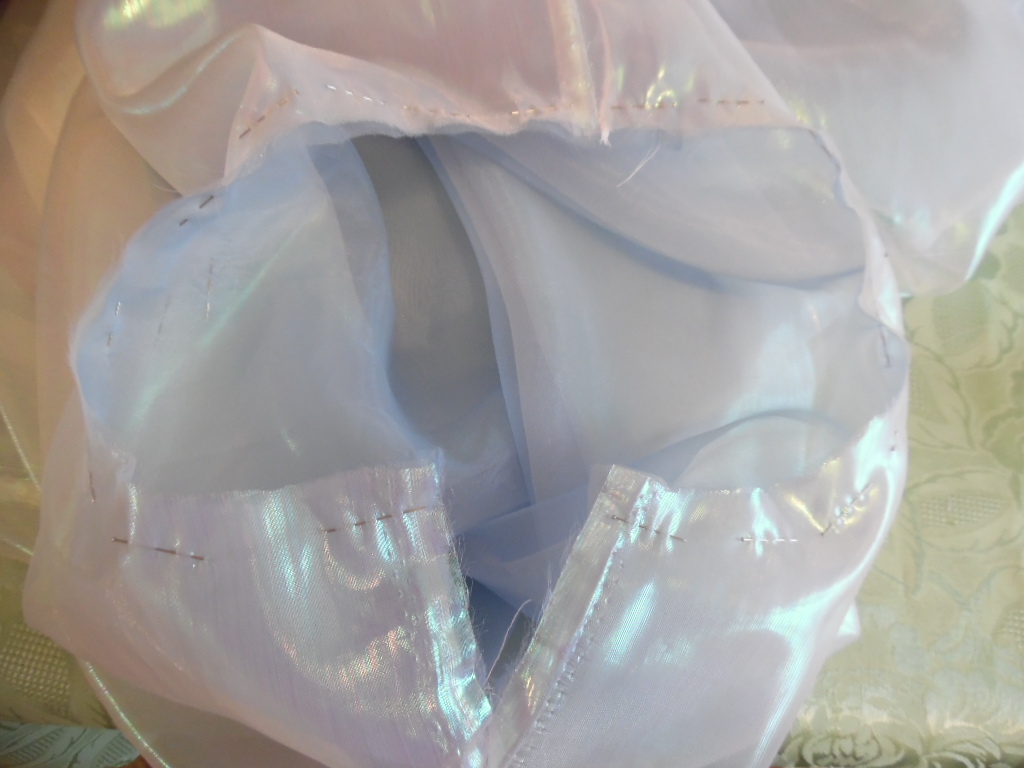
Cut out three full circle skirts using the white polyester organza, blue polyester organza and iridescent organza. Sew each individually leaving a gap of approximately 4" (10cm) as a side opening. Put all three skirts together in this order with the white polyester as the inside layer.
|
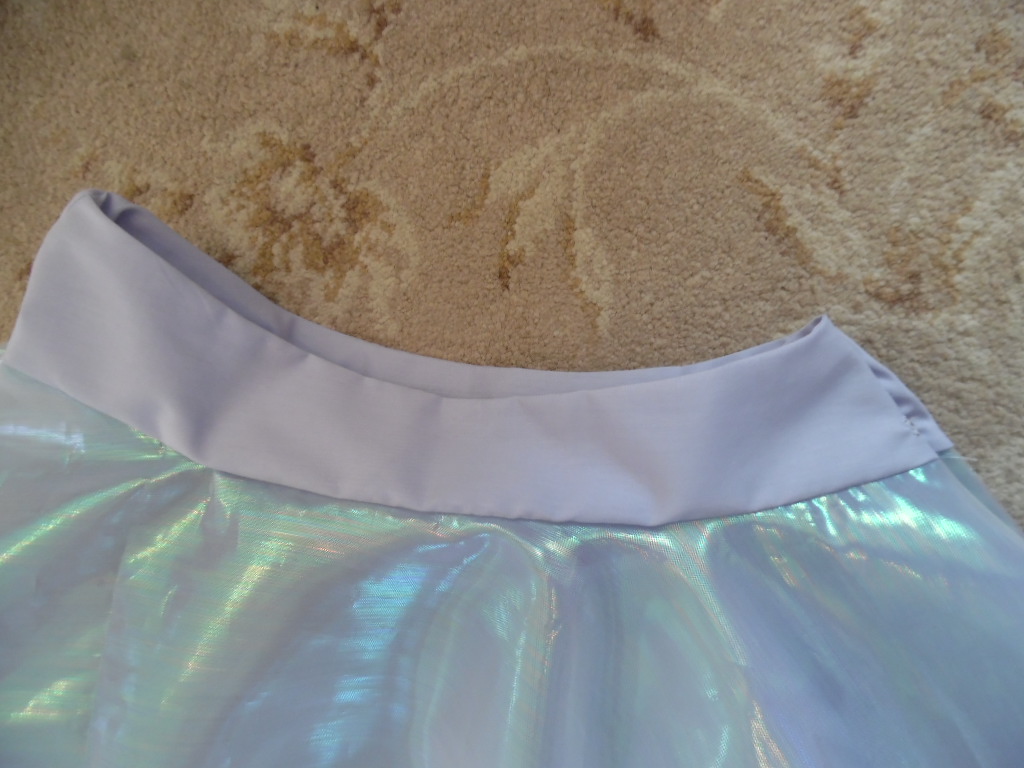
Attach the yoke and sew on two sets of hooks and eyes. The longer yoke piece goes to the back of the skirt.
|
Cut to length and overlock all the hems.
This completes the triple layered skirt.
This completes the triple layered skirt.
Main Outer Skirt:
|

|
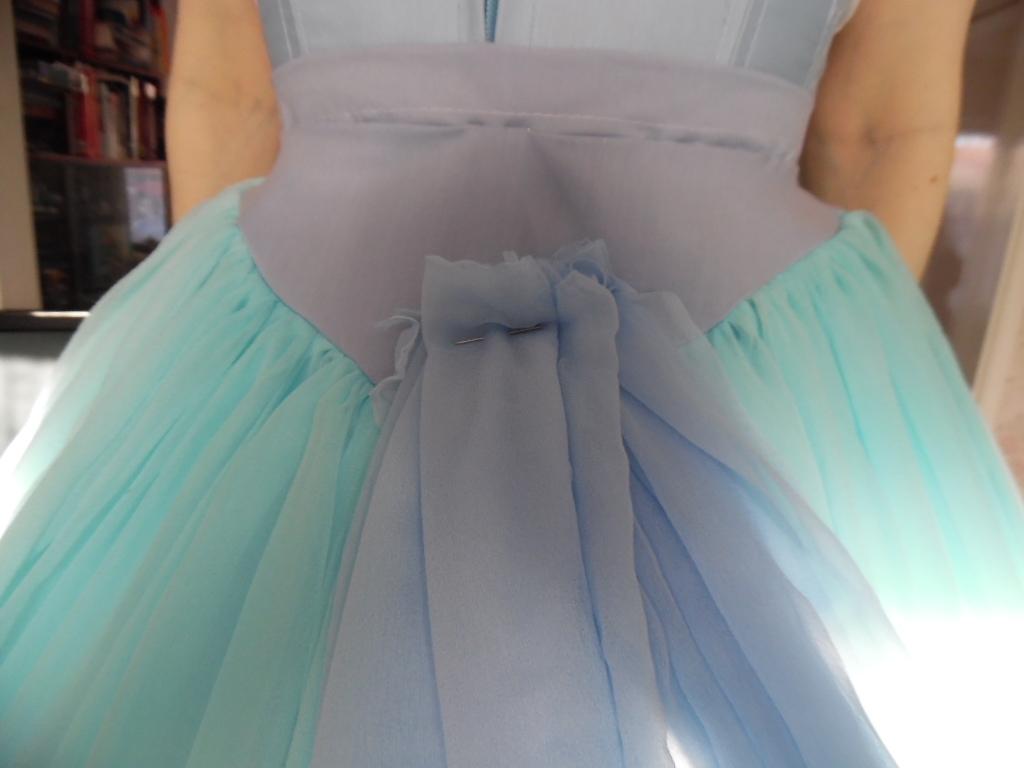
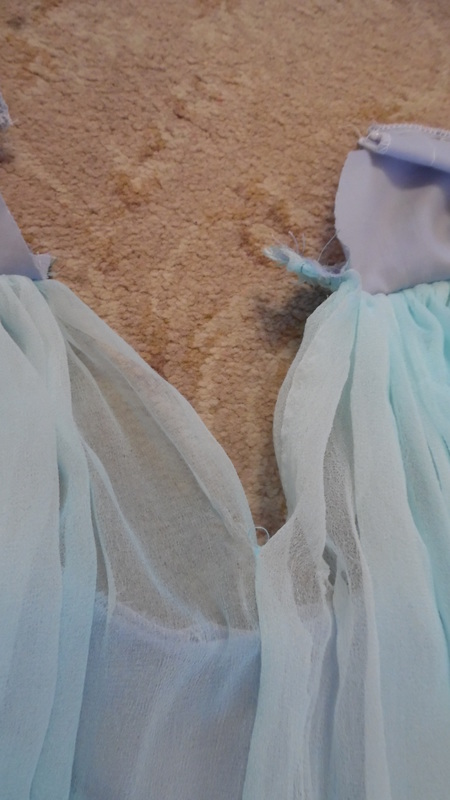
We made up our own yoke, which went to a point at the centre back and had a slight curve at the centre front. Put one set together using an interfacing, but just make up the second one without an interfacing. Treat these yokes separately, don't sew them together. You will also need a straight waistband.
|
|
As you can see from the picture, we have already completed the turquoise layer, which was sewn onto one of the yokes, this second layer will be sewn onto the second yoke, then both yokes will be put together on a waistband.
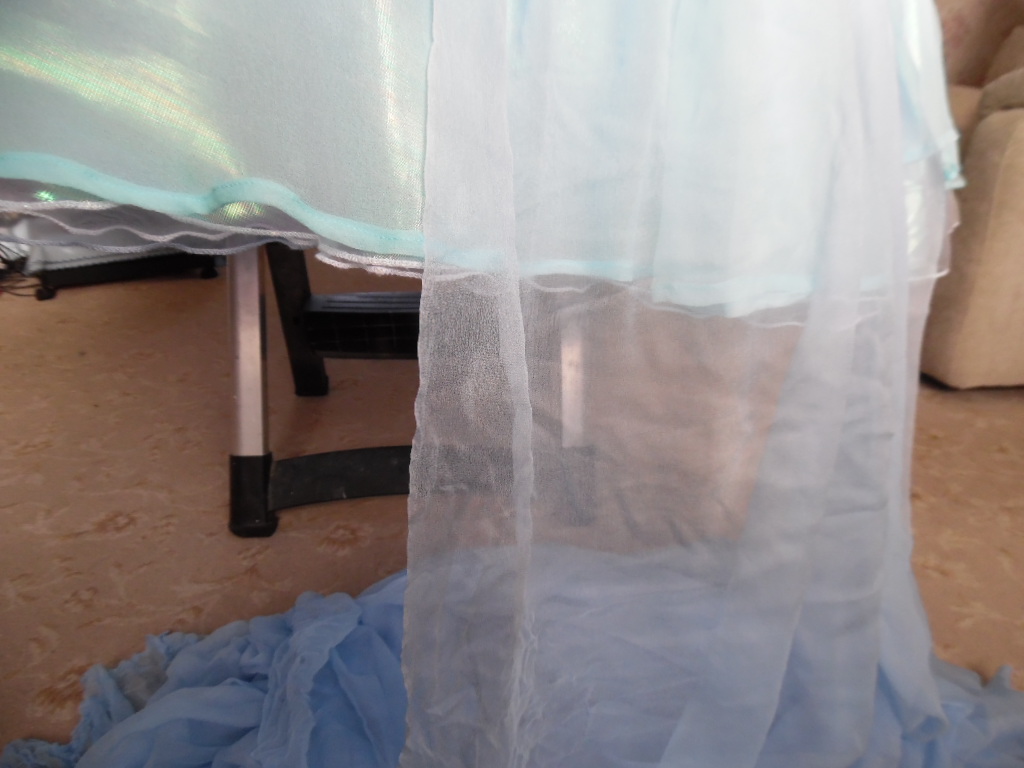
Without cutting ANY of the material just yet, I loosely gathered across the width and pinned it approximately 2" (5cm) higher than the yoke edge to allow for any alterations later on. I then let the fabric hang loose and cut approximately 10-15cm longer than I need to. I am going to use 4 sections for the front and four for the back and each section will be done exactly like this so I know that my lengths are correct. This material has a nasty habit of shrinking and distorting, so making it longer than needed will help.
PLEASE NOTE: INITIALLY I CUT 5 SECTIONS FOR THE FRONT AND 5 FOR THE BACK, BUT THIS PROVED TO BE TOO DIFFICULT TO GATHER IT INTO THE YOKE AS THERE WAS TOO MUCH OF IT. WE THEN REDUCED THE SECTIONS TO 8 ALTOGETHER.
|
|
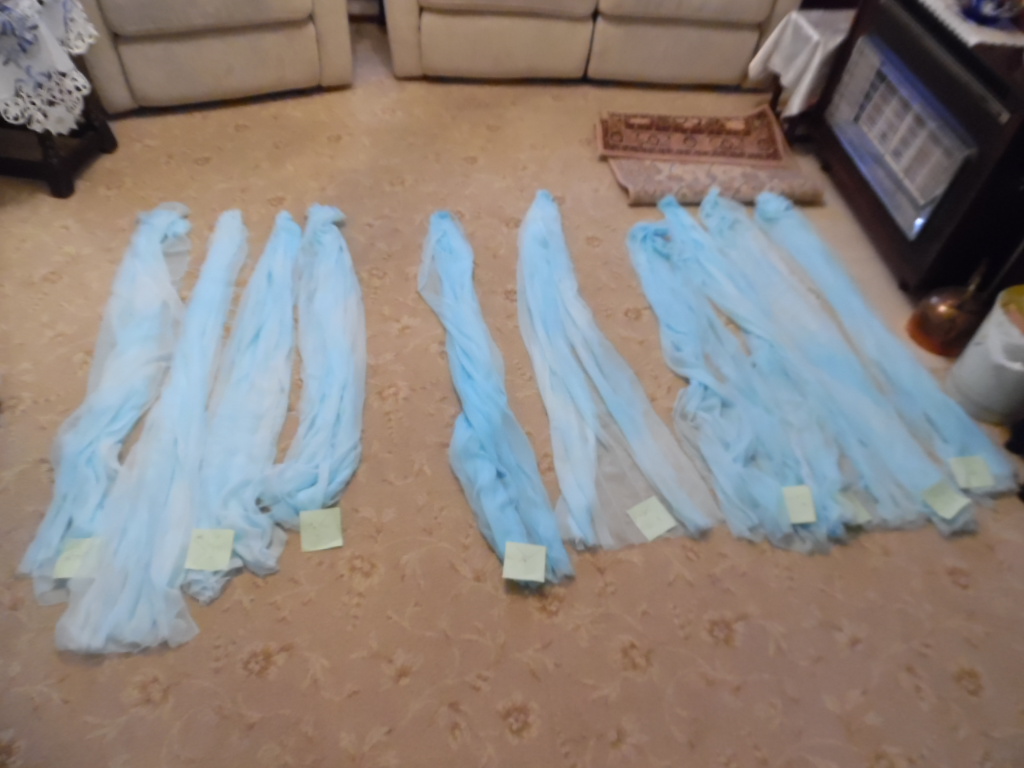
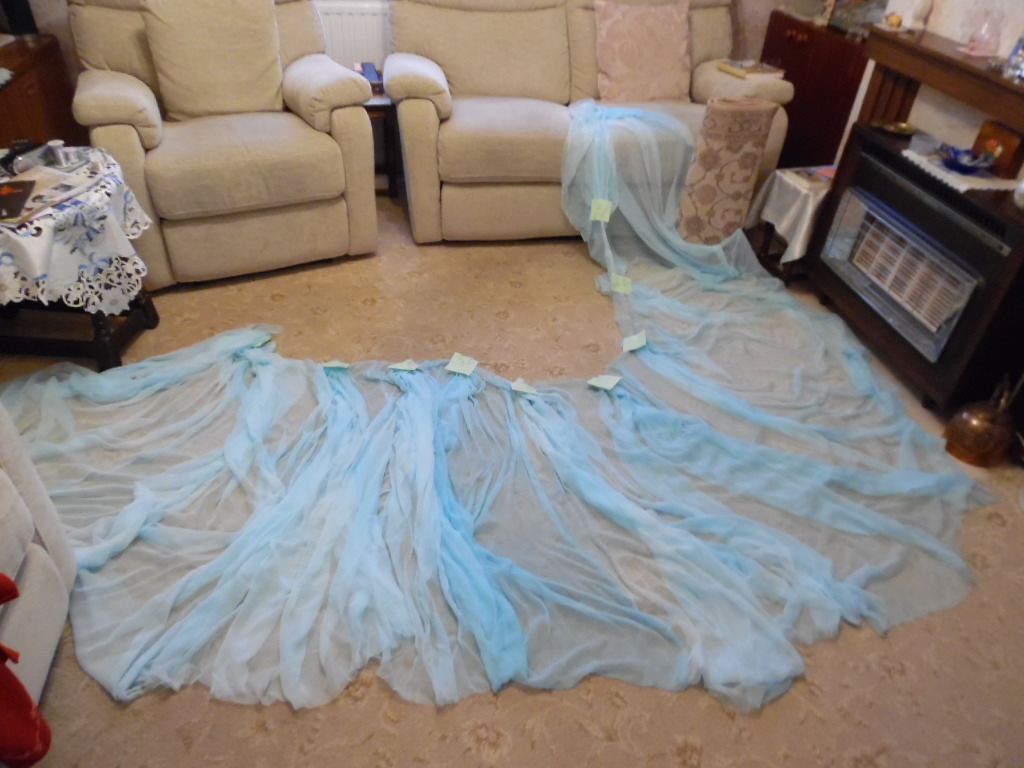
This shows 10 sections cut, which we then reduced to 8. I labelled all the sections in the order they go around the yoke, the back pieces being longer than the front. Sew up all the seams and leave the centre back open for now.
|
Turn over the top of the fabric and sew a double line of long stitch gathering stitches along the top of each section. I did them one at a time to make it easier when gathering. Divide the bottom of the yoke into 8 sections and gather the skirt to fit.
You will do exactly the same for the turquoise layer using the other yoke you made. Using the same method as this one by hanging the fabric then cutting it. At this stage, they are still separate yokes. |
|
To make sure the gathering is flat, I sewed several lines of stitching to secure it to the yoke, do this for both yokes.
|
|
Sew up the back seam on both skirts and leave a gap of approximately 4" (10cm)
|

|
Now put both yokes together, join them together at the back seam and put into a waistband.
You can if you want, put a snap fastener on the bottom of the yoke to hold it together. |
|
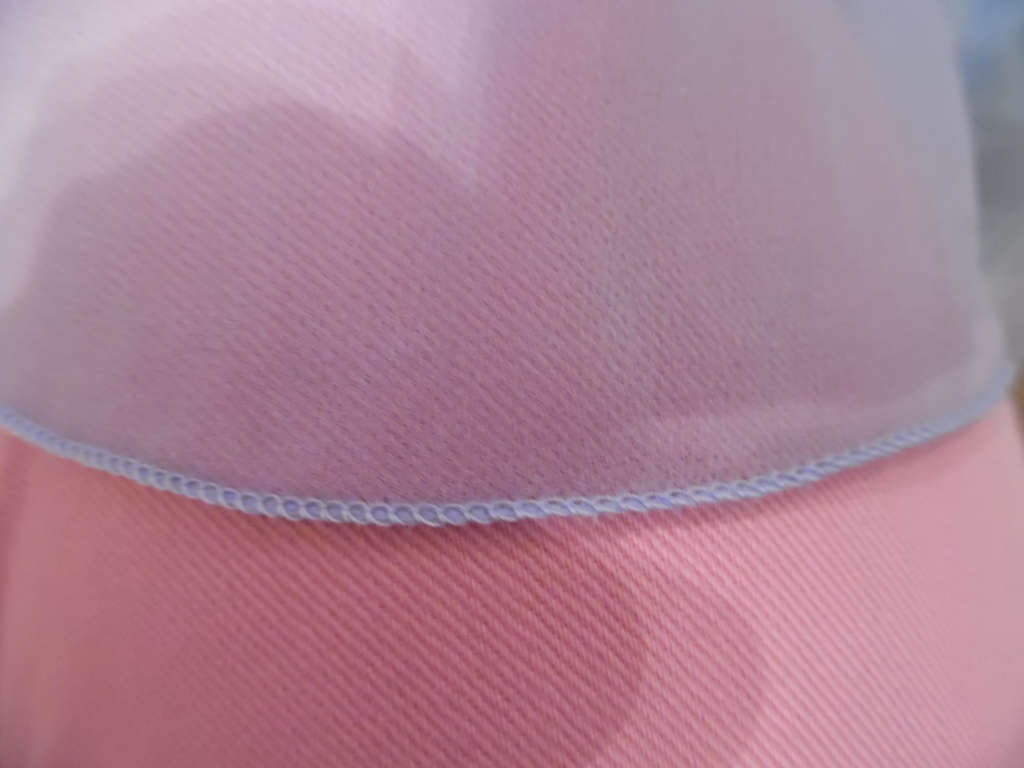
Using an overlocker or rolled hem foot on a sewing machine, cut the hem to length being careful not to stretch the fabric, then sew the hem on both skirts.
There are instructions on the video for the settings, as this needs to be rolled over and very narrow. |
This completes the outer skirt.
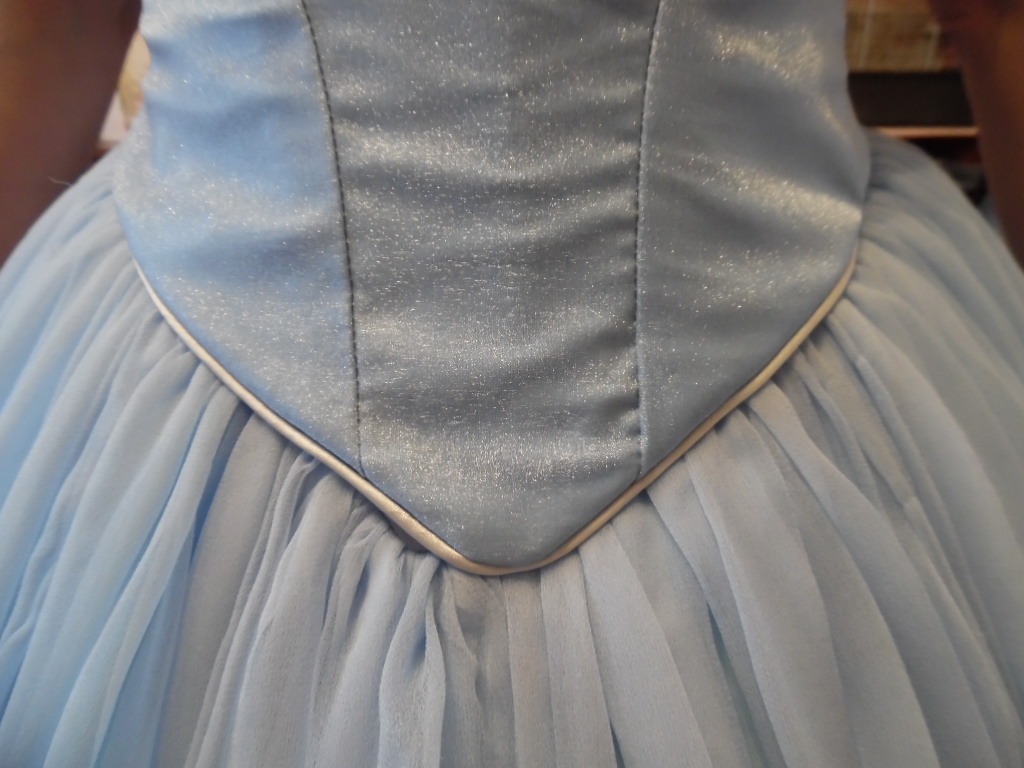
Bodice:
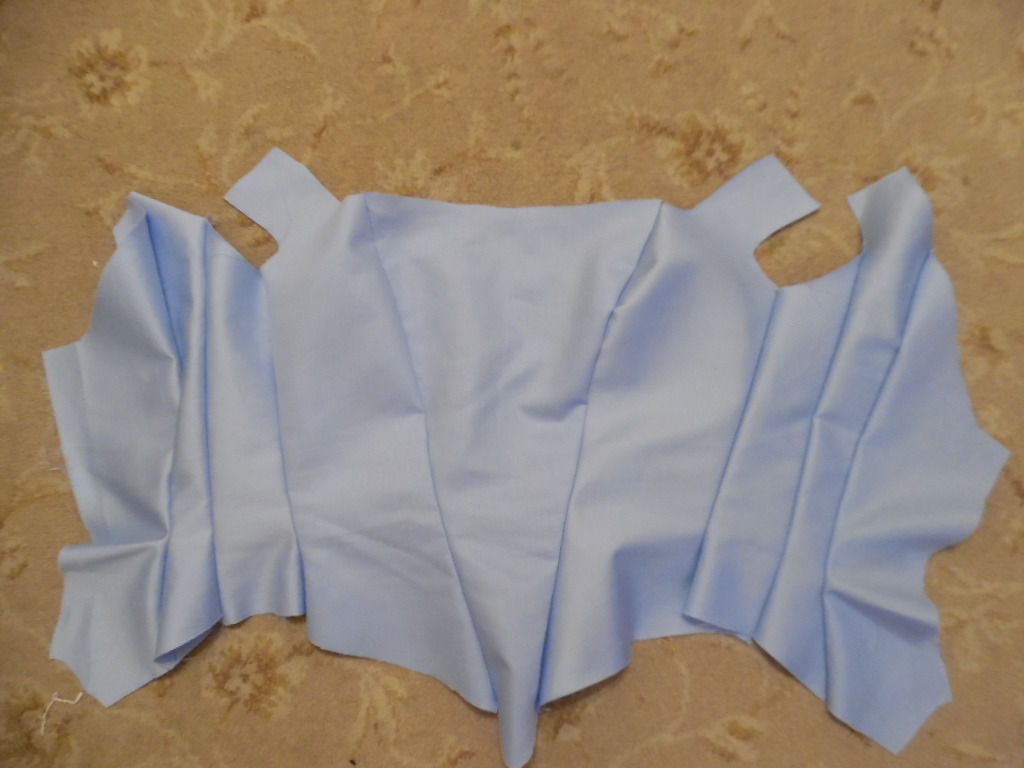
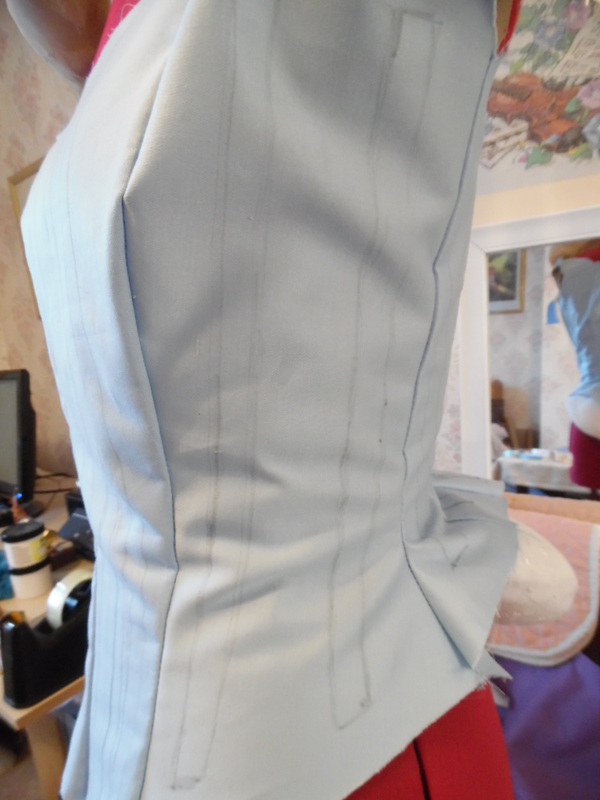
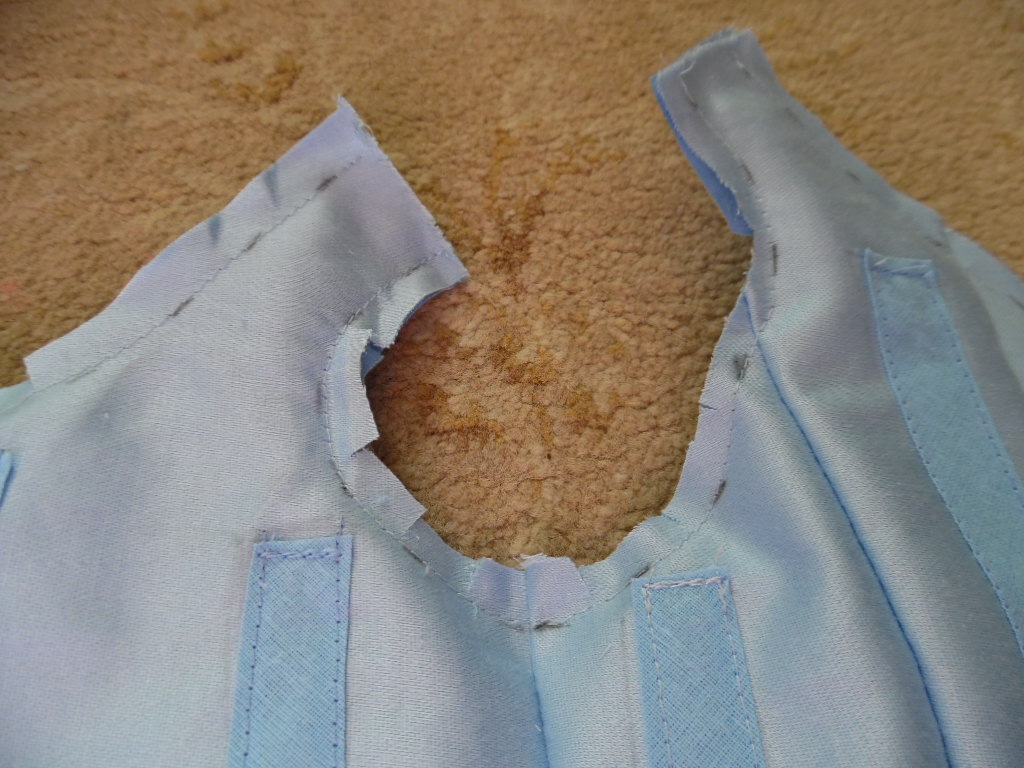
Using Simplicity 1026, we basically used the same pattern pieces to make the mock up, then altered the seams and extending piece 2 and 4 to incorporate a short strap. The back was extended down to create a point and you also need to allow for an angled overlap.
Each piece was then mounted using the Sky Blue and crystal organza . Pin and tack around each piece to hold in place and sew the pieces together. You will also need to make a lining using the pale blue fabric. Cut any curves on both pieces.

|
|
|
|
|
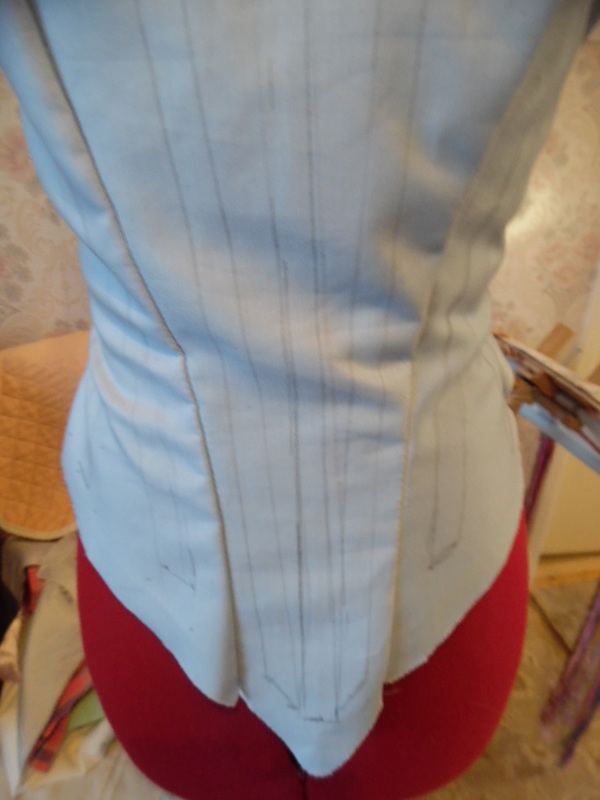
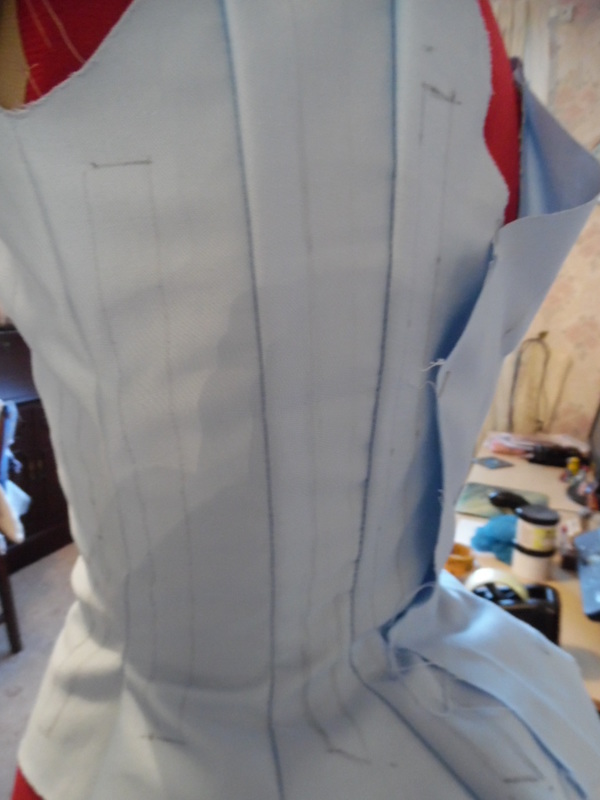
Mark the boning channels onto the liner. None of the boning was put on the seams, but placed as shown.
|

|
No points for seeing that the boning channels were sewn on the wrong side of the liner, these should have been put on the other side, but as it would have been a huge step backwards to undo all the seams and redo it, it was left as it was.
|
|
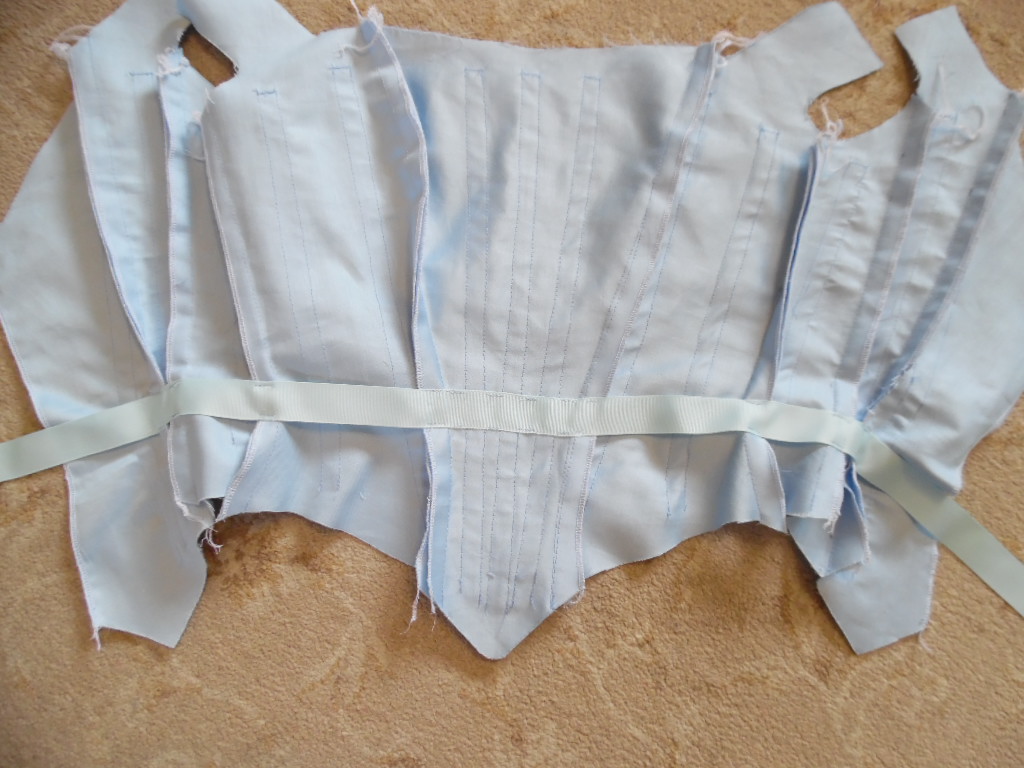
Using the seams, sew the waist tape at waist level. Leaving the ends free with enough left over to neaten.
|
|
Put both pieces together right side to right side, sew up the centre back and around the arm holes, but NOT across the straps. Cut any curves and trim off any excess fabric. Turn it the right side out and press all the seams.
|
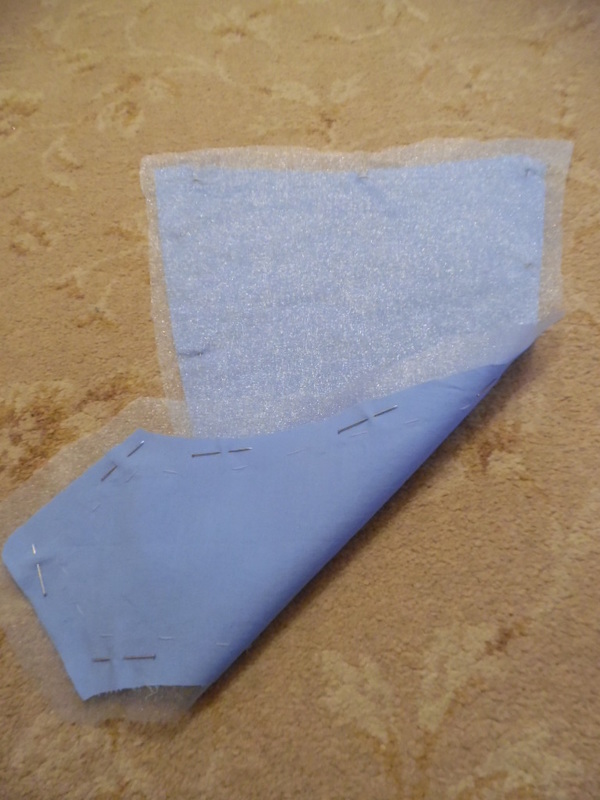
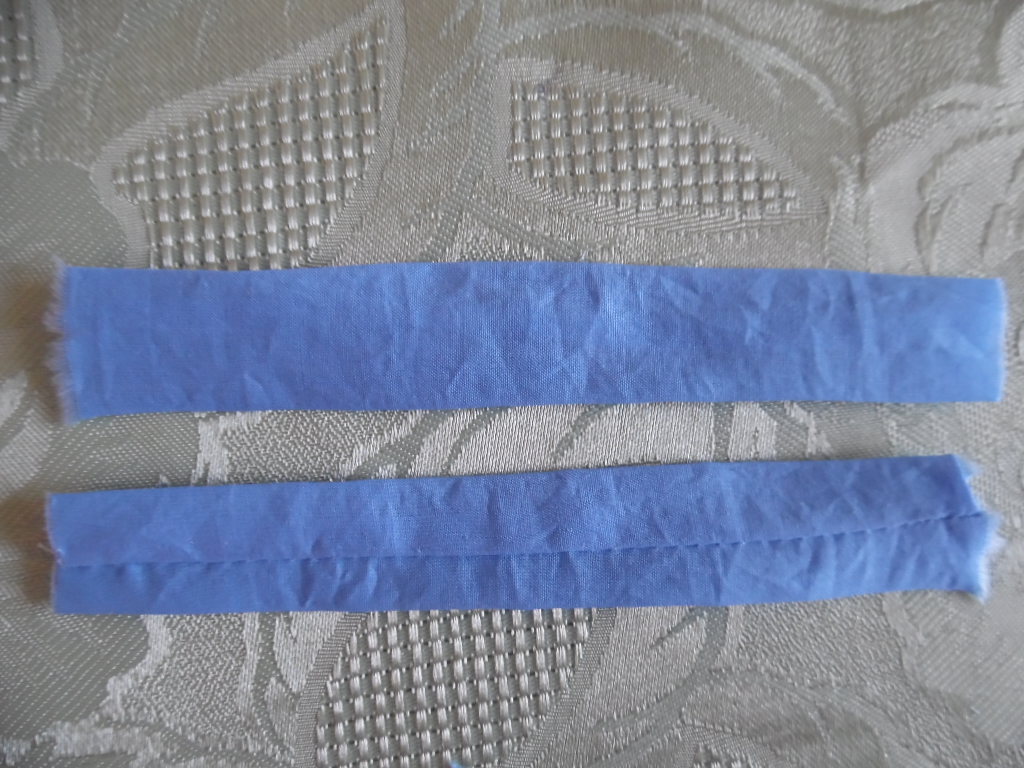
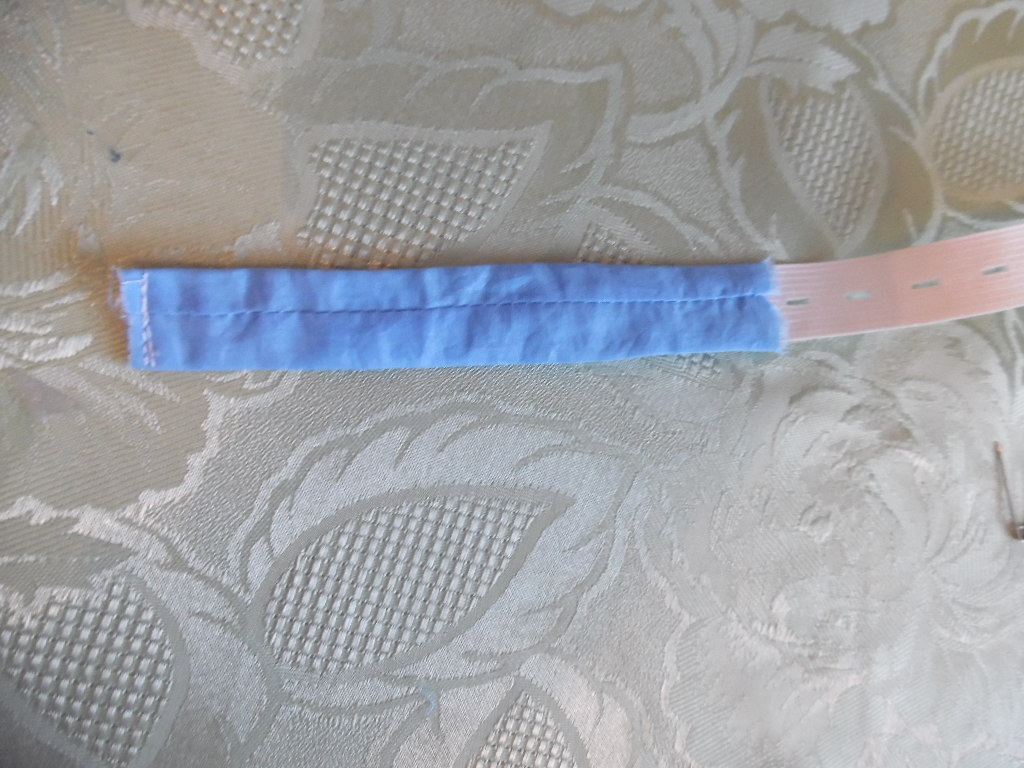
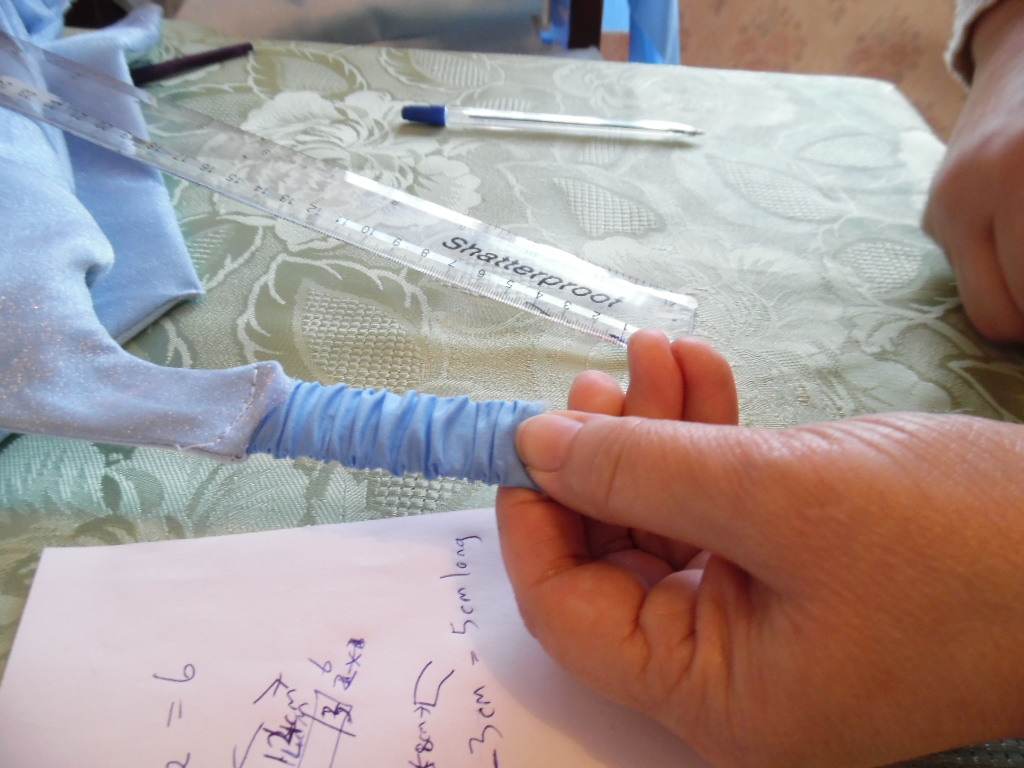
Cut two strips of fabric 6cm x 14cm. Sew length ways and turn the right way out. Thread 1" (2cm) elastic through the strap until it reaches the end and sew it down securely.
|
|
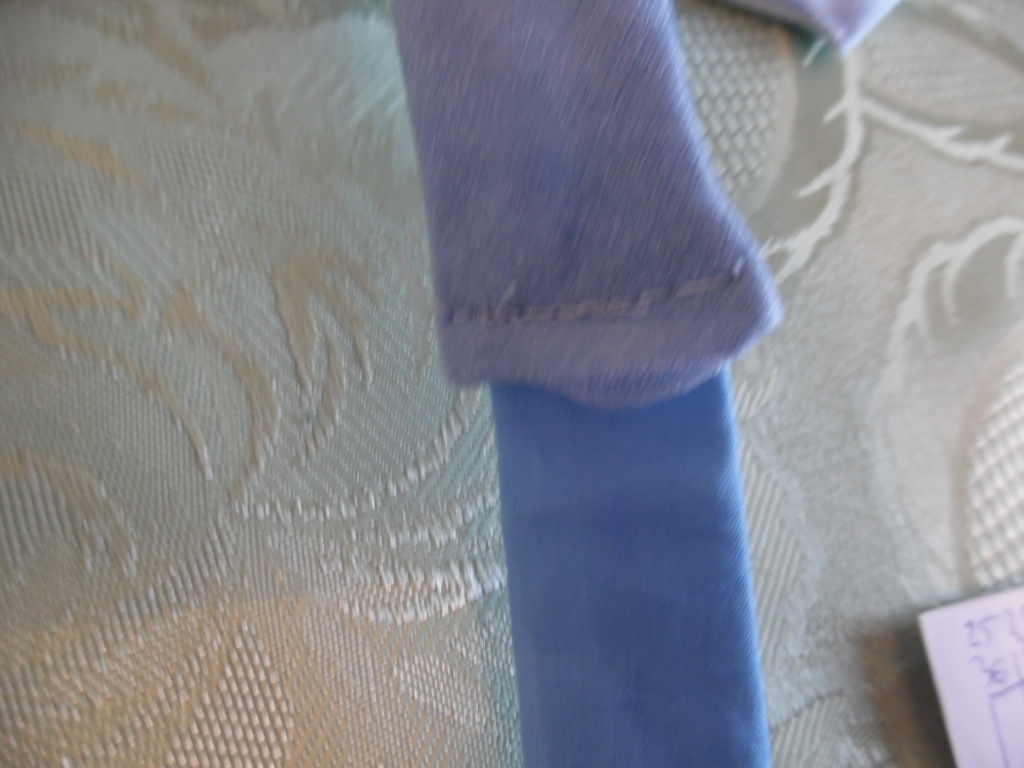
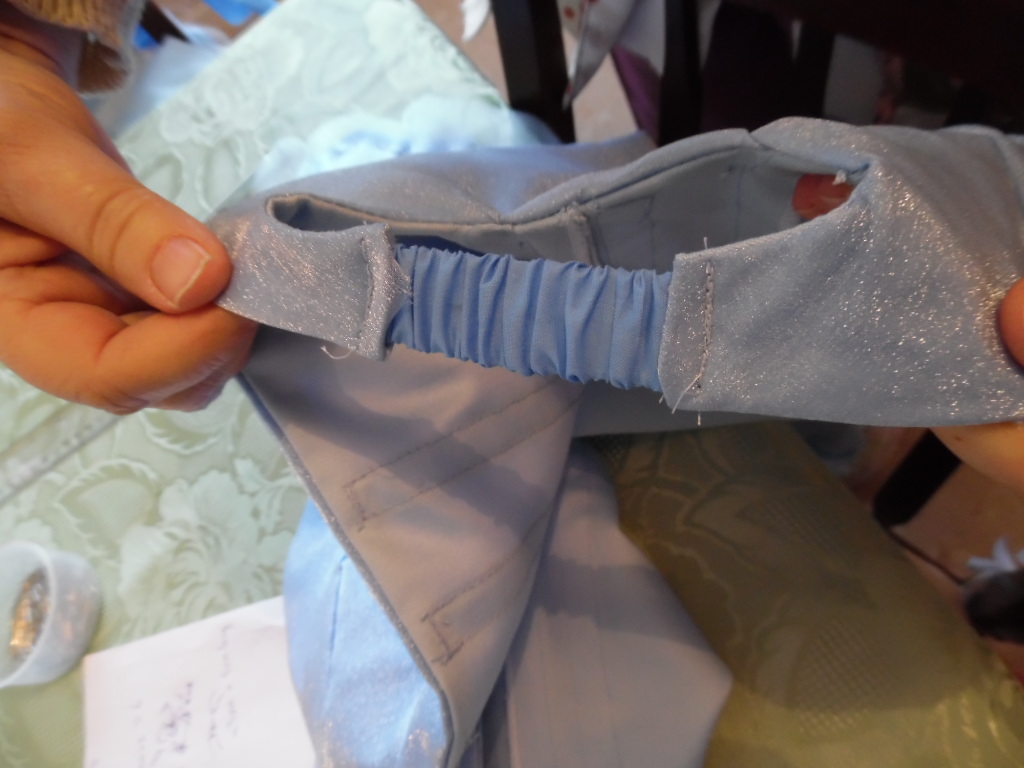
Turn the bodice strap to the inside approximately 1 cm, push the end of the elastic strap into the this and secure with some sewing. Next, pull the elastic until it is the right width to fit across your shoulder and run a sewing line across this to hold it in place.
|
|
|
Cut off the excess elastic, turn the opposite bodice strap to the inside and push the elastic piece into it and secure with sewing.
|
|
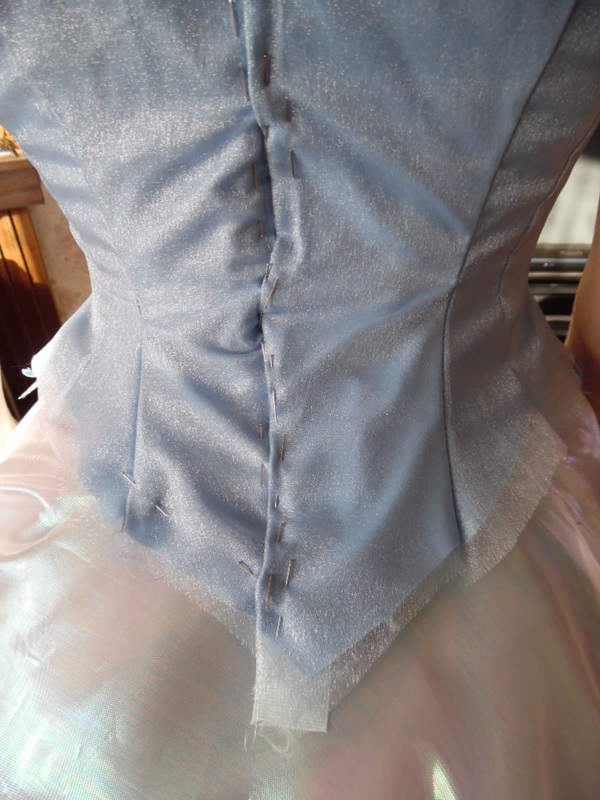
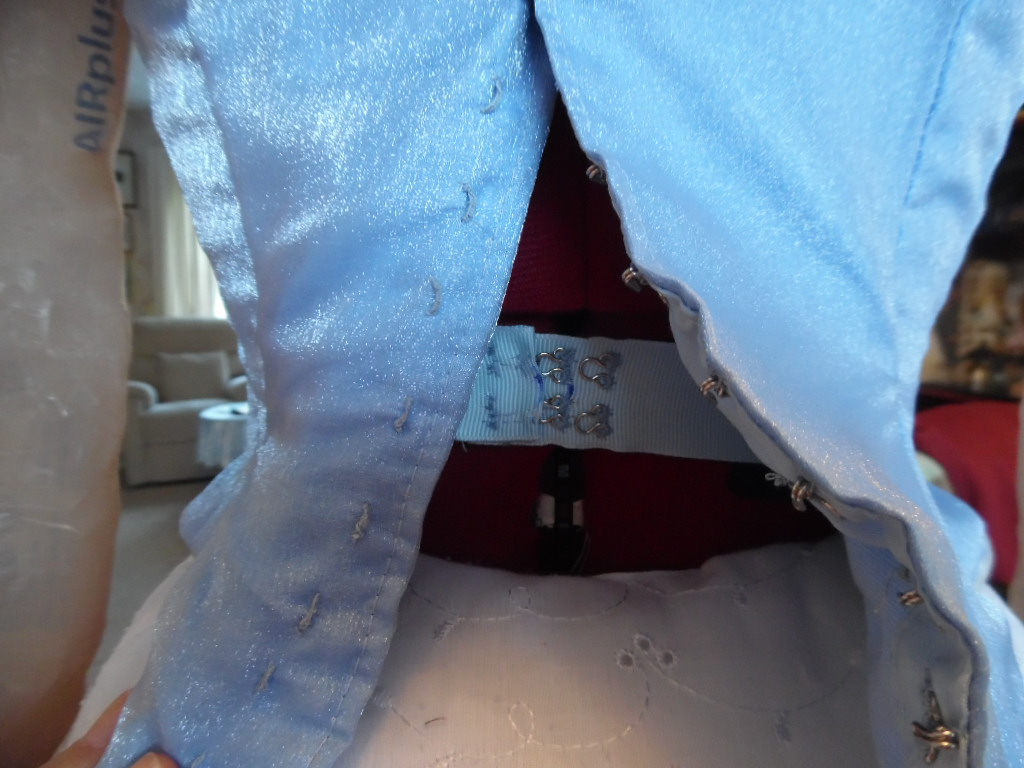
Put the bodice on over the completed skirt and mark with pins where the closing edge will be ready to sew the hooks and bars.
|
|
Turn the corset tape to neaten and sew on two sets of hooks and eyes, you need this to be as tight as you can possibly get it. I usually sew on two sets of eyes to allow for weight gain/loss.
|

|
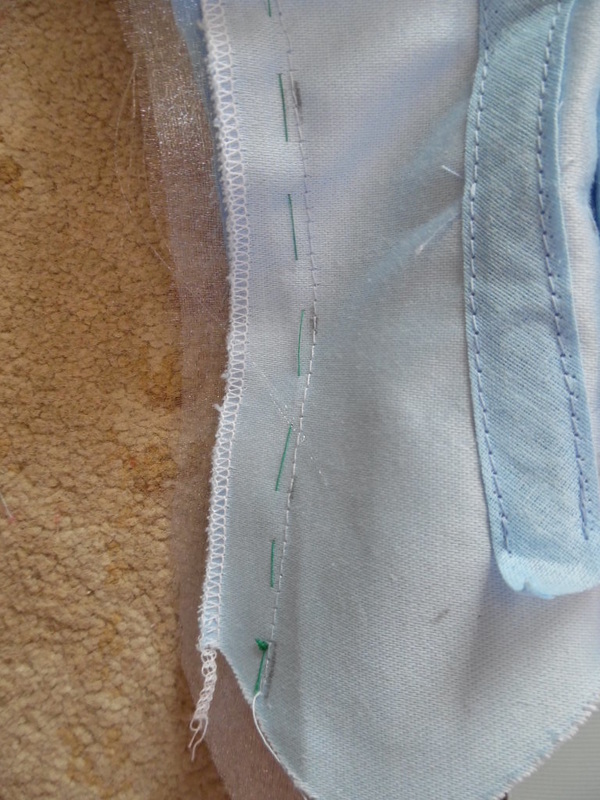
Slide all the boning into your channels. Pin where the line will be for the piping, then sew a long stitch line for reference.
|
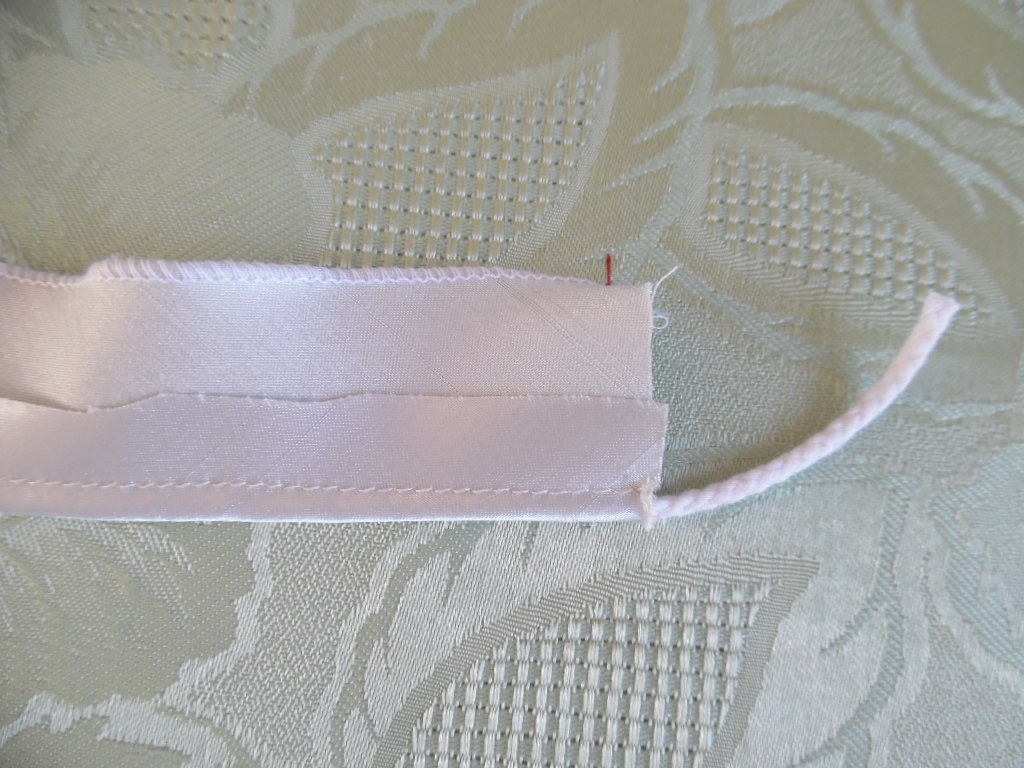
Using the silver polyester dupion, cut a diagonal line and cut a strip approximately 6cm wide.
|

|
|
Overlock one edge then sew in the cord, notice that one side is wider than the other.
|
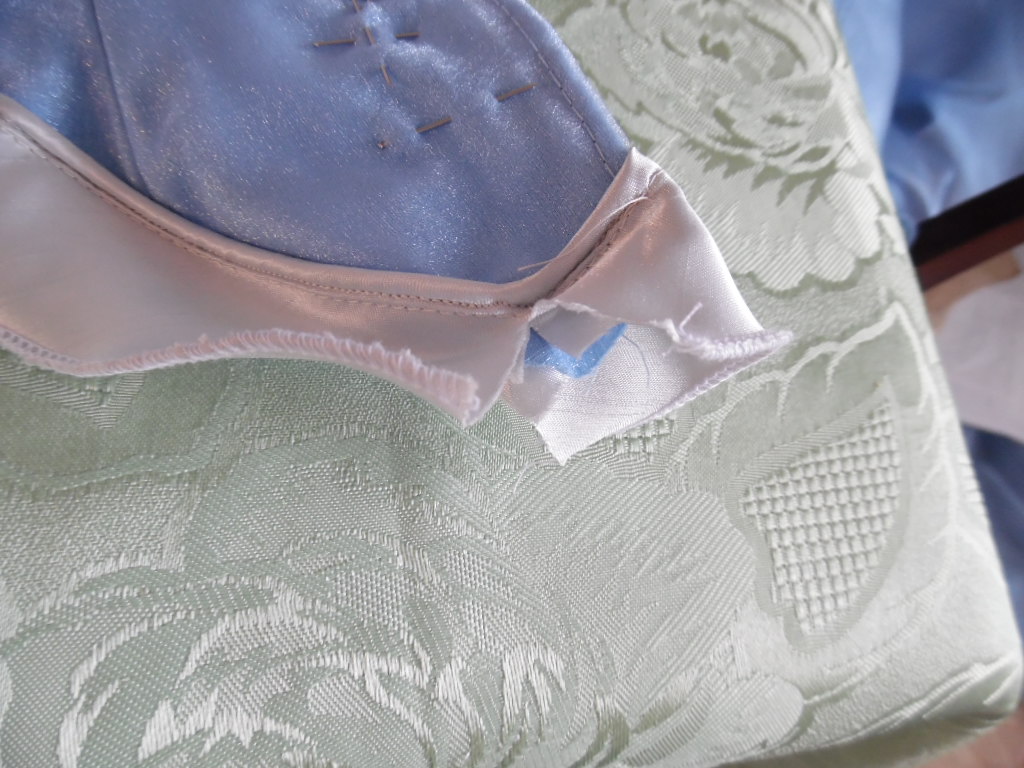
Sew on the piping using your reference line, remembering to clip the front curve and the back curve.
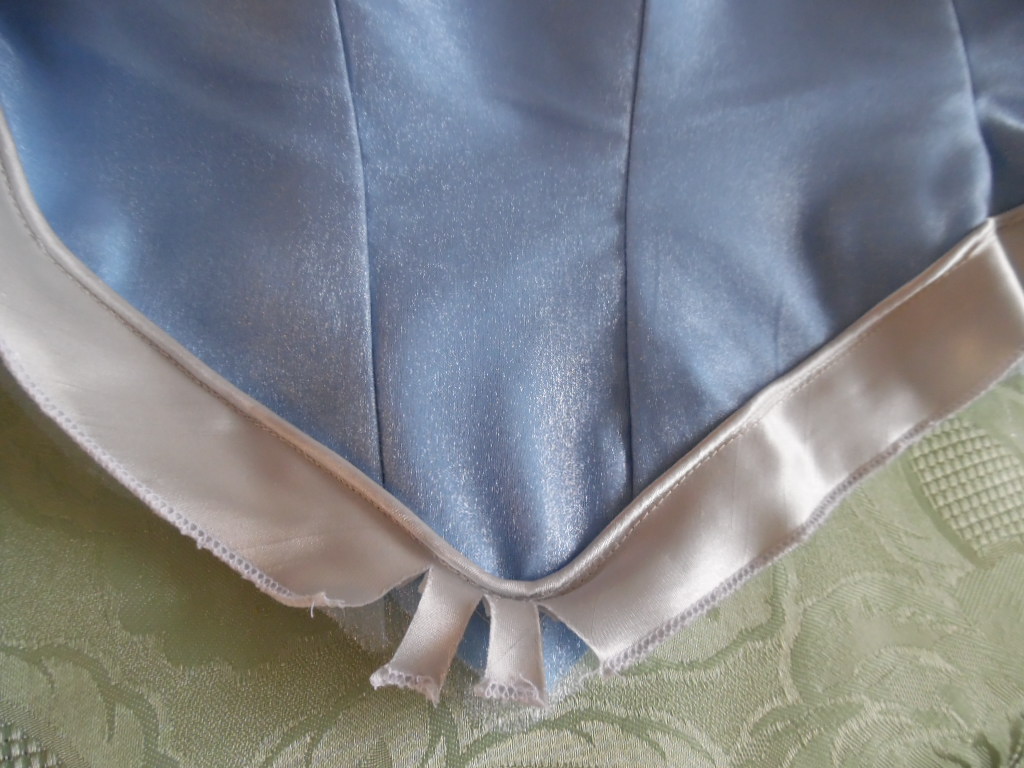
|
|
|
Cut off all the excess fabric, turn the piping to the inside and hand sew in place.
|
The Bertha:
We used the pattern for the bertha cut on the diagonal, but found it was too short to achieve all the rolls and folds we needed, so extended it by 3" (8cm) both sides.
|
|
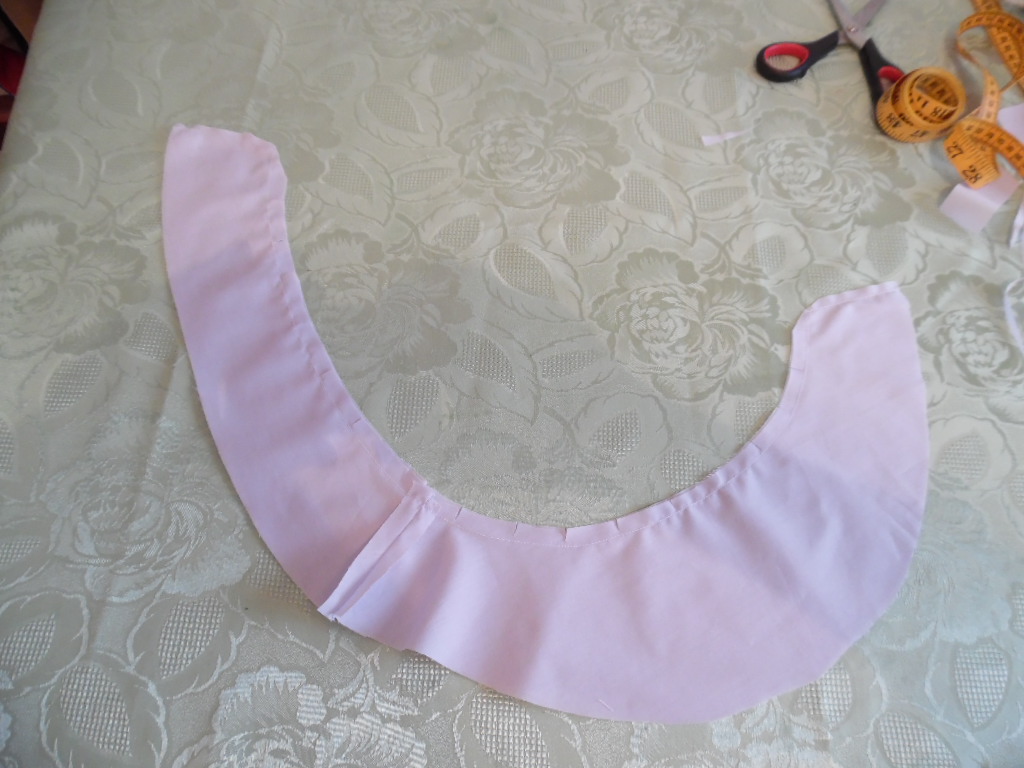
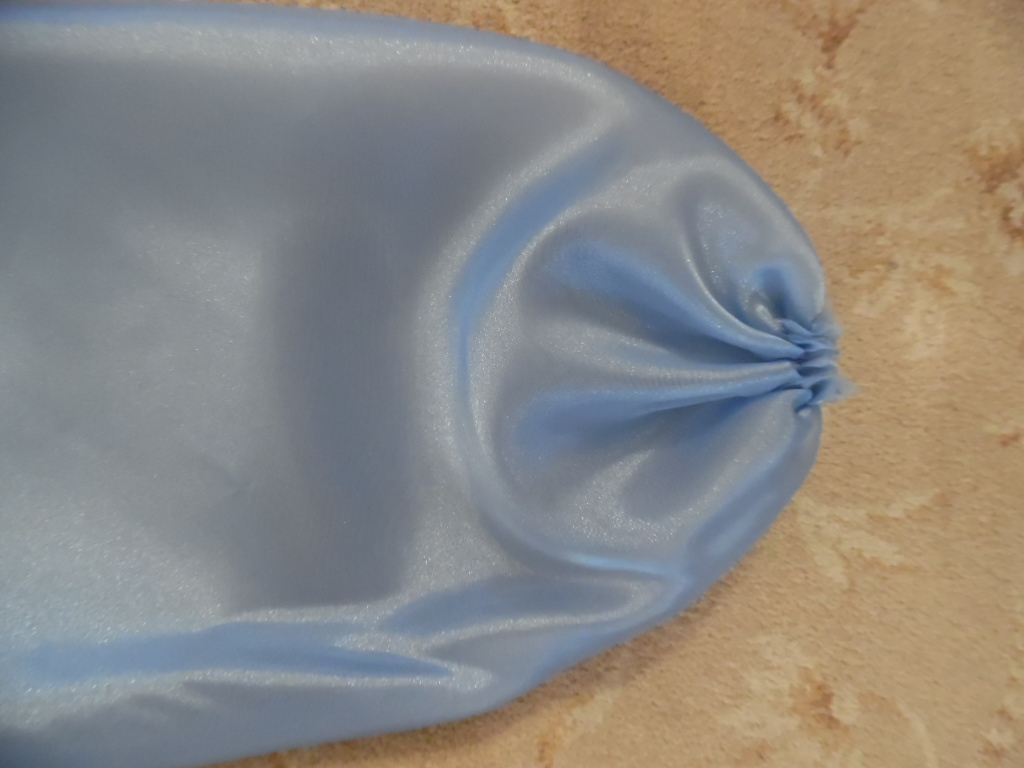
You will need two layers for each side of the bertha. Following the instructions in the pattern, sew a gathering stitch along ONE of the short sides. In the instructions it says to do both sides, but we want it gathered on the front BUT pleated on the back, so we only did one line of sewing.
|
Fold lengthways and sew a gathering stitch along the top.
NOTE: When sewing the longer side, anchor it as shown, putting the gathering threads at the far end. Turn the right way out. |
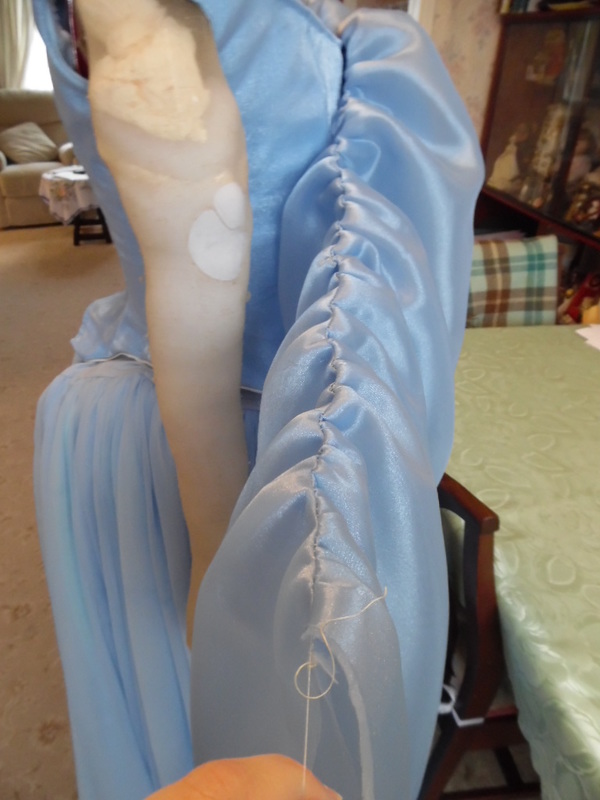
Pull the gathering thread on the short side to 1.1/2" (4cm), secure the thread, turn the end under and sew to the centre front of the bodice. We know that the original bertha was detachable, but we want ours to be permanent, so will be sewn to the top edge of the bodice.
Pull the thread on the long side and gather until it fits over the shoulder and meets the centre back and allow for a final turn under to neaten. There is no need to sew the whole seam to the bodice, just put a tack stitch now and again to secure the bertha to the bodice.
|
|

|
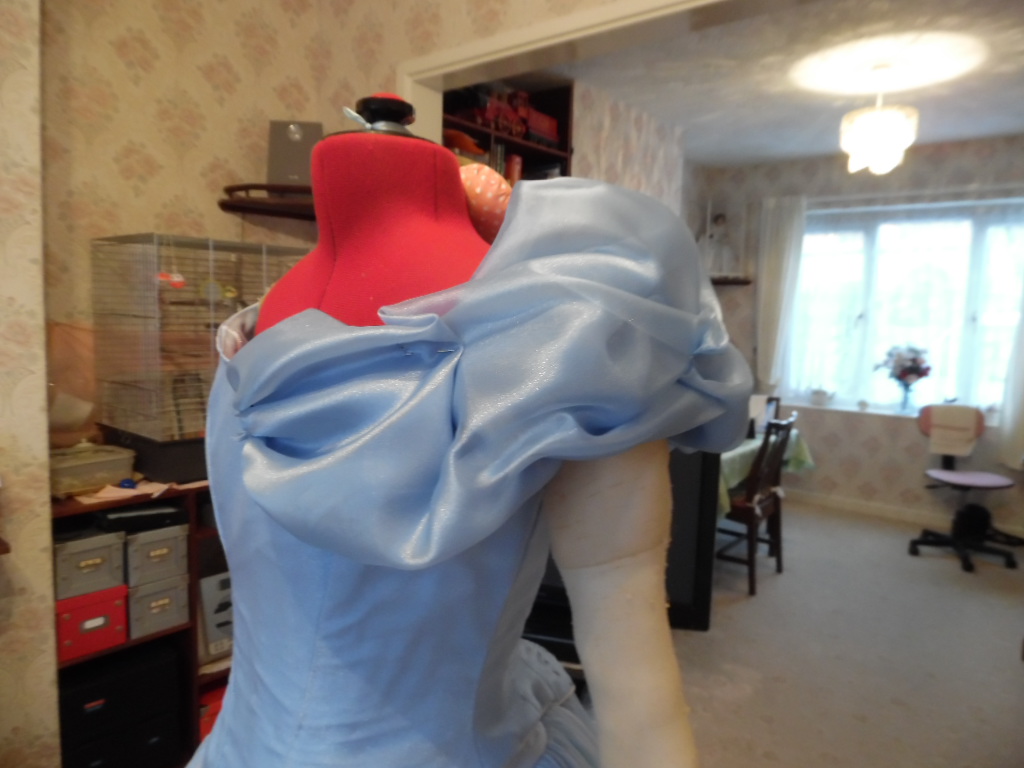
At the centre back, put 3-4 pleats down the open edge, overlock the edge to hold it in place, turn under the seam and hand sew onto the bodice.
|
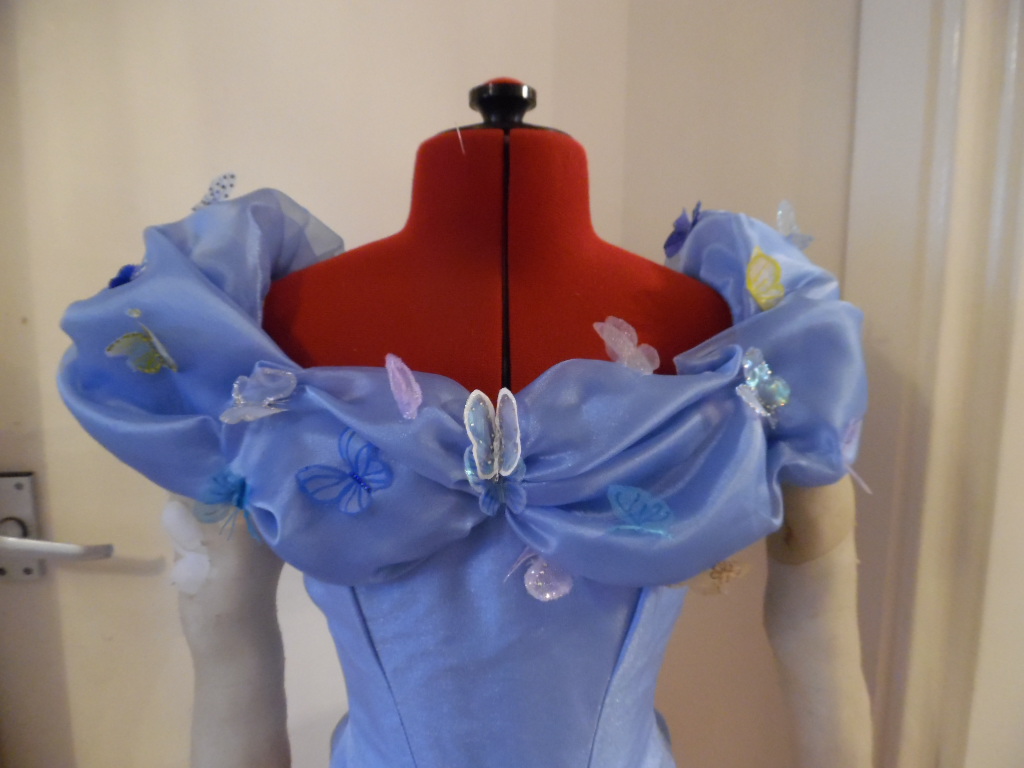
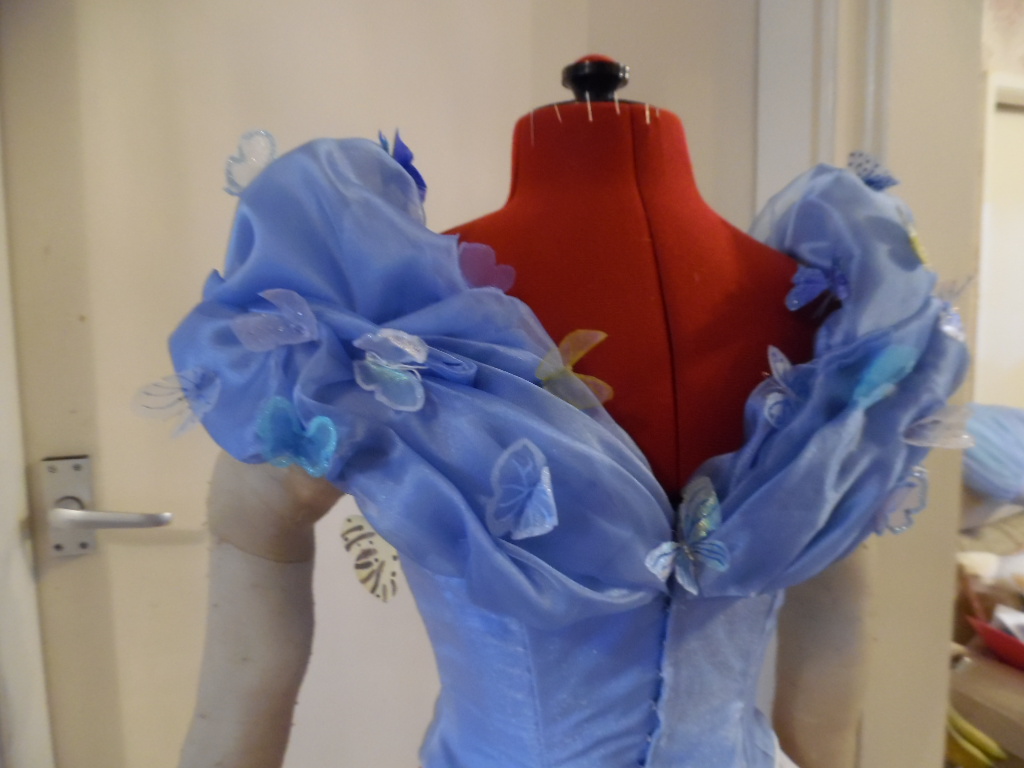
Putting in the folds and swirls took Tracy several hours of frustration before she was happy with it, once they were pinned in place, she then tacked them either to the fabric or to the bertha
|
|

|
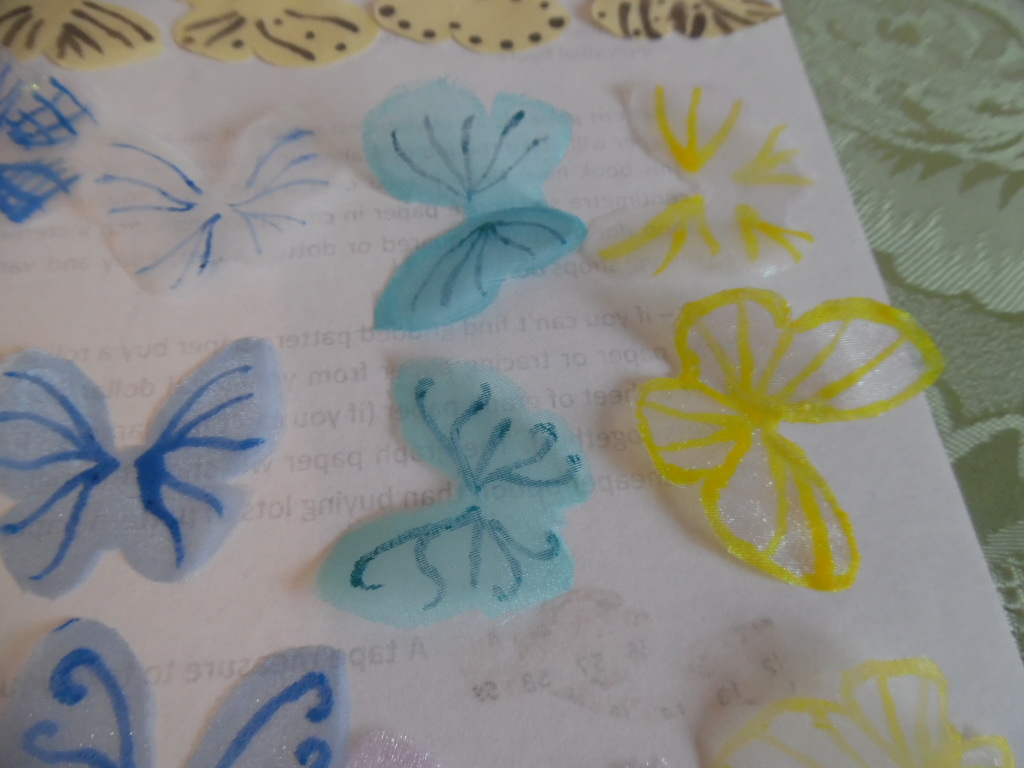
Using different scrap fabrics of the same organza fabrics used on the petticoat frills.Tracy used a butterfly template and went to town drawing the lines with fabric paint, glitter and crystals. On some of them she glued wire down the middle to make "feelers".
|
|
|
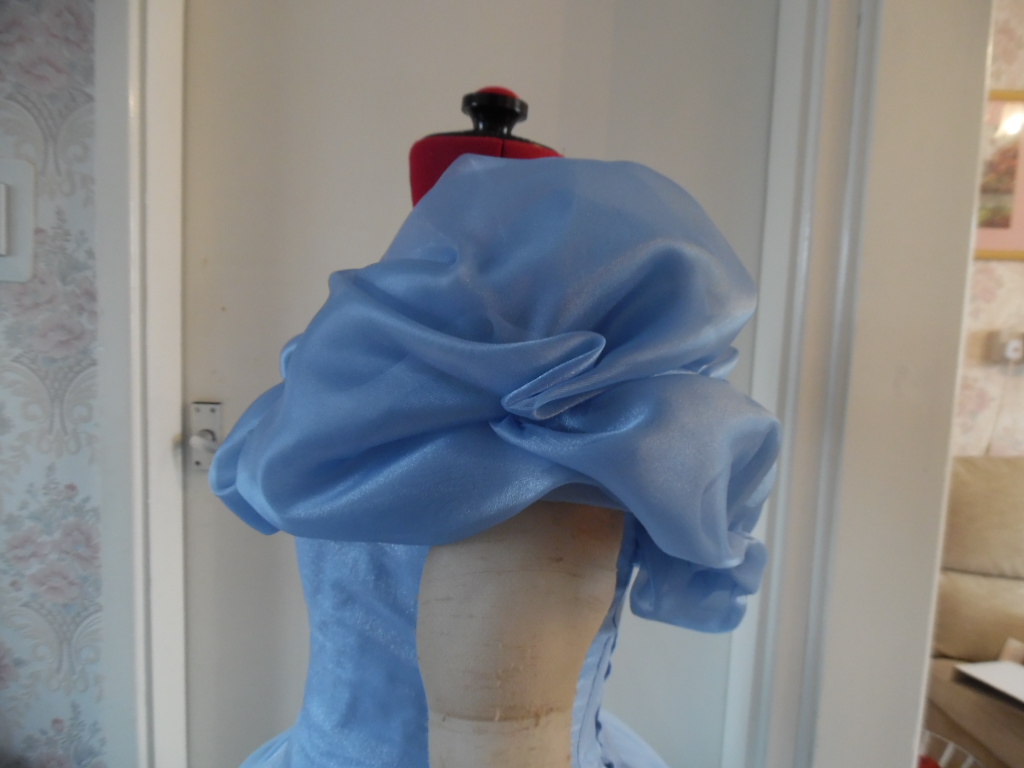
The finished bertha
Tracy permanently attached the centre back butterfly, though I think this would have been separate. So to get to the hooks and bars at the top, the last couple of inches of the bertha on the right hand side, actually hangs loose, with a couple of snap fasteners, which are used to close the bertha together. The video will show how its done. Making it permanent or detachable is entirely up to you.
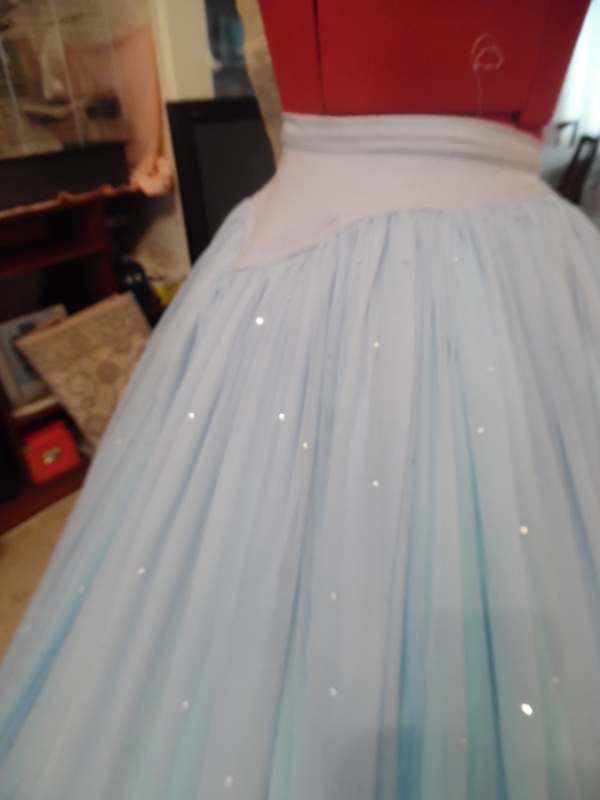
The next stage will be gluing on 10,000 (er, not quite!) crystals onto the skirt and acquiring the wig. Once that is done, the finished result will be photographed and put on the website. Until then, you won't see the finished result - sorry.
If you have access to facebook, you will be able to see Tracy Fletcher doing her twirls, or go to mine - Christine Fletcher
Tracy permanently attached the centre back butterfly, though I think this would have been separate. So to get to the hooks and bars at the top, the last couple of inches of the bertha on the right hand side, actually hangs loose, with a couple of snap fasteners, which are used to close the bertha together. The video will show how its done. Making it permanent or detachable is entirely up to you.
The next stage will be gluing on 10,000 (er, not quite!) crystals onto the skirt and acquiring the wig. Once that is done, the finished result will be photographed and put on the website. Until then, you won't see the finished result - sorry.
If you have access to facebook, you will be able to see Tracy Fletcher doing her twirls, or go to mine - Christine Fletcher
|
|

This complete the costume.
